

Monogram ZGG24L Installation Instructions Manual

GE Monogram
®
Installation
Instructions
24" Outdoor
Cooking Center
Model
ZGG24L

Before you begin— Read these instructions completely and carefully.
IMPORTANT: Save these instructions for local inspector’s use.
IMPORTANT: OBSERVE ALL GOVERNING CODES AND ORDINANCES.
NOTE TO INSTALLER: Be sure to leave these instructions with the Consumer.
NOTE TO CONSUMER: Keep these instructions with your Use and Care Book for future reference.
If you received a damaged cooking center, you should
contact your dealer.
Installation of this cooking center requires basic
mechanical skills. Proper installation is the responsibility
of the installer.
For Monogram local service in your area,
1-800-444-1845.
For Monogram service in Canada, 1-888-880-3030.
For Monogram Parts and Accessories, call
1-800-626-2002.
In the Commonwealth of Massachusetts:
• This product must be installed by a licensed
plumber or gas fitter.
• When using ball type gas shut off valves, they
shall be T-handle type.
• A flexible gas connector, when used, must not
exceed 3 feet.
FOR YOUR SAFETY:
Do not use cooking center in a space where gasoline or
other liquids having flammable vapors are stored or
used.
CAUTION:
• For outdoor use only. Use this cooking center only in
the manner intended by the manufacturer.
• This outdoor cooking gas appliance is not intended to
be installed in or on recreational vehicles and/or
boats.
• Do not use the grill in an explosive atmosphere. Keep
the grill away from areas where gasoline or other
flammable liquids and vapors are stored or being used.
• Observe proper clearances to combustible materials at
all times.
• Do not use a rusty or damaged LP tank.
• Never substitute gases (natural for LP or LP for
natural).
• This grill is factory set for liquid propane gas. A natural
gas conversion kit must be installed before using
natural gas.
• When storing the grill indoors, disconnect the LP tank.
Store the tank outdoors in a well ventilated area.
• Do not store additional LP tanks in or near the gas grill.
• Follow the guidelines on the LP tank for proper storage,
transport and handling.
• Tested in accordance with ANSI Z21.58 latest edition
standard for outdoor cooking gas appliances. This grill
IF YOU SMELL GAS:
• Shut off gas to appliance.
• Extinguish any open flame.
• Open lid.
• If odor continues, immediately call your gas supplier.
is for outdoor use only. Check local building codes for
the proper method of installation in the absence of local
codes, this unit should be installed in accordance with
the National Fuel Gas Code No. Z223 latest edition and
the National Electrical Code ANSI/NFPA No. 70-1990.
CALIFORNIA PROPOSITION 65 - WARNING
The burning of gas cooking fuel generates some by
products that are on the list of substances which are
known by the State of California to cause cancer or
reproductive harm. California law requires businesses to
warn customers of potential exposure to such
substances. To minimize exposure to these substances,
always operate this unit according to the use and care
manual, ensuring you provide good ventilation when
cooking with gas.
INSECT WARNING!
Spiders and insects can nest in the burners of this and
any other grill, and cause the gas to flow from the front of
the burner. This is a very dangerous condition which can
cause a fire to occur behind the valve panel, thereby
damaging the grill and making it unsafe to operate.
Inspect the grill twice a year or immediately if any
symptoms appear.
Contents
2
Design Information
Model ................................................................................. 3
Product Dimensions & Clearances ..............................3
Accessories ......................................................................3
Advance Planning............................................................3
Choosing the Location .................................................... 4
Tools & Materials Required ........................................... 4
Step 1: Remove the Packaging .....................................4
Step 2: Provide Support,
Installation on a Cart ......................................... 4
Installation
Step 2: Provide Support,
Built-In Installations ..........................................5
Step 3: Provide Gas & Electrical Supply ..................... 6
Step 4: Test for Leaks ......................................................7
Step 5: Lighting the Grill..................................................7
Step 6: Adjusting the Burners .......................................8
Finalize Installation ..........................................................9
Install Rotisserie .............................................................. 9
ZXADYSS, ZXSDBSS, Optional Access Doors ...........9
ZX24NGB, Natural Gas Conversion Kit ......................10

Design Information
24" Outdoor Cooking Center
Model
Product
Dimensions
& Clearances
Accessories
ZGG24L20 SS
The Monogram 24” Outdoor Cooking Center
is factory set for LP gas and can be converted
to natural gas. Order ZX24NGB Natural gas
conversion kit when natural gas is available.
24-3/4"
12" Clearance to
Combustibles
Both Sides
24" (Cutout)
This grill may be installed on a portable grill
cart or built into an enclosure.
Enclosures can be constructed of non-combustible (masonry) material or of combustible
material such as wood. Insulated jackets are
required for installation into combustible
enclosures.
• ZX24CTBSS, grill cart
• ZX24JBSS, Insulated jacket for a combustible
enclosure.
*12" Min. to Combustibles
4" Min. for Lid Clearance
9"
9"
9"
4-7/8"
9"
*4" For Lid Clearance when installed
into a non-combustible enclosure.
Allow 12" min. clearance to
combustible vertical surfaces.
• ZX24TKBSS is available to conceal the gap
between the cooking center and the
enclosure.
• ZX24CVC, tough vinyl on the outside, felt
lined inside with elastic to hold the cover in
place. Fits grill installed on a cart or when
built-in.
•ZXSDBSS - Stainless Steel Single Access Door
ZXADYSS - Stainless Steel Double Access
Doors – Optional accessories to cover the
access opening under the grill in a built-in
installation.
• ZXLPY, LP gas tank.
18-7/8"
23-3/4"
Manifold
Pipe 3-1/2"
Advance
Planning
• This Monogram Outdoor Cooking Center is
designed to be installed on a grill cart or into
an enclosure.
• In a non-combustible (masonry) enclosure,
the grill drops into the opening. A ledge on
each side is required for support.
• An Insulated jacket is available to allow the
grill to be installed in a combustible
enclosure. The insulated jacket must be
supported by a ledge on each side.
• If using a backsplash or rear wall, locate the
electrical service for the rotisserie on the
right side.
• Trim kit ZX24TKBSS is available to conceal
the gap between cooking center and the back
and sides of an enclosure.
Clearances
• Allow 4" at the rear for lid clearance.
• Allow at least 12" clearance at the back of the
grill when exhaust is directed to a window or
a surface that is difficult to clean.
• Allow at least 6" clearance on each side to
any non-combustible material located above
the cooking surface for counterspace. This 6"
clearance will allow for placement and
handling of the rotisserie motor and skewer.
• Allow at least 12" clearance on each side and
12" min. clearance at rear to combustible
vertical materials.
3
Design Information
24" Outdoor Cooking Center
Choosing
the Location
Tools &
Materials
Required
(Not supplied)
Step 1
Remove the
Packaging
• This cooking center is designed for outdoor
use only. Do not locate the grill in a
building, garage or other enclosed area.
• Ensure that fresh air ventilation is adequate.
• Consider exposure to wind and proximity to
traffic paths.
• The minimum clearances to combustibles
must be maintained at all times.
• Phillips head screwdriver
• Pipe wrench
• Level
• Flat blade screwdriver (3/32" blade)
• Pliers
• Open the box and remove packaging.
• Open the grill lid and remove hardware
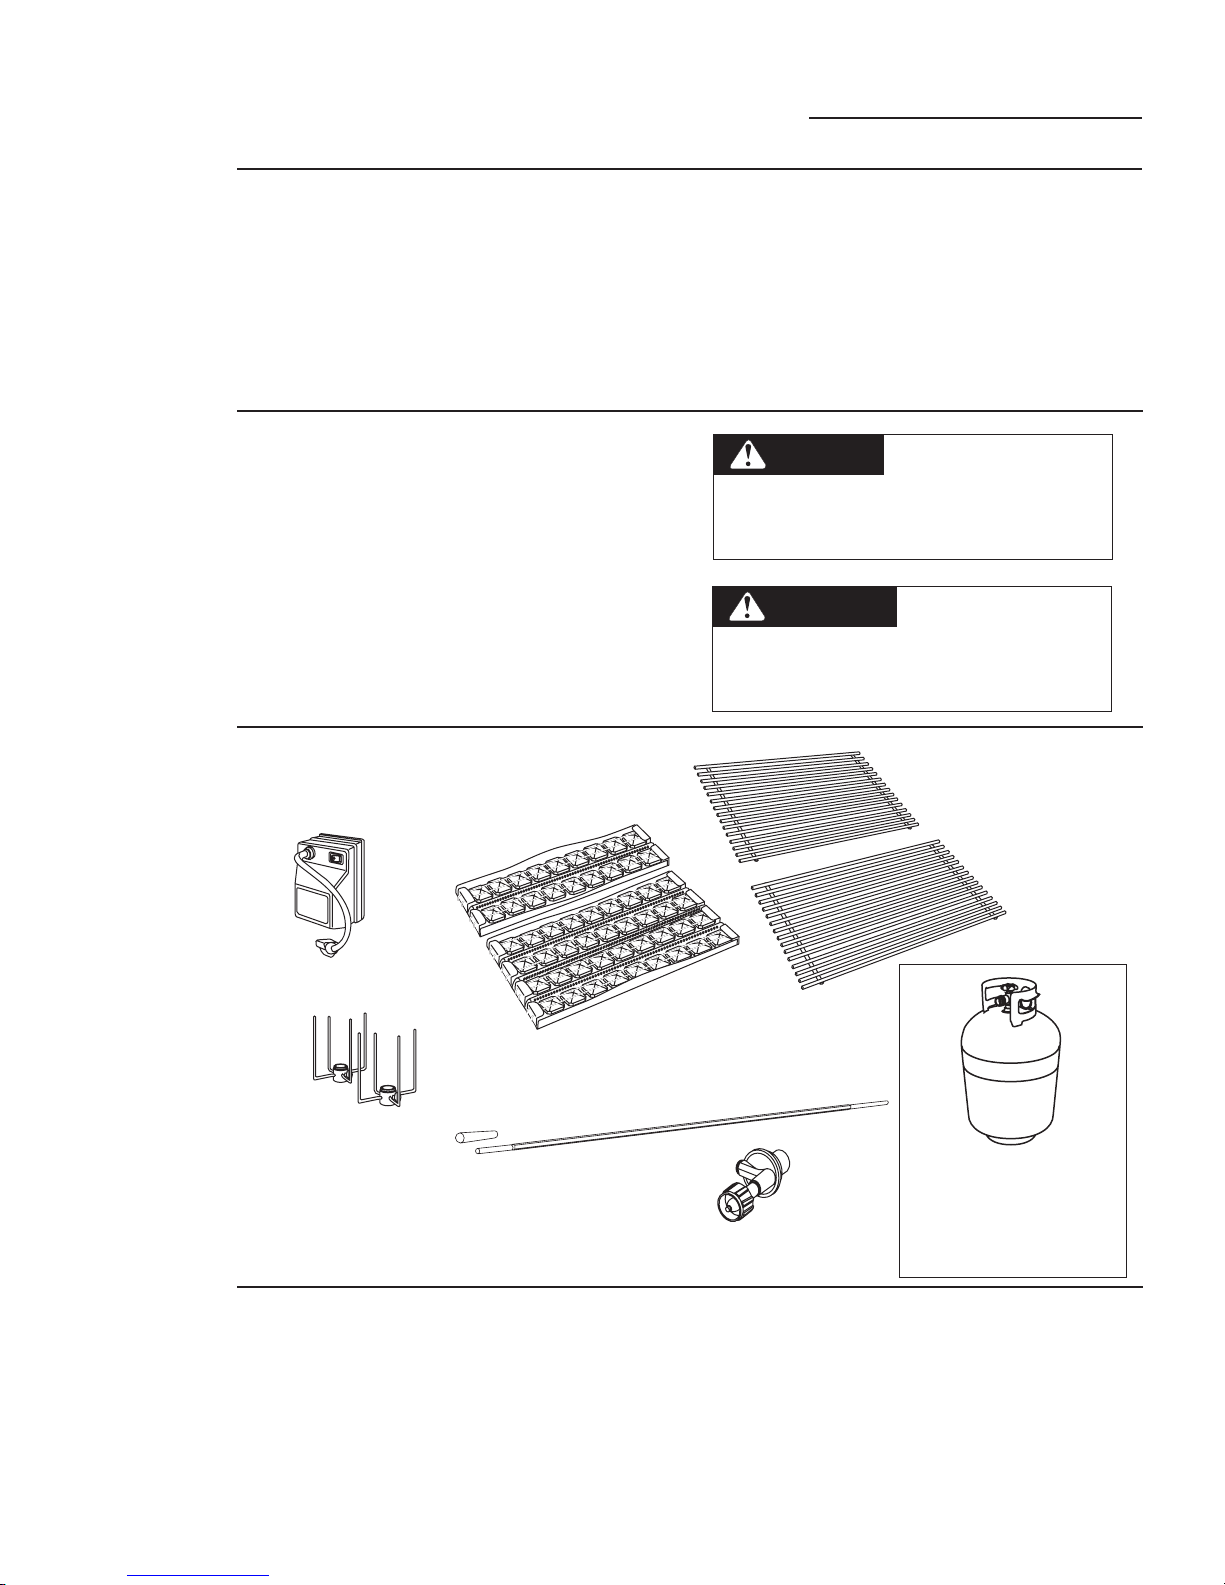
accessory carton. Check contents.
Motor
• Do not install a grill below overhead
unprotected combustible construction.
• The installation must conform to local codes
or in the absence of local codes, with the
national fuel gas code, ANSI Z223 latest
edition.
CAUTION
is extremely heavy. 2 people are required
for lifting and placing the product onto a
cart or into an enclosure.
PRUDENCE
est extrêmement lourd. Il faut deux
personnes pour le soulever et le mettre sur
un chariot ou dans une enceinte.
This Cooking Center
Ce centre de cuisson
2 Grill Grates
Spit Forks
Step 2
Provide
Support
The Outdoor Cooking Center can be installed
on a ZX24CTBSS cart which is designed
specifically for this model. Follow the installation instructions provided with the cart to
install. Proceed to Gas supply, Step 3, to
complete the installation.
Installation
On a Cart
4
2 Ceramic Briquette Trays
Rotisserie Rod and Handle
Type 1 Acme,
20 Lb. LP Tank with Overfill
Protection Device. (not supplied)
LP Regulator
Required for Grill Cart Installation
• Allow at least 12" clearance at the back of the
grill when exhaust is directed to a window or
a surface that is difficult to clean.
Order ZXLPY
 Loading...