

Monogram ZFSB26DSS Installation Instructions Manual
Installation
Instructions
Free-Standing Side-by-Side
Stainless Steel Refrigerator
ZFSB25DSS
ZFSB26DSS
Monogram°
Safet information
BEFORE YOU BEGIN
Read these instructions completely and carefully.
•IMPORTANT- Sa,e_hesei.st,.rtio,,s
for local inspector's use.
. IMPORTANT- Obser,eaU>,er,_i._
codes and ordinances.
• Note to Installer - Be sm'e to leave these
instructions with tile Consmner.
• Note to Consumer - KeeI)these instructions with
)orn" O_ner's Mmmal for future reference.
WARNING:
This appliance must be I_r°I_erlv ,gr(mnded. See
"(;rounding tile Refrigerator," page 4.
AVERTISSEMENT :
Cet appareil dolt _tre correctement rnis a la terre.
(krnsulter <_Mise a la terre du r(_frig(_rateur ' lxige, 4.
If _ou received a d'mv_,,ed refrigerator, _ou should
immediatel} contact }our dealer or bnilder.
Skill Level - Installation of this reii'igerator requires
basic mechanical, carpentry and plum/)ing skills.
Proper installation is tlle responsibilit} of tile installer.
Product fhilure due to improper installation is not
covered under tile GE Appliance _v\_rranty. See tile
Owner's Manual fl)r warranty inflmnation.
CAUTION'.
Due to the _eight and size ot this refrigerator, and to
reduce tile risk of personal iqiur ) or damage to tile
product - T_'_70 PEOPI,E ARE REQUIRED FOR
PROPER ]NSTALIATION.
PRUDENCE ."
_ cause du poids et de la taille de ce r(4irig(4ratem" et
porn" rg_duire le risque de blessure et de dornrnages,
IL EkUT DEUX PERSONNES POUR EMRE
' SL IN, TALLATION (:ORRECTEMENT.
WARNING:
* Use this appliance onE' fl)r its intended pro'pose.
* Immediately repair or replace electric service cords
that become f/"ayed or damaged.
* Unplug tile ret/"igemtor betore cleaning or making
repail_.
* Repairs should be made by a qualified service
technician.
AVERTISSEMENT :
* ]lne/hut utiliser (et appareil que p(rnr l'utilisation
appropri_e.
* Rg_parer ou rernplacer irnmg_diaternent tout cordon
61ectfique efliloch6 ou endommag6.
* 11flair dObrancher le r_ii'ig&'ateur avant le
netto)_lge ou route inte_xention.
* Les r(4pamtions doivent &tre fhites par un technicien
qualifi&
CONTENTS
Planning Information
Product Dimensions and Clearances .............................. 3
The Installation Space ...................................................... 3
Installation Instructions
Tools, Hardware, Materials .............................................. 4
(;rounding tile Refi'igerator ............................................ 4
Step 1, Move Refl'igerator Indoors (ZFSB25) ................ 5
Step 1A, Move Reti'igerator Indoors (ZFSB26) .............. 6
Step 2, Install _'\_lter Line ................................................ 7
For Monogram local service in your area, call
1.800.444.1845.
For Monogram service in Canada, call
1.888.880.3030
For Monogram Parts and Accessories, call
1.800.626.2002.
www. monogram.corn
Step 2A, RO _%ter Line .................................................. 8
Step 3, Connect *v_tter Supply ........................................ 8
Step 4, Connect Power .................................................... 8
Step 5, Move Retfigerator Into Position ........................ 8
Step 6, I,evel Refl'igerator ................................................ 9
Step 7, I,evel Doors .......................................................... 9
Step 8, Start Icemaker . ................................................... 10
Step 9, Temperature Controls ........................................ l0
Step 10, Install Toekick .................................................. l0
2
Plannin information
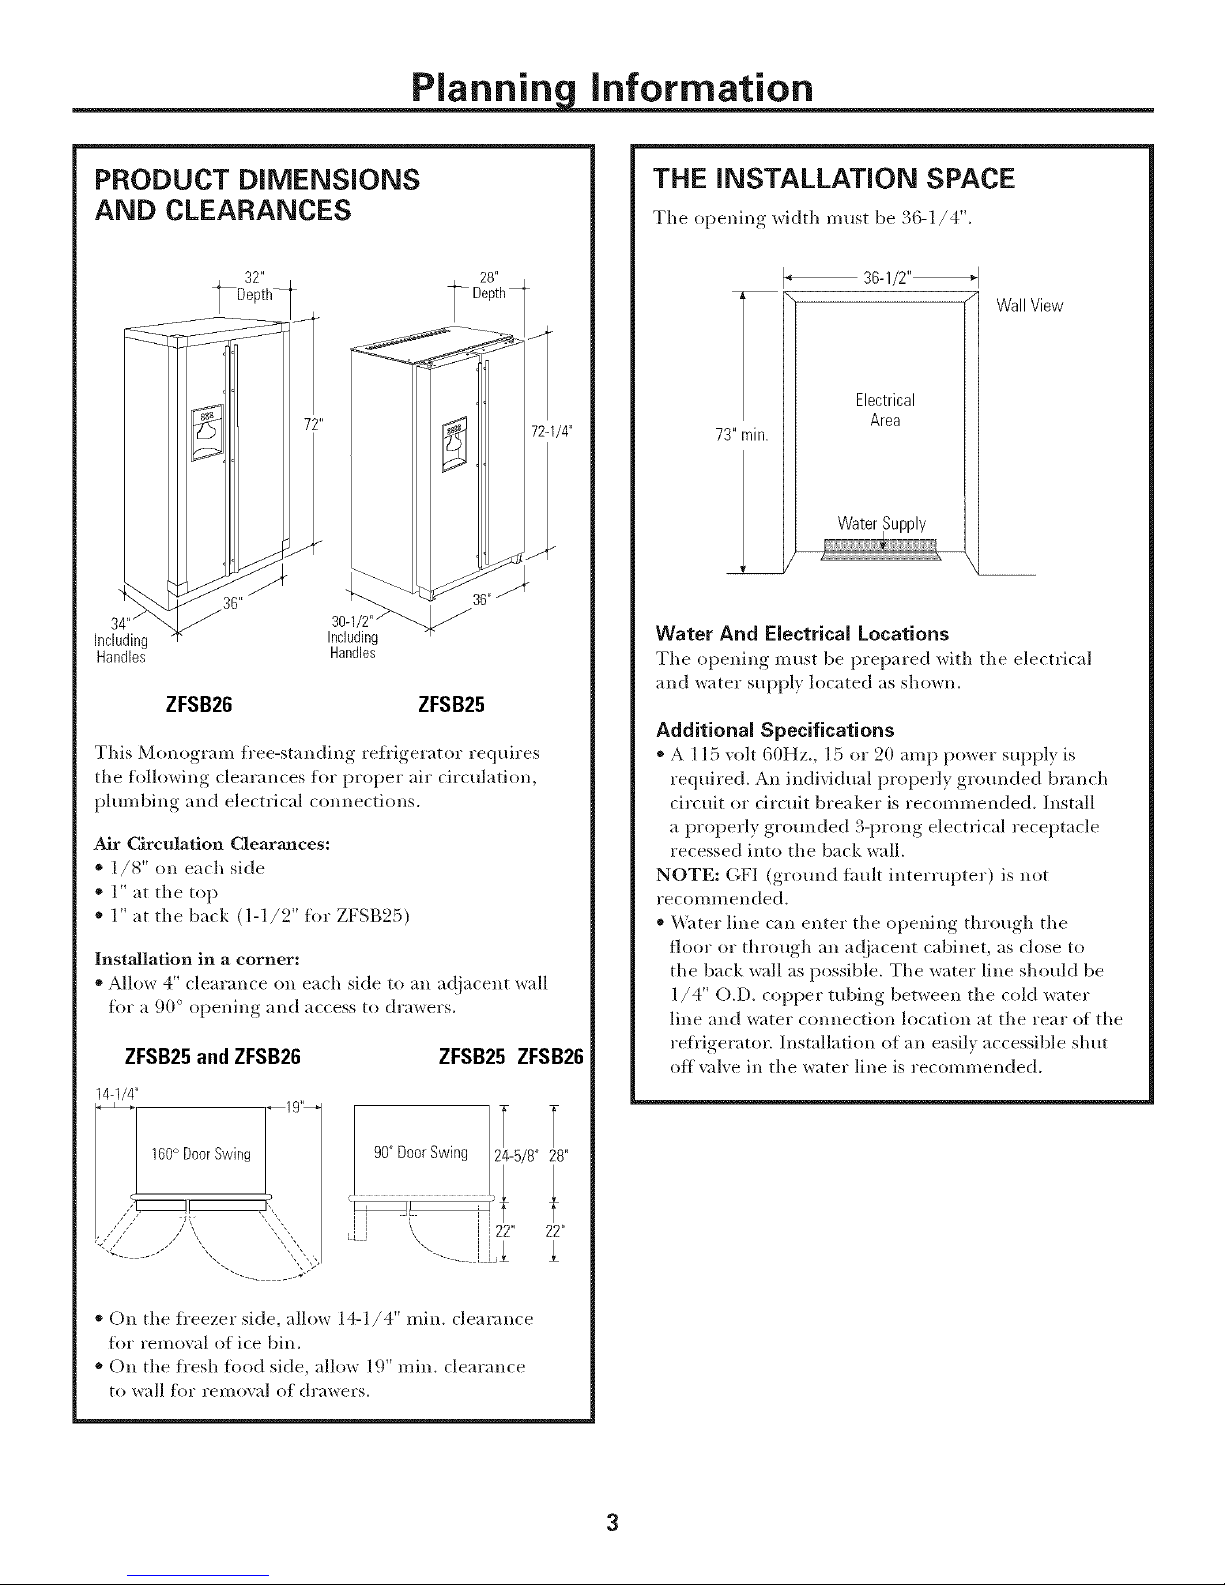
PRODUCT DIMENSIONS
AND CLEARANCES
Including Including
Handles Handles
ZFSB26 ZFSB25
This Mono,,T'ml_, free-standing, refrigerator, requires
tile following clearances for proper air circulation,
plumbing and electrical connections.
Air Circulation Clearances:
* 1/8" on each side
* 1" at the top
* 1" at the back (1-1/2" for Z]_. g2a)
Installation in a corner:
* Allow 4" clearance on each side to an ac!iacent wall
for a 90 ° opening and access to drinkers.
ZFSB25 and ZFSB26
14q/4"
30_1/2"/_._ /
ZFSB25 ZFSB26
72-1/4"
THE INSTALLATION SPACE
The ol_ening, width must be .36-1/4".
36-1/2"_
WallView
Electrical
73"rain.
Water And Electrical Locations
Tile opening must be prepared _dth the electrical
and _,_ater supp1} located as sho_,_n.
AdditionM Specifications
* A l 15 volt 60Hz., 15 or 20 amp power supply is
required. All individual property grounded branch
circuit or drcuit breaker is recommended. Install
a properly grounded 3-prong electrical receptacle
recessed into tile back wall.
NOTE: GFI (ground ihult interrupter) is not
I'ecoI//l/lended,
_'_ater lille call enter tile opening through tile
floor or through all a(!jacent cabinet, as close to
tile back wall as possible. The water lille should be
1/4" O.D. c(_pper tubing between tile cold water
lille and water c(mnection location at tile rear of tile
retl"igerator. Installation of an easily accessible shut
off _dve in tile water line is recommended.
Area
. ' • 160°DoorSwing 19"_
90°D S ' T_ " !8"
* On the freezer side, allow 14-1/4" rain. clearance
flw removal of ice bill.
* On the fl'esh fl)od side, allow 19" mill. clearance
to wall flw removal of drawers.
Installation instructions
TOOLS REQUIRED
* Tinsnips to rut banding
* Stepladder
* Bucket
* Level
* Appliance hand track
* Tubing cutter
* #2 Phillips screwdriver
* Drill and appropriate bits
* 3/8", 5/16" and 7/16" hex socket
* 1/8" Allen wrench
* Safety glasses
MATERIALS REQUIRED
,b 1/4" O.D. compression nut and 2 ferrules (sleeves)
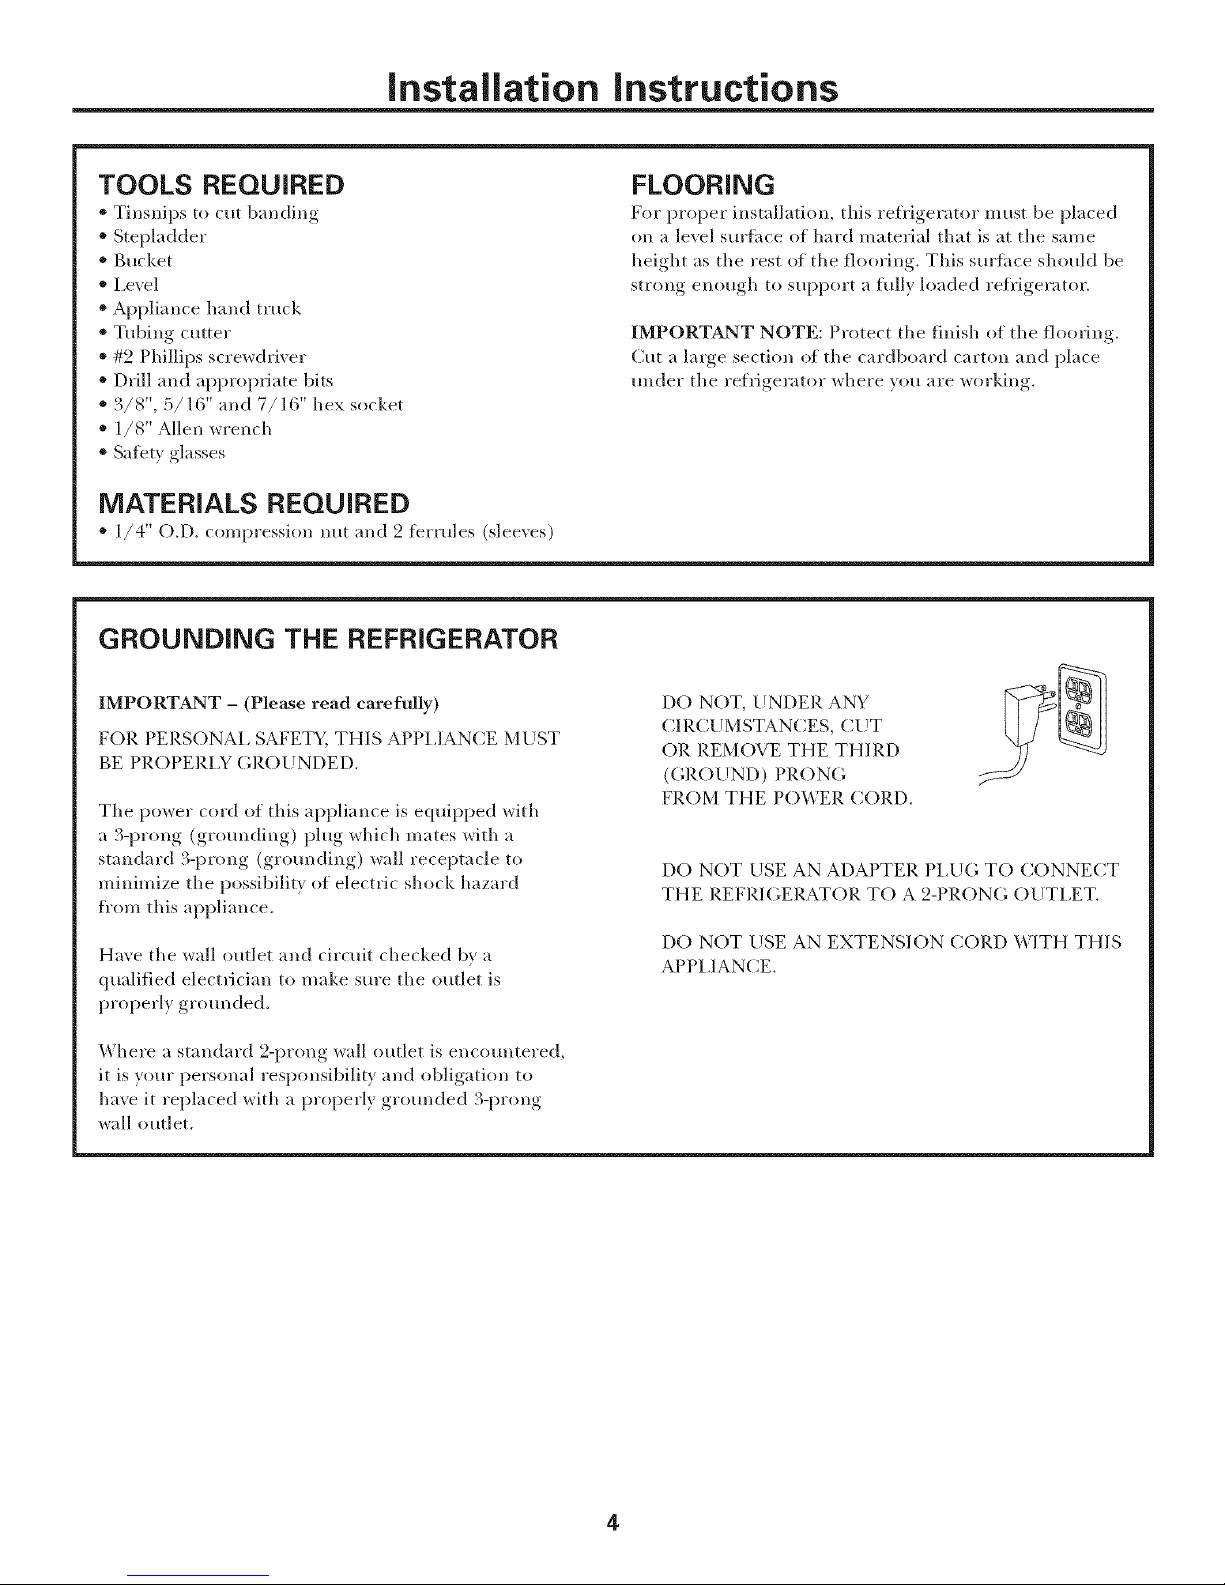
GROUNDING THE REFRIGERATOR
IMPORTANT - (Please read carefully)
FOR PERSONAL SAFETY, THIS APPLIANCE MLIST
BE PROPERI_Y GROUNDED.
The power cord of this appliance is equipped with
a 3-prong (grotmding) plug which mates with a
standard 3-prong (grounding) wall receptacle to
minimize the possibility of electric shock hazard
fl'om this appliance.
Have the wall outlet and circuit checked by a
qualified electrician to make sure the outlet is
properly grounded.
FLOORING
For proper installation, this refl'igerator must be placed
on a level surlhce of hard material that is at the same
height as the rest of the flooring. This sm'fi_ce should be
strong enough to support a tully loaded refi'igerator.
IMPORTANT NOTE: Protect the finish of the flooring.
Cut a large section of the cardboard carton and place
under the refrigerator where you are working.
DO NOT, UNDER ANY
CI P.CUMSTANCES, CUT
OR REMOVE THE THIRD
(GROUND) PRONG
FROM THE POWER CORD.
DO NOT USE AN ADAPTEP. PLUG TO CONNECT
THE I_EFRIGEIL_TOR TO A 2-PRONG ()UTLET.
DO NOT USE AN EXTENSION CORD WITH THIS
APPI JANCE.
Where a standard 2-prong wall outlet is encountered,
it is your personal responsibility and obligation to
have it replaced with a properly grotmded 3-prong
wall outlet.
4
 Loading...