

Page 1
by
The Leading Enterprise Internet of Things Solution
Quick Start Guide - ALTA Sensor Adapter and Wireless Sensors
Simple Setup
1.
Create an online sensor monitoring account
at www.imonnit.com.
MNS2-9-W2-TS-ST
ID: 123456
SC: ABCDEF
900 MHz FHSS
FCC ID: ZTL-G2SC1
IC: 9794A-G2SC1
2.
Follow the on-screen instructions to add
devices to your account.
Opposite End
Computer or
IoT Gateway
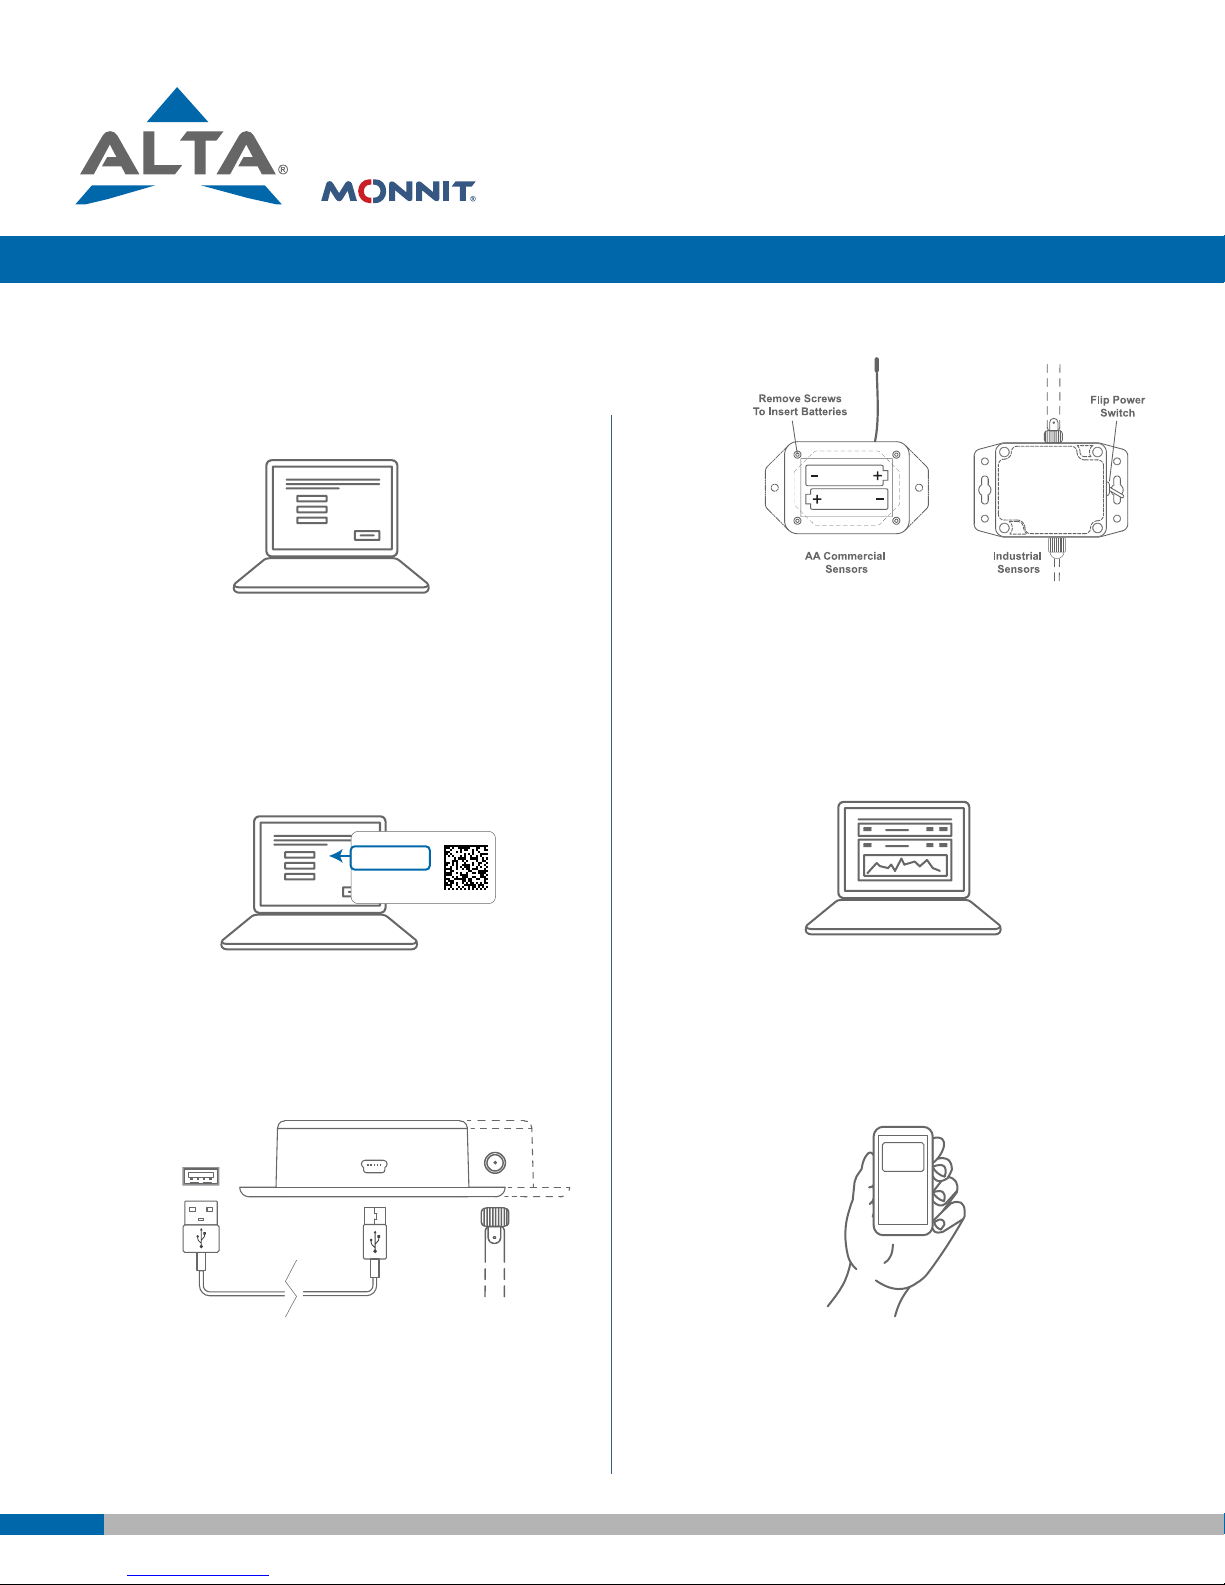
4.
Insert batteries or use switch to power the
wireless sensors on.
5.
View your sensor data from your online
account or mobile app, and customize
sensor settings.
Alert!
Temperature is
48*F. 11:35 PM
3.
USB Cable Antenna
Install computer application, then connect the
wireless sensor adapter via USB. Can also
connect to compatible IoT gateways.*
* PC application is available at www.monnit.com/downloads.
Contact Monnit for information on compatible IoT gateways.
6.
Create notications for things you want to
know about.
Page 2
The Basics
Setting up the Wireless Sensor Adapter
• Visit http://www.monnit.com/downloads/ to download
the Monnit USB Gateway Application.
• Install the application by launching the downloaded le
and following the on-screen instructions.
• Connect the sensor adapter to your PC via USB cable.
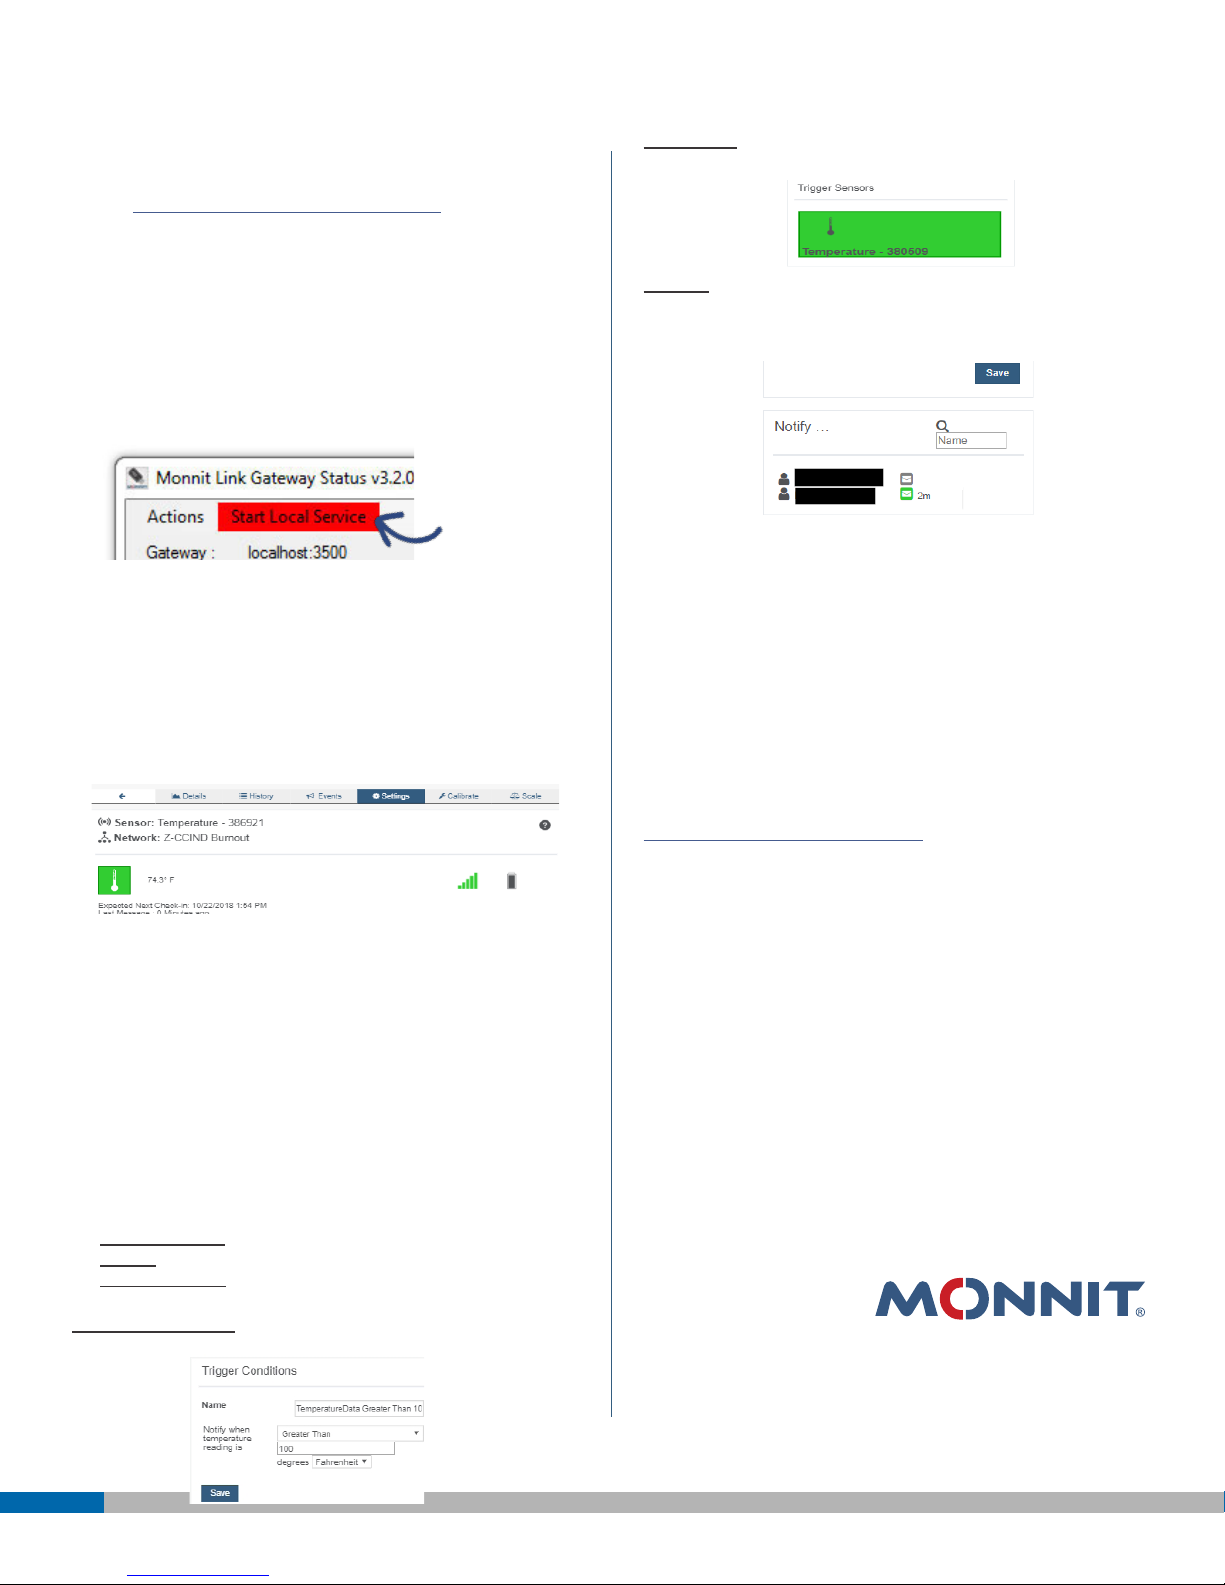
• Launch the “MonnitLink Gateway Status” application.
• Click “Start Local Service”.
Click Here
Sent From - Select devices (sensors and gateways) that
will cause the notication to be sent.
Actions - Click the “Actions” tab to select how they will
recieve the alert.
(green is on, grey is off).
All notications will show in the list after they are created.
Using the iMonnit Online Portal
Sensor Settings
From the overview page click on a sensor row to access
detailed information. Click the “Edit” tab to change the
sensor settings.
Note: Changes made to a sensor’s settings will be applied on the
next sensor heartbeat (check-in). Additional changes can not be
made until the sensor has applied the previous changes. To force
sensor communication, power cycle the sensor by removing the
battery, waiting 30 seconds, then reinserting the battery.
Sensor Notications
Click “Events” in the main menu. Click “Add Event” then
choose the type you want to create.
For more detailed instructions, documentation,
“how-to” guides and video demonstrations on using
Monnit wireless sensors, wireless gateways and
iMonnit software, visit our support page at
http://www.monnit.com/support/.
Types of Notications
Sensor Reading - Alert based on sensor reading or activity.
Battery - Alert based on battery power remaining.
Device Inactivity - Alert when a sensor has not checked in.
Trigger Conditions - Set conditions that trigger the
notication.
Monnit, Monnit Logo, ALTA, MonnitLink and iMonnit are trademarks of Monnit, Corp.
© 2009-2018 Monnit Corp. All Rights Reserved.
Monnit Corporation
3400 South West Temple
South Salt Lake, UT 84115
801-561-5555
www.monnit.com
AQS-003-1A (03/18)
 Loading...