

Page 1

Speaker Manual
Page 2

Page 3

Contents
Introduction from the Technical Director 2
Company History 2
Premium Materials for Unmatched Aesthetics 3
Natural Leather Characteristics 3
Real Wood Veneers 3
Technologies 4
MPD (Micro Pleated Diaphragm) High Frequency
Transducer 4
C-CAM® (Ceramic Coated Aluminium/Magnesium) 4
RDT®II (Rigid Diaphragm Technology 2nd Generation)
4
HiVe®II(HighVelocity,LowNoiseReexPort) 4
ARC® (Anti-Resonance Composite) 5
TLE (Tapered Line Enclosure) 5
Multi-layer Cabinet Curved Cabinet Construction 5
Individual Driver Grilles 5
Single Bolt Though Driver 5
Unpacking 6
Spikes and Feet 6
For Carpeted Floors 6
For Wooden/Hard Floors 6
Setting Up 7
2-Channel Positioning 7
AV Positioning 7
FX Speakers 8
Connecting Speaker Cables 9
Bare Wire Connection 9
Banana Plugs 9
Spade Connectors 9
Wiring 9
Single Wiring 9
Bi-Wiring 10
Bi-Amping 10
TheEectsofBi-Wiring/Bi-Amping 10
Running-In Your Platinum II Speakers 11
Care and Maintenance 12
ToolBox 12
Upkeep of Cabinets 13
Cleaning of Finished Leather 13
Removing the grilles 13
Stands 13
Guarantee 13
Specications 14
monitoraudio.com 1
Page 4
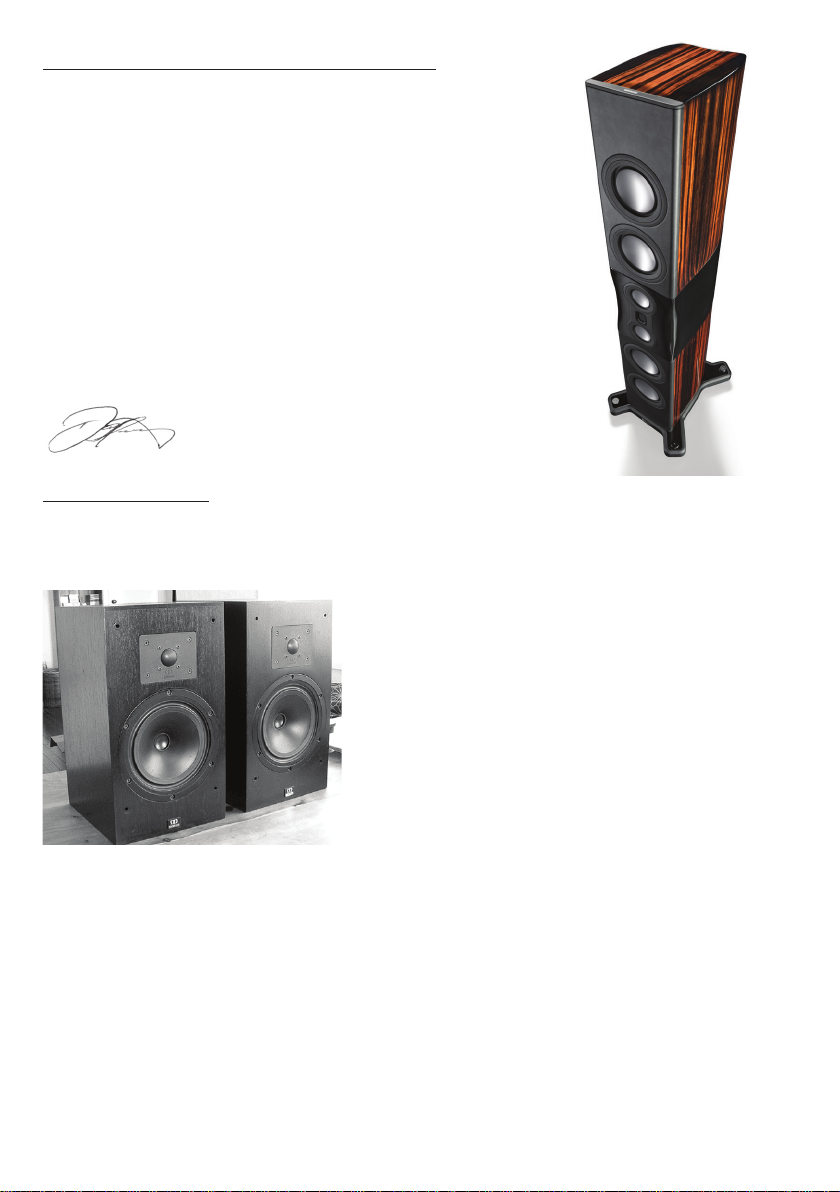
Introduction from the Technical Director
“How can a loudspeaker be made to sound more natural? This is the
question that drives our endeavor day- in, day- out. We’re motivated by
the quest to eliminate distortion from the most important element in
your audio system. How far we’ve come can be measured by the sound
of Platinum II: the most accurate and beautiful loudspeakers Monitor
Audio has ever made. Supported by painstaking analysis and a lifetime
of listening, their evolution has rened our technologies, inspired new
discoveries and achieved advances in every area of design - electrical,
mechanical, magnetic, acoustic and aesthetic. The result is a speaker range
of exceptional quality, dedicated to raising your emotional contact with
music and lm sound in all its natural glory. Built by audio lovers, for audio
lovers, Platinum II provides our answer to the primary challenge of speaker
design. To the big question we simply reply “like this”! “
Dean Hartley
Technical Director
Company History
Since 1972, Monitor Audio’s near fanatical commitment to quality in every aspect of loudspeaker design coupled with
its willingness to innovate has inspired global recognition and acclaim. Daring to challenge design orthodoxy has been
its signature approach.
When Monitor Audio launched its R852MD loudspeaker – the rst
model to incorporate a metal dome tweeter - it caused quite a stir.
Until that time, most metal domes were single-metal types made
from copper or titanium and virtually all sounded unconvincing.
The R852 used an aluminium-magnesium alloy dome and sounded
signicantly better and smoother than all of its single-metal rivals.
It also incorporated ferro-uid damping/cooling of the metal voice-
coil former and a vented voice coil mechanism for better heat
dissipation. These radical design elements formed the basis for
successive generations of C-CAM® metal domes.
By consistently rening and applying the technology, Monitor Audio has become the world’s foremost proponent of
metal dome drivers. Monitor Audio designs everything in house at their world headquarters in England, so that it can
optimise the incomparable blend of virtues that makes Monitor Audio loudspeakers unique: clean, dynamic sound,
superior build quality and innovative design. Because they share a philosophy of excellence and a consistency of
quality and voicing, loudspeakers of dierent types: on-wall, in-wall, oor and stand-mounting, may be used together
to create the perfect acoustic blend for any room.
In the strength and depth of Monitor Audio’s evolving product portfolio, the ideal of a universal whole-house
loudspeaker brand nds true expression. Decades of accumulated expertise and knowledge have rened the rare
mix of innovation, reliability and sheer performance that has propelled the brand to global status and on which
acionados of music and movie sound have come to rely.
Platinum Series II2
Page 5
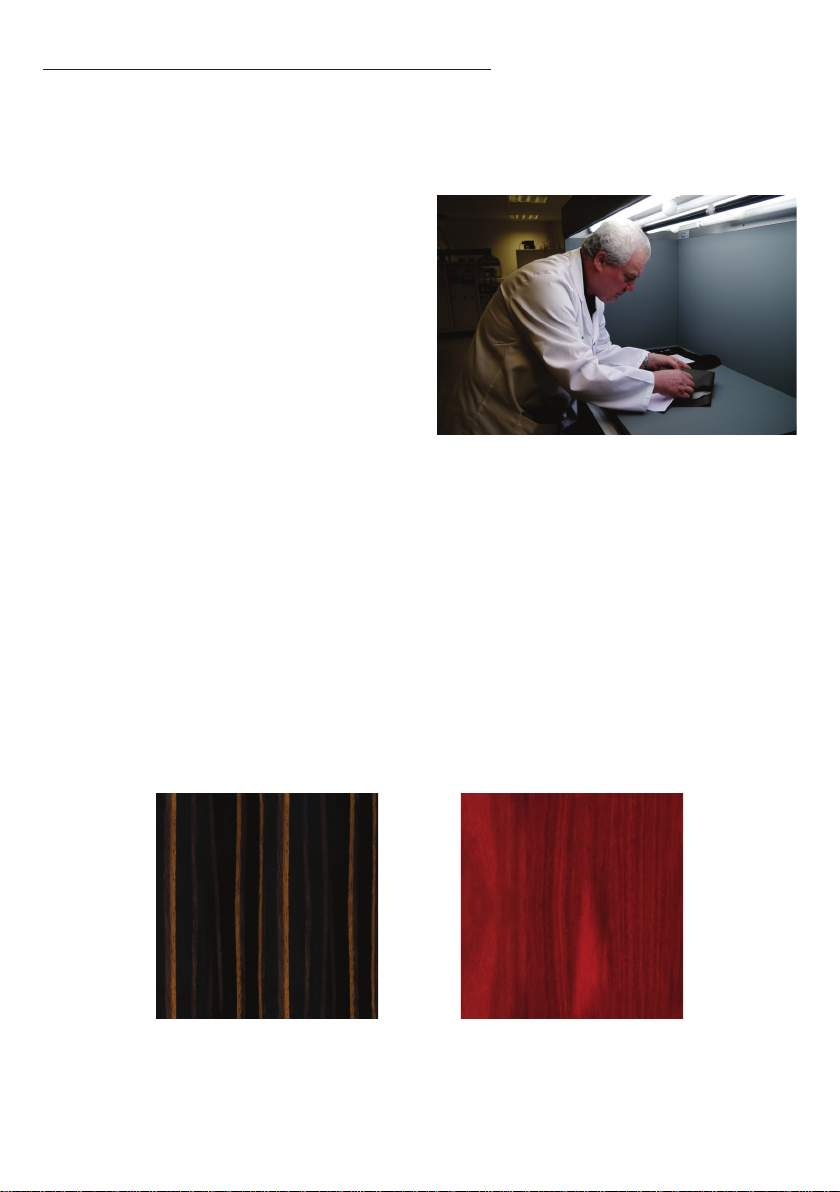
Premium Materials for Unmatched Aesthetics
Natural Leather Characteristics
All front baes are hand upholstered using Ingleston leather supplied by Andrew Muirhead. Andrew Muirhead leather
is used in exotic furniture, automotive and marine applications for the most quintessential British names.
Real leather is of course a natural material that ads
a tactile sense of luxury wherever it’s applied. The
Inglestone leather that distinguishes the Platinum II
baes is of a premium quality and is supplied complete
with the characteristics that give it individuality. These
subtle hallmarks enrich the value of ownership and
endow each Platinum II speaker with a unique identity.
Monitor Audio Ltd. is unable to guarantee that the leather
on each speaker will be identical. We can only assure you
that the very best materials have been selected and used.
Real Wood Veneers
Just like a human ngerprint, no two trees are identical. Each wood grain has an exclusive aesthetic beauty that
tells a story of a lifetime of growth. We use only the highest quality natural wood veneers, hand selected and pair
matched from sustainable sources. Platinum II speakers are hand veneered after the cabinet structure is made, and
then coated with 11 layers of clear gloss piano lacquer. These traditional techniques ensure close grain matching,
and invisible veneer panel joining. The exquisite grain denition and rich colour variation provided by our Santos
Rosewood and Natural Ebony veneers make a statement of quality, while blending naturally with any interior style or
decor. Each cabinet is a unique and natural work of art!
Because of this, Monitor Audio Ltd. is to unable guarantee that the veneer on dierent pairs of speakers will be
identical in colour or grain denition. We can only assure you that the very best raw materials have been selected
and applied.
Please refer to page 12 for advice on care and maintenance.
Santos Rosewood Real Wood VeneerPiano Ebony Real Wood Veneer
monitoraudio.com 3
Page 6
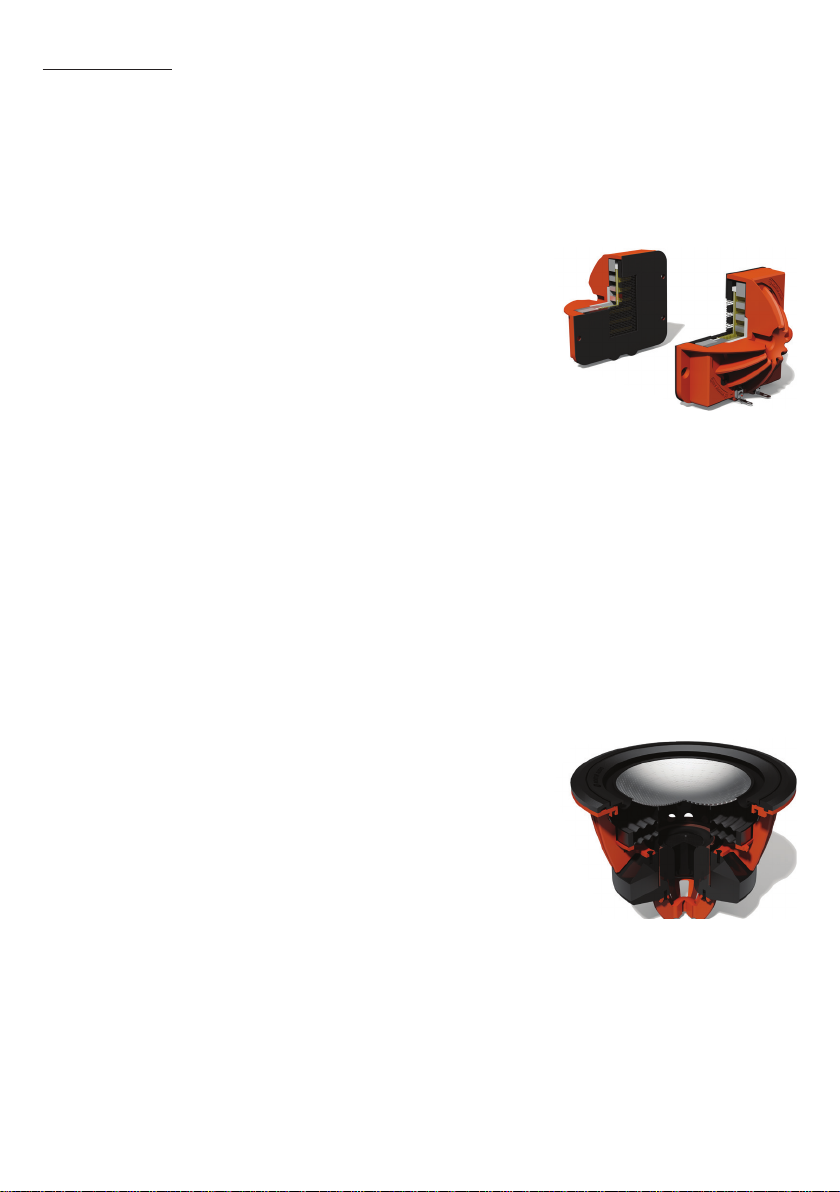
Technologies
MPD (Micro Pleated Diaphragm) High Frequency Transducer
AMT design was rst invented by Dr Oskar Heil in the 1970s. However, all designs typically suer from a null in the
frequency response around 40kHz. Using FEA modelling techniques, Monitor Audio engineers were able to nd the
root cause of this null and develop a solution. This phenomenon was eliminated, allowing the driver to operate with
uniform output to over 100 kHz. We call this unique innovation Micro Pleated Diaphragm (MPD).
The folded MPD diaphragm exhibits a surface area typically eight times that of a
conventional dome tweeter, and around thirteen times that of a pure ribbon tweeter.
This large surface area improves the conducted heat path and the open front
increases the convection. The power handling is also improved by the high sensitivity
of the tweeter. The AMT design also provides a constant non-reactive load to the
amplier, this means it’s able to deliver power more eciently with lower distortion.
The MPD is designed to bend and does not rely on its structural integrity to extend high in the
frequency range. There are no break up modes throughout the entire frequency range, exhibiting clean sonic character,
free from any harmonic artefacts.
C-CAM® (Ceramic Coated Aluminium/Magnesium)
C-CAM is an innovative alloy material originally developed by the aerospace industry. It exhibits ideal qualities for use
as loudspeaker cones, being extremely rigid, yet light enough to yield high overall eciency. C-CAM is formed from
an alloy of aluminium and magnesium, which undergoes stress-relieving processes in manufacturing to avoid surface
deformation and molecular weakness. A layer of pure ceramic (alumina) is depleted onto the surfaces to produce a
completely rigid exterior. C-CAM cones are designed to have high resistance to bending stress. When formed into a cone,
C-CAM material provides increased clarity and reduced distortion compared to conventional cone materials.
RDT®II (Rigid Diaphragm Technology 2nd Generation)
RDT II is a composite ‘sandwich’ structure made from ultra-thin low-mass
skins, bonded to a honeycomb NomexR core material. The overall thickness of
the RDT II diaphragm is only 2mm, yet it exhibits 150 times the strength of
a conventional loudspeaker cone. RDT II is a unique, innovative development
conceived by Monitor Audio engineers for the new Platinum II series. It uses two
skin materials with dissimilar mechanical properties. C-CAM is used for the front
skin, while the rear skin is made from a woven carbon bre. This combination is able
to reduce distortion by over 8dB above 300Hz, which equates to a 60% reduction in
the energy of harmonic components, making RDT II the lowest distortion cone technology in Monitor Audio’s history.
HiVe®II(HighVelocity,LowNoiseReexPort)
A new type of port technology which uses a straight ried design to accelerate air ow and reduce turbulence. HiVe
II technology has the ability to move air in and out much quicker than a conventional port, the result is fast powerful
bass coupled with superior transient response.
Platinum Series II4
Page 7

ARC® (Anti-Resonance Composite)
A cast thermo-set polymer loaded with minerals to provide very inert, optimally damped components. This material is
ideal for high-end acoustic applications where a high degree of structural rigidity and vibration damping is required.
ARC is used for mid-range housings and bae components. ARC is a unique material, developed specically by
Monitor Audio engineers for the Platinum II series. Its properties ensure energy is damped out and not emitted as
high-Q resonance.
TLE (Tapered Line Enclosure)
A tapered, parabolic-shaped enclosure cast from ARC material and designed to prevent the propagation of standing
waves and modal resonances. The tapered shape also has the eect of attenuating high frequencies: smaller waves
being suppressed with the use of graduated damping materials. TLE is a unique design developed specically by
Monitor Audio engineers for the Platinum series II.
Multi-layer Cabinet Curved Cabinet Construction
Platinum II cabinets are hand built using multiple laminations of wood veneers and
shaped using complex curves to form a rigid shell. Curved surfaces are inherently
stronger than at surfaces. Since internal sides are non- regular curvatures, standing
waves (loosely dened as internal reections) cannot be set up.
New internal bracing structures have been developed to ensure the ultimate in
structural integrity, as well as serving to break up long acoustic paths internally.
Instead of large open spaces internally, we now have small, dedicated compartments
and chambers. This further reduced the prospect of standing waves, and is particularly
ecient at lower frequencies.
Bitumastic internal damping material is applied to all internal cabinet walls, ensuring
that any residual energy is damped out. The resulting homogenous enclosure is
supremely rigid, acoustically inert and able to deliver the sound as it was intended,
natural and uninhibited.
Individual Driver Grilles
Drivers are covered by individual grilles, designed to be acoustically transparent. The
system will therefore sound just as good whether the grilles are on or o.
Single Bolt Though Driver
All Platinum II drivers feature a unique single bolt-through driver xing system. Each
driver is xed into to the cabinet from the rear using a long bolt tightened to a specic
torque setting during production. The bolt serves to provide the driver with an equal
clamping force around the periphery, whilst ensuring the motor system is braced.
Since this is eectively an additional form of bracing, the cabinet system with drivers
installed becomes even more rigid.
monitoraudio.com 5
Page 8

Unpacking
Before you unpack your speakers, please make sure that there is plenty of clean oor area available. Pictorial guides
printed on the outer transit carton show you the ideal method for unpacking. Please see below for more information.
WARNING: DO NOT attempt to lift any of the speakers alone. The recommended number of people is
printed on the outer carton.
For all speakers (except the PL300 II and PL500 II): Lay the box down on the oor so the opening is on the side facing up.
Open the outer carton and then use the handles of the inner cardboard sleeve to lift the speaker and packaging out of the box.
Remove the polystyrene end caps and t the feet/spikes (where applicable). Please refer to the Spikes and Feet section below.
The PL300 II and PL500 II: Should be unpacked standing upright, the top of the speaker is indicated on the carton. Open
the carton and use the holes provided in the cardboard tray at the base of the speaker to pull the speaker out of the carton.
The sleeves at the side can be used also to steady the speaker and assist pulling. Once the speaker is out remove the top
polystyrene cap. Tilt the Speaker to remove the base polystyrene caps and protective cloth. The PL500 II has easy-slide
feet attached to the bottom of the plinth. These enable easy positioning of the PL500 II. They work on all oors and will not
scratch. If the carpet is very thick, these may not work as eectively and the cabinet will need to be “walked” into position.
Once positioned the spikes/feet can be added by tilting the cabinet as previously described, please refer to the Spikes and
Feet section below.
Spikes and Feet
For Carpeted Floors
(PL200 II, PL300 II and PL500 II only)
The feet are supplied pre-assemble for use on carpeted oors or where spikes
are appropriate. All you need to do is x them into the plinths. This is achieved
by screwing the feet fully into the 4 threaded holes in the plinth. They are then
secured using the large locking nuts provided.
You can check that the speaker is level on all sides by using the levelling tool
provided in your tool kit. If it’s slightly o-level, unscrew the foot at the lowest
point and check again. Continue this process until the cabinet is fully level. Use
the locking nuts on each foot to x the feet in place and to stop any unwanted
vibrations.
Please ensure there are no hidden wires under the carpet that could be
damaged by the spikes.
For Wooden/Hard Floors
(PL200 II, PL300 II and PL500 II only)
If the speaker is being installed on a hard/wooden oor, remove the spike from the
foot assembly as illustrated.
You can check that the speaker is level on all sides using the levelling tool provided
in your tool kit. If it’s slightly o-level, unscrew the foot at the lowest point and
check again. Continue this process until the cabinet is fully level. Use the locking
nuts on each foot to x the feet in place and to stop any unwanted vibrations.
Platinum Series II6
Locking Nut
Plinth
Locking Nut
PL500 II
Only
Main Threaded
Part
Rubber Pad
Spike
Page 9

Setting Up
2-Channel Positioning
When arranging a 2-channel system, the listening position and the loudspeakers should form an equilateral triangle.
The speakers should be positioned approximately 6 - 10 feet (1.8 - 3m) apart. The ideal distance from the rear wall
varies depending on the speaker (see guide below), however, the speakers need to be a minimum of 3 feet (91cm)
from the side walls.
• Platinum 100 II: 8 - 18 inches (20 - 45cm)
• Platinum 200 II: 18 - 24 inches (45 - 60cm)
• Platinum 300 II and 500 II: up to 36 inches (91cm)
When setting up the speakers, experimentation is strongly advised, as environmental acoustics and personal preference
dier with every installation. If there is insucient bass present for example, try moving your speakers closer to a
wall. The opposite approach is recommended if there is excessive bass. In addition, please see the information on the
supplied USB referring to port bungs. If stereo imaging is being lost, try ‘toeing-in’ the speakers slightly. The sound
should appear to originate from the centre point between the speakers, not the speakers themselves.
AV Positioning
Please refer to the illustration below and on page 8 for the ideal angles and positions of each speaker in your surround
system. The speakers should be distanced from the wall according to the requirements of the speaker, which are listed
in the 2-Channel Positioning section (page 7).
If the sound is too bass heavy or there is bass boom from the room when playing music (without a subwoofer), try
moving the loudspeakers slightly further away from the wall(s) or adjusting the crossover frequency settings for the
speakers and/or sub. Also try changing the subwoofer’s position. If this is not possible, then try the supplied port
bungs. Please refer to the full manual on the supplied USB for more information.
The Platinum II Centre channel speaker should be positioned so that it is pointing at the viewing position and at
approximate ear height. If it is below or above ear height, use the rubber feet supplied to angle it slightly
An example of a Platinum 7.1 system consisting of PL300 II front Left/ Right, a PLC350 II centre channel and PL100 II surrounds.
monitoraudio.com 7
Page 10

0°
22°-22°
30°-30°
90°-90°
1
135°-135°
150°-150°
2
2
1
110°-110°
1. Side surround speakers
2. Rear surround speakers
A 7.(1) surround system will make use of side (position 1) and rear (position 2) speakers to create a full 360°
soundstage, if setting up a 5.(1) system you can place your surrounds in position (1) or (2).
FX Speakers
If you wish to use FX speakers in an AV system with Platinum Series II we would recommend the Gold FX, which not
only will be a good timbre and tonal match with your Platinum II speakers but is also available in the same selection
of high quality nishes. The FX can also be ush-mounted on side or rear walls.
When compared to a traditional surround speaker the FX oers the
addition of spatial sound dispersion through the use of side ring
tweeters which can be used in Di-Pole (spatial sound) or Monopole
(direct ring) mode.
For more information on the Gold FX please refer to our website:
www.monitoraudio.com
The Gold FX in high gloss Piano Black
8 Platinum Series II
Page 11

Connecting Speaker Cables
Bare Wire Connection
Unscrew the binding posts and pass the bare wire through the hole in the binding post. Tighten the binding post to
clamp the wire in place.
Banana Plugs
Remove the red and black plastic plugs from the terminals and insert the banana plugs into the standard 4mm holes
that are revealed. Pliers may be required to gain purchase on the plugs.
Spade Connectors
Unscrew the binding post and place the spade connector around the exposed thread. Tighten the binding post to clamp
the spade connector in place.
Wiring
Single Wiring
Single wiring is achieved by using a single set of cables to the terminals on the back of the speaker. Internally the
speaker crossover guides the frequencies to the appropriate driver/tweeter - low frequencies to the bass drivers, mid
frequencies to the mid/bass drivers and high frequencies to the tweeter.
It is perfectly acceptable to connect to the HF or LF terminals, or to split LF/HF (experimentation is advisable to
achieve the preferred results).
NOTE: When using this method you must KEEP the terminal links in place.
monitoraudio.com 9
Page 12

Bi-Wiring
Bi-wiring is accomplished by connecting separate pairs of speaker cables to the terminals on the loudspeaker from
a single pair of connections on the amplier. In the case of the Platinum II Series, the LF terminals connect to the
bass driver(s) and the HF terminals connect to the tweeter (in 2-way loudspeakers), or the mid and tweeter in 2.5 and
3-way speakers.
NOTE: When using this method the terminal links MUST be removed.
Bi-Amping
Bi-Amping is the same as Bi-Wiring except that you are introducing a second amplier into the equation.
In order to Bi-Amp you must connect a set of speaker cables to the HF terminals on the loudspeaker from one amplier
and another set of speaker cables to the LF terminals from the second amplier.
NOTE: When wiring this method the terminal links MUST be removed.
TheEectsofBi-Wiring/Bi-Amping
Fundamentally a loudspeaker crossover varies the impedance seen by the speaker and by the power amplier. The
situation is such that when the full range musical signal is applied to the terminals of a full-range speaker system,
the bass driver(s) only receives low frequency signals, the mid driver receives the mid band frequency signals and the
10 Platinum Series II
Page 13

tweeter only gets sent high frequency signals. This means that if separate speaker cables are connected to the low
frequency terminals, and the high frequency terminals, not only have the drive units and the frequency’s directed and
divided for them, but the two separate speaker cables will now also carry dierent signals, the bass cable mostly the
lows, and the tweeter cable mostly the highs.
In a single wired system, unwanted mechanical and electrical resonances manifest as distortion at both sets of
speaker terminals. Due to the impedance of the speaker cables, these distortions will not be entirely cancelled
by the amplier. Instead, they modulate between the two crossovers, and degrade sound quality. When bi-wiring,
this interaction is minimised as signal distortion is ‘seen’ at the amplier’s output where it can be more eectively
cancelled. Bi-wiring/ bi-amping therefore presents a ‘cleaner’ signal at both the low frequency and high frequency
speaker terminals, and because the high and low frequencies have already been separated, each has a minimal eect
on the other - in essence the bass does not overpower delicate treble.
In terms of the audible benet, bi-wiring/ bi-amping, provides more clarity and detail to the midrange and high
frequencies. Often the bass will become faster and tighter. Focus and staging will improve as well. In all, this is a
very eective and desirable improvement and is highly recommended by Monitor Audio.
Running-In Your Platinum II Speakers
Run your speakers in by playing normal music or by using our running-in CD: the System
De-Tox Disk, at low-mid listening levels for approximately 50-70 hours play time. You
may nd the sound will continue to improve even after the 70 hour mark.
This can be done naturally over time: like a ne wine the performance will improve with
age.
Alternatively if you wish to run the speakers continuously on loop you can decrease
the audible volume/presence by placing the speakers face-to-face so that the drivers/
tweeters are directly aligned and as close as possible. Then connect the amplier to your
speakers so that one is as normal (in phase): positive to positive and negative to negative
(red to red and black to black), and the other speaker out of phase: positive to negative
and negative to positive inputs on the speaker.
For information on Monitor Audio’s System De-Tox disk please refer to our website:
www.monitoraudio.com
monitoraudio.com 11
Page 14

Care and Maintenance
ToolBox
1. Allen/ Hex keys: 5mm (feet adjustment), 8mm (driver bolt tightening), 10mm (mid-range bolt tightening)
2. Grille removal tool
3. USB drive (Platinum Series II Manuals and Monitor Audio SubConnect application)
4. Spirit level
1
2
3
4
12 Platinum Series II
Page 15

Upkeep of Cabinets
The high gloss nish of the cabinet can be maintained by regular dusting using a soft cloth or micro bre cloth. When
the nish needs to be revived a high-quality, non-abrasive, automotive wax or polish can be used. The drive units
should only be cleaned with a damp cloth if more than normal dusting is required.
Never use solvents or aggressive cleaning/polishing agents on your Platinum II speakers. When in doubt, test the
cleaning product on an inconspicuous area on the cabinet and let it sit for several days before committing to its use
on visible portions of the cabinet.
Cleaning of Finished Leather
Cleaning of leather is perhaps something that is given too much emphasis. Leather furniture in a normal domestic
environment should require little attention and any cleaning should be done only when necessary. However, an
accumulation of dirt and grease over a long period is undesirable and obviously, the longer it is left the more dicult
it will be to remove. Dirt is abrasive and over a period of time in extreme circumstances will cause the removal of the
protective coating.
For regular cleaning, use a cloth soaked in a mild soap/water solution (not detergent) and wring it out until damp.
Apply the cloth to the surface of the leather in a light circular motion, turning the cloth regularly. Avoid an aggressive
rubbing action. Repeat with a damp cloth rinsed in clean warm water. To improve the life of the leather, we recommend
the use of high quality leather conditioners and cleaners such as those commonly found in automotive centres. Do not
use abrasive furniture cleaners on your Platinum II speakers.
Removing the grilles
All Platinum II speakers apart from the PLW215 II feature individual driver grilles,
which come factory tted. If desired these can be removed using the grille removal
tool found in the Platinum II Tool Box (refer to page 12).
To remove the grilles simply place the magnetic face of the grille removal tool
on the outer edges of the grille. Gradually prise the grille o, by using the tool at
various positions around the outer edge of the grille.
Stands
New dedicated Platinum Series II stands are available, to perfectly compliment both aesthetically and acoustically
with the PL100 II stand mount speakers. They feature sturdy ‘no ring’ construction to add safe support and isolate
the speakers from resonant frequencies. The new stands’ height has again been optimised for listening, aligning
the speakers tweeters at ideal ear height within a seated listening position. For more information please visit our
website: www.monitoraudio.com
Guarantee
Both the craftsmanship and the performance of this product is guaranteed against manufacturing defects for the
period of ve years for speakers and two years for the PLW215 II from the date of purchase (see conditions in the
Important Safety Instructions booklet), provided that the product was supplied by an authorised Monitor Audio retailer
under the consumer sale agreement.
To verify your manufacturer’s warranty, please visit the online registration form at: www.monitoraudio.com
monitoraudio.com 13
Page 16

Specications
PL100 II PL200 II PL300 II PL500 II PL150C II PL350C II
System Configuration 2 Way – 2 driver 3 Way – 4 driver 3 Way – 4 driver 3 Way – 7 driver 2.5 Way – 3 driver 3 Way – 4 driver
Frequency Response. 40Hz – 100kHz 35Hz-100kHz 28Hz – 100kHz 22Hz- 100kHz 45Hz-100kHz 32Hz- 100kHz
Sensitivity (1W@1M). 88dB 90dB 90dB 91dB 89dB 90dB
Nominal Impedance
Maximum SPL
(per pair, in room)
6 Ohm
(4.5 Ohm Min @ 160Hz)
111.8dBA 117dBA 117.8dBA 120dBA 112dBA 114dBA
4 Ohm
(4.0 Ohm Min @ 135Hz)
4 Ohm
(4.2 Ohm Min @ 111Hz)
4 Oh m
(4.2 Ohm Min @ 120Hz)
6 Ohm
(4.5 Ohm Min @ 170Hz)
4 Ohm
(4.0 Ohm Min @ 115Hz)
Power Handling (RMS) 120W 250W 300W 400W 200W 250W
Recommended
amplifier power into 4
60-120W 100-250W 100-300W 150-400W 60-200W 100-250W
Ohms (RMS)
System Alignments
Mid - H.F Crossover
Frequency
Bass - Midrange
Crossover Frequency
Drive unit Complement
Single rear HiVe®II port
technology
3.0kHz 3.9kHz 3.4kHz 3.6kHz 3.0kHz 3.3kHz
N/A 750Hz 500Hz 460Hz 600Hz (-6dB LF) 780Hz
1 x 6.5” RDT®II bass/mid-
range driver
1 x MPD high frequency
transducer
Two HiVe®II ports technology
Sealed Mid-range TLE
enclosure
2 x 6.5” long-throw RDT®II
bass drivers
1 x 4” RDT®II mid-range driver
1 x MPD high frequency
transducer
Two HiVe®II ports technology
Sealed Mid-range TLE
enclosure
2 x 8” long-throw RDT®II bass
drivers
1 x 4” RDT®II mid-range driver
1 x MPD high frequency
transducer
Four HiVe®II ports technology
Sealed Mid-range TLE
enclosure
4 x 8” long-throw RDT®II
bass drivers
2 x 4” RDT®II mid-range driver
1 x MPD high frequency
transducer
Single rear HiVe®II port
technology
1 x 6.5” RDT®II bass driver
1 x 6.5” RDT®II bass/ mid-
range driver
1 x MPD high frequency
transducer
Two HiVe®II ports technology
Sealed Mid-range TLE
enclosure
2 x 8” long-throw RDT®II bass
drivers
1 x 4” RDT®II mid-range driver
1 x MPD high frequency
transducer
External Dimensions
(Including Fixed Plinth
where applicable)
370 x 225 x 285 mm
9/16
x 8
7/8
x 11
14
1/4
inch
998 x 360 x 375 mm
5/16
x 14
3/16
x 14
39
3/4
inch
1113 x 410 x 470 mm
13/16
x 16
1/8
x 18
43
1/2
inch
1803 x 504 x 626 mm
13/16
71 x 19
x 24
5/8
inch
225 x 583 x 291.2 mm
15/16
x 8
7/8
x 11
22
7/16
inch
288 x 800 x 368 mm
5/16
x 31
1/2
x 14
11
(H x W x D)
External Dimensions
(Including Fixed Plinth,
Feet and Spikes where
N/A
1043 x 360 x 375 mm
5/16
x 14
3/16
x 14
39
3/4
inch
1158 x 410 x 470 mm
13/16
x 16
1/8
x 18
43
1/2
inch
1848 x 504 x 626 mm
13/16
71 x 19
x 24
5/8
inch
N/A N/A
applicable) (H x W x D)
Product Weight
kg (Ibs)
14.94Kg (32lb 14oz) 36.08Kg (79lb 6oz) 54.52Kg (120lb) 99.1Kg (218lb) 23.98Kg (52lb 12oz) 43.02Kg (94lb 10oz)
Santos Rosewood veneer with piano lacquer.
Finishes Available
Ebony veneer with clear piano lacquer or Piano Black lacquer.
Upholstered front baffle in Black Ingleston premium grade leather By Andrew Muirhead.
1/2
Monitor Audio
reserves the
right to alter
specications
without notice.
inch
14 Platinum Series II
Page 17

Monitor Audio Ltd.
24 Brook Road
Rayleigh, Essex
SS6 7XJ
England
Tel: +44 (0)1268 740580
Fax: +44 (0)1268 740589
Email: info@monitoraudio.co.uk
Web: www.monitoraudio.com
Designed & Engineered in the United Kingdom
Made in China
Version 2. 2016
 Loading...