

Page 1
Internet / Wi-Fi, DAB, FM Radio System
User Manual
Page 2

Page 3
WARNING
TO PREVENT FIRE OR SHOCK HAZARD, DO NOT USE THIS PLUG WITH AN EXTENSION CORD, RECEPTACLE OR •
OTHER OUTLET UNLESS THE BLADES CAN BE FULLY INSERTED TO PREVENT BLADE EXPOSURE.
TO • REDUCE THE RISK OF FIRE OR ELECTRIC SHOCK, DO NOT EXPOSE THIS APPLIANCE TO RAIN OR
MOISTURE.
TO PREVENT ELECTRIC SHOCK, MATCH WIDE BLADE PLUG TO WIDE SLOT AND FULLY INSERT.•
EXCESSIVE SOUND PRESSURE FROM EARPHONES AND HEADPHONES CAN CAUSE HEARING LOSS.•
USE OF CONTROLS OR ADJUSTMENTS OR PERFORMANCE OF PROCEDURES OTHER THAN THOSE SPECIFIED •
MAY RESULT IN HAZARDOUS RADIATION EXPOSURE
CHANGES OR MODIFICATIONS TO THIS UNIT NOT EXPRESSLY APPROVED BY THE PARTY RESPONSIBLE FOR •
COMPLIANCE COULD VOID THE USER’S AUTHORITY TO OPERATE THE EQUIPMENT.
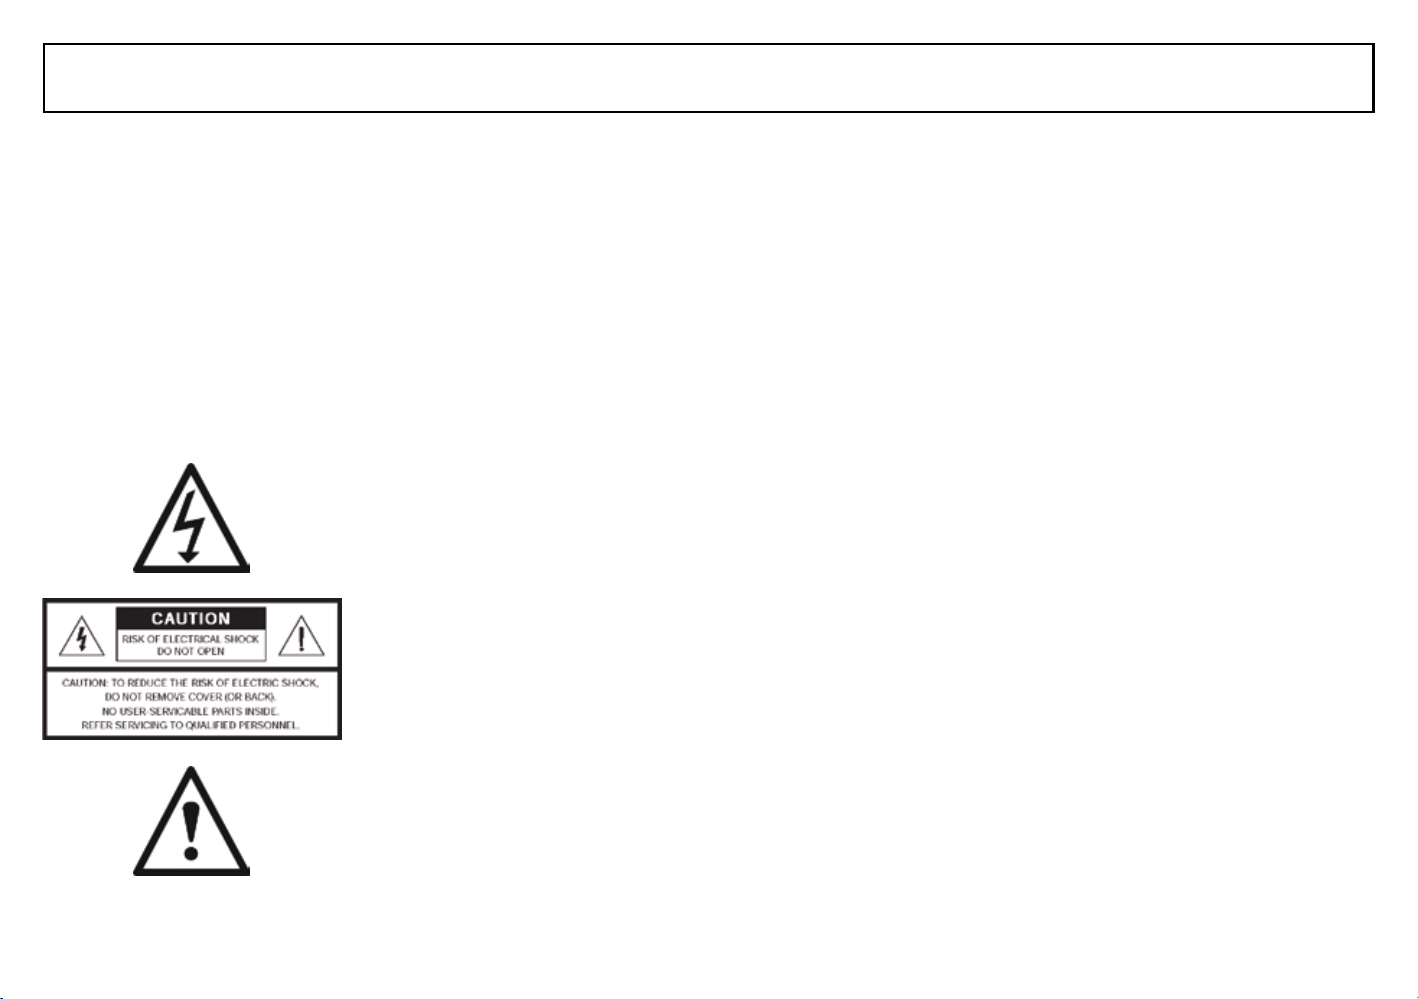
This lightning flash with an arrow head
symbol, within an equilateral triangle, is
intended to alert the user to the presence
of un-insulated “dangerous voltage” within
the product’s enclosure that may be of
sufficient magnitude to constitute a risk of
electric shock to the persons.
Warning: To reduce the risk of electric
shock, do not remove cover (or back),
no user-serviceable parts inside. Refer
servicing to qualified service personnel.
This exclamation point within an equilateral
triangle is intended to alert the user to
presence of important maintenance
(servicing) instructions in the literature
accompanying the appliance.
monitoraudio.co.uk
FCC RF Radiation Exposure statement:
This equipment complies with FCC RF radiation exposure limits set forth for an
uncontrolled environment. This equipment should be installed and operated with a
minimum distance of 20 centimetres between the radiator and your body.
NOTE:
This equipment has been tested and found to comply with the limits for a Class B
digital device, pursuant to Part 15 of the FCC Rules. These limits are designed to
provide reasonable protection against harmful interference in a residential installation.
This equipment generates, uses and can radiate radio frequency energy and, if not
installed and used in accordance with the instructions, may cause harmful interference
to radio communications. However, there is no guarantee that interference will not
occur in a particular installation. If this equipment does cause harmful interference
to radio or television reception, which can be determined by turning the equipment
off and on, the user is encouraged to try to correct the interference by one or more
of the following measures: re-orient or relocate the receiving antenna. Increase the
separation between the equipment and receiver. Connect the equipment into an
outlet on a circuit different from that to which the receiver is needed. Consult the
dealer or an experienced radio/TV technician for help.
i
Page 4

IMPORTANT SAFETY INSTRUCTIONS
Read these instructions1. .
Keep these instructions.2.
Heed all warnings.3.
Follow all instructions.4.
Do not use this apparatus with water.5.
Clean only with a dry cloth.6. Great care and attention has gone into the
materials chosen to produce the product. A gentle wipe with a dry, clean cloth
is all that is required to remove any dust. Treat it as you would a fine piece of
furniture because that is how it has been designed.
Do not block any ventilation openings. 7. Install in accordance with Monitor
Audio’s instructions.
Do not install near any heat sources8. , such as radiators, heat registers, stoves,
or other apparatus (including amplifiers) that produce heat.
Do not defeat the purpose of the polarised or grounding type plug. 9. A
polarised plug has two blades with one wider than the other. A grounding type
plug has two blades and a third grounding prong. The wider blade or the third
prong are provided for your safety. If the provided plug does not fit your outlet,
consult an electrician for replacement of the obsolete outlet.
Protect the power cord from being walked on or pinched10. particularly
at plugs, convenience receptacles, and the point where they exit from the
apparatus.
Only use attachments/ accessories specified by Monitor Audio.11.
Use only with the cart12. , stand, tripod, bracket, or table specified by the
manufacturer or sold with the apparatus. When a cart is used, use caution when
moving the cart/ apparatus combination to avoid injury from tip-over.
Refer all servicing to qualified service personnel.14. Servicing is required when
the apparatus has been damaged in any way, such as power supply cord or plug
is damaged, liquid has been spilled or objects have fallen onto the apparatus,
the apparatus has been exposed to rain or moisture, does not operate normally
or has been dropped.
The appliance coupler is used as the disconnect device,15. the disconnect
device shall remain readily operable.
Switch off the unit when you don’t use it.16. Switch off the unit and disconnect
it from the AC power supply when it is not being used for a long time. The mains
plug is used as the disconnect device, the disconnect device shall remain readily
operable at any time.
This apparatus shall not be exposed to dripping or splashing water 17. and
that no object filled with liquids such as vases shall be placed on the apparatus.
Francais: L’appareil ne doit pas être exposé aux écoulements ou aux
éclaboussures et aucun objet ne contenant de liquide, tel qu’un vase, ne doit
être placé sur l’objet.
The marking information is located at the bottom enclosure of the 18.
apparatus.
Francais: Le marquage de l’appareil figure sur la partie inférieure du boîtier.
AC/DC adaptor is used as a disconnect device 19. and it should remain readily
operable during intended use. In order to disconnect the apparatus from mains
completely, the AC/DC adaptor should be disconnected from the mains socket
outlet completely.
Francais: L’adaptateur AC/DC de l’appareil ne doit pas être obstrué ou doit
être facilement accessible pendant son utilisation. Pour être complètement
déconnecté de l’alimentation d’entrée, l’adaptateur AC/DC de l’appareil doit être
déconnecté du secteur.
Unplug this apparatus during lightening storms13. , or when unused for long
periods of time.
ii
AirStream 10
Page 5

CONTENTS PAGE
IMPORTANT SAFETY WARNINGS i
IMPORTANT SAFETY INSTRUCTIONS ii
CONTENTS 1
WELCOME 2
AirStream Helpline 2
What is in the Box? 2
BUTTONS AND CONNECTIONS 3
Definitions 4
PRODUCT SET UP 5
Where to Position your AirStream 10 5
Switching on and
Connecting to your Network 5
Advanced Users 6
Software Update 6
USING THE AirStream 10 7
Switching On 7
Switching Off 7
Adjusting the Volume 7
Using Headphones 7
Selecting a Listening Mode 7
INTERNET RADIO 8
Introduction to Internet Radio 8
Using the Internet Radio 8
Storing an Internet Station Preset 9
Select an Internet Station Preset 9
Podcasts 9
Last Listened 9
My Favourites and My Added Stations 10
Help 10
Internet Radio Display 10
MUSIC PLAYER 11
Using the Music Player 11
Music File Types 11
Selecting Music Player Mode 11
Setting up the Music Player 11
Setting up for Shared Media 12
Setting up for Shared Folders 14
Music Player Display 14
DAB RADIO 15
What is DAB Digital Radio? 15
Selecting DAB Mode 15
Changing DAB Stations 15
Manually Scanning for DAB Stations 15
Storing a DAB Station Preset 16
Select a DAB Station Preset 16
DAB Display Information 16
Manual Tune 17
Dynamic Range Control 17
Station Order 18
DAB Mode Display 18
FM RADIO 19
FM Radio Mode 19
Selecting FM Radio Mode 19
Tuning to a FM Station 19
Changing the Scan Setting 19
Changing the Audio Setting 20
Storing a FM Station Preset 20
Select a FM Station Preset 20
FM Display Information 20
FM Mode Display 20
monitoraudio.co.uk
AUXILIARY INPUT 21
Auxiliary Mode Display 21
ADDITIONAL SYMBOLS DISPLAYED 21
MAIN MENU 22
SLEEP 22
ALARMS 22
To set an Alarm 22
SYSTEM SETTINGS MENU 22
TIME AND DATE SETTINGS 22
To Manually Set the Time and Date 22
Auto Update 23
Set Format 23
Set the Time zone 23
Daylight Savings 23
LANGUAGE 23
LCD STANDBY - BACKLIGHT 23
FACTORY RESET 23
SOFTWARE UPDATE 24
Automatic Update 24
Manually Check for Updates 24
INFO 25
HELP 26
Unable to Connect to Wireless network 26
DAB Radio Reception is Poor 27
No Sound 27
The AirStream 10 does not Respond 27
CARE AND MAINTENANCE 28
PRODUCT GUARANTEE 28
GLOSSARY OF TERMS 29
1
Page 6
WELCOME
AirStream Helpline
Introducing the AirStream 10 Multi-Format radio from Monitor Audio®. Your AirStream 10
is a combined DAB (not USA model), FM and Internet radio with media streaming. It
utilises the very latest technology with a quick and easy set up and a clear information
display.
Monitor Audio have used their vast experience and knowledge of the hi-fi industry and
transferred it into a complete radio solution.
Please read through all of the Safety Instructions (separate booklet), Initial Set Up
Guide and this User Guide before proceeding to operate your AirStream 10.
Before you can receive internet radio stations you will need to check that you have
the following:
A broadband internet connection•
A wireless access point (Wi-Fi) connected to your broadband internet, •
via a router.
If your wireless network is configured to use Wired Equivalent Privacy (WEP) or
Wi-Fi Protected Access (WPA) data encryption then you will need to know the WEP
or WPA code so that your AirStream 10 can communicate with your network.
Your AirStream 10 should work in all locations where the Wi-Fi network •
is available. You will also need to know the name of your wireless network, i.e.
its SSID.
Before you continue please make sure that your wireless access point is turned on
and connected to your broadband internet. You may need to read the instructions
provided with your wireless access point and router.
The helpdesk is open from 8.30am to 5.00pm, Monday to Friday (excluding Bank
Holidays) and can be contacted on:
+44 (0)1268 740580 (local call rate). Or at www.monitoraudio.co.uk
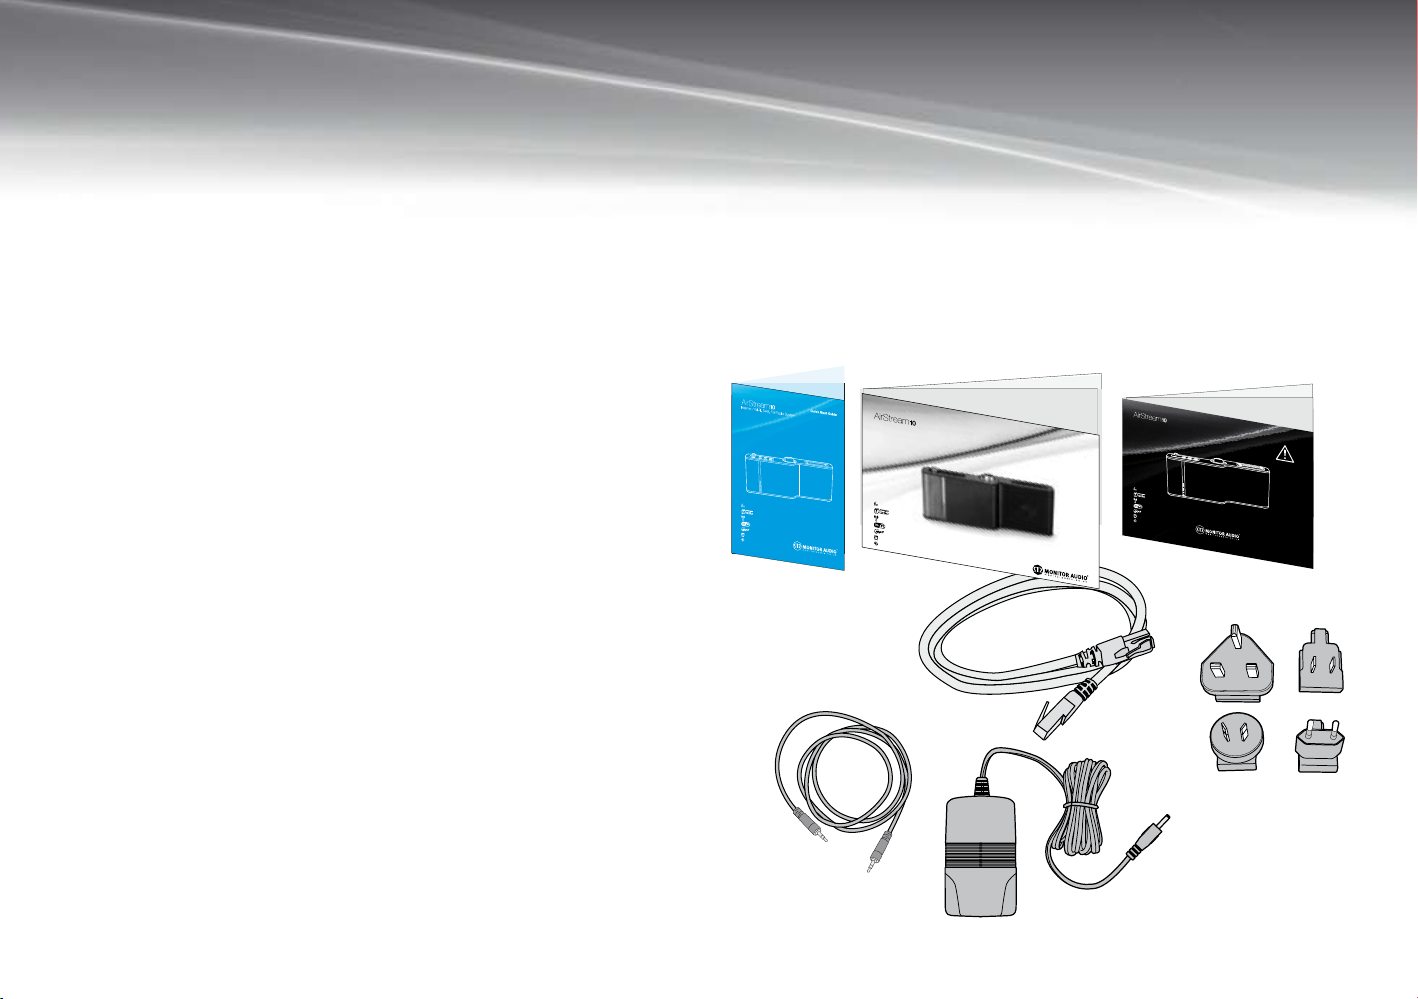
What’s in the Box?
1 x Airstream 10
1 x Mains adaptor
1 x Ethernet cable
1 x 3.5 mm jack lead
User Manual/Guides
Internet / Wi-Fi, DAB, FM Radio System
User Manual
Internet / Wi-Fi, DAB, FM Radio System
UK
Safety Instructions
US
Note:
If you have a wireless laptop computer available you can use this to check that 1.
the wireless network is working OK before you begin to set up your AirStream 10.
If you do not have a wireless connection you can use the Ethernet cable supplied 2.
to connect to your computer/ router/ Ethernet network point.
2
EuroAus
Note: Some models will only
contain 1 plug adaptor
AirStream 10
Page 7
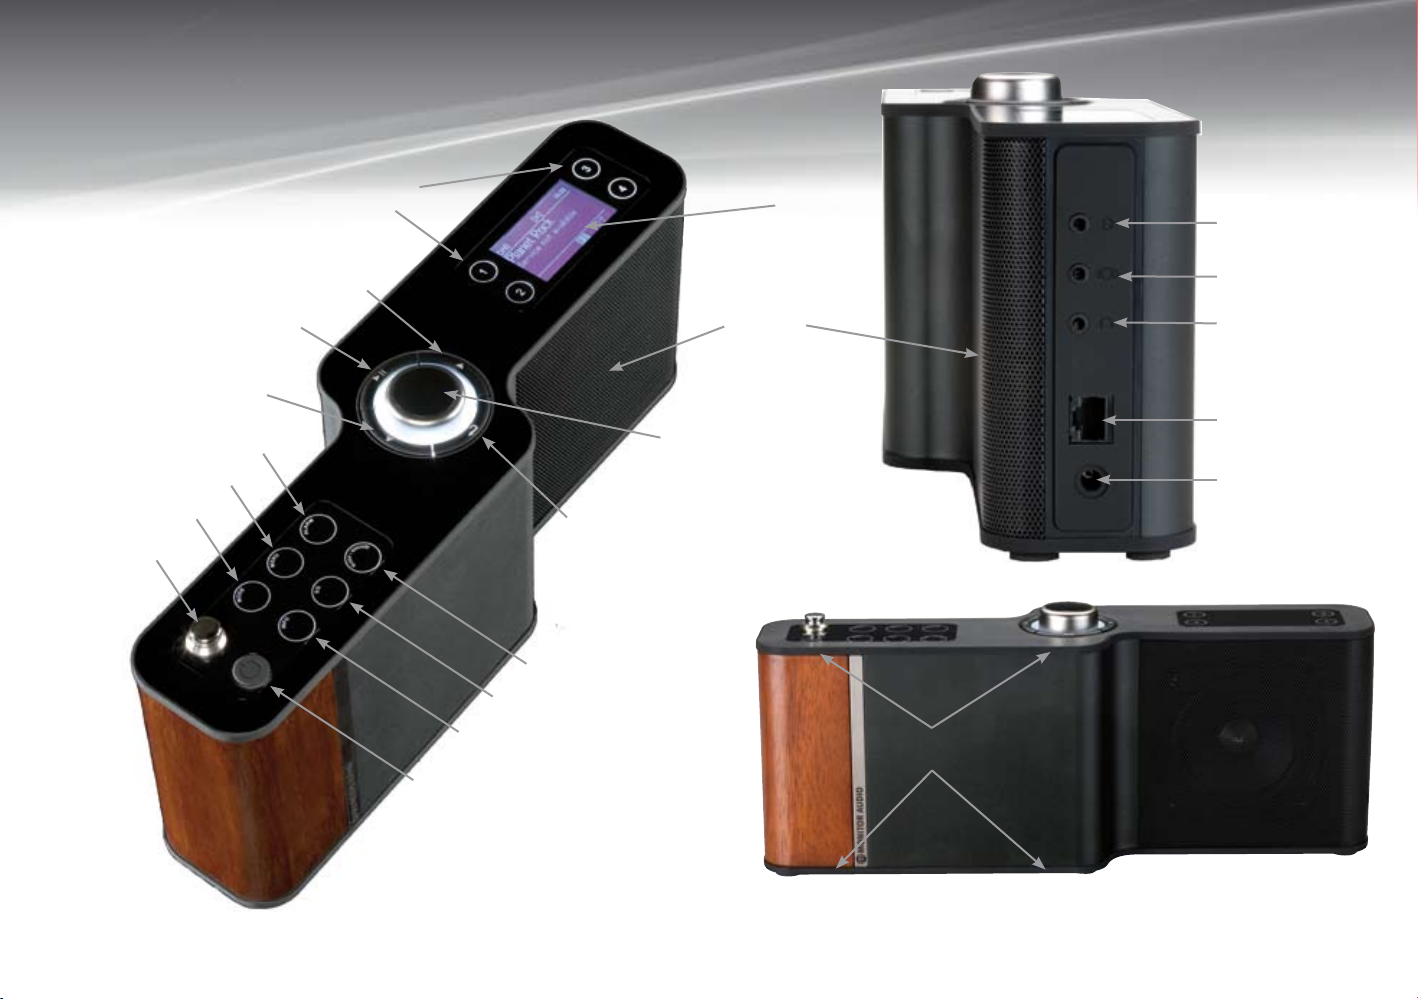
BUTTONS & CONNECTIONS
Preset
Buttons
Right
Button
Play/ Pause
Button
Left
Button
Alarm
Menu
Mode
Aerial
Info
EQ
Return
Button
Sleep/
Snooze
Speaker
Tune/ Select Dial
Display
Auxiliary Input
Stereo Audio
Output
Stereo Headphone
Output
Ethernet Input
Power Input
Anti-slip rubber
pad locations
Stand By Button
monitoraudio.co.uk
3
Page 8

BUTTONS & CONNECTIONS. Cont.
Definitions
Stand By -• Turns the AirStream 10 on and off out of stand by mode. When in
Stand by, you can set the display to be fully illuminated, partially or not at all.
Aerial -• This must be fully extended in order to ensure maximum FM and DAB
signal strength. Some adjustment may be required, but fully extended vertically
is the recommended place to start. The aerial is not required when in Internet
Radio or Music Player modes.
Mode -• Scrolls through the various playback modes.
Menu -• Press this to enter into the main menu (not playing any particular mode)
or the main menu for the mode in which you are in.
Alarm -• Short cut to the alarms setting menu.
Sleep/ Snooze -• The sleep function automatically turn the AirStream 10 off after
a user set period of time. The Snooze function silences an activated alarm for a
period of 5 minutes. You will be able to see it count down on the AirStream 10
display.
EQ -• Scroll through the various preset EQ settings (Optimum, Voice, Classical,
Pop, Rock or Dynamic).
Info -• Press this button to scroll through various information transmitted during
FM (only when an RDS signal is being received), DAB (not all models), Internet
Radio and Music Player.
Play/ Pause Button - • This acts as a mute button when in Internet, DAB and
FM modes. When in Music Player mode, you can play and pause the music
you are listening to.
Left Button - • This is used to skip backward to a previous track(s) when in
Music Player mode. In DAB mode, it brings up the station list. In FM mode, it
is used as a form of manual tuning in -0.05MHz steps. It is disabled in Internet
Radio or Auxiliary modes.
Right Button - • This is used to skip forward to the next track(s) when in Music
Player mode. In DAB mode, it brings up the station list. In FM mode, it is
used as a form of manual tuning in +0.05MHz steps. It is disabled in Internet
Radio or Auxiliary modes.
Return Button - • This button is used frequently in the menu system, to access
the previous display. However, when in Internet Radio mode, it brings up the
Internet radio menu. In Music Player mode, it brings up the music list for that
folder. In DAB mode, it brings up the station list. In FM mode and Auxiliary
mode, it has no function.
Tune/ Select Dial - • It is used to scroll through the menus, and select the
highlighted option by pressing down on it.
Auxiliary Input - • An input to allow inter-connection of other devices, such as
MP3 players and CD players. It is recommended that the volume of the auxiliary
device is set to approximately three quarter volume for optimum playback quality.
Audio Output - • This connection is used to connect the AirStream 10 to other
audio devices. This is set to a fixed level and the volume is controlled via the
external device. The speaker on the AirStream 10 will still remain active. A stereo
signal will be played providing one is received.
Headphone Output - • Use to connect headphones (not supplied with the
AirStream 10). The volume is controlled via the AirStream 10 however, the speaker
of the AirStream 10 will be muted. A stereo signal will be played providing one
is received.
Ethernet Input - • Allows for a wired connection to a router (or Ethernet switch)
where a wireless connection is not available.
Power Input - • Connect only the power supply unit supplied with the AirStream 10.
Do not use any other devices.
Anti-slip Rubber pad locations - • Place the self adhesive rubber pads here
when using the AirStream 10 in a horizontal orientation. Eight pieces have been
supplied. Only four are required, leaving four spares. Additional information can
be found on the help sheet contained with the pads.
4
AirStream 10
Page 9
PRODUCT SET UP
Where to Position Your AirStream10
It is important that you consider carefully in advance where your AirStream 10 will be
situated and make sure that it is:
On a flat and stable surface.•
Within 1.8 metres of a power socket.•
Within a strong wireless network reception area. •
If you are not using the wireless connection, you must be near, or have access •
to a Ethernet point.
Where the telescopic aerial can be fully extended when listening to DAB or FM •
stations.
Away from bright sunlight or heat sources, such as a radiator.•
Away from humid or very damp places such as a bathroom.•
Switching on and Connecting to Your Network.
(Also see the Quick Start Guide.)
Connect the mains power lead into the socket on the bottom right hand side 1.
of the AirStream10 (see the image on page 3) and plug the power adaptor into
the mains power wall socket and switch on. If using an ethernet network lead
(supplied), also connect it at this stage.
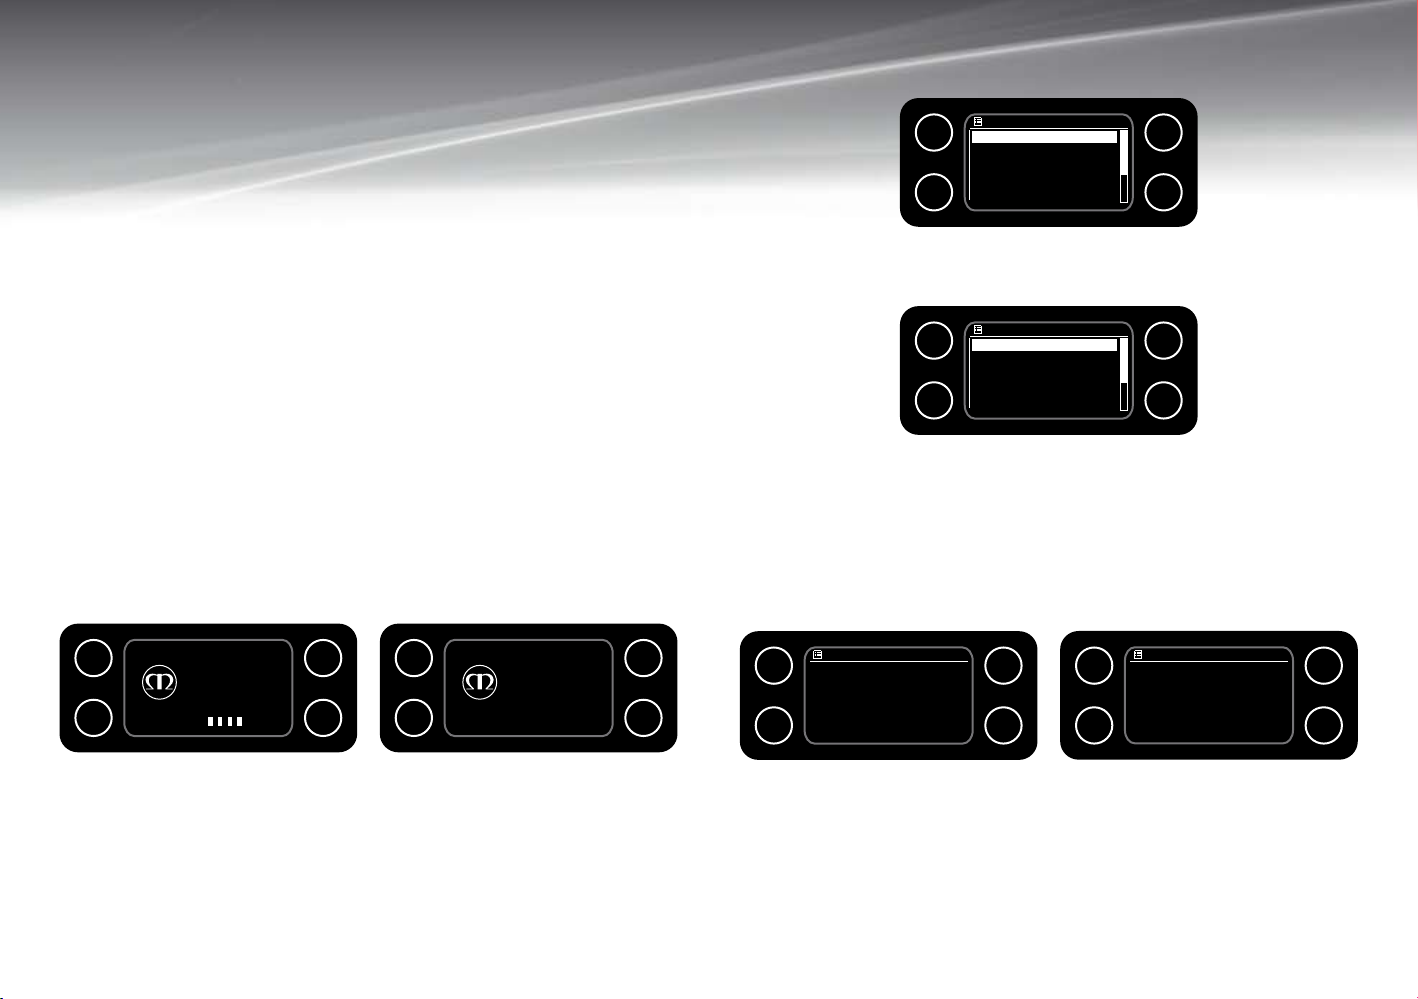
‘DESIGN FOR SOUND, STARTING ...’ will be displayed followed by an un-set 2.
time and date.
Press the ‘Stand By’ button (see the image on page 3). The main menu will be 3.
displayed (if it is not displayed, press the menu button):
Main Menu
1
2
Internet AirStream 10
Music player
DAB
FM
AUX in
3
4
Turn the ‘Tune/ Select Dial’ to highlight and select ‘System Settings’4. . This will
display the ‘System Settings’ menu:
System settings
1
Network >
Time/ Date >
Language >
LCD Standby-Backlight >
2
Factory reset
3
4
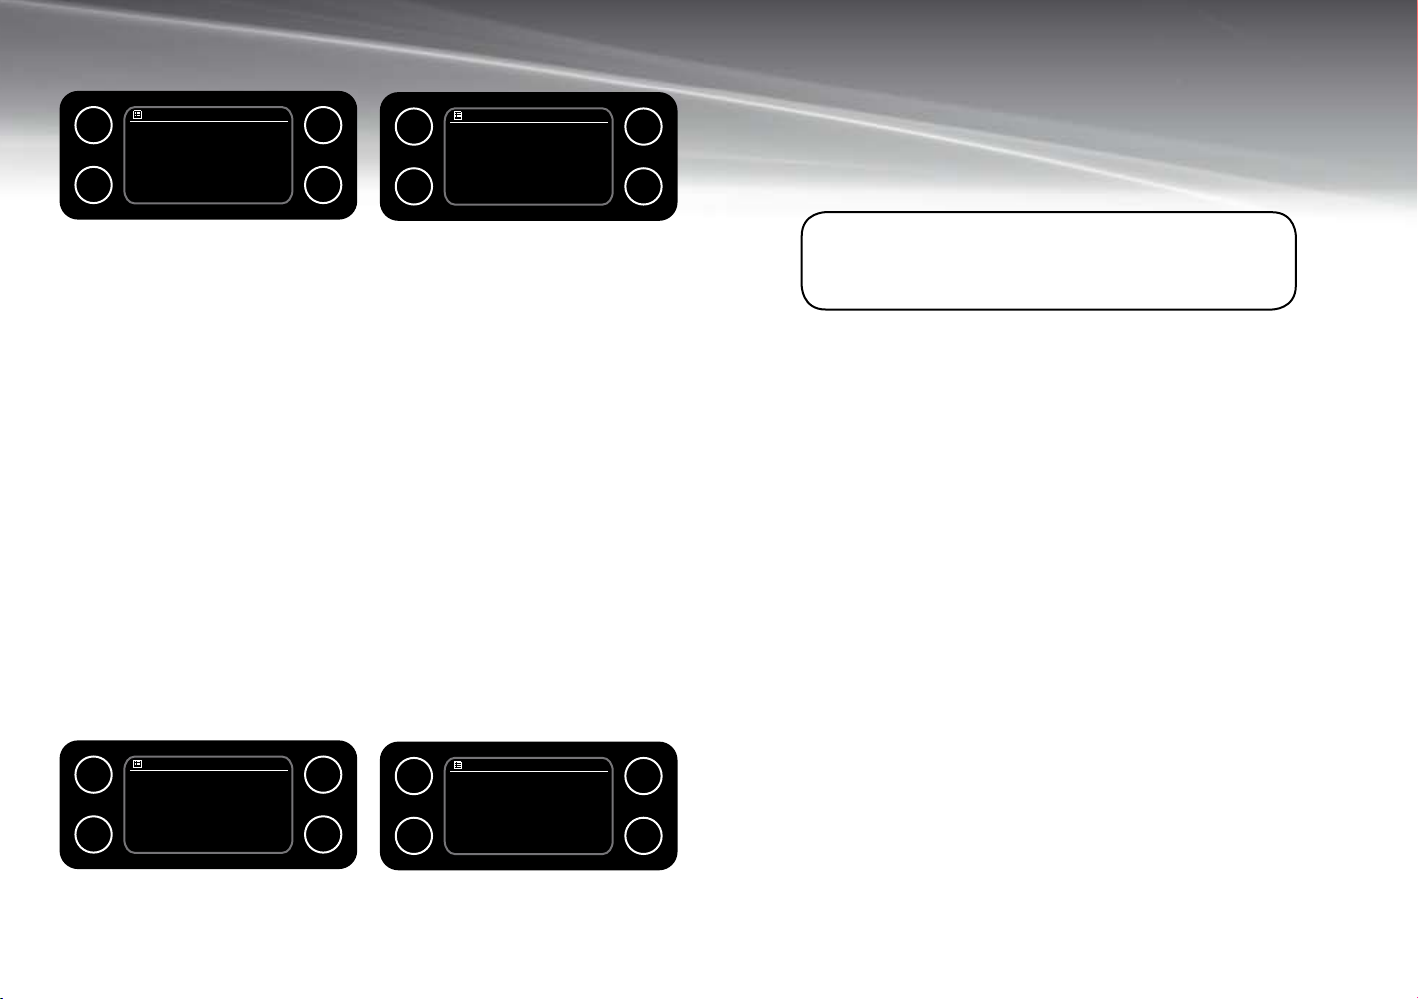
Press the ‘Tune/Select Dial’ to select ‘Network’ which in turn bringing up the 5.
‘Network settings’ menu. Press the ‘Tune/Select Dial’ again to select and start
the ‘Internet Wizard’. The wizard will automatically scan for available Wi-Fi and
Wired networks displaying a list of those that are available.
Turn the ‘Tune/Select Dial’ to your chosen network and press it to select. If 6. using
the wired connection method, select ‘[WIRED]’ from the list (please go to step
8). If the network does not have any security, ‘Please wait connecting’, and then
‘Connected’ will be displayed.
1
2
DESIGN FOR
SOUND
STARTING
3
4
1
2
00:00
00/00/0000
3
4
1
2
Network settings
Please wait.
Connecting...
3
4
Network settings
1
Connected
2
3
R
4
If your network does have security, the wizard will prompt you to enter the relevant 7.
Wired Equivalent Privacy (WEP) or Wi-Fi Protected Access (WPA) code or pass
phrase. This is accomplished by turning the ‘Tune/ Select Dial’ to highlight the
appropriate character, then pressing it to select. When the key has been entered,
turn the dial to highlight ‘OK’ and press it to select.
monitoraudio.co.uk
5
Page 10
After successful entry of these details, the display will change to ‘Please wait
connecting.’, and then ‘Connected’ will be displayed.
1
2
Network settings
Please wait.
Connecting...
3
4
Network settings
1
Connected
2
3
R
4
Note:
If your network name or SSID has been hidden, the AirStream 10 will not be able
to detect it. You can either turn on the SSID of your access point and then select
’[Rescan]’ or manually enter the SSID into the AirStream 10. To enter your SSID into
the AirStream 10, select ‘[Manual config]’ as below, then ‘DHCP Enable’, ‘Wireless’
and then enter your SSID, (see page 4 for key entry). After you have entered your
SSID, either select ’Open’ if you have no further security on your network or proceed
to enter your WEP or WPA codes. The AirStream 10 will now connect to the network
as in Step 4 (refer to page 5).
Note:
In addition to the list of available networks there are three advanced options:
Rescan - • To scan again for available networks
Wired - • Which selects a ’wired‘ network
Manual config - • Which enables manual set up of a wireless configuration
including SSID and WEP/WPA codes.
If using the wired connection method, then simply select it 8. from the Network
Wizard menu. It will then run through the connection process and the following
will be displayed. If it doesn’t connect first time, go to the ‘Manual settings’ in the
‘Network settings’ menu and select the ‘Wired’ option, then ‘DHCP enable’
1
2
Network settings
Please wait.
Connecting...
3
4
Network settings
1
Connected
2
3
R
4
Note:
For privacy reasons, you should only connect to wireless access points that you own
or have agreement to use.
Note:
The security details must be the same as those saved in the wireless access point,
which would have been set up by the person who installed your wireless network. The
WEP/ WPA code and SSID can be written into the box below for future reference.
Note:
Make sure that the letter, number or symbol you wish to select is flashing in the display
before you press the ‘Tune/ Select’ knob to select it.
Note:
WEP and WPA codes are sensitive to upper and lower case characters so must be
entered exactly as they have been stored in the wireless access point.
Advanced Users
It is possible to edit all of the settings for your internet connection. To access this
menu:
Press ‘Menu’ and use the ‘Tune/Select Dial’ to scroll to and select ‘Main Menu’.1.
Use the ‘Tune/Select Dial’ again to scroll to and select ‘System setup’, followed 2.
by ‘Internet setup’ and then ‘Manual settings’.
Within this same menu list you can select ‘View settings’, which enables you to 3.
see the current settings for:
MAC address DHCP•
PC settings SSID•
IP settings, which displays the IP address, subnet mask and gateway address.•
Software Update
It is recommended that you perform a software update before proceeding any further.
Please go to page 24 for information on how to do this.
6
AirStream 10
Page 11
USING THE AirStream®10
Switching On
Press the power switch on the top of the AirStream 10 (see image on page 3). The
display will illuminate and the AirStream 10 will return to the mode it was last used in
(DAB/FM/ Internet). If listening to a radio station when you last switched the AirStream
10 off, this station will automatically be selected and begin to play.
Switching Off
Press the power switch on the top of the AirStream 10 (see image on page 3). The
current time and date will be displayed, if already set. Turn to page 22 for information
on how to set the time.
Adjusting the Volume
The ‘Tune/Select Dial’ can be used to adjust the volume of the AirStream 10 and the
headphones. Turn the ‘Tune/Select Dial’ clockwise to increase the volume and anticlockwise to decrease the volume.
Using Headphones
It is possible to connect headphones (not included) to the AirStream 10. The
headphone socket can be found on the right hand side of the AirStream 10 (see
image on page 3). When headphones are connected, the AirStream 10 speaker is
switched off and all sound will be via the headphones. The volume is controlled via
the ‘Tune/ Select Dial’.
Selecting a Listening Mode
When the AirStream 10 is turned on (out of stand by mode) for the first time, it will
start up in the ‘Main Menu’ screen. From here, there are 2 ways of selecting a
listening mode. Either use the ‘Tune/Select Dial’ and select the mode, or press the
‘Mode’ button. If pressing the mode button, it will cycle through the available source
modes:
1
101100110001
110011110000
2
* DAB is only available on the UK version
DAB
radio
1
3
4
1
FM
2
3
FM
radio
3
4
AUX
in
2
4
To enter the desired mode, do not press any further buttons and it will automatically
enter the selected source mode.
1
Internet
radio
2
3
1
3
Music
Player
4
2
4
monitoraudio.co.uk
7
Page 12

INTERNET RADIO
Introduction to Internet Radio
Internet radio, is the accumulation of thousands of radio stations all broadcast over
the World Wide Web. They consist of major national stations, regional stations and
even minor stations that only broadcast over the Internet. The wonderful thing about
having so many stations is the variety, you could be trying to locate your usual preferred
station and stumble across something completely new. Searching for stations can be
initiated by station name, location or by genre. It is possible to tune into stations from
countries all over the world, or just your favourite local stations.
Using the Internet Radio
When selecting Internet radio for the first time, you will see the ‘Internet Radio Menu’
screen (below). If this display doesn’t appear, press the Menu button:
Internet AirStream 10
1
Last listened
Station list >
System settings >
Main menu >
2
From here, you can also access the ‘System Settings’ and the ‘Main Menu’ screens.
When using Internet Radio for the first time, the ‘Last Listened’ section will be empty,
so you will need to use the ‘Tune/Select Dial’ to highlight and select ‘Station list’.
This will enter the second Internet Radio menu, to initiate the search for your desired
station(s):
Internet AirStream 10
1
My Favourites >
Stations >
Podcasts >
My Added Stations >
2
Help >
3
4
3
4
To search for a station, follow these few simple steps:
Turn the ‘Tune/Select Dial’ to highlight ’Stations’ and press it to select.1.
Using the ‘Tune/Select Dial’, you can now scroll and choose from the following 2.
5 options:
Location - Enables a choice of continent and then a country from that continent.
Then select from a list of stations from within the chosen country.
Genre - Enables a choice of radio stations according to their content, e.g.: Blues,
Comedy, Dance, Folk, Rock, etc.
Search stations - Enables a search for a specific station by entering it’s name.
Popular stations - Enables selection from a list of popular radio stations.
New stations - Enables selection from a list of stations that are the latest to
become available to you.
Press the ‘Tune/Select Dial’ to select the desired option.
Continue to use the ‘Tune/Select Dial’ to find and select (by pressing) the station 3.
that you would like to listen to.
The AirStream 10 will then connect to that radio station. The name of the station 4.
will be displayed as well as the status e.g.: ‘Connecting.. .,’Loading.. .’followed
by ‘Playing...’ as the AirStream 10 begins to play the selected station.
You can press the ‘Info’ button to change the information that is being 5. displayed.
It will cycle through the following information modes:
Bit Rate/Codec/Sampling Rate Playback Buffer Date
Reliability Genre/Location Description
Note:
Not all radio stations broadcast, or are online 24 hours a day.
Note:
For quick access to the ‘Station List’ menu, simply press the ‘Return Button’
8
AirStream 10
Page 13

Storing an Internet Station Preset
The AirStream 10 can store up to 4 internet stations in its preset memories for instant
access to your favourites stations.
Press and hold the 1-4 numbered preset button to store the radio station to that
number. The display will confirm ‘Preset stored’.
Note:
An existing internet station stored under a preset will be overwritten when you store
the new station. However, internet radio station presets do not overwrite your DAB
or FM station presets.
Select an Internet Station Preset
When in Internet Radio mode, press the preset number (1-4) and the AirStream 10 will
connect to that station and begin to play.
Using the ‘Tune/Select Dial’, scroll and choose from the following 3 4. options (very
much like the Internet radio station search):
Location - Enables the choice of continent and then a country from that continent.
Then select from a list of Podcasts from within the chosen country.
Genre - Enables the choice of Podcasts according to their content, e.g.:
Alternative, Comedy, Dance, Folk, Rock, etc.
Search Podcasts - Enables a search for a specific Podcast by entering it’s
name.
Press the ‘Tune/Select Dial’ to select the desired option.5.
Continue to use the ‘Tune/Select Dial’ to find the Podcast that you would like to 6.
listen to.
The Podcast will then either start playing or a list of days of the week will be 7.
displayed for you to choose from. Use the ‘Tune/Select Dial’ to select the day the
programme was broadcast and press to select.
Note:
If the preset location is empty, the display will confirm this with: ’Preset empty’ before
reverting to the previously selected station after a few seconds.
Podcasts
Some radio stations enable listening to programmes or compilations of programmes
that have previously been broadcast. These are known as ‘On demand’ services or
‘Podcasts’. To select and listen to a Podcast follow the steps below:
To find and listen to a Podcast, select Internet Radio mode on the 1. AirStream 10.
Press the menu button and select ‘Station List’.2.
Turn the ‘Tune/Select Dial’ to ‘Podcasts’ and press to select.3.
Internet AirStream 10
1
My Favourites >
Stations >
Podcasts >
My Added Stations >
2
Help >
3
4
monitoraudio.co.uk
Last Listened
Pressing the ‘Menu’ key while in Internet Radio mode, will enable selection of the
‘Last listened’ function. A list of all the internet radio stations and Podcasts listened
to recently will be displayed. Use the ‘Tune/Select Dial’ to scroll through the list and
select as desired.
9
Page 14

My Favourites and My Added Stations
Help
My Favourites - You can create a list of your own favourite Internet radio stations,
to appear under this option, via the Frontier Silicon (refer to the Glossary of Terms on
page 29) website:
http://www.wifiradio-frontier.com/setupapp/fs/asp/AuthLogin/SignIn.asp
My Added Stations - If you find a new station that is not on the list on the Frontier
Silicon website, then you can add it to your selected stations on the website above.
Before you can add stations to the ‘My favourites’ and ‘My added stations’ options
you will need to register on the frontier silicon website (http://www.wifiradio-frontier.
com/setupapp/fs/asp/AuthLogin/SignIn.asp) and enter the Access code from your
AirStream 10. The register tab is on the right hand side of the web page.
To find out your access code, ensure you are in Internet Radio mode and follow these
simple steps:
Press the [RETURN] key. Alternatively, go to the ‘Menu’ and then ‘Station List’1.
Use the ‘Tune/Select Dial’ to scroll to ‘Help’ and press to select.2.
Use the ‘Tune/Select Dial’ to scroll to ‘Get access code’ and press to select.3.
Your access code will now be displayed. If the code display times out before you 4.
have had the opportunity to make a note of it, just press the [RETURN] key.
Once you have found your Access Code, follow the instructions on the web site to
continue your registration.
Once registered, you can then add stations to your favourites that will appear on the
AirStream 10 menu.
When you select the first station to store as a favourite, it will ask you to create a
group. You can then create further groups for additional users of the AirStream 10
or Genres, etc.
If you need help with your AirStream 10 you can browse through the Frequently
Asked Questions (FAQ’s), which can be found in internet radio mode, under ‘Help’.
In internet radio mode:
Press the [RETURN] key.1.
Use the ‘Tune/Select Dial’ to scroll to ‘Help’ and press to select.2.
Use the ‘Tune/Select Dial’ to scroll to ‘FAQ’ and press to select.3.
A list of questions will now be displayed and you can use the ‘Tune/Select Dial’ to 4.
scroll and select, you can then listen to the answer to the question. Alternatively
you can call the Helpline. See page 2.
Internet Radio Display
Below is an example of the display and the icon status when a station is ‘tuned in’ or
selected by using one of the 4 preset buttons.
12:00
3
P3
4
This Symbol will always be displayed whenever the AirStream 10 is
powered, symbolising that the product is connected to the mains
voltage supply.
This Symbol indicates the signal strength. Obviously, the more bars
displayed, the stronger the signal. There will be a maximum of 5 bars
displayed.
12:00
This is the current set time and will be constantly displayed on your
AirStream 10.
1
2
Internet radio
Radio 1
Today’s Date:
DD/MM/YYYY
10
AirStream 10
This indicates if the current station is stored to a specific preset -
( P1- P4). No display indicates the station has no preset.
P3
Page 15

MUSIC PLAYER
Using the Music Player
Music File Types
The AirStream 10 will play all the most popular music types:
The Music Player function of the AirStream 10 allows the playing of music stored on
a computer or hard drive connected to your local network. The AirStream 10 can be
connected to it using the Windows Media Player (version 11 or greater), by using the
Universal Plug and Play (UPnP) protocol or through shared folders, commonly know
as Windows Shares. This section will guide through both methods of connection and
any difficulties experienced.
Each method uses different criteria to search for the music. Windows Shares, is
purely folder based. The AirStream 10 will show the folders that are shared, and
allowing manual searching to find the music you want to play. It is not possible to
share your “My Music” folder, and be able to automatically play the music within sub
folders stored in “My Music”. Select this method of playback if you wish to listen to
your iTunes. Ensure your iTunes music files are stored in your “My Music” folder and
that it is set to enable sharing.
Note: the AirStream 10 cannot play protected music files.
Using the “Shared Media” option will search through the different criteria. These
include: All Music; Genre; All Artists; Contributing Artists; Album Artists; Composers;
Albums; Rating; Music Playlists; Folders and <Search>.
If selecting the “Search” option, you can highlight and select characters to form a word/
name to search for. See page 5 for information and help on character selection.
They will be played according to set criteria, rather than folder location.
In order to play music files stored on your computer via the AirStream 10, first ensure
the following:
That the music files on your computer are not ‘protected’.•
If using an Apple Mac, you need to have a 3rd party UPnP software driver installed •
on your computer. Please refer to the Help section on page 26.
That your computer has the correct type of music files (as below).•
Your computer has file sharing turned on.•
The music files can be shared on the network.•
You know the name and password (if applicable) of your computer• .
MP3 - .mp3
Windows media - .wma
Real - .ra
Apple - .aac
Selecting ‘Music Player’ Mode
Press the ‘Mode’ button until the “Music Player” screen is displayed:
Then choose from two different options for streaming music from your computer, of
which each will require a different set up.
1
Music
Player
2
3
4
Setting up the Music Player
There are 2 options available to you:
Shared Media (UPnP) - Works with Windows Media Player 11 and above. This
option does not require any settings to be changed in the AirStream 10 but your
computer will need to be configured to allow the AirStream 10 access to the media
files. This will only need to be done once. (See instructions on page 12).
Shared Folders - You can ‘share’ the folders where the music is stored on your
computer with your AirStream 10. To do this you will need to ensure that the folders
on your computer have been enabled for file sharing and if you have a password on
your computer you will need to enter this into your AirStream 10. Full instructions on
what to do can be found on page 14.
monitoraudio.co.uk
11
Page 16

Setting up for Shared Media
It is recommended that the PC and AirStream 10 are positioned near each other
during this phase as access to each will be required.
The computer must be connected to the network that will be used to share 1.
media with the AirStream 10.
The computer must have Windows Media Player 11 (or later) installed. If it 2.
doesn’t, it can be downloaded from the Microsoft web site, following the online
instructions.
Once installed, create a library using Windows Media Player (if 3. not already done
so ). To do this you must:
Run the Media Player > Click on small arrow below “Library” >
Add to Library (1) > Advanced Options (if not already selected) (2) >
Click on Add (3) > Choose folder(s) to add > Click on “OK” (4).
1
2
3
4
Now that you have enabled your music to be shared via the Media Player, the
AirStream 10 must be connected as follows.
The AirStream 10 must be switched on and connected to the same network 1. as
the computer. (see page 5, Switching on and Connecting to your Network)
Press the “Mode” button to select the “Music Player”2.
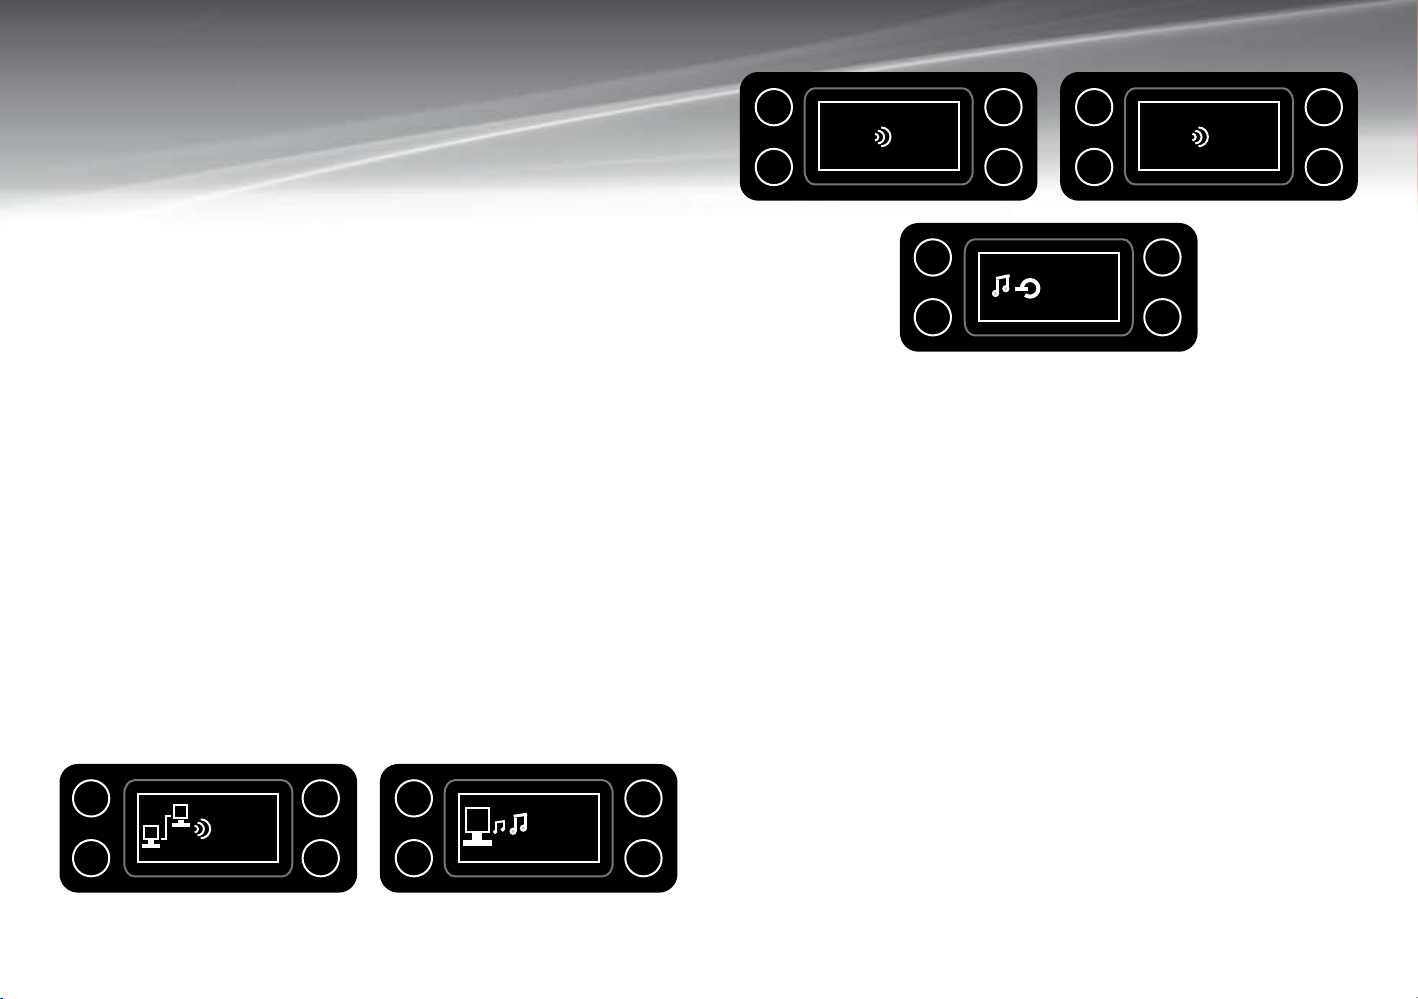
Press the “Menu” button and use the “Tune/ Select Dial” to highlight and select 3.
“Shared Media”. It will the start to search for available UPnP servers and then
display the name(s) of the servers that the AirStream10 can connect to. If none
are found, it will display <Empty>.
12
AirStream 10
Music player
1
Shared media >
Shared folders >
PC settings >
System settings >
2
Main menu >
3
4
Page 17

Select the PC you wish to connect to. If you are using Windows Media Player 4. 11, at
this stage, it will usually display “Unauthorised - Select to Retry”. The PC/ server
may also prompt that there has been an attempt to access your media files.
Regardless if prompted or not, the AirStream 10 must be allowed to access the
media files.
Back on the server/ PC, in Windows Media Player, select the “Media Sharing” 5.
option from the drop down menu (illustrated below).
This will open the Media Sharing Window. Make sure that “Share my Media to:” 6.
is checked.
The AirStream 10 will be displayed as “Unknown Device” in the Media Sharing 7.
window. Click on the “Unknown Device” and then click on the “Allow” button,
then “OK”.
Going back to the AirStream 10, select the Server/ PC again using the “Tune/ 8.
Select Dial”. If it can communicate with the Server/ PC, it will show the following
display:
Internet AirStream 10
1
Music >
Video >
Pictures >
Playlists >
2
<Search>
3
4
Note:
You will notice that “Video” and “Pictures” are displayed on the AirStream 10.
Many UPnP applications are also capable of sharing pictures and videos to other
devices. Obviously it will not be possible to see or play the videos/ pictures on your
Airstream 10. The Airstream 10 does not support that capability therefore, please
only select the “Music” option.
Now to select and play 9. the files from your server/ PC. Select the “Music” option.
The AirStream 10 will then show the different categories available to browse
through. These include: All Music; Genre; All Artists; Contributing Artists; Album
Artists; Composers; Albums; Rating; Music Playlists; Folders and <Search>.
If selecting the “Search” option, it is possible to highlight and select characters to
form a word/ name to search for.
Note:
It may take a while for certain media to appear in the menus because Windows Media
Player needs to access embedded information on the track, artist, etc.
Note:
If the operating system the computer that is to stream music from is not shown,
please refer to the instructions that came with the operating system and look for
‘Sharing Media’.
monitoraudio.co.uk
13
Page 18

Setting up for Shared Folders
Music Player Display
Please ensure that your Server/ PC is connected to the same network as your
AirStream 10 in order to share the music folders. These next steps will guide you
through the processes to enable music folders to be shared and played back through
the AirStream 10.
On your Server/ PC find the music folder that you would like to share with your 1.
AirStream 10.
Right mouse click on the folder and select ‘Properties’.2.
When the ‘Properties’ window opens, select ‘Sharing’ tab and select the option 3.
for file sharing. In Windows XP this is within the ‘Network and Security’ section
and you need to click in the box to ‘Share this folder on the network’. Next, click
on ‘Apply’ and then ‘OK’.
Note:
If the sharing option is not highlighted (not available for selection), your computer
will need to be configured for a network. Go to ‘Control panel’, select ‘Network
connections, select ‘File’ and ‘Network set Up Wizard’. The wizard is called ‘Set up a
home or small office network’
Note:
Shared folders are displayed with a ‘cupped hand’ icon underneath them.
Your computer is now ready to share folders with the AirStream 10. If you do not 4.
have a password set on your computer, go to straight to step 6.
You now need to enter the user name and password for your computer into the 5.
AirStream 10. Press the ‘Menu’ button and then use the ‘Tune/Select Dial’ to
scroll and select: ‘Main menu’, ‘System setup’, ‘Internet setup’, ‘PC settings’
and then ‘User name’ and ‘Password’. The user name and password will be the
same as the one that you enter when you are sitting at your computer. Please see
page 5 for help on character selection.
On your AirStream 10, use the ‘Tune/Select Dial’ to select ‘Shared folders’, 6.
followed by the name of the computer that you have just setup to allow folder
sharing with the AirStream 10. It will now be possible to view and select folders
held on your computer from the AirStream 10.
Note:
Your computer may contain shared folders, which shared which do not contain
music. The AirStream 10 simply searches for shared folders and therefore will find
and display all shared folders, regardless of content. Use the ‘Tune/Select Dial’ to
scroll to and select the folders that contain the music files.
Below is an example of the display and the icon status when a music track is being
streamed.
UPnP
12:00
3
4
1
2
Music player
Track Title
Artist:
This Symbol will always be displayed whenever the AirStream 10 is
powered, symbolising that the product is connected to the mains
voltage supply.
This Symbol indicates the signal strength. Obviously, the more bars
displayed, the stronger the signal. There will be a maximum of 5 bars
displayed.
This indicates this indicates that you are streaming the chosen files
UPnP
12:00
over the UPnP protocol.
This is the currently set time and will be constantly displayed on your
AirStream 10.
This is shown when the music being streamed is paused. It will
appear in the top of the display. Refer to the ‘Play/ Pause button’
information found on pages 3 and 4.
14
AirStream 10
Page 19

DAB RADIO (not available on all models)
What is DAB Digital Radio?
DAB stands for Digital Audio Broadcasting. The difference between DAB and
a conventional AM/FM radio broadcast is, it is transmitted digitally resulting in
a higher quality audio sound*, without hiss, fading or crackle. In DAB Mode,
your AirStream 10 will automatically scan and find all available stations too. The
station name, together with other helpful broadcast information is shown on
the display, very much like Internet Radio broadcasts. For more information
about DAB services and to find a list of stations available in your area visit
www.digitalradionow.com.
* Please note that sound quality is dependent on strong signal strength. Signal
strength can vary from area to area.
When you switch on the AirStream 10 it will always begin with the mode that it was
last used (DAB/FM/Internet) for example. If you were listening to a DAB station before
turning it off, it will start up playing the last station tuned to automatically.
Selecting ‘DAB’ Mode
Use the ‘Tune/Select Dial’ to scroll through the station list and press one . If the
station you are trying to find is not displayed, it can be searched for manually (see
below).
Note:
The DAB radio station list is stored in the memory and so the next time you switch
your AirStream 10 on, the station search does not take place. It is possible to scan
manually for stations (see below).
Changing DAB Stations
If you are not already in DAB mode, press the ‘Mode’ button until you reach “DAB 1.
Radio”.
The AirStream 10 will automatically select the last DAB station listened to 2. and
begin to play. To choose an alternative DAB station, press the “left or right arrow
keys” (see page 3) to bring up the Station List menu. Then use the ‘Tune/Select
Dial’ to scroll through the stations.
When the desired station that you would like to listen to is highlighted press the 3.
‘Tune/Select Dial’ to select. ‘Connecting..: will be displayed while the AirStream
10 tunes to the selected station.
Always make sure that the aerial is fully extended and adjusted (a vertical position is
recommended), to ensure the maximum signal strength and the best possible sound
quality when scanning or listening to DAB stations.
Press the ‘Mode’ button and scroll through the modes until you find DAB. The first
time you select DAB mode on your AirStream 10 it will automatically begin to scan for
DAB radio stations. A progress bar will show the progress of the scan and the number
of stations found will also be displayed.
Full scan
1
101100110001
110011110000
2
DAB
radio
3
4
1
2
Stations: 00
Scanning
3
4
When the scan is complete, a list of available DAB stations will be displayed in
numerical and then alphabetical order by default.
monitoraudio.co.uk
Manually Scanning for DAB Stations
Additionally DAB radio, stations and services regularly become available, therefore
we recommend manually scanning every now and then to ensure that the most up to
date station listings stored within the memory of the AirStream 10. If the AirStream 10
is moved to another location, e.g. moving house or if taken on holiday, a new manual
scan is also recommended. In DAB mode:
When in DAB mode, press the ‘Menu’ button and use the ‘Tune/Select Dial’ to 1.
scroll to ‘Local Scan’.
Press the ‘Tune/Select Dial’ to begin a search for local DAB stations. 2. A local scan
will take approximately 20 seconds.
Local scan
1
2
Stations: 00
Scanning
3
4
15
Page 20

If using the AirStream 10 outside of the UK, use the ‘Tune/3. Select Dial’, and scroll
to and select ‘Full scan’. This will start a much wider, national and local scan. A
full scan will take between 1 minute to 3 minutes to complete.
Note:
Occasionally, a ’?‘ will be displayed alongside a station name. This indicates that the
station is not available/not currently active. This could occur if attempting to tune into
a secondary service/station at a time when it is not transmitting.
Storing a DAB Station Preset
The AirStream 10 can store up to 4 DAB stations in preset memory locations for
instant access to favourites stations.
When the AirStream 10 is playing the station to be saved to a preset, press and hold
the 1-4 preset button it is to be stored to. The display will confirm ‘Preset Stored’.
1
Preset Stored
R
2
Note:
When storing DAB radio station presets, these do not overwrite previously stored
Internet or FM station presets. However, if there is already an existing DAB station
stored under the preset, it will be overwritten with the new station.
3
4
Select a DAB Station Preset
In DAB mode, press the preset number and the AirStream 10 will connect to that
station and begin to play.
Note:
If the preset location is empty, the display will confirm this with: ’Preset empty’ before
reverting to the previously selected station after a few seconds.
DAB Display Information
When listening to a DAB station you can change the information that appears on the
second line of the display below the station name. There are several different types
of information that are transmitted by the broadcaster. Press the ‘Info’ key to scroll
through the display options.
Dynamic Label Segment Program Type Multiplex Name
Todays Date Signal Info Signal Error/ Strength
Dynamic Label Segment (DLS) - This is scrolling text information supplied by the
broadcaster. Information could contain the name of an artist or music title, DJ’s name,
contact details for the radio station, etc.
Program Type (PTY) - Such as ‘Rock, ‘Pop, Talk’ or ‘News’
Location & Frequency - Displays the broadcasting area and sampling frequency.
Signal Error- The information provided gives details of the signal error rate, shown
as a number between 0 - 99. It will not be possible to satisfactorily listen to a radio
station with a signal error rate of 30 or above. Try adjusting the aerial or repositioning
the AirStream 10 to improve reception.
Signal Information -The data rate at which the signal is being transmitted, codec
and channels.
Todays Date - Date information supplied by the broadcaster.
16
AirStream 10
Page 21

Manual Tune
Dynamic Range Control
The ‘Manual tune’ function is used as a reference to see if stations are being broadcast
over set frequencies. It is not possible to store a station from here, although the
signal strength will be displayed.
Using the manual tune feature, select a specific digital radio channel frequency and
then manually adjust the aerial, or the location of the AirStream 10, to obtain the
strongest possible signal for that channel.
When in DAB mode, press the ‘Menu’ button.1.
Use the ‘Tune/Select Dial’ to scroll to and select ‘Manual tune’.2.
Use the ‘Tune/Select Dial’ to scroll through the digital radio frequencies and 3.
press to select. The AirStream 10 will display the radio frequency and a strength
indicator, in the form of a rectangle with fluctuating (depending on signal strength)
solid indicator bars. The row of bars indicate the actual signal strength that you
are receiving. The stronger the signal, the larger the number of signal bars that
will be displayed.
If a signal is detected, the frequency will scroll along the display showing the
station name. Example:
Manual tune
1
12B 225.648MHz BBC National
Strength:
2
3
4
Note:
If the signal strength box is empty, this indicates no signal reception at all for that
particular digital radio channel in your area.
Adjust the position of the aerial on the AirStream 10, to obtain the maximum signal
strength and press the [Return Key] to exit back.
The dynamic range for each radio programme is set by the broadcaster for each
radio station, and may be different for certain types of programme broadcast. For
example, pop, classical music or a chat show. The Dynamic Range Control signal is
transmitted in parallel with the audio signal for each programme. With the AirStream
10, it is possible to use this control signal to expand or compress the dynamic range
(the difference between the loudest and quietest sounds) of the reproduced audio
signal. Changing the dynamic range can affect the ‘loudness’ and/or ‘quality of sound’
of the programme so that it will be more suited to your listening conditions and your
own personal listening requirements. For example, if within a noisy environment,
where quiet sounds can be swamped, setting the compression to maximum (DRC
High) will ‘boost‘ the quiet sounds, whilst keeping the loudest sounds at their original
level.
There are 3 levels of compression:
DRC Off - No compression. This is the default setting.
DRC Low - Medium compression.
DRC High - Maximum compression.
To change the Dynamic Range Control:
In DAB mode, press the ‘Menu’ button.1.
Use the ‘Tune/Select Dial’ to scroll to and select ‘DRC’. The current DRC setting 2.
will have an asterisk ( ) next to it.
Use the ‘Tune/Select Dial’ to scroll through the 3 levels of compression and 3.
*
press to select the preferred choice. We would suggest trying different levels of
compression to see which suits you best.
DRC
1
DRC High
DRC Low
DRC Off
2
3
*
4
Note:
The DRC Level cannot be set for each preset. The same level will be used for all
stations and presets.
monitoraudio.co.uk
17
Page 22

Station Order
DAB Mode Display
There are three different station order options to choose from which change the way
DAB stations are displayed in the Station List:
Alphanumeric - The stations are listed in numerical and then alphabetical order. This
is the default setting.
Ensemble - The stations are listed in frequency order.
Valid - The stations accessible in your area will be reordered to the top of the DAB
station, list and those inaccessible will be positioned at the bottom, prefixed by a’?’.
To change the station order, when in DAB mode:
Press the ‘Menu’ button.1.
Use the ‘Tune/Select Dial’ to scroll to and select ‘Station order’.2.
Use the ‘Tune/Select Dial’ to scroll through the options and press to select the 3.
desired option.
Below is an example of the display and the icon status when a station is ‘tuned in’ or
selected by using one of the 4 preset buttons.
1
2
DAB
Radio 1
Today’s Date:
DD/MM/YYYY
12:00
3
P3
4
This Symbol will always be displayed whenever the AirStream 10 is
powered, symbolising that the product is connected to the mains
voltage supply.
This Symbol indicates the signal strength. Obviously, the more bars
displayed, the stronger the signal. There will be a maximum of 5 bars
displayed.
These back to back speakers indicate a stereo signal. If the signal
strength is strong enough, this symbol will be shown and indicates
that it is receiving a stereo signal rather than a mono signal.
This indicates if the current station is stored to a specific preset -
P3
( P1- P4). No display indicates the station has no preset.
12:00
This is the current set time and will be constantly displayed on your
AirStream 10.
18
AirStream 10
Page 23

FM RADIO
FM Radio Mode
When the AirStream 10 is in FM mode it can receive Radio Data System or ‘RDS’
information if being transmitted by the broadcaster. RDS information will often
include the station name, detail about the programme and the current time.
Tuning to a FM Station
There are several methods of tuning into FM Radio stations on the AirStream 10.
Press the ‘Tune/Select Dial’ and it will automatically scan through the stations until
it finds a strong enough signal, it will stop and then play that station. Alternatively,
manually scan for stations, by pressing the left or right arrow buttons.
Selecting ‘FM’ mode
Always ensure the aerial is fully extended and adjusted (a vertical position is
recommended), to ensure maximum signal strength and the best possible sound
quality when scanning or listening to FM stations.
Press the ‘Mode’ button and scroll through the modes until you reach “FM Radio”.
The first time FM mode is selected on the AirStream 10, it will display the default
87.5MHz frequency.
FM
1
FM
2
If listening to an FM station on the AirStream 10 when last switched off, this station
will be automatically selected when the AirStream 10 is switched on again.
FM
radio
3
4
1
2
87.5MHz
Today’s Date:
DD/MM/YYYY
3
4
Changing the Scan Setting
If the desired station isn’t displayed after the auto scan, try changing the “Scan
Setting”. There are 2 options:
Strong Stations - The scan will only stop when a strong signal strength is received
which should also result in better audio quality. It is possible however, to miss the
desired station using this option if the signal is weak.
All Stations - The scan will stop for every station received, even if the signal strength
is weak. Select “No” in the station scan menu option for this scan setting.
To change the setting:
Press the ‘Menu’ button and use the ‘Tune/Select Dial’ to scroll to and select 1.
‘Scan Setting’. At the prompt:
Use the ‘Tune/Select Dial’ to highlight and select a scan option. Select ‘Yes’ for 2.
strong stations only, or ‘No’ to search for all stations.
FM Station Scan
1
2
The next time the ‘Tune/Select Dial’ is pressed to scan for a station, from the 3.
FM playing screen, your chosen scan option will be used.
Strong stations only?
YES NO
*
3
4
monitoraudio.co.uk
19
Page 24

Changing the Audio Setting
It is possible to program the audio setting of the AirStream 10 to always play stations
in mono, or to switch automatically from stereo to mono when the signal quality is low.
Even when receiving a stereo signal the AirStream 10 will only output a mono sound
from the loudspeaker.
Press the ‘Menu’ key and use the ‘Tune/Select Dial’ to scroll to ‘Audio setting’ 1.
and press to select.
Use the ‘Tune/Select Dial’ to scroll to ‘Stereo or Mono’ or ‘Mono only’ and press 2.
to select.
FM Mode Display
Below is an example of the display and the icon status when a station is ‘tuned in’ or
selected by using one of the 4 preset buttons.
1
2
FM
Radio 1
Today’s Date:
DD/MM/YYYY
12:00R.D.S
3
P3
4
Storing a FM Station Preset
The AirStream 10 can store up to 4 FM stations in preset memory locations for instant
access to favourites stations.
When the AirStream 10 is playing the station to be saved to a preset, press and hold
the 1-4 preset button it is to be stored to. The display will confirm ‘Preset Stored’.
Note:
When storing FM radio station presets, these do not overwrite previously stored
Internet or DAB station presets. However, if there is already an existing FM station
stored under the preset, it will be overwritten with the new station.
Select a FM Station Preset
In FM mode, press the preset number and the AirStream 10 will connect to that
station and begin to play.
Note:
If a preset has no previously stored station assigned, the display will change to ‘Preset
empty’ and then revert to the selected station after a few seconds.
FM Display Information
When listening to a FM station (and the RDS symbol is displayed, see opposite), it is
possible to change the information that will appear on the second line of the display.
Choose between the frequency, type of show, such as ‘Rock, ‘Pop, Talk ‘or ‘News’,
the time or the date. Press the ‘Info.’ key repeatedly to move through the display
options.
R.D.S
12:00
This Symbol will always be displayed whenever the AirStream 10 is
powered, symbolising that the product is connected to the mains
voltage supply.
This Symbol indicates the signal strength. Obviously, the more bars
displayed, the stronger the signal. There will be a maximum of 5 bars
displayed.
These back to back speakers indicate a stereo signal. If the signal
strength is strong enough, this symbol will be shown and indicates
that it is receiving a stereo signal rather than a mono signal.
Indicates a RDS signal is being received. The Radio Data Service being
transmitted by the broadcaster will have various pieces of information
contained within it and they can be displayed on the Airstream 10 by
pressing the “Info” button and scrolling through the different pieces of
information. Content will vary depending on broadcaster.
This indicates if the current station is stored to a specific preset -
P3
( P1- P4). No display indicates the station has no preset.
This is the current set time and will be constantly displayed on your
AirStream 10.
20
AirStream 10
Page 25

AUXILIARY INPUT
ADDITIONAL SYMBOLS DISPLAYED
This is used to connect an MP3 player, personal CD player, etc to the AirStream 10.
We recommend that the volume level of the auxiliary device is set to approximately
75%.
Auxiliary Mode Display
Below is an example of the display and the icon status when an auxiliary device is
connected.
12:00
3
4
12:00
Auxiliary Input
1
Audio In
Today’s Date:
DD/MM/YYYY
2
This Symbol will always be displayed whenever the AirStream 10 is
powered, symbolising that the product is connected to the mains
voltage supply.
This is the current set time and will be constantly displayed on your
AirStream 10.
Below are a list of different symbols that appear on the AirStream 10 display:
This symbol denotes the alarm is active. There will be a number 1
1
and/ or 2 depending on the alarm that is set.
This shows that the AirStream 10 is connected to a wired network.
When connected to a wireless network, this symbol will not be
visible.
This shows that the sound has been muted. Refer to the ‘Play/
Pause button’ information found on pages 3 and 4.
monitoraudio.co.uk
21
Page 26

MAIN MENU
SLEEP
It is possible to set the AirStream 10 to automatically switch off after 15, 30, 45 or 60
minutes. To quickly access this menu option press the ‘Sleep’ button.
ALARMS
Two separate alarms can be set on the AirStream 10. A different alarm mode can be
chosen for each. Firstly set the time and date on the AirStream 10 before using the
alarm functionality. When an alarm is set, a symbol will appear in the stand by screen
containing the time the alarm(s) is set for.
When the alarm sounds, silence it by pressing the “Stand By” button or the “Alarm”
button. Alternatively, press the Snooze button to delay the alarm for 5 minutes.
Save:• Saves your alarm settings. “Save” MUST be selected to store any alarm
settings. Even when making small changes.
SYSTEM SETTINGS MENU
THE TIME AND DATE
It is possible to manually change or allow the AirStream 10 to automatically update
the Time and Date via DAB (UK only), FM or the network to which you are connected.
Both manual and automatic methods are explained below. Also explained are the
other options within the Time/Date Menu:
When in standby mode, the AirStream 10 will display the time and date (and any
alarms that have been set.
To Set an Alarm:
Press the ‘Menu’ key and use the ‘Tune/Select Dial’ to scroll and select the 1.
following options: ‘Main menu, ‘Alarms’. Alternatively press the ‘Alarm’ button
Turn the ‘Tune/Select Dial’ to highlight and select ‘Alarm 1’ or ‘Alarm 2’.2.
Using the ‘Tune/Select Dial’, scroll through the options and press to select and/ 3.
or change.
Alarms
1
Enable: Off
Time: 00:00
Mode: Internet Radio
Preset: Last Listened
2
Frequency: Daily
Enable:• Either enables or disables the alarms.
Time:• Set the time for an alarm to sound. This is in a 24hr clock format. Use
the ‘Tune/ Select Dial’ to change and set.
Mode:• Select from either DAB (where available), FM, Internet Radio or Buzzer
modes, for the alarm to sound with.
Preset:• Select a specific preset or the last listened to station for the alarm to
sound with.
Frequency:• Select the alarm to sound either Daily, Once, Weekdays & Weekends.
Weekdays are Monday - Friday, weekends are Saturday and Sunday only.
Volume:• Select the volume for the alarm to sound with.
22
3
4
To manually Set the Date and Time:
Press the ‘Menu’ key and use the ‘Tune/Select Dial’ to scroll and select the 1.
following options: ‘Main Menu’, ‘System Settings’; ‘Time/Date’, ‘Set Time/
Date’.
Turn the ‘Tune/Select Dial’ to the correct day and press to select.2.
Turn the ‘Tune/Select Dial’ to the correct month and press to select.3.
Turn the ‘Tune/Select Dial’ to the correct year and press to select.4.
Turn the ‘Tune/Select Dial’ to the correct hour (24 hour clock by default) and 5.
press to select.
Turn the ‘Tune/Select Dial’ to the correct minutes and press to select.6.
Note:
Press the ‘Return Button’ (see page 3) at any point to go back to alter any settings.
AirStream 10
Set Time/Date
1
DD - MM - YYYY
2
HH:MM
3
4
Page 27

Auto Update
LANGUAGE
It is possible to set the AirStream 10 to automatically update the time and date when
tuned to a DAB (UK only), FM radio station or network that provides this service. This
feature can be disabled is desired. To manually set, go to page 22
Set Format
To choose the clock display to be either 12 or 24 hour. 24 hour is the default setting.
Date/Time
1
2
12/24 Hour Format
2412
*
3
4
Set the Time Zone
Use this feature to select the time zone in which you live. Use the ‘Tune/ Select Dial’
to highlight and select the appropriate time-zone.
Daylight Savings
In the countries that operate a daylight savings time system, this can be toggled on
and off, depending on the time of year.
Daylight savings
1
Daylight savings
3
The display language of the AirStream 10 can be changed to 1 of 5 preset languages.
Choose from: English; French; German; Italian and Spanish.
Further languages may be available at a later date via an update.
LCD STANDBY-BACKLIGHT
There are 3 setting available of the backlight for the display when in stand by mode.
They are: Always On, Always Dim and Off.
Always On - The backlight is the same brightness/ intensity as normal operating
mode.
Always Dim - When this is selected, the brightness of the display is half of the
‘Always On’ setting.
Always Off - The backlight is permanently off. The time and date however, will still
be dimly displayed.
FACTORY RESET
This restores ALL settings of the AirStream 10 back to factory default settings. All
preset and network settings will be lost, however, the firmware will remain at it’s
current version.
2
OFFON
*
4
monitoraudio.co.uk
23
Page 28

SOFTWARE UPDATE
This enables the AirStream 10 to keep up to date with the latest soft and firmware
updates. Changes could be in the form of updates to the system’s features or if
necessary, minor bug fixes.
Choose between manually or automatically checking for updates. When set to
automatic, the AirStream 10 will check for updates approximately 10 minutes after
main power up (not from stand by) and then in 24 hour periods thereafter.
Manually Check for Updates.
From the System Settings Menu, use the ‘Tune/ Control Dial’ to highlight ‘Software 1.
Update’ and press the dial. The Software update menu will be displayed:
Software update
1
2
Auto-check setting
Check now
3
4
Automatic Updates
To ensure the AirStream 10 is always kept up to date with the very latest software
changes, we recommend enabling the ‘Auto-Check Setting’ in the update menu, as
follows:
From the System Update menu, rotate the ‘Tune/Select Dial’ to 1. highlight the
‘Auto-check Setting’ and press the dial to select it. The following screen will be
displayed:
Software update
1
Check periodically
for new versions
2
YES NO
Highlight ‘Yes’ (if not already highlighted) and press the ‘Tune/Select Dial’. The 2.
screen will return to the previous menu display.
System Settings
1
Time/date >
Language >
LCD Standby-Backlight >
Factory Reset
2
Software update >
Press the ‘Return Button’ (see page 3) to return to the ‘System Settings’ 3. menu.
3
4
3
4
Turn the ‘Tune/ Select Dial’ to highlight ‘Check Now’ and press the dial. The 2.
Airstream 10 will then check via the internet connection for the latest updates (if
there are any). If already up to date, it will display the following images:
1
2
Network settings
Checking for
new updates...
3
4
Network settings
1
Software up to
date
R
2
3
4
If an update is available (possible when using for the very first time), the following 3.
images will be displayed:
1
2
Network settings
Checking for
new updates...
3
4
1
2
Network settings
[update number]
downloading update
3
4
Note:
Do not remove the power supply during the update as this could cause irreversible
damage to the AirStream 10. An additional warning will be shown on the display
of the AirStream 10.
24
AirStream 10
Page 29

A ‘Continue’ prompt will be displayed when the update has been downloaded. 4.
Rotate the ‘Tune/Select Dial’ anti-clockwise to highlight ‘Yes’ and press to
select.
1
2
Network settings
Update complete.
Continue?
YES NO
3
4
1
2
Network settings
WARNING. Do
not remove power.
3
4
INFO
This will display the software version and the Radio ID.
1
2
Network settings
Updating...
1
2
3
4
Network settings
Press Select to restart
Network settings
1
Software up to
date
R
2
3
4
3
4
Note:
If there is a major update to the AirStream 10, then the internet settings and all presets
will be lost. Please make a note of them in the table below for future reference. If any
stations have been stored in ‘My Favourites’ on Internet Radio mode, then these will
remain because they are not stored on the AirStream 10.
Internet
Radio
DAB Radio FM Radio
Preset 1
Preset 2
Preset 3
Preset 4
monitoraudio.co.uk
25
Page 30

HELP
If experiencing problems with the AirStream 10, there are some quick and easy
checks, which may help to solve the problem.
Unable to connect to the wireless network
Some wireless networks may be set up so that only registered MAC addresses •
can connect to them. The person who set up the network will be able to advise
if the MAC address is required. See page 6 for how to find the MAC address of
the AirStream 10. Refer to router/ access point guide to find out how to add the
AirStream 10’s MAC address into the list of allowed devices.
If connecting to an encrypted network, check that the correct • key or pass phrase
has been entered into the AirStream 10. Remember that the key or pass phrase
must be entered exactly as it appears in your access point and is case sensitive.
A location to record the WEP key or pass phrase for future use can be found on
page 6.
The network name or SSID may have been set to hidden. In this case, the •
AirStream 10 will not be able to find it. Either turn on the SSID of your access
point and then select one of the options as on page 6 ‘[Rescan]’ or manually
enter the SSID into the AirStream 10:
To enter the SSID into the AirStream 10, select the ‘[Manual config]’ option, as
on page 6. Then ‘DHCP Enable’; ‘Wireless’ and then enter the SSID. After the
SSID has been entered, either select ‘Open’ if there are no further security on the
network or proceed to enter the WEP or WPA codes.
I can connect to the network but cannot play some internet
radio stations
The station may not be broadcasting at the time of day that an attempt has been •
made to listen to it. (Depending on the particular radio station, it may be in a
different time zone).
The station may have too many people trying to connect to its servers and their •
server capacity may not be enough to enable everyone to connect. Try again
later to see if connection is now possible.
The station is no longer broadcasting•
The internet connection between the server (possibly located in another country) •
and the AirStream 10 is slow. Internet Service Providers may fail to provide
service in certain geographical areas. Use a computer to check if the internet
radio station can be received.
26
AirStream 10
If the AirStream 10 station connection is intermittent or keeps stopping. Check •
the broadband connection and speed. If experiencing an intermittent service or
high error rate on your broadband connection, the AirStream 10 will not connect
continuously and play in internet radio mode. If you are experiencing problems
with your broadband connection, you will need to contact your broadband
provider.
The computer to stream music from can be seen, but cannot
find any folders via the AirStream 10
The folder with the music in it has not been shared on the computer. Please refer •
to pages 12 - 14 for instructions on sharing folders.
The wrong user name and password may have been entered for the computer •
trying to accessed. Check and re-enter the user name and password,
remembering that the password will be case sensitive and must be entered into
the AirStream 10 exactly as it would be entered into the computer.
I cannot see the name of the computer to connect to on the
AirStream 10
The network may have a hidden SSID. Please refer to page 6 for how to connect •
to a hidden network from the AirStream 10.
The AirStream 10 may not be connected to the wireless network. Refer to page •
5 for information on running the ‘Internet Wizard’ and connecting to wireless/
wired network.
The computer might not be set up to recognise a network, refer to page 12 on •
how to set up shared media on a network.
If using an Apple Mac, 3rd party software is required because Apple do not offer •
native UPnP support as part of their operating systems. Suggested software
items are Media Tomb (http://mediatomb.cc), Eye Connect (http://www.elagato.com).
Note:
Please note that all 3rd party software is offered as a recommendation only for using
UPnP servers on Macintosh computers. Monitor Audio do not offer support on these
applications. Nor will Monitor Audio be held responsible for any loss or damage
occurred to any person acting upon any advice given.
Try connecting the AirStream to the network using the network cable supplied •
rather than using wireless connectivity.
Page 31

I cannot play my iTunes Music via the AirStream 10
The AirStream 10 will only recognise music stored in your iTunes Music folder by •
selecting the ‘Shared Folders’ option. Ensure the ‘iTunes Music’ folder is stored
within ‘My Music’ on the computer.
The AirStream 10 will not play protected music downloaded with copyright •
protection by DRM.DAB radio reception is poor
Please check that the aerial is FULLY extended for the maximum signal strength •
and improved reception.
Use the manual tune (refer to page 17), to adjust the aerial for the best reception.•
Try moving the AirStream 10 to an alternative location to see if reception • improves.
Please remember to scan for DAB stations again once you have moved your
AirStream 10. Refer to page 15.
Check that there are no other items of electrical equipment too close to your •
AirStream 10, causing interference.
Visit www.digitalrad• ionow.com for information about DAB reception in your
area.
No sound
Check the volume using the ‘Tune/Select Dial’ or mute button.•
Are there headphones connected? The speaker is muted when headphones are •
connected.
Please check that the mains power lead is connected at the side of the •
AirStream 10 and the mains power wall socket is switched on.
You may need to re-scan if the station you last listened to is no longer available. •
Refer to page 15.
Note:
A reset to factory defaults will delete all of the network settings, station lists and
presets stored in the AirStream 10. To re-enter them again, follow the instructions
contained within this manual.
If still experiencing difficulties after making the suggested checks, please call the
helpdesk for further assistance. The helpdesk is open from 9.00am to 5.00pm (GMT),
Monday to Friday (excluding Bank Holidays) and can be contacted on +44(0) 1268 740580.
The helpdesk may ask you for the software version of your AirStream 10 and so it
may be a good idea to note this before you call. To check the software version of the
AirStream 10:
Press ‘Menu’ > ‘Main Menu’ > ‘System Settings’ > ‘lnfo’.
The AirStream 10 does not respond
Please check that the mains power lead is connected at the side of the •
AirStream 10 and the mains power wall socket is switched on.
Turn off the AirStream 10 and unplug the mains power connector. Leave for •
approximately 1 minute and then reconnect the AirStream 10 and turn on.
Try searching for software updates. Refer to page 24.•
Try a reset to factory defaults. Refer to page 23 for information on this. The •
‘Factory Reset’ can be found in the ‘System Setup’ menu.
monitoraudio.co.uk
27
Page 32

CARE AND MAINTENANCE
PRODUCT GUARANTEE
The AirStream 10 is of superior design and manufacture and should be treated with
care. The suggestions below will help you to enjoy this product and the benefits it
brings for many years.
Keep the product and all its parts out of reach of small children.•
Keep it dry. Avoid exposure to precipitation, humidity and liquids which could all •
affect the product’s circuitry.
Do not leave it in high temperature environments as electronic devices and plastic •
parts may warp in heat.
Do not leave it in low temperature environments as moisture can form inside the •
product, which may damage the circuit board.
Do not store in dusty or dirty areas.•
Do not use harsh chemicals, cleaning solvents or detergents to clean the product. •
Wipe with a damp (not wet) soft cloth to clean.
Do not attempt to open the product. Unauthorised handling of the device may •
damage it and will void your warranty.
Only use the power supply that came with the product. Using an unauthorised •
power supply will invalidate your guarantee and may irrecoverably damage the
AirStream 10.
NetBits Model No: KSAD1200150W1UV-1
Input: 100-240V ~ 50/60Hz 0.4A
Output: DC 12V 1.5A
This product has a warranty of 12 months from date of purchase and is therefore
guaranteed to be free from defects in materials and workmanship during that period.
If you experience a problem within that time, simply call the Helpdesk on +44 (0) 1268
740580. If the problem cannot be solved by our Helpdesk, you will need to return the
product to the place it was originally purchased. Remember to take your receipt as
proof of purchase as it must be produced before the warranty can be honoured. This
product must have been used only for the intended purpose and not been subjected
to willful or accidental, damage. This warranty does not cover damage caused by
excessive voltage or lightning. If this product has been tampered with in any way,
the warranty shall be considered null and void. This guarantee does not affect your
statutory rights.
WEEE Directive - Directive 2002/96/EC of the European Parliament and Council of
27th January 2003 on waste electrical and electronic equipment. At the end of the
product’s life cycle, you should not throw this product into the normal household
waste but take it to a collection point for the recycling of electrical and electronic
equipment. The ’WEEE’ symbol below, on the product, user manual and packaging
indicate this. Please contact your local authority if you need more information about
the collection points in your area. For more information telephone Envirowise on 0800
585794
28
AirStream 10
Page 33

GLOSSARY OF TERMS
AAC - • Advanced Audio Coding. This is a standardised encoding system for
digital audio. Designed to be the successor of the MP3 format, AAC generally
achieves better sound quality than MP3.
AAC’s best known use is as the default audio format of Apple’s iPhone, iPod,
iTunes, and the format used for all iTunes Store audio.
DAB - • Digital Audio Broadcasting. This is a digital radio technology for
broadcasting radio stations, used in several countries, particularly in the UK and
Europe. As of 2006, approximately 1,000 stations worldwide broadcast in the
DAB format.
The standard offers several benefits over existing analogue FM radio, such as
more stations in the same broadcast spectrum, and increased resistance to
noise, multipath, fading, and co-channel interference.
DHCP - • Dynamic Host Configuration Protocol (DHCP) is a network application
protocol used by devices to obtain configuration information for operation in
an Internet Protocol network. This protocol reduces system administration
workload, allowing devices to be added to the network with little or no manual
intervention.
Dynamic Host Configuration Protocol automates network parameter assignment
to network devices from one or multiple, fault-tolerant DHCP servers. Even in
small networks, DHCP is useful because it can make it easy to add new machines
to the network.
EQ - • Equaliser. This is used to change the characteristics of the sound output by
the AirStream10. The changes can included accentuated bass, treble or voices.
These are all preset curves that cannot be altered.
Frontier Silicon - • Established in 2001 as a privately-funded fabless semiconductor
company, Frontier Silicon has rapidly become the world’s leading supplier of
innovative semiconductor, module and software solutions for digital radio and
connected audio systems.
Headquartered in Watford, on the northwest outskirts of London, Frontier Silicon
has around 120 staff, 70% engineers, with R&D centres in several locations
including Cambridge, Dublin, Shannon and Hong Kong
Their multimode connected audio platforms support over 10,000 Internet radio
stations through the Frontier Silicon on-line radio portal. Innovative on-line music
services are driving forward our platforms to support more sophisticated displays
and graphical user interfaces as we move from mono to rich full colour UI’s.
monitoraudio.co.uk
IP Address - • An Internet Protocol address is a numerical identification that is
assigned to devices participating in a computer network utilising the Internet
Protocol for communication between its nodes. Although IP addresses are stored
as binary numbers, they are usually displayed in human-readable notations, such
as 192.168.68.1
The original designers of TCP/IP defined an IP address as a 32-bit number and
this system, is still in use today.
Media Streaming - • Streaming media is media that is constantly transferred
between devices contained on a network.
MP3 - • MP3, is a digital audio encoding format using a form of lossy data
compression. It is a common audio format for consumer audio storage, as well
as a de facto standard encoding for the transfer and playback of music on digital
audio players.
Podcast - • A podcast is a series of audio or video digital media files which are
distributed over the Internet, through web feeds, to portable media players and
personal computers. Though the same content may also be made available by
direct download or streaming, a podcast is distinguished from most other digital
media formats by its ability to be syndicated, subscribed to, and downloaded
automatically when new content is added. Like the term broadcast, podcast
can refer either to the series of content itself or to the method by which it is
syndicated; the latter is also called podcasting.
RDS - • Radio Data System, is a communications protocol standard from the
European Broadcasting Union for sending small amounts of digital information
using conventional FM radio broadcasts. The RDS system standardises several
types of information transmitted, including time, track/artist info and station
identification. RDS has been standard in Europe and Latin America since the
early 1990s, but less so in North America.
Radio Broadcast Data System is the official name used for the U.S. version of
RDS, though the “RDS” name seems to be at least as common in usage. The
two standards are nearly identical, with only slight differences, mainly in which
numbers are assigned to each of 31 musical and other program formats the
RBDS system can identify. RBDS was approved by the NRSC, RDS by the
EBU.
Continued...
29
Page 34

Real - • RealAudio is a proprietary audio format developed by RealNetworks. It
uses a variety of audio codecs, ranging from low-bit rate formats that can be
used over dialup modems, to high-fidelity formats for music. It can also be used
as a streaming audio format, that is played at the same time as it is downloaded.
It is used heavily by the BBC web sites.
SSID - • Service Set Identifier, is a name used to identify the particular IEEE 802.11
wireless LAN’s to which a user wants to attach. A client device will receive
broadcast messages from all access points within range advertising their SSID’s,
and can choose one to connect to based on pre-configuration, or by displaying
a list of SSID’s in range and asking the user to select one.
UPnP - • Universal Plug and Play is a set of computer protocols promulgated
by the UPnP Forum. The goals of UPnP are to allow devices to connect
seamlessly and to simplify the implementation of networks in the home (data
sharing, communications, and entertainment) and in corporate environments for
simplified installation of computer components. UPnP achieves this by defining
and publishing UPnP device control protocols built upon open, Internet-based
communication standards.
WEP - • Wired Equivalent Privacy is a deprecated algorithm to secure IEEE 802.11
wireless networks. Wireless networks broadcast messages using radio and are
thus more susceptible to eavesdropping than wired networks. When introduced
in 1997, WEP was intended to provide confidentiality comparable to that of a
traditional wired network.
WEP is often inaccurately referred to as Wireless Encryption Protocol.
Wi-Fi - • Wi-Fi is a trademark of the Wi-Fi Alliance, founded in 1999 as Wireless
Internet Compatibility Alliance (WICA), comprising more than 300 companies,
whose products are certified by the Wi-Fi Alliance, based on the IEEE 802.11
standards (also called Wireless LAN (WLAN) and Wi-Fi). This certification warrants
inter operability between different wireless devices.
A Wi-Fi enabled device such as a PC, game console, mobile phone, MP3 player
or PDA can connect to the Internet when within range of a wireless network
connected to the Internet.
WMA - • Windows Media Audio is an audio data compression technology
developed by Microsoft. The name can be used to refer to its audio file format or
its audio codecs. It is a proprietary technology that forms part of the Windows
Media framework. WMA consists of four distinct codecs. The original WMA
codec, known simply as WMA, was conceived as a competitor to the popular
MP3 and RealAudio codecs.
WPA - • Wi-Fi Protected Access is a certification program created by the Wi-Fi
Alliance to indicate compliance with the security protocol created by the Wi-Fi
Alliance to secure wireless computer networks.
®
and iPhone® are registered trademarks of Apple Computer Inc.
iPod
All other trademarks appearing herein are the property of their respective owners.
30
AirStream 10
Page 35

Page 36

Monitor Audio Ltd.
Unit 2, 24 Brook Road
Rayleigh, Essex
SS6 7XJ
England
Tel: +44 (0)1268 740580
Fax: +44 (0)1268 740589
Email: info@monitoraudio.co.uk
monitoraudio.co.uk
Designed in the United Kingdom
Version 1. 2009
 Loading...