

Page 1
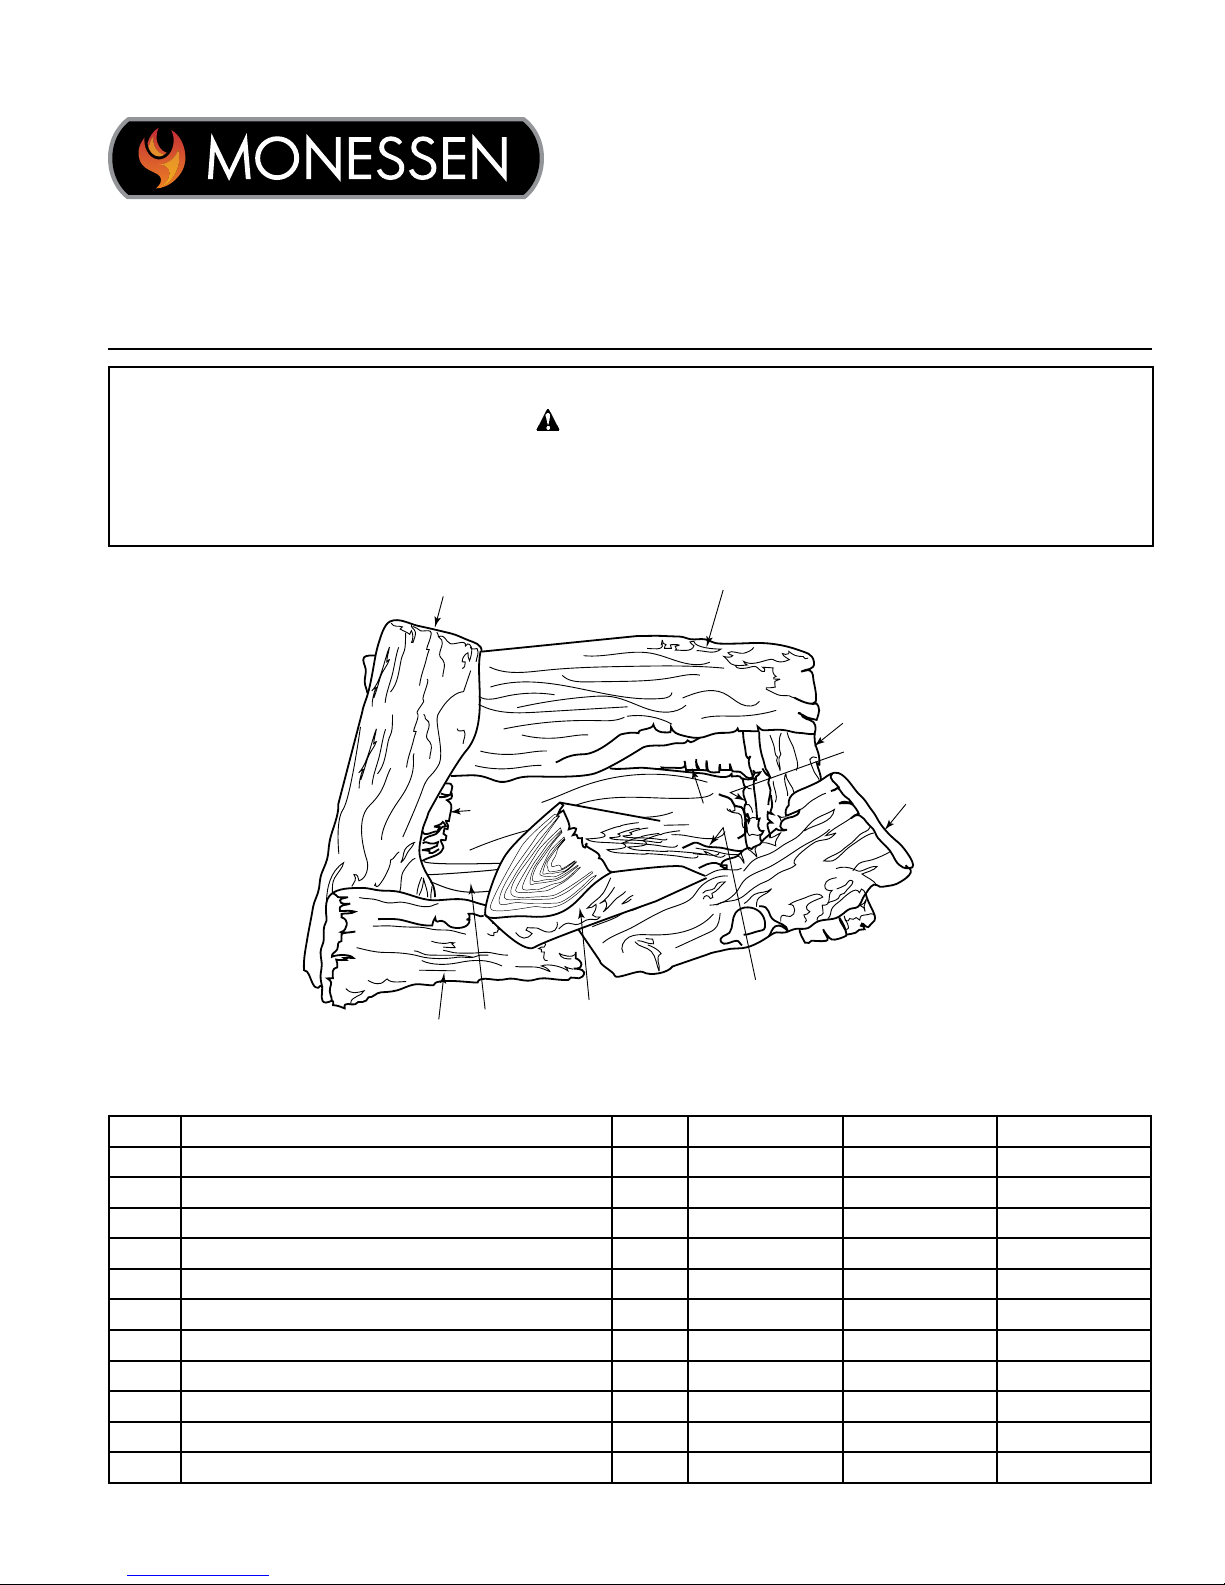
Log Placement Instructions
Models: SC18-R, SC24-R, SC30-R
WARNING!
The positioning of the logs is critical to the safe, clean operation of this gas log set. Sooting and other problems may
result if the logs are not properly positioned per these instructions. Failure to position in accordance with the diagrams
below, or failure to use only parts specically approved for this log set may result in property damage or personal injury.
8
3 (Ember
Chunk)
5
11
REF. DESCRIPTION QTY SC18-R SC24-R SC30-R
1 Bottom Rear Log #1 1 20303558 20303570 20303570
2 Ember Chunk #2 (notch on both ends) 1 81D0110 81D0110 81D0110
3 Ember Chunk # 3 (notch on one end) 1 81D0110 20303559 20303559
4 Front Bottom Right Log #4 1 20303560 20303571 20303943
5 Front Bottom Left Log #5 1 20303561 20303572 20303944
6 Mid Right Log #6 1 20303562 20303573 20303573
7 Mid Rear Log #7 1 20303563 20303574 20303574
8 Mid Left Log #8 1 20303564 20303575 20303945
9 Center Log #9 1 20303565 20303576 20303576
10 Top Front Right Log #10 1 20303566 20303577 20303946
11 Top Front Left Log #11 1 20303567 20303578 20303578
9
7
6
2 (Ember Chunk)
10
1
4
Monessen • Stony Creek Installation Instructions • 4604-909 Rev. A • 05/18
Page 2
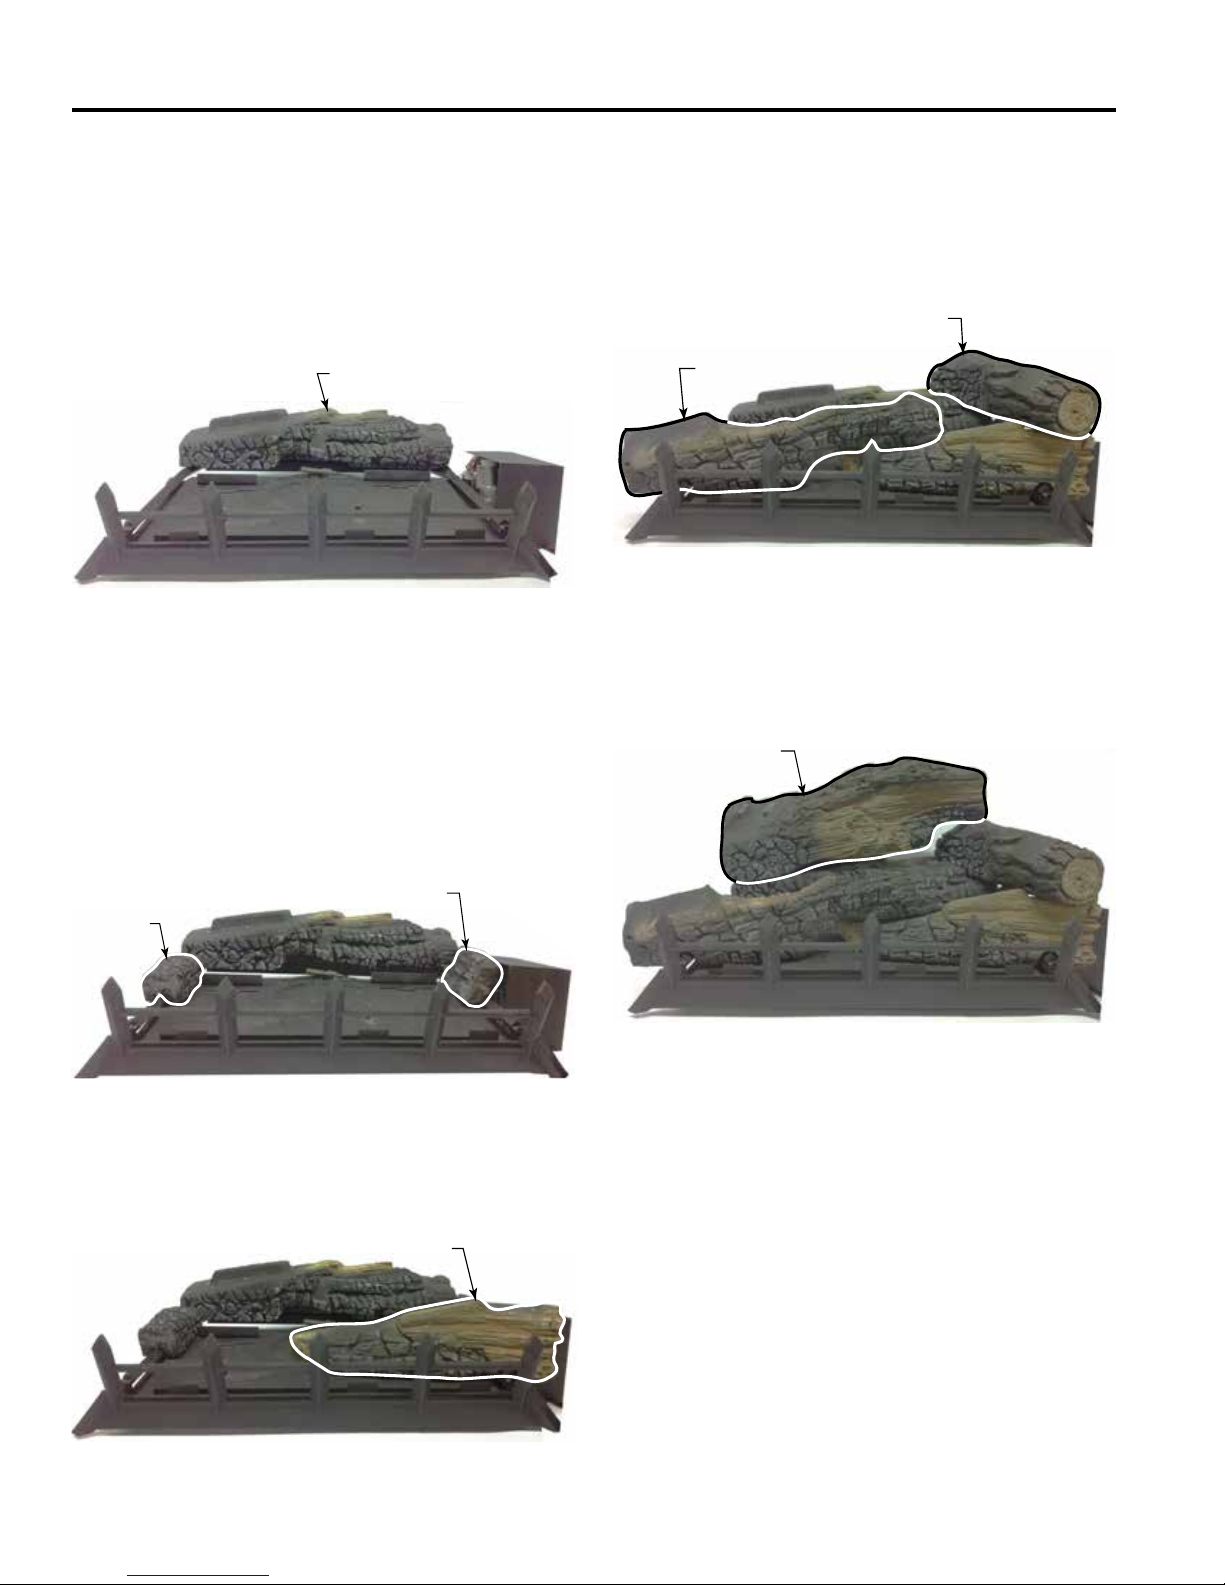
STONY CREEK SC18/24/30-R LOGS
PLACEMENT
1. Place bottom log (#1) on two (2) pins on rear of grate
assembly and push towards rear as far as possible.
Figure 1
NOTE: Installation instructions are the same for 18”,
24”, and 30” log sets. Pictures used in this manual
illustrate the 24” set. Some variation may exist between
the images and the set.
Bottom Rear Log #1
5. Place front bottom left log (#5) on left pin located on
burner and left grate bar. The right side of the log
should rest on log #4. Figure 4
6. Place mid right log (#6) on bottom rear log (#1) and
front bottom right log (#4) by placing notch on bottom
of log on locating block on log #1. Place front of log in
notch of log #4. Figure 4
Mid Right Log #6
Front Bottom Left
Log #5
Figure 4
Figure 1
2. Place the ember chunk (#2) with notch on both ends
on the grate bar right side of the burner adjacent to the
controls. Push towards rear as far as possible. Figure
2
3. Place the ember chunk (#3) with notch on one end on
the grate bar left side of the burner with notch towards
rear. Push towards rear as far as possible. Figure 2
Ember Chunk Log #2
Ember Chunk
Log #3
(Notch on
one end)
Figure 2
(Notch on both ends)
4. Place front bottom right log (#4) on right pin located
on burner and right grate bar. Figure 3
7. Place mid rear log (#7) on bottom rear log (#1) and mid
right log (#6) by placing notch on bottom of log onto
locating block on log #1. Right side of log will rest on
log #6. Figure 5
Mid Rear Log #7
Figure 5
Front Bottom Log #4
Figure 3
2 Monessen • Stony Creek Installation Instructions • 4604-909 Rev. A • 05/18
Page 3

8. Place mid left log (#8) on mid rear log (#7) and front
bottom log (#5) by placing notches on bottom of log
onto locating blocks on log #7 and log #5. Figure 6
9. Place center log (#9) onto front bottom left log (#5) by
placing notch on bottom of log #9 onto locating block on
log #5. The at triangle-shaped end of log #9 should be
towards front with pointed end of log resting on bottom
rear log (#1). Figure 6
Center Log #9
Mid Left Log #8
Figure 6
10. Place top front right log (#10) onto mid right log (#6) by
placing notch on bottom of log onto locating block on
log #6. Rest bottom end of log onto grate bar. Figure
7
11. Place top front left log (#11) onto mid left log (#8) by
placing notch on bottom of log onto locating block on
log #8. Rest bottom end of log onto grate bar. Figure
7
Top Front
Left Log #11
Top Front
Right Log #10
PLACE THE DECORATIVE ROCK
Optional volanic rock may be placed around the unit on
the oor of the rebox. Be sure to avoid any areas on the
burner itself.
DO NOT sprinkle volcanic rock on the logs,
around the pilot, or on or near burners. This
may cause sooting. Place volcanic rock only
on the oor of the replace.
During initial operation of the new heater,
new burning logs and/or rock wool will give
CAUTION
off a paper burning smell and orange ames
will be present. Simply open the windows for
a few hours to vent the odor.
Figure 7
Monessen, a brand of Hearth & Home Technologies
7571 215th Street West, Lakeville, MN 50044
Monessen • Stony Creek Installation Instructions • 4604-909 Rev. A • 05/18
www.monessenhearth.com
 Loading...