

Page 1
Log Placement Instructions
Models: Mojo22-R/Mojo27-R
BEFORE YOU BEGIN
Mojo logs are sold separately. Do not handle these logs
with your bare hands. Always wear gloves to prevent
skin irritation from refractory material. After handling
the logs, wash your hands gently with soap and water to
remove any traces of refractory material.
WARNING
• Gloves are recommended when handling logs to
prevent skin irritation from loose bers. Logs
are fragile - handle with care.
• Use only rock wool provided with log set.
• DO NOT ADD ADDITIONAL ROCK WOOL.
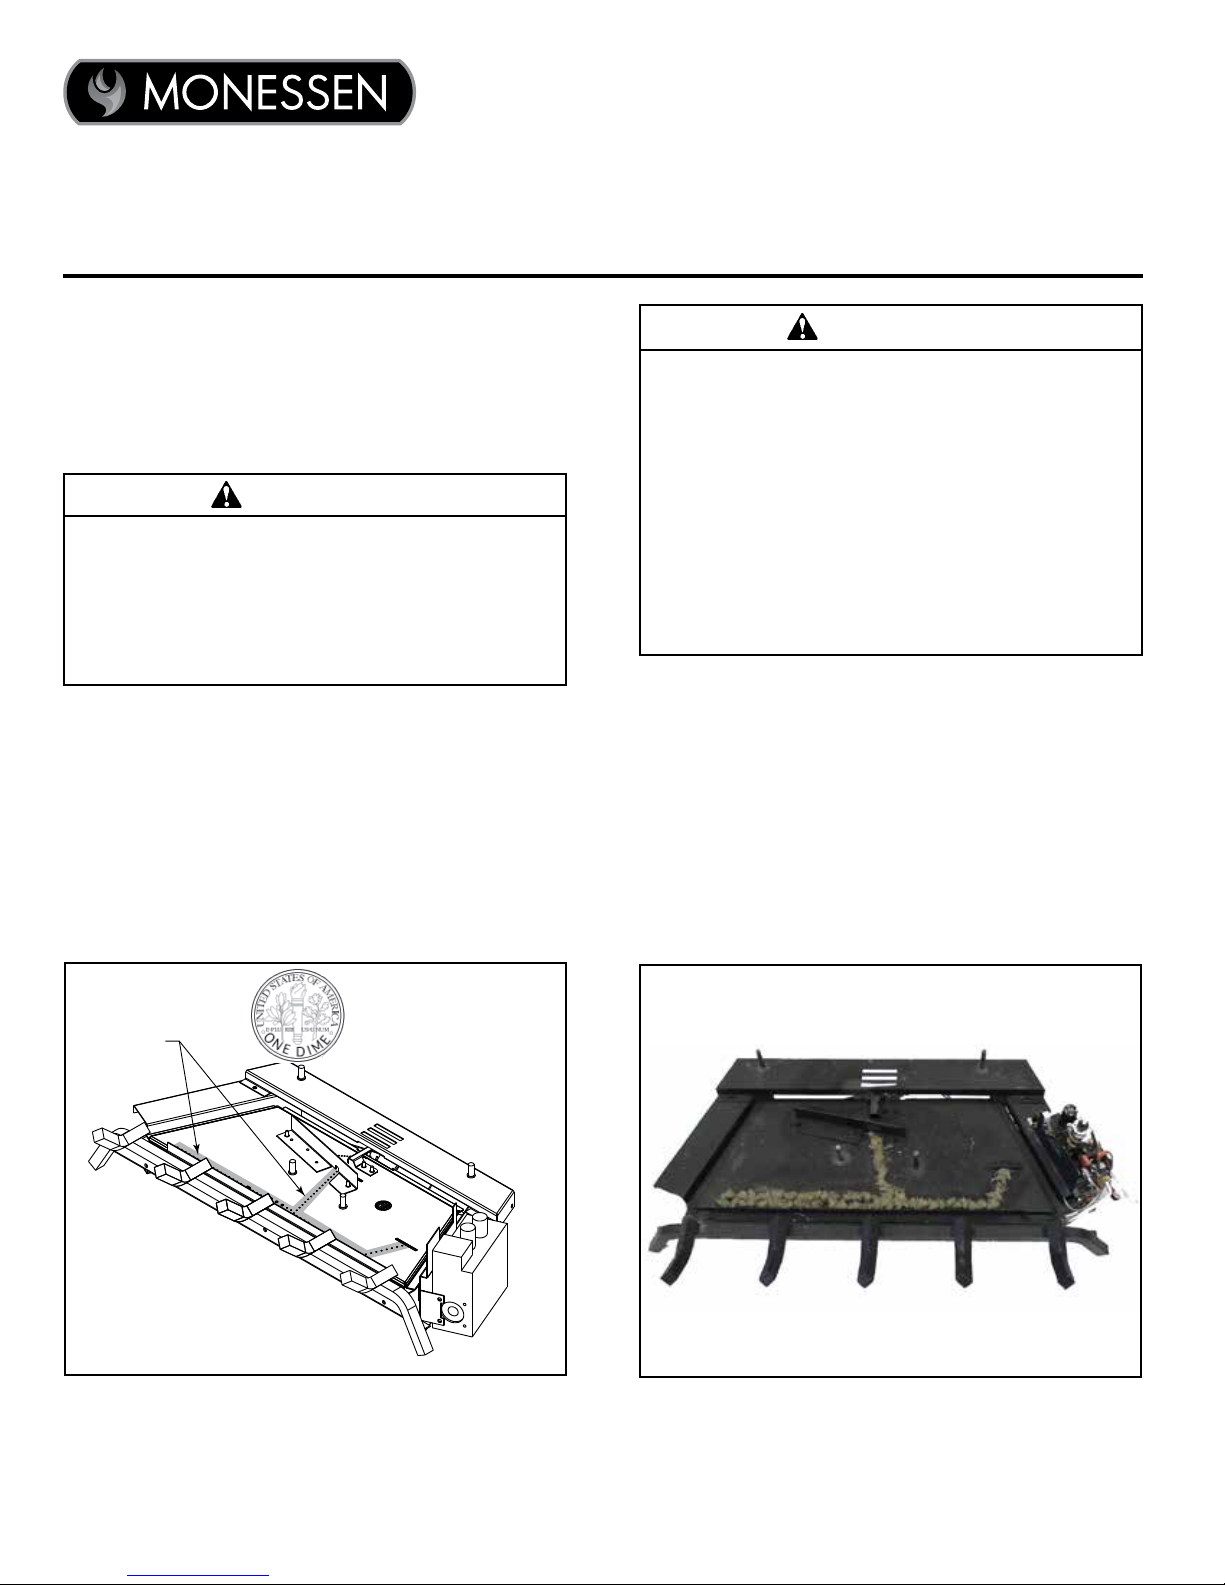
PLACE ROCK WOOL
Before installing logs, place rockwool in dime size
pieces evenly over small burner ports starting in front
of the rear deector shield towards the front. Avoid
placing rock wool over the slots on rear and right side
of burner and on large yellow ame ports on front of
burner.
Wash hands after placing rock wool. Itching may
occur.
WARNING
The positioning of the logs is critical to the safe and
clean operation of this heater. Sooting and other
problems may result if the logs are not properly
and rmly positioned in the appliance. Never add
additional logs or embellishments such as pine
cones, vermiculite or rock wool to the heater. Only
use 2G-RW rock wool supplied with the unit.
Failure to position the parts in accordance with
diagrams below or to use only parts specically
approved for this heater may result in property
damage or personal injury.
NOTE — This unit is supplied with eight (8) ceramic ber
logs. Do not handle these logs with your bare hands.
Always wear gloves to prevent skin irritation from
ceramic bers. After handling the logs, wash your hands
gently with soap and water to remove any traces of bers.
Dime-Sized
Pieces of Rock
Wool
Figure 1 - Installing Rock Wool
Monessen • Mojo Log Placement Instruction Manual • 4614-903 Rev. A • 6/18
Figure 2 - Correct Rock Wool Placement
1
Page 2
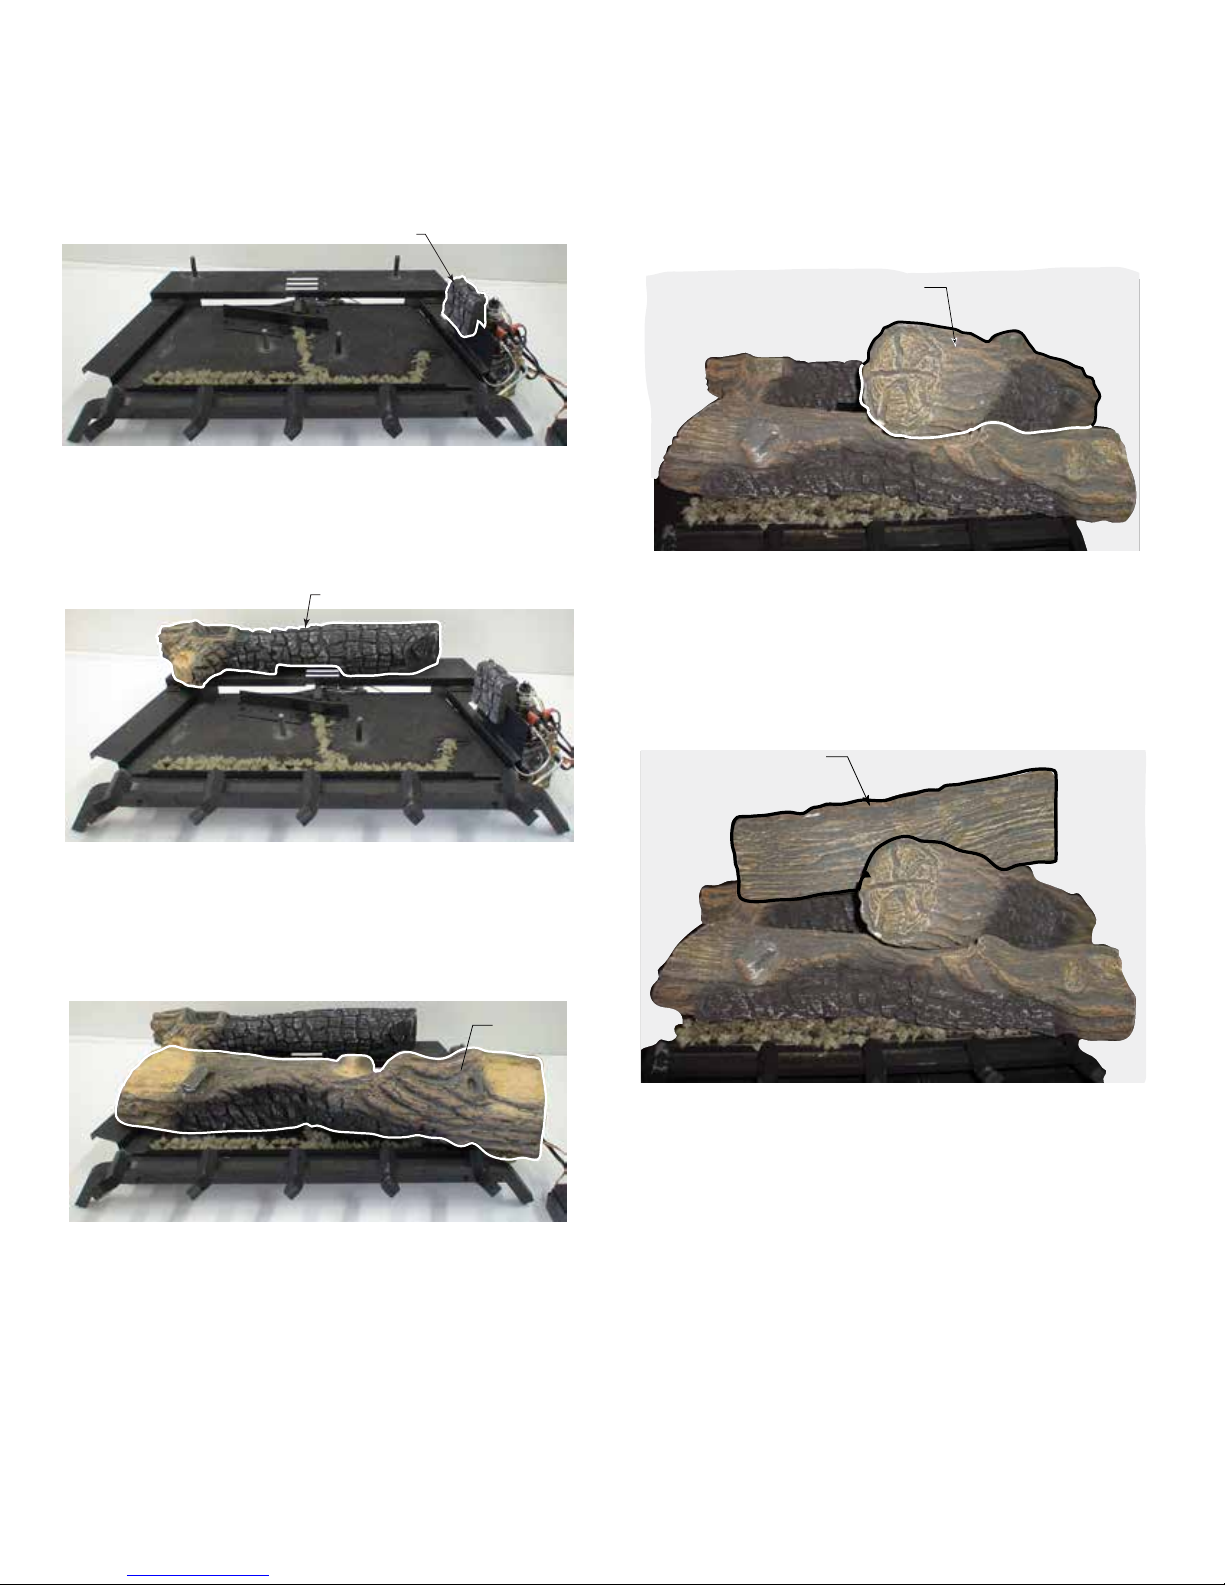
LOG PLACEMENT
1. Place log #8 on right bracket next to valve by sliding
grooves on sides of log into cutout on brackets. Figure
3.
Log #8
Figure 3 - Log #8 Placement
2. Place log #1 over the two pins located on the rear log
bracket. Figure 4.
Log #1
4. Place log #3 at an angle over log #2 toward the back
by matching the rectangular notch on the bottom of this
log with the rectangular protrusion on log #2. Set the
notch located on the bottom of this log toward the back
over the metal bracket located to the right side of the
burner. Figure 6.
Log #3
Figure 6 - Log #3 Placement
5. Place Log #4 by matching the rectangular protrusion
on the bottom of this log over the rectangular notch on
log #3. Swing the log slightly to the front and set the log
over the notch located on the upper surface of log #3.
Figure 7.
Log #4
Figure 4 - Log #1 Placement
3. Log #2 is positioned over the two pins located in the
middle of the burner pan. The log will set at a slight
angle. Figure 5.
Log #2
Figure 5 - Log #2 Placement
Figure 7 - Log #4 Placement
Monessen • Mojo Log Placement Instruction Manual • 4614-903 Rev. A • 6/18
2
Page 3
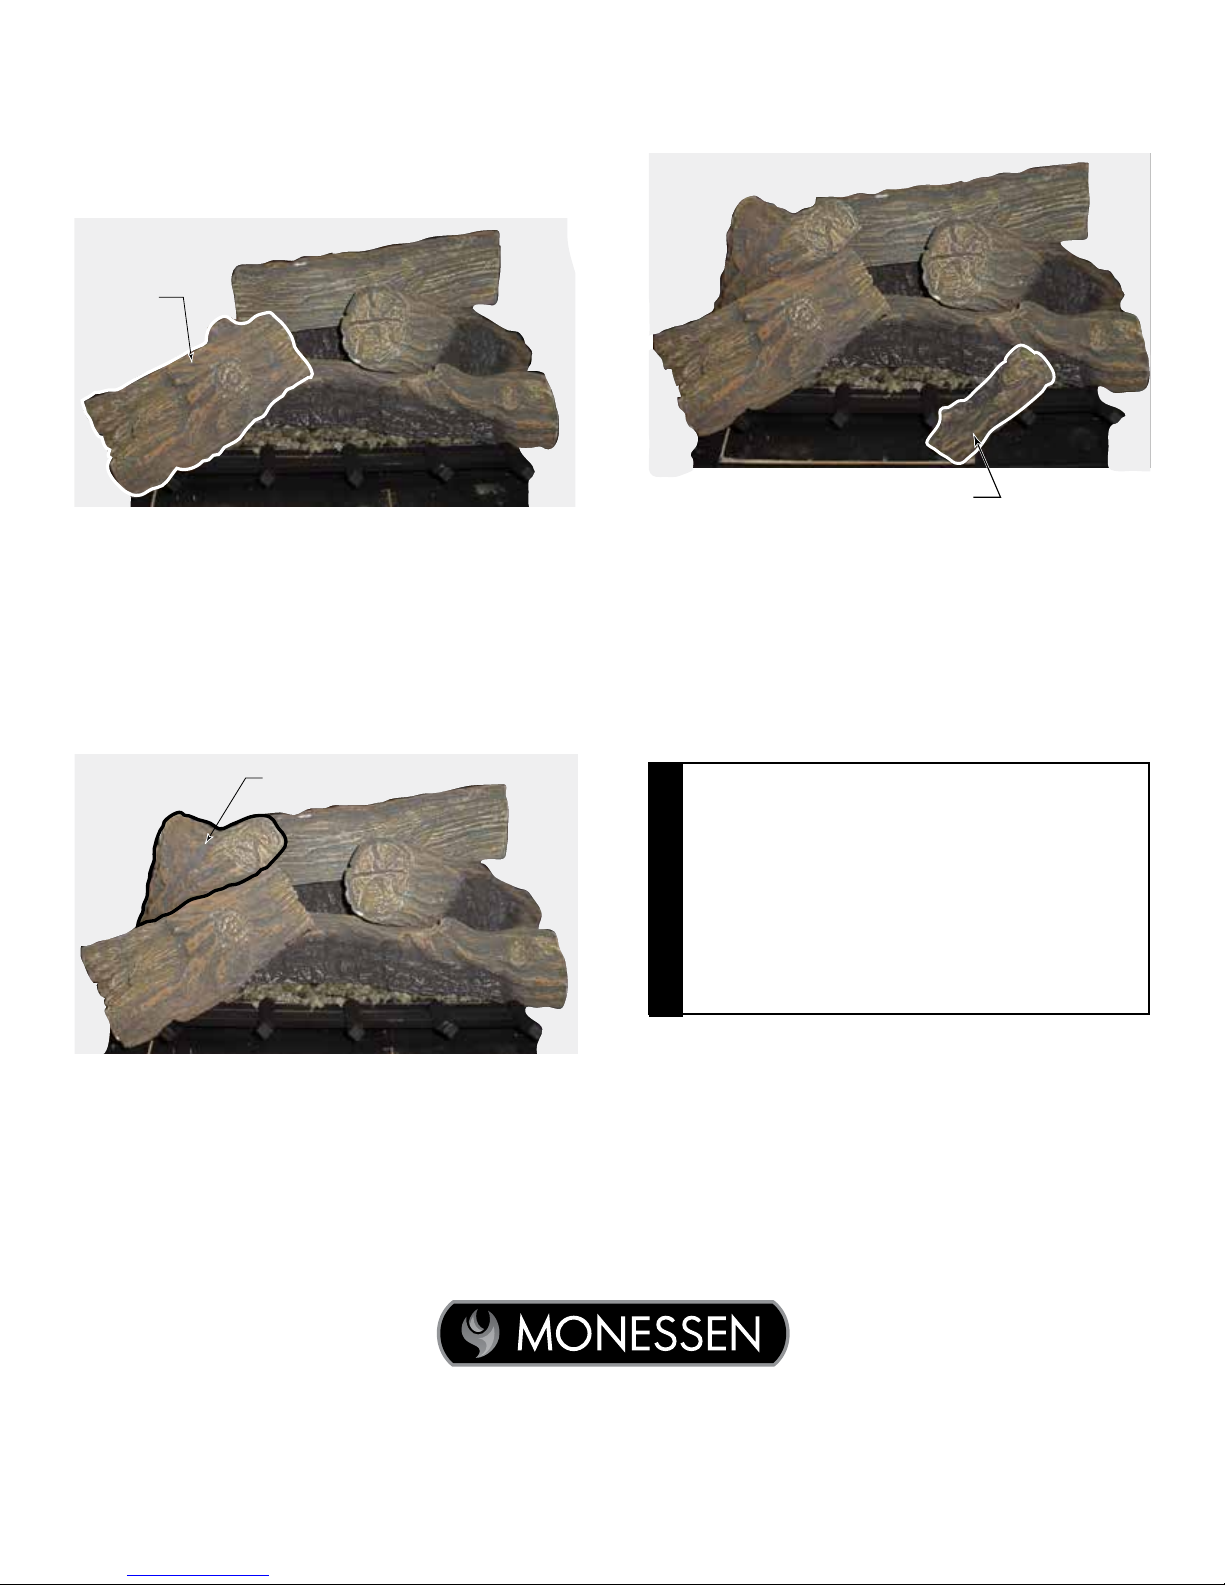
6. Place log #5 by matching the rectangular notch on the
bottom of the log with the rectangular protrusion on log
#2. Set the notch on the bottom of this log over the very
far left tong on the grate. Figure 8.
Log #5
8. Place log #7 between the second and third right tong
on the grate as shown in Figure 10.
Log #7
Figure 8 - Log #5 Placement
7. Place log #6 at an angle over log #5 toward the back
by matching the rectangular notch on the bottom of
this log with the rectangular protrusion on log #5. Set
the notch located on the bottom of this log toward the
back over the metal bracket located to the left side of
the burner. Figure 9.
Log #6
Figure 9 - Log #6 Placement
Figure 10 - Installing Rock Wool
PLACE THE DECORATIVE ROCK
The volcanic rocks are shipped with your log set. The vol-
canic rocks may be placed around the unit on the oor of
the rebox. Be sure to avoid any areas on the burner itself.
DO NOT sprinkle volcanic rocks on the logs,
around the pilot, nor near the burners. This
may cause sooting. Place volcanic rocks
only on the oor of the replace.
During initial opearation of the new heater,
new burning logs and/or rock wool will give
CAUTION
off a paper burning smell and orange ames
will be present. Simply open the windows
for a few hours to vent the odor.
Monessen, a brand of Hearth & Home Technologies
Monessen • Mojo Log Placement Instruction Manual • 4614-903 Rev. A • 6/18
7571 215th Street West, Lakeville, MN 55044
www.monessenhearth.com
3
 Loading...