

Page 1

Using
Your
Terminal
Moneris® S80
(01/12)
Page 2

Need help?
Call 1-866-319-7450
Record your Moneris merchant number here:
2
Page 3

Contents
Moneris S80 .................................... 2
Card entry options ..............................
Transactions .................................... 5
4
Receipts ........................................
Reporting ....................................... 12
Administrative transactions .....................
End-of-day process ..............................
Troubleshooting ................................
10
21
22
25
1
Page 4

Moneris S80
The S80 terminal is a cost effective, secure and
ruggedized payment solution ideal for use in financial,
retail and service environments. Credit and Debit
transactions are supported within the application.
The S80 allows transaction receipts to be produced.
The saved transactions within the current unsettled/
open batch are reviewable via the S80 display, and
several different types of printed reports are also
available.
Cards accepted
• Magnetic stripe cards
• Chip cards
6
8
7
5
9
3
2
3
1
4
10
2
Page 5

Terminal keys
1
Menu key
2
Power key
3
ATM/Function
4
Numeric Keypad
5
LCD
6
Paper
7
Paper Tear
8
Paper cover release button
9
Card Swipe
10
Chip/Smartcard
Component Specifications:
Printer
• Thermal printer, Speed 20 lines/sec.
• Paper width: 58mm
• Paper roll outer diameter: 50mm
Magnetic Card Reader
• Track 1/2/3, bi-directional swipe
Display
• 128x64 pixel LCD, LED backlight
Keypad
• 10 alphanumeric keys
• 8 function plus 4 ATM style keys
• 1 power switch key
IC (Chip / Smartcard) card reader
• EMV 2000 compliant
Optional Devices
The S80 does not support any optional devices, such
as external PINpads and Printers.
3
Page 6
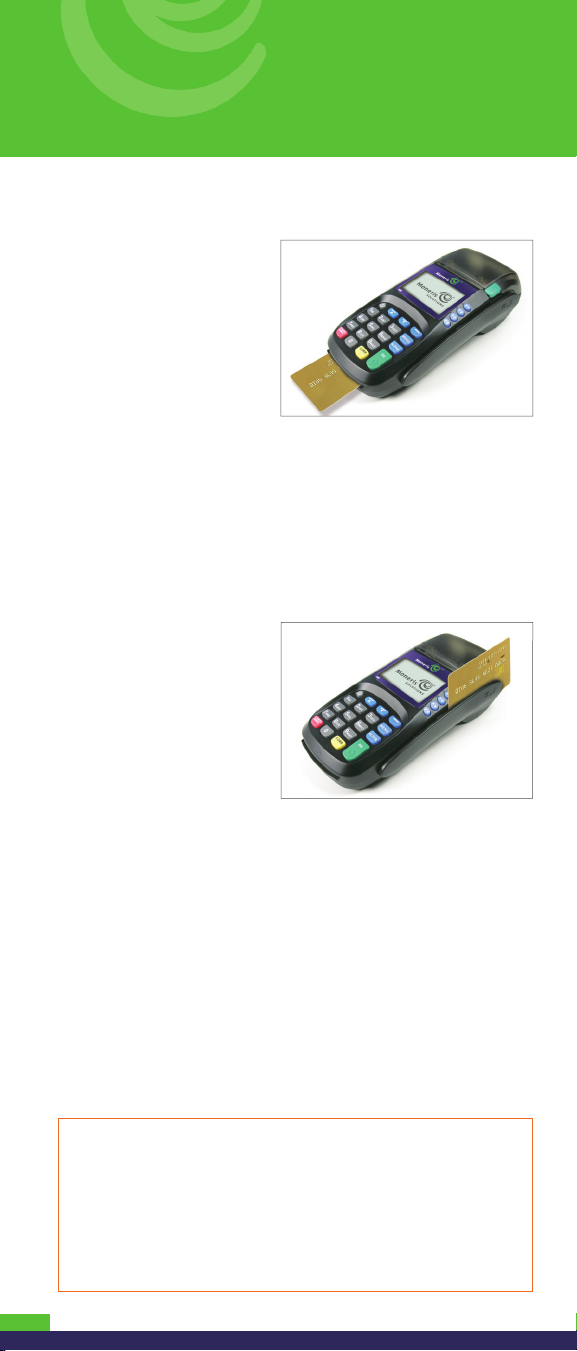
Card Entry Options
Insert: Chip cards
1. Wait for the “Insert,
swipe or key card #”
prompt to appear on
the terminal, or just
insert the card at the
idle screen.
2. Either you or the
customer inserts the
card into the device’s chip reader.
3. The customer may be prompted to key in a PIN.
4. The chip card must remain inserted until the
“Please Remove Card” prompt appears.
Note: Unless the device prompts otherwise, do not
swipe a chip card even if the card has a magnetic stripe.
Swipe: Magnetic stripe cards
1. Wait for the “Insert,
swipe or key card #”
prompt to appear on
the terminal.
2. Swipe the card through
the magnetic stripe
reader.
OR
Just swipe the card at the idle screen.
Note: If the card has a chip and the terminal is
enabled to read chip cards, the card must be inserted
into the chip reader.
Manual entry
If all available card entry methods fail, you may
manually enter the card number for credit cards. At
the idle screen, or when the “Insert, swipe or key card
#” prompt appears on the terminal, simply key in
the card number and press OK.
Note: You will be prompted to enter the card’s expiry
date.
The idle screen displays “SWIPE / INSERT CARD”
To access the Main Menu, press the “MENU” key on
the device.
The MAIN MENU displays:
1 FINANCIAL
2 ADMIN
3 INITIALIZE
4
Page 7

Transactions
All instructions in this guide begin at the Main Menu.
To access the Transactions options from the Main
Menu, select Financial Menu. To access the Financial
Menu from any screen in the application, press the
CANCEL key repeatedly until the Main Menu appears.
Financial transactions
General guidelines
1. Determine the transaction to be processed
(e.g. Purchase or Refund).
2. Establish the means of payment (credit or debit).
3. Enter the card data on the S80 device (see page 4).
4. Follow the terminal prompts (see pages 8 and 9).
Note: Prompts may vary depending on variables such
as terminal setup, merchant setup and card type.
5. Process receipts (see page 10).
Purchase
Sale of goods or services using a debit or credit card.
1. Insert card (if chip card), or swipe card, or manually
enter key card number and proceed to step 5 below,
or follow at step 2.
2. Scroll to FINANCIAL and press OK, or just press 1.
3. Scroll to PURCHASE and press OK, or just press 1.
4. Insert card, swipe card, or manually enter card
number.
5. Key in the purchase amount, press OK, then follow
the prompts. Refer to the Merchant prompts table
(see page 8).
6. Process receipts (see page 10).
Pre-Auth
Authorizes a temporary amount when the final
purchase amount is unknown (e.g., hotel or car rental).
1. Make sure the terminal is at either the “MAIN MENU”
or idle “SWIPE / INSERT CARD” screen. Press the
“CANCEL” at any screen to return to the MAIN MENU.
2. From the MAIN MENU screen:
a) Scroll to FINANCIAL and press OK, or just press 1.
Or from idle “SWIPE / INSERT CARD” screen:
b) Press to select “Fn” for FINANCIAL.
3. Scroll to PRE-AUTH and press OK, or just press 5.
5
Page 8

4. Insert card (if chip card), or swipe card, or manually
key in the card number.
5. Key in the amount, press OK, then follow the prompts.
Refer to the Merchant prompts table (see page 8).
6. Process receipts (see page 10).
Note: When the final amount of the purchase is
known, you must perform a Pre-Auth Completion
(see below) for the final amount using the same
card number.
Pre-Auth Completion
Used to finish a Pre-Authorization once the final
amount is known.
IMPORTANT: The Completion must be performed
on the same terminal using the same card as the
Pre-Authorization.
1. Make sure the terminal is at either the “MAIN MENU”
or idle “SWIPE / INSERT CARD” screen. Press the
“CANCEL” at any screen to return to the MAIN MENU.
2. From the MAIN MENU screen:
a) Scroll to FINANCIAL and press OK, or just press 1.
Or from idle “SWIPE / INSERT CARD” screen:
b) Press to select “Fn” for FINANCIAL.
3. Scroll to COMPLETION and press OK, or just press 6.
4. Key in the invoice number of the Pre-Auth to be
completed and press OK.
5. Verify the correct Pre-Auth was selected or use PREV
and/or NEXT to search for the correct transaction,
then enter the completion amount and press OK.
6. Follow the subsequent prompts. Refer to the
Merchant prompts table (see page 8).
7. Process receipts (see page 10).
Refund
Credits a customer’s account for a previous purchase.
1. Make sure the terminal is at either the “MAIN MENU”
or idle “SWIPE / INSERT CARD” screen. Press the
“CANCEL” at any screen to return to the MAIN MENU.
2. From the MAIN MENU screen:
a) Scroll to FINANCIAL and press OK, or just press 1.
Or from idle “SWIPE / INSERT CARD” screen:
b) Press to select “Fn” for FINANCIAL.
3. Scroll to REFUND and press OK, or just press 2.
4. Key in the password and press OK.
5. Insert card (if chip card), or swipe card, or manually
key in the card number.
6
Page 9

6. Key in the amount, press OK, then follow the prompts.
Refer to the Merchant prompts table (see page 8).
7. Process receipts (see page 10).
Correction (Void)
Cancels (voids) a previous purchase or refund.
Note: Credit card corrections MUST be processed in the
same batch as the original transaction.
1. Make sure the terminal is at either the “MAIN MENU”
or idle “SWIPE / INSERT CARD” screen. Press the
“CANCEL” at any screen to return to the MAIN MENU.
2. From the MAIN MENU screen:
a) Scroll to FINANCIAL and press OK, or just press 1.
Or from idle “SWIPE / INSERT CARD” screen:
b) Press to select “Fn” for FINANCIAL.
3. Scroll to CORRECTION and press OK, or just press 3.
4. Key in the password and press OK.
5. Key in the invoice number of the transaction to void
and press OK.
6. Verify the correct transaction was selected or use
PREV and/or NEXT to search for the correct
transaction, then follow the prompts. Refer to the
Merchant prompts table (see page 8).
7. Process receipts (see page 10).
Force Post
Completes a voice-authorized purchase.
1. Make sure the terminal is at either the “MAIN
MENU” or idle “SWIPE / INSERT CARD” screen. Press
the “CANCEL” at any screen to return to the MAIN
MENU.
2. From the MAIN MENU screen:
a) Scroll to FINANCIAL and press OK, or just press 1.
Or from idle “SWIPE / INSERT CARD” screen:
b) Press to select “Fn” for FINANCIAL.
3. Scroll to FORCE POST and press OK, or just press 7.
4. Insert card (if chip card), or swipe card, or manually
key in the card number.
5. Key in the Force Post amount, press OK, then follow
the prompts. Refer to the Merchant prompts table
(see page 8).
Note: At the “Enter Approval Code” prompt, enter
the code from the dropped transaction or that was
received from IVR.
6. Process receipts (see page 10).
7
Page 10

Merchant prompts
This table lists prompts you might see during a POS
transaction, along with the actions to take for each
one.
Merchant prompts Merchant actions
Insert, swipe or
key card #
Enter Last 4
Acc # Digits
Enter Expiry
Date MMYY
Imprint card
Press OK
Enter Operator
Id
Enter Receipt
Number
Enter Invoice
Pass to Customer
Return To Clerk
PURCHASE
$nnnnn.nn
TIP $nnnnn.nn
TOTAL $nnnnn.nn
Press OK to confirm
Press OK for
customer copy
Enter Cashback
Amount
Insert EMV chip card into chip reader, or
slide the card through the card reader,
or key in the card number and press OK.
Key in the last 4 digits of the card
number and press OK.
Key in the card’s expiry date and press
OK.
Take manual imprint of card then press
OK.
Key in the Operator ID and press OK.
(Operator ID refers to Clerk ID)
Key in the Receipt/Invoice number and
press OK or simply press OK to leave
blank.
Key in invoice number from
Pre-Authorized receipt and press OK.
Pass the terminal to your customer.
When the customer sees this prompt,
retrieve the terminal then press OK
to continue the transaction.
If Cash Back is enabled, check for the
cashback amount on this screen.
Press OK to continue or select CORR
to return to “Enter Amount”.
Tear off the receipt and press OK.
Key in a dollar amount (or nothing
at all) and press OK.
8
Page 11

Customer prompts
This table lists prompts your customers might see
during a POS transaction, along with the actions to
take for each one.
Customer prompts Customer actions
Fee
$1.00 OK?
OK Cancel
Enter
tip%
or amount
Enter Tip Amount
$nnnnn.nn
PURCHASE
$nnnnn.nn
TIP $nnnnn.nn
CASHBACK
$nnnnn.nn
TOTAL $nnnnn.nn
Press OK to confirm
Select Account
CHQ SAV
Enter PIN
+ OK
Remove Card
PURCHASE
$nnnnn.nn
TIP $nnnnn.nn
CASHBACK
$nnnnn.nn
FEE $nnnnn.nn
TOTAL $nnnnn.nn
Press OK to confirm
If cashback has been selected then that
fee is used, otherwise just the regular
debit fee is used. Select OK to accept the
fee or CANCEL to cancel the transaction.
Select a displayed percentage by
pressing F1 or F2 or F3, or select $$
to show the tip amount screen.
Key in a dollar amount (or nothing at
all) and press OK.
Press OK to continue or select CORR
to return to “Enter Amount”.
Select CHQ (for Chequing account) or
SAV (for Savings account.)
Key in their PIN (Personal Identification
Number) and press OK.
Remove their chip card from the reader.
Note: Do not remove the chip card until
“Remove Card” appears on the terminal.
Press OK to continue or select CORR
to return to “Enter Amount”.
9
Page 12

Receipts
Useful Codes
The Invoice # is the four-digit Invoice number printed
on the Pre-Auth receipt just above the approval text.
Signing Credit Card Receipts
Merchant copy
Always retain this copy for your records, but note:
• If a signature line is printed, obtain the cardholder’s
signature.
• If VERIFIED BY PIN is printed, do not obtain a signature.
Customer Copy
Give this copy to the customer, but note:
• If a merchant signature line is printed, sign this copy.
Custom Header
Lines (Max 4)
Txn type
Txn amt
Tip
Txn total
Masked Card#
Txn Date/Time
Ref# & [C]hip
Auth#
Card type
AID
Invoice#
Approval text,
Includes bank
Resp Code
Verified by PIN
or signature line
Cardholder
Agreement
Custom Trailer
Lines (Max 4)
Copy type
10
Page 13

Reprint a receipt
Prints a duplicate copy of a receipt.
1. Make sure the terminal is at either the “MAIN MENU”
or idle “SWIPE / INSERT CARD” screen. Press the
“CANCEL” at any screen to return to the MAIN MENU.
2. From the MAIN MENU screen:
a) Scroll to FINANCIAL and press OK, or just press 1.
Or from idle “SWIPE / INSERT CARD” screen:
b) Press
to select “Fn” for FINANCIAL.
3. Scroll to REPRINT and press OK, or just press 4.
4. Enter the Invoice Number of the transaction for
which a duplicate receipt is required.
5. Duplicate receipt prints with **DUPLICATE**
appearing immediately below the 4 custom receipt
header lines.
11
Page 14

Reporting
Operator Detail Report
A report detailing the transactions performed for
a single operator or all operators is available. This
assumes that the configurable operator ID prompt
is enabled during transaction processing.
1. Make sure the terminal is at either the “MAIN MENU”
or idle “SWIPE / INSERT CARD” screen. Press the
“CANCEL” at any screen to return to the MAIN MENU.
2. From the MAIN MENU screen:
a) Scroll to ADMIN and press OK, or just press 2.
Or from idle “SWIPE / INSERT CARD” screen:
b) Press
3. Scroll to REPORTS and press OK, or just press 2.
4. Scroll to OPER DETAIL and press OK, or just press 5.
5. Enter an operator ID to select that one operator, or
press OK with no data entry to select all operators.
6. Print report, which looks like:
to select “Ad” for ADMIN MENU.
Report type
Custom Header
Lines (Max 4)
Merchant ID
Terminal ID
Report date/time
Invoice#, Card/Txn Type
& Amount
Total value for operator
Total tips for operator
End of Report marker
Note: If a report for all operators is requested
(Operator Summary Report) then an ordered report
is generated with the operator ID printed above the
invoice, card, transaction and total heading. This
section is then repeated for each unique operator ID.
12
Page 15

Tip Detail Report
The tip detail report provides details of all transactions
that include tip amount. The report format is the
same as the “Invoice Detail” report on page 16.
1. Make sure the terminal is at either the “MAIN MENU”
or idle “SWIPE / INSERT CARD” screen. Press the
“CANCEL” at any screen to return to the MAIN MENU.
2. From the MAIN MENU screen:
a) Scroll to ADMIN and press OK, or just press 2.
Or from idle “SWIPE / INSERT CARD” screen:
b) Press
to select “Ad” for ADMIN MENU.
3. Scroll to REPORTS and press OK, or just press 2.
4. Scroll to TIP DETAIL and press OK, or just press 6.
5. Print report.
Pre-Auth Report
This report prints all the open Pre-Auth transactions
from the current batch. The report format is the same
as the “Invoice Detail” report on page 16.
1. Make sure the terminal is at either the “MAIN MENU”
or idle “SWIPE / INSERT CARD” screen. Press the
“CANCEL” at any screen to return to the MAIN MENU.
2. From the MAIN MENU screen:
a) Scroll to ADMIN and press OK, or just press 2.
Or from idle “SWIPE / INSERT CARD” screen:
b) Press to select “Ad” for ADMIN MENU.
3. Scroll to REPORTS and press OK, or just press 2.
4. Scroll to PRE-AUTH and press OK, or just press 7.
5. Print report.
13
Page 16

Card Summary Report
The summary report provides totals for credit and
debit transactions. If a particular card type does not
have any activity in the batch, that card type is not
included in the summary report.
1. Make sure the terminal is at either the “MAIN MENU”
or idle “SWIPE / INSERT CARD” screen. Press the
“CANCEL” at any screen to return to the MAIN MENU.
2. From the MAIN MENU screen:
a) Scroll to ADMIN and press OK, or just press 2.
Or from idle “SWIPE / INSERT CARD” screen:
b) Press
to select “Ad” for ADMIN MENU.
3. Scroll to REPORTS and press OK, or just press 2.
4. Scroll to CARD SUMMRY and press OK, or just press 3.
5. Print report, which looks like:
Report type
Custom Header
Lines (Max 4)
Merchant ID
Terminal ID
Report date/time
Category
#Purchases, total amt
#Refunds, total amt
#Completions, total amt
Total for all credit txns
Category
#Purchases, total amt
#Refunds, total amt
Total for all debit
transactions
Category
Credit subtotal
Debit subtotal
Grand total for
open batch
Card Total Summary
Card type and totals
Card type and totals
Card type and totals
Fee totals
End of Report marker
14
Page 17

Debit Summary Report
The summary report provides totals for debit
transactions.
1. Make sure the terminal is at either the “MAIN MENU”
or idle “SWIPE / INSERT CARD” screen. Press the
“CANCEL” at any screen to return to the MAIN MENU.
2. From the MAIN MENU screen:
a) Scroll to ADMIN and press OK, or just press 2.
Or from idle “SWIPE / INSERT CARD” screen:
b) Press
to select “Ad” for ADMIN MENU.
3. Scroll to REPORTS and press OK, or just press 2.
4. Scroll to DEBIT SUMMA and press OK, or just press 4.
5. Print report, which looks like:
Report type
Custom Header
Lines (Max 4)
Merchant ID
Terminal ID
Report date/time
Category
#Purchases, total amt
#Refunds, total amt
#Surcharge Fees, total amt
#Cashback Fees, total amt
#Cashbacks, total amt
Total for all debit txns
End of Report marker
15
Page 18

Invoice Detail Report
Prints a detail report of all transactions in the current
open batch ordered by Invoice Number. This report is
printed after the Batch Close transaction
is performed on the terminal.
1. Make sure the terminal is at either the “MAIN MENU”
or idle “SWIPE / INSERT CARD” screen. Press the
“CANCEL” at any screen to return to the MAIN MENU.
2. From the MAIN MENU screen:
a) Scroll to ADMIN and press OK, or just press 2.
Or from idle “SWIPE / INSERT CARD” screen:
b) Press to select “Ad” for ADMIN MENU.
3. Scroll to REPORTS and press OK, or just press 2.
4. Scroll to INVOICE DET and press OK, or just press 1.
5. Print report, which looks like:
Report type
Custom Header
Lines (Max 4)
Merchant ID
Terminal ID
Report date/time
Inv#, card type, txn
type, entry method
Masked Card#
Operator ID (optional)
Txn date/time
Reference# and
[S]wiped or [M]anual
Host Response
Txn Amount
Optional:
Cashback amt
Tip amount
Surcharge amt
Total amount
Inv#, card type, txn
type, entry method
Masked Card#
Operator ID (optional)
Txn date/time
Reference# and
[S]wiped or [M]anual
Host Response
Txn Amount
Optional:
Tip amount
Total amount
End of Report marker
Note:
1. Voided transactions are displayed in the Invoice
Detail report.
2. The Card Numbers are masked. For example,
card number 1234567890123456 is printed as
XXXXXXXXXXXX3456
16
Page 19

Card Detail Report
Prints a detail report of all transactions in the current
open batch ordered by Card Type.
1. Make sure the terminal is at either the “MAIN MENU”
or idle “SWIPE / INSERT CARD” screen. Press the
“CANCEL” at any screen to return to the MAIN MENU.
2. From the MAIN MENU screen:
a) Scroll to ADMIN and press OK, or just press 2.
Or from idle “SWIPE / INSERT CARD” screen:
b) Press
to select “Ad” for ADMIN MENU.
1. Scroll to REPORTS and press OK, or just press 2.
2. Scroll to CARD DETAL and press OK, or just press 2.
3. Print report, which looks like:
Report type
Custom Header
Lines (Max 4)
Merchant ID
Terminal ID
Report date/time
Card Type
Inv#, card type, txn
type, entry method
Masked Card#
Operator ID (optional)
Txn date/time
Reference# and
[S]wiped or [M]anual
Host Response
Txn Amount
Optional:
Tip amount
Total amount
Card Type
Inv#, card type, txn
type, entry method
Masked Card#
Operator ID (optional)
Txn date/time
Reference# and
[S]wiped or [M]anual
Host Response
Txn Amount
Optional:
Cashback amount
Tip amount
Surcharge amount
Total amount
End of Report marker
Note:
1. Voided transactions are displayed in the Card Detail
report.
2. If no transactions are present for a particular card
type, the card type is not displayed in the report.
3. The Card Numbers are masked. For example,
card number 1234567890123456 are printed as
XXXXXXXXXXXX3456
17
Page 20

Host Totals Report
The Host Totals report will display the terminal batch
Credit/Debit/Total amounts, then connect to the host,
print a report of the host Credit/Debit/Total amounts,
and if the batch is in balance. This function does not
settle/close the current terminal batch. To settle/
close the current terminal batch, please refer to the
“End-of-Day Process” section on page 23.
1. Make sure the terminal is at either the “MAIN MENU”
or idle “SWIPE / INSERT CARD” screen. Press the
“CANCEL” at any screen to return to the MAIN MENU.
2. From the MAIN MENU screen:
a) Scroll to ADMIN and press OK, or just press 2.
Or from idle “SWIPE / INSERT CARD” screen:
b) Press
to select “Ad” for ADMIN MENU.
3. Scroll to REPORTS and press OK, or just press 2.
4. Scroll to HOST TOTALS and press OK, or just press 8.
5. Print report, which looks like:
Report type
Custom Header
Lines (Max 4)
Merchant ID
Terminal ID
Report date/time
Batch Status
Host Totals
Card type, qty, & subtotal
Card type, qty, & subtotal
Grand Total, txn
quantity and total
End of Report marker
18
Page 21

EMV Parameters Report
Only the “Offline Inf” option is currently supported.
Selecting the “Offline Inf” menu item will print a list
of the offline EMV tags.
1. Make sure the terminal is at either the “MAIN MENU”
or idle “SWIPE / INSERT CARD” screen. Press the
“CANCEL” at any screen to return to the MAIN MENU.
2. From the MAIN MENU screen:
a) Scroll to ADMIN and press OK, or just press 2.
Or from idle “SWIPE / INSERT CARD” screen:
b) Press
to select “Ad” for ADMIN MENU.
3. Scroll to REPORTS and press OK, or just press 2.
4. Scroll to EMV INFO and press OK, or just press 9.
5. Scroll to OFFLINE INF and press OK, or just press 3.
6. Print report.
19
Page 22

Configuration Report
The Configuration report provides a detailed list
of the terminal settings and parameters.
1. Make sure the terminal is at either the “MAIN MENU”
or idle “SWIPE / INSERT CARD” screen. Press the
“CANCEL” at any screen to return to the MAIN MENU.
2. From the MAIN MENU screen:
a) Scroll to ADMIN and press OK, or just press 2.
Or from idle “SWIPE / INSERT CARD” screen:
b) Press
to select “Ad” for ADMIN MENU.
3. Scroll to REPORTS and press OK, or just press 2.
4. Scroll to CONFIG and press OK, or just press 0.
5. Print report, which looks like:
Report type
Merchant ID
Terminal ID
Report date/time
Payment application
version
Merchant ID
Default txn type
Operator ID On/Off
Receipt # prompt On/Off
Fraud check On/Off
Language setting
(English/French)
Tipping On/Off
Custom header lines
Custom trailer lines
Debit options
Surcharge amount
Cashback On/Off
Communications
settings
End of Report marker
Note: ON and OFF mean Enabled and Disabled,
respectively.
20
Page 23

Administrative
transactions
Re-Initialization
This performs a parameter download from the Moneris
host.
Note: If transactions are present in the current batch,
you must close the batch first (see next section) then
return here.
1. Make sure the terminal is at either the “MAIN MENU”
or idle “SWIPE / INSERT CARD” screen. Press the
“CANCEL” at any screen to return to the MAIN MENU.
2. From the MAIN MENU screen:
a) Scroll to INITIALIZE and press OK, or just press 3.
Or from idle “SWIPE / INSERT CARD” screen:
b) Press to select the Init function.
3. Key in the password and press OK.
4. Scroll to DOWNLOAD and press OK, or just press 3.
21
Page 24

End-of-Day Process
The end of day or batch settlement is processed in
two ways based on merchant set up at the host level:
• Close batch: The merchant needs to initiate the
batch settlement at the end of the business day.
• Clear batch: The host initiates the batch settlement
at a specific time and the merchant will only print
the report for reconciliation purposes.
Step 1. Process a Batch Close transaction
1. Make sure the terminal is at either the “MAIN MENU”
or idle “SWIPE / INSERT CARD” screen. Press the
“CANCEL” at any screen to return to the MAIN MENU.
2. From the MAIN MENU screen:
a) Scroll to ADMIN and press OK, or just press 2.
Or from idle “SWIPE / INSERT CARD” screen:
b) Press to select “Ad” for ADMIN MENU.
3. Scroll to CLOSE BATCH/CLEAR BATCH and press OK,
or just press 3.
4. Key in the password and press OK.
5. Press the key (“Yes”) to print the Batch Close report
(see Batch Close Report #1 below) and Invoice Detail
report (see page 16). Press the key (“No”) to print
a summary Batch Close report only (see Batch Close
Report #2 below).
6. Press OK to confirm the close and to print the various
reports.
7. If (“Yes”) was selected at step 5 above, press OK
to print the Invoice Detail Report (see page 16).
22
Page 25

Step 2. Confirmation
If the batch is NOT in balance, call Moneris the next
business day for reconciliation assistance.
The Batch Settlement Report looks like:
Report type
Custom Header
Lines (Max 4)
Merchant ID
Terminal ID
Batch Open and
Close date/time
Batch Status
Section Title
Host #Txns & Total
Section Title
Store #Txns & Total
End of Report marker
23
Page 26

Batch Close Report #1
(“Yes” selected) looks like:
Report type
Custom Header
Lines (Max 4)
Merchant ID
Terminal ID
Report date/time
Batch Status
Host Totals
Card type, qty, & subtotal
Card type, qty, & subtotal
Grand Total, txn
quantity and total
Batch settled with host
Txn type, qty, & subtotal
Txn type, qty, & subtotal
Txn type, qty, & subtotal
Grand Total, txn
quantity and total
End of Report marker
Batch Close Report #2
(“No” selected) looks like:
Report type
Custom Header
Lines (Max 4)
Merchant ID
Terminal ID
Report date/time
Batch Status
Batch settled with host
Txn type, qty, & subtotal
Txn type, qty, & subtotal
Txn type, qty, & subtotal
Grand Total, txn
quantity and total
End of Report marker
24
Page 27

Troubleshooting
If an error message appears, fi rst press the key
or the key to clear the message then retry the
transaction. If the error message reappears and is
listed in the table below, follow the instructions in
the table. If the problem is still not resolved, call us
toll free at 1-866-319-7450.
Error message Solution
No Dialtone
Connect Line!
Host Busy
Try Again
No Answer
Host Timeout
Line Lost
Connection Error
• Confi rm that the dial connection is
correct and secure. See “Connecting
the S80 Terminal” on page 26.
• The dial line should be a dedicated
analog phone line that is not shared
with other appliances (i.e. fax). Sharing
the line can cause connection disruptions.
• Check the dedicated dial line by
plugging in a telephone handset; lift
the receiver to see if you hear a dial tone.
• Confi rm the dial host number. See
“Communications Setup”, in section
“2. Host Phone Number” on page 27.
• Try again.
• Confi rm the dial host number. See
“Communications Setup”, in section
“2. Host Phone Number” on page 27.
• Try again.
• The dial line should be a dedicated
analog phone line that is not shared
with other appliances (i.e. fax). Sharing
the line can cause connection disruptions.
• Please try again.
• The dial line should be a dedicated
analog phone line that is not shared
with other appliances (i.e. fax). Sharing
the line can cause connection disruptions.
• Please try again.
• Confi rm that the IP connection is correct
and secure. See “Communications
Setup”, in section “3. Ethernet IP Host”
on page 27.
• Cycle terminal power and observe
IP connection status displayed at the
bottom of the initialization screen.
A successful connection will display
the DHCP IP address.
25
Page 28

Error message Solution
Re-dialing
• Confirm the dial host number. See
“Communications Setup”, in section
“2. Host Phone Number” on page 27.
• Try again.
Unsuccessful!
• Complete initialization steps and try
parameter download again. See
“Terminal Initialization” on page 27.
• Check phone and/or Ethernet cable
connections. See “Connecting the S80
Terminal” on page 26.
• Check communications settings.
See “Communications Setup”
on page 26.
• Check host availability.
Batch nearly full
Warning that the open batch is 95% full.
• Perform batch settlement as soon
as possible. See pages 22 and 23.
Settlement
Required
Maximum number of 600 transactions
has been reached.
• Perform batch settlement immediately.
See pages 22 and 23.
Host Download
Required
Press OK
Paper Out
Add Paper
• Initialize the terminal and perform
parameter download. See “Terminal
Initialization” on page 27.
• Follow paper load instructions to
replace paper roll. See “Loading &
Changing the Paper Roll” on page 28.
• Make sure paper roll cover is securely
shut.
26
Page 29

Connecting the S80 Terminal
• Place the S80 face down on a stable table or work
surface.
• Detach the plastic cable/cord shield by squeezing
in on the two upper tabs.
• Plug the round barrel end connector of the power
adapter cord, into the S80 “POWER” jack.
• Plug the required communications cord(s) into the
proper communications socket(s) (refer to image
below).
• Plug Ethernet cable into the “LAN” socket, and/or:
• Plug the telephone line cable into the “LINE”
socket.
• Run the cables through the recessed cable guides,
and snap the plastic cable/cord shield back in place.
• Plug the S80 power cord into available electrical
wall jack or power bar.
• Switch the terminal on by pressing the power
button.
USB PORT
Communications Setup
1. Communication Type
• The default terminal communication setting
is Ethernet/IP primary with Dial backup.
• To confirm or change the communication type:
• Press MENU
• Press 2 to select Admin
• Press 1 to select Settings (Enter Password)
• Press 9 to select Term Setup (Enter Password)
• Press 1 to select Com Type
• Press to select “Yes” to change the communication
type between Dial and Ethernet.
27
Page 30

2. Host Phone Number
• To confirm or change the phone number:
• Press MENU
• Press 2 to select Admin
• Press 1 to select Settings (Enter Password)
• Press 9 to select Term Setup (Enter Password)
• Press 2 to select Phone #
• Press 1 to select Host
• Press to select “Yes” to change the phone number,
or press to select “No” to leave it unchanged.
• The default Moneris production numbers (by national
region) are as follows:
If your merchant number begins with:
00301
00302
00304
Key in:
1-888-699-7299
1-888-358-8602
1-888-332-8433
3. Ethernet IP Host
• To confirm or change the IP host address select the
following menu items:
• Press MENU
• Press 2 to select Admin
• Press 1 to select Settings (Enter Password)
• Press 9 to select Term Setup (Enter Password)
• Press 8 to select Ethernet
• Press 1 to select Host
• Press to select “Yes” to change the IP host address,
or press to select “No” to leave it unchanged.
• The default Moneris production host URL is
IPGATE.MONERIS.COM
Terminal Initialization
SWIPE/ INSERT
MAIN MENU
1 FINANCIAL
2 ADMIN
3 INITIALIZE
28
CARD
Fn Ad Init
Function Key
OR
Page 31

1. The terminal initialization functions are quickly
accessible from the idle “SWIPE / INSERT CARD” screen,
by selecting the “Init” option with the function
key, or by selecting MENU and pressing 3
to select “INITIALIZE”.
2. Key in the password.
The default password is “9876”. However it is advisable
that the merchant change their password.
3. From the “INITIALIZE” menu, press 1 to select “TERM ID”.
4. Press to select “Yes” to change the Terminal ID.
Enter the Terminal ID (Look on bottom of your terminal.
The Terminal ID (8-digit number) is printed on a
sticker and appears as “ID:83xxxxxx”).
5. Press 2 to select “MERCHANT ID”. Press
to select
“Yes” to change the MERCHANT ID. Enter your 13 digit
“MERCHANT ID”.
6. Press 3 to select the “DOWNLOAD”, to complete a
parameter download from the Moneris host.
7. The terminal should now be ready to process
transactions.
Loading & Changing the Paper Roll
• Press the paper cover release button to unlock &
release the paper roll cover.
• Open the paper roll cover fully to access the paper
roll compartment.
• Place the paper roll in the compartment making
sure that the paper feeds from the underside of the
roll, towards the paper tear bar.
Make sure the
paper is feeding
towards the
paper tear bar.
Place paper roll
in paper roll
compartment.
• Pull the end of the paper out of the compartment
beyond the tear bar, and close the paper roll cover.
Tear off any excess paper if required.
29
Page 32

Problem Solution
Terminal is
unable to
connect; Ethernet.
• Confirm that the IP connection
is correct and secure. See
“Communications Setup”, in section
“3. Ethernet IP Host” on page 27.
• Switch the terminal power off then on
again. Confirm that DHCP connection
is established during initialization.
A successful connection will display
the IP address (i.e. 172.16.50.9:1180).
• Print “Configuration” report and
confirm settings. See page 20.
• Test Connection by performing
parameter download. See “Terminal
Initialization” on page 27.
• Confirm CONNECTION type. See
“Communications Setup”, in section
“1. Communication Type” on page 26.
Terminal is
unable to
connect; Dial.
• Print “Configuration” report and
confirm settings. See page 20.
• Check physical connection. See
“Connecting the S80 Terminal”
on page 26.
• Test Connection by performing
parameter download. See “Terminal
Initialization” on page 27.
• Confirm CONNECTION type. See
“Communications Setup”, in section
“1. Communication Type” on page 26.
• Confirm the HOST phone number. See
“Communications Setup”, in section
“2. Host Phone Number” on page 27.
Blank screen
on device
Card swipe
not working
(card swipe
not detected)
30
• Check that S80 power adapter barrel
connector is plugged into S80 “POWER”
port, and that the other end is plugged
into a working power outlet. See
“Connecting the S80 Terminal”
on page 26.
• The green LED light on the power
adapter “brick” should be on.
• Press and hold the S80 power button
for a few seconds, to see if it powers on.
• If a chip card is swiped the terminal
application will prompt to insert chip
card in chip/smartcard reader.
Page 33

Problem Solution
Blank receipt
• Insure that the paper roll is fed
correctly. See “Loading & Changing the
Paper Roll” on page 28.
• Is a thermal paper roll being used?
Is the correct (outside) part of the
thermal paper roll contacting the
printer head? See “Loading &
Changing the Paper Roll” on page 28.
Sticky,
unresponsive
keys
• A liquid spill onto the keymat can
cause key presses to stick, and/or
damage the device.
• Clean the keymat area with a damp
cloth. Do not spray any product
directly onto the keymat.
• Cycle the power on the S80 by pressing
the power button, and try the key
presses again.
Terminal
constantly
reboots
• Cycle the power on the S80 by pressing
the power button.
• Call Moneris technical support at
1-866-319-7450.
Terminal dials
slowly
• If the terminal is in pulse dial mode,
switch to tone dialling if available.
See “Communication Setup” in section
“2. Host Phone number” on page 27 , and
follow the terminal prompts until you
see the option to change between
tone or pulse dialing.
Terminal is
frozen or locked
• Cycle the power on the S80 by pressing
the power button.
• Call Moneris technical support at
1-866-319-7450.
Terminal beeps
constantly
• Cycle the power on the S80 by pressing
the power button.
• Call Moneris technical support at
1-866-319-7450.
31
Page 34

Notes
________________________________________________
________________________________________________
________________________________________________
________________________________________________
_______________________________________________
________________________________________________
________________________________________________
________________________________________________
________________________________________________
________________________________________________
________________________________________________
________________________________________________
________________________________________________
________________________________________________
________________________________________________
________________________________________________
_______________________________________________
________________________________________________
________________________________________________
________________________________________________
________________________________________________
________________________________________________
________________________________________________
________________________________________________
________________________________________________
________________________________________________
________________________________________________
32
________________________________________________
Page 35

________________________________________________
________________________________________________
________________________________________________
________________________________________________
_______________________________________________
________________________________________________
________________________________________________
________________________________________________
________________________________________________
________________________________________________
________________________________________________
________________________________________________
________________________________________________
________________________________________________
________________________________________________
________________________________________________
33
Page 36

Need help?
Please contact the Moneris Merchant Service Centre
toll-free at 1-866-319-7450 (open 24 hours a day, 7 days
a week).
If you use Merchant Direct, you can also contact us
online. Simply log in to Merchant Direct and use the
Message Centre to send a secure message directly
to the Moneris Merchant Service Centre.
For more information, visit the Moneris S80 product
webpage at moneris.com/S80.
Shop for point-of-sale supplies and paper online at
shopmoneris.com.
Important: You must use the exact power adaptor and
cables provided by Moneris Solutions to work with
the Moneris S80 terminal. Failure to do so may affect
the operability of or cause damage to the equipment.
Moneris and the Moneris Solutions design are registered trademarks of
®
Moneris Solutions Corporation. All other marks or registered trademarks are
the marks or registered trademarks of their respective owners.
All Rights Reserved. This manual shall not wholly or in part, in any
form or by any means, electronic, mechanical, including photocopying,
be reproduced or transmitted without the authorized consent of
Moneris Solutions.
For informational purposes only. Neither Moneris Solutions Corporation
(“Moneris”) nor any of its affiliates shall be liable for any direct, indirect,
incidental, consequential or punitive damages arising out of use of any
of the information contained in this guide. Neither Moneris or any of
its affiliates nor any of our or their respective licensors, licensees, service
providers or suppliers warrant or make any representation regarding the use
or the results of the use of the information, content and materials contained
in this guide in terms of their correctness, accuracy, reliability or otherwise.
Your credit and/or debit card processing is separately governed by the Terms
and Conditions of your Moneris VISA Merchant Agreement, your Moneris
MasterCard Merchant Agreement and/or your Moneris Debit Card and
Terminal Agreement, as applicable with Moneris. It is the merchant’s
responsibility to ensure that proper card processing procedures are
followed at all times. Please refer to your Merchant manuals and the
Terms and Conditions of your Merchant Agreement(s) for details.
The Moneris Merchant Operating Manual is available for free download
at moneris.com/en/Support/Downloads/MerchantManuals.aspx.
PAX-S80-UYT-E (01/12)
 Loading...