

Page 1

Setting up Your e355
for Android™
10/17
Page 2

For more information
and assistance:
Web: getpayd.com/paydpro/support
Email: info@getpayd.com
Toll-free: 1-855-423-PAYD (7293)
Record your Moneris® merchant ID here:
____________________________________
Page 3

1
Contents
Introduction ................................................................................................ 2
Before you get started .............................................................................. 3
Learning about e355 basics .................................................................... 4
Pairing a new e355 with your mobile device: Bluetooth ................ 5
Pairing a new e355 with your mobile device: Wi-Fi ....................... 14
Using the e355: best practices ............................................................. 29
Things to do before starting a PAYD Pro transaction 29
Staying within communication range 29
Communication status indicators 29
Powering on the e355 30
Conserving e355 battery power 30
Maintaining battery charge/powering off the e355 31
e355 keyboard: entering numbers, letters, and special characters 32
Merchant support .................................................................................... 33
Page 4

2 USING PAYD PRO®: SETTING UP YOUR E355 FOR ANDROID™
Introduction
PAYD Pro allows you to accept Interac® Debit and credit payments right on
your mobile device, just about anywhere your business takes you.
This guide provides instructions on how to pair a Moneris e355 PIN Pad with
an Android mobile device (referred to as "mobile device" or "device").
Note: For instructions on how to use PAYD Administration to manage your
PAYD Pro store and any other registered account users, refer to the Using
Moneris® PAYD Administration guide (visit getpayd.com/paydpro/support to
download a copy).
Page 5

3
Before you get started
1. Ensure that you have the following components:
A mobile device that supports Bluetooth® and/or Wi-Fi connectivity.
Note: If you want to pair the e355 via Wi-Fi, ensure that you have
access to a secure (non-public) Wi-Fi network using WPA2 encryption.
e355 and USB charging cable (provided in your welcome kit).
Note: You will be required to plug this cable into a powered USB
port (e.g., on a computer).
The e355's terminal ID (also known as the "PIN Pad ID"), which is an
eight-digit alpha-numeric code starting with "E1" (e.g., "E1012345")
that is printed on a label affixed to the underside of the e355.
Important! You will be required to refer to this terminal ID during
the setup procedures.
2. Ensure that you have your PAYD employee ID (username), store ID, and
password.
If you do not have the required components and IDs, please contact
us: call 1-855-423-PAYD (7293) or email info@getpayd.com.
3. Visit Google Play™, and download/install the latest version of the PAYD
App onto your mobile device.
4. Confirm that the PAYD App is closed so that it is not running in the
background on your mobile device.
5. Proceed to Learning about e355 basics on page 4.
Page 6

4 USING PAYD PRO®: SETTING UP YOUR E355 FOR ANDROID™
Learning about e355 basics
1. Familiarize yourself with the key elements of the e355:
Label
Description
1
Charge indicator light (right side of the e355)
2
Micro-USB port (right side of the e355)
Plug the USB charging cable here.
3
Cancel key (red)
Clear a displayed message, or cancel a transaction.
Power off the e355 (press and hold down
until the e355 beeps and starts to power off).
4
Correct key (yellow)
Clear data entered on the e355.
5
OK/Enter key (green)
Submit data or acknowledge a message on the e355.
Power on the e355 (press and hold down until the
e355 starts to power on).
6
Chip Reader (slot at the bottom of the e355)
Insert debit/credit chip cards into the slot.
7
Display Screen/Contactless Reader
To do contactless transactions, tap/wave debit/credit
cards over the screen.
8
Magnetic Stripe Reader (slot along the top of the e355)
Swipe debit/credit cards in the slot.
9
Contactless Reader Indicator (lights up during transactions)
2. Once you have familiarized yourself with the e355, follow the setup
procedures for instructions on how to pair the e355 with your mobile
device:
To pair the e355 via Bluetooth, proceed to page 5.
To pair the e355 via Wi-Fi, proceed to page 14.
1
2345678
9
Page 7

5
Pairing a new e355 with your
mobile device: Bluetooth
Follow the steps below to pair and initialize the e355 via Bluetooth.
Important! Before you begin this setup procedure, ensure that the PAYD App
is closed so that it is not running in the background on your mobile device.
1. Power on the e355
a. Plug the small end of the USB charging cable into the micro-USB port on
the e355 (see page 4).
Important! Use the USB charging cable provided with the e355.
Failure to do so may affect the operability of or cause damage to the
e355.
b. Plug the other end of the USB charging cable into a powered USB port
(e.g., on a computer).
Note: Leave the USB charging cable connected to the e355 for the
remainder of the e355 setup procedures.
c. Wait while the e355 powers on.
d. When the "LANGUAGE/LANGUE" screen
displays, proceed to step 2 (Ready your
mobile device for Bluetooth pairing) on
page 6.
SELECT / CHOISIR
LANGUAGE/LANGUE
1 - ENGLISH
2 - FRANCAIS
1
Page 8

6 USING PAYD PRO®: SETTING UP YOUR E355 FOR ANDROID™
2. Ready your mobile device for Bluetooth pairing
a. Power on the mobile device with which you want to pair the e355.
b. Ensure that Bluetooth is turned on, the mobile device is discoverable,
and its Bluetooth settings screen is displayed.
Note: If the mobile device has ever been paired with a different e355 or
another type of PIN Pad, ensure that the mobile device does not continue
to retain the older PIN Pad's terminal ID in its Bluetooth memory (i.e., if
necessary, un-pair the older PIN Pad from the mobile device so that it
forgets the terminal ID).
c. Place the mobile device beside the e355 with which you want to pair it.
d. Proceed to step 3 (Configure the e355 for Bluetooth communication)
below.
3. Configure the e355 for Bluetooth communication
a. On the "LANGUAGE/LANGUE" screen,
press the 1 key (ENGLISH).
SELECT / CHOISIR
LANGUAGE/LANGUE
1 - ENGLISH
2 - FRANCAIS
b. When the "TERMINAL SETUP" screen
displays, press the 1 key
(Communication).
TERMINAL SETUP
1 - Communication
2 - Information
3 - Reboot PED
4 - Factory Defaults
c. When the "COMMUNICATION" screen
displays, press the 1 key (PAYD Family).
SELECT
2-POSPAD
COMMUNICATION
1-PAYD Family
3-Moneris Cloud
2
3
Page 9

7
d. When the "ECR CONNECTION" screen
displays, press the 2 key (Bluetooth).
ECR CONNECTION
2 - Bluetooth
3 - Sled
1 - WiFi
4 - USB
e. When the "ECR OS" screen displays, press
the 2 key (Android).
SELECT
ECR OS
1 - iOS
2 - Android
f. When the "Bluetooth" screen displays,
proceed to step 4 (Pair the e355 with your
mobile device via Bluetooth) on page 8.
Bluetooth
Add de vice
Manag e devices
5
2
Page 10

8 USING PAYD PRO®: SETTING UP YOUR E355 FOR ANDROID™
4. Pair the e355 with your mobile device via Bluetooth
a. On the "Bluetooth" screen, press the
green key (Add device).
Bluetooth
Add de vice
Manag e devices
5
2
b. Wait while the e355 searches for devices
with which to pair.
Searching for devices
Add device
c. When the "Add device" screen displays,
scroll to your mobile device name, and
press the green key to select it.
Add device
< mob ile dev ice A >
< Your m obile d evice name >
< mob ile dev ice C >
5
2
d. When the "Pair device" screen displays,
press the 3 key (Yes).
Pair with <Your mobile device name >?
Pair device
YesNo
?
3
1
e. When the "Pairing" screen displays, wait
while the passkey/code is generated.
Try to pair with device
Pairing
f. When the "Please compare" screen
displays, note the six-digit passkey/code.
Please compare 000000
Please compare
YesNo
?
3
1
4
Note: To scroll up, press the 2 key; to scroll
down, press the 5 key. If your mobile device
name is not listed, press the yellow
key, and go back to step 4a.
Page 11

9
g. On the mobile device, wait for the "Bluetooth Pairing Request" popup to
display (this popup will also include a six-digit passkey/code).
h. Compare the passkey/code on the e355 and the passkey/code on the
mobile device. If the passkeys/codes are identical, go to the next step.
i. On the mobile device's "Bluetooth Pairing Request" popup, tap Pair
(OK or Connect).
j. On the e355's "Please compare" screen,
press the 3 key (Yes).
Please compare 000000
Please compare
YesNo
?
3
1
k. When the "Paired" screen displays, press
the green key (OK).
Pairing established
Paired
OK
l. When the "REBOOT TERMINAL" screen
displays, wait while the e355 reboots.
TERMINAL WILL BE
REBOOTED...
PLEASE WAIT
REBOOT TERMINAL
m. Proceed to step 5 (Confirm that your mobile device is successfully paired
with the e355) on page 10.
Page 12

10 USING PAYD PRO®: SETTING UP YOUR E355 FOR ANDROID™
5. Confirm that your mobile device is successfully paired with
the e355
a. When the "WELCOME/BONJOUR" screen
displays, go to the next step.
Note: The clock time ("hh:mm AM/PM") at
the top of the e355 screen will be
synchronized to the correct time when you
initialize the e355. To conserve power, the
e355's screen may dim, and/or display
"Moneris BE PAYMENT READY", or turn off
completely. If this happens, simply continue
the setup steps as instructed.
WELCOME / BONJOUR
hh:mm AM/PM AA%
b. On your mobile device's Bluetooth settings screen, locate the e355's
eight-digit terminal ID, which displays with the prefix "e355-" as in
"e355-E1012345".
Note: The e355's terminal ID (e.g., "E1012345") is also printed on a label
affixed to the underside of the e355.
c. On your mobile device's Bluetooth settings screen, confirm that the
terminal ID is shown as a "Connected" or "Paired" device.
d. Proceed to step 6 (Initialize the e355 via Bluetooth) on page 11.
5
Page 13

11
6. Initialize the e355 via Bluetooth
a. From your mobile device's home screen, tap the PAYD icon ( ) to
launch the PAYD App.
If the "Terms of Use" screen displays, read the terms, and tap the
I Agree button.
If at any time a PAYD App requests permission to access data from
your mobile device (e.g., location, microphone, or contacts data),
allow the PAYD App to access the data.
b. When the PAYD sign-in screen displays, sign into the PAYD App.
If at any time the "Pinpad has been successfully connected" popup
displays, tap the OK button to continue.
c. In the PAYD App, start on the "Settings" screen.
Note: If another screen is displayed, tap , and then tap Settings.
d. Tap Pinpad.
e. Tap the Bluetooth button if it is not
already selected.
f. When the "Terminal ID:" line item displays
the e355's terminal ID (e.g., "E102345"), go
to the next step.
Note: The terminal ID starts with the
prefix "E1" and is also printed on a label
affixed to the underside of the e355.
g. Tap the Initialize Pinpad button.
h. Wait while the PAYD App attempts to
communicate with the e355
(for a very brief period, the e355 displays
the "CONNECTED TO BT <Your mobile
device name >" screen).
CONNECTED TO
BT < Your mobile device name >
< Your mobile device name > AA%
6
Page 14

12 USING PAYD PRO®: SETTING UP YOUR E355 FOR ANDROID™
i. When the e355 displays the "PLEASE WAIT"
screen, wait while the e355 initializes.
Note: During this period, the PAYD App
displays the "Initializing Pinpad. This may
take a few minutes" screen.
PLEASE WAIT
j. When the PAYD App displays the "Initialization was successful. Pinpad
is ready to use" popup, tap the OK button to continue.
k. When the e355 displays the
"WELCOME/BONJOUR" screen, go to the
next step.
Note: To conserve power, the e355's screen
may dim, and/or display "Moneris BE
PAYMENT READY", or turn off completely. If
this happens, simply continue the setup
steps as instructed.
WELCOME / BONJOUR
hh:mm AM/PM AA%
l. In the PAYD App, tap to return to the main menu, and then
tap Sign Out.
m. Proceed to step 7 (Charge the e355's battery to full capacity) on page 13.
Page 15

13
7. Charge the e355's battery to full capacity
a. Leave the USB charging cable plugged into the e355 and the external
power source until the e355's battery has reached optimum charge: at
least 90%. (If the USB charging cable is not connected to the e355,
connect it now.)
Note: It may take up to 3 hours to reach optimum charge depending
on the battery's current charge status. The orange light above the microUSB port will blink continuously while the battery is charging.
Note: The battery charge indicator displays on the e355's
"WELCOME/BONJOUR" screen. If the e355 screen backlight is dim, and/or
"Moneris BE PAYMENT READY" displays, or the backlight turns off
completely during charging, simply press the green key to return
to the "WELCOME/BONJOUR" screen.
Important! Use the USB charging cable provided to work with the
e355. Failure to do so may affect the operability of or cause damage to
the e355.
b. Once the battery has reached optimum
charge (at least 90%), you may disconnect
the USB charging cable.
WELCOME / BONJOUR
hh:mm AM/PM 90%
c. The e355 is now ready to process PAYD Pro transactions.
For useful tips and recommendations on how to maintain your e355,
proceed to Using the e355: best practices on pages 29 to 31.
7
Page 16

14 USING PAYD PRO®: SETTING UP YOUR E355 FOR ANDROID™
Pairing a new e355 with your
mobile device: Wi-Fi
Follow the steps below to pair and initialize the e355 via Wi-Fi.
Important! Before you begin this setup procedure, ensure that the PAYD App
is closed so that it is not running in the background on your mobile device.
1. Power on the new e355
a. Plug the small end of the USB charging cable into the micro-USB port on
the new e355 (see page 4).
Important! Use the USB charging cable provided with the e355.
Failure to do so may affect the operability of or cause damage to the
e355.
b. Plug the other end of the USB charging cable into a powered USB port
(e.g., on a computer).
Note: Leave the USB charging cable connected to the e355 for the
remainder of the e355 setup procedures.
c. Wait while the e355 powers on.
d. When the "LANGUAGE/LANGUE" screen
displays, proceed to step 2 (Ready your
mobile device for Wi-Fi pairing) on page 15.
SELECT / CHOISIR
LANGUAGE/LANGUE
1 - ENGLISH
2 - FRANCAIS
1
Page 17

15
2. Ready your mobile device for Wi-Fi pairing
a. Power on the mobile device with which you want to pair the e355.
b. Determine which is the network that you want to use to pair the e355
with the mobile device:
If you want the mobile device to connect an external Wi-Fi network,
configure the mobile device to connect to the network.
Note: In the upcoming steps, you will be instructed to configure the
e355 to connect to the same Wi-Fi network as the mobile device.
Important! Do not attempt to configure the e355 to connect to a
public Wi-Fi network.
If you want the e355 to connect to the mobile device's personal
Wi-Fi hotspot, generate the hotspot from the mobile device now.
c. Place the mobile device beside the e355 with which you want to pair it.
d. Proceed to step 3 (Configure the e355 for Wi-Fi communication) below.
3. Configure the e355 for Wi-Fi communication
a. On the "LANGUAGE/LANGUE" screen,
press the 1 key (ENGLISH).
SELECT / CHOISIR
LANGUAGE/LANGUE
1 - ENGLISH
2 - FRANCAIS
b. When the "TERMINAL SETUP" screen
displays, press the 1 key
(Communication).
TERMINAL SETUP
1 - Communication
2 - Information
3 - Reboot PED
4 - Factory Defaults
2
3
Page 18

16 USING PAYD PRO®: SETTING UP YOUR E355 FOR ANDROID™
c. When the "COMMUNICATION" screen
displays, press the 1 key (PAYD Family).
SELECT
2-POSPAD
COMMUNICATION
1-PAYD Family
3-Moneris Cloud
d. When the "ECR CONNECTION" screen
displays, press the 1 key (WiFi).
ECR CONNECTION
2 - Bluetooth
3 - Sled
1 - WiFi
4 - USB
e. When the "WiFi" screen displays, create a
profile for the Wi-Fi network to which
you want the e355 to connect:
To manually enter the Wi-Fi network
name (SSID), proceed to step 4
(Create a Wi-Fi network profile on the
e355: manually entering the SSID) on
page 17.
To scan for the Wi-Fi network name
(SSID), proceed to step 5 (Create a Wi-
Fi network profile on the e355:
scanning for the SSID) on page 19.
Note: Use the scan option only if
you are certain that the desired Wi-Fi
network is broadcasting its SSID.
WiFi
5
2
WiFi Sc anNew
31
Page 19

17
4. Create a Wi-Fi network profile on the e355: manually
entering the SSID
a. On the "WiFi" screen, press the 1 key
(New).
Note: If you have already configured a
Wi-Fi network profile, it will be listed on
this screen.
WiFi
5
2
WiFi Sc anNew
31
b. When the "View/Edit" screen displays,
press the green key (SSID).
View/Edit
5
2
Save
3
SSID
Wi-Fi Pas sword
c. When the "SSID" screen displays, enter
the name/SSID of the Wi-Fi network to
which you want the e355 to connect, and
press the green key (OK).
Note: This parameter is case sensitive.
To enter small/capital letters and special
symbols, see page 32.
SSID
< SSID
OK
+
No value entered
d. When the "View/Edit" screen displays,
press the 5 key to scroll to Wi-Fi
Password, and then press the green
key.
View/Edit
5
2
Save
SSID
< Your Wi-F i network SS ID >
Wi-Fi Pas sword
5
2
3
e. When the "WiFi Password" screen
displays, enter the password of the Wi-Fi
network to which you want the e355 to
connect, and press the green key
(OK).
Note: This parameter is case sensitive.
To enter small/capital letters and special
symbols, see page 32.
Enter Password
< Wi-Fi Password
OK
+
No value entered
4
Page 20

18 USING PAYD PRO®: SETTING UP YOUR E355 FOR ANDROID™
f. When the "View/Edit" screen displays,
press the 3 key (Save).
View/Edit
5
2
Save
SSID
< Your Wi-F i network SS ID >
Wi-Fi Pas sword
5
2
3
g. When the "Configure Interface" screen
displays, wait while the e355 applies the
network settings.
In progress
Configure Interface
h. When the "Accepted" screen displays,
press the green key (OK).
Press OK to continue
Accepted
OK
i. Wait while the e355 establishes its
connection to the Wi-Fi network (during
this period, the "WELCOME/BONJOUR
NOT CONNECTED" screen displays).
WELCOME / BONJOUR
NOT CONNECTED
hh:mm AM/PM AA%
j. When the "CONNECTED TO Wi-Fi < Your
Wi-Fi network SSID >" screen displays, go
to the next step.
Note: Your Wi-Fi network SSID and the
e355's IP address (e.g., "987.654.3.21")
display on the screen.
CONNECTED TO
Wi-Fi < Your Wi-Fi network SSID >
987.654.3.21
< Your Wi-Fi network SSID > AA%
k. When the "WELCOME/BONJOUR" screen
displays, proceed to step 6 (Confirm that
the e355 is connected to the Wi-Fi
network) on page 21.
WELCOME / BONJOUR
< Your Wi-Fi network SSID > AA%
Page 21

19
5. Create a Wi-Fi network profile on the e355: scanning for the
SSID
a. On the "WiFi" screen, press the 3 key
(WiFi Scan).
WiFi
5
2
WiFi Sc anNew
31
b. When the "WiFi Scan" screen displays,
wait while the e355 scans for available
Wi-Fi networks.
Scanning for WIFI networks
WiFi Scan
c. When the list of available Wi-Fi networks
displays, scroll to the Wi-Fi network to
which you want the e355 to connect, and
press the green key to select it.
Note: To scroll down, press the 5 key; to
scroll up, press the 2 key. If your
Wi-Fi network is not listed, press the
yellow key, and go back to step 5a
of this procedure.
WiFi Scan
5
2
[AA%] < Wi-Fi netw ork SSID #1 >
[AA%] < Wi-Fi netw ork SSID #2 >
[100% ] < Your Wi-F i netw ork SS ID >
d. When the next screen displays your Wi-
Fi network profile settings, press the 3
key (Add).
SSID
< Your Wi-Fi Network SSID >
Protocol
WPA2
Key Management
AAAAAA
Pairwise cipher
AAAAAA
< Your Wi-Fi network SSID >
5
2
Add
3
e. When the "Wi-Fi Password" screen
displays, enter the password for your WiFi network, and press the green
key (OK).
Note: This parameter is case sensitive.
To enter small/capital letters and special
symbols, see page 32.
Enter Password
< Wi-Fi Password
OK
+
No value entered
5
Page 22

20 USING PAYD PRO®: SETTING UP YOUR E355 FOR ANDROID™
f. When the "Configure Interface" screen
displays, wait while the e355 applies the
network settings.
Note: This process may take up to two
minutes.
In progress
Configure Interface
g. When the "Accepted" screen displays,
press the green key (OK).
If the "Internal error" screen displays,
press the green key (OK), and
go back to step 5a of this procedure.
If the "Failed: Wifi already present"
screen displays, press the green
key (OK) to clear the error
screen, and then press the red key
twice.
Press OK to continue
Accepted
OK
h. Wait while the e355 establishes its
connection to the Wi-Fi network (during
this period, the "WELCOME/BONJOUR
NOT CONNECTED" screen displays).
WELCOME / BONJOUR
NOT CONNECTED
hh:mm AM/PM AA%
i. When the "CONNECTED TO Wi-Fi < Your
Wi-Fi network SSID >" screen displays, go
to the next step.
Note: Your Wi-Fi network SSID and the
e355's IP address (e.g., "987.654.3.21")
display on the screen.
CONNECTED TO
Wi-Fi < Your Wi-Fi network SSID >
987.654.3.21
< Your Wi-Fi network SSID > AA%
j. When the "WELCOME/BONJOUR" screen
displays, proceed to step 6 (Confirm that
the e355 is connected to the Wi-Fi
network) on page 21.
WELCOME / BONJOUR
< Your Wi-Fi network SSID > AA%
Page 23

21
6. Confirm that the e355 is connected to the Wi-Fi network
a. On the "WELCOME/BONJOUR" screen,
confirm that the Wi-Fi icon ( ) is
displayed in the upper left corner on the
screen and your Wi-Fi network SSID is
displayed at the top centre on the screen.
The network icon ( ) may display
periodically beside the Wi-Fi icon.
Note: As long as the e355 can connect to
the Wi-Fi network, the network SSID will
display at five-second intervals at the top
centre of the e355 screen (otherwise, the
e355's internal clock time "hh:mm AM/PM"
will display). The clock time will be
synchronized to the correct time when you
initialize the e355.
WELCOME / BONJOUR
< Your Wi-Fi network SSID > AA%
b. Proceed to step 7 (Pair the e355 with your mobile device via Wi-Fi) on
page 22.
6
Page 24

22 USING PAYD PRO®: SETTING UP YOUR E355 FOR ANDROID™
7. Pair the e355 with your mobile device via Wi-Fi
a. From your mobile device's home screen, tap the PAYD icon ( ) to
launch the PAYD App.
If the "Terms of Use" screen displays, read the terms, and tap the
I Agree button.
If at any time the PAYD App requests permission to access data
from your mobile device (e.g., location, microphone, or contacts
data), allow the PAYD App to access the data.
b. When the PAYD sign-in screen displays, sign into the PAYD App.
If at any time the "Pinpad has been successfully connected" popup
displays, tap the OK button to continue.
c. In the PAYD App, start on the "Settings" screen.
Note: If another screen is displayed, tap , and then tap Settings.
d. Tap Pinpad.
e. Tap the WIFI button.
f. Register the e355's IP address in the PAYD
App:
To manually enter the e355's IP address,
proceed to step 8 (Manually enter the
e355's IP Address) on page 23.
To make the PAYD App scan for the e355's
IP address, proceed to step 9 (Scan for the
e355's IP Address) on page 25.
7
Page 25

23
8. Manually enter the e355's IP Address
a. In the PAYD App, tap the Manual button.
b. On the e355's "WELCOME/BONJOUR"
screen, simultaneously press both
the 4 key and the yellow key.
WELCOME / BONJOUR
< Your Wi-Fi network SSID > AA%
c. When the e355 displays the "WiFi"
screen, locate the "IP Address" value.
Status
Up
SSID
< You r Wi-Fi Network SSID >
IP Address
987.654.3.21
Netmask
123.456.789.123
WiFi
5
2
OK
3
d. In the PAYD App's Pinpad IP field, enter
the e355's IP address.
e. On the e355's "WiFi" screen, press
the 3 key (OK).
Status
Up
SSID
< You r Wi-Fi Network SSID >
IP Address
987.654.3.21
Netmask
123.456.789.123
WiFi
5
2
OK
3
f. When the e355 displays the
"WELCOME/BONJOUR" screen, go to the
next step.
WELCOME / BONJOUR
< Your Wi-Fi network SSID > AA%
8
Page 26

24 USING PAYD PRO®: SETTING UP YOUR E355 FOR ANDROID™
g. In the PAYD App, tap the Save and
Connect button.
h. In the PAYD App, wait for a response:
If the "Terminal ID:" line item
displays the e355's terminal ID,
(e.g., "E1012345"), proceed to
step 10 (Initialize the e355 via Wi-Fi)
on page 27.
Note: If the "Pinpad has been
successfully connected" popup
displays, tap the OK button to
continue.
If the "Terminal ID:" line item does
not display, go to step 8i.
i. Tap to return to the main menu, and then tap Sign Out.
j. Close the PAYD App so that it is not running in the background on the
mobile device.
k. From the mobile device's home screen, tap the PAYD icon ( ) to
launch the PAYD App.
l. When the PAYD sign-in screen displays, sign into the PAYD App.
If at any time the "Pinpad has been successfully connected" popup
displays, tap the OK button to continue.
m. In the PAYD App, start on the "Settings" screen.
Note: If another screen is displayed, tap , and then tap Settings.
n. Tap Pinpad.
o. Go back to step 8h of this procedure.
Page 27

25
9. Scan for the e355's IP Address
a. In the PAYD App, tap the Scan button.
b. When the PAYD App displays the
"Scanning. Please wait" screen, wait
while the PAYD App attempts to detect
the e355's IP address on the Wi-Fi
network (this process may take up to a
minute).
c. In the PAYD App, wait for a response:
If the "Terminal ID:" line item
displays the e355's terminal ID (e.g.,
"E1012345"), proceed to step 10
(Initialize the e355 via Wi-Fi) on
page 27.
Note: If the "Pinpad has been
successfully connected" popup
displays, tap the OK button to
continue.
If the "Terminal ID" line item does
not display, go to step 9d.
Note: If the "No pinpads were
found..." popup displays, tap the OK
button to continue.
d. Tap to return to the main menu, and then tap Sign Out.
e. Close the PAYD App so that is not running in the background on the
mobile device.
9
Page 28

26 USING PAYD PRO®: SETTING UP YOUR E355 FOR ANDROID™
f. From the mobile device's home screen, tap the PAYD icon ( ) to
launch the PAYD App.
If at any time the "Pinpad has been successfully connected" popup
displays, tap the OK button to continue.
g. When the PAYD sign-in screen displays, sign into the PAYD App.
h. In the PAYD App, start on the "Settings" screen.
Note: If another screen is displayed, tap , and then tap Settings.
i. Tap Pinpad.
j. Go back to step 9c of this procedure.
Page 29

27
10. Initialize the e355 via Wi-Fi
a. In the PAYD App, tap the Initialize Pinpad
button.
b. When the e355 displays the "PLEASE WAIT"
screen, wait while the e355 initializes.
Note: During this process, the PAYD App
displays the "Initializing Pinpad. This may
take a few minutes" screen.
PLEASE WAIT
c. When the PAYD App displays the "Initialization was successful. Pinpad
is ready to use" popup, tap the OK button to continue.
d. When the e355 displays the
"WELCOME/BONJOUR" screen, go to the
next step.
WELCOME / BONJOUR
< Your Wi-Fi network SSID > AA%
e. In the PAYD App, tap to return to the main menu, and then
tap Sign Out.
f. Proceed to step 11 (Charge the e355's battery to full capacity) on
page 28.
10
Page 30
28 USING PAYD PRO®: SETTING UP YOUR E355 FOR ANDROID™
11. Charge the e355's battery to full capacity
a. Leave the USB charging cable plugged into the e355 and the external
power source until the e355's battery has reached optimum charge: at
least 90%. (If the USB charging cable is not connected to the e355,
connect it now.)
Note: It may take up to 3 hours to reach optimum charge depending
on the battery's current charge status. The orange light above the microUSB port will blink continuously while the battery is charging.
Note: The battery charge indicator displays on the e355's
"WELCOME/BONJOUR" screen. If the e355 screen backlight is dim and/or
"Moneris BE PAYMENT READY" displays during charging, simply press the
green key to return to the "WELCOME/BONJOUR" screen.
Important! Use the USB charging cable provided to work with the
e355. Failure to do so may affect the operability of or cause damage to
the e355.
b. Once the battery has reached optimum
charge (at least 90%), you may disconnect
the USB charging cable.
WELCOME / BONJOUR
< Your Wi-Fi network SSID > 90%
c. The e355 is now ready to process PAYD Pro transactions.
For useful tips and recommendations on how to maintain your e355,
proceed to Using the e355: best practices on pages 29 to 31.
11
Page 31

29
Using the e355: best practices
Moneris recommends that you follow these general guidelines to use and
maintain your e355.
Things to do before starting a PAYD Pro
transaction
1. Ensure that your mobile device is powered on and the PAYD App is closed
(i.e., not running in the background on your mobile device).
2. Press the green key to ensure that the e355 is powered on and
ready (see page 30).
3. Launch the PAYD App on your mobile device, and sign into the PAYD App.
4. Check the e355 communication status indicators to ensure that the e355
is connected to your mobile device and/or the Wi-Fi network (see Staying
within communication range below).
5. Initiate your transaction.
Staying within communication range
Keep the e355 and your mobile device in close proximity to each other.
Do not attempt to perform PAYD Pro transactions near strong sources of
electromagnetic interference.
Communication status indicators
The indicators shown below should display on your e355's "WELCOME/
BONJOUR" screen when you are ready to perform transactions.
Communication type
e355 screen status indicators
Bluetooth
Wi-Fi
Page 32

30 USING PAYD PRO®: SETTING UP YOUR E355 FOR ANDROID™
Powering on the e355
Before you perform a PAYD Pro transaction, confirm that the e355 is powered
on by pressing the green key and waiting for a response:
e355 response
e355 status
Beeps and displays the
"WELCOME/BONJOUR"
screen.
The e355 is powered on and ready to do
transactions.
Note: After several minutes of inactivity,
the e355 will attempt to conserve its power
(see Conserving e355 battery power below).
Screen remains dark (the
backlight is turned off
completely).
The e355 is powered off. Press and hold
down the green key until the e355
starts to power on.
Conserving e355 battery power
If the e355 is powered on but not being used to perform transactions, it will
go into an idle state to conserve power (the e355 screen backlight dims
and/or "Moneris BE PAYMENT READY" displays).
If you do not initiate a transaction from the PAYD App or press the green
key /the red key on the e355 keypad, and:
Bluetooth is enabled:
The e355 will go into a sleep/stand-by state (the screen backlight will
turn off completely) for up to several hours1, and then the e355 will
shutdown/power off completely.
Wi-Fi is enabled:
The e355 will remain in its idle state for as long as the battery is
sufficiently charged. 1
1
If the e355 loses its connection with the mobile device for up to 15 minutes (e.g., the
e355 is outside its Bluetooth communication range/cannot connect to the Wi-Fi
network) , the e355 will shut down/power off completely.
Page 33

31
Maintaining battery charge/powering off the e355
When you are not using the e355 (e.g., at night), connect it to a power
source via the USB charging cable, and leave the e355 to recharge to full
capacity. OR
Power off the e355 by pressing and holding down the red key until
the e355 beeps and starts to shutdown/power off (ensure that the USB
charging cable is not connected to a power source).
Charge indicator light
The charge indicator light is located on right side of e355 (see page 4).
If the e355 is powered off or it is powered on but goes into a sleep/standby state to conserve power (see page 30), the charge indicator light will
turn off.
light Colour
Description
Orange
Battery is charging (blinking light).
Green
Battery charge is moderate to high.
Yellow
Battery charge is moderate to low.
Red
Battery charge is critically low. Connect e355 to power source.
Page 34

32 USING PAYD PRO®: SETTING UP YOUR E355 FOR ANDROID™
e355 keyboard: entering numbers, letters,
and special characters
Press the e355 keys to enter numbers, letters, and special symbols.
1. To enter the desired value in a data field, press the key that corresponds
to the value that you want to enter (press the key repeatedly as necessary
until the desired value is displayed in the field. Refer to the table below
for the full list of corresponding values.)
2. Once a value is successfully entered, proceed to enter the next value.
Note: The SSID (network name) and password parameters are case
sensitive (i.e., if your network SSID and password contain capital and small
letters, you must enter capital and small letters in the data fields).
To delete/correct the last entered value, press the yellow key.
Key
Enters this value
1
1, Q, Z, <period>, q, z
2
2, A, B, C, a, b, c
3
3, D, E, F, d, e, f
4
4, G, H, I, g, h, i
5
5, J, K, L, j, k, l
6
6, M, N, O, m, n, o
7
7, P, R, S, p, r, s
8
8, T, U, V, t, u, v
9
9, W, X, Y
0
0, *, #, <period>, -, <space>, +, <comma>, ', ", !, :, ;, @, =, &, /, \, %,
$, (, ), ^, _
Page 35

33
Merchant support
If you need assistance with your payment processing solution, we’re here to
help, 24/7.
We’re only one click away.
Visit getpayd.com/paydpro/support to:
Consult the FAQs on how to set up and use PAYD Pro.
Download PAYD Pro guides to assist with getting started,
configuration, and usage instructions.
Visit shop.moneris.com to purchase point-of-sale supplies and
accessories.
Visit moneris.com/insights for business and payment news & trends,
customer success stories, and quarterly reports & insights.
Can’t find what you are looking for?
Email info@getpayd.com or call Moneris Customer Care toll-free
(available 24/7) at 1-855-423-PAYD (7293). We’ll be happy to help.
You can also send us a secure message 24/7 by logging in to Merchant
Direct® at moneris.com/mymerchantdirect.
Page 36

Important! You must use the USB charging cable provided with the e355.
Failure to do so may affect the operability of or cause damage to the e355.
®MONERIS, PAYD, PAYD PRO, MERCHANT DIRECT, MONERIS PAYD and MONERIS BE PAYMENT
READY & Design are registered trade-marks of Moneris Solutions Corporation. INTERAC is a
registered trade-mark of Interac Inc. BLUETOOTH is a registered trade-mark of Bluetooth SIG, Inc.
™ANDROID and GOOGLE PLAY are trade-marks of Google Inc. All other marks or registered trademarks are the property of their respective owners.
© 2017 Moneris Solutions Corporation, 3300 Bloor Street West, Toronto, Ontario, M8X 2X2.
All Rights Reserved. This manual shall not wholly or in part, in any form or by any means,
electronic, mechanical, including photocopying, be reproduced or transmitted without the
authorized consent of Moneris Solutions Corporation ("Moneris"). This guide is for informational
purposes only. Neither Moneris nor any of its affiliates shall be liable for any direct, indirect,
incidental, consequential or punitive damages arising out of use of any of the information
contained in this guide. Neither Moneris or any of its affiliates nor any of our or their respective
licensors, licensees, service providers or suppliers warrant or make any representation regarding
the use or the results of the use of the information, content and materials contained in this
guide in terms of their correctness, accuracy, reliability or otherwise. Your credit and/or debit
card processing is governed by the terms and conditions of the Moneris PAYD Merchant
Agreement (the "Merchant Agreement") with Moneris. It is the merchant’s responsibility to
ensure that proper card processing procedures are followed at all times. Please refer to your
Merchant manuals and the Terms and Conditions of your Merchant Agreement(s) for details.
The Moneris Merchant Operating Manual is available at getpayd.com/paydpro/support.
PAYDPRO_e355_And_SYT_E (10/17)
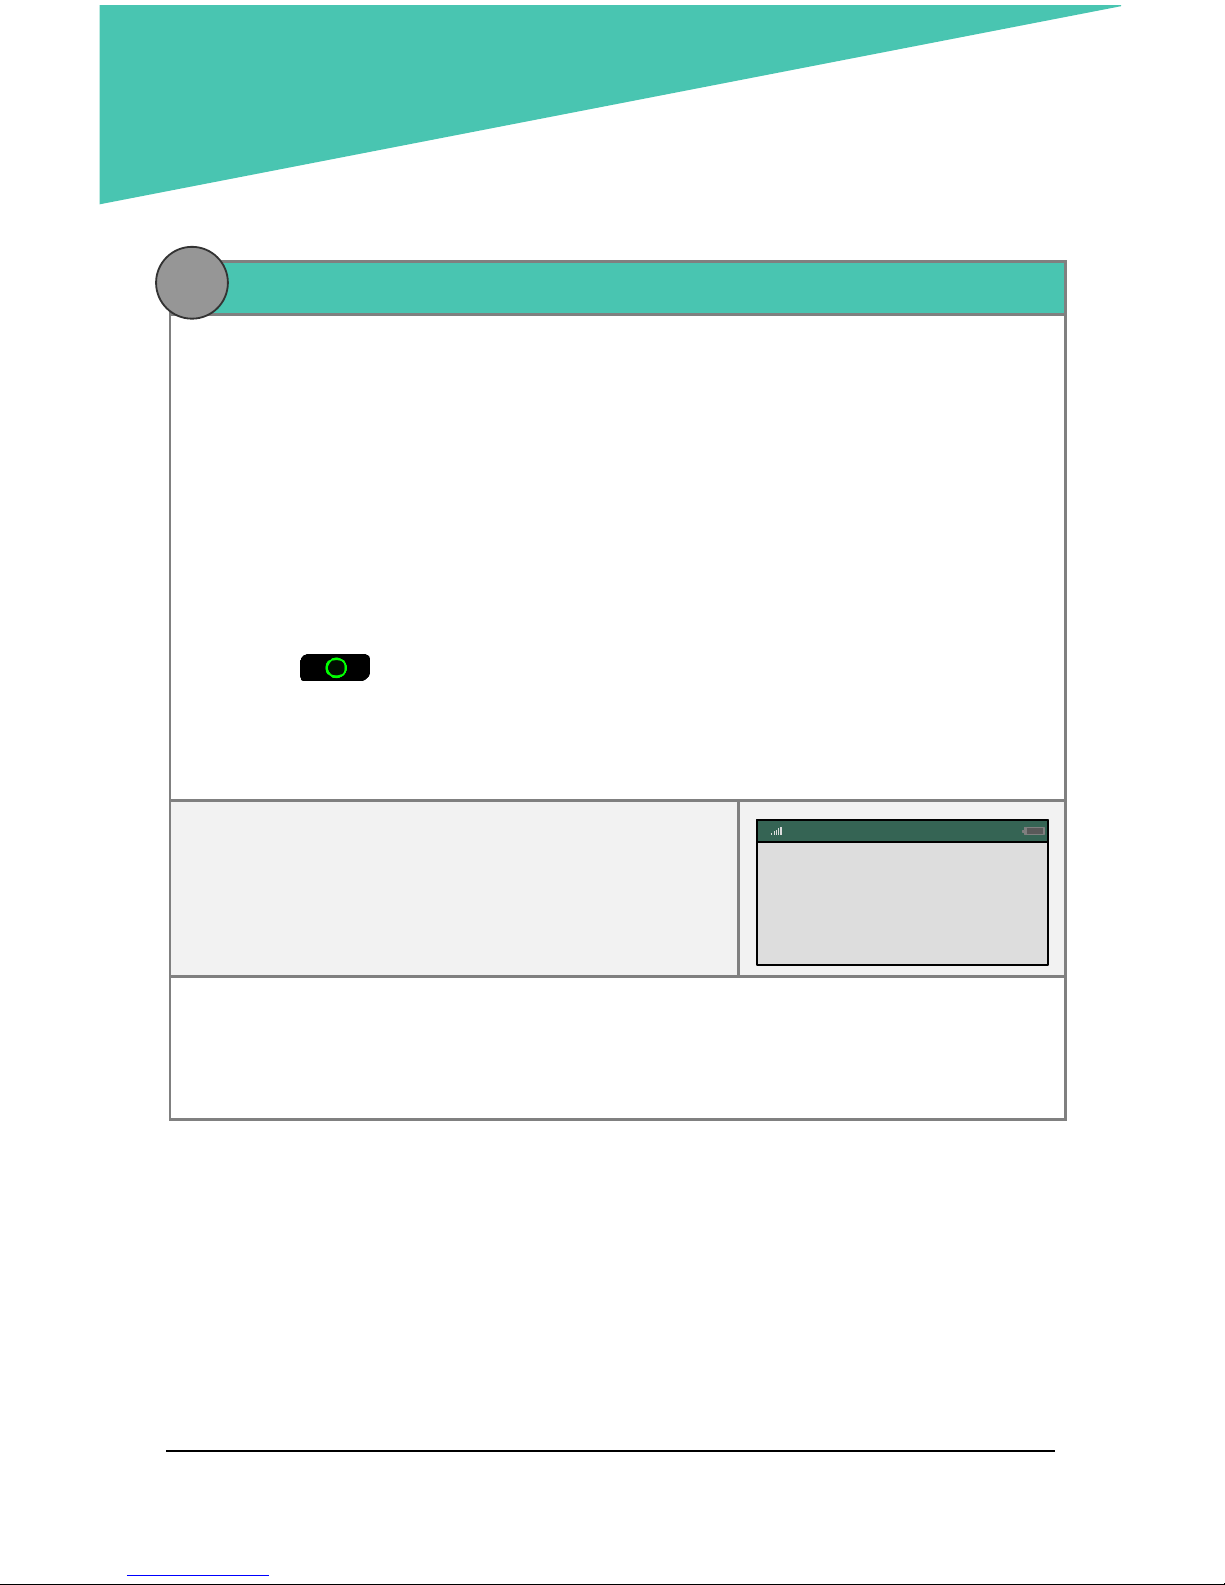
 Loading...