

Page 1
Loyalty Programs
Using Your Terminal
for Loyalty and
Tracking Programs
For Moneris
® Mobile 8300
Page 2

Need help?
Call 1-866-319-7450
24 hours a day, 7 days a week
Record your Moneris merchant number here:
__________________________________________
Contents
Loyalty programs ..................................................................1
Loyalty card entry options .................................................1
Administrative transactions .............................................2
Basic Loyalty transactions ..................................................5
Enhanced Loyalty transactions.........................................8
Pro Loyalty transactions .................................................. 12
Tracking transactions ...................................................... 17
Receipts ................................................................................ 21
Reporting ............................................................................. 23
End-of-day process ............................................................ 25
Troubleshooting ................................................................ 26
Page 3
1
Loyalty programs
There are four types of loyalty programs:
Basic Loyalty
,
Enhanced Loyalty, Pro Loyalty
and
Tracking
. Loyalty
program functions and user instructions will vary
depending on the loyalty program package to which you
are subscribed.
In this guide, instructions that are specific to a package
will be outlined with the appropriate headings (e.g. Basic
Loyalty transactions). All other instructions will be
common across all loyalty program types.
In general, this is how your
loyalty
program works:
• Every time a cardholder makes a purchase, you
swipe the loyalty card so he or she can earn points
towards rewards.
• When a cardholder reaches a specified number of
points, he or she can redeem for a reward.
• To learn how to enrol cardholders, replace lost or
damaged cards, promote your loyalty program
and more, please refer to the Loyalty Program
Operating Manual.
In general, this is how a
Tracking
program works:
• Every time a cardholder makes a purchase, you
swipe the Tracking loyalty card so the cardholder
can earn points towards rewards.
• The transaction data is passed to the Loyalty
Program Provider who then awards points to the
customer’s account.
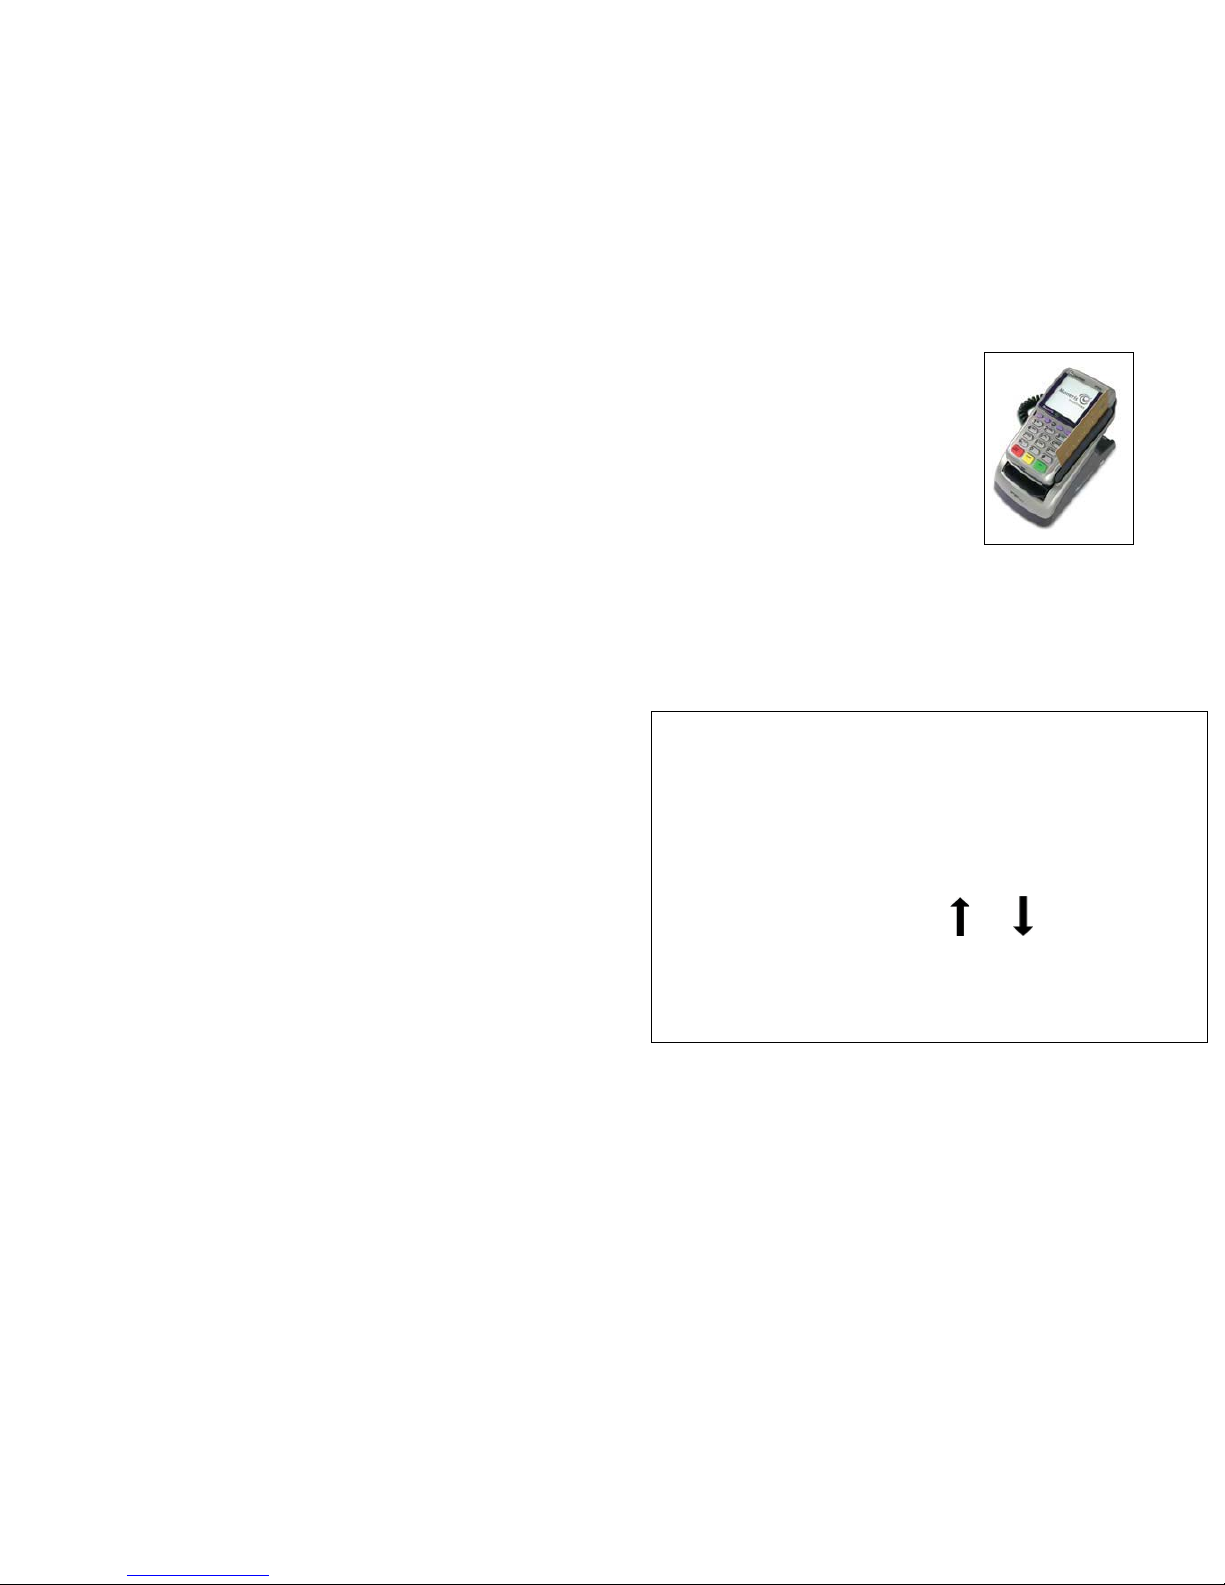
Loyalty card entry options
There are two ways to perform transactions with a loyalty
card using the terminal:
Swipe
1. Wait for the “Swipe or Enter
Card:” prompt to appear on
the terminal display.
2.
Swipe the card
on the
terminal’s magnetic stripe
reader.
Manual entry
If the magnetic stripe reader fails to read the loyalty card,
you may manually enter the card number.
1. Wait for the “Swipe or Enter Card:” prompt to appear
on the terminal display.
2. Key in the
card number
and press the green OK key.
Helpful hints
• To access reports, press the first purple key on the
right.
• To reprint receipts, press the second purple key from
the right.
• To scroll through menus, use the
Arrow
key (first
purple key from the left). Press the yellow
CORR
key to
toggle between scrolling up and down.
• To select a menu item, press the corresponding
function key (F1, F2, etc.).
• To finish entering information and move on to the
next step, press the green OK key.
Page 4

2
Administrative transactions
Initializing the terminal
You must initialize your terminal when you first configure
it for the loyalty program, and when prompted by the
terminal after a program change request has been
processed (e.g. activation or deactivation of Bonus Code
functionality, if applicable to your program).
1. On the applications menu, select
GIFT & LOYALTY.
2. On the Gift & Loyalty transactions menu, scroll down
and select
Setup
.
If the “Password:” prompt appears, key in the
manager password
and press the green OK key.
3. On the Setup menu, scroll down and select
Initialization
.
If there are transactions in the open batch, the “Batch
Not Empty Close Batch?” prompt appears.
• To close the batch and delete all transactions from
the terminal memory, select
Yes
.
OR
• To leave the batch open and keep all transactions
in the terminal memory, select
No
. (This is
recommended.)
The “Ernex Term ID:” prompt appears.
4. Choose one of the following:
• To accept the displayed ID, press the green
OK
key.
OR
• To change the
Ernex Terminal ID:
a. Press the red
CANC ANNUL
key.
b. On the Setup menu, select
Merchant
.
c. Select
Next
until “Ernex Term ID” appears.
d. Select
Edit
and key in the new terminal ID.
e. Press the green
OK
key to accept your input.
f. Select
Exit.
g. Select
OK
key to save your changes.
The terminal returns to the Setup menu.
h. Return to step 3.
The terminal communicates with the Moneris host
and “000 Approved” appears after the initialization is
completed successfully.
5. Press the green
OK
key to return to the Setup menu.
6. Press the red
CANC ANNUL
key to return to the Gift &
Loyalty transactions menu
.
7. Press the * (
asterisk
) key to return to the applications
menu.
Activating a card
Basic Loyalty/Enhanced Loyalty:
Loyalty cards are activated before they are shipped to you,
so no activation process is required.
Tracking Loyalty:
Tracking loyalty cards are activated by the Loyalty
Program Provider, so no activation process is required.
Pro Loyalty:
Depending on how your program is set up, the loyalty
cards you have may require activation on your terminal,
or they may have been activated before they were shipped
to you.
Note:
Moneris recommends that you store any
pre-
activated
loyalty cards in a secure location, and that you
provide a card to a customer
only after
he or she has
provided basic contact information and written consent to
participate in the program.
Following a card activation, points may be deducted
periodically from the card due to user inactivity (your
program must be configured to allow for this). To
determine your program configuration: ask your manager,
visit the Merchant Web Portal if available to you, or call the
Moneris Merchant Service Centre.
If your cards are not pre-activated, follow the steps below
to activate them.
1. On the applications menu, select
GIFT & LOYALTY.
2. On the Gift & Loyalty transactions menu, select
Activate/Load
.
If the “Password:” prompt appears, key in the
manager password
and press the green OK key.
The “Swipe or Enter Card:” prompt appears.
3. Swipe the loyalty card or key in the
card number
and
press the green
OK
key.
If “Clerk ID:” appears, key in the
Clerk ID
and press the
green
OK
key.
If a prompt appears for additional data (e.g. “Bonus
Code” or “Reference Code”):
Page 5

3
• Key in the
appropriate information
and press the
green
OK
key
.
OR
• To bypass the prompt, just press the green
OK
key.
“000 Approved” appears.
4. Press the green
OK
key
.
The “Activate/Load another card?” prompt appears.
• To activate another loyalty card, select
Yes
. Repeat
steps 3 and 4.
OR
• To proceed without activating other cards, select
No
. Proceed to step 5.
5. If the “Balance Due:” prompt appears, press the green
OK
key
.
Note:
The Balance Due prompt will appear if you are
charging a fee for activation of loyalty cards.
If you are NOT charging a fee for activation of loyalty
cards, go to step 7.
6. If you are charging an activation fee, follow these
steps:
a. When the “Balance Due:” prompt appears, press
the green
OK
key.
The “Select Payment For Balance Due” prompt
appears.
b. Select the method that the customer wishes to
use to pay:
• To use a
debit card
or
credit card
, press F1
(
DbCr
).
• To pay with a
gift card
, press F2 (
Gift
).
• To pay with
cash
, press F3 (
Cash
).
The terminal prints the Customer copy of the
receipt.
c. Tear the receipt and press the green
OK
key to
print the Merchant copy of the receipt.
d. If you selected:
•
DbCr
, the terminal automatically begins a
debit or credit Purchase transaction at the
“Amount: $0.00” prompt. Refer to the
Merchant receipt for the amount to charge.
•
Gift
, the terminal automatically begins a gift
card Purchase transaction at the “Total
Amount: $0.00” prompt. Refer to the
Merchant receipt for the amount to charge.
Refer to the Gift Card Program Using Your
Terminal guide for instructions on processing
a gift card Purchase. Visit
moneris.com/guides to download a free copy
of the guide.
•
Cash
, the Activation transaction is completed.
After the transaction, the terminal returns to the
Gift & Loyalty transactions menu.
7. If you are
not
charging for activation:
The terminal prints the Customer copy of the receipt.
Tear the receipt and press the green OK key to print
the Merchant copy of the receipt and return to the
Gift & Loyalty transactions menu.
The “Activate/Load another card?” prompt appears.
• To activate another loyalty card, select
Yes
. Repeat
steps 3 and 4.
OR
• To continue without activating other cards, select
No
. Proceed to step 8.
8. Press the * (
asterisk
) key to return to the applications
menu.
Looking up a card balance (Card Inquiry)
Follow the steps below to display and print the points
balance on a loyalty card.
Note:
Balances for Tracking loyalty cards cannot be
obtained on the terminal. To obtain the card balance of a
Tracking loyalty card, the cardholder must contact the
Loyalty Program Provider under which the card is enrolled.
1. On the applications menu, select
GIFT & LOYALTY
.
2. On the Gift & Loyalty transactions menu, scroll down
and select
Card Inquiry
.
If the “Password:” prompt appears, key in the
manager password
and press the green OK key.
The “Swipe or Enter Card:” prompt appears.
Page 6

4
3. Swipe the loyalty card or key in the
card number
and
press the green
OK
key.
If “Clerk ID:” appears, key in the
Clerk ID
and press the
green
OK
key.
4. At the “000 Inquiry Complete” prompt, press the
green
OK
key.
The card balance and card status appear.
5. Press the green
OK
key.
The “Print Receipt?” prompt appears.
6. To print a receipt with the points balance and card
status, select
Yes
.
OR
To return to the Gift & Loyalty transactions menu
without printing, select
No
.
7. Press the * (
asterisk
) key to return to the applications
menu.
Note:
If the card is deactivated, the points balance is zero.
On the printed receipt, the status is “D” to indicate
Deactivated.
Deactivating a card
Follow the steps below to deactivate a loyalty card. A
receipt will print showing the points balance
before
deactivation. When a card is deactivated, any remaining
points are removed.
Note:
Tracking loyalty cards cannot be deactivated on the
terminal. To deactivate a Tracking loyalty card, the
cardholder must contact the Loyalty Program Provider
under which the card is enrolled.
Important: Once a loyalty card has been deactivated, it
can never be used again.
1. On the applications menu, select
GIFT & LOYALTY
.
2. On the Gift & Loyalty transactions menu, scroll down
and select
Deactivate
.
If the “Password:” prompt appears, key in the
manager password
and press the green OK key.
The “Swipe or Enter Card:” prompt appears.
3. Swipe the loyalty card or key in the
card number
and
press the green
OK
key.
If the “Clerk ID:” prompt appears, key in the
Clerk ID
and press the green
OK
key.
If a prompt appears for additional data (e.g. “Bonus
Code” or “Reference Code”):
• Key in the
appropriate information
and press the
green
OK
key
.
OR
• Just press the green
OK
key to bypass the prompt.
“000 Approved” appears.
4. Press the green
OK
key to print the Customer copy of
the Deactivation receipt.
5. Tear the receipt and press the green
OK
key to print
Merchant copy of the Deactivation receipt and return
to the Gift & Loyalty transactions menu.
6. Press the * (
asterisk
) key to return to the applications
menu.
Page 7

5
Basic Loyalty transactions
Awarding points
Follow the steps below to award points to a loyalty card
when the cardholder makes a Purchase by credit card,
debit card or cash; or with an Advice.
1. Process the Purchase transaction on your terminal.
2. On the applications menu, select
GIFT & LOYALTY
.
3. On the Gift & Loyalty transactions menu, select
Purchase
.
If the “Password:” prompt appears, key in the
manager password
and press the green OK key.
The “Total Amount:” prompt appears.
4. Key in the
total transaction dollar amount
(including
tax and gratuity) and press the green
OK
key.
The “Accept amount?” prompt appears.
5. To accept the purchase amount, select
Yes
. The “Swipe
or Enter Card:” prompt appears. Proceed to step 6.
OR
To enter a different amount, select
No
. The “Total
Amount:” prompt appears. Repeat step 4.
6. Swipe the loyalty card or key in the
card number
and
press the green
OK
key.
If the “Clerk ID:” prompt appears, key in the
Clerk ID
and press the green
OK
key.
If the “Invoice Number:” prompt appears, key in the
Invoice Number
and press the green OK key.
“000 Approved” appears.
7. Press the green
OK
key to print the Cardholder copy of
the receipt.
8. Tear the receipt and press the green
OK
key to print
the Merchant copy of the receipt and return to the
Gift & Loyalty transactions menu.
9. Press the
* (asterisk
) key to return to the applications
menu.
Loyalty Pre-authorizations
Process a Pre-authorization to pre-allocate points if you
know that you will
NOT
have the loyalty card available
later for the Completion. Process the Pre-authorization
Completion to award points that were pre-allocated in the
initial Pre-authorization.
Processing a loyalty Pre-authorization
The Pre-authorization transaction does not award points
on approval, but rather “pre-allocates” points that will be
awarded on the Pre-authorization Completion. A Card
Inquiry (see page 6) will not include these points in the
card balance until the Completion has been processed.
1. Process the Pre-authorization or the Purchase
transaction on your terminal.
2. On the applications menu, select
GIFT & LOYALTY
.
3. On the Gift & Loyalty transactions menu, select
Pre
Auth
.
4. On the Pre Auth menu, select
Pre Auth
.
The “Total Amount:” prompt appears.
5. Key in the total amount of the pre-authorization and
press the green
OK
key.
The “Accept amount?” prompt appears.
6. To accept the pre-authorization amount, select
Yes
.
The “Swipe or Enter Card:” prompt appears. Proceed
to step 7.
OR
To use a different amount, select
No
. The “Total
Amount:” prompt appears. Repeat step 5.
7. Swipe the loyalty card or key in the
card number
and
press the green
OK
key.
If the “Clerk ID:” prompt appears, key in the
Clerk ID
and press the green
OK
key.
If the “Invoice Number:” prompt appears, key in the
Invoice Number
and press the green OK key.
“000 Approved” appears.
8. Press the green
OK
key to print the Cardholder copy of
the receipt.
9. Tear the receipt and press the green
OK
key to print
the Merchant copy of the receipt and return to the Pre
Auth menu.
10. Press the red
CANC ANNUL
key to return to the Gift &
Loyalty transactions menu.
11. Press the
* (asterisk
) key to return to the applications
menu.
Deleting a loyalty Pre-authorization
Loyalty pre-authorizations can be deleted before they are
completed.
1. On the applications menu, select
GIFT & LOYALTY
.
Page 8

6
2. On the Gift & Loyalty transactions menu, select
Pre
Auth
.
3. On the Pre Auth menu, select
Del Pre Auth
.
The “Retrieve By” prompt appears.
4. Do one of the following:
• To locate the pre-authorization by
reference
number
, select
Ref#
. The “Ernex Ref Number:”
prompt appears. Key in the
loyalty reference
number
(printed on the pre-authorization receipt)
and press the green
OK
key. Transaction details
appear. Choose one of the following:
o To delete the displayed transaction, select
Yes
.
Proceed to step 5.
o To cancel the operation and return to the Pre
Auth menu, select
No
.
o To locate another pre-authorization to delete,
select
Next
. Once the desired transaction is
displayed, select
Yes
to delete it. Proceed to
step 5.
OR
• To locate the pre-authorization by
loyalty card
number
, select
Acct
. The “Last 4 digits:” prompt
appears. Key in the last four digits of the loyalty
card used and press the green
OK
key. Transaction
details appear. Choose one of the following:
o To delete the displayed transaction, select
Yes
.
Proceed to step 5.
o To cancel the operation and return to the Pre
Auth menu, select
No
.
o To locate another pre-authorization to delete,
select
Next
. Once the desired transaction is
displayed, select
Yes
to delete it. Proceed to
step 5.
The terminal displays “Preauth deleted” and returns
to the Pre Auth menu.
5. Press the red
CANC ANNUL
key to return to the Gift &
Loyalty transactions menu.
6. Press the
* (asterisk
) key to return to the applications
menu.
Processing a loyalty Pre-authorization Completion
1. Process the Pre-authorization Completion transaction
on your terminal.
2. On the applications menu, select
GIFT & LOYALTY
.
3. On the Gift & Loyalty transactions menu, select
Pre
Auth
.
4. On the Pre Auth menu, select
Completion
.
The “Ernex Ref Number:” prompt appears.
5. Key in the
loyalty reference number
(located on the
original pre-authorization receipt) and press the
green
OK
key.
The Completion screen appears.
6. Do one of the following:
• To accept the displayed pre-authorization
transaction, select
Yes
. The “New Amount:”
prompt appears. Proceed to step 7.
• To scroll to a different transaction, select
Next
or
Prev
. Once you locate the transaction, select
Yes.
The “New Amount:” prompt appears. Proceed to
step 7.
• To cancel the operation and return to the previous
step, select
No
. Repeat step 5.
7. At the “New Amount:” prompt, do one of the
following:
• For a different amount than the displayed value,
key in a new amount and press the green
OK
key.
OR
• To keep the displayed value, press the green
OK
key.
“000 Approved” appears.
8. Press the green
OK
key to print the Cardholder copy of
the receipt.
9. Tear the receipt and press the green
OK
key to print
the Merchant copy of the receipt and return to the Pre
Auth menu.
10. Press the red
CANC ANNUL
key to return to the Gift &
Loyalty transactions menu.
11. Press the
* (asterisk
) key to return to the applications
menu.
Page 9

7
Redeeming points automatically
If your loyalty program has been set up for Automatic
Redemption, points are automatically redeemed when a
cardholder reaches the configured Reward Threshold
Level, and a Reward Coupon prints from the terminal.
Note:
If a cardholder’s points balance surpasses the Reward
Threshold Level multiple times in one transaction (e.g. the
Reward Threshold Level is 200 and the cardholder makes a
$600 purchase with a
Points Earning Rate of $1 = 1 point, meaning they have
earned 600 points), the terminal will redeem points for only
one Reward and print only one Reward Coupon.
In the above example, the remaining coupons will be
generated in increments of the Reward Threshold Level
during subsequent transactions with the same card.
Processing a Refund
Follow the steps below to remove points from a loyalty
card when the cardholder receives a Refund on a Purchase
transaction that awarded points.
Note:
A loyalty Purchase reference number can only be used
once
for a refund regardless of whether the refund is for the
full or partial amount of the Purchase.
1. Process the Refund on the terminal.
2. On the applications menu, select
GIFT & LOYALTY
.
3. On the Gift & Loyalty transactions menu, select
Refund
.
If the “Password:” prompt appears, key in the
manager password
and press the green OK key.
The “Total Amount:” prompt appears.
4. Key in the
total dollar amount of the refund for which
points are to be deducted
following the guidelines
below, then press the green
OK
key.
If points were awarded on the
Total Amount
of the
Purchase transaction (including tax and gratuity), key
in the dollar amount printed on the
Amount
line of
the loyalty card Purchase receipt, or part of the
amount if the cardholder wants a partial Refund, then
press the green
OK
key.
Note:
The amount can be a partial amount of the
original Purchase.
The “Swipe or Enter Card:” prompt appears.
5. Swipe the loyalty card or key in the
card number
and
press the green
OK
key.
If the “Clerk ID:” prompt appears, key in the
Clerk ID
and press the green
OK
key.
The “Ernex Ref Number:” prompt appears.
6. Key in the
loyalty reference number
printed on the
loyalty Purchase receipt and press the green
OK
key.
If the “Invoice Number:” prompt, appears, key in the
Invoice Number
and press the green OK key.
“000 Approved” appears.
7. Press the green
OK
key to print the Cardholder copy of
the receipt.
8. Tear the receipt and press the green
OK
key to print
the Merchant copy of the receipt and return to the
Gift & Loyalty transactions menu.
9. Press the
* (asterisk
) key to return to the applications
menu.
Voiding a loyalty transaction
Follow the steps below to void a loyalty card transaction in
the current batch.
Important: A Void must be performed in the same batch
and for the same amount as the original transaction. To
reverse a loyalty card Purchase transaction in a closed
batch, or for a partial amount, you must process a Refund.
1. On the applications menu, select
GIFT & LOYALTY
.
2. On the Gift & Loyalty transactions menu, scroll down
and select
Void
.
If the “Password:” prompt appears, key in the
manager password
and press the green OK key.
The “Swipe or Enter Card:” prompt appears.
3. Swipe the loyalty card or key in the
card number
and
press the green
OK
key.
If the “Clerk ID:” prompt appears, key in the
Clerk ID
and press the green
OK
key.
The “Ernex Ref Number:” prompt appears.
4. Key in the
loyalty reference number
printed on the
receipt of the loyalty card transaction you want to
void and press the green
OK
key.
If the “Invoice Number:” prompt appears, key in the
Invoice Number
and press the green OK key.
“000 Approved” appears.
Note:
If “No Match Found” appears, the loyalty card
transaction you were trying to void is
not
in the open
batch. Cancel the Void and perform a Refund instead
(see page 13).
5. Press the green
OK
key to print the Cardholder copy of
the receipt.
6. Tear the receipt and press the green
OK
key to print
the Merchant copy of the receipt and return to the
Gift & Loyalty transactions menu.
7. Press the
* (asterisk
) key to return to the applications
menu.
Page 10

8
Enhanced Loyalty
transactions
Awarding points
Follow the steps below to award points to a loyalty card
when the cardholder makes a Purchase by credit card,
debit card or cash; or with an Advice.
1. Process the Purchase transaction on your terminal.
2. On the applications menu, select
GIFT & LOYALTY
.
3. On the Gift & Loyalty transactions menu, select
Purchase
.
If the “Password:” prompt appears, key in the
manager password
and press the green OK key.
The “Total Amount:” prompt appears.
4. Key in the
total transaction dollar amount
(including
tax and gratuity) and press the green
OK
key.
The “Accept amount?” prompt appears.
5. To accept the purchase amount, select
Yes
. The “Swipe
or Enter Card:” prompt appears. Proceed to step 6.
OR
To enter a different amount, select
No
. The “Total
Amount:” prompt appears. Repeat step 4.
6. Swipe the loyalty card or key in the
card number
and
press the green
OK
key.
If the “Clerk ID:” prompt appears, key in the
Clerk ID
and press the green
OK
key.
If the “Bonus Code” prompt appears:
• Key in the appropriate
bonus code
and press the
green
OK
key to award bonus points.
OR
• Just press the green
OK
key to bypass bonus
points.
If the “Pre-Tax Amount” prompt appears:
• Key in the
dollar amount for which points
are to be awarded
(excluding tax and gratuity)
and press the green
OK
key.
OR
• If the amount is the
same
as the amount entered
in step 4, just press the green
OK
key.
If the “Invoice Number:” prompt appears, key in the
Invoice Number
and press the green OK key.
“000 Approved” appears.
7. Press the green
OK
key to print the Customer copy of
the receipt.
8. Tear the receipt and press the green
OK
key to print
the Merchant copy of the receipt and return to the
Gift & Loyalty transactions menu.
9. Press the
* (asterisk
) key to return to the applications
menu.
Loyalty Pre-authorizations
Process a Pre-authorization to pre-allocate points if you
know that you will
NOT
have the loyalty card available
later for the Completion. Process the Pre-authorization
Completion to award points that were pre-allocated in the
initial Pre-authorization.
Processing a loyalty Pre-authorization
The Pre-authorization transaction does not award points
on approval, but rather “pre-allocates” points that will be
awarded on the Pre-authorization Completion. A Card
Inquiry (see page 6) will not include these points in the
card balance until the Completion has been processed.
1. Process the Pre-authorization or the Purchase
transaction on your terminal.
2. On the applications menu, select
GIFT & LOYALTY
.
3. On the Gift & Loyalty transactions menu, select
Pre
Auth
.
4. On the Pre Auth menu, select
Pre Auth
.
The “Total Amount:” prompt appears.
5. Key in the total amount of the pre-authorization and
press the green
OK
key.
The “Accept amount?” prompt appears.
6. To accept the pre-authorization amount, select
Yes
.
The “Swipe or Enter Card:” prompt appears. Proceed
to step 7.
OR
To use a different amount, select
No
. The “Total
Amount:” prompt appears. Repeat step 5.
7. Swipe the loyalty card or key in the
card number
and
press the green
OK
key.
If the “Clerk ID:” prompt appears, key in the
Clerk ID
and press the green
OK
key.
If the “Invoice Number:” prompt appears, key in the
Invoice Number
and press the green OK key.
Page 11

9
If the “Bonus Code” prompt appears:
• Key in the appropriate
bonus code
and press the
green
OK
key to award bonus points.
OR
• Just press the green
OK
key to bypass bonus
points.
If the “Pre-Tax Amount” prompt appears:
• Key in the
dollar amount for which points
are to be awarded
(excluding tax and gratuity)
and press the green
OK
key.
OR
• If the amount is the
same
as the amount entered
in step 5, just press the green
OK
key.
“000 Approved” appears.
8. Press the green
OK
key to print the Cardholder copy of
the receipt.
9. Tear the receipt and press the green
OK
key to print
the Merchant copy of the receipt and return to the Pre
Auth menu.
10. Press the red
CANC ANNUL
key to return to the Gift &
Loyalty transactions menu.
11. Press the
* (asterisk
) key to return to the applications
menu.
Deleting a loyalty Pre-authorization
Loyalty pre-authorizations can be deleted before they are
completed.
1. On the applications menu, select
GIFT & LOYALTY
.
2. On the Gift & Loyalty transactions menu, select
Pre
Auth
.
3. On the Pre Auth menu, select
Del Pre Auth
.
The “Retrieve By” prompt appears.
4. Do one of the following:
• To locate the pre-authorization by
reference
number
, select
Ref#
. The “Ernex Ref Number:”
prompt appears. Key in the loyalty reference
number (printed on the pre-authorization receipt)
and press the green
OK
key. Transaction details
appear. Choose one of the following:
o To delete the displayed transaction, select
Yes
.
Proceed to step 5.
o To cancel the operation and return to the Pre
Auth menu, select
No
.
o To locate another pre-authorization to delete,
select
Next
. Once the desired transaction is
displayed, select
Yes
to delete it. Proceed to
step 5.
OR
• To locate the pre-authorization by
loyalty card
number
, select
Acct
. The “Last 4 digits:” prompt
appears. Key in the last four digits of the loyalty
card used and press the green
OK
key. Transaction
details appear. Choose one of the following:
o To delete the displayed transaction, select
Yes
.
Proceed to step 5.
o To cancel the operation and return to the Pre
Auth menu, select
No
.
o To locate another pre-authorization to delete,
select
Next
. Once the desired transaction is
displayed, select
Yes
to delete it. Proceed to
step 5.
The terminal displays “Preauth deleted” and returns
to the Pre Auth menu.
5. Press the red
CANC ANNUL
key to return to the Gift &
Loyalty transactions menu.
6. Press the
* (asterisk
) key to return to the applications
menu.
Processing a loyalty Pre-authorization Completion
1. Process the Pre-authorization Completion transaction
on your terminal.
2. On the applications menu, select
GIFT & LOYALTY
.
3. On the Gift & Loyalty transactions menu, select
Pre
Auth
.
4. On the Pre Auth menu, select
Completion
.
The “Ernex Ref Number:” prompt appears.
5. Key in the
loyalty reference number
(located on the
original pre-authorization receipt) and press the
green
OK
key.
The Completion screen appears.
6. Do one of the following:
• To accept the displayed pre-authorization
transaction, select
Yes
. The “New Amount:”
prompt appears. Proceed to step 7.
Page 12

10
• To scroll to a different transaction, select
Next
or
Prev
. Once you locate the transaction, select
Yes
.
The “New Amount:” prompt appears. Proceed to
step 7.
• To cancel the operation and return to the previous
step, select
No
. Repeat step 5.
7. At the “New Amount:” prompt, do one of the
following:
• For a different amount than the displayed value,
key in a new amount and press the green
OK
key.
OR
• To keep the displayed value, press the green
OK
key.
If the “Bonus Code” prompt appears:
• Key in the appropriate
bonus code
and press the
green
OK
key to award bonus points.
OR
• Just press the green
OK
key to bypass bonus
points.
If the “Pre-Tax Amount” prompt appears:
• Key in the
dollar amount for which points
are to be awarded
(excluding tax and gratuity)
and press the green
OK
key.
OR
• If the amount is the
same
as the amount entered
in step 7, just press the green
OK
key.
“000 Approved” appears.
8. Press the green
OK
key to print the Cardholder copy of
the receipt.
9. Tear the receipt and press the green
OK
key to print
the Merchant copy of the receipt and return to the Pre
Auth menu.
10. Press the red
CANC ANNUL
key to return to the Gift &
Loyalty transactions menu.
11. Press the
* (asterisk
) key to return to the applications
menu.
Redeeming points automatically
If your loyalty program has been set up for Automatic
Redemption, points are automatically redeemed when a
cardholder reaches the configured Reward Threshold
Level, and a Reward Coupon prints from the terminal.
Note:
If a cardholder’s points balance surpasses the Reward
Threshold Level multiple times in one transaction (e.g. the
Reward Threshold Level is 200 and the cardholder makes a
$600 purchase with a Points Earning Rate of $1 = 1 point,
meaning they have earned 600 points), the terminal will
redeem points for only one Reward and print only one
Reward Coupon.
In the above example, the remaining coupons will be
generated in increments of the Reward Threshold Level
during subsequent transactions with the same card.
Redeeming points manually
If your loyalty program has been set up for Manual
Redemption, follow the steps below to manually initiate a
Redemption at the cardholder’s request.
1. On the applications menu, select
GIFT & LOYALTY
.
2. On the Gift & Loyalty transactions menu, select
Redemption
.
If the “Password:” prompt appears, key in the
manager password
and press the green OK key.
The “Swipe or Enter Card:” prompt appears.
3. Swipe the loyalty card or key in the
card number
and
press the green
OK
key.
If the “Clerk ID:” prompt appears, key in the
Clerk ID
and press the green
OK
key.
The “Benefit” prompt appears.
4. Key in the
number of points to be redeemed
and press
the green
OK
key.
If the “Invoice Number:” prompt, appears, key in the
Invoice Number
and press the green OK key.
“000 Approved” appears.
5. Press the green
OK
key to print the Customer copy of
the receipt.
6. Tear the receipt and press the green
OK
key to print
the Merchant copy of the receipt and return to the
Gift & Loyalty transactions menu.
7. Press the
* (asterisk
) key to return to the applications
menu.
Processing a Refund
Follow the steps below to remove points from a loyalty
card when the cardholder receives a Refund on a Purchase
transaction that awarded points.
Note:
A loyalty Purchase reference number can only be used
once
for a refund regardless of whether the refund is for the
full or partial amount of the Purchase.
1. Process the Refund on the terminal.
2. On the applications menu, select
GIFT & LOYALTY
.
3. On the Gift & Loyalty transactions menu, select
Refund
.
If the “Password:” prompt appears, key in the
manager password
and press the green OK key.
The “Total Amount:” prompt appears.
Page 13

11
4. Key in the
total dollar amount of the refund for which
points are to be deducted
following the guidelines
below then press the green
OK
key.
• If points were awarded on the
Total Amount
of
the Purchase transaction (including tax and
gratuity), key in the dollar amount printed on the
Amount
line of the loyalty Purchase receipt, or
part of the amount if the cardholder wants a
partial Refund, then press the green
OK
key.
Note:
The amount can be a partial amount of the
original Purchase.
• If points were awarded on the
Pre-Tax Amount
of
the Purchase transaction (excluding tax and
gratuity), key in the dollar amount printed on the
Pre-Tax Amount
line of the loyalty Purchase
receipt, or part of the amount if the cardholder
wants a partial Refund, then press the green
OK
key.
The “Swipe or Enter Card:” prompt appears.
5. Swipe the loyalty card or key in the
card number
and
press the green
OK
key.
If the “Clerk ID:” prompt appears, key in the
Clerk ID
and press the green
OK
key.
If the “Bonus Code” prompt appears:
• To remove any bonus points awarded on the
Purchase, key in the appropriate
bonus code
and
press the green
OK
key (see the loyalty Purchase
receipt for the bonus code used).
OR
• To leave any awarded bonus points on the card,
just press the green
OK
key.
The “Ernex Ref Number:” prompt appears.
6. Key in the
loyalty reference number
printed on the
loyalty Purchase receipt and press the green
OK
key.
If the “Invoice Number:” prompt, appears, key in the
Invoice Number
and press the green OK key.
“000 Approved” appears.
7. Press the green
OK
key to print the Customer copy of
the receipt.
8. Tear the receipt and press the green
OK
key to print
the Merchant copy of the receipt and return to the
Gift & Loyalty transactions menu.
9. Press the
* (asterisk
) key to return to the applications
menu.
Voiding a loyalty transaction
Follow the steps below to void a loyalty card transaction in
the current batch.
IMPORTANT:
A Void must be performed in the same batch
and for the same amount as the original transaction. To
reverse a loyalty card transaction in a closed batch or for a
partial amount, you must process a Refund.
1. On the applications menu, select
GIFT & LOYALTY
.
2. On the Gift & Loyalty transactions menu, scroll down
and select
Void
.
If the “Password:” prompt appears, key in the
manager password
and press the green OK key.
The “Swipe or Enter Card:” prompt appears.
3. Swipe the loyalty card or key in the
card number
and
press the green
OK
key.
If the “Clerk ID:” prompt appears, key in the
Clerk ID
and press the green
OK
key.
The “Ernex Ref Number:” prompt appears.
4. Key in the
loyalty reference number
printed on the
receipt of the loyalty transaction you want to void and
press the green
OK
key.
Note:
If “No Match Found” appears, the loyalty card
transaction you were trying to void is
not
in the open
batch. Cancel the Void and perform a Refund instead
(see page 21).
If the “Invoice Number:” prompt, appears, key in the
Invoice Number
and press the green OK key.
“000 Approved” appears.
5. Press the green
OK
key to print the Customer copy of
the receipt.
6. Tear the receipt and press the green
OK
key to print
the Merchant copy of the receipt and return to the
Gift & Loyalty transactions menu.
7. Press the
* (asterisk
) key to return to the applications
menu.
Note:
A Void automatically includes any bonus points
awarded or removed in the original transaction.
Page 14

12
Pro Loyalty transactions
Awarding points
Follow the steps below to award points to a loyalty card
when the cardholder makes a Purchase by credit card,
debit card, or cash; or with an Advice.
1. Process the Purchase transaction on your terminal.
2. On the applications menu, select
GIFT & LOYALTY
.
3. On the Gift & Loyalty transactions menu, select
Purchase
.
If the “Password:” prompt appears, key in the
manager
password
and press the green OK key.
The “Total Amount:” prompt appears.
4. Key in the
total transaction dollar amount
(including
tax and gratuity) and press the green
OK
key.
The “Accept amount?” prompt appears.
5. To accept the purchase amount, select
Yes
. The “Swipe
or Enter Card:” prompt appears. Proceed to step 6.
OR
To enter a different amount, select
No
. The “Total
Amount:” prompt appears. Repeat step 4.
6. Swipe the loyalty card or key in the
card number
and
press the green
OK
key.
If the “Clerk ID:” prompt appears, key in the
Clerk ID
and press the green
OK
key.
If a prompt appears for additional data (e.g. “Bonus
Code” or “Reference Code”):
• Key in the
appropriate information
and press the
green
OK
key. Consult your manager if you are
unsure of what to enter. OR
• Just press the green
OK
key to bypass the prompt.
If a prompt appears for the Benefit amount (e.g. “PreTax Amount” or “Food Amount”):
• Key in the
dollar amount for which points are to
be awarded
and press the green OK key. Consult
your manager if you are unsure of what to enter.
OR
• If the amount is the
same
as the amount entered
before, just press the green
OK
key.
“000 Approved” appears.
7. Press the green
OK
key to print the Customer copy of
the receipt.
8. Tear the receipt and press the green
OK
key to print
the Merchant copy of the receipt and return to the
Gift & Loyalty transactions menu.
9. Press the
* (asterisk
) key to return to the applications
menu.
Loyalty Pre-authorizations
Process a Pre-authorization to pre-allocate points if you
know that you will
NOT
have the loyalty card available
later for the Completion. Process the Pre-authorization
Completion to award points that were pre-allocated in the
initial Pre-authorization.
Processing a loyalty Pre-authorization
The Pre-authorization transaction does not award points
on approval, but rather “pre-allocates” points that will be
awarded on the Pre-authorization Completion. A Card
Inquiry (see page 6) will not include these points in the
card balance until the Completion has been processed.
1. Process the Pre-authorization or the Purchase
transaction on your terminal.
2. On the applications menu, select
GIFT & LOYALTY
.
3. On the Gift & Loyalty transactions menu, select
Pre
Auth
.
4. On the Pre Auth menu, select
Pre Auth
.
The “Total Amount:” prompt appears.
5. Key in the total amount of the pre-authorization and
press the green
OK
key.
The “Accept amount?” prompt appears.
6. To accept the pre-authorization amount, select
Yes
.
The “Swipe or Enter Card:” prompt appears. Proceed
to step 7.
OR
To use a different amount, select
No
. The “Total
Amount:” prompt appears. Repeat step 5.
7. Swipe the loyalty card or key in the
card number
and
press the green
OK
key.
If the “Clerk ID:” prompt appears, key in the
Clerk ID
and press the green
OK
key.
If a prompt appears for additional data (e.g. “Bonus
Code” or “Reference Code”):
• Key in the
appropriate information
and press the
green
OK
key. Consult your manager if you are
unsure of what to enter. OR
• Just press the green
OK
key to bypass the prompt.
If a prompt appears for the Benefit amount (e.g. “PreTax Amount” or “Food Amount”):
Page 15

13
• Key in the
dollar amount for which points are to
be awarded
and press the green OK key. Consult
your manager if you are unsure of what to enter.
OR
• If the amount is the
same
as the amount entered
in step 5, just press the green
OK
key.
If the “Invoice Number:” prompt appears, key in the
Invoice Number
and press the green OK key.
“000 Approved” appears.
8. Press the green
OK
key to print the Cardholder copy of
the receipt.
9. Tear the receipt and press the green
OK
key to print
the Merchant copy of the receipt and return to the Pre
Auth menu.
10. Press the red
CANC ANNUL
key to return to the Gift &
Loyalty transactions menu.
11. Press the
* (asterisk
) key to return to the applications
menu.
Deleting a loyalty Pre-authorization
Loyalty pre-authorizations can be deleted before they are
completed.
1. On the applications menu, select
GIFT & LOYALTY
.
2. On the Gift & Loyalty transactions menu, select
Pre
Auth
.
3. On the Pre Auth menu, select
Del Pre Auth
.
The “Retrieve By” prompt appears.
4. Do one of the following:
• To locate the pre-authorization by
reference
number
, select
Ref#
. The “Ernex Ref Number:”
prompt appears. Key in the
loyalty reference
number
(printed on the pre-authorization receipt)
and press the green
OK
key. Transaction details
appear. Choose one of the following:
o To delete the displayed transaction, select
Yes
.
Proceed to step 5.
o To cancel the operation and return to the Pre
Auth menu, select
No
.
o To locate another pre-authorization to delete,
select
Next
. Once the desired transaction is
displayed, select
Yes
to delete it. Proceed to
step 5.
OR
• To locate the pre-authorization by
loyalty card
number
, select
Acct
. The “Last 4 digits:” prompt
appears. Key in the last four digits of the loyalty
card used and press the green
OK
key. Transaction
details appear. Choose one of the following:
o To delete the displayed transaction, select
Yes
.
Proceed to step 5.
o To cancel the operation and return to the Pre
Auth menu, select
No
.
o To locate another pre-authorization to delete,
select
Next
. Once the desired transaction is
displayed, select
Yes
to delete it. Proceed to
step 5.
The terminal displays “Preauth deleted” and returns
to the Pre Auth menu.
5. Press the red
CANC ANNUL
key to return to the Gift &
Loyalty transactions menu.
6. Press the
* (asterisk
) key to return to the applications
menu.
Processing a loyalty Pre-authorization Completion
1. Process the Pre-authorization Completion transaction
on your terminal.
2. On the applications menu, select
GIFT & LOYALTY
.
3. On the Gift & Loyalty transactions menu, select
Pre
Auth
.
4. On the Pre Auth menu, select
Completion
.
The “Ernex Ref Number:” prompt appears.
5. Key in the
loyalty reference number
located on the
original pre-authorization receipt and press the green
OK
key.
The Completion screen appears.
6. Do one of the following:
• To accept the displayed pre-authorization
transaction, select
Yes
. The “New Amount:”
prompt appears. Proceed to step 7.
• To scroll to a different transaction, select
Next
or
Prev
. Once you locate the transaction, select
Yes.
The “New Amount:” prompt appears. Proceed to
step 7.
• To cancel the operation and return to the previous
step, select
No
. Repeat step 5.
7. At the “New Amount:” prompt, do one of the
following:
Page 16

14
• For a different amount than the displayed value,
key in a new amount and press the green
OK
key.
OR
• To keep the displayed value, press the green
OK
key.
If a prompt appears for additional data (e.g. “Bonus
Code” or “Reference Code”):
• Key in the
appropriate information
and press the
green
OK
key. Consult your manager if you are
unsure of what to enter. OR
• Just press the green
OK
key to bypass the prompt.
If a prompt appears for the Benefit amount (e.g. “PreTax Amount” or “Food Amount”):
• Key in the
dollar amount for which points are to
be awarded
and press the green OK key. Consult
your manager if you are unsure of what to enter.
OR
• If the amount is the
same
as the amount entered
before, just press the green
OK
key.
“000 Approved” appears.
8. Press the green
OK
key to print the Cardholder copy of
the receipt.
9. Tear the receipt and press the green
OK
key to print
the Merchant copy of the receipt and return to the Pre
Auth menu.
10. Press the red
CANC ANNUL
key to return to the Gift &
Loyalty transactions menu.
11. Press the
* (asterisk
) key to return to the applications
menu.
Redeeming points automatically
If your loyalty program has been set up for Automatic
Redemption, points are automatically redeemed when a
cardholder reaches the configured Reward Threshold
Level, and a Reward Coupon prints from the terminal.
Note:
If a cardholder’s points balance surpasses the Reward
Threshold Level multiple times in one transaction (e.g. the
Reward Threshold Level is 200 and the cardholder makes a
$600 purchase with a Points Earning Rate of $1 = 1 point,
meaning they have earned 600 points), the terminal will
redeem points for only one Reward and print only one
Reward Coupon.
In the above example, the remaining coupons will be
generated in increments of the Reward Threshold Level
during subsequent transactions with the same card.
If you have set up multiple Reward Threshold Levels, the
maximum threshold will be used for the first coupon and
for the remaining coupons as long as the points are
available. Once the points balance falls below the
maximum threshold, the next threshold level will be used.
Redeeming points manually
If your loyalty program has been set up for Manual
Redemption of
points
, follow the steps below to manually
initiate a Redemption at the cardholder’s request.
1. On the applications menu, select
GIFT & LOYALTY
.
2. On the Gift & Loyalty transactions menu, select
Redemption
.
If the “Password:” prompt appears, key in the
manager
password
and press the green
OK
key.
The “Swipe or Enter Card:” prompt appears.
3. Swipe the loyalty card or key in the
card number
and
press the green
OK
key.
If the “Clerk ID:” prompt appears, key in the
Clerk ID
and press the green
OK
key.
If a prompt appears for additional data (e.g. “Bonus
Code” or “Reference Code”):
• Key in the
appropriate information
and press the
green
OK
key
OR
• Just press the green
OK
key to bypass the prompt.
The “Benefit” prompt appears.
Note:
The wording of this prompt may be different if
you have customized it (e.g. “Pre-Tax Amount” or “Food
Amount”).
4. Key in the
number of points to be redeemed
and press
the green
OK
key.
“000 Approved” appears.
5. Press the green
OK
key to print the Customer copy of
the receipt.
6. Tear the receipt and press the green
OK
key to print
the Merchant copy of the receipt and return to the
Gift & Loyalty transactions menu.
7. Press the
* (asterisk
) key to return to the applications
menu.
Page 17

15
Redeeming dollars manually
If your loyalty program has been set up for Manual
Redemption of
dollars
, follow the steps below to manually
initiate Redemption at the cardholder’s request.
1. On the applications menu, select
GIFT & LOYALTY
.
2. On the Gift & Loyalty transactions menu, select
Redemption
.
If the “Password:” prompt appears, key in the
manager
password
and press the green
OK
key.
The “Swipe or Enter Card:” prompt appears.
3. Swipe the loyalty card or key in the
card number
and
press the green
OK
key.
If the “Clerk ID:” prompt appears, key in the
Clerk ID
and press the green
OK
key.
If a prompt appears for additional data (e.g. “Bonus
Code” or “Reference Code”):
• Key in the
appropriate information
and press the
green
OK
key
.
OR
• Just press the green
OK
key to bypass the prompt.
The “Enter Amount:” prompt appears.
4. Key in the
dollar amount to be redeemed
and press
the green
OK
key.
“000 Approved” appears.
5. Press the green
OK
key.
Note:
The Balance Due prompt appears if there are
insufficient points on the card. If there are
sufficient
points on the card, go to step 6. If there are
insufficient
points on the card, follow these steps:
a. Press the green
OK
key.
The “Select Payment For Balance Due” prompt
appears.
b. Select the method that the customer wishes
to use to pay:
• To use a
debit card
or
credit card
, press F1
(
DbCR
).
• To pay with a
gift card
, press F2 (
Gift
).
• To pay with
cash
, press F3 (
Cash
).
The terminal prints the Customer copy of the
receipt.
c. Tear the receipt and press the green
OK
key to
print the Merchant copy of the receipt.
d. If you selected:
•
DbCr
, the terminal automatically begins a
debit or credit Purchase transaction at the
“Amount: $0.00” prompt. Refer to the
Merchant receipt for the amount to
charge.
•
Gift
, the terminal automatically begins a
gift card Purchase transaction at the
“Total Amount: $0.00” prompt. Refer to
the Merchant receipt for the amount to
charge. Refer to the Gift Card Program
Using Your Terminal guide for
instructions on processing a gift card
Purchase. Visit
moneris.com/guides to
download a free copy of the guide.
•
Cash
, the Redemption transaction is
completed. The terminal prints the
Customer copy of the receipt. Proceed to
step 7.
6. If there were sufficient points on the card and the
“Balance Due” prompt did not appear:
The terminal prints the Customer copy of the receipt.
7. Tear the receipt and press the green
OK
key to print
the Merchant copy of the receipt and return to the
Gift & Loyalty transactions menu.
8. Press the
* (asterisk
) key to return to the applications
menu.
Processing a Refund
Follow the steps below to remove points from a loyalty
card when the cardholder receives a Refund on a Purchase
transaction that awarded points.
Note:
A loyalty Purchase reference number can only be used
once
for a refund regardless of whether the refund is for the
full or partial amount of the Purchase.
1. Process the Refund on your terminal.
2. On the applications menu, select
GIFT & LOYALTY
.
3. On the Gift & Loyalty transactions menu, select
Refund
.
If the “Password:” prompt appears, key in the
manager
password
and press the green
OK
key.
The “Total Amount:” prompt appears.
Page 18

16
4. Key in
the total dollar amount of the transaction,
including tax and tip
, key in the dollar amount
printed on the
Amount
line of the loyalty Purchase
receipt, or key in part of the amount if the cardholder
wants a partial Refund then press the green
OK
key.
Note:
The amount can be a partial amount of the
original Purchase.
The “Swipe or Enter Card:” prompt appears.
5. Swipe the loyalty card or key in the
card number
and
press the green
OK
key.
If the “Clerk ID:” prompt appears, key in the
Clerk ID
and press the green
OK
key.
If a prompt appears for additional data (e.g. “Bonus
Code” or “Reference Code”), follow the instructions
below:
If you are using the prompt for the Bonus Code:
• To leave any awarded bonus points on the card,
just press the green
OK
key.
OR
• To remove any bonus points on the Purchase, key
in the
appropriate bonus code
and press the
green
OK
key (see the loyalty card Purchase
receipt for the bonus code used).
If you are using the prompt for other data:
• Key in the
appropriate information
and press the
green
OK
key.
OR
• To bypass the prompt, just press the green
OK
key.
If a prompt appears for the Benefit amount (e.g. “PreTax Amount” or “Food Amount”):
• Key in the
dollar amount for which points are to
be refunded
and press the green OK key. Consult
your manager if you are unsure of what to enter.
OR
• If the amount is the
same
as the amount entered
before, just press the green
OK
key.
The “Ernex Ref Number:” prompt appears.
6. Key in the
loyalty reference number
printed on the
loyalty card Purchase receipt and press the green
OK
key.
“000 Approved” appears.
7. Press the green
OK
key to print the Customer copy of
the receipt.
8. Tear the receipt and press the green
OK
key to print
the Merchant copy of the receipt and return to the
Gift & Loyalty transactions menu.
9. Press the
* (asterisk
) key to return to the applications
menu.
Voiding a loyalty transaction
Follow the steps below to void a loyalty card transaction in
the current batch.
Important: A Void must be performed in the same batch
and for the same amount as the original transaction. To
reverse a loyalty card Purchase transaction in a closed
batch or for a partial amount, you must process a Refund.
1. On the applications menu, select
GIFT & LOYALTY
.
2. On the Gift & Loyalty transactions menu, scroll down
and select
Void
.
If the “Password:” prompt appears, key in the
manager
password
and press the green
OK
key.
The “Swipe or Enter Card:” prompt appears.
3. Swipe the loyalty card or key in the
card number
and
press the green
OK
key.
If the “Clerk ID:” prompt appears, key in the
Clerk ID
and press the green
OK
key.
The “Ernex Ref Number:” prompt appears.
4. Key in the
loyalty reference number
printed on the
receipt of the loyalty card transaction you
want to void and press the green
OK
key.
Note:
If “No Match Found” appears, the loyalty card
transaction you were trying to void is
not
in the open
batch. Cancel the Void and perform a Refund instead
(see page 32).
“000 Approved” appears.
5. Press the green
OK
key to print the Customer copy of
the receipt.
6. Tear the receipt and press the green
OK
key to print the
Merchant copy of the receipt and return to the Gift &
Loyalty transactions menu.
7. Press the
* (asterisk
) key to return to the applications
menu.
Note:
A Void automatically reverses any bonus points
awarded or removed in the original transaction.
Page 19

17
Tracking transactions
Awarding points
Follow the steps below to award points to a Tracking
loyalty card when the cardholder makes a Purchase by
credit card, debit card, or cash; or with an Advice.
1. Process the Purchase transaction on your terminal.
2. On the applications menu, select
GIFT & LOYALTY
.
3. On the Gift & Loyalty transactions menu, select
Purchase
.
If the “Password:” prompt appears, key in the
manager
password
and press the green
OK
key.
The “Total Amount:” prompt appears.
4. Key in the
total transaction dollar amount
(including
tax and gratuity) and press the green
OK
key.
The “Accept amount?” prompt appears.
5. To accept the purchase amount, select
Yes
. The “Swipe
or Enter Card:” prompt appears. Proceed to step 6.
OR
To enter a different amount, select
No
. The “Total
Amount:” prompt appears. Repeat step 4.
6. Swipe the Tracking loyalty card, or key in the
card
number
and press the green OK key.
If the “Clerk ID:” prompt appears, key in the
Clerk ID
and press the green
OK
key.
If a prompt appears for additional data (e.g. “Bonus
Code” or “Reference Code”):
• Key in the
appropriate information
and press the
green
OK
key. Consult your manager if you are
unsure of what to enter.
OR
• Just press the green
OK
key to bypass the prompt.
If a prompt appears for the Benefit amount (e.g. “PreTax Amount” or “Food Amount”):
• Key in the
dollar amount for which points are to
be awarded
and press the green OK key. Consult
your manager if you are unsure of what to enter.
OR
• If the amount is the
same
as the amount entered
before, just press the green
OK
key.
“000 Approved” appears.
7. Press the green
OK
key to print the Customer copy of
the receipt.
8. Tear the receipt and press the green
OK
key to print
the Merchant copy of the receipt and return to the
Gift & Loyalty transactions menu.
9. Press the
* (asterisk
) key to return to the applications
menu.
Pre-authorizations
Process a Pre-authorization to pre-allocate points if you
know that you will
NOT
have the card available later for
the Completion. Process the Pre-authorization Completion
to award points that were pre-allocated in the initial Preauthorization.
Processing a Pre-authorization
The Pre-authorization transaction does not award points
on approval, but rather “pre-allocates” the points that will
be awarded on the Pre-authorization Completion.
1. Process the Pre-authorization or the Purchase
transaction on your terminal.
2. On the applications menu, select
GIFT & LOYALTY
.
3. On the Gift & Loyalty transactions menu, select
Pre
Auth
.
4. On the Pre Auth menu, select
Pre Auth
.
The “Total Amount:” prompt appears.
5. Key in the total amount of the pre-authorization and
press the green
OK
key.
The “Accept amount?” prompt appears.
6. To accept the pre-authorization amount, select
Yes
.
The “Swipe or Enter Card:” prompt appears. Proceed
to step 7.
OR
To use a different amount, select
No
. The “Total
Amount:” prompt appears. Repeat step 5.
7. Swipe the Tracking loyalty card, or key in the
card
number
, and press the green OK key.
If the “Clerk ID:” prompt appears, key in the
Clerk ID
and press the green
OK
key.
If a prompt appears for additional data (e.g. “Bonus
Code” or “Reference Code”):
Page 20

18
• Key in the
appropriate information
and press the
green
OK
key. Consult your manager if you are
unsure of what to enter.
OR
• Just press the green
OK
key to bypass the prompt.
If a prompt appears for the Benefit amount (e.g. “PreTax Amount” or “Food Amount”):
• Key in the
dollar amount for which points are to
be awarded
and press the green OK key. Consult
your manager if you are unsure of what to enter.
OR
• If the amount is the
same
as the amount entered
before, just press the green
OK
key.
If the “Invoice Number:” prompt appears, key in
the
Invoice Number
and press the green OK key.
“000 Approved” appears.
8. Press the green
OK
key to print the Cardholder copy of
the receipt.
9. Tear the receipt and press the green
OK
key to print
the Merchant copy of the receipt and return to the Pre
Auth menu.
10. Press the red
CANC ANNUL
key to return to the Gift &
Loyalty transactions menu.
11. Press the
* (asterisk
) key to return to the applications
menu.
Deleting a Pre-authorization
Loyalty pre-authorizations can be deleted before they are
completed.
1. On the applications menu, select
GIFT & LOYALTY
.
2. On the Gift & Loyalty transactions menu, select
Pre
Auth
.
3. On the Pre Auth menu, select
Del Pre Auth
.
The “Retrieve By” prompt appears.
4. Do one of the following:
• To locate the pre-authorization by
reference
number
, select
Ref#
. The “Ernex Ref Number:”
prompt appears. Key in the
loyalty reference
number (
printed on the pre-authorization receipt)
and press the green
OK
key. Transaction details
appear. Choose one of the following:
o To delete the displayed transaction, select
Yes
.
Proceed to step 5.
o To cancel the operation and return to the Pre
Auth menu, select
No
.
o To locate another pre-authorization to delete,
select
Next
. Once the desired transaction is
displayed, select
Yes
to delete it. Proceed to
step 5.
OR
• To locate the pre-authorization by
loyalty card
number
, select
Acct
. The “Last 4 digits:” prompt
appears. Key in the
last four digits
of the loyalty
card used and press the green
OK
key. Transaction
details appear. Choose one of the following:
o To delete the displayed transaction, select
Yes
.
Proceed to step 5.
o To cancel the operation and return to the Pre
Auth menu, select
No
.
o To locate another pre-authorization to delete,
select
Next
. Once the desired transaction is
displayed, select
Yes
to delete it. Proceed to
step 5.
The terminal displays “Preauth deleted” and returns
to the Pre Auth menu.
5. Press the red
CANC ANNUL
key to return to the Gift &
Loyalty transactions menu.
6. Press the
* (asterisk
) key to return to the applications
menu.
Processing a Pre-authorization Completion
1. Process the Pre-authorization Completion transaction
on your terminal.
2. On the applications menu, select
GIFT & LOYALTY
.
3. On the Gift & Loyalty transactions menu, select
Pre
Auth
.
4. On the Pre Auth menu, select
Completion
.
The “Ernex Ref Number:” prompt appears.
5. Key in the
loyalty reference number
located on the
original pre-authorization receipt and press the green
OK
key.
The Completion screen appears.
6. Do one of the following:
• To accept the displayed pre-authorization
transaction, select
Yes
. The “New Amount:”
prompt appears. Proceed to step 7.
• To scroll to a different transaction, select
Next
or
Prev
. Once you locate the transaction, select
Yes.
The “New Amount:” prompt appears. Proceed to
step 7.
Page 21

19
• To cancel the operation and return to the previous
step, select
No
. Repeat step 5.
7. At the “New Amount:” prompt, do one of the
following:
• For a different amount than the displayed value,
key in a new amount and press the green
OK
key.
OR
• To keep the displayed value, press the green
OK
key.
If a prompt appears for additional data (e.g. “Bonus
Code” or “Reference Code”):
• Key in the
appropriate information
and press the
green
OK
key. Consult your manager if you are
unsure of what to enter.
OR
• Just press the green
OK
key to bypass the prompt.
If a prompt appears for the Benefit amount (e.g. “PreTax Amount” or “Food Amount”):
• Key in the
dollar amount for which points are to
be awarded
and press the green OK key. Consult
your manager if you are unsure of what to enter.
OR
• If the amount is the
same
as the amount entered
before, just press the green
OK
key.
“000 Approved” appears.
8. Press the green
OK
key to print the Cardholder copy of
the receipt.
9. Tear the receipt and press the green
OK
key to print
the Merchant copy of the receipt and return to the Pre
Auth menu.
10. Press the red
CANC ANNUL
key to return to the Gift &
Loyalty transactions menu.
11. Press the
* (asterisk
) key to return to the applications
menu.
Processing a Refund
Follow the steps below to remove points from a Tracking
loyalty card when the cardholder receives a Refund on a
Purchase transaction that awarded points.
Note:
A Tracking loyalty Purchase reference number can
only be used
once
for a refund regardless of whether the
refund is for the full or partial amount of the Purchase.
1. Process the Refund on your terminal.
2. On the applications menu, select
GIFT & LOYALTY
.
3. On the Gift & Loyalty transactions menu, select
Refund
.
If the “Password:” prompt appears, key in the
manager
password
and press the green
OK
key.
The “Total Amount:” prompt appears.
4. Key in
the total dollar amount of the transaction,
including tax and tip
, key in the dollar amount
printed on the
Amount
line of the Purchase receipt, or
part of the amount if the cardholder wants a partial
Refund then press the green
OK
key.
Note:
The amount can be a partial amount of the
original Purchase.
The “Swipe or Enter Card:” prompt appears.
5. Swipe the Tracking loyalty card, or key in the
card
number
and press the green OK key.
If the “Clerk ID:” prompt appears, key in the
Clerk ID
and press the green
OK
key.
If a prompt appears for additional data (e.g. “Bonus
Code” or “Reference Code”), follow the instructions
below:
If you are using the prompt for the Bonus Code:
• To leave any awarded bonus points on the card,
just press the green
OK
key.
OR
• To remove any bonus points on the Purchase, key
in the appropriate
bonus code
and press the
green
OK
key (see the Purchase receipt for the
bonus code used).
If you are using the prompt for other data:
• Key in the
appropriate information
and press the
green
OK
key.
OR
• To bypass the prompt, just press the green
OK
key.
If a prompt appears for the Benefit amount (e.g. “PreTax Amount” or “Food Amount”):
• Key in the
dollar amount for which points are to
be refunded
and press the green OK key. Consult
your manager if you are unsure of what to enter.
OR
• If the amount is the
same
as the amount entered
before, just press the green
OK
key.
The “Ernex Ref Number:” prompt appears.
Page 22

20
6. Key in the
loyalty reference number
printed on the
Purchase receipt and press the green
OK
key.
“000 Approved” appears.
7. Press the green
OK
key to print the Customer copy of
the receipt.
8. Tear the receipt and press the green
OK
key to print
the Merchant copy of the receipt and return to the
Gift & Loyalty transactions menu.
9. Press the
* (asterisk
) key to return to the applications
menu.
Voiding a transaction
Follow the steps below to void a Tracking loyalty card
transaction in the current batch.
Important: A Void must be performed in the same batch
and for the same amount as the original transaction. To
reverse a Tracking loyalty card Purchase transaction in a
closed batch or for a partial amount, you must process a
Refund.
1. On the applications menu, select
GIFT & LOYALTY
.
2. On the Gift & Loyalty transactions menu, scroll down
and select
Void
.
If the “Password:” prompt appears, key in the
manager
password
and press the green
OK
key.
The “Swipe or Enter Card:” prompt appears.
3. Swipe the Tracking loyalty card, or key in the
card
number
and press the green OK key.
If the “Clerk ID:” prompt appears, key in the
Clerk ID
and press the green
OK
key.
The “Ernex Ref Number:” prompt appears.
4. Key in the
loyalty reference number
printed on the
receipt of the transaction you want to void and press
the green
OK
key.
Note:
If “No Match Found” appears, the loyalty card
transaction you were trying to void is
not
in the open
batch. Cancel the Void and perform a Refund instead
(see page 40).
“000 Approved” appears.
5. Press the green
OK
key to print the Customer copy of
the receipt.
6. Tear the receipt and press the green
OK
key to print
the Merchant copy of the receipt and return to the
Gift & Loyalty transactions menu.
7. Press the
* (asterisk
) key to return to the applications
menu.
Note:
A Void automatically reverses any bonus points
awarded or removed in the original transaction.
Page 23

21
Receipts
Reprinting a receipt
This function prints a duplicate Customer copy of a loyalty
card transaction receipt.
1. On the applications menu, select
GIFT & LOYALTY
.
2. On the Gift & Loyalty transactions menu, press the
Reprint
key (second purple key from the right).
The Reprints menu appears.
3. Select the receipt you want to reprint:
• To print a receipt for the last transaction:
o Select
Last Receipt
.
• To reprint another receipt:
a. Select
Any Receipt
.
b. At the “Ernex Ref Number:” prompt, key in the
loyalty reference number
of the transaction
for which you want to print a receipt and
press the green
OK
key.
The terminal prints the receipt and returns to the
Reprints menu.
4. Press
the red
CANC ANNUL
key to return to the Gift &
Loyalty transactions menu.
5. Press the
* (asterisk
) key to return to the applications
menu.
Loyalty reference number
A loyalty card transaction’s reference number is printed at
the bottom of each receipt (
Ref #
). You may be prompted
to key in this number when transacting loyalty Refunds
and Voids, and when reprinting transaction receipts.
For more information about a program-specific receipt,
refer to the specified page:
• Basic Loyalty receipt, see page 44.
• Enhanced/Pro Loyalty receipt, see page 45.
• Tracking Loyalty receipt, see page 46.
Page 24

22
Receipt – Basic Loyalty program
Receipt – Enhanced Loyalty/Pro Loyalty program
Page 25

23
Receipt – Tracking Loyalty program
Reporting
Transaction Inquiry
This report lists details of loyalty transactions in the open
batch by card type, card number, amount and date. You
can choose to view or print results.
1. On the applications menu, select
GIFT & LOYALTY
.
2. On the Gift & Loyalty transactions menu, press the
Reports
key (first purple key on the right).
3. On the Reports menu, select
Trans Inquiry
.
If the “Password:” prompt appears, key in the
manager
password
and press the green OK key.
If the “Clerk ID:” prompt appears, key in the
Clerk ID
and press the green
OK
key.
4. To select the desired card type, select
Next
until the
card type appears, then select
Slct
.
OR
To include all card types, select
All
.
5. At the “Card #:” prompt:
• Key in the desired
card number
and press the
green
OK
key.
OR
• Press the green
OK
key to include all card
numbers.
6. At the “Enter Amount: $0.00” prompt:
• Key in the desired
amount
and press the green OK
key.
OR
• Press the green
OK
key to include all amounts.
7. At the “Date: MMDDYY” prompt:
• Key in the desired
date
and press the green OK
key.
OR
• Press the green
OK
key to include all dates.
The “Select option” prompt appears.
8. Select how you want to view results:
• To
view
the results on the screen:
a. Select
View
.
b. Select
Prev/Next
to scroll up/down through
results and view individual transactions.
c. Select
Cncl
to stop viewing results and return
to the Reports menu.
• To
print
the results:
o Select
Print
to print the transaction list and
return to the Reports menu.
Page 26

24
9. Press
the red
CANC ANNUL
key to return to the Gift &
Loyalty transactions menu.
10. Press the
* (asterisk
) key to return to the applications
menu.
Clerk Sub-Totals
This report lists totals for all loyalty card transactions for
one or more Clerk IDs. Clerk sub-totals remain in memory
even when a batch is closed and deleted. The steps below
include the option of resetting the clerk sub-totals to zero.
1. On the applications menu, select
GIFT & LOYALTY
.
2. On the Gift & Loyalty transactions menu, press the
Reports
key (first purple key on the right).
If the “Password:” prompt appears, key in the
manager
password
and press the green OK key.
3. On the Reports menu, select
Clerk Subtotals
.
If the “Clerk ID:” prompt appears, key in the
Clerk ID
and press the green
OK
key.
The “Zero Clerk totals?” prompt appears.
4. To
reset
clerk totals to zero (0) at the completion of the
report, select
Yes.
OR
To
continue accumulating
clerk totals, select No.
The “Select Clerks” prompt appears.
5. Select the clerk sub-totals you want to print:
• To print sub-totals for
one clerk
:
a. Select
One
.
b. At the “Enter Clerk ID:” prompt, key in the
desired
Clerk ID
and press the green OK key.
• To print sub-totals for a
group of clerks
:
a. Select
Grp
.
b. At the “Enter Group:” prompt, key in the
desired the
Group ID
and press the green OK
key.
• To print sub-totals for a
list of clerks
:
a. Select
List
.
b. At the “Add Clerk/Group ID:” prompt, key in
the desired
Clerk ID
or
Group ID
and press the
green
OK
key.
The “Add more?” prompt appears.
c. To include another clerk’s or group’s sub-
totals in the report, select
Yes
and key in the
appropriate ID as above. Continue adding
clerks/groups as needed.
OR
To print the report now, select
No.
• To print sub-totals for
all clerks
:
o Select
All
.
The terminal prints the report and returns to the
Reports menu.
6. Press
the red
CANC ANNUL
key to return to the Gift &
Loyalty transactions menu.
7. Press the
* (asterisk
) key to return to the applications
menu.
Loyalty Pre-auth report
This report lists details of loyalty Pre-authorization
transactions that have NOT been completed.
1. On the applications menu, select
GIFT & LOYALTY
.
2. On the Gift & Loyalty transactions menu, select
Pre
Auth
.
3. On the Pre Auth menu, select
PreAuth Report
.
If the “Password:” prompt appears, key in the
manager
password
and press the green OK key.
The report prints and returns to the Pre Auth menu.
4. Press the red
CANC ANNUL
key to return to the Gift &
Loyalty transactions menu.
5. Press the
* (asterisk
) key to return to the applications
menu.
Page 27

25
End-of-day process
Printing a Stored Transaction Report
This report prints loyalty card transactions in the current
batch, by date or by batch number,
without
closing the
current batch. The report includes transaction details and
batch totals.
1. On the applications menu, select
GIFT & LOYALTY
.
2. On the Gift & Loyalty transactions menu, press the
Reports
key (first purple key on the right).
3. On the Reports menu, select
Trans List
.
If the “Password:” prompt appears, key in the
manager
password
and press the green OK key.
If the “Clerk ID:” prompt appears, key in the
Clerk ID
and press the green
OK
key.
The “Print by Date or Batch?” prompt appears.
4. Select the transactions you want to print:
•
By date:
a. Select
Date
.
b. At the “Date: MMDDYY:” prompt, key in the
desired date and press the green
OK
key.
OR
Simply press the green
OK
key to include all
dates.
Note
: Only the current batch is stored in
memory and available for reporting.
•
By batch:
a. Select
Batch
.
b. At the “Batch Num:” prompt, simply press the
green
OK
key.
Note
: Only the current batch is stored in
memory and available for reporting.
The terminal prints the report and returns to the
Reports menu.
5. Press
the red
CANC ANNUL
key to return to the Gift &
Loyalty transactions menu.
6. Press the
* (asterisk
) key to return to the applications
menu.
Closing a batch
This transaction closes the current batch of loyalty card
transactions and settles with the Moneris host.
Important: A Batch Close must be completed daily.
Note:
Moneris recommends printing a Stored Transactions
Report (p. 47)
before
performing a Batch Close to ensure
batch totals are balanced. If totals are not balanced, please
contact the Moneris Merchant Service Centre.
1. On the applications menu, select
GIFT & LOYALTY
.
2. On the Gift & Loyalty transactions menu, press the
Reports
key (first purple key on the right).
3. On the Reports menu, scroll down and select
Batch
Close
.
If the “Password:” prompt appears, key in the
manager
password
and press the green OK key.
If the “Clerk ID:” prompt appears, key in the
Clerk ID
and press the green OK key.
The “Print Details Report?” prompt appears.
4. To include transaction details in the Batch Close
report, select
Yes
.
OR
To print only batch totals, select
No
.
“000 Approved” appears.
5. Press the green
OK
key.
The terminal prints the Batch Close report, displays
“BATCH DELETED”, and returns to the Reports menu.
6. Press
the red
CANC ANNUL
key to return to the Gift &
Loyalty transactions menu.
7. Press the
* (asterisk
) key to return to the applications
menu.
Important: If “Balanced – NO” is printed at the bottom of
the report, contact the Moneris Merchant Service Centre
the next day for reconciliation assistance.
Page 28

26
Troubleshooting
If an error message appears, first press the green OK key
or the red
CANC ANNUL
key to clear the message then
retry the transaction. If the error message reappears and
is listed in the table below, follow the instructions in the
table’s Solution column. If the problem is still not resolved,
call the Moneris Merchant Service Centre toll-free at
1-
866-319-7450
.
Note:
Some of these prompts may not appear based on the
loyalty Program you are configured to use.
Error message
Solution
BATCH EMPTY
No loyalty transactions have been
processed since the last Batch Close.
Cardholder info
missing
Cardholder profile information
(e.g. first name, email) is required
to continue using the loyalty card.
Capture the cardholder’s profile
information using the process
outlined by your organization.
###
Card Disabled
The loyalty card you swiped has
been deactivated and cannot be
used.
Card Not
Supported
The card type you swiped cannot be
used for loyalty transactions.
Try again with a different card or
cancel the transaction.
XXX
Card Number
Not On File
You tried to use a Tracking loyalty
card to do a
Card Balance Inquiry
on
the terminal. Balance Inquiry
transactions are not supported for
Tracking loyalty cards.
Press the green OK key, and when
prompted to print the receipt,
choose No.
To obtain the balance of a Tracking
loyalty card, the customer must
contact the Loyalty Program Provider
under which their card is enrolled.
Card Read Error
There is a problem with the
magnetic stripe on the loyalty card
that was swiped.
Try swiping the card again, this
time more slowly or quickly, or
from front of the terminal to the
back. You can also key in the
card
number.
Error message
Solution
ERNEX
INITIALIZATION
FAILED
There has been a terminal, host or
communication problem during
initialization with the Moneris host.
Press the green OK key to return to
the Gift & Loyalty transactions
menu.
Try to re-initialize again (see
Initializing the terminal on page 4).
If this does not work, contact the
Moneris Merchant Service Centre.
ERNEX
INITIALIZATION
REQUIRED
Your terminal requires re-
initialization with the Moneris host.
Re-initialize your terminal with the
Moneris host (see Initializing the
terminal on page 4).
INITIALIZE ERNEX
The Moneris host is requesting a re-
initialization of the terminal.
Re-initialize your terminal with the
Moneris host (see Initializing the
terminal on page 4).
Insufficient
Points For
Redemption
There are not enough points on the
card to redeem the number of
points requested.
Perform a
Card Inquiry
(see page 6)
to obtain the balance on the card
then retry the Redemption with a
valid number of points.
INVALID AMOUNT
The $ amount you have entered is
invalid, e.g. you have entered $0.00
or the amount you have entered
exceeds the maximum or falls below
the minimum.
Re-enter a valid $ amount.
Invalid Entry
The information you have entered in
the terminal is not valid.
Check the information and retry.
Note: You will get this message when
the Pre-Tax $ amount you have
attempted to enter for a Purchase is
greater than the total transaction $
amount. In this case, make sure to
use the yellow
CORR
key to bring the
displayed amount back to 0.00
before entering the correct amount.
Remember that the wording for “PreTax Amount” may be different if you
have customized it.
Page 29

27
Error message
Solution
Invalid Password Press the red
CANC ANNUL
key, then
re-enter the manager password and
press the green OK key.
IMPORTANT: If the manager
password is entered incorrectly five
times in a row, the terminal will lock
and will be unable to perform
transactions. To unlock the terminal,
contact the Moneris Merchant
Service Centre and request a
password reset.
Invalid
redemption
points/amount
You have entered a redemption
value that is outside the minimum
or maximum value allowable for
your loyalty program.
Re-enter a valid $ amount.
Matching
Transaction Not
Found
RECORD NOT
FOUND
No transaction matching the
reference number you entered could
be found in terminal memory. Check
the number and try again.
“N O TOTALS
AVAILABLE”
appears and is
printed on the
Gift & Loyalty
Batch Close
report.
A Batch Close has been sent to the
Moneris host, but there are no
transaction totals at the host.
REFUND AMOUNT
GREATER THAN
ORIGINAL
The $ amount you have entered for
a Refund is greater than the amount
in the original Purchase transaction.
Press the green OK key and retry the
Refund with the correct amount.
SYSTEM ERROR
PLEASE TRY LATER
One or more configuration
parameters may have been set up
incorrectly or the terminal is unable
to communicate with the Moneris
host.
Check the parameter configuration
and make the necessary corrections.
You will need to re-initialize your
terminal (see Initializing the
terminal on page 4) before
processing any transactions.
Transaction
amount over
maximum
You have entered a Purchase
amount that is greater than the
maximum allowable for your loyalty
program.
Enter a valid amount.
Error message
Solution
XXX
Transaction Code
Invalid
You tried to use a Tracking loyalty
card to do one of the following
transactions on the terminal:
Activation
or
Deactivation
. However,
these transactions on the terminal
are not supported by the Tracking
program configured for your
account.
Press the green OK key. If you were
activating a card, you will be
returned to the Activate/Load
screen. If you had tried to deactivate
a Tracking loyalty card, you will be
returned to the Gift & Loyalty
transactions menu.
To activate or deactivate a Tracking
loyalty card, the customer must
contact the Loyalty Program Provider
under which their card is enrolled.
TRANSACTION
NOT FOUND
No loyalty transaction matching the
reference number you entered could
be found in terminal memory.
Check the number and try again.
Other problems
Problem
Solution
Points balance is
negative.
A negative points balance is
possible if you have chosen
this option during program
setup.
Terminal does not
respond when
entering a $ amount
and pressing the green
OK
key.
You have attempted to enter
$0.00 as the loyalty card total
transaction or Pre-Tax
amount.
Re-enter the correct amount.
Only one Reward
coupon prints
although the loyalty
card has reached the
Reward Threshold Level
multiple times.
For Automatic Redemption, a
cardholder may redeem only
one Reward Coupon per
transaction (a Reward is
equal to the Reward
Threshold Level).
Inform the cardholder that
he/she can receive the
remaining Reward Coupons
during subsequent
transactions with the same
card.
Page 30

28
Problem
Solution
Problems with or
questions about the
Tracking program
and/or Tracking cards.
Contact the Loyalty Program
Provider.
“Tracking Points
Earned”, “Lifetime
Balance”, “Current
Balance” and/or
“Bonus Points” are not
printed on transaction
receipts nor displayed
during Card Inquiry.
You have used a Tracking
loyalty card for the
transaction. Those values do
not print on a Tracking
transaction receipt.
The Loyalty Program Provider
under which the card is
enrolled stores card and
points information.
To obtain a Tracking loyalty
card’s points balance
summary, the cardholder
must contact the Loyalty
Program Provider under
which the card is enrolled.
At the Redemption
screen, the Tracking
Program name
appears and nothing
happens when the
Tracking loyalty card is
swiped.
You have used a Tracking
loyalty card in a Redemption
transaction. Redemption
transactions are not
supported for Tracking loyalty
cards.
Press the red
CANC/ANNUL
key to return to the Gift &
Loyalty menu.
To redeem points using a
Tracking loyalty card, the
customer must contact the
Loyalty Program Provider
under which their card is
enrolled.
Page 31

Need help?
Please contact the Moneris Merchant Service Centre
toll-free at
1-866-319-7450 (open 24 hours a day, 7
days a week).
If you use Merchant Direct®, you can also contact us
online. Simply log in to Merchant Direct and use the
Message Centre to send a secure message directly to
the Moneris Merchant Service Centre.
For additional information and copies of manuals
and guides for the Moneris Mobile 8300:
• Visit moneris.com/manuals
to download a
copy of the Moneris Mobile 8300 Duet
Operating Manual.
• Visit moneris.com/guides to download
additional copies of this reference guide.
Shop for point-of-sale supplies and paper online at
shop.moneris.com.
Important: If you are experiencing equipment
problems, please refer to the
Moneris Mobile 8300
Using Your Terminal Guide.
® MONERIS, MONERIS & Design, MONERIS SOLUTIONS & Design, and
MERCHANT DIRECT are registered trade-marks of Moneris Solutions
Corporation. All other marks or registered trade-marks are the property of
their respective owners.
© 2017 Moneris Solutions Corporation, 3300 Bloor Street West, Toronto,
Ontario, M8X 2X2
All Rights Reserved. This guide shall not wholly or in part, in any form or by
any means, including electronic, mechanical, and photocopying, be
reproduced or transmitted without the authorized consent of Moneris
Solutions Corporation (“Moneris”).
This guide is for informational purposes only. Neither Moneris nor any of
its affiliates shall be liable for any direct, indirect, incidental, consequential
or punitive damages arising out of use of any of the information contained
in this guide.
Neither Moneris or any of its affiliates nor any of our or their respective
licensors, licensees, service providers or suppliers warrant or make any
representation regarding the use or the results of the use of the
information, content and materials contained in this guide in terms of
their correctness, accuracy, reliability or otherwise.
It is the merchant’s responsibility to ensure that proper card processing
procedures are followed at all times. Please refer to your Loyalty Program
Operating Manual and your Moneris Loyalty Program Agreement for
details. The Moneris Loyalty Program manuals are available for free
download at
moneris.com/guides.
LOY-8300 UYT-E (11/17)
 Loading...