

Moneris hispeed 6200, mobile 8200 Installation Manual
Moneris HiSpeed 6200
Merchant Self Installation Guide
IMPORTANT – If this is your first POS device with Moneris Solutions
your POS device you should have received your Moneris Visa Merchant Agreement /
Moneris MasterCard Merchant Agreement / Moneris Debit Card and Terminal Agreement
(Moneris Agreements English 80016 (07/05). If you did not receive this document, please do
not proceed with this installation. Please contact us at 1-866-319-7450, Select option 1 for
English and Option 4 for Technical support. Once you have obtained a copy of this
document please proceed with your install.
If you have an existing POS device with Moneris Solutions
proceed with your installation.
© Copyright Moneris Solutions, 2008.
All rights reserved. No part of this publication may be reproduced, stored in retrieval system, or transmitted, in any form or
by any means, electronic, mechanical, photocopying, recording, or otherwise, without the prior written permission of
Moneris Solutions.
, this document is not required to
, in the package with
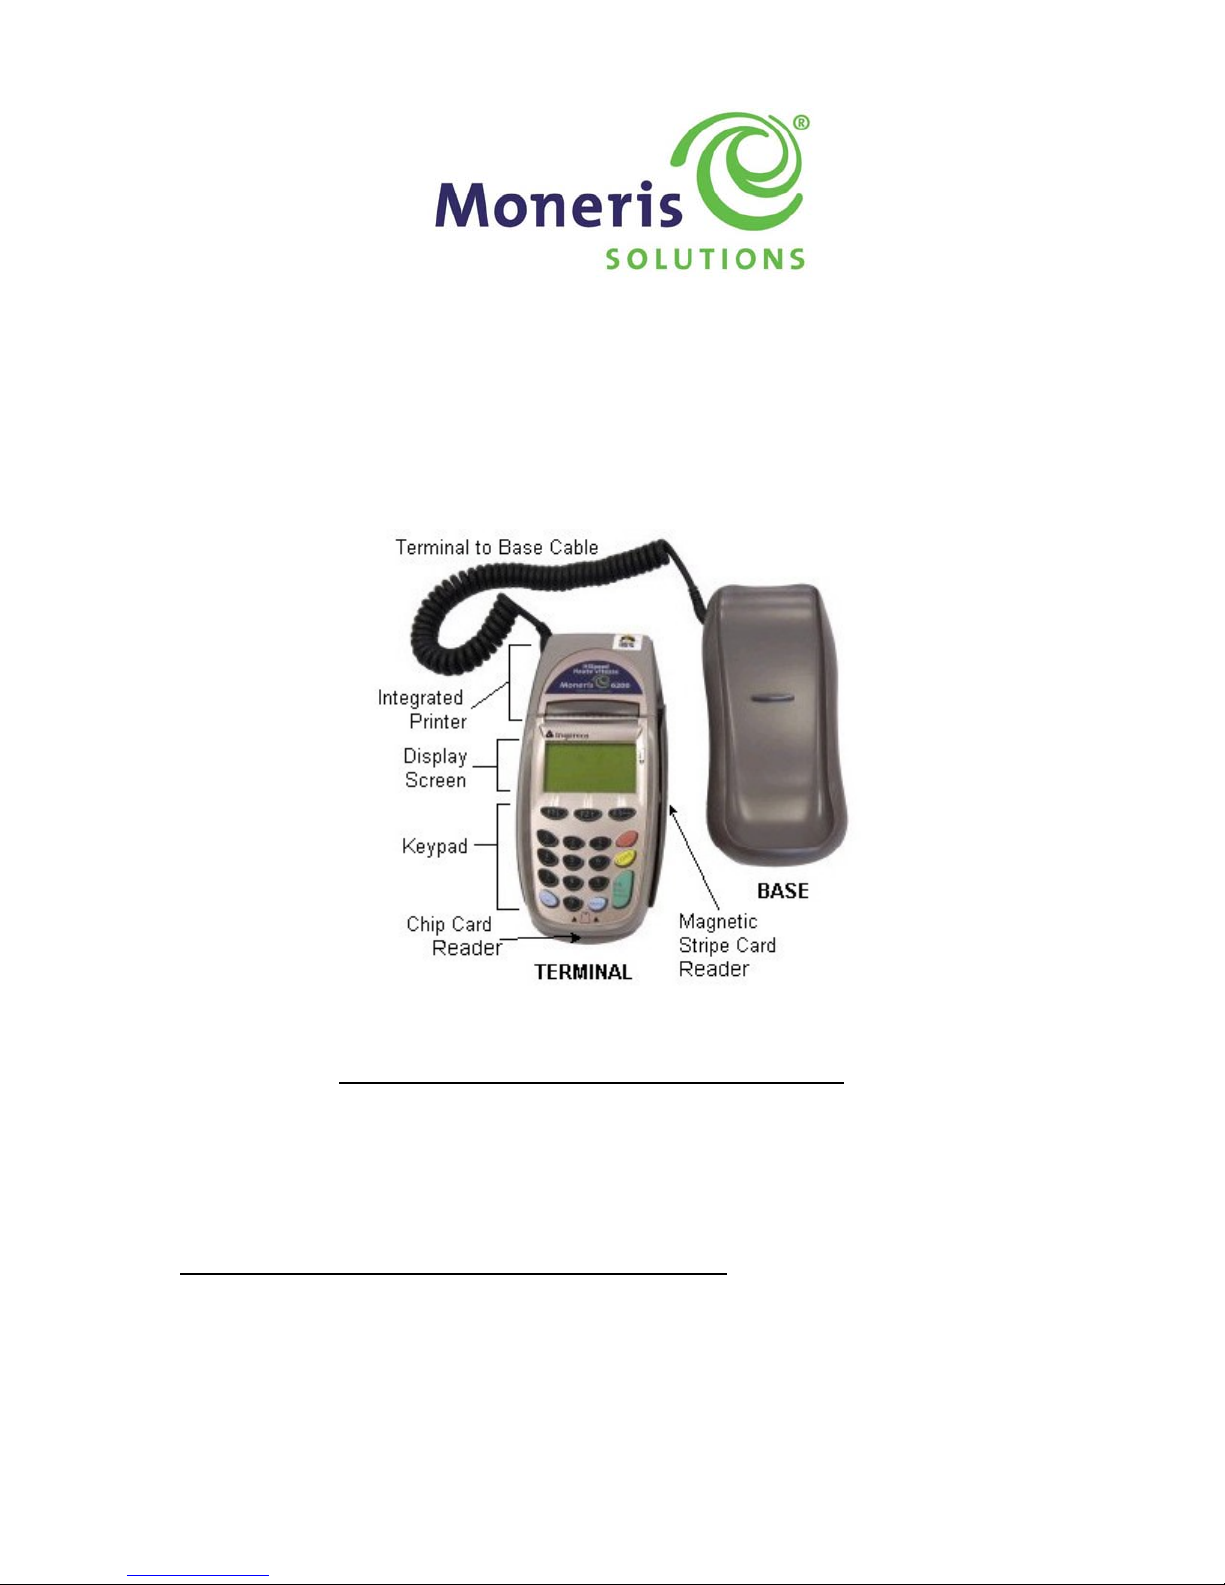
Setting up the Terminal
If installing on dial up (analog phone line)
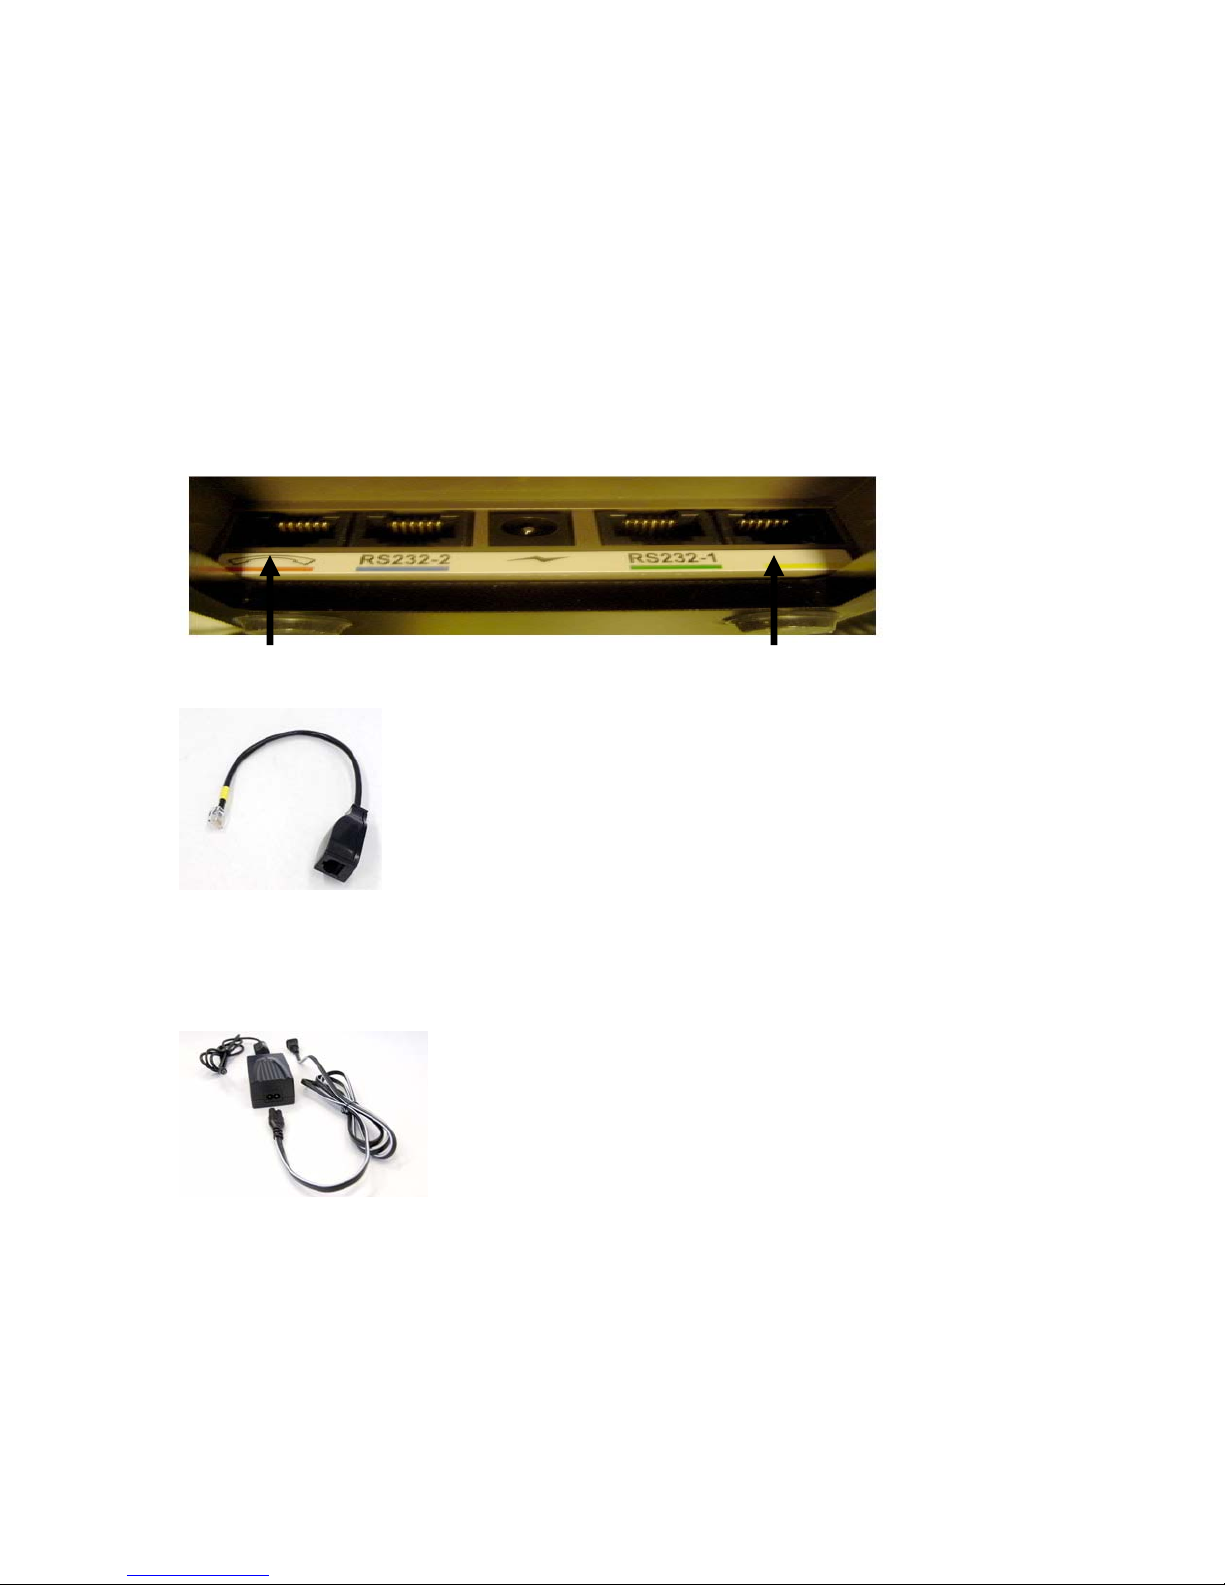
¾ Plug phone cable into red bar on back of terminal base (see Picture #1.) Plug other end of cable
into phone jack.
¾ If using a 2 way splitter, sometimes it may be necessary to test both sides ( if sharing a line and
using a splitter, the terminal and the phone cannot be used at the same time )
If installing on IP (Ethernet)
¾ Plug Ethernet cable into yellow bar on back of terminal base (see Picture#1.) Plug other end of
cable into router/switch/hub/internal wiring – whatever is applicable to your specific location
(please refer to Moneris IP readiness checklist if necessary)
Picture #1
(dial red) (Ethernet yellow)
Some devices require an adaptor to connect the
Ethernet cable. Should you receive the part on
the left (pigtail) you will need to connect this to
the Ethernet Port on the back of the device prior
to connecting the Ethernet cable.
¾ Locate the power cord
¾ It may be in 2 parts in the box. (See picture #2)
Picture #2
Please ensure you are using the power cable provided to you with this device. Do not use
the power cable from your existing device as it will damage the equipment.
¾ Plug power cord into terminal base using the middle port (see picture #1) then plug into power
source.
¾ It is recommended that a power bar with surge protection be used.
¾ It is important to plug into power source last to avoid any initial power surges.
¾ After the device conducts a power up process it should read TERMINAL SET UP REQUIRED.
2
Helpful Hints
¾ F1 is to say yes to any questions and to scroll down.
¾ F3 is to say no and to scroll up.
¾ You always need to press OK or enter for it to accept any prompts and to move on to next step.
If you ordered a VIVOPay 5000 Contactless Reader please refer to the Contactless Reader Quick
Reference Guide for set up instructions.
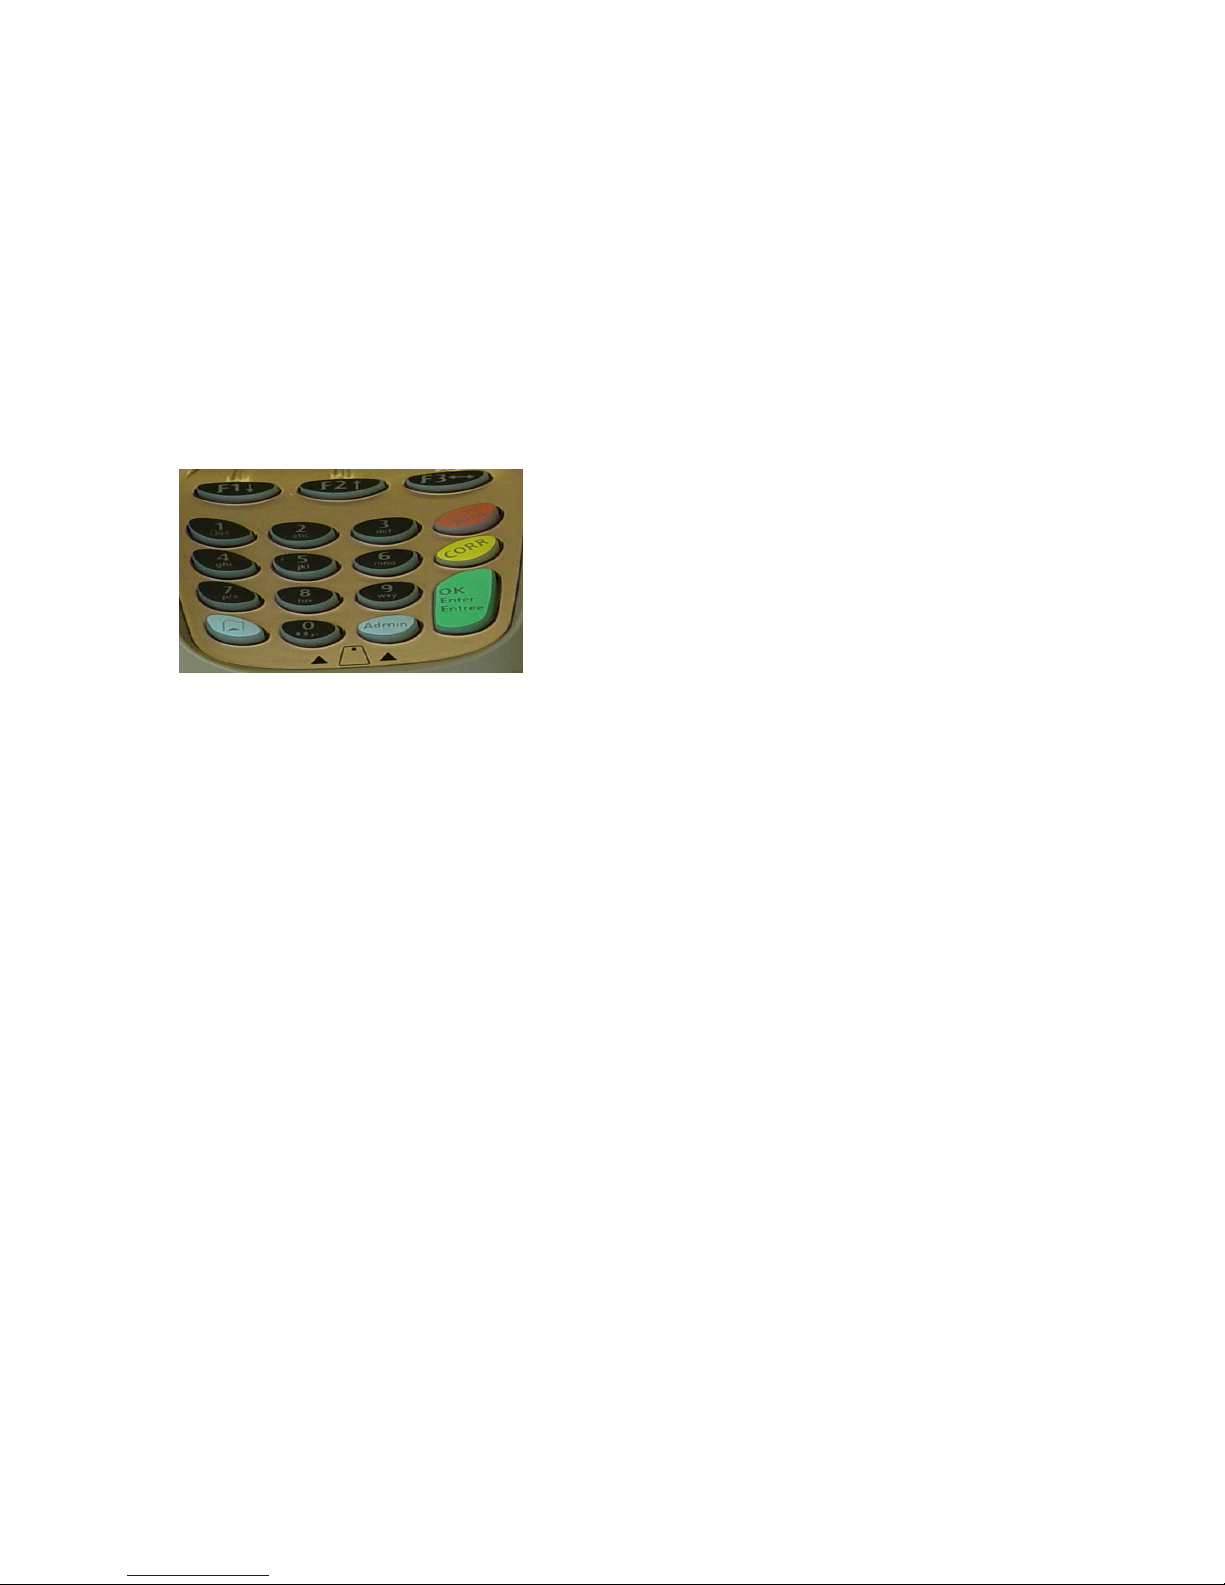
Configuring the Terminal
Picture #3
Step 1
If you require TIPS, CASH BACK or INVOICE NUMBERS continue with Step 1. If not proceed to Step 2.
¾ Press the blue admin button twice (see picture #3)
¾ The terminal will ask for admin code, enter 08 & push OK.
¾ Use F1 to scroll down to the option you want to enable, make sure it is highlighted, press OK, and
then enable it by pressing F1 for yes
¾ The screen will now say COMMS TYPE.
¾ Press red cancel button (see picture #3) twice.
¾ The screen will say – TERMINAL SETUP REQUIRED.
Step 2
Communications Configuration and Initialization
For Dial Communication -
If you need a prefix to dial out continue below (If not proceed to Dial initialization Steps)
If a 9 is required press blue admin button twice, enter admin code 15, press OK.
¾ The terminal will read PREFIX.
¾ Press OK, enter 9.
¾ The screen will again read PREFIX.
3
 Loading...