

Page 1
(09/17)
Moneris® iPP320 PIN Pad: Quick Install
Guide
Page 2

For more information
and assistance:
Web: moneris.com/support-PAYDProPlus-mobile
Toll-free: 1-855-423-PAYD (7293)
Record your Moneris merchant ID here:
____________________________________
Page 3

1
Contents
Introduction ............................................................................................. 3
Before you get started............................................................................ 4
Requirements for PAYD Pro Plus Mobile Solution 4
Requirements for PAYD Pro Plus In-Store Solution 5
Locating the PIN Pad ID 6
Setting up the iPP320 PIN Pad for PAYD Pro Plus Mobile Solution8
Setup considerations 8
Connecting the iPP320 PIN Pad cables 8
Determining the iPP320 PIN Pad’s software version 10
Configuring the iPP320 PIN Pad options 10
Configuring the iPP320 PIN Pad in the PAYD Pro Plus App 11
Selecting the iPP320 PIN Pad 11
Initializing the iPP320 PIN Pad 14
Rebooting the iPP320 PIN Pad 15
Troubleshooting iPP320 PIN Pad issues in the PAYD Pro Plus App 15
Setting up the iPP320 PIN Pad for PAYD Pro Plus In-Store
Solution ................................................................................................... 17
Downloading and installing the USB driver 17
Connecting the iPP320 PIN Pad to the laptop or computer 18
Determining the software version 19
Verifying the USB driver 19
Configuring the iPP320 PIN Pad options 20
Page 4

2 MONERIS® IPP320 PIN PAD: QUICK INSTALL GUIDE
Configuring PAYD Pro Plus to use the iPP320 PIN Pad 21
Enabling the iPP320 PIN Pad 21
Setting the iPP320 PIN Pad port 22
Establishing communication with the iPP320 PIN Pad 23
Troubleshooting iPP320 PIN Pad issues in the PAYD Pro Plus In-Store
Solution 25
Merchant support ................................................................................. 27
Page 5

3
Introduction
This guide explains how to install and configure the iPP320 PIN Pad for the
PAYD Pro Plus Mobile App on an Apple® iPad®, and for the PAYD Pro Plus InStore Solution on a laptop or computer.
Page 6
4 MONERIS® IPP320 PIN PAD: QUICK INSTALL GUIDE
Before you get started
Requirements for PAYD Pro Plus Mobile
Solution
To use the iPP320 PIN Pad with the PAYD Pro Plus Mobile Solution on an
Apple iPad, please ensure you have the following items:
High speed Internet access
A wireless internet router with one or more available Ethernet ports
A Wi-Fi network to which both the router and the Apple iPad are
connected
The PAYD Pro Plus App downloaded and installed on your Apple iPad
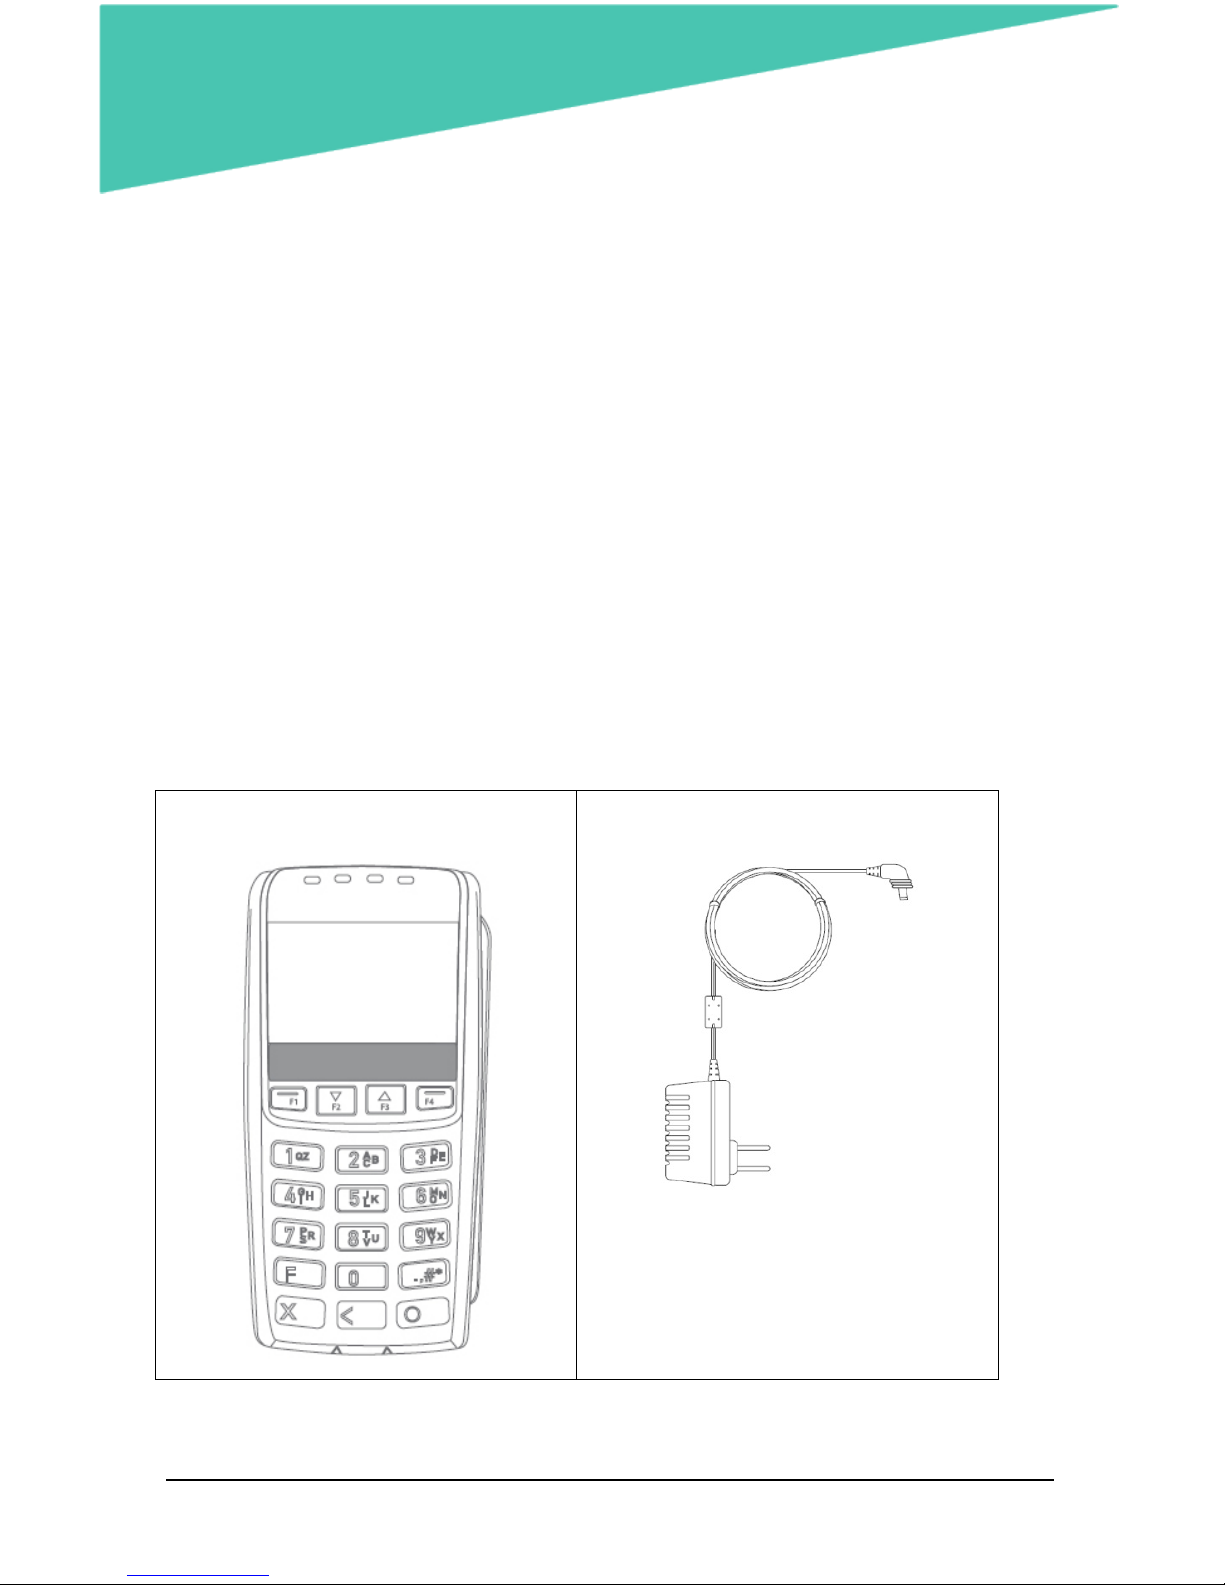
Please confirm you received the following items to use the iPP320 PIN Pad
with the PAYD Pro Plus App.
iPP320 PIN Pad
Power adaptor cable
Note:
This power adaptor cable
is used exclusively for the iPP320
PIN Pad integrating with the PAYD
Pro Plus App.
Page 7
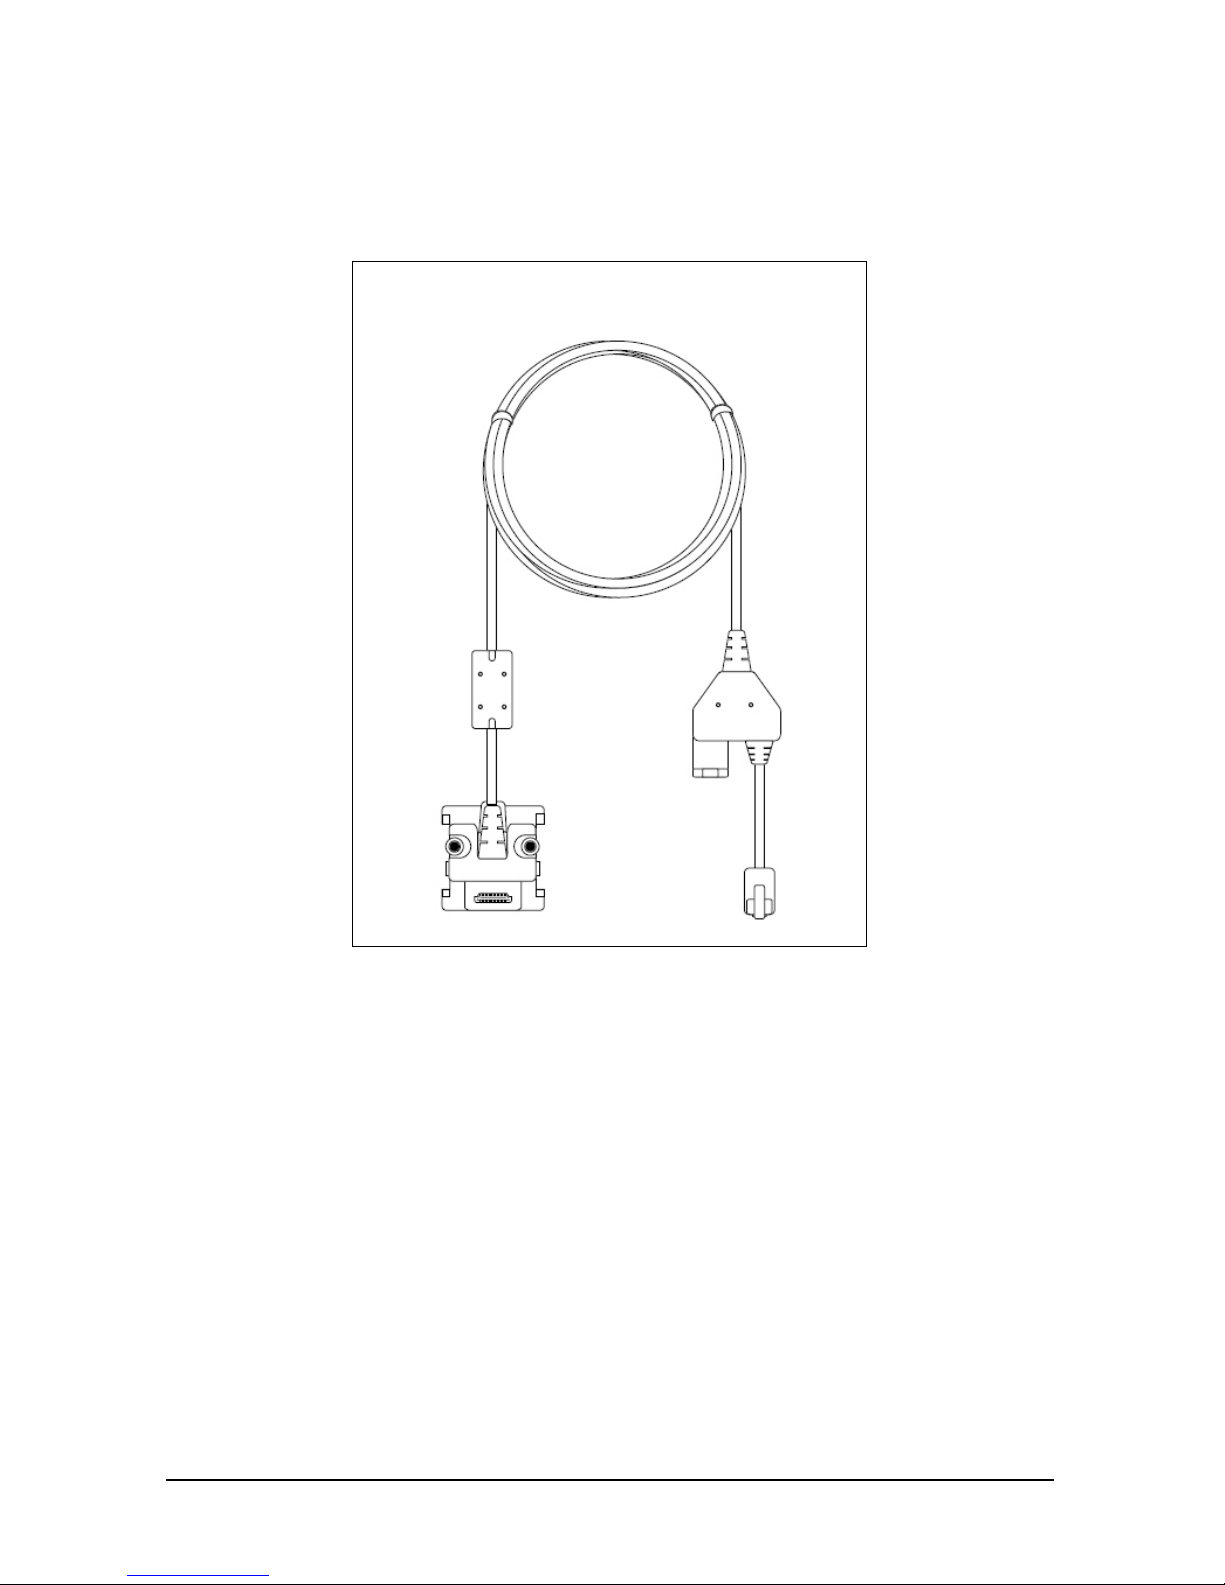
5
PIN Pad cable
Requirements for PAYD Pro Plus In-Store
Solution
To use the iPP320 PIN Pad with the PAYD Pro Plus In-Store Solution on a
laptop or computer, please ensure you have the following items:
The PAYD Pro Plus In-Store Solution is optimized to run on
Internet
Explorer 11
on a laptop or computer using Windows® 7 or Windows 8.
Your laptop or computer must be equipped with 7 or more USB ports
and a processor, graphics processor and RAM capable of supporting the
Windows operating system.
Note:
The PAYD Pro Plus In-Store Solution is also compatible with
Windows 10; however it has not been optimized to run on Edge, the web
Page 8
6 MONERIS® IPP320 PIN PAD: QUICK INSTALL GUIDE
browser installed by default with Windows 10. You will need to run
Internet Explorer 11 on Windows 10 in order to operate PAYD Pro Plus.
The login of your Windows operating system must be an Administrator
login, or it must be the login of a member of the Administrator’s group.
Your computer must have the Java® Platform installed. To download the
latest version of Java, go to
java.com
and click “Free Java Download”.
Follow the prompts in the Java installation wizard to guide you through
the setup.
Your store must be enabled to accept payment with cards using a PIN
Pad.
iPP320 PIN Pad
PIN Pad cable
Locating the PIN Pad ID
As you begin the process of setting up the iPP320 PIN Pad to work with your
PAYD Pro Plus Mobile Solution, you will need to record the PIN Pad ID.
The PIN Pad ID displays on the screen as the iPP320 PIN Pad is booting up.
Page 9

7
It is also printed on a sticker
attached to the side of the
iPP320 PIN Pad (as shown in
the diagram here).
Page 10

8 MONERIS® IPP320 PIN PAD: QUICK INSTALL GUIDE
Setting up the iPP320 PIN Pad for
PAYD Pro Plus Mobile Solution
Setup considerations
Before you begin setting up the iPP320 PIN Pad, consider the following:
The location where the PIN Pad will be used by your customers must be
within reach of:
the router (the PIN Pad cable is 2 meters (6.6 feet))
a power source (the power adaptor cable is 1.8 meters (6 feet))
Note:
If the PIN Pad cable is not long enough, do not connect routers or
Ethernet cables together (“daisy chaining”). The iPP320 PIN Pad with the PAYD
Pro Plus Mobile Solution does not support this type of configuration. Instead,
you should try to situate the router closer to the location where the PIN Pad
will be used by your customers.
Connecting the iPP320 PIN Pad cables
Note:
You must use the exact power adaptor and cables provided by
Moneris to work with the iPP320 PIN Pad. Failure to do so may affect the
operability of, or cause damage to, the equipment.
Page 11

9
iPP320 PIN Pad
PIN Pad cable
Power adaptor cable
Power outlet (or surge protector)
Junction box
Wi-Fi router
Wi-Fi signal
Apple iPad
To connect the iPP320 PIN Pad cables:
1. Turn the iPP320 PIN Pad over so that the back panel is facing you.
2. Plug the HDMI connection of the PIN Pad cable into the HDMI port on
the back of the iPP320 PIN Pad (raise the latch).
3. Optional: Secure the PIN Pad cable to the iPP320 PIN Pad.
a. Lift the flap exposing the screw holes.
b. Use a Phillips screwdriver to tighten the screws onto the housing
of the HDMI connection.
4. Fold the latch down and press to secure the cable.
5. Connect the other end of the PIN Pad cable to an available Ethernet port
on the router .
6. Connect the power adaptor cable to the junction box on the PIN
Pad cable.
Page 12

10 MONERIS® IPP320 PIN PAD: QUICK INSTALL GUIDE
7. Connect the other end of the power adaptor cable to a wall outlet or
surge protector .
The iPP320 PIN Pad boots up to the LANGUAGE/LANGUE screen.
You are now ready to configure the iPP320 PIN Pad’s options.
Determining the iPP320 PIN Pad’s software version
The software version information appears
as the iPP320 PIN Pad is booting up. Use
the diagram presented here to determine
the software version.
Configuring the iPP320
PIN Pad options
Some configuration needs to be done to the iPP320 PIN Pad to ensure it will
work with the router and the PAYD Pro Plus App.
Note:
Perform this task with each iPP320 PIN Pad that you ordered for the
PAYD Pro Plus App.
Note:
These instructions assume you have successfully connected the iPP320
PIN Pad to a power source as described in the Connecting the iPP320 PIN Pad
cables section on page
8. The first time the iPP320 PIN Pad is powered up, it
remains at the LANGUAGE/LANGUE screen until the user makes a selection.
1. At the LANGUAGE/LANGUE screen, select the PIN Pad display language:
Press the
F1
key to select English (
ENGL
).
Press the
F4
key to select French (
FRAN
).
2. At the MODE screen, press the green key to select
SPT
.
3. At the COMM TYPE screen, press the
F2
key to scroll down and highlight
ETHERNET
. Once highlighted, press the green key to select it.
4. At the ETHERNET IP TYPE screen, press the
F4
key to select
DYNAMIC
.
Page 13

11
5. At the ENTER IP CONFIG RETRY PERIOD prompt, press the green key
to accept the default value (10 seconds).
6. At the PED SERIAL NUMBER prompt, press the green key.
The iPP320 PIN Pad displays “TERMINAL WILL BE REBOOTED…”.
7. After the iPP320 PIN Pad reboots, the WELCOME/BONJOUR screen
appears.
You are now ready to configure the iPP320 PIN Pad in the PAYD Pro Plus App.
Configuring the iPP320 PIN Pad in the
PAYD Pro Plus App
Selecting the iPP320 PIN Pad
Follow the instructions below to select the iPP320 PIN Pad within the PAYD
Pro Plus App.
Note:
Perform this task on each iPad to which you wish to connect an iPP320
PIN Pad.
Note:
This guide explains how to connect one iPP320 PIN Pad to one iPad. If
you have more than one iPP320 PIN Pad and iPad, refer to the PAYD Pro Plus
Online Help for instructions.
1. Log in to the PAYD Pro Plus App on the iPad you wish to configure.
2. Tap the
Settings
button ( ).
3. On the main menu, tap
Configuration
.
4. On the Configuration screen, tap
Devices
.
5. On the Devices screen, in the
PIN PAD
section, toggle the
Enable PIN Pad
switch to the right (Enabled).
6. Tap
Setup
.
7. In the PIN Pad Configuration popup, in the CONNECTION TYPE section,
select
Network
.
Page 14
12 MONERIS® IPP320 PIN PAD: QUICK INSTALL GUIDE
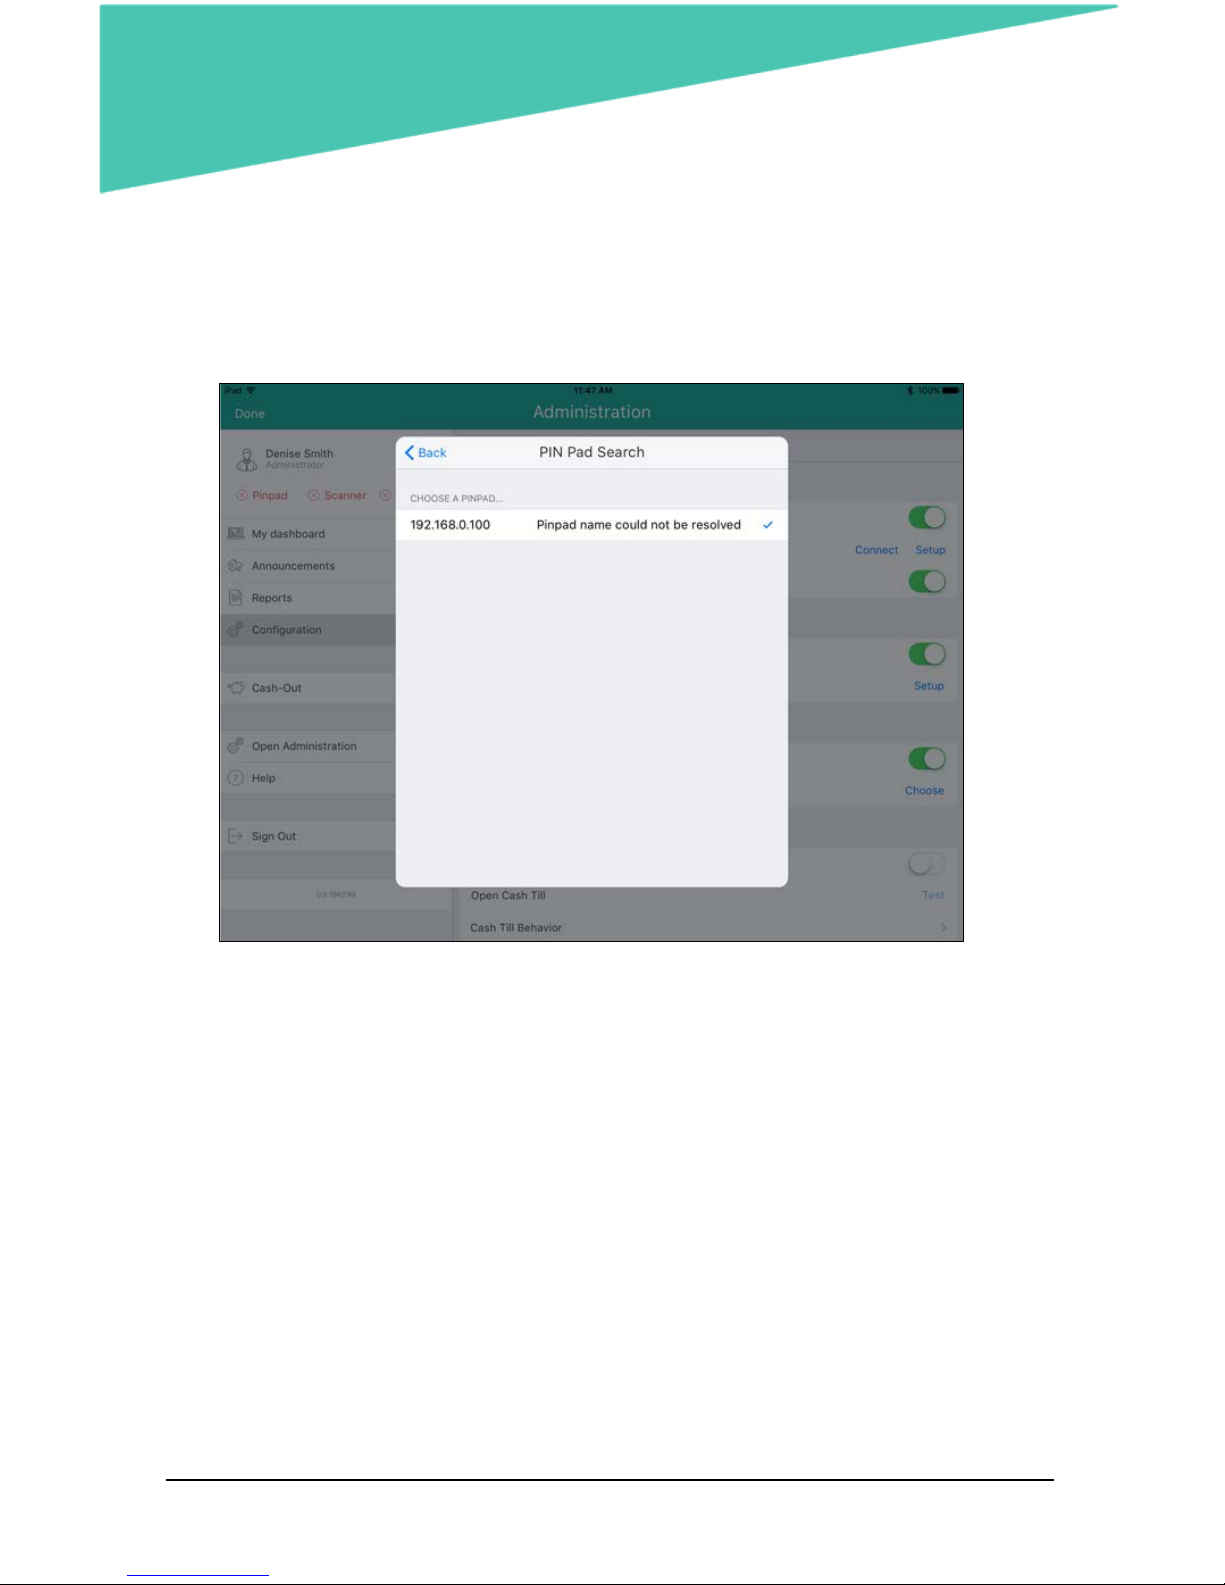
8. In the NETWORK ADDRESS section, tap
Search
.
The PAYD Pro Plus App searches the network for iPP320 PIN Pads
connected to the router, and then displays them.
9. Tap the PIN Pad’s IP address e.g. “192.168.0.100”, then tap
<Back
at the
top of the popup.
The PIN Pad’s IP address is now displayed.
Page 15

13
10. Tap
Finish
in the top right corner of the PIN Pad Configuration popup.
The screen displays “Connecting to PIN Pad”. This operation may take a
couple minutes.
Page 16

14 MONERIS® IPP320 PIN PAD: QUICK INSTALL GUIDE
11. Do one of the following:
If you want to enable tips (gratuities) to be collected via the PIN Pad,
toggle the
Enable debit/credit card tipping
switch to the right
(Enabled).
OR
If you do not wish to collect tips via the PIN Pad, leave the switch
alone (not toggled).
12. Initialize the iPP320 PIN Pad. Proceed to Initializing the iPP320 PIN Pad
below.
Initializing the iPP320 PIN Pad
Once the iPP320 PIN Pad has been selected, it will need to be initialized.
Follow the instructions below.
Note:
Perform this task on each iPad with an iPP320 PIN Pad connected.
Page 17

15
1. In the Configuration – Devices screen, in the
PIN PAD
section, tap
Initialize
.
A Warning popup appears.
2. Tap
Yes
.
The PAYD Pro Plus App displays “Initializing PIN Pad…”. The iPP320 PIN
Pad displays “PLEASE WAIT”.
3. Once completed, the message “PIN Pad has been successfully initialized”
appears on the iPad. Tap the
OK
button.
The iPP320 PIN Pad returns to the WELCOME/BONJOUR screen and the
PAYD Pro Plus App returns to the Configuration – Devices screen.
Congratulations! You are now ready to process Interac debit and credit card
transactions with your PAYD Pro Plus App and the iPP320 PIN Pad.
Rebooting the iPP320 PIN Pad
On the iPP320 PIN Pad, hold down the yellow key and press the
alphanumeric key at the same time. The iPP320 PIN Pad will beep and
restart.
Troubleshooting iPP320 PIN Pad issues in
the PAYD Pro Plus App
Issue
Solution
“PINPad connection
could not be
established. If this
problem persists
please restart the
PINPad and
Application.”
1. Log out of the PAYD Pro Plus App.
2. Restart the Apple iPad.
3. Disconnect and reconnect the iPP320 PIN Pad’s
power cable from the Junction Box.
4. Log in to the PAYD Pro Plus App.
Repeat the instructions in the Selecting the iPP320
PIN Pad section on page 11.
Page 18

16 MONERIS® IPP320 PIN PAD: QUICK INSTALL GUIDE
Issue
Solution
“No Pinpads found”
appears in the PIN Pad
Configuration popup
when searching for an
iPP320 PIN Pad.
Try these steps:
1. Refer to Connecting the iPP320 PIN Pad cables on
page 8 to ensure that:
The iPP320 PIN Pad is connected to power.
The PIN Pad cable is connected to the
router.
2. Log out of the PAYD Pro Plus App.
3. Log in to the PAYD Pro Plus App.
4. Repeat the instructions in the Selecting the
iPP320 PIN Pad section on page 11 beginning at
step 8.
“PIN Pad initialization
error.”
Contact Moneris Customer Care toll-free at
1-855-
423-PAYD (7293)
.
The router is not
within reach of the
location where the
iPP320 PIN Pad will be
used.
Consider relocating the router to a location closer
to
the iPP320 PIN Pad’s intended point of use
. Consult
your network administrator or a local computer
retailer for
help in relocating the router
.
The power source is
not within reach of
the location where the
iPP320 PIN Pad will be
used.
Consider using an extension cable or a power bar
with surge protection, which can get closer to the
iPP320 PIN Pad’s power adaptor cable.
Page 19

17
Setting up the iPP320 PIN Pad for
PAYD Pro Plus In-Store Solution
Downloading and installing the USB driver
Note:
In a multi-lane environment, perform this task on each laptop or
computer that will use an iPP320 PIN Pad.
1. Open the Internet Explorer web browser.
2. Go to
https://esqa.moneris.com/connect/en/download/drivers/index.html
.
3. Click on the
iPP320 USB Driver
link to download the zip file.
4. Save the file into a folder on your hard drive.
5. Once the file is saved, unzip the file into the save folder on your hard
drive.
6. Close any programs that are currently open on your computer.
7. Double-click the unzipped installation file
(
IngenicoUSBDrivers_2.60_setup.exe
) and follow the Installation Wizard
prompts to install the driver onto your computer.
a. At the first installation screen, click
Next
.
b. At the Choose Install Location screen, accept the default
installation directory and click
Next
.
c. At the USB Driver parameters screen, leave the fields blank and
click
Next
.
d. At the Advanced parameters screen, leave the
Uninstall
Microsoft Usbser drivers
checkbox checked and the
Command
line
field blank and click
Next
.
e. At the Choose Start Menu Folder screen, accept the default Start
folder shown and click
Install
.
f. Wait while the driver package installs on your computer.
g. Once the installation completes, click
Finish
.
Page 20

18 MONERIS® IPP320 PIN PAD: QUICK INSTALL GUIDE
8. Proceed to the Connecting the iPP320 PIN Pad to the laptop or computer
section below.
Connecting the iPP320 PIN Pad to the
laptop or computer
Note:
In a multi-lane environment, perform this task on each laptop or
computer that will use an iPP320 PIN Pad.
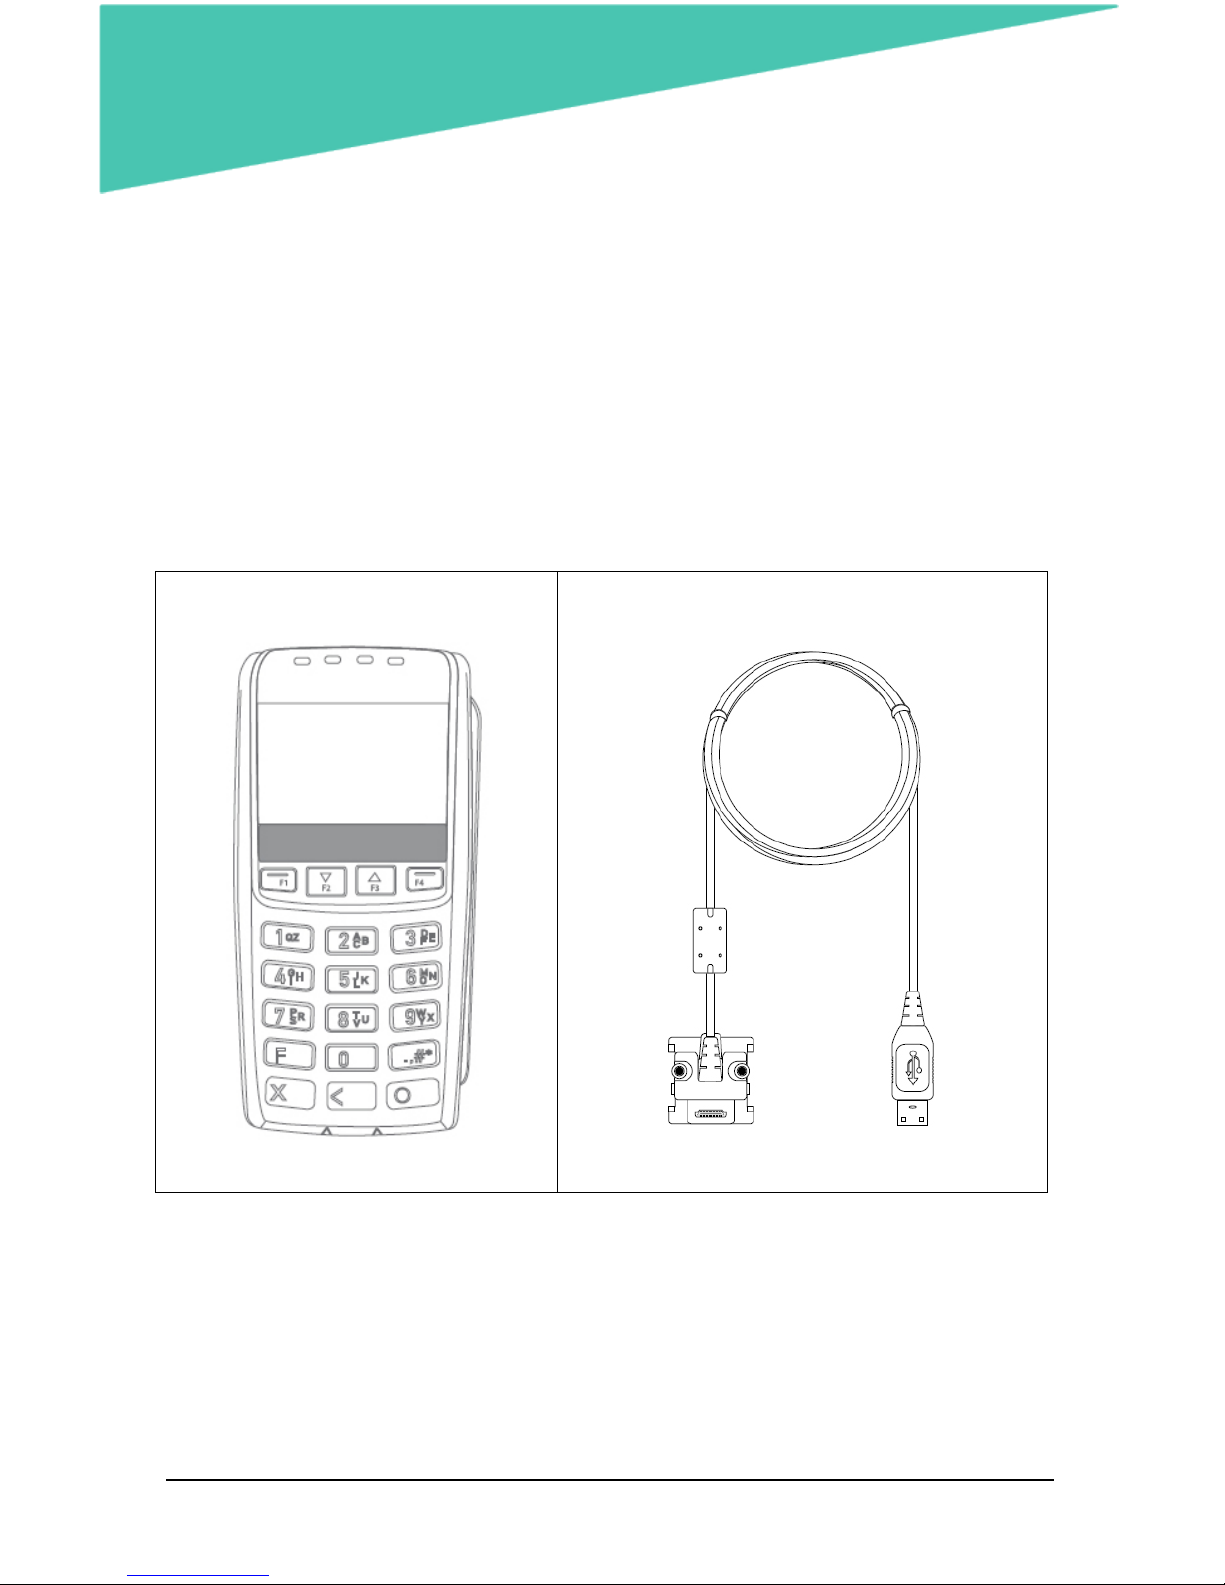
iPP320 PIN Pad
PIN Pad cable
USB connection
USB port on the back or side of the laptop or computer
To connect the iPP320 PIN Pad cable to the laptop or computer:
1. Turn the iPP320 PIN Pad over so that the back panel is facing you.
2. Plug the HDMI connection of the PIN Pad cable into the HDMI port on
the back of the iPP320 PIN Pad (raise the latch).
Page 21

19
3. Optional: Secure the PIN Pad cable to the iPP320 PIN Pad.
a. Lift the flap exposing the screw holes.
b. Use a Phillips screwdriver to tighten the screws onto the housing
of the HDMI connection.
4. Fold the latch down and press to secure the cable.
5. Connect the other end of the PIN Pad cable to an available USB port
on the laptop or computer .
Once connected, Windows will detect the iPP320 PIN Pad and install drivers
for it.
Determining the software version
The software version information
appears as the iPP320 PIN Pad is booting
up. Use the diagram presented here to
determine the software version.
Verifying the USB
driver
Follow the instructions below to determine if the correct USB driver for the
iPP320 PIN Pad is installed on your computer.
1. Click the Start menu.
2. Right-click
Computer
and select
Manage
.
The Computer Management screen opens.
3. Click
Device Manager
.
4. Click the arrow in front of
Ports (COM & LPT)
to reveal the available ports.
5. In the list of ports, look for SAGEM Telium. This is the name of the driver
for the iPP320 PIN Pad.
Page 22

20 MONERIS® IPP320 PIN PAD: QUICK INSTALL GUIDE
If the SAGEM Telium driver is there, proceed to the Configuring the
iPP320 PIN Pad options instructions on page 20.
If not, return to the Downloading and installing the USB driver
instructions on page 17 and ensure you have correctly installed the
USB driver.
Configuring the iPP320 PIN Pad options
1. Power cycle the iPP320 PIN Pad.
On the PIN Pad, hold down the yellow key and press the
alphanumeric key at the same time. The iPP320 PIN Pad will
beep and restart.
2. When you see the version information screen,
you have 10 seconds to press the red
key, and then press the green key.
Note:
If the WELCOME/BONJOUR screen appears, repeat step 1 to power
cycle the iPP320 PIN Pad.
3. At the LANGUAGE/LANGUE screen, press the
F1
key to select
ENGL
.
4. At the CABLE TYPE screen, press the green key to select
USB
.
5. At the QR-CODE screen, press the
F4
key to select
OFF
.
6. At the BEEP screen, press the
F1
key to select ON.
7. At the TERMINAL ID screen, press the green key.
8. At the PED SERIAL NUMBER screen, press the green key.
The iPP320 PIN Pad displays a summary of some of the choices you made,
then displays the WELCOME/BONJOUR screen.
Page 23

21
Configuring PAYD Pro Plus to use the
iPP320 PIN Pad
Since you are an integrated payments merchant, your PAYD Pro Plus In-Store
Solution has already been set up to accept payments from an integrated
iPP320 PIN Pad. Now you need to make a few changes to the PAYD Pro Plus
configuration to complete the integration.
Enabling the iPP320 PIN Pad
Follow the instructions below to enable PAYD Pro Plus to recognize the
iPP320 PIN Pad.
Note:
In a multi-lane environment, you only need to perform this task on
any one of the laptops or computers, as you can control configuration options
for all POS lanes for the business in the Lanes screen.
1. From the Moneris PAYD
®
Administration main screen, click the
Configuration
icon ( ).
2. On the Configuration menu, click
Lanes
.
3. In the Lanes screen, place a checkmark in the
Use a PIN Pad
checkbox for
each lane that will be equipped with a PIN Pad.
Page 24

22 MONERIS® IPP320 PIN PAD: QUICK INSTALL GUIDE
4. Click the
Save
button at the top of the screen.
Setting the iPP320 PIN Pad port
1. From the PAYD Administration screen, click the
Open POS
link in the top
right corner of the screen.
The POS view opens.
Note:
The POS view might detect the iPP320 PIN Pad and present you
with a message to restart your browser. If this message appears, click
Okay
and close the browser. Repeat step 1 to reopen the POS view and proceed to
the next step.
2. In the POS view, click the
Tools
tab in the bottom right corner of the
screen.
3. On the Tools button panel, click the
Hardware Setup
button.
4. In the POS – Hardware Setup popup, click the
PIN Pad
tab.
5. Select the
USB
option beside
PIN pad connection
.
Page 25

23
6. Click the
Close
button at the bottom of the popup.
7. Log out of the POS view and PAYD Administration and close the browser.
8. Re-launch your web browser, and log in to the POS view from the Login
screen.
Establishing communication with the iPP320 PIN Pad
1. In the POS view, click the
Tools
tab in the bottom right corner of the
screen.
2. On the Tools tab, you will see a message indicating that the software is
trying to establish communication with the iPP320 PIN Pad. At this point,
the PIN Pad status indicator is red ( ).
If the countdown reaches 0 before communication is established,
proceed to step 3.
If the communication is established before the countdown reaches 0,
proceed to step 4.
Page 26

24 MONERIS® IPP320 PIN PAD: QUICK INSTALL GUIDE
3. At the prompt to reset the PIN Pad, click
Yes
.
A new countdown will begin as the software tries to communicate.
Repeat step 2.
4. Once the communication is established, the screen prompts that it is
initializing the PIN Pad, and the iPP320 PIN Pad displays “PLEASE WAIT”.
5. Once the initialization completes, the iPP320 PIN Pad displays the
“WELCOME/BONJOUR” screen and the status indicator icon changes to
black ( ).
Congratulations! You are now ready to use the iPP320 PIN Pad with the PAYD
Pro Plus In-Store Solution.
Page 27

25
Troubleshooting iPP320 PIN Pad issues in
the PAYD Pro Plus In-Store Solution
Issue
Solution
The
“Establishing
communication with
the PIN pad”
message
counts down to 0.
The POS view was unable to communicate with the
iPP320 PIN Pad.
1. Click the red PIN Pad status indicator ( ).
The Confirm popup appears.
2. Click
Fast
. PAYD Pro Plus will attempt to
communicate with the iPP320 PIN Pad again.
If this fails:
1. Click the red PIN Pad status indicator ( ).
The Confirm popup appears.
2. Click
Full
.
PAYD Pro Plus will attempt to initialize the
iPP320 PIN Pad, and then communicate with it
again.
Page 28

26 MONERIS® IPP320 PIN PAD: QUICK INSTALL GUIDE
Issue
Solution
“PIN Pad initialization
error”
If this message appears, you can attempt to reset
the iPP320 PIN Pad connection.
1. In the PIN Pad initialization error popup, click
Yes
.
2. If prompted to run the Java applet, click
Yes
.
PAYD Pro Plus will attempt to initialize the
iPP320 PIN Pad, and then communicate with it
again.
3. If problems persist, log out of the POS view and
log in again.
4. Follow the instructions in the Establishing
communication with the iPP320 PIN Pad section
on page 23.
Stuck in a loop of
being unable to
initialize the iPP320
PIN Pad.
If you are unable to initialize the iPP320 PIN Pad,
contact Moneris Customer Care toll-free at
1-855-
423-PAYD (7293)
.
Stuck in a loop of
being unable to
communicate with
the iPP320 PIN Pad.
If you are unable to communicate with the iPP320
PIN Pad:
1. Log out of the POS view.
2. Power cycle the iPP320 PIN Pad:
• On the PIN Pad, hold down the yellow
key and press the alphanumeric key at
the same time. The iPP320 PIN Pad will beep
and restart.
3. Follow the instructions in the Establishing
communication with the iPP320 PIN Pad section
on page 23.
4. If problems still persist, contact Moneris
Customer Care toll-free at
1-855-423-PAYD
(7293)
.
Page 29

27
Merchant support
If you need assistance with your payment processing solution, we’re here to
help, 24/7.
We’re only one click away.
Visit
moneris.com/support-PAYDProPlus
to:
consult the FAQs on how to set up and use PAYD Pro Plus
download PAYD Pro Plus guides to assist with getting started,
hardware installation, configuration, and usage instructions
Visit
shop.moneris.com
to purchase point-of-sale supplies and receipt
paper
Visit
moneris.com/insights
for payment news & trends, customer
success stories, and quarterly reports & insights
Need help setting up? We’ll be there.
Moneris offers quick, hassle-free on-site setup of your complete iPad POS
Solution by our in-house technicians. Contact us at
1-866-MONERIS
to learn
more or visit
moneris.com/iPadPOS
to learn more.
Can’t find what you are looking for?
Call Moneris Customer Care (available 24/7) at
1-866-319-7450
. We’ll be
happy to help. You can also send us a secure message 24/7 by logging in to
Merchant Direct® at
moneris.com/mymerchantdirect
.
Page 30

PPPMAN iPP320 QIG-EN (09/17)
®MONERIS BE PAYMENT READY & Design, MONERIS and MONERIS PAYD PRO PLUS are registered trade-marks
of Moneris Solutions Corporation.
TM
BE PAYMENT READY is a trade-mark of Moneris Solutions Corporation. All
other marks or registered trade-marks are the property of their respective owners.
© 2017 Moneris Solutions Corporation, 3300 Bloor Street West, Toronto, Ontario, M8X 2X2. All Rights Reserved .
This manual shall not wholly or in part, in any form or by any means, electronic, mechanical, including
photocopying, be reproduced or transmitted without the authorized consent of Moneris Solutions
Corporation (“Moneris”).
This guide is for informational purposes only. Neither Moneris nor any of its affiliates shall be liable for any
direct, indirect, incidental, consequential or punitive damages arising out of use of any of the information
contained in this guide. Neither Moneris or any of its affiliates nor any of our or their respective licensors,
licensees, service providers or suppliers warrant or make any representation regarding the use or the results
of the use of the information, content and materials contained in this guide in terms of their correctness,
accuracy, reliability or otherwise. This guide has not been authorized, sponsored, or otherwise approved by
Apple Inc.
Your credit and/or debit card processing is governed by the terms and conditions of the Moneris PAYD
[remove if not PAYD family] Merchant Agreement (the “Merchant Agreement”) with Moneris. It is your
responsibility to ensure that proper card processing procedures are followed at all times. Please refer to your
Merchant manuals and the Merchant Agreement for details. The
Moneris Merchant Operating Manual
is
available at
moneris.com/support-PAYDProPlus
.
 Loading...