

Monarch Water Scaleout XP Installer/user Manual
Model No.
MONARCH WATER
Installer & User Guide
Effective June 2018
For Monarch Scaleout
‘Suppliers to H.M. the Queen’s Estate at Sandringham’
T 01986 784759 F 01986 784769
info@monarchwater.co.uk www.monarchwater.co.uk
Monarch Water Ltd.

HINTS AND TIPS ABOUT YOUR NEW SCALEOUT
1 The Scaleout converts both cations and anions into harmless crystals. Crystals will
adhere themselves to the Post Filters internal cartridge, which is to be changed annually
(or before in very hard water areas). However some will pass through as this is part of
the descaling process. These will materialise as a residue/dust if the water is allowed to
evaporate. For best results it is recommended to wipe away with a damp cloth before
they appear.
2 Helping your kettle last longer: Your kettle will continue to have an amount of scale, but
the level can be kept to a minimum by running the tap for 5-10 seconds prior to filling.
Additionally, it is recommended to empty the kettle of any water left over from the
previous use. When emptying, you may notice scale flakes and possibly ‘milky’ water too.
This is normal and proof that the Scaleout is working at optimum performance. Flakes are
caused by taking the water to boiling point and will not happen elsewhere throughout
your system.
3 Toilets, Showers, Shower cubicle/screen, Taps etc: Because there is no direct flow across
these surfaces, other than water splashing, the old scale may need to be removed with a
scale remover. Any new accumulation will deposit as a soft scale and can be removed.
For best results, wipe away water before being allowed to evaporate.
4 Existing scale – Scaleout water will immediately begin to de-scale your pipes and
appliances. Your hot water cylinder will take longer to de-scale than your pipe work;
in some cases 12-18 months; therefore you may notice different levels of Scaleout water
for some time whilst the system is de-scaling. This is particularly noticeable in your bath
and shower.
5 Dishwashers – On most installations the dishwasher is to be connected to the Scaleout
water. We recommend that you continue to add a small amount of salt to the appliance
as before, as this helps the salt holder in the appliance stay clean. We do not however
recommend that crystal glass; solid silver or silver plated items are washed in your
dishwasher as etching may occur. Less dishwasher liquid may be required and in certain
cases this will also apply to rinse aid. For best results use a natural soap detergent/
cleaning agent. On dishwashers connected to untreated water, you should continue
to put salt into the dishwashers own softener. It will help if your dishwasher could be
de-scaled prior to the installation of the Scaleout. This would also apply to your shower
cubicle too. For best results use a phosphate free dish washing detergent.
6 Scaleout water will become available throughout your system in varying time spans.
Conventional systems (tanks in your roof) will take anything from 4-10 days, whilst mains
fed Pressurised Systems will give treated water within 2-3 days.
7 Scaleout water will have no adverse effect in your heating system. In every case a
corrosion inhibitor such as Sentinel X100 must be used.
8 Bath and shower surfaces will become smoother – be careful, in particular the young and
infirm – why not buy a bath mat?
9 If possible look to use a pure soap powder as this will help give optimum results.
10 Outside Tap – It is recommended to leave your outside tap on mains water. Additionally,
in the wintertime we recommend that this tap is isolated via an internal valve to prevent
freezing.
11 Accumulators – Please ensure that a Scaleout is installed on the outlet to an accumulator.
2

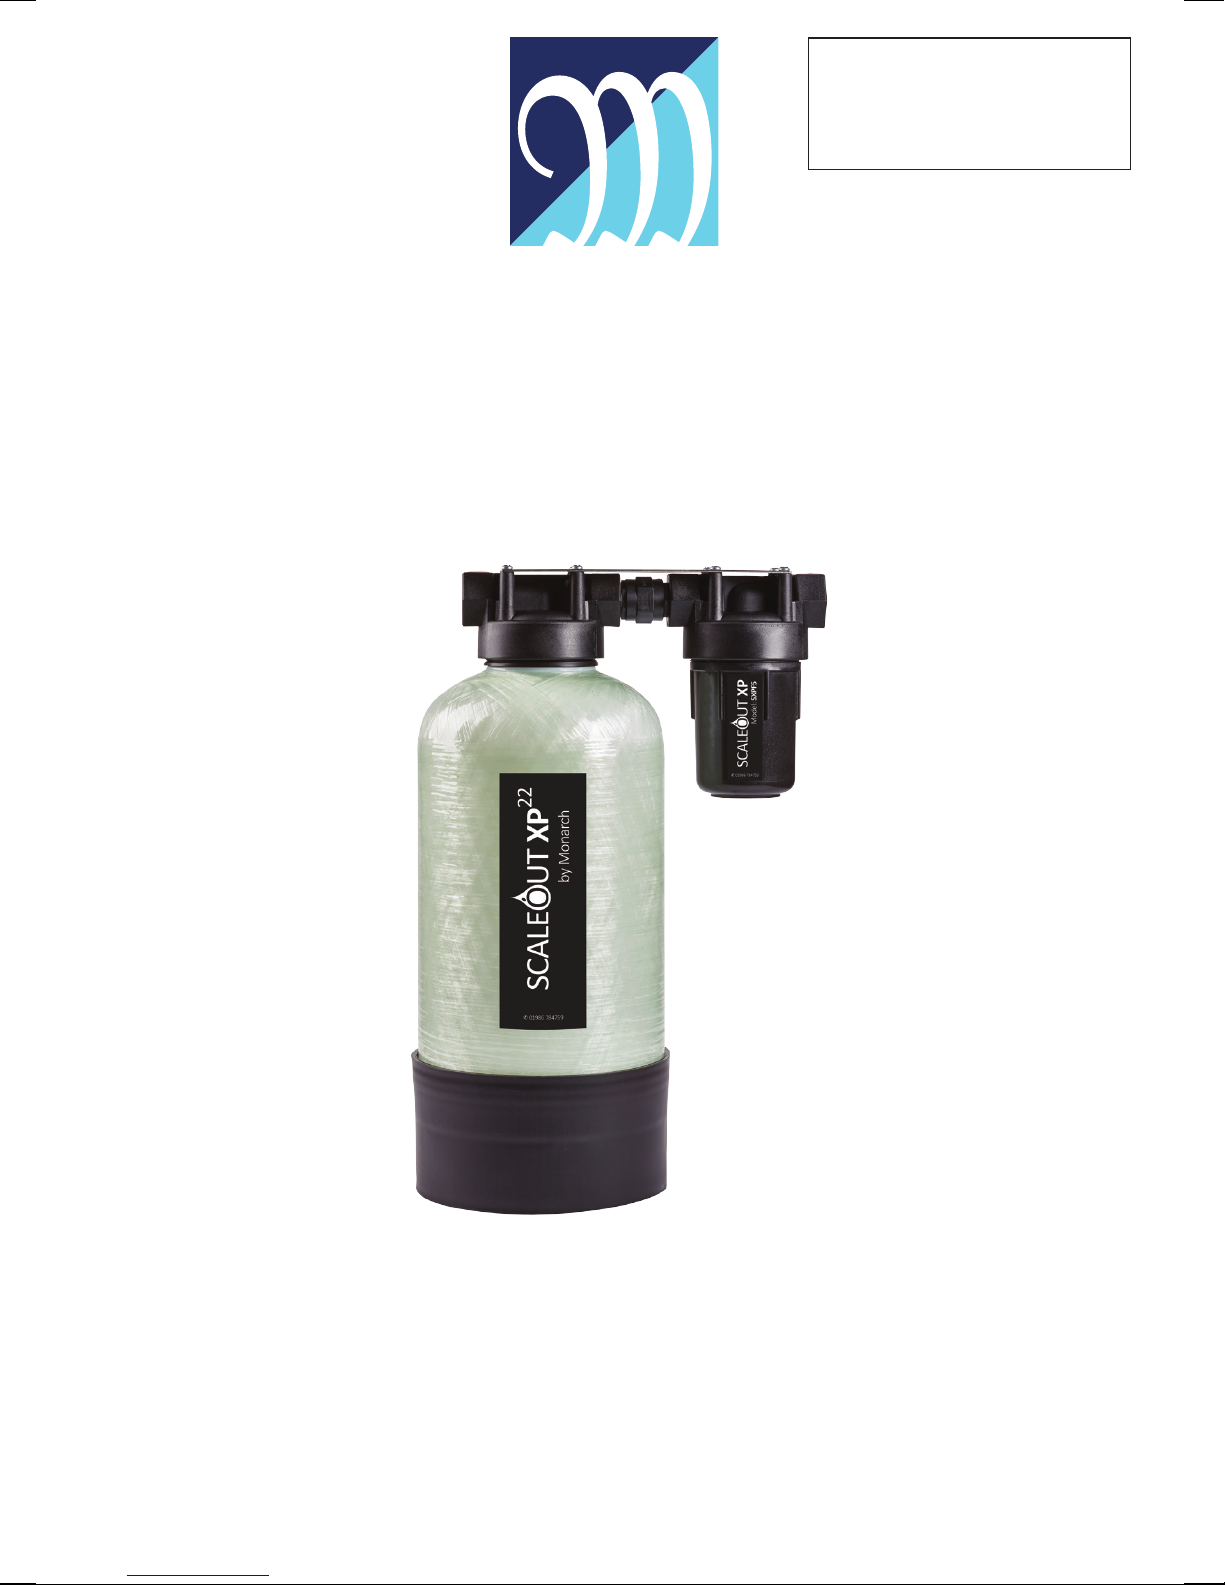
MONARCH SCALEOUT INSTALLATION INSTRUCTIONS
Thank you for choosing our SCALEOUT XP. Please read the following carefully,
which if followed correctly, should ensure the installation is trouble free.
Before you install the unit, please ensure you have the correct model with regard
to demand placed upon unit and also the water hardness. Ensure + models are
used on all water hardness over 500ppm. Monarch has a nationwide database on
all water hardness’s for your assistance
A. PLANNING THE INSTALLATION
• Always observe the water byelaws.
• Ensure there is only one rising main.
• Make sure you have allowed space for access to the unit for any possible
maintenance in the future.
• Check the water pressure and locate the rising main. Be aware of
condensation occurring in warm environments. If condensation occurs, we
recommend the unit is sited in a small tray that allows the water to evaporate.
• Unit must be kept upright.
B. SITING THE SCALEOUT
• Where possible, this should be close to the rising main.
• ‘T’ off for an untreated mains supply for the outside tap.
• Ensure that the unit is not subject to below 4 or above 50ºC.
• If siting the unit within a kitchen cupboard, loft etc. Ensure that the base/
floor is adequately supported.
• If the unit is being installed in your loft, 1st, 2nd floor etc., it is recommended
to house the unit within a plastic tank and insulate well.
• The overflow on the plastic tank should be a minimum of ¾”in size. Failure to
install the unit in a suitable tank will void the Guarantee.
C. CHECK VALVE
In domestic applications i.e. house, bungalow, apartment, flat etc, a single check
valve should be fitted. All other applications require a double check valve.
D. DRINKING WATER FACILITY
The unit produces drinking water, so unlike a salt based softener, no dedicated
tap is required.
E. MATERIAL CHECK LIST
• The unit includes an installation kit as relevant to the model ordered.
3
 Loading...