

Page 1

Install Android Application on Compatible Device*
1
Download and install the Track-It™ RFID application from Google Play. Scan the
QR code below with your Android device. Or navigate to the address below. This
will bring you directly to the App on Google Play.
https://play.google.com/store/apps/details?id=com.jt.isb.nfc.app
*The Track-It™ RFID application will only work on compatible Android
devices with Near Field Communication (NFC). A current list of compatible
devices can be found at:
http://en.wikipedia.org/wiki/List_of_NFC-enabled_mobile_devices
Open RFID Application on your Android device
2
Once the RFID logger application has been downloaded and installed to your
device find the RFID Logger icon and start the program. Ensure NFC (Near Field
Communication) on this device is turned “On”. Place and hold the RFID logger
directly against your device and in the location of your devices NFC antenna
(typically on the back of the device. Refer to your manual for exact location). Hold
in place until the application indicates it has finished reading. It takes
approximately 2-3 seconds to retrieve
and open the summary page.
Always ensure logger antenna is in the
NFC area of Phone/Tablet
Google Nexus 7 2nd generation shown.
View Summary Information
3
The Summary page shows details including unit tag name, serial number, battery
voltage and current record status. It also shows the number of samples and start
and end time of the record. Alarms that have occurred during the record session
will also be indicated on this page.
Touching the data tab will initiate a
full data download. Place Logger in
NFC antenna location and hold in
place. Full data transfer can take up
to 8 seconds.
Touching graph tab will open the
graphic trend page. If data has
already been transferred this
happens instantly otherwise use
same method to transfer data.
Touch the “Tools” icon to enter the
configuration mode. You can then set
the parameters for recording data.
4
Configure your data logger
The configuration menu allows you to assign a Tag Name and set the logger to
record now, on button press or after a time delay. You can also set the record
rate and up to 4 alarm set points.
Record rate tab
Alarm setup tab
Once you have finalized all of your
settings you can send the
configuration to the data logger.
1. Make sure the Enable box is
checked.
2. Touch the send to logger icon.
3. Place the logger against your
device and wait for
confirmation that your
configuration has successfully
transferred. You are now
ready to deploy your data
logger!
Page 2
5
Using Windows PC software
PUSH BUTTON AND LED INDICATOR
In addition to the Android application, users can also use the free Windows
based software package and optional docking station. Software, drivers and
complete user manuals can be downloaded here:
www.monarchinstrument.com/Software/Track-It_RFID_PC_Install.zip
Once the file has been downloaded, unzip the files to a local folder on your PC
and run the CDStart.exe program. This will launch a menu where you can install
the PC software and USB docking station drivers. Complete User Manuals are
also available from this menu.
The pushbutton on the device can be used to start and stop the record mode
and/or indicate the status of the logger. A quick button press and release (less
than 2 seconds) will cause the LED to flash in a pattern to indicate the status of
the logger. The status of the logger can be checked at any time before, during or
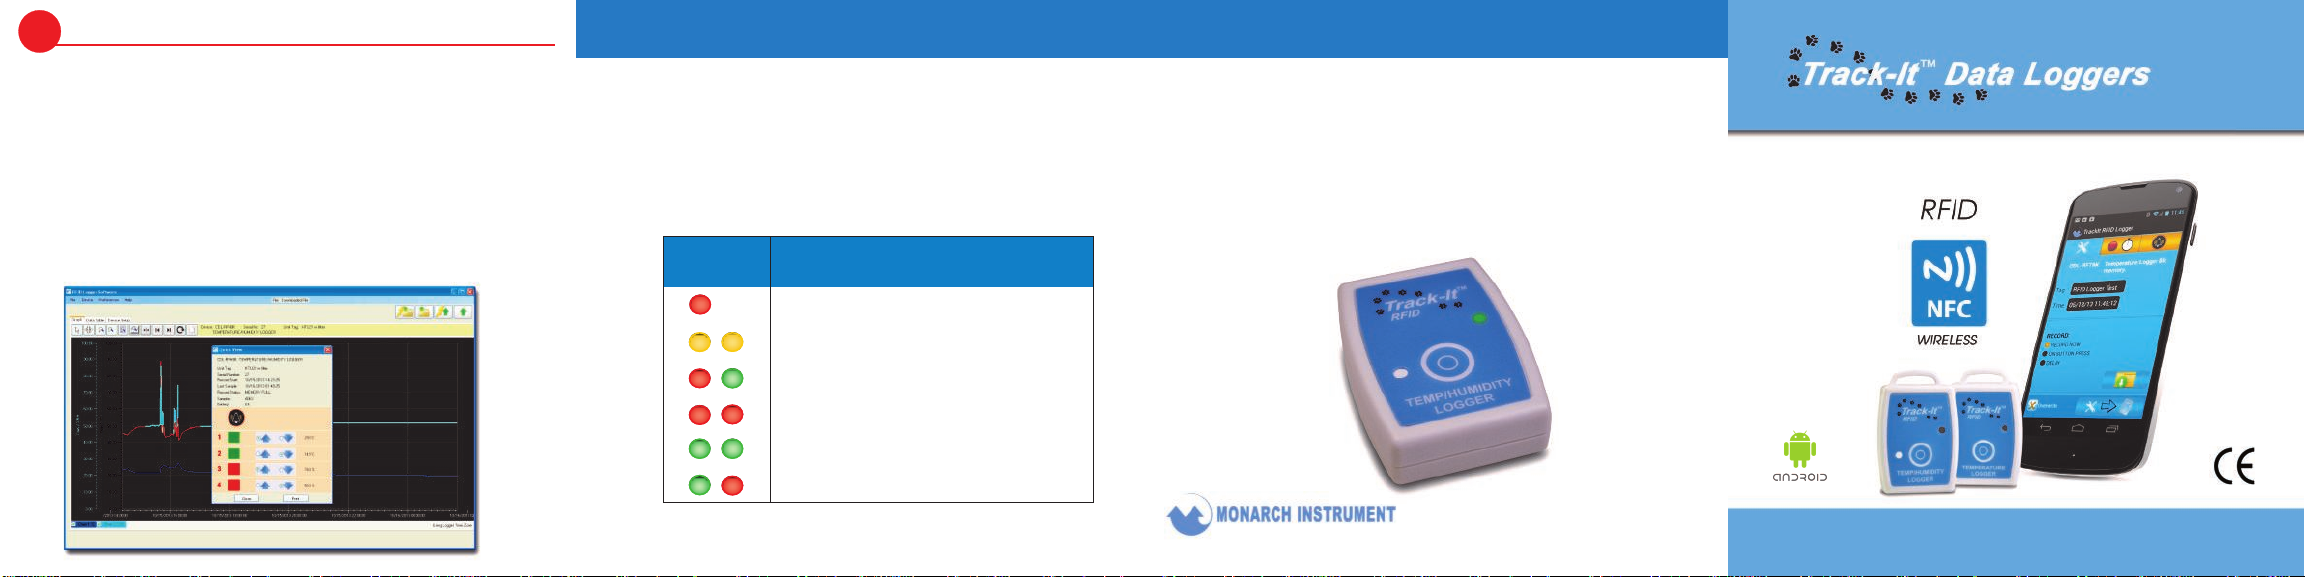
after a record session. The status LED flash patterns are summarized below:
Short button press (< 2 sec.) shows status
LED Flash
Pattern
Waiting to Record (delayed or on button press)
Un-programmed, Needs Configuration
Recording complete, No Alarm Occurred
Recording complete, Alarm Occurred
Recording, No Alarm Occurred
Recording, Alarm Occurred
Status
The push button on the logger can also be used to start and stop the logger 1
time per logging session (this feature must be configured using the Android or
PC software). Pressing and holding the button on the logger for longer than 2
seconds will activate the feature if it has been configured to do so.
If you have programmed the logger to record on button press it will not begin
recording until activated by the push button. That record session can then be
stopped by pressing and holding the button again. There can only be one start
and one stop per record session. The logger must be reconfigured using the
Android App or PC program before it can be used again.
15 Columbia Drive
Amherst, NH 03031
Ph: 603-883-3390
www.monarchinstrument.com 11/13
QUICK START GUIDE
 Loading...