

Page 1

PAB-52WP/ WS
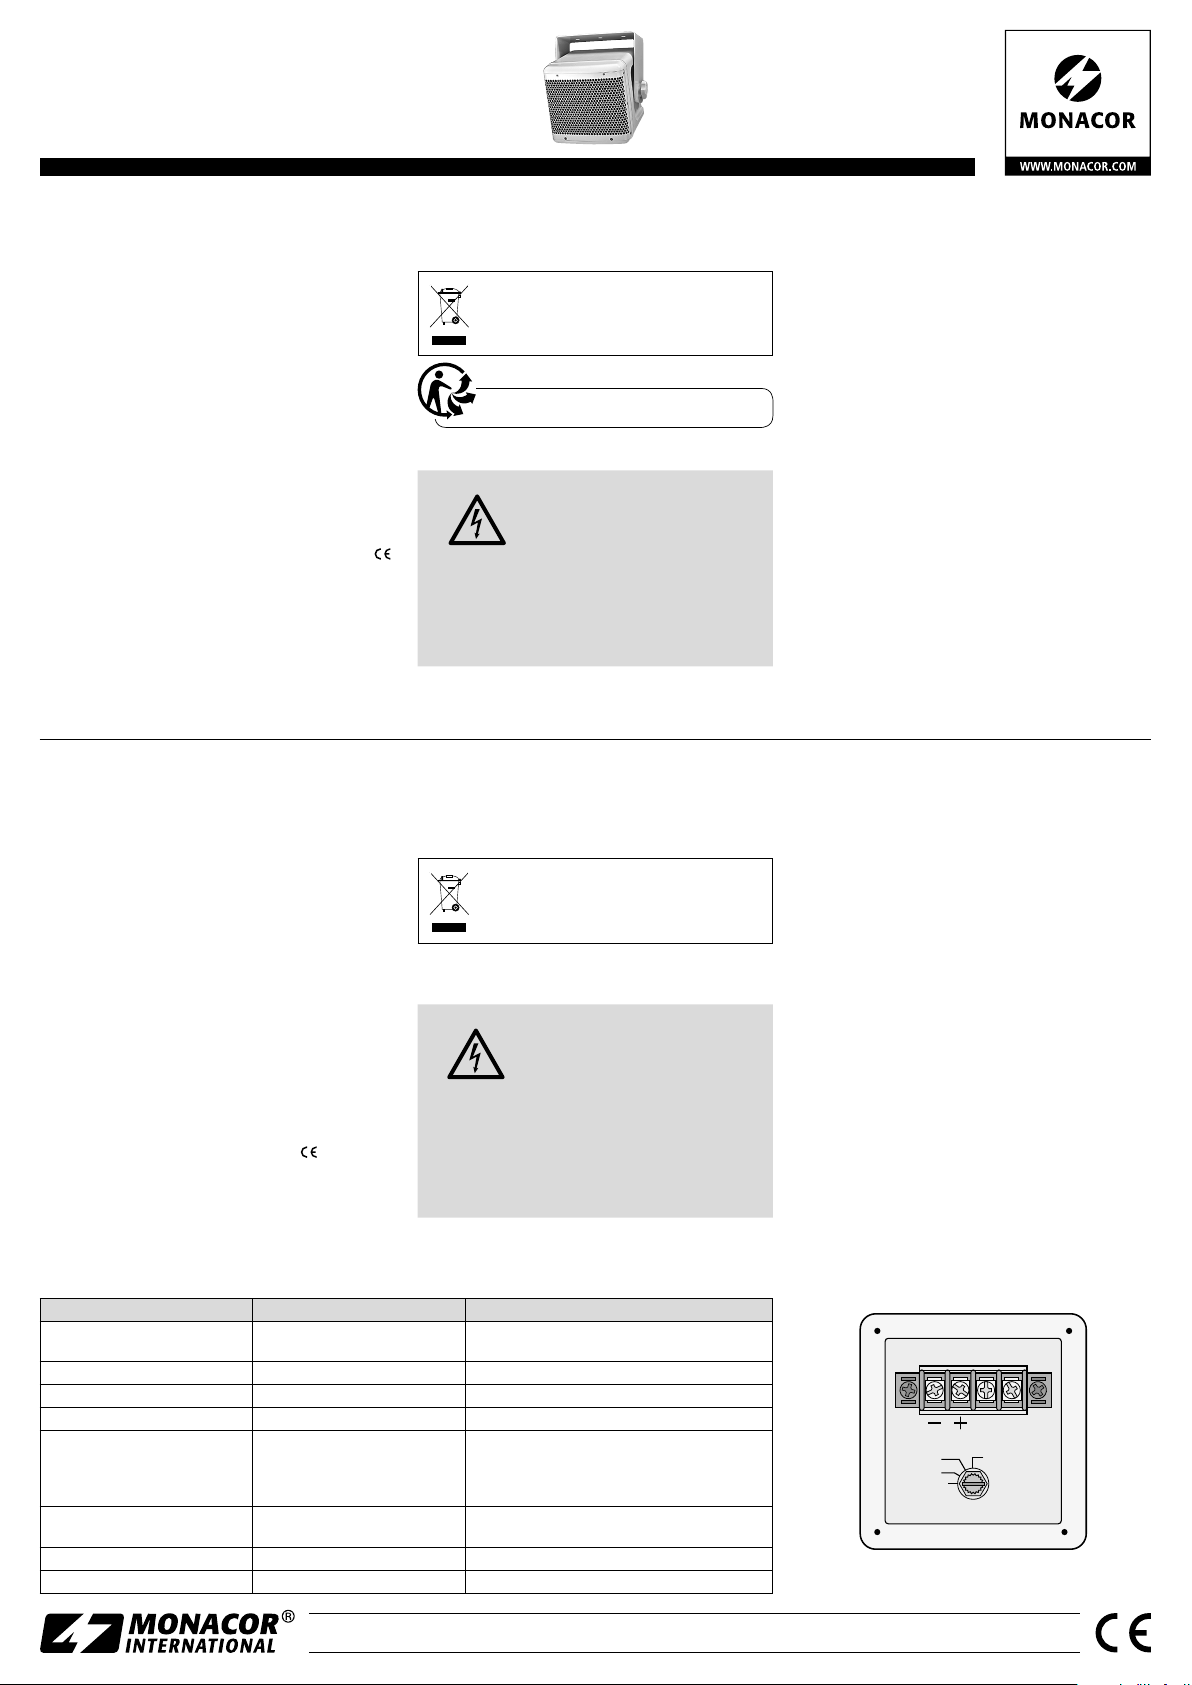
Bestell-Nr. • Order No. 25.3580
ELECTRONICS FOR SPECIALISTS ELECTRONICS FOR SPECIALISTS ELECTRONICS FOR SPECIALISTS ELECTRONICS FOR SPECIALISTS ELECTRONICS FOR SPECIALISTS ELECTRONICS
ELA-Lautsprecherbox für 100-Voder 4-Ω-Betrieb
Diese Anleitung richtet sich an Installateure, die
Fachkenntnisse in der 100-V-Beschallungstech-
DeutschEnglish
nik besitzen. Bitte lesen Sie die Anleitung vor
der Installation gründlich durch und heben Sie
sie für ein späteres Nachlesen auf.
1 Verwendungsmöglichkeiten
Diese Lautsprecherbox zur Decken- und Wandmontage ist speziell für den Einsatz in 100-V-Beschallungsanlagen konzipiert, kann aber auch direkt
an einen niederohmigen Verstärkerausgang angeschlossen werden. Sie ist wetterfest (IP 45) und somit
auch für den Außenbereich geeignet. Die Ballwurfsicherheit nach DIN 18 032, Teil3 wurde bestätigt.
2 Wichtige Hinweise
für den sicheren Gebrauch
Die Lautsprecherbox entspricht allen relevanten
Richt linien der EU und trägt deshalb das -Zeichen.
Schützen Sie die Lautsprecherbox vor extremen
•
Temperaturen. Der zulässige Einsatztemperaturbereich beträgt −10 °C bis +40 °C.
Verwenden Sie für die Reinigung nur ein tro-
•
ckenes oder angefeuchtetes, weiches Tuch, auf
keinen Fall Chemikalien oder aggressiven Reinigungsmittel.
PA Speaker System for 100 V
or 4 ΩOperation
These instructions are intended for installers
with knowledge in 100 V technology for PA
applications. Please read the instructions carefully prior to installation and keep them for
later reference.
1 Applications
This speaker system for ceiling and wall mounting is specially designed for applications in 100 V
PA systems, but it can also be directly connected
to a low-impedance amplifier output. It is weatherproof (IP 45) and therefore also suitable for outdoor use. Ball impact resistance in accordance with
DIN18 032, part 3 has been confirmed.
2 Important Safety Notes
The speaker system corresponds to all relevant
directives of the EU and is therefore marked with .
Protect the speaker system against extreme tem-
•
peratures. The admissible ambient temperature
range is −10 °C to +40 °C.
For cleaning only use a soft cloth, dry or slightly
•
wet; never use chemicals or aggressive detergents.
No guarantee claims for the speaker system and
•
Wird die Lautsprecherbox zweckentfremdet, nicht
•
fachgerecht installiert oder überlastet, kann keine
Haftung für daraus resultierende Sach- oder Personenschäden und keine Garantie für die Lautsprecherbox übernommen werden.
Soll die Lautsprecherbox endgültig aus
dem Betrieb genommen werden, übergeben Sie sie zur umweltgerechten Entsorgung einem örtlichen Recyclingbetrieb.
3 Installation
WARNUNG Beim Betrieb in 100-V-Anlagen liegt
Achten Sie auf die Belastung des ELA-Verstärkers
durch die Lautsprecher. Eine Überlastung kann den
Verstärker beschädigen! Die Summe der Leistungen aller angeschlossenen Lautsprecher darf die
Verstärkerleistung nicht überschreiten.
1) Vor der Installation der Lautsprecherbox den
ELA-Verstärker ausschalten, damit die Lautsprecherleitung spannungsfrei ist!
2) Auf der Rückseite die Abdeckung mit der Kabel-
durchführung abschrauben. Die Anschlüsse und
no liability for any resulting personal damage or
material damage will be accepted if the speaker
system is used for other purposes than originally
intended, if it is not correctly installed, or if it is
overloaded.
berührungsgefährliche Spannung bis
100 V an der Lautsprecherleitung an.
Die Installation darf nur durch Fachpersonal erfolgen.
If the speaker system is to be put out of
operation definitively, take it to a local
recycling plant for a disposal which is not
harmful to the environment.
3 Installation
WARNING During operation in 100 V systems,
Always observe the load of the PA amplifier by the
speakers. An overload may damage the amplifier!
The total load of all speakers connected must not
exceed the amplifier power.
1) Before installing the speaker system, switch off
the PA amplifier so that the speaker cable will not
carry any voltage!
2) Unscrew the cover with the cable inlets on the
rear of the speaker to access the connections
there is a hazard of contact with a
voltage of up to 100 V at the speaker
cable. Installation must be made by
skilled personnel only.
der Schalter für die Nennbelastung sind jetzt zugängig (siehe Abbildung unten). Die gewünschte
Nennbelastung (Lautstärke) einstellen oder beim
Betrieb an einem niederohmigen Verstärkerausgang den Schalter in die Position DIRECT drehen.
VORSICHT! In der Position DIRECT die Lautsprecherbox auf keinen Fall in einer 100-V-Anlage betreiben. Die Lautsprecherbox und eventuell auch
der Verstärker werden beschädigt.
3) Zur Decken- oder Wandmontage den Montagebügel an gewünschter Stelle befestigen und die Lautsprecherbox am Montagebügel festschrauben.
4) Die Lautsprecherleitung durch die Kabeldurchführung ziehen und an die Klemmen „+“ und
„−“ anschließen. Die transparente Schutzkappe
dazu abnehmen. Beim Anschluss von mehreren
Lautsprechern darauf achten, dass diese alle
gleich gepolt werden (z. B. Klemme „−“ = Minuspol). Die Schutzkappe wieder auf den Klemmen stecken.
5) Die Abdeckung auf der Rückseite wieder festschrauben. Mit der Mutter der Kabeldurchführung die Lautsprecherleitung festklemmen.
6) Die Lautsprecherbox auf den zu beschallenden
Bereich ausrichten.
Änderungen vorbehalten.
and the switch for the rated load (refer to figure
below). Adjust the desired rated load (volume) or,
when the speaker system is operated at a lowimpedance amplifier output, set the switch to the
position DIRECT.
CAUTION! Never use the position DIRECT when
the speaker system is operated in a 100 V system.
The speaker system and possibly also the amplifier will be damaged.
3) For ceiling or wall mounting, attach the mounting bracket as desired. Then fasten the speaker
system to the mounting bracket using screws.
4) Pull the speaker cable through the cable inlet and
connect the cable to the terminals “+” and “–”.
Before connecting, remove the transparent protective cap from the terminals. When connecting
multiple speakers, make sure that all speakers
have the same polarity (e. g. terminal “–” = negative pole). Place the protective cap on the terminals again.
5) Fasten the cover on the rear with screws. Use the
nut of the cable inlet to secure the speaker cable.
6) Align the speaker system to the zone where the
sound is desired.
Subject to technical modification.
Technische Daten Specifications PAB-52WP/ WS
Nennbelastbarkeit Power rating
Kennschalldruck (1 W /1 m) SPL (1 W /1 m) 87 dB
Max. Nennschalldruck Max. SPL 104 dB
Frequenzbereich Frequency range 60 Hz – 18 kHz
Lautsprecher Speaker
Abmessungen (B × H × T)
Gewicht
Einsatztemperatur Ambient temperature −10 °C … +40 °C
Anschluss Connection Schraubklemmen / Screw terminals
Dimensions (W × H × D)
Weight
MONACOR INTERNATIONAL GmbH & Co. KG • Zum Falsch 36 • 28307 Bremen • Germany
Copyright
©
by MONACOR INTERNATIONAL. All rights reserved.
13 cm (5”) high-quality full range speaker
100 V : 50 / 25 / 12,5 W
4 Ω: 50 W
13-cm-High-Quality-Breitbänder (5”)
mitAluminiummembran
withaluminium cone
200 × 200 × 190 mm
5,1 kg
NC NC
50W
25W
12.5W
Beispiel: eingestellte Nennbelastung = 12,5 W
Example: rated load adjusted = 12.5 W
DIRECT
A-1870.99.02.07.2019
Page 2
PAB-52WP/ WS
Référence num. • Codice 25.3580
ELECTRONICS FOR SPECIALISTS ELECTRONICS FOR SPECIALISTS ELECTRONICS FOR SPECIALISTS ELECTRONICS FOR SPECIALISTS ELECTRONICS FOR SPECIALISTS ELECTRONICS
Enceinte Public Adress pour
fonctionnement 100 V ou 4 Ω
Cette notice s’adresse aux installateurs possédant des connaissances en technique de sonori-
FrançaisItaliano
sation ligne 100 V. Veuillez lire la présente notice
avec attention avant l‘installation et conservez-la
pour pouvoir vous y reporter ultérieurement.
1 Possibilités d’utilisation
Cette enceinte pour montage plafond et mural est
spécialement conçue pour une utilisation dans des
installations de sonorisation 100 V, mais elle peut
également être reliée à une sortie amplificateur basse
impédance. Elle est étanche (IP 45) et donc adaptée
pour l’extérieur. La résistance aux jets de ballons,
selon la norme DIN18 032, partie 3, est validée.
2 Conseils importants de sécurité
L’enceinte répond à toutes les directives nécessaires
de l’Union européenne et porte donc le symbole
Protégez l‘enceinte également des températures
•
extrêmes. La plage de température ambiante admissible est de −10 °C à +40 °C.
Pour le nettoyage, utilisez uniquement un chiffon
•
doux, sec ou légèrement humide, en aucun cas de
produits chimiques ou détergents agressifs.
Nous déclinons toute responsabilité en cas de
•
dommages matériels ou corporels résultants si
Cassa acustica PA per il funzionamento a 100 V oppure a 4 Ω
Queste istruzioni sono rivolte agli installatori
che dispongono di conoscenze della tecnica di
sonorizzazione a 100 V. Vi preghiamo di leggerle attentamente e di conservarle per un uso
futuro.
1 Possibilità d‘impiego
Questa cassa acustica per il montaggio a soffitto o
pareti è stata realizzata specialmente per l‘impiego
in impianti di sonorizzazione con uscita audio 100 V,
ma può essere collegata anche direttamente all‘uscita a bassa impedenza di un amplificatore. È resistente alle intemperie (IP 45) e quindi adatta anche
per l‘esterno. È stata confermata la protezione contro il lancio di palloni secondo DIN18 032, parte 3.
2 Avvertenze di sicurezza
La cassa acustica è conforme a tutte le direttive rilevanti dell’UE e pertanto porta la sigla .
Proteggere
•
estreme. La temperatura d’esercizio ammessa è
da −10 °C a +40 °C.
Per la pulizia usare solo un panno asciutto o inu-
•
midito, morbido; non impiegare in nessun caso
prodotti chimici o detergenti aggressivi.
Caractéristiques techniques Dati tecnici PAB-52WP/ WS
Puissance nominale Potenza nominale
Pression sonore (1 W /1 m) Sensibilità (1 W /1 m) 87 dB
Pression sonore nominale max. Pressione sonora nominale max. 104 dB
Bande passante Gamma di frequenze 60 Hz – 18 kHz
Haut-parleur Altoparlante
Dimensions (l × h × p)
Poids
Température fonctionnement Temperatura d‘esercizio −10 °C … +40 °C
Branchement Contatto bornes à vis / morsetti a vite
la cassa acustica
da temperature
Dimensioni (l × h × p)
Peso
l‘enceinte est utilisée dans un but autre que celui
pour lequel elle a été conçue, si elle n’est pas correctement installée ou s’il y a surcharge ; en outre,
la garantie deviendrait caduque.
Lorsque l‘enceinte est définitivement retirée du service, vous devez la déposer
dans une usine de recyclage adaptée pour
contribuer à son élimination non polluante.
CARTONS ET EMBALLAGE
PAPIER À TRIER
3 Installation
AVERTISSEMENT
.
Faites attention à la charge de l’amplificateur PA
par les haut-parleurs. Une surcharge peut endommager l’amplificateur. La somme des puissances de
l’ensemble des enceintes reliées ne doit pas dépasser la puissance de l’amplificateur.
1) Avant d’installer l’enceinte, éteignez l’amplificateur Public Adress pour que le câble haut-parleur
ne soit pas porteur de tension !
Nel caso d’uso improprio, di installazione non a
•
regola d’arte o di sovraccarico della cassa acustica,
non si assume nessuna responsabilità per eventuali danni consequenziali a persone o a cose e
non si assume nessuna garanzia per la cassa.
Pendant le fonctionnement, une
tension de contact dangereuse
jusqu’à 100 V est présente au câble
haut-parleur. Seul un personnel
qualifié peut effectuer l’installation.
Se si desidera eliminare la cassa acustica
definitivamente, consegnarla per lo smaltimento ad un‘istituzione locale per il
riciclaggio.
3 Installazione
AVVERTIMENTO Durante l‘uso di impianti a 100 V,
Tenete presente il carico dell‘amplificatore PA per
via degli altoparlanti. Un sovraccarico può danneggiare l‘amplificatore! La somma delle potenze di
tutti gli altoparlanti collegati non deve superare la
potenza dell‘amplificatore.
1) Prima dell‘installazione spegnere l‘amplificatore
PA per togliere la tensione dalla linea degli altoparlanti!
d‘excellente qualité avec membrane aluminium
nel cavo per gli altoparlanti è presente una tensione fino a 100 V,
pericolosa in caso di contatto. L’installazione deve essere fatta solo
da persone qualificate.
100 V : 50 / 25 / 12,5 W
4 Ω: 50 W
haut-parleur
altoparlante a larga banda high-quality di
13 cm(5”) con membrana d‘allumini
large bande 13 cm (5”)
200 × 200 × 190 mm
5,1 kg
2) Sur la face arrière, dévissez le couvercle avec le
passage de câble. Les branchements et le sélecteur pour la puissance nominale sont accessibles
(voir schéma ci-dessous). Réglez la puissance nominale souhaitée (volume) ou, pour un fonctionnement avec une sortie amplificateur basse impédance, tournez le sélecteur sur la position DIRECT.
ATTENTION ! En position DIRECT, ne faites jamais fonctionner l’enceinte dans une installation
ligne 100 V. L’enceinte et éventuellement l’amplificateur pourraient être endommagés.
3) Pour un montage plafond ou mural, fixez l’étrier
à l’endroit voulu sur le mur et vissez l’enceinte
sur l’étrier.
4) Faites passer le câble haut-parleur via le passage
de câble et reliez-le aux bornes «+» et «−».
Retirez le capuchon de protection transparent. Si
vous branchez plusieurs haut-parleurs, veillez à
ce qu’ils aient tous la même polarité (p. ex. borne
«−» = pôle moins). Replacez le capuchon de protection sur les bornes.
5) Revissez le cache sur la face arrière. Avec l’écrou
du passage de câble, fixez le câble haut-parleur.
6) Orientez maintenant l‘enceinte vers la zone à
sonoriser.
Tout droit de modification réservé.
2) Sul retro svitare la copertura del passacavi. I contatti e il selettore per la potenza nominale sono
ora accessibili (fig. in basso). Impostare la potenza
nominale (volume) desiderata oppure, in caso di
uso con un‘uscita a bassa impedenza dell‘amplificatore, girare il selettore in posizione DIRECT.
ATTENZIONE! In posizione DIRECT, non usare in
nessun caso la cassa acustica in un impianto a
100 V. La cassa e eventualmente anche l‘amplificatore subiranno dei danni.
3) Per il montaggio sul soffitto o sulla parete fissare
la staffa di montaggio alla parete e avvitare la
cassa sulla staffa.
4) Far passare il cavo dell‘altoparlante attraverso il
passacavi e collegarlo ai morsetti “+” e “−”. Per
fare ciò, togliere la copertura trasparente. Collegando più altoparlanti fare attenzione alla medesima polarità di tutti (p. es. morsetto “−” = polo
negativo). Rimettere la copertura sui morsetti.
5) Riavvitare la copertura sul retro. Con il dado del
passacavi fissare il cavo per altoparlanti.
6) Orientare la cassa verso la zona da sonorizzare.
Con riserva di modifiche tecniche.
NC NC
50W
25W
12.5W
Exemple :
Esempio: potenza nominale impostata = 12,5 W
puissance nominale réglée = 12,5 W
DIRECT
MONACOR INTERNATIONAL GmbH & Co. KG • Zum Falsch 36 • 28307 Bremen • Germany
Copyright
©
by MONACOR INTERNATIONAL. All rights reserved.
A-1870.99.02.07.2019
 Loading...