

Page 1
ELECTRONICS FOR SPECIALISTS ELECTRONICS FOR SPECIALISTS ELECTRONICS FOR SPECIALISTS ELECTRONICS FOR SPECIALISTS
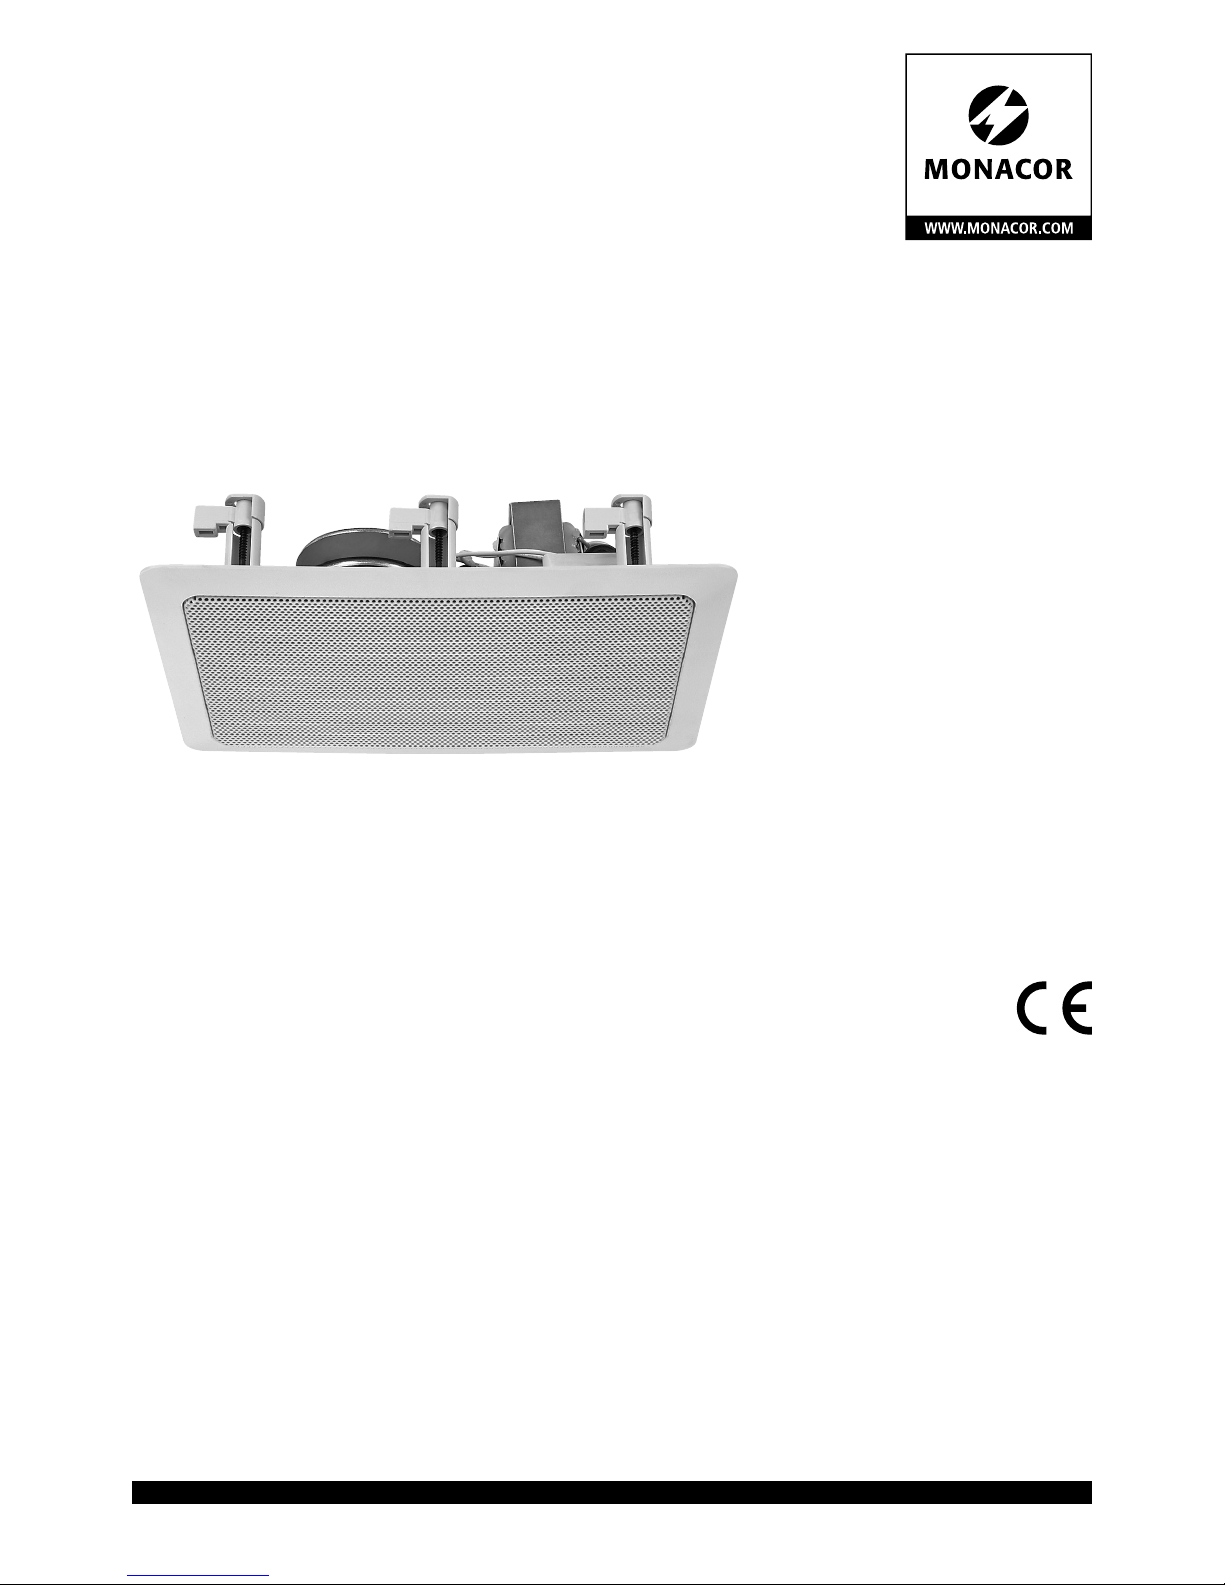
ELA-HiFi-Wand- / Deckenlautsprecher
PA HiFi Wall / Ceiling Speaker
INSTALLATIONSANLEITUNG
INSTALLATION INSTRUCTIONS
NOTICE D’INSTALLATION
ISTRUZIONI PER L’INSTALLAZIONE
INSTRUCCIONES DE INSTALACIÓN
INSTRUKCJA INSTALACJI
ESP-17 / WS Bestell-Nr. • Order No. 16.1660
ESP-22 / WS Bestell-Nr. • Order No. 16.1670
ESP-32 / WS Bestell-Nr. • Order No. 16.1680
Page 2

2
DeutschEnglish
ELA-HiFi-Wand- / Deckenlautsprecher
Diese Anleitung richtet sich an Installateure mit
Fachkenntnissen in der 100-V-Beschallungstechnik. Bitte lesen Sie die Anleitung vor der
Installation gründlich durch und heben Sie sie
für ein späteres Nachlesen auf.
1 Verwendungsmöglichkeiten
Dieser ELA-Lautsprecher ist speziell für den
Einsatz in ELA-Anlagen konzipiert, die mit
100-V-Technik arbeiten. Er lässt sich in Decken
oder Wände mit einer Stärke von 8 – 35 mm
einbauen. Durch die 2-Wege-Ausführung (Breitbandlautsprecher plus schwenkbaren Kalottenhochtöner) wird eine besonders gute Klangwiedergabe erreicht.
2 Wichtige HinweiseGebrauch
Der Lautsprecher entspricht allen relevanten
Richtlinien der EU und ist deshalb mit
ge-
kennzeichnet.
•
Verwenden Sie den Lautsprecher nur im Innenbereich. Schützen Sie ihn von Tropf- und
Spritzwasser, hoher Luftfeuchtigkeit und
Hitze (zulässiger Einsatztemperaturbereich:
0 – 40 °C).
•
Verwenden Sie für die Reinigung nur ein trockenes, weiches Tuch, auf keinen Fall Chemikalien oder Wasser.
•
Wird der Lautsprecher zweckentfremdet, nicht
fachgerecht angeschlossen oder überlastet,
kann keine Haftung für daraus resultierende
Sach- oder Personenschäden und keine Garantie für den Lautsprecher übernommen werden.
Soll der Lautsprecher endgültig aus
dem Betrieb genommen werden,
übergeben Sie ihn zur umweltgerechten Entsorgung einem örtlichen Recyclingbetrieb.
3 Montage
1) In die Decke bzw. Wand ein entsprechend
großes Loch sägen (siehe Technische Daten).
2) Den elektrischen Anschluss herstellen (Kap.4).
3) Zur Montage mit Hilfe des beiliegenden
Hakens das Schutzgitter herausziehen.
4) Den Lautsprecher in die Decke bzw. in die
Wand einsetzen und durch Anziehen der
sechs Montageschrauben das Lautsprechergehäuse festklemmen. Das Schutzgitter wieder einsetzen.
4 Elektrischer Anschluss
WARNUNG Im Betrieb liegt berührungsge-
fährliche Spannung bis 100 V
an der Anschlussleitung an. Die
Installation darf nur durch Fachpersonal erfolgen.
Isolieren Sie unbedingt die nicht benutzten
Adern der Lautsprecher-Anschlussleitung.
Achten Sie auf die Belastung des ELA-Verstärkers durch die Lautsprecher. Eine Überlastung kann den Verstärker beschädigen! Die
Summe der Leistungen aller angeschlossenen
Lautsprecher darf die Verstärkerleistung nicht
überschreiten.
1) Falls die ELA-Anlage eingeschaltet ist, diese
zuerst komplett ausschalten!
2) Den Lautsprecher über den Transformatoreingang anschließen: Die schwarze Ader und
eine der anderen farbigen Adern, die der gewünschten Nennbelastung durch den Lautsprecher entspricht, mit dem Ausgang des
ELA-Verstärkers verbinden.
Aderfarbe
Nennbelastbarkeit
ESP-17/ WS ESP-22 / WS ESP-32 / WS
schwarz gemeinsamer Anschluss
grün
1 W 2,5 W 2 W
gelb 2 W 5 W 4 W
orange 4 W 10 W 7,5 W
rot 7,5 W 15 W 15 W
braun 15 W 20 W 30 W
3) Beim Anschluss von mehreren Lautsprechern
darauf achten, dass die Lautsprecher alle
gleich gepolt werden (z. B. schwarze Ader =
Minuspol) und dass der ELA-Verstärker nicht
überlastet wird. Änderungen vorbehalten.
PA HiFi Wall / Ceiling Speaker
These instructions are intended for installers
with sufficient knowledge in 100 V technology
for PA applications. Please read the instructions
carefully prior to installation and keep them for
later reference.
1 Applications
This PA speaker is specially designed for application in PA systems operating with 100 V technology. It can be installed in ceilings or walls
with a thickness of 8 mm to 35 mm. Designed
as a 2-way system (full-range speaker and dome
tweeter), the speaker provides excellent sound
reproduction.
2 Important Notes
The speaker corresponds to all relevant directives
of the EU and is therefore marked with
.
•
The speaker is suitable for indoor use only.
Protect it against dripping water and splash
water, high air humidity and heat (admissible
ambient temperature range: 0 – 40 °C).
•
For cleaning only use a dry, soft cloth; never
use chemicals or water.
•
No guarantee claims for the speaker and no
liability for any resulting personal damage
or material damage will be accepted if the
speaker is used for other purposes than originally intended, if it is not correctly connected
or if it is overloaded.
If the speaker is to be put out of operation definitively, take it to a local
recycling plant for a disposal which is
not harmful to the environment.
3 Mounting
1) Saw a hole of the required size into the ceiling or wall (see specifications).
2) Make the electrical connection (chapter 4).
3) For mounting, remove the protective grille by
means of the supplied hook.
4) Insert the speaker into the ceiling or wall and
fix the speaker cabinet by tightening the six
mounting screws. Replace the protective grille.
4 Electrical Connection
WARNING During operation, there is a haz-
ard of contact with a voltage of
up to 100 V at the connection cable. Installation must be made by
skilled personnel only.
Always insulate the cores of the speaker connection cable that are not used.
Observe the load of the PA amplifier by the
speakers. An overload may damage the amplifier! The total power of all speakers connected
must not exceed the amplifier power.
1) If the PA system is switched on, switch it off
completely before connecting it!
2) Connect the speaker via the transformer input: Connect the black core and one of the
coloured cores corresponding to the desired
power rating by the speaker to the output of
the PA amplifier.
Core
Colour
Power Rating
ESP-17/ WS ESP-22 / WS ESP-32 / WS
black common connection
green
1 W 2.5 W 2 W
yellow 2 W 5 W 4 W
orange 4 W 10 W 7.5 W
red 7.5 W 15 W 15 W
brown 15 W 20 W 30 W
3) When connecting several speakers, make
sure that all speakers have the same polarity
(e. g. black core = negative pole) and that the
PA amplifier is not overloaded.
Subject to technical modification.
Technische Daten Specifications ESP-17/ WS ESP-22 / WS ESP-32 / WS
Frequenzbereich Frequency range 55 – 20 000 Hz 50 – 20 000 Hz 40 – 20 000 Hz
Nennbelastbarkeit /
Impedanz
Power rating /
impedance
15 W/ 667 Ω
7,5 W/ 1,33 kΩ
4 W/ 2,5 kΩ
2 W/ 5 kΩ
1 W/ 10 kΩ
20 W / 500 Ω
15 W/ 667 Ω
10 W / 1 kΩ
5 W / 2 kΩ
2,5 W / 4 kΩ
30 W/ 333 Ω
15 W/ 667 Ω
7,5 W/ 1,33 kΩ
4 W/ 2,5 kΩ
2 W/ 5 kΩ
Kennschalldruck SPL 87 dB (1 W/1 m) 88 dB (1 W/1 m) 89 dB (1 W/1 m)
Einbauöffnung
Einbautiefe
Mounting hole
Mounting depth
270 × 185 mm
85 mm
275 × 190 mm
95 mm
330 × 225 mm
95 mm
Abmessung (B × H × T) Dimensions (W × H × D)
300 × 214 ×
90 mm
306 × 220 ×
100 mm
358 × 256 ×
100 mm
Gewicht Weight 1,9 kg 2,6 kg 2,8 kg
Einsatztemperatur Ambient temperature 0 °C … 40 °C
min.
8 mm
max. 35 mm
Page 3

3
Français Italiano
Altoparlante PA hi-fi
da parete o soffitto
Queste istruzioni sono rivolte agli installatori
che possiedono delle conoscenze specifiche sufficienti della tecnica di sonorizzazione a 100 V.
Vi preghiamo di leggerle attentamente prima
dell‘installazione e di conservarle per un uso
futuro.
1 Possibilità d’impiego
Questo altoparlante PA è stato realizzato per
l’impiego in impianti PA con uscita audio 100 V.
Può essere montato in soffitti o pareti con spessore fra 8 e 35 mm. Grazie alla versione a 2 vie
(altoparlante a larga banda più tweeter a cupola
orientabili), si ottiene una riproduzione particolarmente buona del suono.
2 Avvertenze importanti
L’altoparlante
è conforme a tutte le direttive rile-
vanti dell’UE e pertanto porta la sigla
.
•
Usare il diffusore solo all’interno di locali.
Proteggerlo dall’acqua gocciolante e dagli
spruzzi d’acqua, da alta umidità dell’aria e dal
calore (temperatura d’impiego ammessa fra
0e 40 °C).
•
Per la pulizia usare solo un panno morbido,
asciutto; non impiegare in nessun caso prodotti chimici o acqua.
•
Nel caso di uso improprio, di collegamenti
sbagliati o sovraccarico non si assume nessuna responsabilità per eventuali danni consequenziali a cose o persone e non si assume
nessuna garanzia per l’altoparlante.
Se si desidera eliminare l’altoparlante
definitivamente, consegnarlo per lo
smaltimento ad un’istituzione locale
per il riciclaggio.
3 Montaggio
1) Praticare l’apertura necessaria nella parete o
nel soffitto (vedi dati tecnici).
2) Eseguire il collegamento elettrico (cap. 4).
3) Per il montaggio staccare la griglia di protezione con l’aiuto del gancio in dotazione.
4) Inserire l’altoparlante nel soffitto o nella parete e fissare il contenitore stringendo le sei
viti di montaggio. Rimettere la griglia di protezione.
4 Collegamento elettrico
AVVERTIMENTO Durante il funzionamento, al
cavo di collegamento è presente una tensione pericolosa
fino a 100 V. L’installazione
deve essere fatta solo da personale qualificato.
Isolare assolutamente i conduttori liberi del
cavo di collegamento dell’altoparlante.
Tener presente anche il carico dell’amplificatore da parte degli altoparlanti. Un sovraccarico può danneggiare l’amplificatore!
La somma delle potenze di tutti gli altoparlanti collegati non deve superare la potenza
dell’amplificatore.
1) Se l’impianto PA è acceso occorre dapprima
spegnerlo completamente!
2) Collegare l’altoparlante tramite l’ingresso del
trasformatore: collegare il conduttore nero
più un altro conduttore colorato che corrisponda alla potenza nominale desiderata
dell’altoparlante con l’uscita dell’amplificatore PA.
Colore
conduttore
Potenza nominale
ESP-17/ WS ESP-22 / WS ESP-32 / WS
nero collegamento comune
verde
1 W 2,5 W 2 W
giallo 2 W 5 W 4 W
arancio 4 W 10 W 7,5 W
rosso 7,5 W 15 W 15 W
marron 15 W 20 W 30 W
3) Nel caso di collegamento di più altoparlanti
fare attenzione all’identica polarità degli altoparlanti (p. es. conduttore nero = negativo) e
di non sovraccaricare l’amplificatore PA.
Con riserva di modifiche tecniche.
Haut-parleur Hi-Fi PA de plafond / mur
Cette notice s’adresse aux installateurs possédant des connaissances suffisantes en technique
de sonorisation ligne 100 V. Veuillez lire la présente notice avec attention avant l‘installation
et conservez-la pour pouvoir vous y reporter
ultérieurement.
1 Possibilités d’utilisation
Ce haut-parleur PA (Public Adress) est spécialement
conçu pour une installation dans des systèmes de
sonorisation Public Adress fonctionnant en ligne
100 V. Il peut être installé dans des plafonds ou
murs d’une épaisseur de 8 à 35 mm. Grâce au système 2 voies (haut-parleur large bande plus hautparleur d’aigu à dôme orientable), on obtient une
très bonne reproduction sonore.
2 Conseils importants
Le haut-parleur répond à toutes les directives
nécessaires de l’Union Européenne et porte
donc le symbole
.
•
Le haut-parleur n’est conçu que pour une
utilisation en intérieur. Protégez-le des éclaboussures, de tout type de projections d’eau,
d’une humidité élevée de l’air et de la chaleur
(température ambiante admissible 0 – 40 °C).
•
Pour le nettoyer, utilisez un chiffon sec et doux,
en aucun cas de produits chimiques ou d’eau.
•
Nous déclinons toute responsabilité en cas de
dommages matériels ou corporels résultants si
le haut-parleur est utilisé dans un but autre que
celui pour lequel il a été conçu, s’il n’est pas
correctement branché ou s’il y a surcharge; en
outre, la garantie deviendrait caduque.
Lorsque le haut-parleur est définitivement retiré du service, vous devez le
déposer dans une usine de recyclage
adaptée pour contribuer à son élimination non polluante.
CARTONS ET EMBALLAGE
PAPIER À TRIER
3 Montage
1) Découpez dans le plafond ou le mur un trou
de dimensions adéquates (voir les caractéristiques techniques).
2) Effectuez le branchement électrique (voir
chap. 4).
3) Pour le montage, retirez la grille de protection à l’aide du crochet livré.
4) Placez le haut-parleur dans le plafond ou
le mur, fixez le boîtier à l’aide des six vis de
montage. Replacez la grille.
4 Branchement électrique
AVERTISSE-
MENT
Pendant le fonctionnement, une
tension de contact dangereuse
jusqu’à 100 V est présente au câble
de branchement. Seul un personnel
qualifié peut effectuer l’installation !
Isolez toujours les conducteurs non utilisés du
câble haut-parleur.
Faites attention à la charge de l’amplificateur
PA par les haut-parleurs. Une surcharge peut
endommager l’amplificateur. La somme des
puissances de l’ensemble des haut-parleurs
reliés ne doit pas dépasser la puissance de
l’amplificateur.
1) Si l’installation Public Adress est allumée, veillez à la débrancher totalement !
2) Reliez le haut-parleur via l’entrée transformateur : reliez le conducteur noir et un des
autres conducteurs de couleur qui correspond
à la puissance nominale souhaitée par le
haut-parleur, à la sortie de l’amplificateur PA.
Couleur
conducteur
Puissance nominale
ESP-17/ WS ESP-22 / WS ESP-32 / WS
noir branchement commun
vert
1 W 2,5 W 2 W
jaune 2 W 5 W 4 W
orange 4 W 10 W 7,5 W
rouge 7,5 W 15 W 15 W
marron 15 W 20 W 30 W
3) Si vous branchez plusieurs haut-parleurs,
veillez à ce qu’ils aient tous la même polarité
(p. ex. conducteur noir = pôle moins) et veillez
à éviter toute surcharge sur l’amplificateur PA.
Tout droit de modification réservé.
Caractéristiques techniques Dati tecnici ESP-17/ WS ESP-22 / WS ESP-32 / WS
Bande passante Gamma di frequenze 55 – 20 000 Hz 50 – 20 000 Hz 40 – 20 000 Hz
Puissance nominale /
Impédance
Potenza nominale /
Impedenza
15 W/ 667 Ω
7,5 W/ 1,33 kΩ
4 W/ 2,5 kΩ
2 W/ 5 kΩ
1 W/ 10 kΩ
20 W / 500 Ω
15 W/ 667 Ω
10 W / 1 kΩ
5 W / 2 kΩ
2,5 W / 4 kΩ
30 W/ 333 Ω
15 W/ 667 Ω
7,5 W/ 1,33 kΩ
4 W/ 2,5 kΩ
2 W/ 5 kΩ
Pression sonore nominale Pressione sonora nominale 87 dB (1 W/1 m) 88 dB (1 W/1 m) 89 dB (1 W/1 m)
Ouverture de montage
Profondeur de montage
Apertura di montaggio
Profondità di montaggio
270 × 185 mm
85 mm
275 × 190 mm
95 mm
330 × 225 mm
95 mm
Dimensions (l × h × p) Dimensioni (l × h × p)
300 × 214 ×
90 mm
306 × 220 ×
100 mm
358 × 256 ×
100 mm
Poids Pese 1,9 kg 2,6 kg 2,8 kg
Température fonc. Temperatura d‘esercizio 0 °C … 40 °C
min.
8 mm
max. 35 mm
Page 4

MONACOR INTERNATIONAL GmbH & Co. KG • Zum Falsch 36 • 28307 Bremen • Germany
Copyright© by MONACOR INTERNATIONAL. All rights reserved.
A-0195.99.03.09.2018
EspañolPolski
Altavoz de Techo / Pared HiFi
paraMegafonía
Estas instrucciones van dirigidas a instaladores
con un conocimiento suficiente sobre la tecnología de 100 V en aplicaciones para megafonía.
Lea atentamente estas instrucciones antes de la
instalación y guárdelas para usos posteriores.
1 Aplicaciones
Este altavoz de megafonía está especialmente
diseñado para sistemas de megafonía que funiconan con technología de 100 V. Puede instalarse en techos o paredes de un espesor de
8 a 35 mm. Mediante el sistema 2 vías (altavoz
larga banda y tweeter de cúpula orientable), se
obtiene un reproducción sonora muy buena.
2 Notas Importantes
El altavoz cumple con todas las directivas relevantes de la UE y por lo tanto está marcado con
el símbolo
.
•
El altavoz está adecuado para utilizarlo sólo
en interiores. Proteja el altavoz de goteos y
salpicaduras, elevada humedad del aire y calor
(temperatura ambiente admisible: 0 – 40 °C).
•
Para limpiarlo, utilice un trapo seco y suave, no
utilice nunca ni productos químicos ni agua.
•
No podrá reclamarse garantía o responsabilidad alguna por cualquier daño personal o
material resultante si el altavoz se utiliza para
otros fines diferentes a los originalmente concebidos, si no se conecta adecuadamente o si
no se repara por expertos.
Si va a poner el altavoz definitivamente
fuera de servicio, llévelo a la planta de
reciclaje más cercana para que su eliminación no sea perjudicial para el
medioambiente.
3 Montaje
1) Haga un corte de dimensiones adecuada (vea
las especificaciones) en el techo o el pared.
2) Efectué la conexión eléctrica (vea apartado4).
3) Para el montaje, saque la rejilla de protección
mediante del ganchillo entregado.
4) Coloque el altavoz en el techo o en la pared,
fije la caja con las 6 tornillos de montaje. Coloque de nuevo la rejilla.
4 Conexión Eléctrica
ADVERTENCIA
Durante el funcionamiento existe el
peli gro de contacto con un voltaje de
hasta 100 V en el cable de conexión.
La instalación debe hacerse sólo el
personal cualificado.
Aísle siempre los conductores del cable de
conexión de altavoz que no se utilizan.
Observe la carga del amplificador de megafonía en los altavoces. Una sobrecarga puede
dañar el amplificador. La potencia total de todos los altavoces conectados no puede sobrepasar la potencia del amplificador.
1) ¡Si el sistema está conectado, desconéctelo
completamente antes de la conexión!
2) Conecte el altavoz via la entrada del transformador: conecte el conductor negro y uno de
los conductores de color que corresponde a
la potencia nominal por el altavoz, a la salida
del amplificador de megafonía.
Color
conductor
Potencia nominal
ESP-17/ WS ESP-22 / WS ESP-32 / WS
negro conexión común
verde
1 W 2,5 W 2 W
amarillo 2 W 5 W 4 W
naranja 4 W 10 W 7,5 W
rojo 7,5 W 15 W 15 W
marrón 15 W 20 W 30 W
3) Si conecta varios altavoces, verifique que tengan la misma polaridad (p. ej. conductor negro = polo negativo) y evite toda sobrecarga
en el amplificador de megafonía.
Sujeto a modificaciones técnicas.
Głośnik sufitowy / naścienny PA HiFi
Niniejsza instrukcja przeznaczona jest instalatorów posiadających wiedzę w zakresie systemów
PA pracujących w technice 100 V. Przed rozpoczęciem użytkowania proszę zapoznać się z instrukcją, a następnie zachować ją do wglądu.
1 Zastosowanie
Niniejszy głośnik przeznaczony jest do zastosowań PA w technice 100 V. Może być montowany zarówno w suficie, jak i na ścianie o grubości od 8 do 35 mm. Dzięki wersji dwudrożnej
(głośnik pełnozakresowy plus obrotowy głośnik
wysokotonowy) można uzyskać wysoką jakośc
odtwarzanego dźwięku.
2 Informacje Dotyczące Bezpieczeństwa
Ponieważ głośnik spełnia wymogi norm obowiązujących w Unii Europejskiej, został oznaczony
symbolem
.
•
Głośnik przeznaczony jest tylko do zastosowań wewnętrznych. Należy chronić go przez
wodą, dużą wilgotnością oraz wysokimi temperaturami (dopuszczalny zakres 0 – 40 °C).
•
Do czyszczenia urządzenia zawsze używać
czystego i suchego kawałka materiału; nigdy
nie należy używać wody, ani środków chemicznych.
•
Dostawca oraz producent nie ponoszą odpowiedzialności za ewentualnie wynikłe szkody
materialne lub uszczerbki na zdrowiu, jeśli
urządzenie było używane niezgodnie z przeznaczeniem, zostało niepoprawnie zainstalowane lub obsługiwane oraz było poddawane
naprawom przez nieautoryzowany personel.
Jeśli urządzenie nie będzie już nigdy
więcej używa ne, wskazane jest przekazanie go do miejsca utylizacji odpadów, aby zostało zniszczone bez
szkody dla środowiska.
3 Montaż
1) Wyciąć w ścianie, lub suficie dziurę o odpowiednim rozmiarze (patrz dane techniczne).
2) Podłączyć przewody (rozdz. 4).
3) W celu montażu należy usunąć metalową
maskownicę za pomocą dołączonego haka.
4) Zainstalować głośnik w otworze oraz dokręcić go za pomocą sześciu śrub mocujących.
Nałożyć ponownie nałożyć maskownicę.
4 Połączenie Elektryczne
UWAGA W trakcie pracy głośnika, na przy-
łączach może występować niebezpieczne dla życia napięcie o wartości
do 100 V. Instalację może przepro-
wadzać tylko przeszkolony personel. Należy
zaizolować nie podłączone końcówki kabla
połączeniowego.
Szczególną uwagę należy zwrócić na odpowiedni dobór mocy wzmacniacza do mocy
głośników. Niedopasowanie mocowe może
spowodować przeciążenie wzmacniacza i w
konsekwencji jego uszkodzenie. Sumaryczna
moc głosników, nie może przekraczać mocy
wzmacniacza.
1) Jeżeli wzmacniacz jest włączony, należy go
wyłączyć przed przystąpieniem do podłączania!
2) Należy podłączyć sygnał 100 V wychodzący
ze wzmacniacza: Podłączyć czarny przewód
oraz jeden z kolorowych przewodów odpowiadających mocy do linii wyjściowej 100 V
wzmacniacza PA.
Kolor
Przewodu
Poziom Wejścia
ESP-17/ WS ESP-22 / WS ESP-32 / WS
czarny wspólna końcówka
zielony
1 W 2,5 W 2 W
żółty 2 W 5 W 4 W
pomarań-
czowy
4 W 10 W 7,5 W
czerwony 7,5 W 15 W 15 W
brązowy 15 W 20 W 30 W
3) Podczas podłączanie dwóch, lub więcej głośników należy zwrócić uwagę, aby miały tą
samą polaryzację (np. przewód czarny = biegun ujemny) oraz żeby wzmacniacz nie był
przeciążony.
Z zastrzeżeniem możliwości zmiany.
Especificaciones Specyfikacja ESP-17/ WS ESP-22 / WS ESP-32 / WS
Rango de frecuencias Pasmo przenoszenia 55 – 20 000 Hz 50 – 20 000 Hz 40 – 20 000 Hz
Potencia nominal /
Impedancia
Moc znamionowa /
Impedancja
15 W/ 667 Ω
7,5 W/ 1,33 kΩ
4 W/ 2,5 kΩ
2 W/ 5 kΩ
1 W/ 10 kΩ
20 W / 500 Ω
15 W/ 667 Ω
10 W / 1 kΩ
5 W / 2 kΩ
2,5 W / 4 kΩ
30 W/ 333 Ω
15 W/ 667 Ω
7,5 W/ 1,33 kΩ
4 W/ 2,5 kΩ
2 W/ 5 kΩ
SPL SPL 87 dB (1 W/1 m) 88 dB (1 W/1 m) 89 dB (1 W/1 m)
Apertura de montaje
Profundidad de montaje
Otwór montażowy
Głębokość otworu
montażowego
270 × 185 mm
85 mm
275 × 190 mm
95 mm
330 × 225 mm
95 mm
Dimensiones (B × H × P) Wymiary (S × W × G)
300 × 214 ×
90 mm
306 × 220 ×
100 mm
358 × 256 ×
100 mm
Peso Waga 1,9 kg 2,6 kg 2,8 kg
Temperatura ambiente Zakres temperatur 0 °C … 40 °C
min.
8 mm
max. 35 mm
 Loading...