

Monaco Imperial, Endeavor, Scepter, Ambassador, Vacationer Owner's Manual
...
Combination
Washer/Dryer Addendum
2005
Imperial
Scepter
Endeavor
Ambassador
Vacationer
Atlantis

The information printed here reflects product design, fabrication, and
component parts at the date of printing. The manufacturer reserves the
right, at any time, to make changes in product design or material or
component specifications as its sole option, without notice. This includes
the substitution of components of a different brand or trade name, which
will result in comparable performance. All information printed in this
document is subject to change after the date of printing. Due to product
improvements, changes during the model year and/or transcription errors
that may occur, information represented within the owner’s manual and/or
this document may not be accurate at the time of your purchase. Please
confirm any information with your dealer.
The following information supersedes the information published in the
2005 Imperial, Scepter, Endeavor, Ambassador, Vacationer and Atlantis
Owner’s Manual in Section 4 (Appliances). Please utilize the information
provided henceforth.
©Monaco Coach Corporation. Holiday Rambler. All rights reserved.
All other trademarks or registered trademarks are property of their
respective holders. Brand name products of other companies
mentioned in this addendum are not endorsed by Monaco Coach
Corporation.
JS 04300
WASHER-DRYER PREPARED
(CONSULT YOUR OWNER’S MANUAL FOR EITHER STANDARD OR OPTIONAL USAGE)
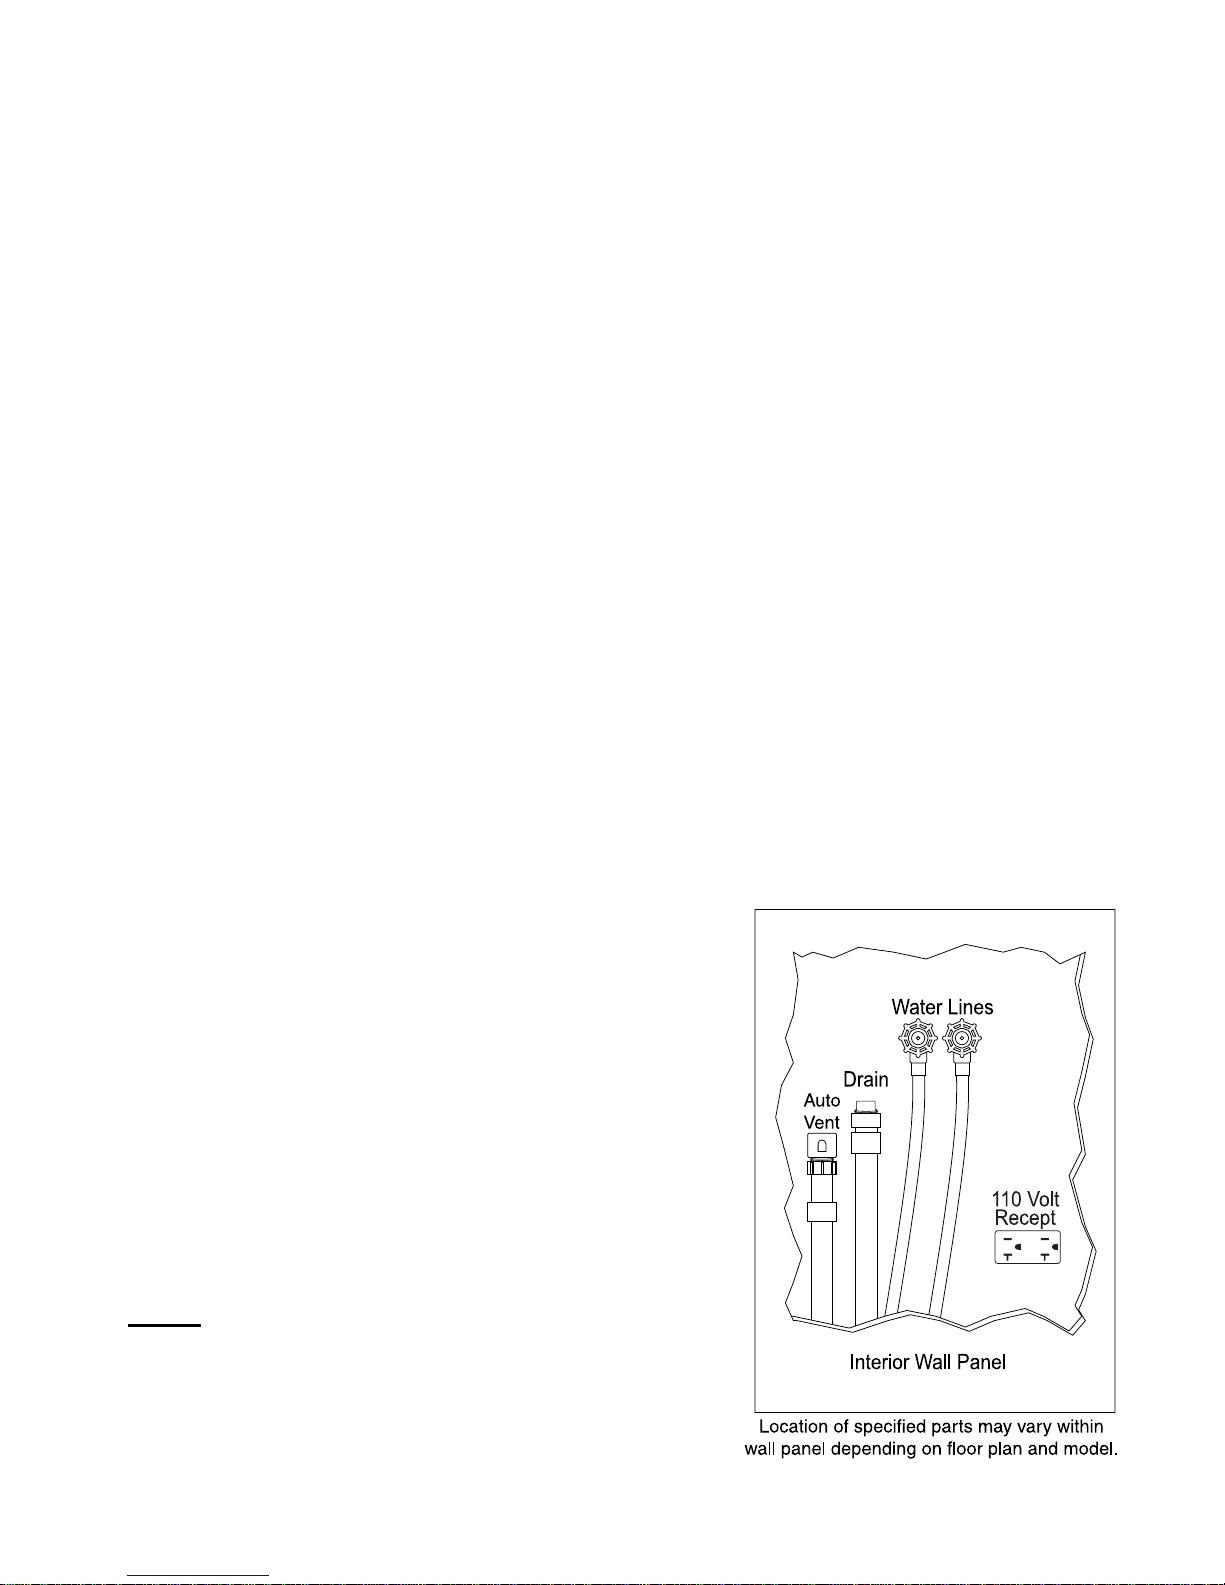
The washer-dryer “prep” package includes the following items:
• Two color coded water supply lines. A red line for hot; a blue line for cold.
• A1½ inch water drain line with threaded cap, P-trap and an automatic vent cap.
• A120 Volt receptacle located in the compartment.
The washer drain line will either be connected to a grey or black holding tank.
When the black (solid waste water) holding tank is used, the drain valve should be opened to drain the
washer water into the drain service. The black tank drain valve must be closed when washer is not being
used to prevent the tank from becoming clogged.
When the grey (waste water) holding tank is used, the drain valve should be opened to drain the washer water into the drain service. The grey tank drain valve can be left open when the washer is not being
used.
Before using the washer for the first time, determine which holding tank is being used:
• Empty all the holding tanks (see “Water Systems” section).
• Close all holding tank valves and run washer for one cycle. Washer will use between twelve
and twenty gallons of water.
• Use the tank level monitor to determine which holding tank is being used. Drain the holding
tank.
If a washer-dryer is to be installed at a later date, follow all the manufacturer’s installation
instructions. Listed here are further instructions which should be adhered to for safe and reliable
operation:
• Do not connect the clothes dryer exhaust duct to any
other duct, vent or chimney.
• Do not terminate the exhaust duct beneath the
motorhome.
• Use proper length fastener when attaching exhaust vent
to exterior sidewall. Stainless steel fasteners are best
suited for this as they will not rust.
• If the cabinet or closet in which a washer-dryer is
installed does not have vented louvered doors, the
manufacturer’s installation instructions may require
installation of vented doors or vents to be installed in
the doors. This is for sufficient circulation of drying.
NOTE: Sidewall dryer vents are not part of the prep
package. If a sidewall vent is to be installed,
properly seal vent to sidewall.
040495
 Loading...