

Momento UTN User Manual
1
® The OJ trademark is a registred trademark belonging to OJ Electronics A/S · © 2010 OJ Electronics A/S
Developed by OJ Electronics A/S - www.oj.dk
Type UTN
English .................. 1
Français ................. 3
Español ................. 5
67084 11/10 (MBC)
© 2010 OJ Electronics A/S
U S E R M A N U A L
Contents
Introduction
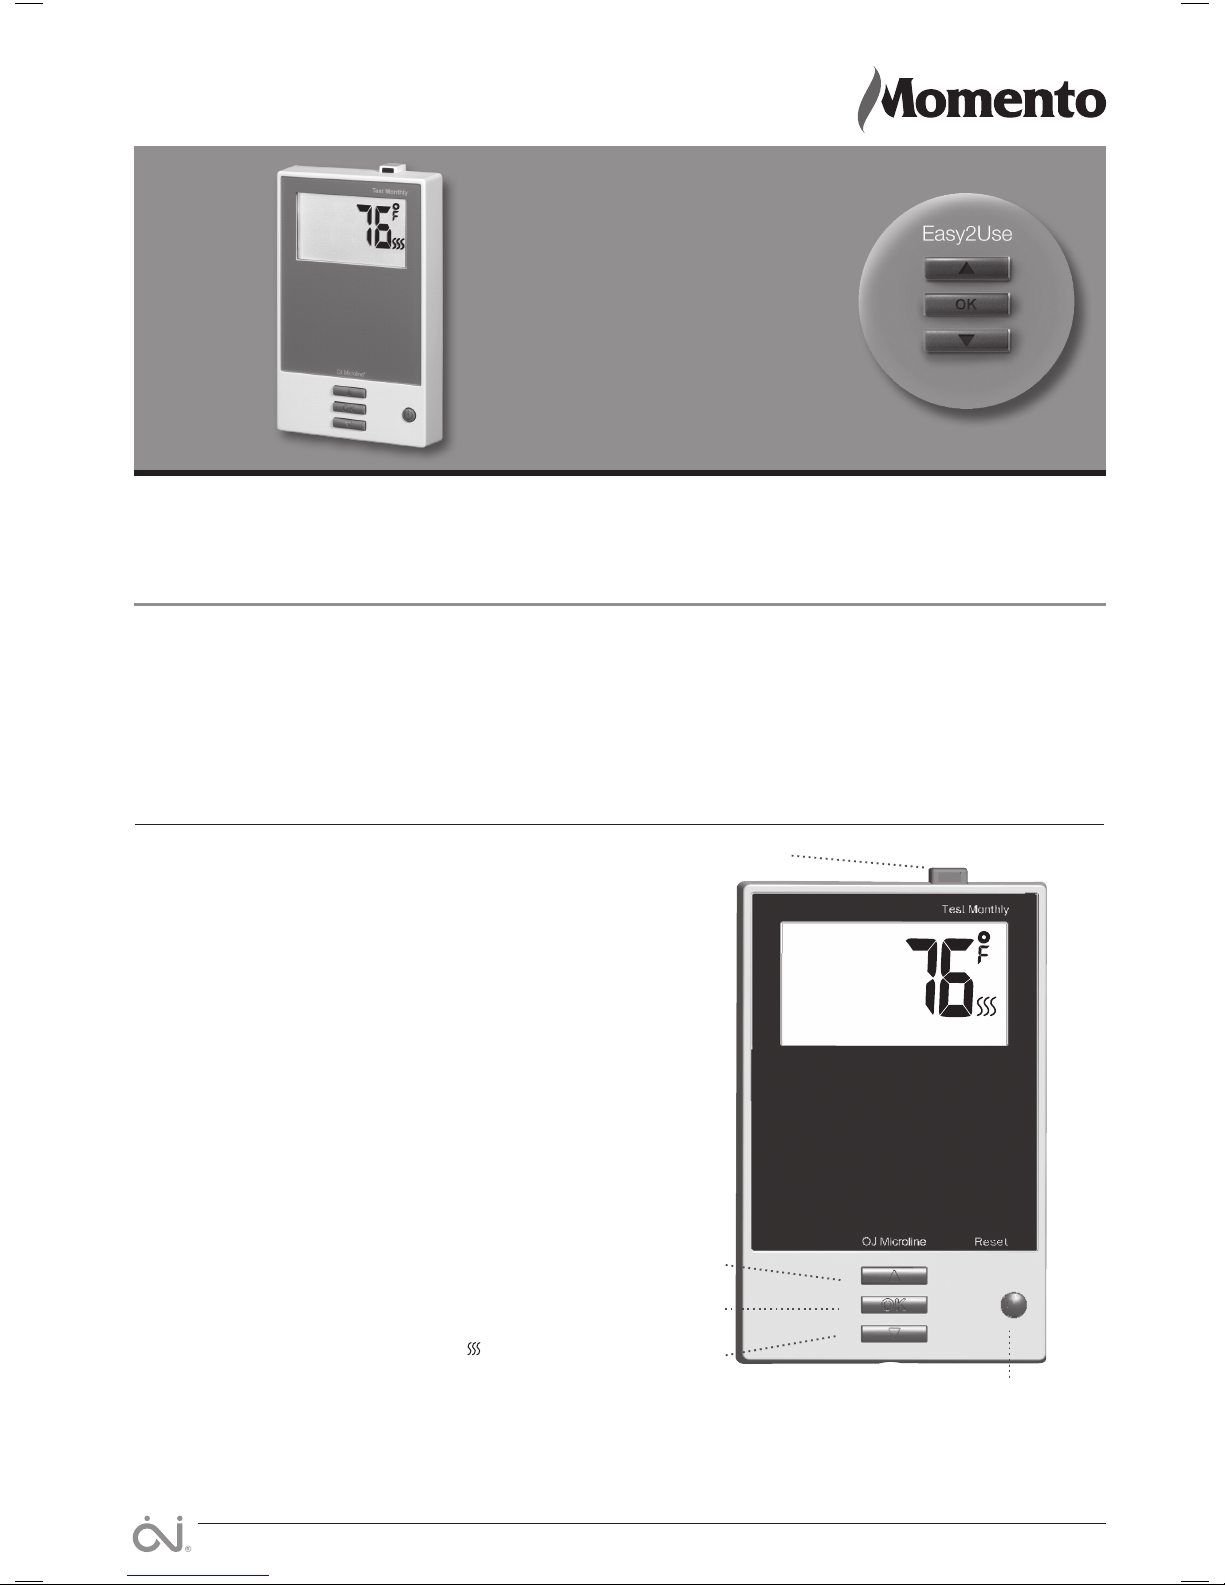
UTN is an electronic thermostat for comfort heating. It combines
elegant simplicity with advanced technology and features a large,
easily read temperature display and Easy2Use buttons for simple
operation. The backlit display is activated by the first press of a
button. UTN thermostats have built-in GFCI (Ground Fault Circuit
Interrupter) to ensure maximum safety.
Setting the temperature
To set the temperature, press the UP or DOWN button until the
required temperature is shown on the display.
The thermostat will calculate the best way to control the heating in
order to obtain the required temperature. Minor adjustments should
first be made after a few hours, depending on floor heating design.
Ground Fault Circuit Interrupter (GFCI)
The thermostat has a built-in GFCI that ensures personal safety in
case of ground faults.
It is important that the GFCI is checked monthly.
Checking the GFCI
Testing can only be performed while the thermostat is calling for
heat. Adjust the setpoint until the heating symbol ( ) appears. Use
the Up button to increase the heating demand and then press the
OK button. Wait 10 seconds to allow the thermostat to adjust to the
new setpoint. Then press the TEST button on the top of the thermostat. The test is successful if the red light in the TEST button lights
up and GROUND FAULT is shown on the display. If this does not
occur, check the installation/contact your electrical installer. Press
Up button
OK button
Down button
Standby button
Reset GFCI
GFCI test button
Type UTN English
Introduction ................................................................................. 1
Setting the temperature .............................................................. 1
Ground Fault Circuit Interrupter (GFCI) ....................................... 1
Checking the GFCI ...................................................................... 1
Settings ....................................................................................... 2
Standby ....................................................................................... 2
Error messages ........................................................................... 2
2
© 2010 OJ Electronics A/S
Type UTN English
the Standby/Reset button to reset the GFCI.
The red light should go out and the display returns to normal appearance.
Press the Down button to return to the original temperature setting.
If the test fails, check the heating cable and thermostat.
If during normal operation the GFCI trips without the TEST button
being pressed, there could be a ground fault! To check whether it
is a ground fault or nuisance tripping, press Standby/Reset. If this
causes the red light to go o and stay o, it was nuisance tripping
and the system is operating correctly. If this does not occur, there is
a ground fault! Contact your electrical installer.
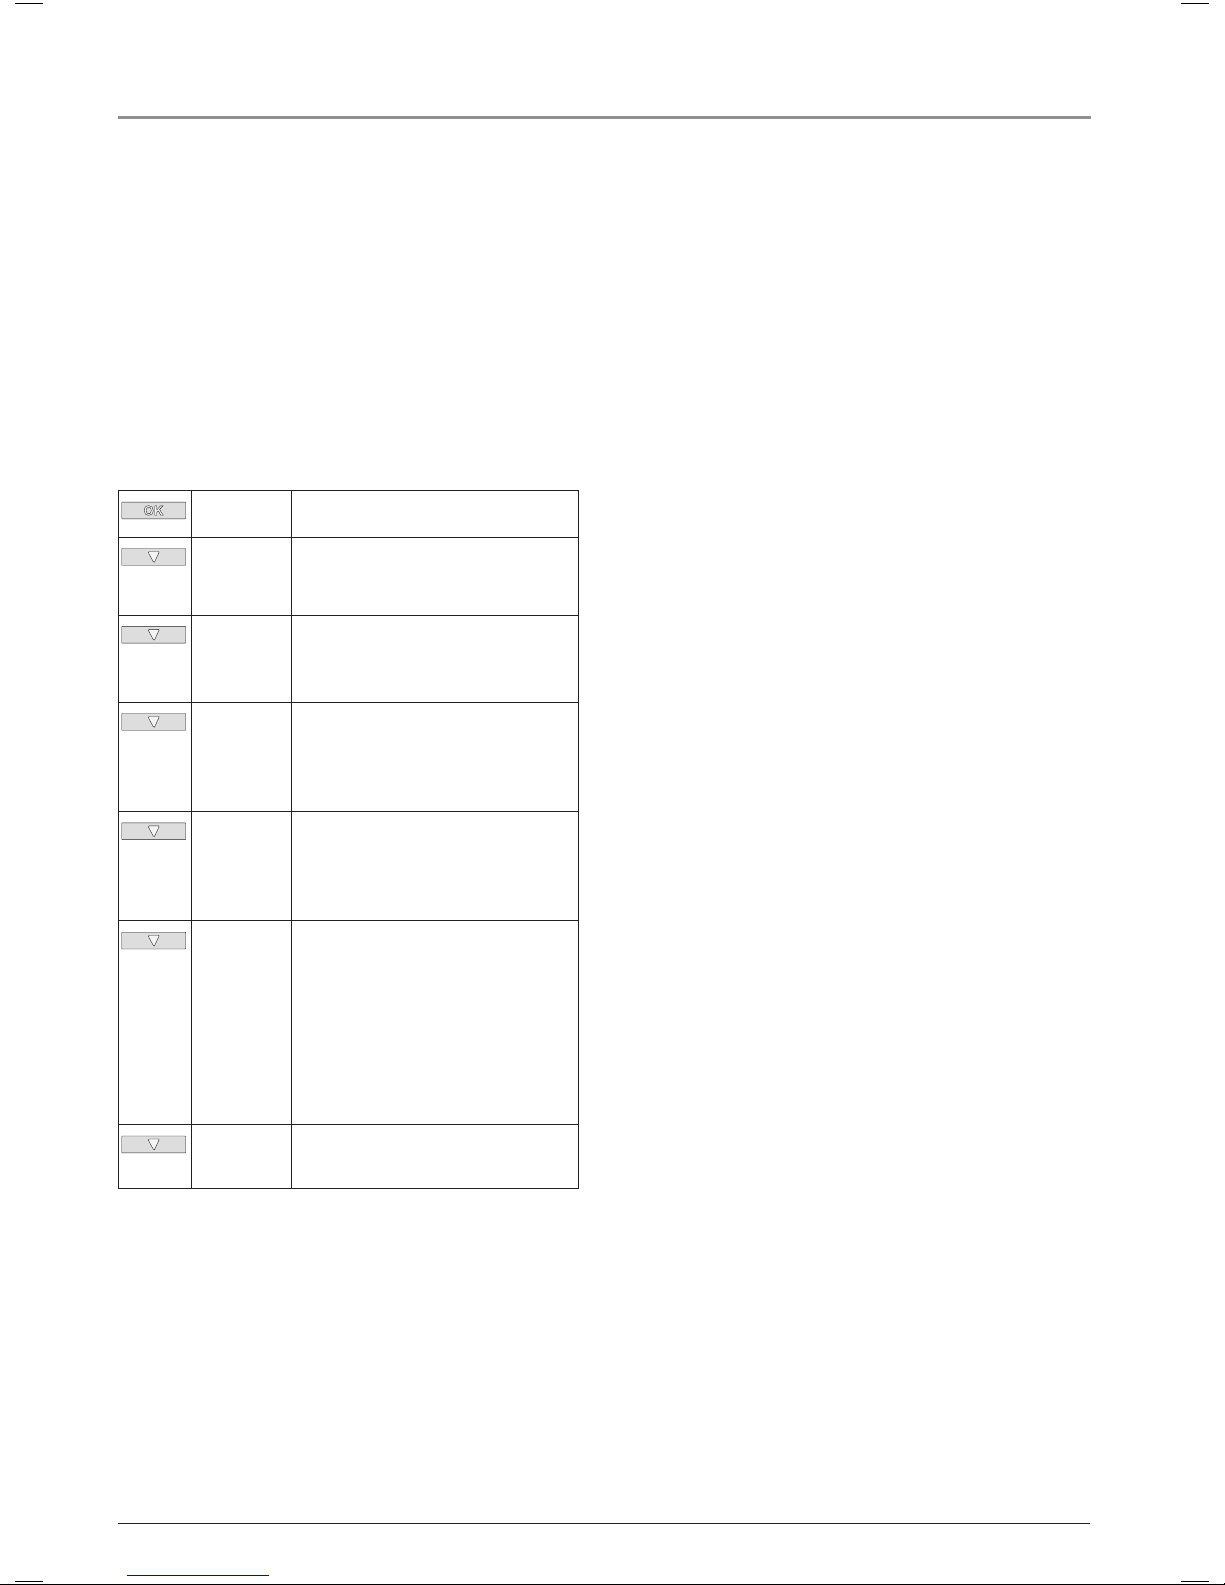
Settings
The thermostat has an intuitive menu, allowing it to be easily set.
Press OK to access the following options:
FLOOR TEMP Displays actual floor
temperature.
SCALE HIGH Allows you to set the highest temperature to
which the thermostat can be adjusted.
Press OK and change the temperature with
the UP or DOWN button. Confirm with OK.
SCALE LOW
Allows you to set the lowest temperature to
which the thermostat can be adjusted.
Press OK and change the temperature with
the UP or DOWN button. Confirm with OK.
C ° / F ° Allows
°C (Celsius) or °F (Fahrenheit) to be selected
as the temperature unit.
Press OK and change the temperature unit
with the UP or DOWN button. Confirm with
OK.
OFFSET
TEMP
Allows the dierence in temperature between
the thermostat and a room thermometer to
be set.
Press OK. Press the UP or DOWN button
to set the oset temperature (in steps of
0.2°F/0.1°C). Confirm with OK
APPLICATION Allows you to select
FLOOR SENSOR or REGULATOR.
FLOOR SENSOR: A floor sensor is used. Only
floor temperature is controlled.
REGULATOR: The thermostat functions as a
simple regulator and no sensors are used.
Press OK. Press the UP or DOWN button
to select FLOOR SENSOR or
REGULATOR. Confirm with OK
EXIT Exits the menu.
Press OK to return to the initial display.
Standby
The thermostat has a standby function, which turns o the thermostat and display.
Press and hold the Standby button for 2 seconds. The display
shows OFF and then turns o.
To turn the thermostat on again, simply press the Standby button.
Error messages
E0 = Internal failure. Replace thermostat.
E1 = Internal sensor defective or short-circuited. Replace thermostat.
E2 = External sensor defective or short-circuited. Check external sensor.
 Loading...