

Momento MD-5200 User Manual
MD-5200 QUICK START GUIDE
Full HD Driving Image Recorder
www.momentocam.com
Before Using MOMENTO’s MD-5200
- Copyright laws prohibit this manual to be copied, modified or
translated without the written consent of MOMENTO.
- The contents in this manual can be changed or modified due to
technical errors or improvements therefore we cannot guarantee
the manual’s precise information.
- MOMENTO has the right to change or modify the product and
manual contents at anytime without prior notice for improvements
or customization.
< CAUTION >
- MOMENTO is not responsible for damages that can occur from using
unauthorized parts and accessories other than from the manufacturer.
- It is dangerous to operate this device while driving.
- The device and the recorded videos are intended for personal use
and reference only.
- Based on the user’s setting and environment, please be informed
that the device may NOT record videos of all accidents.
- Please test the Micro SD card for errors frequently and because it is
a consumable item, it should be replaced periodically.
- Handle the device with care.
- Install the device where it doesn't interfere the driver's vision.
- Check for local driving rules before installing the device (as it may be
different according to each region).
- Do not use wet hands when operating this device.
- Please use this device with the original parts provided from the
manufacturer.
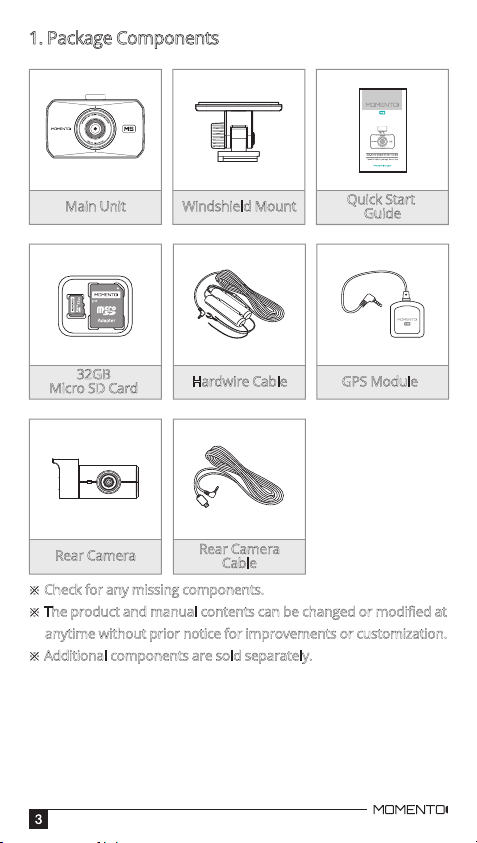
1. Package Components
Main Unit
32GB
Micro SD Card
Rear Camera
※ Check for any missing components.
※ The product and manual contents can be changed or modified at
anytime without prior notice for improvements or customization.
※ Additional components are sold separately.
Windshield Mount
Hardwire Cable
Rear Camera
Cable
Quick Start
Guide
GPS Module
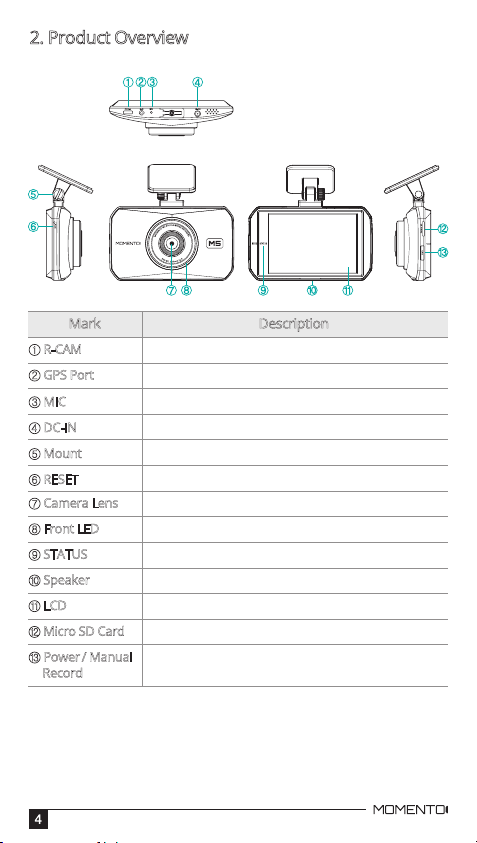
2. Product Overview
① R-CAM
② GPS Port
③ MIC
④ DC-IN
⑤ Mount
⑥ RESET
⑦ Camera Lens
⑧ Front LED
⑨ STATUS
⑩ Speaker
⑪ LCD
⑫ Micro SD Card
⑬ Power / Manual
Record
Rear camera port
GPS module port
Microphone for voice and audio recording
Power cable port
Installation mount
Reset button
Front camera for video recording
Indicates parking status and provides security effect
Notification for recording
Voice guidance
3.5” TFT LCD for live view, playback, menu operation
Memory card slot
Press more than 3 secs : Power ON/OFF
Press less than 3 secs : Manual Record
DescriptionMark
3. Device Installation
< Caution >
- Please check if the Micro SD card is inserted correctly before connecting
to power.
- Make sure the installation area is clean.
- Disconnect the power cable if you are not using the device for a long
period of time.
- Handle the device with care.
- Do not drop the product as it may not function properly.
- Please make sure that the device is used in the suggested operating
temperatures between -4°F ~ 140°F. (-20°C ~ 60°C)
- During extreme high temperatures or hot weathers, parking indoors
is suggested.
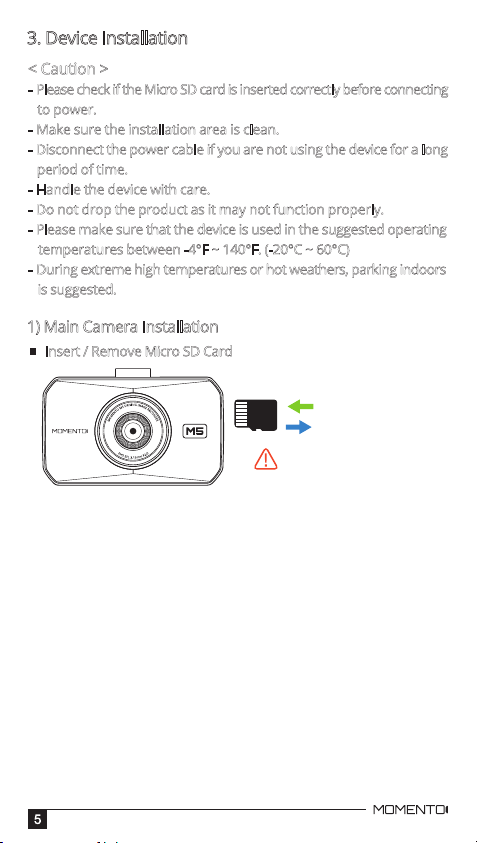
1) Main Camera Installation
Insert / Remove Micro SD Card
Insert
Remove
Do not apply excessive force to
the Micro SD card or insert it in
the wrong direction.
3. Device Installation
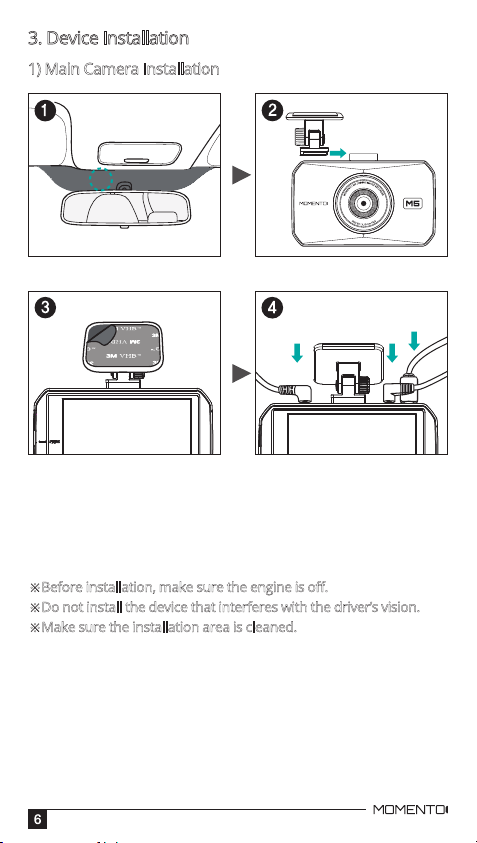
1) Main Camera Installation
Rear Camera
Cable
Hardwire Cable
1. Select and clean the area where the product will be installed.
2. Connect the camera and the mount.
3. Remove the double sided tape and attach the device.
4. Connect the rear camera and GPS cables first, then connect the
power cable.
※
Before installation, make sure the engine is off.
※Do not install the device that interferes with the driver’s vision.
※Make sure the installation area is cleaned.
GPS
Module
3. Device Installation
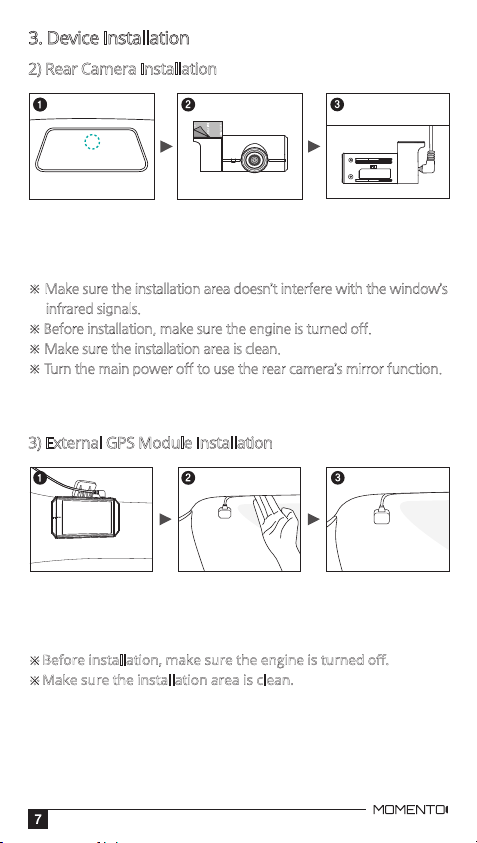
2) Rear Camera Installation
1. Select and clean the area where the camera will be installed.
2. Remove the double sided tape and attach the device.
3. Connect the rear camera cable.
※ Make sure the installation area doesn’t interfere with the window’s
infrared signals.
※ Before installation, make sure the engine is turned off.
※ Make sure the installation area is clean.
※ Turn the main power off to use the rear camera’s mirror function.
3) External GPS Module Installation
1. Connect the external GPS module to the right connector on the camera.
2. Organize the cable line across the car’s ceiling.
3. Remove the double sided tape and attach the module.
※
Before installation, make sure the engine is turned off.
※Make sure the installation area is clean.
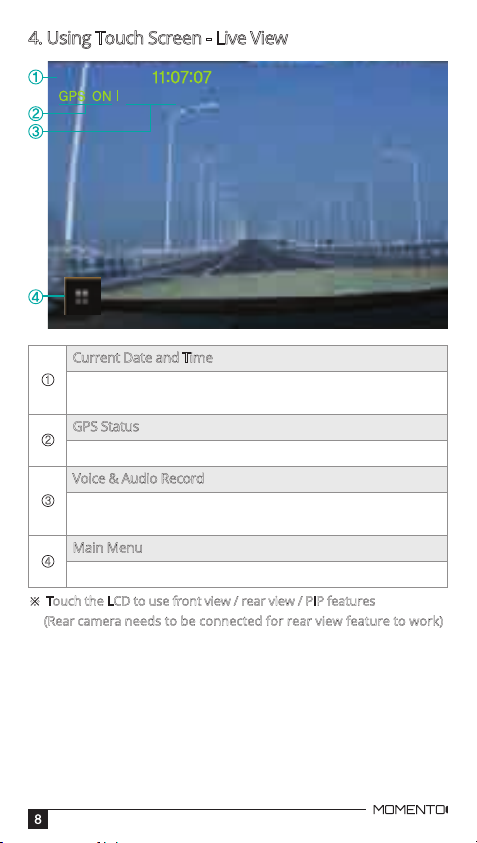
4. Using Touch Screen - Live View
2016/11/27
MIC ON
Current Date and Time
①
Main Menu → System Settings → Time Settings
* Automatic setting if GPS is connected
GPS Status
②
GPS ON / OFF
Voice & Audio Record
③
Main menu → MIC ON/OFF
MIC ON : recording / MIC OFF : not recording
Main Menu
④
Main menu screen
※ Touch the LCD to use front view / rear view / PIP features
(Rear camera needs to be connected for rear view feature to work)
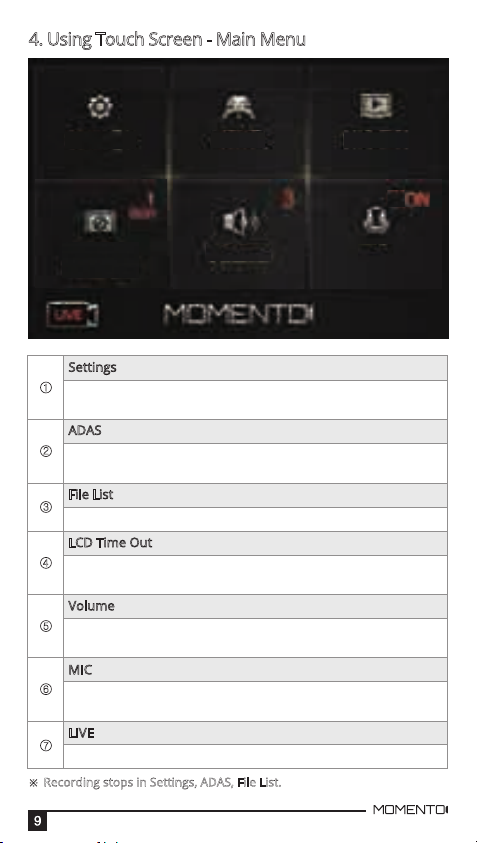
4. Using Touch Screen - Main Menu
Settings ADAS
LCD
Time out
Settings
①
Main menu settings
→ System Settings / Dashcam Settings / F/W version
ADAS
②
ADAS menu settings
→ FVMA / FCW
File List
③
List of recorded files
LCD Time Out
④
LCD screen off setting menu
→ 30sec / 1min / 3min / clock / always on
Volume
⑤
Changes the volume level (5=loudest)
→ OFF / 1 / 2 / 3 / 4 / 5
MIC
⑥
Audio/voice record using the microphone
→ ON / OFF
LIVE
⑦
Go to Liveview
※ Recording stops in Settings, ADAS, File List.
Volume MIC
File List
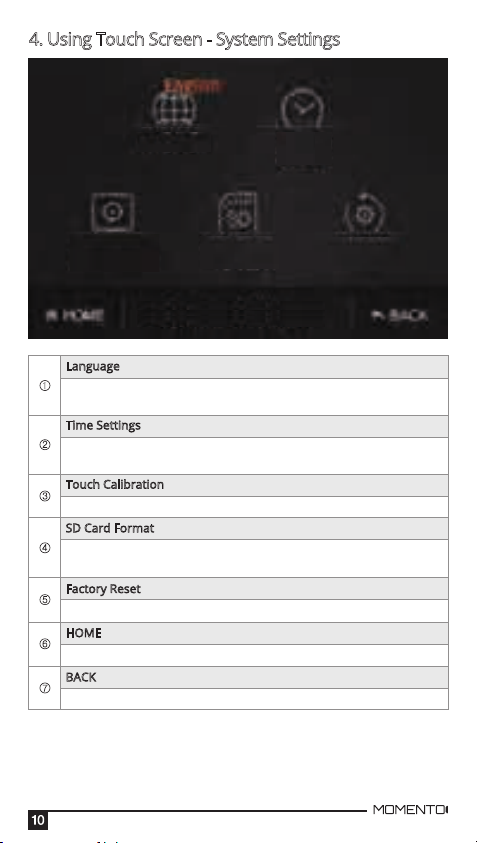
4. Using Touch Screen - System Settings
Language
Time
Settings
Touch
Calibration
SD Card
Format
System Settings
Language
①
Language setting
→ English / Francais
Time Settings
②
System’s time setting
* Automatic setting if GPS is connected
Touch Calibration
③
Resets touch screen
SD Card Format
④
Micro SD Card Format
* Saved files will be deleted. Backup the files before formatting
Factory Reset
⑤
Reset camera to factory settings (except for recorded files)
HOME
⑥
Move to Main menu screen
BACK
⑦
Back to previous screen
Factory
Reset
 Loading...