

Page 1
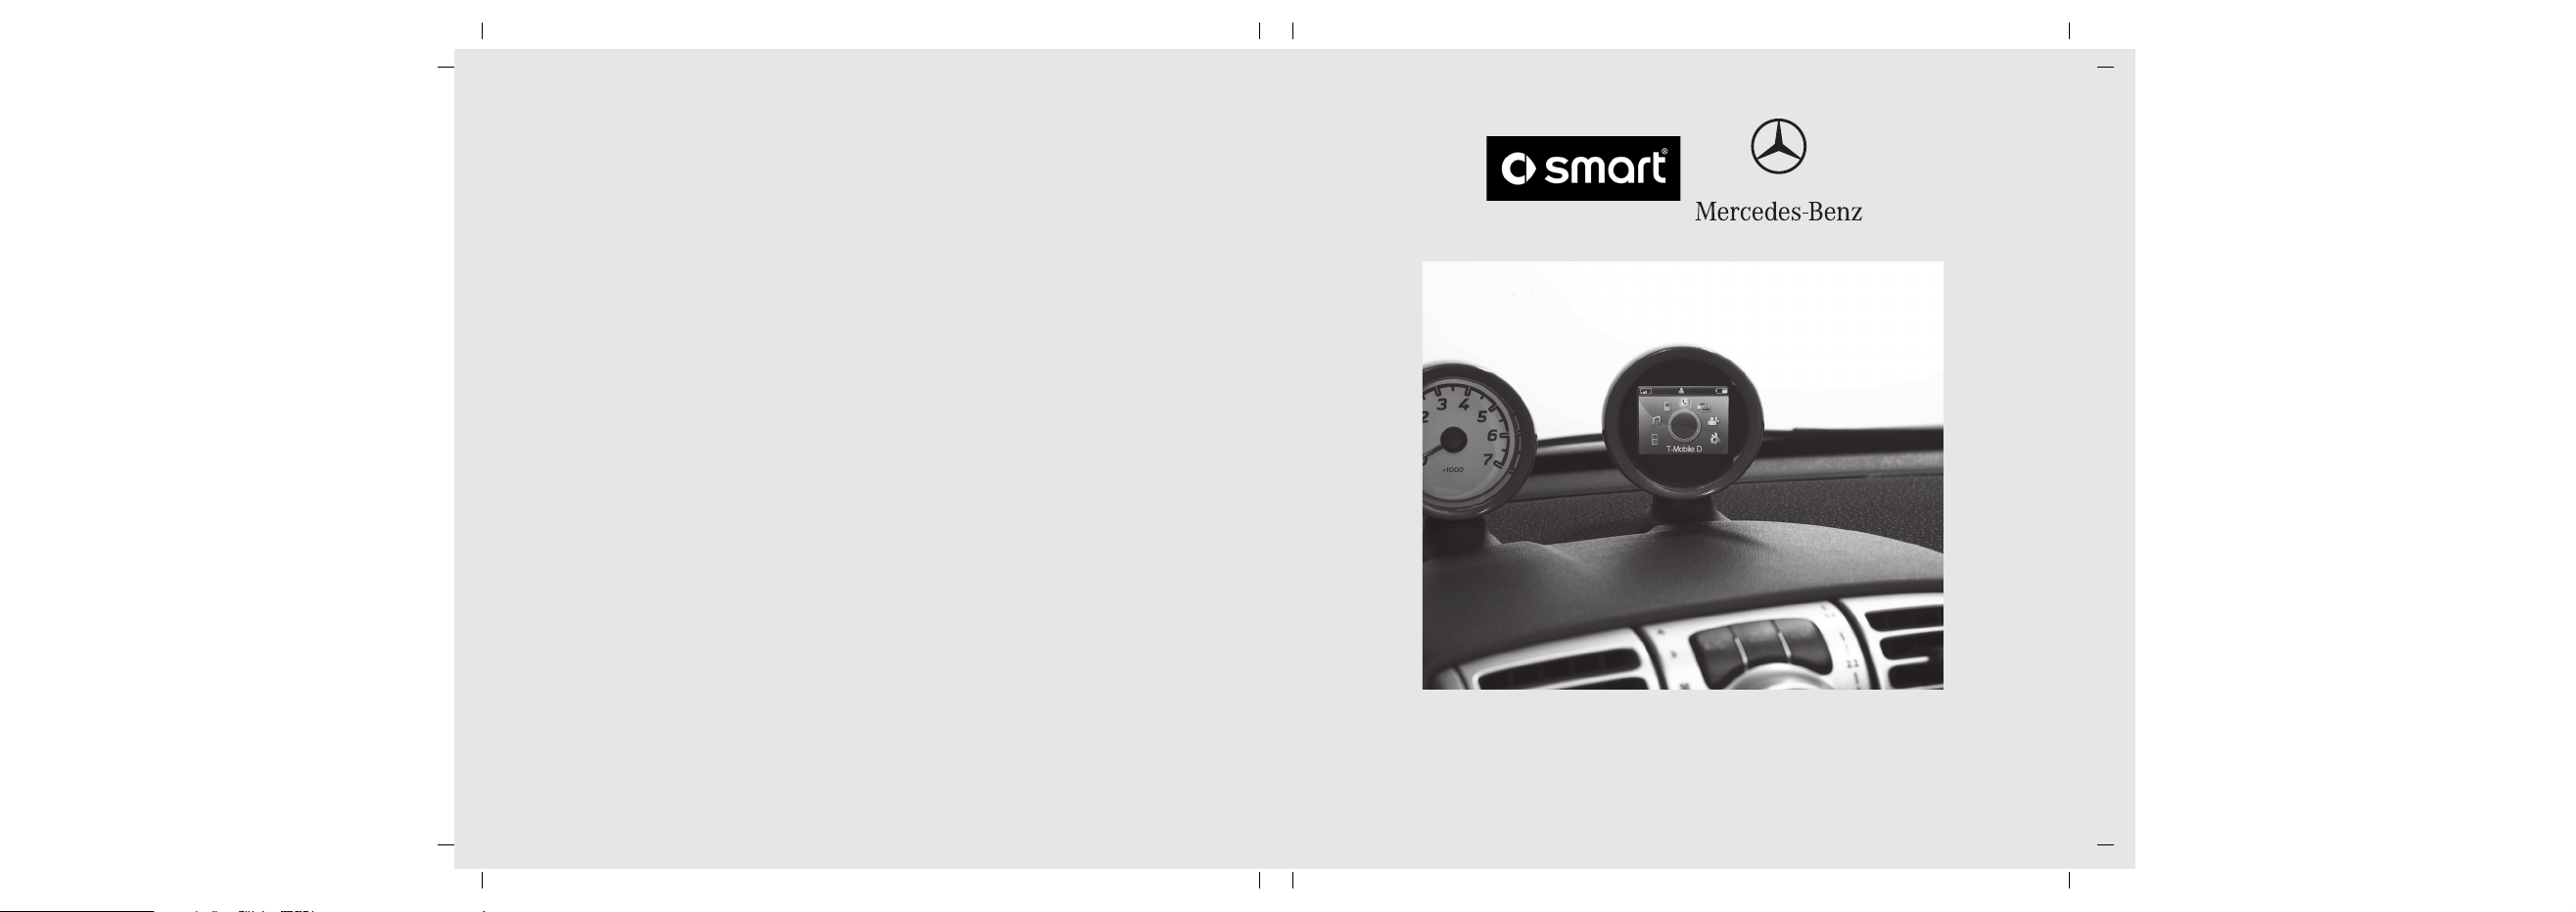
Freisprecheinrichtung für smart / A- Klasse / B- Klasse
Hands- free System for smart / A- Class / B- Class
Dispositif mains libres pour smart/Classe A/Classe B
Page 2

MBA_BA_book.book Seite 3 Mittwoch, 21. Januar 2009 9:52 09
쮕
Betriebsanleitung Seite 3
Owner's Manual page 23
Notice d'utilisation page 43
Page 3

MBA_BA_book.book Seite 4 Mittwoch, 21. Januar 2009 9:52 09
Page 4

MBA_BA_book.book Seite 3 Mittwoch, 21. Januar 2009 9:52 09
Einleitung
Viel Freude mit Ihrer neuen
Freisprecheinrichtung!
Wir gratulieren Ihnen zu Ihrer neuen Freisprecheinrichtung.
Diese Betriebsanleitung ist gültig für smart
Fahrzeuge sowie Fahrzeuge der A-Klasse
und B-Klasse mit installierter Freisprecheinrichtung. Diese Betriebsanleitung
informiert Sie über die Bedienung Ihrer
Freisprecheinrichtung und gibt Ihnen
wichtige Hinweise.
Machen Sie sich zuerst mit Ihrer Freisprecheinrichtung vertraut und lesen Sie
die Betriebsanleitung, bevor Sie losfahren.
Sie haben dadurch mehr Freude an Ihrer
Freisprecheinrichtung und vermeiden
Gefahren für sich und andere.
smart passt seine Freisprecheinrichtung
laufend dem neuesten Stand der Technik an
und behält sich deswegen Änderungen in
Form, Ausstattung und Technik vor.
Deshalb können Sie aus den Angaben,
Abbildungen und Beschreibungen in dieser
Betriebsanleitung keine Ansprüche ableiten.
Ein smart Service-Center steht Ihnen
jederzeit mit Hilfe und Ratschlägen zur
Verfügung.
Diese Betriebsanleitung gehört zum Fahrzeug. Daher sollten Sie diese stets im Fahrzeug mitführen und beim Verkauf des
Fahrzeugs an den neuen Besitzer weitergeben.
smart wünscht Ihnen mit Ihrer neuen
Freisprecheinrichtung eine gute Fahrt.
Mercedes-Benz Accessories GmbH
Ein Unternehmen der Daimler AG
3
Page 5

MBA_BA_book.book Seite 4 Mittwoch, 21. Januar 2009 9:52 09
Inhaltsverzeichnis
Symbolerklärung ................................. 5
Betriebssicherheit ............................... 5
Funktionsvoraussetzung .................... 6
Funktionsübersicht ............................. 6
Funkbedienteil ..................................... 6
Navigation mit dem Funkbedienteil........ 7
Symbole................................................. 7
Statusleiste ........................................... 7
Displaytastatur ...................................... 7
Menüoptionen ....................................... 8
Nummerntypen Telefonbuch ................. 8
Freisprecheinrichtung mit
Mobiltelefon koppeln ............................ 8
Mobiltelefon mit Freisprech-
einrichtung verbinden .......................... 10
Menüübersicht ................................... 10
Menü - Benutzerverwaltung ............. 11
Neuen Benutzer anlegen ..................... 11
Einstellungen ....................................... 11
Menü - Einstellungen ........................ 11
Telefonieren ....................................... 13
Anruf tätigen ....................................... 14
Rufnummer aus Telefonbuch wählen ... 14
Eingehender Anruf ............................... 14
Anruf beenden ..................................... 14
Einstellungen ....................................... 15
Sprachwahl ........................................ 15
Sprachwahl der
Freisprecheinrichtung ......................... 15
Sprachwahl des Mobiltelefons ............ 16
Sprachwahl abbrechen ........................ 16
Einstellungen ....................................... 16
Sprachbefehle ................................... 16
<Name> anrufen / wählen ................... 16
<Name> anrufen / wählen nach
bestimmten Rufnummertyp ................. 16
Wähle Nummer ................................... 17
Wahlwiederholung ............................... 17
Telefonbuch ....................................... 18
Telefonbuch laden ............................... 18
Kontakt im Telefonbuch suchen .......... 18
Ruflisten ............................................. 18
Textnachrichten ................................ 19
Textnachricht lesen ............................. 19
Textnachricht vorlesen lassen ............. 19
Textnachricht senden .......................... 19
®
iPod
Player ...................................... 19
®
iPod
Player mit Freisprech-
einrichtung verbinden ............................ 19
Bedienung ........................................... 20
®
iPod
laden ......................................... 20
Musik Player ...................................... 20
Audio-Gerät mit Freisprech-
einrichtung koppeln ............................. 20
Bedienung ........................................... 21
Batteriewechsel des
Funkbedienteils ................................. 22
4
Page 6
MBA_BA_book.book Seite 5 Mittwoch, 21. Januar 2009 9:52 09
Freisprecheinrichtung
Symbolerklärung
GWarnhinweis
Ein Warnhinweis macht Sie auf mögliche
Gefahren für Ihre Gesundheit oder Ihr Leben
aufmerksam.
Wichtig!
Ein so gekennzeichneter Text macht Sie auf
die Gefahr von Material- und Funktionsschäden aufmerksam.
Hinweis
Ein so gekennzeichneter Hinweis gibt Ihnen
Ratschläge und weiterführende
Informationen.
1. Diese Aufzählungen erklären Ihnen die einzelnen Bedienschritte.
• Diese Aufzählungen zeigen Ihnen Auswahlmöglichkeiten auf.
Anzeige
Anzeigen im Display sind in dieser Schrift
gedruckt.
Zieleingabe 씮 Favoriten
Dies zeigt eine Abfolge von nacheinander zu
betätigenden Tasten.
Spracheingabe
Sprachbefehle sind in dieser Schrift gedruckt.
Betriebssicherheit
GUnfallgefahr
Widmen Sie Ihre Aufmerksamkeit dem
Verkehrsgeschehen. Benutzen Sie die Freisprecheinrichtung nur, wenn die Verkehrssituation dies zulässt. Durch Bedienung der
Freisprecheinrichtung werden Sie vom Verkehrsgeschehen abgelenkt und können hierdurch die Kontrolle über Ihr Fahrzeug
verlieren und einen Unfall verursachen.
In dieser Betriebsanleitung wird auf die Fahrzeug-Betriebsanleitung, die Betriebsanleitung
Ihres Mobiltelefons und Ihres Audio-Systems
sowie auf verschiedene Betriebsanleitungen
von angeschlossenen Geräten (z.B. iPod
Audio-Geräte) verwiesen.
Bitte halten Sie diese bereit.
®
,
5
Page 7
MBA_BA_book.book Seite 6 Mittwoch, 21. Januar 2009 9:52 09
Freisprecheinrichtung
Funktionsvoraussetzung
Zur Nutzung der Funktionen der Freisprecheinrichtung muss das Radio bzw. das Audio-System des Fahrzeugs eingeschaltet sein, siehe
Fahrzeug-Betriebsanleitung.
Funktionsübersicht
Die Freisprecheinrichtung unterstützt das
Bluetooth
fortanlage für das Telefonieren im Auto und
bietet folgenden Funktionsumfang:
• Anruffunktionen wie eingehender Ruf,
• Integrierte Sprachsteuerung
• Sprachwahl direkt aus dem Telefonbuch des
• Sprachwahl des Mobiltelefons aktivieren
•Lesen und Beantworten von Textnachrichten
•iPod
• Telefonbuch, Ruflisten
• Musik-Player: Wiedergabe von Musikdateien
• Automatische Radiostummschaltung
• Anmeldung von bis zu 10 Mobiltelefonen
®
-Handsfree-Profil. Sie ist die Kom-
ausgehender Ruf, anklopfen und Wahlwiederholung
Mobiltelefons (ohne Anlernen)
und benutzen
®
Player
des Mobiltelefons oder MP3-Players via
Bluetooth
®
Audio-Streaming
Funkbedienteil
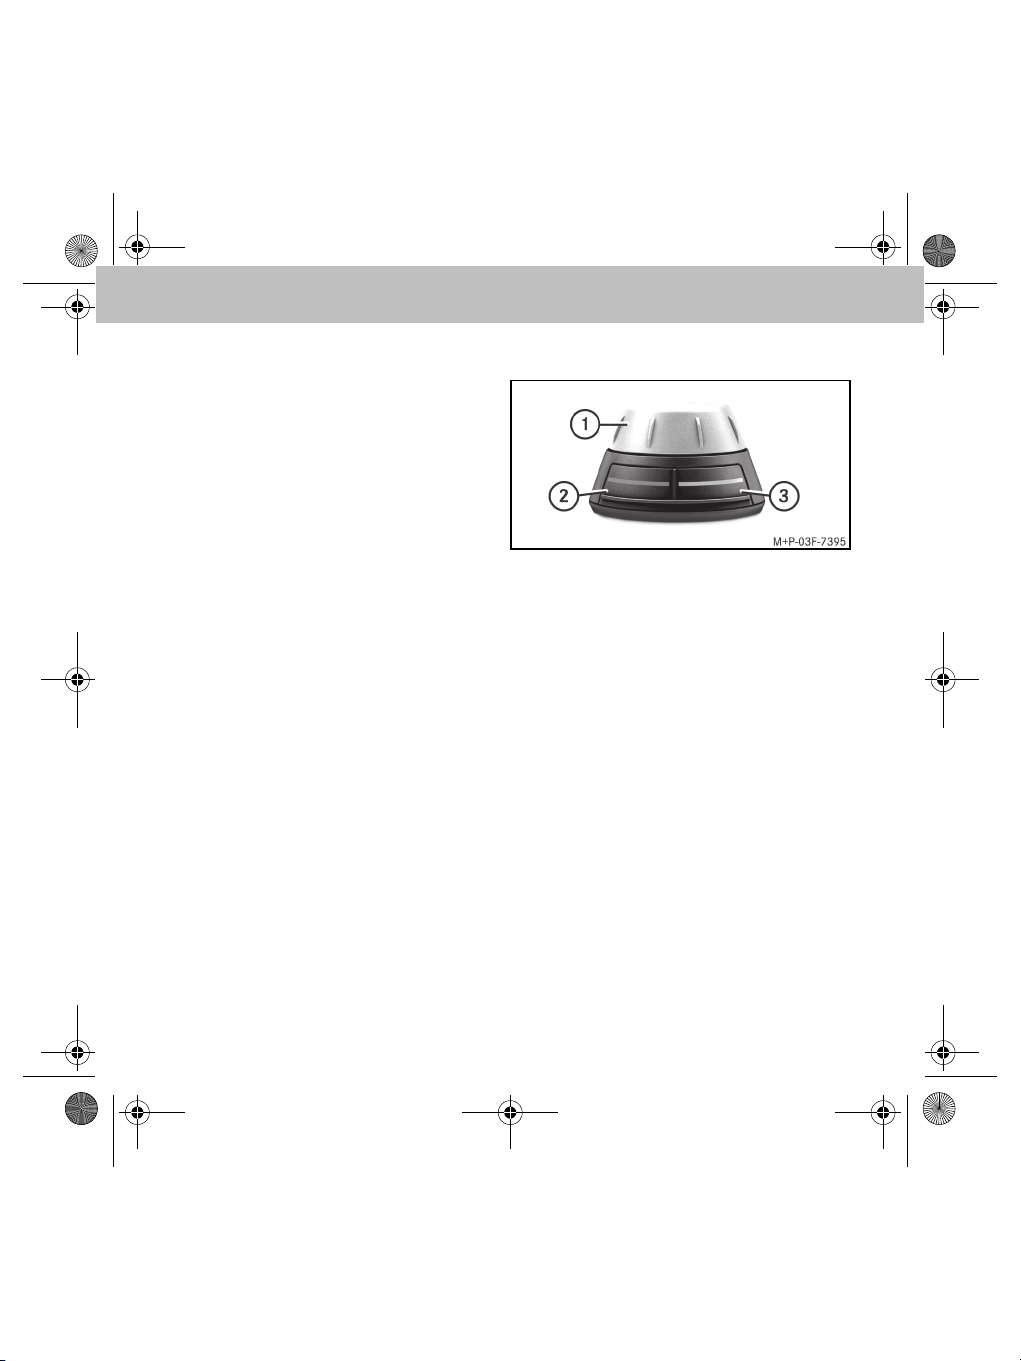
1 Drehknopf:
• Navigation durch die Menüs
• Starten der Sprachsteuerung
• Eingabe von Ziffern und Buchstaben
• Anwahl des aktiven Menüs
2 rote Taste:
• Abweisen eingehender Anrufe
•Auflegen
•Zurückspringen aus aktuellem Untermenü
• Sprachwahl des Telefons aktivieren
3 grüne Taste:
• Annehmen eingehender Anrufe
• Anwahl des aktiven Menüs
• Rufaufbau zur aktuell gewählten Rufnummer
6
Page 8

MBA_BA_book.book Seite 7 Mittwoch, 21. Januar 2009 9:52 09
Freisprecheinrichtung
Hinweis
Die Freisprecheinrichtung verfügt über einen
Bildschirmschoner. Nach 60 Sekunden
Inaktivität wird die DisplayUhr eingeblendet
(smart) bzw. die Displayhelligkeit reduziert
(A-Klasse/B-Klasse). Das NavigationsDisplay kann durch Betätigung des Funkbedienteils wieder aktiviert werden. Ein
Tastendruck führt dabei gleichzeitig zur Ausführung der damit verbundenen Funktion.
Navigation mit dem Funkbedienteil
Mit dem Drehknopf navigieren Sie zu einem
Menüpunkt. Wählen Sie einen Menüpunkt mit
dem Drehknopf und bestätigen Sie die Auswahl
durch Drücken des Drehknopfes. Mit einem erneuten Druck auf den Drehknopf wählen Sie ein
Untermenü. Sie wechseln in die nächsthöhere
Menüebene durch Drücken der roten Taste am
Funkbedienteil.
Symbole
Statusleiste
1 Empfang des Mobiltelefons
2 Empfangene Textnachrichten
3 Anrufe in Abwesenheit
4 Initialen des Benutzers
5 Akkukapazität des Mobiltelefons
Displaytastatur
Bestätigen der Eingabe
Löschen des letzten Zeichens
Wechsel zur Zifferneingabe
Wechsel zur Eingabe von
Kleinbuchstaben
Wechsel zur Eingabe von
Großbuchstaben
Wechsel zur Eingabe von
Sonderzeichen
Displaytastatur verlassen
7
Page 9
MBA_BA_book.book Seite 8 Mittwoch, 21. Januar 2009 9:52 09
Freisprecheinrichtung
Menüoptionen
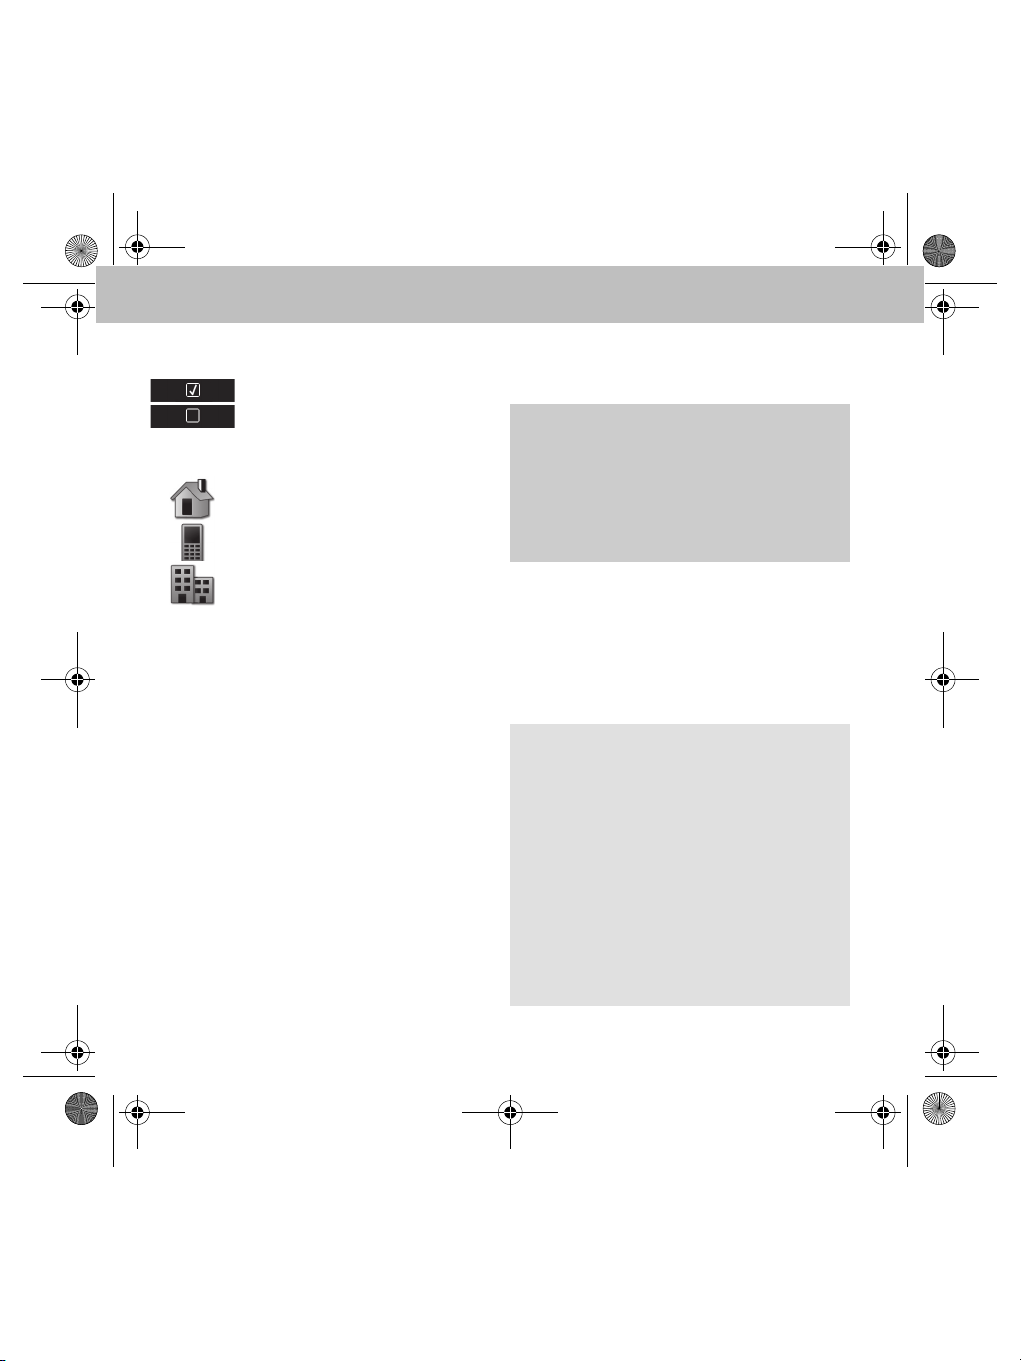
Aktivierte Option
Deaktivierte Option
Nummerntypen Telefonbuch
Private Telefonnummer
Mobiltelefonnummer
Dienstliche Telefonnummer
Freisprecheinrichtung mit Mobiltelefon
koppeln
GUnfallgefahr
Koppeln Sie die Freisprecheinrichtung mit
dem Mobiltelefon nur bei Fahrzeugstillstand.
Andernfalls besteht die Gefahr, dass Sie vom
Verkehrsgeschehen abgelenkt werden und
einen Unfall verursachen.
Für eine erste gemeinsame Verwendung müssen die Freisprecheinrichtung und das Mobiltelefon gekoppelt werden ("Pairing").
Nach dem Koppeln werden die beiden Geräte
innerhalb des Fahrzeugs bei jedem Einschalten
automatisch miteinander verbunden.
Hinweise
Eventuell müssen am verwendeten Mobiltelefon für den Koppelvorgang und für ein selbstständiges Verbinden mit der Freisprecheinrichtung entsprechende Einstellungen vorgenommen werden, siehe Betriebsanleitung
Mobiltelefon.
Zum erfolgreichen Koppeln müssen Mobiltelefon und Freisprecheinrichtung eingeschaltet und Bluetooth
koppelnde Mobiltelefon muss sich im Fahrzeug befinden.
®
aktiviert sein. Das zu
8
Page 10

MBA_BA_book.book Seite 9 Mittwoch, 21. Januar 2009 9:52 09
Freisprecheinrichtung
1. Bluetooth® am Mobiltelefon aktivieren,
siehe Betriebsanleitung Mobiltelefon.
2. Zündschlüssel in Stellung 1 oder 2 drehen,
siehe Fahrzeug-Betriebsanleitung.
Freisprecheinrichtung wird gestartet.
3. Im Hauptmenü Benutzerverwaltung
auswählen.
4. Neuer Benutzer auswählen.
Alle verfügbaren Mobiltelefone werden an-
gezeigt.
Hinweis
Wird das gewünschte Mobiltelefon nicht angezeigt, stattdessen Vom Telefon koppeln
auswählen und vom Mobiltelefon aus nach
Bluetooth
®
-Geräten suchen, siehe Betriebsanleitung Mobiltelefon. Die Freisprecheinrichtung wird über Bluetooth® als smart BT
oder MB Bluetooth erkannt.
5. Gewünschtes Mobiltelefon zum Verbindungsaufbau aus der Liste auswählen.
Im Display der Freisprecheinrichtung erscheint eine Bluetooth
6. Nach Aufforderung die Bluetooth
®
PIN.
®
PIN am
Mobiltelefon eingeben.
7. Verbindungsaufforderung akzeptieren.
8. Initialen des Benutzers bzw. des Mobiltelefons eingeben.
Nach erfolgreichem Verbindungsaufbau erfolgt
die automatische Übertragung des Telefonbuchs vom Mobiltelefon an die Freisprecheinrichtung.
Hinweis
Es können bis zu 10 Mobiltelefone mit der
Freisprecheinrichtung gekoppelt werden, jedoch ist immer nur eines verbunden.
Nach erfolgreichem Verbindungsaufbau stehen die vom Mobiltelefon unterstützten Funktionen im Hauptmenü zur Verfügung.
9
Page 11
MBA_BA_book.book Seite 10 Mittwoch, 21. Januar 2009 9:52 09
Freisprecheinrichtung
Mobiltelefon mit Freisprecheinrichtung
verbinden
In Zündschlüsselstellung 1 oder 2 sucht die
Freisprecheinrichtung automatisch nach dem
zuletzt verbundenen Mobiltelefon und baut eine
Verbindung zu diesem auf.
Zum Verbindungsaufbau mit einem anderen
Mobiltelefon muss dieses in der Benutzerverwaltung ausgewählt und aktiviert oder neu gekoppelt werden.
Hinweis
Wird die Zündung ausgeschaltet, schaltet
sich die Freisprecheinrichtung ab und die
Verbindung zum Mobiltelefon wird beendet.
Wird die Zündung während eines Telefonats
ausgeschaltet, wird dieses Telefonat aufrechterhalten und weiter geführt. Die Freisprecheinrichtung wird erst nach Beendigung
des Telefonats ausgeschaltet.
Menüübersicht
Benutzerverwaltung (Seite 11):
Benutzerspezifische Einstellungen
wie „Initialen ändern“, „Anmelden“,
„Abmelden“ etc.
Einstellungen (Seite 11):
Allgemeine Einstellungen für die
Freisprecheinrichtung wie „Rufton“,
„Anrufbeantworter“ etc.
®
iPod
Steuerung des iPod
Freisprecheinrichtung
Musik Player (Seite 20):
Audio-Geräte mit der Freisprecheinrichtung koppeln und Musiktitel abspielen
Telefonbuch (Seite 18):
Enthält die heruntergeladenen
Einträge vom Mobiltelefon
Ruflisten (Seite 18):
Enthält Listen der zuletzt gewählten
Rufnummern, der angenommenen
und der entgangenen Anrufe
Textnachrichten (Seite 19):
Enthält die Liste der heruntergelade-
nen Textnachrichten vom Mobiltelefon
Player (Seite 19):
®
über die
10
Page 12

MBA_BA_book.book Seite 11 Mittwoch, 21. Januar 2009 9:52 09
Freisprecheinrichtung
Menü - Benutzerverwaltung
Die Freisprecheinrichtung erlaubt die Verwaltung von bis zu 10 Benutzerprofilen. Für jeden
Benutzer werden unter anderem folgende
Daten individuell gespeichert:
•Telefonbuch
• Displayhelligkeit
• Klingelton
• Displaysprache
• Lautstärkeeinstellungen
• Ruflisten
Neuen Benutzer anlegen
Siehe "Freisprecheinrichtung mit Mobiltelefon
koppeln", Seite 8.
Einstellungen
• Initialen auswählen, um den Namen
des Benutzers zu bearbeiten.
• IconFarbe auswählen, um die Farbe des
Benutzersymbols zu bearbeiten.
• Anmelden auswählen, um den aktuellen
Benutzer abzumelden und einen anderen Benutzer anzumelden.
Hinweis
Ist der ausgewählte Benutzer für die Freisprecheinrichtung nicht auffindbar, wird wieder in die Benutzerverwaltung
zurückgesprungen.
• Abmelden auswählen, um die aktuelle
Bluetooth
sprecheinrichtung und dem Mobiltelefon zu
trennen.
• Löschen auswählen, um alle Daten des Be-
nutzers von der Freisprecheinrichtung zu
entfernen.
®
-Verbindung zwischen der Frei-
Menü - Einstellungen
• Rufton: in den Untermenüs Melodie
und Lautstärke kann ein Klingelton ausgewählt und die Ruftonlautstärke eingestellt
werden.
• Helligkeit: in den Untermenüs
Helligkeit und Standby Helligkeit
kann die Displaybeleuchtung an die Benutzerbedürfnisse angepasst werden.
11
Page 13
MBA_BA_book.book Seite 12 Mittwoch, 21. Januar 2009 9:52 09
Freisprecheinrichtung
• Anruf Einst.: ist Autom. Annahme
aktiviert, so werden eingehende Anrufe nach
dreimaligem Klingeln automatisch angenommen.
• Drehrichtung:die Bedienrichtung des
Drehknopfes kann gegen oder mit dem Uhrzeigersinn eingestellt werden.
• Nachlaufzeit:über die Einstellung der
Nachlaufzeit kann festgelegt werden, wie
lange die Freisprecheinrichtung nach Abschalten der Zündung aktiv bleibt.
Hinweis
Es wird empfohlen, die Nachlaufzeit auf 0 zu
stellen.
• Zurücksetzen:setzt alle Einstellung der
Freisprecheinrichtung auf Standardwerte
zurück.
Wichtig!
Durch Zurücksetzen werden alle Benutze-
reinstellungen inklusive Telefonbuchdaten
von der Freisprecheinrichtung entfernt.
• Info:informiert über die verwendeten
Software- und Hardwareversionen der Freisprecheinrichtung.
• Sprache:in diesem Menüpunkt kann die
Displaysprache eingestellt werden.
• Sprachsteuer.: bietet die Möglichkeit
die Sprachsteuerung zu
Aktivieren (bzw. deaktivieren) und die
verwendete Sprache festzulegen.
• Audio:
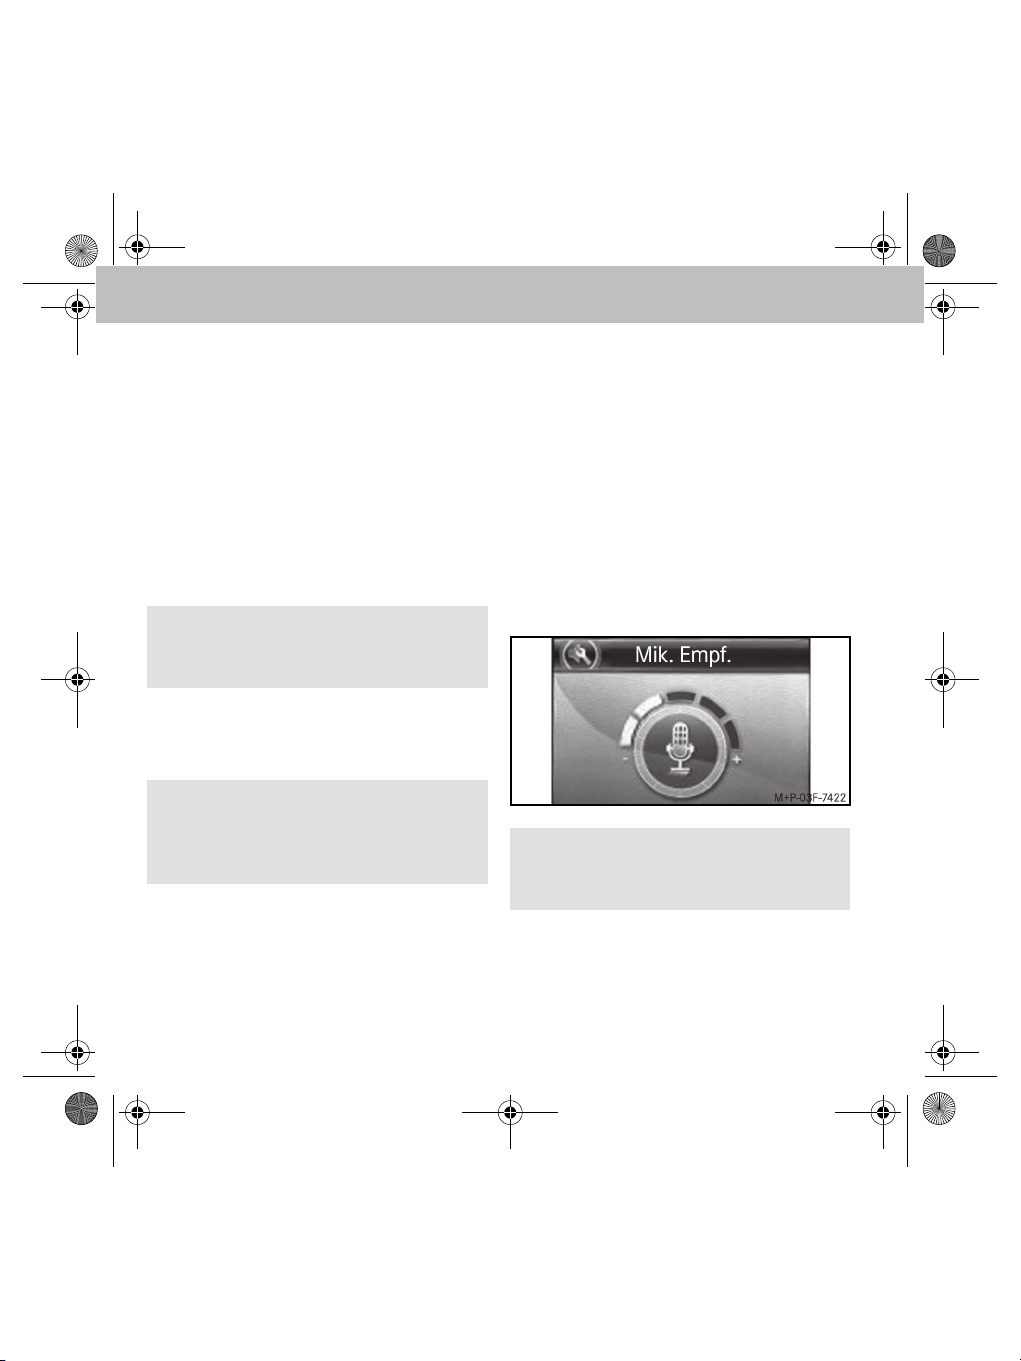
• Mik. Empf.: Mikrofonempfind-
lichkeit einstellen
Hinweis
Es wird empfohlen, die Mikrofonempfindlichkeit wie abgebildet ein zu stellen.
12
Page 14
MBA_BA_book.book Seite 13 Mittwoch, 21. Januar 2009 9:52 09
Freisprecheinrichtung
• Telefonansagen: bei Aktivie-
rung werden Telefonansagen (bspw.
bei in das Telefon integriertem Navigationssystem) über die Freisprecheinrichtung ausgegeben. Das Radio
wird während der Ansage stumm geschaltet.
• Zurücksetzen:setzt alle Audio-
Einstellung der Freisprecheinrichtung auf Standardwerte zurück.
• Ausschalten auswählen, um die aktuelle
Bluetooth
sprecheinrichtung und dem Mobiltelefon zu
trennen und die Freisprecheinrichtung abzuschalten.
Hinweis
Die Freisprecheinrichtung kann mit einem
Druck auf eine Taste des Funkbedienteils
wieder eingeschaltet werden.
®
-Verbindung zwischen der Frei-
Telefonieren
Während einer aktiven Bluetooth®-Verbindung
zwischen der Freisprecheinrichtung und dem
Mobiltelefon, können Sie Rufnummern per
Sprachwahl, per Menü oder direkt am Mobiltelefon wählen.
GUnfallgefahr
Beachten Sie beim Betrieb des Mobiltelefons
im Fahrzeug die gesetzlichen Bestimmungen
des Landes, in dem Sie sich momentan
aufhalten.
Ist die Bedienung eines Mobiltelefons
während der Fahrt gesetzlich zugelassen, so
bedienen Sie dieses nur, wenn es die
Verkehrssituation zulässt. Sie könnten sonst
vom Verkehrsgeschehen abgelenkt werden,
einen Unfall verursachen und sich und andere
verletzen.
Benutzen Sie während der Fahrt aus Sicherheitsgründen nur die Freisprecheinrichtung
zum Telefonieren.
Wenn Sie mit der Freisprecheinrichtung
telefonieren, fahren Sie aufmerksam,
schließen Sie alle Fenster und vermeiden Sie
alle störenden Geräusche.
Halten oder parken Sie, wenn Sie zum
Telefonieren nicht die Freisprecheinrichtung
benutzen wollen. Halten oder parken Sie
nicht im Halte- oder Parkverbot.
13
Page 15

MBA_BA_book.book Seite 14 Mittwoch, 21. Januar 2009 9:52 09
Freisprecheinrichtung
Anruf tätigen
1. Rufnummer an der Freisprecheinrichtung
wählen:
• Wahl aus dem Telefonbuch
• Wahl aus den Ruflisten
• Rückrufmöglichkeit aus eingegangenen Textnachrichten
• Direkteingabe einer Rufnummer
Hinweis
Rufnummern können ebenso direkt am Mobiltelefon ausgewählt oder eingegeben werden.
2. Rufnummer mit der grünen Taste am Funkbedienteil bestätigen, um den Rufaufbau zu
starten.
Rufnummer aus Telefonbuch wählen
1. Im Hauptmenü Telefonbuch auswählen.
Eine Liste der im Telefonbuch hinterlegten
Kontakte wird angezeigt.
2. Gewünschten Kontakt auswählen und mit
der grünen Taste am Funkbedienteil bestätigen.
Eine Liste der zu diesem Kontakt hinterlegten Rufnummern wird angezeigt.
3. Gewünschte Rufnummer auswählen und
mit der grünen Taste am Funkbedienteil bestätigen, um den Rufaufbau zu starten.
Eingehender Anruf
Entsprechend der Telefoneinstellungen und des
verfügbaren Funktionsumfangs werden eingehende Anrufe durch den Klingelton des Mobiltelefons oder durch einen Klingelton der Freisprecheinrichtung signalisiert (siehe Seite 11).
Die Rufnummer bzw. der Anrufername wird an der
Freisprecheinrichtung angezeigt, insofern das
Mobiltelefon die Rufnummernübertragung unterstützt, siehe Betriebsanleitung Mobiltelefon.
Die Annahme des Anrufs erfolgt über die grüne
Taste und die Abweisung des Anrufs über die
rote Taste am Funkbedienteil.
Anruf beenden
Ein aktives Gespräch wird durch Drücken der
roten Taste am Funkbedienteil beendet.
14
Page 16
MBA_BA_book.book Seite 15 Mittwoch, 21. Januar 2009 9:52 09
Freisprecheinrichtung
Einstellungen
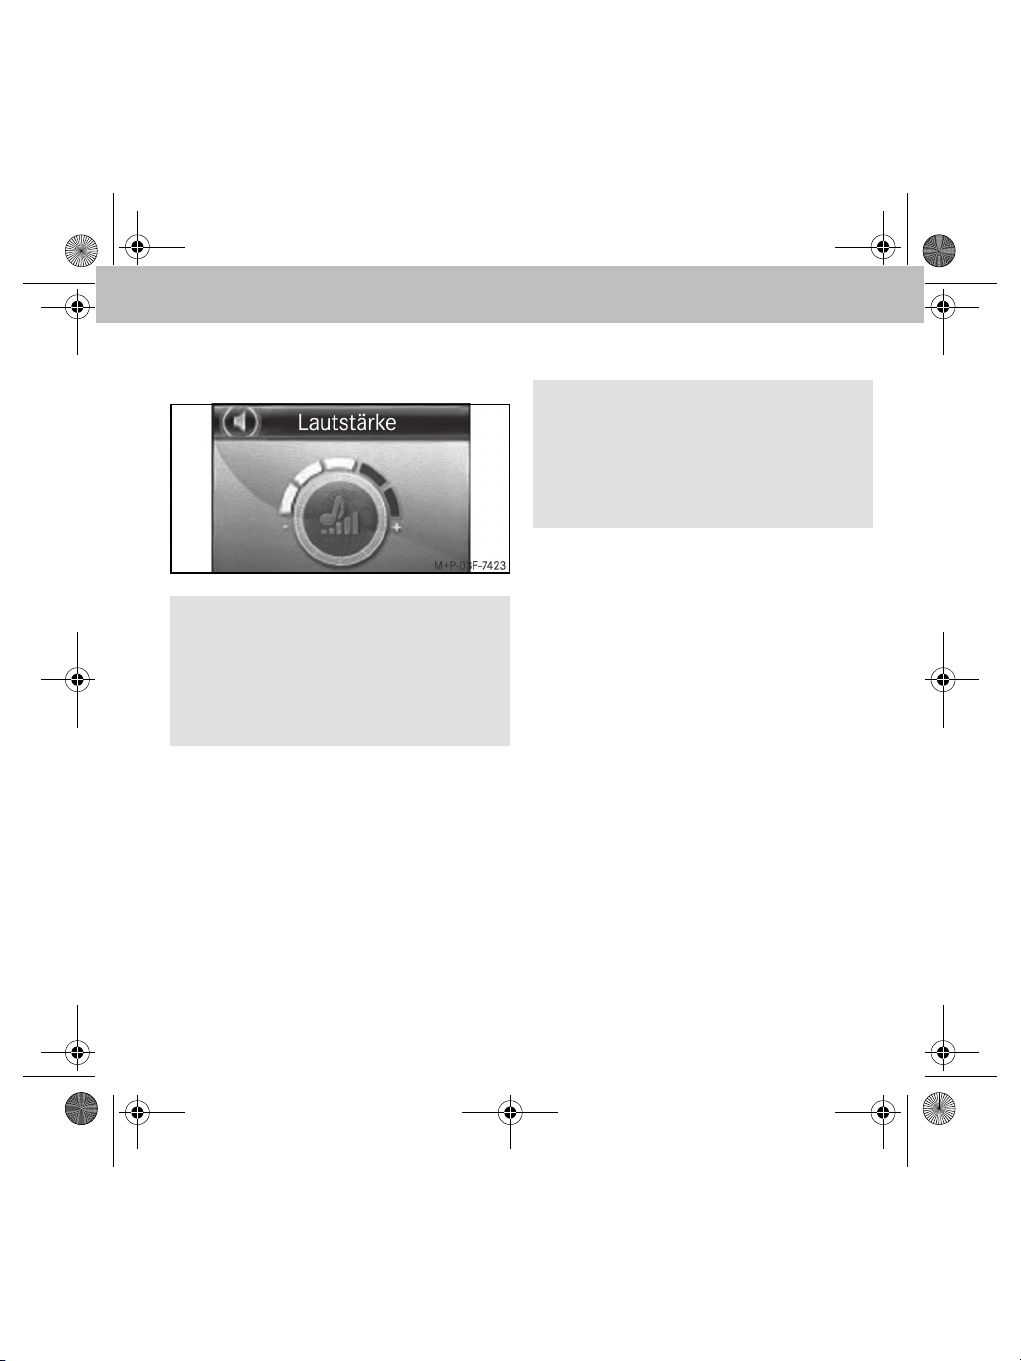
• Wiedergabelautstärke:
Hinweis
Es wird empfohlen, die Wiedergabelautstärke
wie abgebildet ein zu stellen.
Die Wiedergabelautstärke ist während eines
Gesprächs und während einer aktiven Spracherkennung am Radio regulierbar.
• Stummschaltung des Mikrofons: über die
Option Mic. Stumm kann das Mikrofon der
Freisprecheinrichtung während eines aktiven Gesprächs vorübergehend ausgeschaltet werden.
• Privat Modus: über die Option Privat Modus
kann ein aktives Gespräch vorübergehend
auf das Mobiltelefon umgestellt werden.
Sprachwahl
Hinweis
Die Sprachsteuerung ist nur möglich, wenn
eine Bluetooth®-Verbindung zwischen der
Freisprecheinrichtung und dem Mobiltelefon
besteht, jedoch keine Gesprächsverbindung
aktiv ist.
Sprachwahl der Freisprecheinrichtung
1. Ins Hauptmenü wechseln und den Drehknopf länger als eine halbe Sekunde
drücken.
Der Bereitschaftstext Hauptmenü ertönt
und im Display erscheint Bitte sprechen
Sie...
2. Sprachbefehl ansagen:
• Namen: den im Telefonbuch hinter-
legten Kontakt anwählen
(siehe Seite 16)
• Wähle Nummer: zu wählende
Rufnummer direkt ansagen
(siehe Seite 17)
3. Rufaufbau mit den Sprachbefehlen Ja,
Anrufen oder Wählen starten.
15
Page 17

MBA_BA_book.book Seite 16 Mittwoch, 21. Januar 2009 9:52 09
Freisprecheinrichtung
Sprachwahl des Mobiltelefons
1. Rote Taste am Funkbedienteil lang
drücken.
Die telefoneigene Sprachwahl wird
aktiviert.
2. Sprachwahl, siehe Betriebsanleitung
Mobiltelefon.
Sprachwahl abbrechen
• Rote Taste am Funkbedienteil lang drücken
oder
• Sprachbefehl: Abbruch
Einstellungen
Sprache: unter Einstellungen 씮
Sprachsteuer. 씮 Sprache aus
einer Liste von verfügbaren Sprachen die für die
Spracherkennung gewünschte Sprache auswählen.
Sprachbefehle
<Name> anrufen / wählen
Mit diesem Sprachbefehl kann ein Name aus
dem Telefonbuch gewählt werden.
Hinweis
Wird der gewünschte Name nicht erkannt,
meldet sich die Freisprecheinrichtung mit
Wie bitte und bietet die Möglichkeit einer
erneuten Ansage.
Wird der angesagte Name erkannt, wird nachgefragt, ob der Rufaufbau gestartet werden soll:
• Ja / Anrufen / Wählen: Rufaufbau zur ausge-
wählten Rufnummer
• Nein / Zurück: Rufnummer wird nicht
gewählt
• Abbruch / Abbrechen: Sprachwahl wird
ohne Funktionsausführung beendet
• Hilfe: Erklärung der möglichen Sprachbefehle
<Name> anrufen / wählen nach
bestimmten Rufnummerntyp
Mit diesem Sprachbefehl kann zu einem Namen
ein bestimmter Rufnummerntyp eines Telefonbucheintrags gewählt werden.
16
Page 18

MBA_BA_book.book Seite 17 Mittwoch, 21. Januar 2009 9:52 09
Freisprecheinrichtung
Rufnummerntypen:
• zu Hause
•privat
• auf der Arbeit
•im Büro
•dienstlich
•mobil
•auf dem Handy
•unterwegs
Werden der angesagte Name und der Rufnummerntyp erkannt, wird nachgefragt, ob der
Rufaufbau gestartet werden soll:
• Ja / Anrufen / Wählen: Rufaufbau zur ausge-
wählten Rufnummer
• Nein / Zurück: Rufnummer wird nicht
gewählt
• Abbruch / Abbrechen: Sprachwahl wird
ohne Funktionsausführung beendet
• Hilfe: Erklärung der möglichen Sprachbefehle
Wähle Nummer
Mit diesem Sprachbefehl kann eine Rufnummer
direkt angesagt werden:
• +, *, #, 0, 1, ..., 9: Nummerneingabe
• Alles Löschen: Eingegebene Rufnummer
wird komplett gelöscht
• Löschen / Korrigieren / Ändern: Zuletzt
eingegebene Ziffer/Zifferngruppe wird
gelöscht
• Wiederholen: Bisher eingegebene Rufnum-
mer wird angesagt
• Ja / Anrufen / Wählen: Rufaufbau zur ausge-
wählten Rufnummer
• Nein / Zurück: Rufnummer wird nicht
gewählt
• Speichern: Eingegebene Rufnummer wird
gespeichert
• Abbruch / Abbrechen: Sprachwahl wird
ohne Funktionsausführung beendet
• Hilfe: Erklärung der möglichen Sprachbefehle
Wahlwiederholung
Mit diesem Sprachbefehl wird die zuletzt
gewählte Rufnummer nochmals gewählt.
17
Page 19

MBA_BA_book.book Seite 18 Mittwoch, 21. Januar 2009 9:52 09
Freisprecheinrichtung
Telefonbuch
Unter dem Menüpunkt Telefonbuch können
die Telefonbucheinträge des Mobiltelefons gelesen werden.
Telefonbuch laden
1. Im Hauptmenü Telefonbuch auswählen.
2. Optionen 씮 Synchronisieren
auswählen.
3. Gewünschtes Telefonbuch des Mobiltelefons auswählen und Auswahl mit der grünen
Taste am Funkbedienteil bestätigen:
• SIM
• Telefon
• SIM und Telefon
Hinweis
Die Synchronisation kann mit der roten Taste
am Funkbedienteil abgebrochen werden.
Wird der Abbruch mit JA bestätigt, werden
die synchronisierten Telefonbucheinträge gelöscht.
Kontakt im Telefonbuch suchen
Mit Hilfe der Displaytastatur kann der gesuchte
Name oder ein Anfangsbuchstabe eingegeben
werden. Nach Bestätigung mit der grünen Taste
am Funkbedienteil wird das Telefonbuch nach
diesem Namen bzw. Buchstaben durchsucht.
Ruflisten
1. Im Hauptmenü Ruflisten auswählen.
Die Ruflisten werden vom Mobiltelefon
herunter geladen.
2. Gewünschte Rufliste auswählen:
• Gewählt
• Entgangen
• Angenommen
Hinweis
Wird der Zugriff auf die Ruflisten vom Mobiltelefon nicht unterstützt, wird eine Rufliste innerhalb der Freisprecheinrichtung geführt.
18
Page 20

MBA_BA_book.book Seite 19 Mittwoch, 21. Januar 2009 9:52 09
Freisprecheinrichtung
Textnachrichten
Die Freisprecheinrichtung unterstützt das
Senden und Empfangen von Textnachrichten.
Hinweis
Wird diese Funktion über Bluetooth® vom
Mobiltelefon nicht unterstützt, dann ist der
Menüpunkt Nachrichten in der Freisprecheinrichtung nicht auswählbar.
Textnachricht lesen
Empfangene Textnachrichten können unter
Nachrichten 씮 Nachricht lesen eingesehen werden.
Textnachricht vorlesen lassen
Empfangene Textnachrichten unter Nachrichten 씮 Nachricht lesen anwählen
und Option Vorlesen auswählen.
Textnachricht senden
1. Im Hauptmenü Nachrichten auswählen.
2. Neue Nachricht auswählen.
3. Textnachricht aus den aufgelisteten
Vorlagen auswählen.
4. Rufnummer des Empfängers eingeben oder
aus dem Telefonbuch wählen und mit der
grünen Taste am Funkbedienteil bestätigen.
iPod® Player
Zum Anschluss eines iPod® an die Freisprecheinrichtung benötigen Sie einen iPod®-Adapter
sowie ein iPod®-Adapterkabel. Dieses Zubehör
ist bei einem smart Service-Center erhältlich.
iPod® mit Freisprecheinrichtung
verbinden
GUnfallgefahr
Verbinden Sie die Freisprecheinrichtung mit
dem iPod
dernfalls besteht die Gefahr, dass Sie vom
Verkehrsgeschehen abgelenkt werden und
einen Unfall verursachen.
1. Audio-System auf AUX stellen, siehe
2. iPod
®
nur bei Fahrzeugstillstand. An-
Betriebsanleitung des Audio-Systems.
®
anschließen.
Die Verbindung zwischen iPod
Freisprecheinrichtung wird nach dem Anstecken des iPod
®
an das iPod®-Adapter-
®
und
kabel automatisch aufgebaut. Nach dem
Verbindungsaufbau kann sofort Musik vom
®
abgespielt werden.
iPod
19
Page 21
MBA_BA_book.book Seite 20 Mittwoch, 21. Januar 2009 9:52 09
Freisprecheinrichtung
Bedienung
Titelauswahl*
Lautstärkeeinstellung
Play, Pause
Stopp
Titelsprung vorwärts
Titelsprung rückwärts
Hinweis
Zum Suchen in der Titelliste muss die Audiowiedergabe zunächst gestoppt werden.
®
laden
iPod
Der iPod
den. Das automatische Laden kann unter
iPod® Player 씮 Optionen 씮 Einstellungen
manuell ausgeschaltet werden.
* Die Ordnerstruktur und Bedienung entspricht
®
wird über den iPod®-Adapter gela-
derer des iPod®.
Musik Player
Der Musik Player ermöglicht die Wiedergabe
von Audio-Dateien mittels eines gekoppelten
Bluetooth®-Audio-Streaming kompatiblen
Gerätes (z.B. MP3-Player).
Es können bis zu 10 Audio-Geräte mit der Freisprecheinrichtung gekoppelt werden, jedoch
kann immer nur eines aktiv sein.
Audio-Gerät mit Freisprecheinrichtung
koppeln
GUnfallgefahr
Koppeln Sie die Freisprecheinrichtung mit
dem Audio-Gerät nur bei Fahrzeugstillstand.
Andernfalls besteht die Gefahr, dass Sie vom
Verkehrsgeschehen abgelenkt werden und
einen Unfall verursachen.
®
1. Bluetooth
he Betriebsanleitung Audio-Gerät.
2. Zündschlüssel in Stellung 1 oder 2 drehen,
siehe Fahrzeug-Betriebsanleitung.
Freisprecheinrichtung wird gestartet.
3. Im Hauptmenü Musik Player auswählen.
4. Optionen 씮 Neues Gerät auswählen.
Alle verfügbaren Audio-Geräte werden an-
gezeigt.
am Audio-Gerät aktivieren, sie-
20
Page 22
MBA_BA_book.book Seite 21 Mittwoch, 21. Januar 2009 9:52 09
Freisprecheinrichtung
5. Gewünschtes Audio-Gerät zum Verbindungsaufbau aus der Liste auswählen.
6. Nach Aufforderung die Bluetooth
(0000) am Audio-Gerät eingeben.
Nach erfolgreicher Kopplung stehen alle
Abspielfunktionen zur Verfügung.
7. Audio-System auf AUX stellen, siehe
Betriebsanleitung des Audio-Systems.
Hinweis
Wird ein MP3-Player mit A2DP-Adapter verwendet, koppelt sich dieses Gerät
automatisch mit der Freisprecheinrichtung.
Dazu muss bei der Gerätesuche der Menüpunkt Vom Gerät koppeln ausgewählt
werden.
®
PIN
Bedienung
Geräteauswahl
Lautstärkeeinstellung
Play, Pause
Stopp
Titelsprung vorwärts
Titelsprung rückwärts
21
Page 23

MBA_BA_book.book Seite 22 Mittwoch, 21. Januar 2009 9:52 09
Freisprecheinrichtung
Batteriewechsel des Funkbedienteils
GAchtung!
Explosionsgefahr bei unsachgemäßem Austausch der Batterie.
Wichtig!
Verwenden Sie nur Lithium-Batterien vom
Typ CR2477. Andere Batterien können dazu
führen, dass das Gerät nicht ordnungsgemäß arbeitet oder sogar beschädigt wird.
Der Hersteller übernimmt keine Haftung für
Schäden, die durch den Einsatz falscher Batterien entstanden sind.
Die Batterie ist nicht wiederaufladbar. Geben
Sie die verbrauchten Batterien in einer dafür
vorgesehenen Sammelstelle (z.B. bei Ihrem
smart Service-Center oder im Elektronikfachmarkt) ab.
1. Unteren Teil des Bedienteils im Uhrzeigersinn und oberen Teil entgegen dem Uhrzeigersinn drehen.
2. Oberteil abheben.
3. Batterie mit Pluspol nach unten schräg ins
Batteriefach schieben und verrasten.
4. Oberteil so aufsetzen, dass die Kontakte
vom Boden des Bedienteils auf die Kontaktfläche im Oberteil aufliegen.
5. Verrasterungen in die Kerben setzen und
entgegengesetzt der Öffnungsrichtung
drehen.
22
Page 24

MBA_BA_book.book Seite 23 Mittwoch, 21. Januar 2009 9:52 09
Introduction
Thank you for choosing the new
hands-free system!
Congratulations! You are the proud owner
of a high-quality hands-free telephone
system.
These Operating Instructions apply to
smart vehicles as well as A-Class and
B-Class vehicles equipped with a handsfree system. These Operating Instructions
provide you with important information on
how to operate your hands-free system.
First of all, familiarise yourself with your
hands-free system and read the Operating
Instructions before driving off. This will
enable you to enjoy your hands-free
system to the full and help you to avoid
dangers to you and others.
smart continuously adapts the hands-free
system to the state of the art and reserves
the right to make changes in design, equipment and technology.
Therefore, you cannot base any claims on
the data, illustrations or descriptions
contained in these Operating Instructions.
Any authorised smart Service Centre will
be happy to assist you at any time.
These Operating Instructions are a part of
the vehicle's equipment. You should therefore always keep them in the vehicle and
hand them over to the new owner if you
sell the vehicle.
smart hopes that you will enjoy driving with
your new hands-free system.
Mercedes-Benz Accessories GmbH
A Daimler AG company
23
Page 25

MBA_BA_book.book Seite 24 Mittwoch, 21. Januar 2009 9:52 09
Inhaltsverzeichnis
Explanation of symbols .................... 25
Operating safety................................. 25
Functional requirement..................... 26
Function overview.............................. 26
Radio remote control ........................ 26
Navigation with the radio remote control .... 27
Symbols............................................... 27
Status bar ............................................ 27
On-screen touchpad ............................ 27
Menu options ...................................... 28
Number types in the phone book ........ 28
Pairing the hands-free system with
the mobile phone ............................... 28
Connecting the mobile phone to the
hands-free system ............................. 30
Menu overview .................................. 30
Menu – User management ............... 31
Creating a new user ............................ 31
Settings ............................................... 31
Menu – Settings ................................. 31
Using the telephone .......................... 33
Making a call ....................................... 34
Dialling phone numbers from the
phone book ......................................... 34
Incoming call ....................................... 34
Ending a call ........................................ 34
Settings ............................................... 35
Voice control ...................................... 35
Voice control of the hands-free
system ................................................ 35
Voice control of the mobile phone ...... 36
Cancelling voice control ...................... 36
Settings ............................................... 36
Voice commands ............................... 36
<Name> call / dial ............................... 36
<Name> call / dial according to
certain phone number type ................. 36
Dial number ......................................... 37
Redial / call again ............................... 37
Phonebook ......................................... 38
Loading a phone book ......................... 38
Finding a contact in the phone book ... 38
Call register ....................................... 38
Text messages ................................... 39
Reading text messages ....................... 39
Having a text message read out .......... 39
Sending a text message ...................... 39
®
iPod
player ....................................... 39
Connecting an iPod
®
to the hands-free
system ................................................ 39
Operation ............................................ 40
Charging an iPod
®
.............................. 40
Music player ...................................... 40
Pairing an audio device with the
hands-free system ............................... 40
Operation ............................................ 41
Replacing the radio remote
control battery .................................. 42
24
Page 26
MBA_BA_book.book Seite 25 Mittwoch, 21. Januar 2009 9:52 09
Hands-free system
Explanation of symbols
GWarning
Warning notices draw your attention to hazards that may endanger your health or life.
Important
A text marked with this label alerts you to a
risk of material damage and possible malfunctions.
Note
A text marked with this label offers advice
and additional information.
1. Numbered lists describe specific operating
steps.
• Bullet lists present you with selections.
Display
Texts that appear on the display are set in this
typeface.
Destination entry 씮
Favourites
This text indicates a sequence of buttons to be
activated.
Voice input
Voice commands appear in this font.
Operating safety
GRisk of accident
Always pay attention to the road and traffic
situation. Only use the hands-free system if
the road and traffic conditions permit. Operating the hands-free system distracts you from
the road and traffic situation and you could
lose control of your vehicle and cause an accident.
These instructions refer to the vehicle Owner's
Manual, the mobile phone operating instructions, the audio system operating instructions
as well as the operating instructions of various
other devices which may be connected in the
vehicle (iPod
Please keep them handy for reference.
®
, audio devices, etc.).
25
Page 27
MBA_BA_book.book Seite 26 Mittwoch, 21. Januar 2009 9:52 09
Hands-free system
Functional requirement
In order to use the functions of the hands-free
system, the radio or the audio system of the vehicle must be switched on. (Please refer to the
vehicle Owner's Manual.)
Function overview
The hands-free system supports the
Bluetooth
ent system for making phone calls in your car
which provides the following functions:
• Call functions such as incoming call,
• Integrated voice control
• Voice control directly from the mobile phone
• Activating and using the mobile phone voice
• Reading and replying to text messages
•iPod
• Phone book, call lists
• Music player: playback of music files from
• Automatic radio muting
• Log-on of up to 10 mobile phones
®
hands-free profile. This is a conveni-
outgoing call, call waiting and redialling
phone book (without programming)
control
®
player
the mobile phone or MP3 player via Blue-
®
audio streaming
tooth
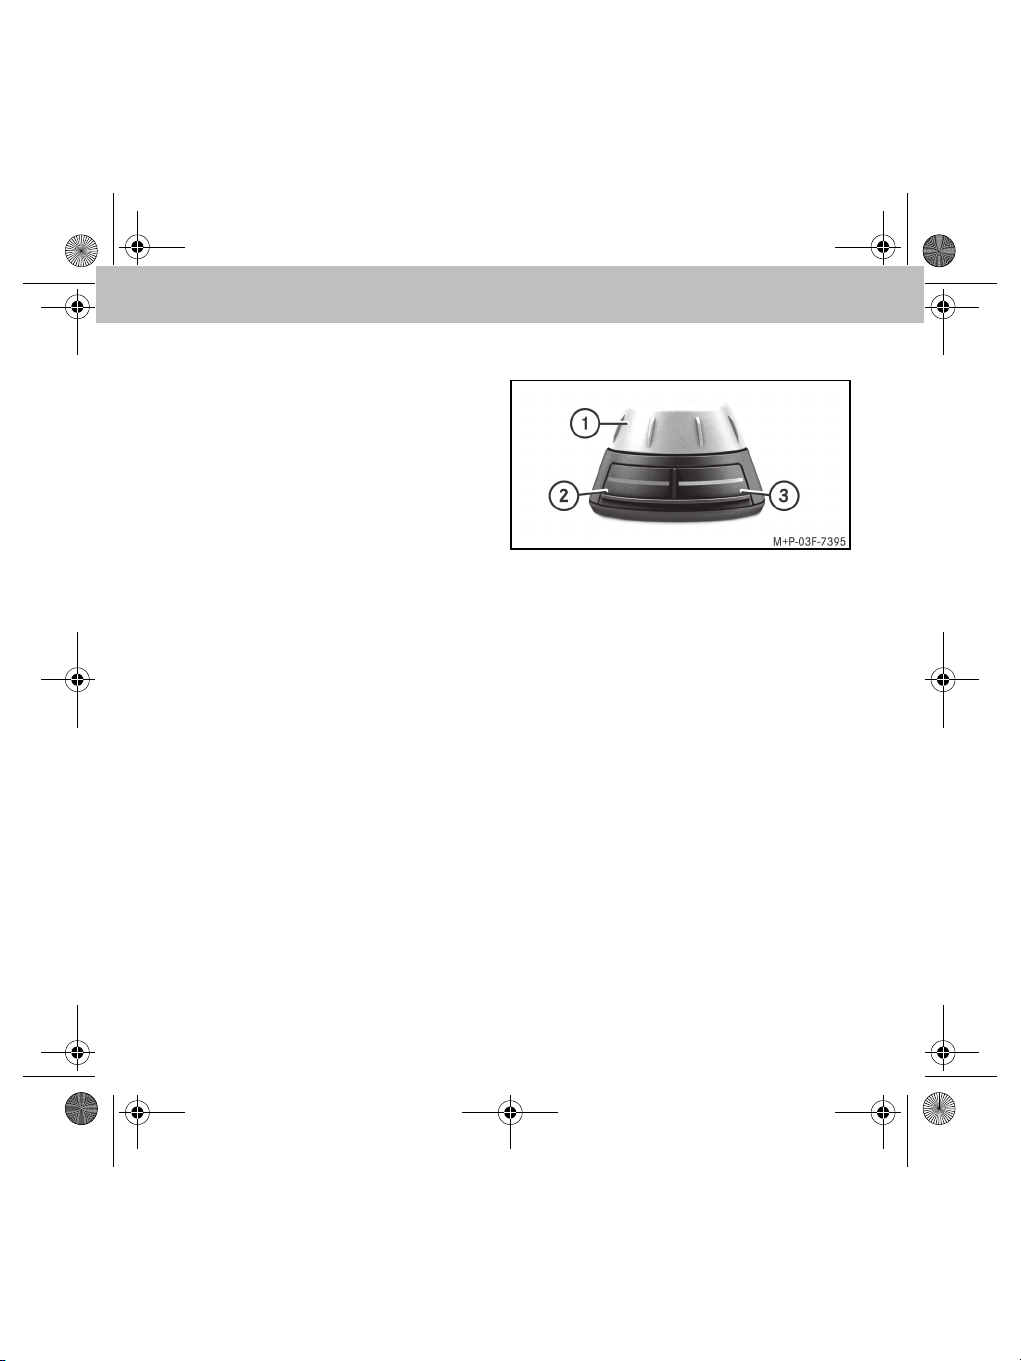
Radio remote control
1 Rotary knob:
• Navigating through the menus
• Starting voice control
• Entering digits and letters
• Selecting the active menu
2 Red button:
• Rejecting incoming calls
•Hanging up
• Jumping back from current submenu
• Activating telephone voice control
3 Green button:
• Accepting incoming calls
• Selecting the active menu
• Initiating a call to the currently selected
phone number
26
Page 28
MBA_BA_book.book Seite 27 Mittwoch, 21. Januar 2009 9:52 09
Hands-free system
Note
The hands-free system has a screen saver.
After 60 seconds of inactivity, the display
clock appears (smart) or the display brightness is reduced (A-Class/B-Class). The
navigation display can be reactivated by
operating the radio remote control. Press a
button to simultaneously run the associated
function.
Navigation with the radio remote control
Use the rotary knob to navigate to a menu item.
Select the menu item with the rotary knob and
confirm the selection by pressing the rotary
knob. Pressing the rotary knob again selects a
submenu. Press the red button on the radio
remote control to switch to the next-highest
menu level.
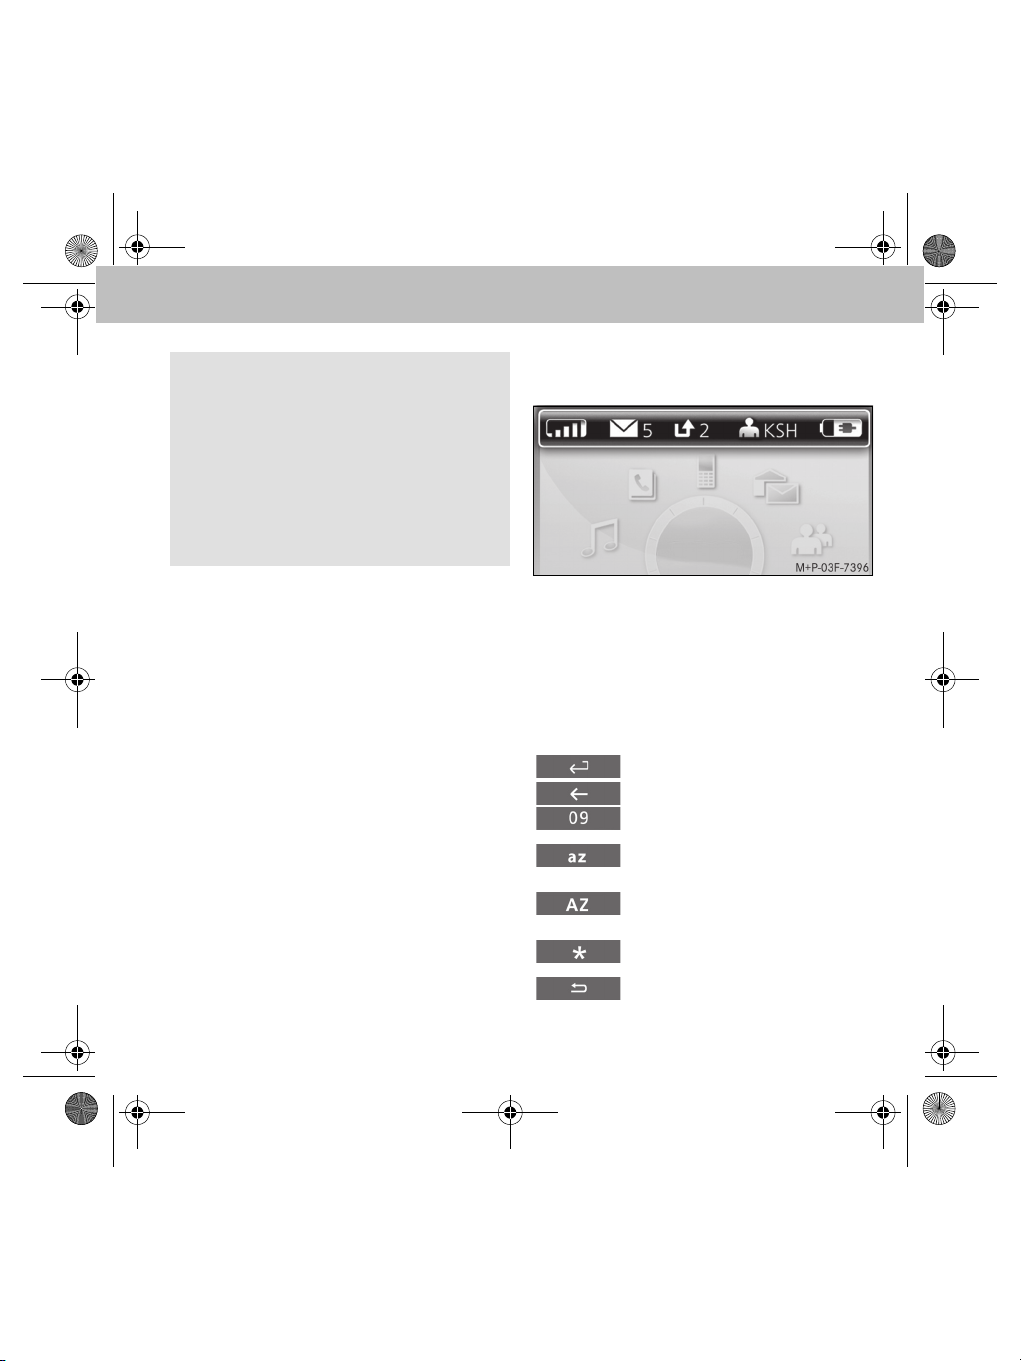
Symbols
Status bar
1 Reception of the mobile phone
2 Received text messages
3 Calls in absence
4 Initials of the user
5 Battery capacity of the mobile phone
On-screen touchpad
Confirms the entry
Deletes the last character
Switches to numerical input
Switches to input of lower-case
letters
Switches to input of upper-case
letters
Switches to input of special
characters
Closes the on-screen touchpad
27
Page 29
MBA_BA_book.book Seite 28 Mittwoch, 21. Januar 2009 9:52 09
Hands-free system
Menu options
Activated option
Deactivated option
Number types in the phone book
Private phone number
Mobile phone number
Work phone number
Pairing the hands-free system with the
mobile phone
GRisk of accident
Only pair the hands-free system with the mobile phone when the vehicle is at a standstill.
Otherwise, there is a risk that you could be
distracted from the traffic situation and cause an accident.
The hands-free system and mobile phone must
be paired before they can be used together.
After they have been paired, the two devices
are automatically connected within the vehicle
whenever they are switched on.
Notes
Corresponding settings may need to be configured on the mobile phone being used for
the pairing process and for automatic connection to the hands-free system. (Please
refer to the mobile phone operating instructions.)
For successful pairing, the mobile phone and
hands-free system must be switched on and
Bluetooth
mobile phone must be in the vehicle.
®
must be enabled. For pairing, the
28
Page 30

MBA_BA_book.book Seite 29 Mittwoch, 21. Januar 2009 9:52 09
Hands-free system
1. Activate Bluetooth® on the mobile phone.
(Please refer to the mobile phone operating instructions.)
2. Turn the ignition key to position 1 or 2.
(Please refer to the vehicle Owner's Manual.)
The hands-free system is activated.
3. In the main menu, select User management.
4. Select New user.
All available mobile phones are displayed.
Note
If the desired mobile phone is not displayed,
select Pair through tel. instead and
search for Bluetooth
®
devices on the mobile
phone. (Please refer to the mobile phone operating instructions.) The hands-free system is
recognised via Bluetooth
®
as a smart BT or
MB Bluetooth.
5. To establish a connection, select the desired mobile phone from the list.
®
A Bluetooth
PIN appears in the hands-
free system display.
6. When asked to do so, enter the Bluetooth
PIN on the mobile phone.
7. Accept the request for connection.
8. Enter the initials of the user or of the mobile
phone.
After a connection has been established, the
mobile phone's phone book is automatically
transferred to the hands-free system.
Note
A maximum of 10 mobile phones can be
paired with the hands-free system, but only
one is connected at any one time.
After a connection has been established, the
functions supported by the mobile phone are
available in the main menu.
®
29
Page 31
MBA_BA_book.book Seite 30 Mittwoch, 21. Januar 2009 9:52 09
Hands-free system
Connecting the mobile phone to the
hands-free system
With the ignition key in position 1 or 2, the
hands-free system automatically searches for
the mobile phone connected last and establishes a connection to this mobile phone.
To establish a connection to another mobile
phone, this phone has to be selected in the user
administration and activated or paired.
Note
If the ignition is switched off, the hands-free
system switches off and the connection to
the mobile phone is terminated.
If the ignition is switched off during a phone
call, the phone call is continued. The handsfree system is only switched off after termination of the phone call.
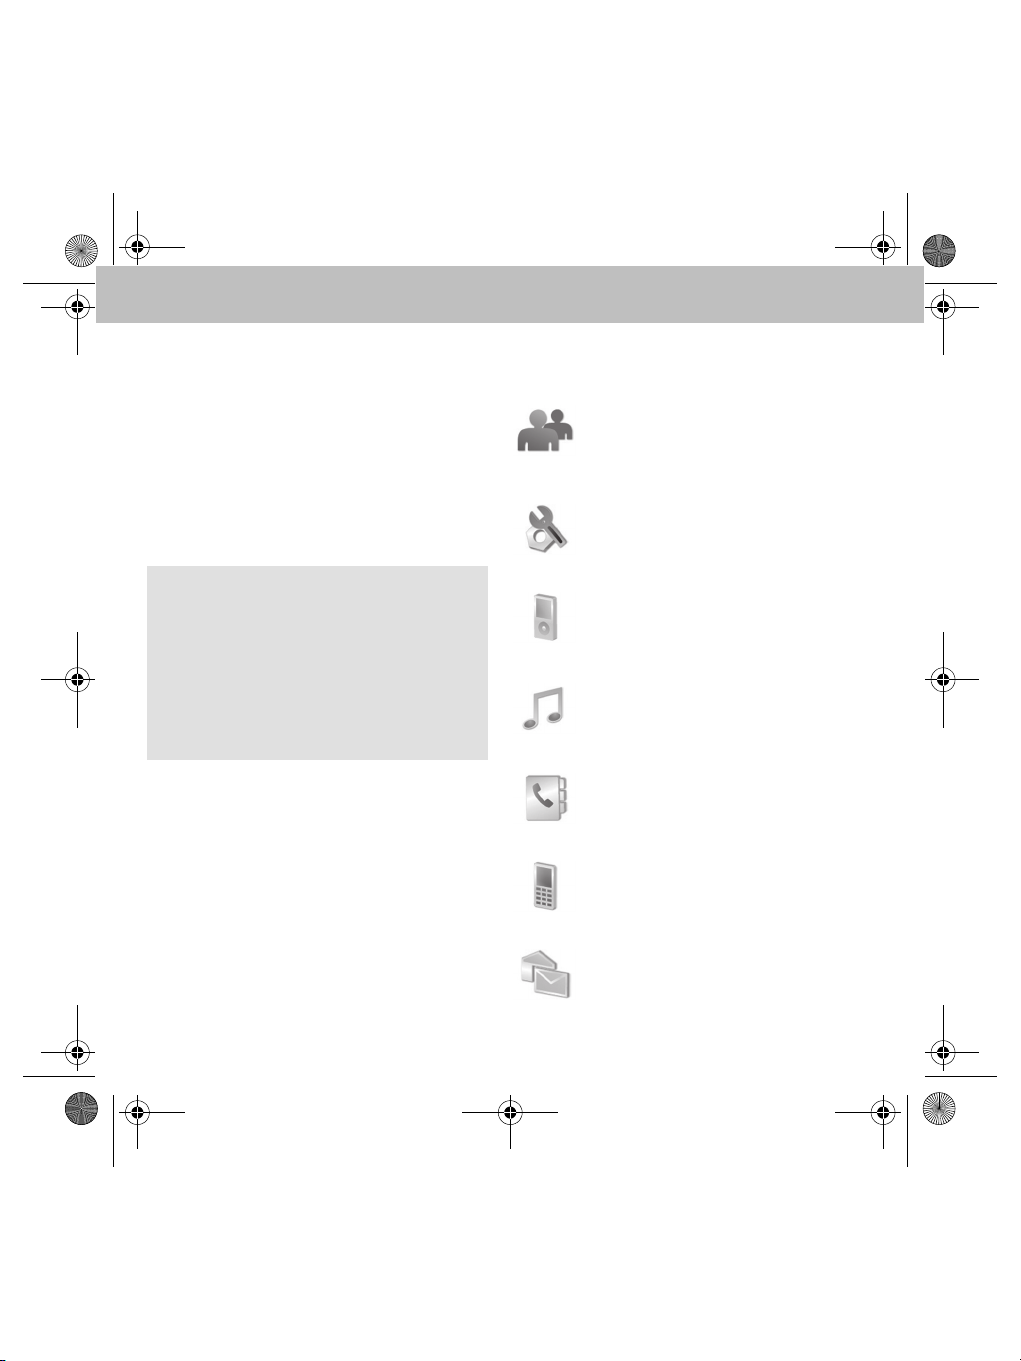
Menu overview
User administration (page 31):
User-specific settings such as "Change
initials", "Login", "Logout" etc.
Settings (page 31):
General settings for the hands-free sys-
tem such as "Ringtone", "Mailbox" etc.
®
iPod
Controlling the iPod® via the hands-
free system
Music player (page 40):
Pairing audio devices with the handsfree system and playing music tracks
Phone book (page 38):
Contains the entries downloaded
from the mobile phone
Call lists (page 38):
Contains lists of the last phone numbers dialled and accepted and missed
calls
Text messages (page 39):
Contains the list of text messages
downloaded from the mobile phone
player (page 39):
30
Page 32

MBA_BA_book.book Seite 31 Mittwoch, 21. Januar 2009 9:52 09
Hands-free system
Menu – User management
The hands-free system allows you to manage up
to 10 user profiles. Among other things, the following data is stored individually for each user:
•Phone book
• Display brightness
• Ringing tone
•Display language
• Volume settings
• Call lists
Creating a new user
See "Pairing the hands-free system with the
mobile phone" on page 28.
Settings
• Select Initials to edit the name of the
user.
• Select Icon colour to change the colour
of the user ID icon.
• Select Login to log off the current user and
log in another user.
Note
If the hands-free system is unable to find the
selected user, the system returns to the user
administration.
®
• Select Logout to end the Bluetooth
nection between the hands-free system and
the mobile phone.
• Select Delete to remove all the user data
from the hands-free system.
con-
Menu – Settings
• Ringtone: Select ringtone and set the ringing volume in the submenus Melody and
Volume.
• Brightness: Adapt the display lighting to
your individual needs in the submenus
Brightness and Standby brightness.
• Call settings: if Auto answer is activated, incoming calls are accepted automatically after three ringing tones.
• Rotation dir.: the rotary knob can be
set to move anticlockwise or clockwise.
31
Page 33
MBA_BA_book.book Seite 32 Mittwoch, 21. Januar 2009 9:52 09
Hands-free system
• Follow-up: setting the follow-up time
specifies how long the hands-free system
remains active after the ignition is switched
off.
Note
It is recommended to set the follow-up
time to 0.
• Reset: resets all the settings of the hands-
free system to default values.
Important
Reset removes all the user settings from
the hands-free system, including phone
book data.
• Information: provides information re-
garding the software and hardware versions
of the hands-free system.
• Language: the display language can be set
in this menu item.
• Voice control: provides the possibility
to activate (or deactivate) voice control
and set the language used.
• Audio:
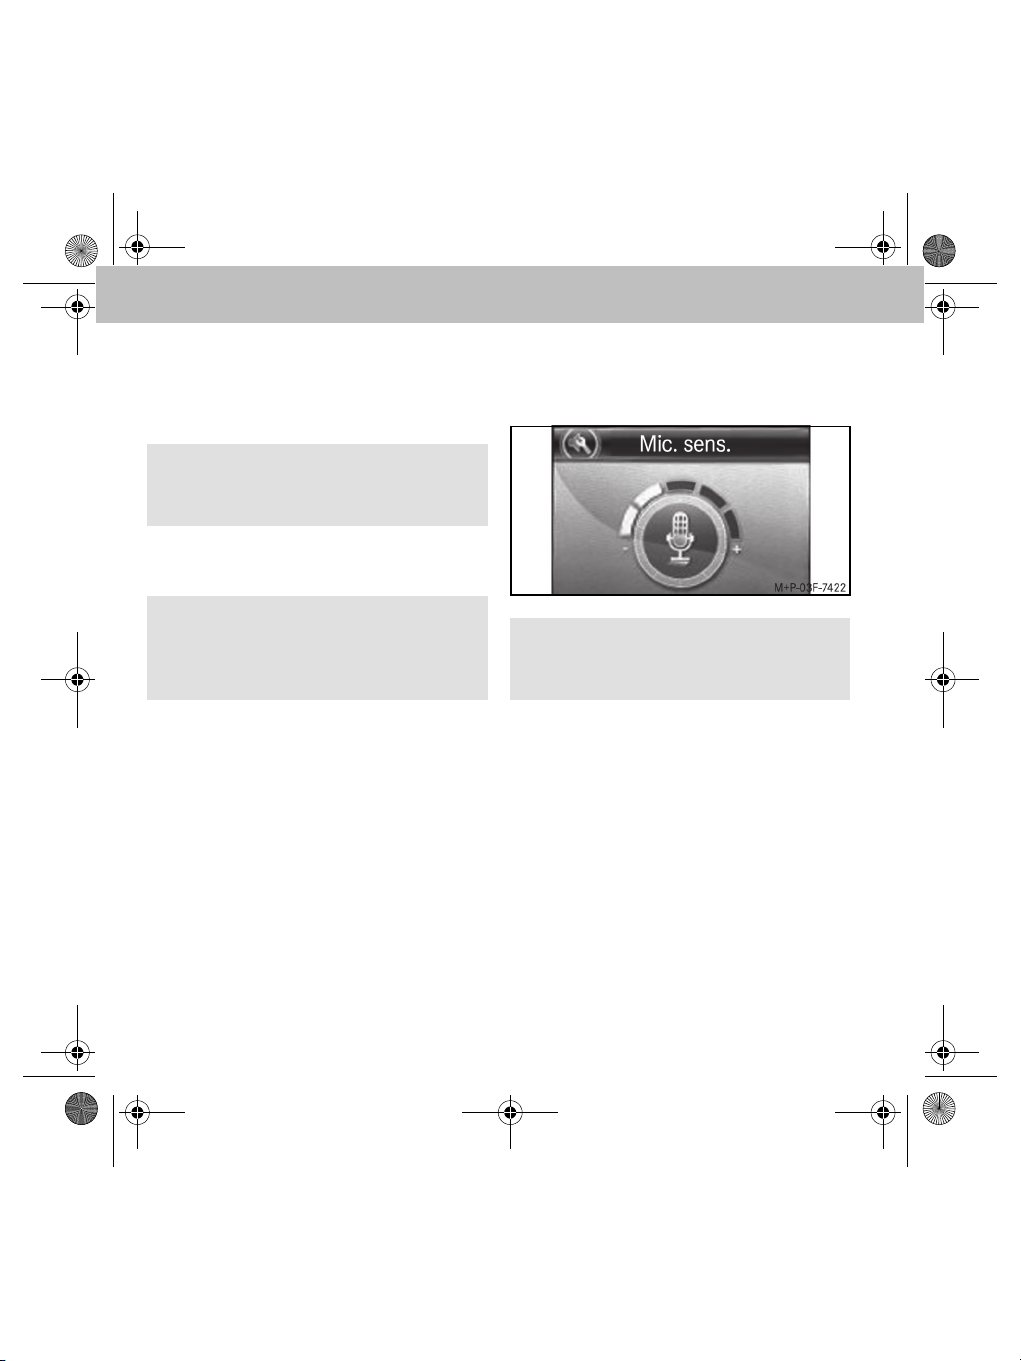
• Mic. sens.: sets the microphone
sensitivity
Note
It is recommended to set the microphone
sensitivity as shown in the illustration.
• Telephone messages: when
this is activated, telephone messages (e.g. if a navigation system is
integrated in the telephone) are played via the hands-free system. The
radio is muted during the message.
• Reset: resets all the audio settings
of the hands-free system to default
values.
32
Page 34
MBA_BA_book.book Seite 33 Mittwoch, 21. Januar 2009 9:52 09
Hands-free system
• Select Switch off to end the current
Bluetooth
free system and the mobile phone and to
switch off the hands-free system.
Note
The hands-free system can be switched on
again by pressing a button on the radio
remote control.
®
connection between the hands-
Using the telephone
During an active Bluetooth® connection between the hands-free system and the mobile
phone, you can select phone numbers via voice
input, via the menu or by dialling directly on the
mobile phone.
GRisk of accident
Comply with the laws and regulations of the
country in which you are driving regarding
using a mobile phone inside the vehicle.
If it is legally permissible to use the mobile
phone while driving, only do so when traffic
conditions allow for it. You may otherwise
become distracted from the traffic situation,
which may lead to an accident in which you or
others may be injured.
For safety reasons, only use the hands-free
system to make calls while driving.
When using the mobile phone via the handsfree system, drive with extra caution, close all
windows and try to eliminate background
noise.
Please pull over or park the vehicle if you do
not wish to use the hands-free system to
make a call. Do not stop the vehicle or park
where it is prohibited to do so.
33
Page 35

MBA_BA_book.book Seite 34 Mittwoch, 21. Januar 2009 9:52 09
Hands-free system
Making a call
1. To dial the phone number on the handsfree system:
• Select number from the phone book
• Select number from the call lists
• Callback option from received text
messages
• Dial a phone number directly
Note
Phone numbers can also be selected or dialled
directly on the mobile phone.
2. Confirm the phone number with the green
button on the radio remote control to initiate the call.
Dialling phone numbers from the phone
book
1. In the main menu, select Phonebook.
A list of the contacts stored in the phone
book is displayed.
2. Select the desired contact and confirm with
the green button on the radio remote control.
A list of the phone numbers stored for this
contact is displayed.
3. Select the desired phone number and
confirm with the green button on the radio
remote control to initiate the call.
Incoming call
In correspondence with the telephone settings
and available range of functions, incoming calls
are indicated by the ringing tone of the mobile
phone or by a ringing tone of the hands-free
system (see page 31).
The phone number or the caller's name is displayed on the hands-free system if the mobile phone
supports phone number transfer (Please refer to
the operating instructions of your mobile phone.)
You accept a call by pressing the green button
and reject the call by pressing the red button on
the radio remote control.
Ending a call
An active call is terminated by pressing the red
button on the radio remote control.
34
Page 36
MBA_BA_book.book Seite 35 Mittwoch, 21. Januar 2009 9:52 09
Hands-free system
Settings
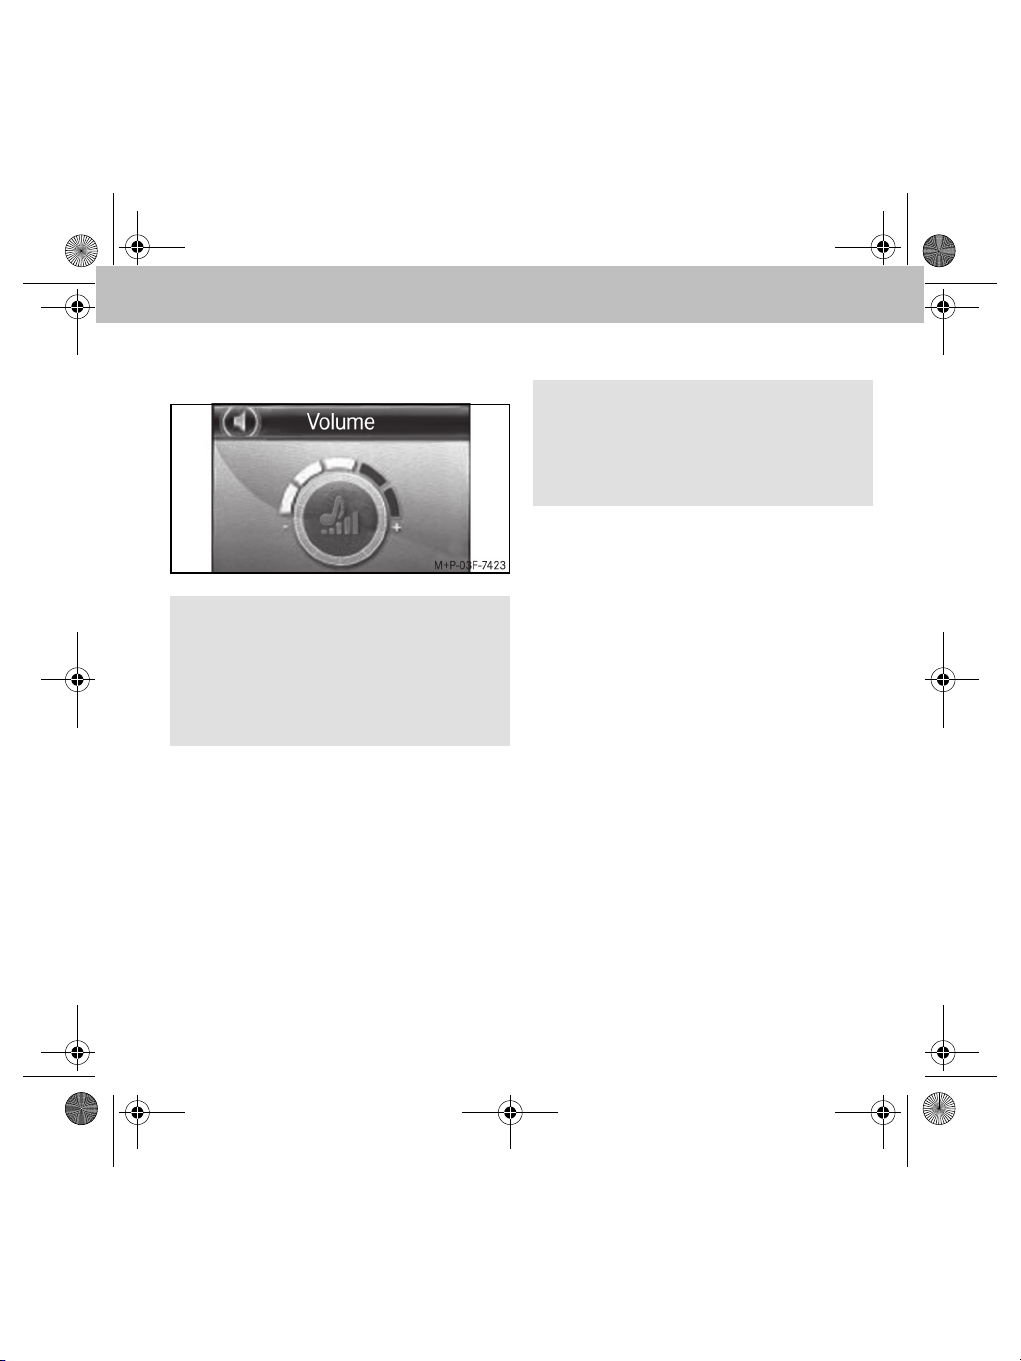
• Playback volume:
Note
It is recommended to set the playback volume as shown in the illustration.
The playback volume can be regulated during
a call and during active speech recognition on
the radio.
• Muting the microphone: the option
Microphone off can be used to switch
off the microphone of the hands-free system
temporarily during an active call.
• Private mode: the option Private mode
can be used to switch an active call temporarily onto the mobile phone.
Voice control
Note
Voice control is only possible if there is a
Bluetooth® connection between the handsfree system and the mobile phone and no call
is currently active.
Voice control of the hands-free system
1. Switch to the main menu and press the
rotary knob for longer than half a second.
The standby text main menu can be heard
and Please speak... appears in the
display.
2. Issue the voice command:
• Name: select the contact stored in
the phone book (see page 36)
• Dial number: say the phone number
to be dialled directly (see page 37)
3. Initiate the call with the voice commands
Yes, Call or Dial.
35
Page 37

MBA_BA_book.book Seite 36 Mittwoch, 21. Januar 2009 9:52 09
Hands-free system
Voice control of the mobile phone
1. Press the red button on the radio remote
control for a longer period.
The telephone's own voice control is
activated.
2. Voice control (Please refer to the mobile
phone operating instructions.)
Cancelling voice control
• Press the red button on the radio remote
control for a longer period
or
• Voice command: Cancel
Settings
Language: Go to Settings 씮 Voice
control. 씮 Language, to select the
desired language for speech recognition from a
list of available languages.
Voice commands
<Name> call / dial
You can use this command to select a name
from the phone book.
Note
If the desired name is not recognised, the
hands-free system replies with Please repeat
and offers you the possibility to say the name
again.
If the name is recognised, you are asked
whether the call should be initiated:
• Yes / Call / Dial: initiate call to selected
phone number
• No / Back: phone number is not dialled
• Cancel / Abort: voice control is terminated
without a function being run
• Help: explanation of possible voice
commands
<Name> call / dial according to certain
phone number type
You can use this voice command to dial a certain phone number type of a phone book entry
for a name.
36
Page 38

MBA_BA_book.book Seite 37 Mittwoch, 21. Januar 2009 9:52 09
Hands-free system
Phone number types:
•at home
•at work
• in the office
• on business
• on the cell phone
If the name and phone number type are recognised, you are asked whether the call should be
initiated:
• Yes / Call / Dial: initiate call to selected
phone number
• No / Back: phone number is not dialled
• Cancel / Abort: voice control is terminated
without a function being run
• Help: explanation of possible voice
commands
Dial number
This voice command can be u se d t o s ay a p ho ne
number directly:
• +, *, #, 0, 1, ..., 9: number entry
• Delete all: entered phone number is fully
deleted
• Delete / Correct / Change: last entered
character/character group is deleted
• Repeat: phone number entered so far is read
out
• Yes / Call / Dial: initiate call to selected
phone number
• No / Back: phone number is not dialled
• Save: entered phone number is saved
• Cancel / Abort: voice control is terminated
without a function being run
• Help: explanation of possible voice
commands
Redial/call again
This voice command redials the last dialled
phone number.
37
Page 39
MBA_BA_book.book Seite 38 Mittwoch, 21. Januar 2009 9:52 09
Hands-free system
Phonebook
Go to the menu item Phonebook to have the
phone book entries of the mobile phone read.
Loading a phone book
1. In the main menu, select Phonebook.
2. Select Options 씮 Synchronisation.
3. Select the desired phone book of the mobile
phone and confirm the selection with the
green button on the radio remote control:
• SIM
• Mobile
• SIM and mobile
Note
Synchronisation can be cancelled with the
red button on the radio remote control. If the
cancellation is confirmed with Yes, the synchronised phone book entries are deleted.
Finding a contact in the phone book
The on-screen touchpad can be used to enter
the target name or enter an initial letter. After
confirmation with the green button on the radio
remote control, the phone book is scanned to
find this name or letter.
Call register
1. In the main menu, select Call register.
The call register is downloaded from the
mobile phone.
2. Select the desired call list:
• Dialled
• Missed
• Received
Note
If access to the call register is not supported
by the mobile phone, a call register is kept
within the hands-free system.
38
Page 40

MBA_BA_book.book Seite 39 Mittwoch, 21. Januar 2009 9:52 09
Hands-free system
Text messages
The hands-free system supports sending and
receiving text messages.
Note
If this function is not supported by the mobile
phone via Bluetooth®, the menu item
Messages cannot be selected in the handsfree system.
Reading text messages
Go to Messages 씮 Read message to
view received text messages.
Having a text message read out
Go to Messages 씮 Read message and
select the option Read out to select received
text messages.
Sending a text message
1. In the main menu, select Messages.
2. Select New message.
3. Select a text message from the templates
listed.
4. Enter the recipient's phone number or se-
lect the number from the phone book and
confirm with the green button on the radio
remote control.
iPod® player
To connect an iPod® to the hands-free system,
you need an iPod® adapter as well as an iPod®
adapter cable. These accessories are available
from an authorised smart Service Centre.
Connecting an iPod® to the hands-free system
GRisk of accident
Only connect the hands-free system to the
®
when the vehicle is at a standstill.
iPod
Otherwise, there is a risk that you could be
distracted from the traffic situation and cause an accident.
1. Set the audio system to AUX. (Please refer
to the audio system operating instructions.)
2. Connect the iPod
The connection between the iPod
hands-free system is set up automatically
when the iPod® is plugged into the iPod®
adapter cable. After a connection has been
established, music from the iPod
played immediately.
®
.
®
and
®
can be
39
Page 41
MBA_BA_book.book Seite 40 Mittwoch, 21. Januar 2009 9:52 09
Hands-free system
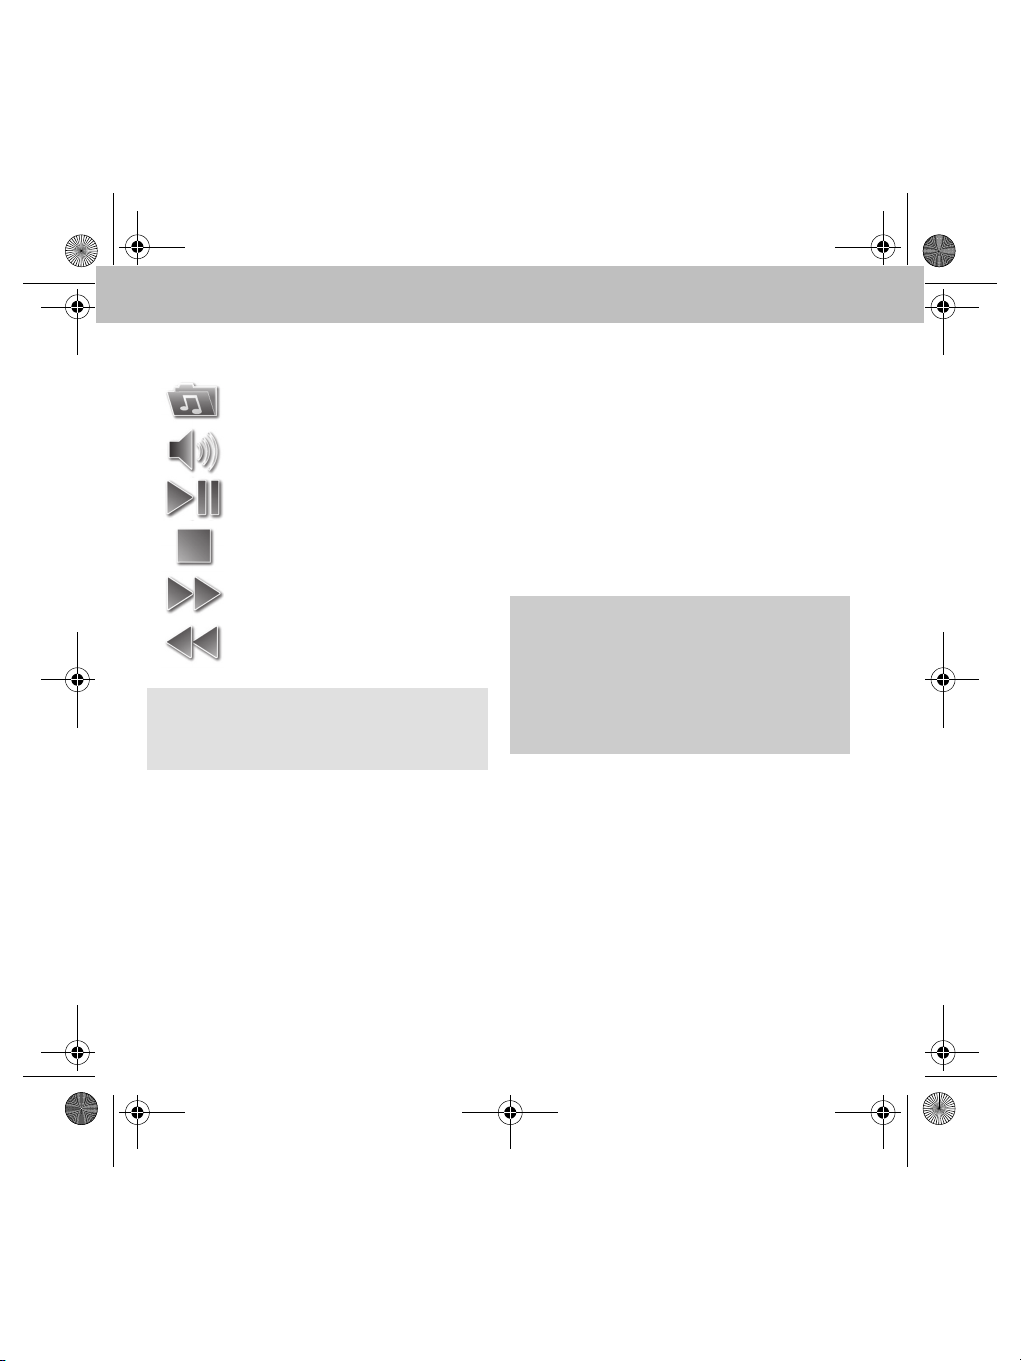
Operation
Track selection*
Volume setting
Play, Pause
Stop
Skip forwards
Skip backwards
Note
To search in the list of tracks, audio must be
stopped first.
Charging an iPod
The iPod® is charged via the iPod® adapter. Go
to iPod® player 씮 Options R Settings
to manually switch off automatic charging.
* The folder structure and operation correspond
to those of the iPod
®
®
.
40
Music player
The music player function enables playback of
audio files by means of a paired, compatible
Bluetooth® audio streaming device (e.g. an
MP3 player).
A maximum of 10 audio devices can be paired
with the hands-free system, but only one can be
active at any one time.
Pairing an audio device with the hands-free
system
GRisk of accident
Only pair the hands-free system with an audio
device when the vehicle is at a standstill.
Otherwise, there is a risk that you could be
distracted from the traffic situation and cause an accident.
®
1. Activate Bluetooth
ment. (Please refer to the audio device's
operating instructions.)
2. Turn the ignition key to position 1 or 2.
(Please refer to the vehicle Owner's Manual.)
The hands-free system is activated.
3. In the main menu, select Music player.
4. Select Options 씮 New device.
All available audio devices are displayed.
on the audio equip-
Page 42
MBA_BA_book.book Seite 41 Mittwoch, 21. Januar 2009 9:52 09
Hands-free system
5. To establish a connection, select the desired audio device from the list.
6. When asked to do so, enter the Bluetooth
PIN (0000) on the audio device.
After successful pairing, all the playback
functions are available.
7. Set the audio system to AUX. (Please refer
to the audio system operating instructions.)
Note
If an MP3 player is used with an A2DP adapter,
this device is automatically paired with the
hands-free system. To achieve this, select the
menu item Couple from device when searching for the device.
®
Operation
Device selection
Volume setting
Play, Pause
Stop
Skip forwards
Skip backwards
41
Page 43

MBA_BA_book.book Seite 42 Mittwoch, 21. Januar 2009 9:52 09
Hands-free system
Replacing the radio remote control battery
GWarning
Danger of explosion in the case of incorrectly
changing the battery.
Important
Use only lithium batteries of the type
CR2477. Using other batteries can cause the
device to malfunction and can even damage
the device.
The manufacturer accepts no liability for damage caused by the use of incorrect batteries.
The battery is not rechargeable. Dispose of
used batteries at a collection point specifically designed for this purpose (e.g. at your
authorised smart Service Centre or at an
electronics sales outlet).
1. Turn the lower part of the remote control
clockwise and the upper part anticlockwise.
2. Lift off the upper part.
3. Push the battery with the positive terminal
facing downwards at an angle into the battery compartment and engage into place.
4. Fit the upper part in such a way that the
contacts on the base of the remote control
touch the contact surface in the upper
part.
5. Place the catches in the notches and turn
in the direction opposite to that used to
open the remote control.
42
Page 44

MBA_BA_book.book Seite 43 Mittwoch, 21. Januar 2009 9:52 09
Introduction
Nous vous souhaitons beaucoup de
plaisir avec votre nouveau dispositif mains libres !
Félicitations pour l'acquisition de votre
nouveau dispositif mains libres.
Cette notice d'utilisation s'applique aux
véhicules smart ainsi qu'aux véhicules de
la Classe A et Classe B équipés d'un dispositif mains libres. Vous y trouverez des
informations sur l'utilisation de votre
dispositif mains libres ainsi que des remarques importantes.
Avant de prendre la route, nous vous
recommandons de vous familiariser avec
votre dispositif mains libres et de lire la
notice d'utilisation. Votre dispositif mains
libres vous donnera ainsi toute satisfaction
et vous pourrez également prévenir les
dangers auxquels vous ou d'autres personnes pourriez être exposés.
smart adapte en permanence son dispositif mains libres à une technique en constante évolution et se réserve le droit d'en
modifier la forme et l'équipement ainsi que
d'adopter d'autres solutions techniques.
Nul ne pourra donc se prévaloir d'aucune
des indications, illustrations et descriptions contenues dans cette notice à l'appui
de revendications de quelque nature que
ce soit.
Les points de service smart se tiennent
toujours à votre disposition pour vous
aider et vous conseiller.
Cette notice d'utilisation fait partie intégrante du véhicule. Par conséquent, elle
doit toujours se trouver à bord et être remise au nouveau propriétaire en cas de
revente du véhicule.
smart vous souhaite bonne route avec
votre nouveau dispositif mains libres.
Mercedes-Benz Accessories GmbH
Une entreprise de Daimler AG
43
Page 45

MBA_BA_book.book Seite 44 Mittwoch, 21. Januar 2009 9:52 09
Table des matières
Symboles utilisés .............................. 45
Sécurité de fonctionnement ............. 45
Conditions préalables au
fonctionnement .................................. 46
Vue d'ensemble des fonctions ......... 46
Unité de commande radio ................ 46
Navigation avec l'unité de
commande radio .................................. 47
Symboles............................................. 47
Affichage du statut .............................. 47
Clavier tactile ...................................... 47
Options des menus ............................. 48
Types de numéros du répertoire
téléphonique ....................................... 48
Couplage du dispositif mains
libres avec le téléphone portable .... 48
Connexion du téléphone portable
au dispositif mains libres ................. 50
Vue d'ensemble des menus ............. 50
Menu – Gestion utilisateurs ............ 51
Création d'un nouveau profil
d'utilisateur ......................................... 51
Réglages .............................................. 51
Menu – Réglages .............................. 51
Utilisation du téléphone ................... 53
Passer un appel ................................... 54
Sélection d'un numéro dans
le répertoire ........................................ 54
Appel entrant ...................................... 54
Terminer une communication .............. 54
Réglages .............................................. 55
44
Numérotation vocale ........................ 55
Commande vocale du dispositif
mains libres ......................................... 55
Commande vocale du
téléphone portable .............................. 56
Interrompre la sélection par
commande vocale ............................... 56
Réglages ............................................. 56
Commandes vocales ......................... 56
Appeler/composer <Nom> ...................56
Appeler/composer <Nom> selon
un type défini de numéros d'appel ...... 56
Composer numéro ............................... 57
Répétition d'appel ............................... 57
Répertoire téléphonique ................... 58
Chargement du répertoire téléphonique . 58
Rechercher un contact dans le
répertoire téléphonique ....................... 58
Listes d'appel .................................... 58
SMS ..................................................... 59
Lecture d'un SMS ................................ 59
Lecture vocale d'un SMS .................... 59
Envoi d'un SMS ................................... 59
Lecteur iPod
Connexion d'un iPod
®
.................................... 59
®
au dispositif
mains libres ......................................... 59
Utilisation ............................................ 60
Chargement de l'iPod
®
....................... 60
Lecteur audio ..................................... 60
Couplage d'un appareil audio avec
le dispositif mains libres....................... 60
Utilisation ............................................ 61
Remplacement des piles de
l'unité de commande radio............... 62
Page 46
MBA_BA_book.book Seite 45 Mittwoch, 21. Januar 2009 9:52 09
Dispositif mains libres
Symboles utilisés
GAvertissement
Ce symbole est utilisé pour attirer votre
attention en cas de risque pour votre santé
ou votre vie.
Important !
Ce type de texte sert à attirer votre attention
sur les risques de dégradation du matériel et
de dysfonctionnements.
Nota
Ce type de remarque vous fournit des conseils et des informations complémentaires.
1. Ce type d'énumération vous indique les
différentes opérations à effectuer.
• Ce type d'énumération vous indique les
différentes possibilités dont vous disposez.
Affichage
Les affichages sur le visuel apparaissent dans
cette police de caractères.
Entrée de destination 씮
Favoris
Ceci indique une succession de touches à
actionner les unes après les autres.
Entrée vocale
Les commandes vocales apparaissent dans
cette police de caractères.
Sécurité de fonctionnement
GRisque d'accident
Prêtez attention aux conditions de circulation.
Utilisez le dispositif mains libres uniquement
lorsque les conditions de circulation le permettent. L'utilisation du dispositif mains libres
détourne votre attention de la circulation et
vous risquez alors de perdre le contrôle de
votre véhicule et de provoquer un accident.
Cette notice d'utilisation renvoie à la notice
d'utilisation du véhicule, aux notices d'utilisation de votre téléphone portable et de votre
système audio ainsi qu'aux notices d'utilisation
des différents appareils connectés (iPod
appareils audio par exemple).
Veuillez tenir celles-ci à portée de main.
®
,
45
Page 47
MBA_BA_book.book Seite 46 Mittwoch, 21. Januar 2009 9:52 09
Dispositif mains libres
Conditions préalables au fonctionnement
Pour pouvoir utiliser les fonctions du dispositif
mains libres, il faut que la radio ou le système
audio du véhicule soit en marche (voir la notice
d'utilisation du véhicule).
Vue d'ensemble des fonctions
Le dispositif mains libres prend en charge le
profil Handsfree Bluetooth
idéal pour pouvoir téléphoner confortablement
en conduisant. Il offre les fonctions suivantes :
• Fonctions de téléphonie (appel entrant, appel sortant, appel en attente et répétition
d'appel)
• Commande vocale intégrée
• Sélection par commande vocale directement dans le répertoire du téléphone portable (sans initialisation)
• Activation et utilisation de la fonction de
commande vocale du téléphone portable
• Lecture des SMS et envoi de réponses
•Lecteur iPod
®
• Répertoire téléphonique, listes d'appel
• Lecteur audio : lecture de fichiers musicaux enregistrés sur le téléphone portable ou sur des
lecteurs MP3 par streaming audio Bluetooth
• Coupure automatique du son de la radio
• Couplage de jusqu'à 10 téléphones portables
®
. C'est le système
®
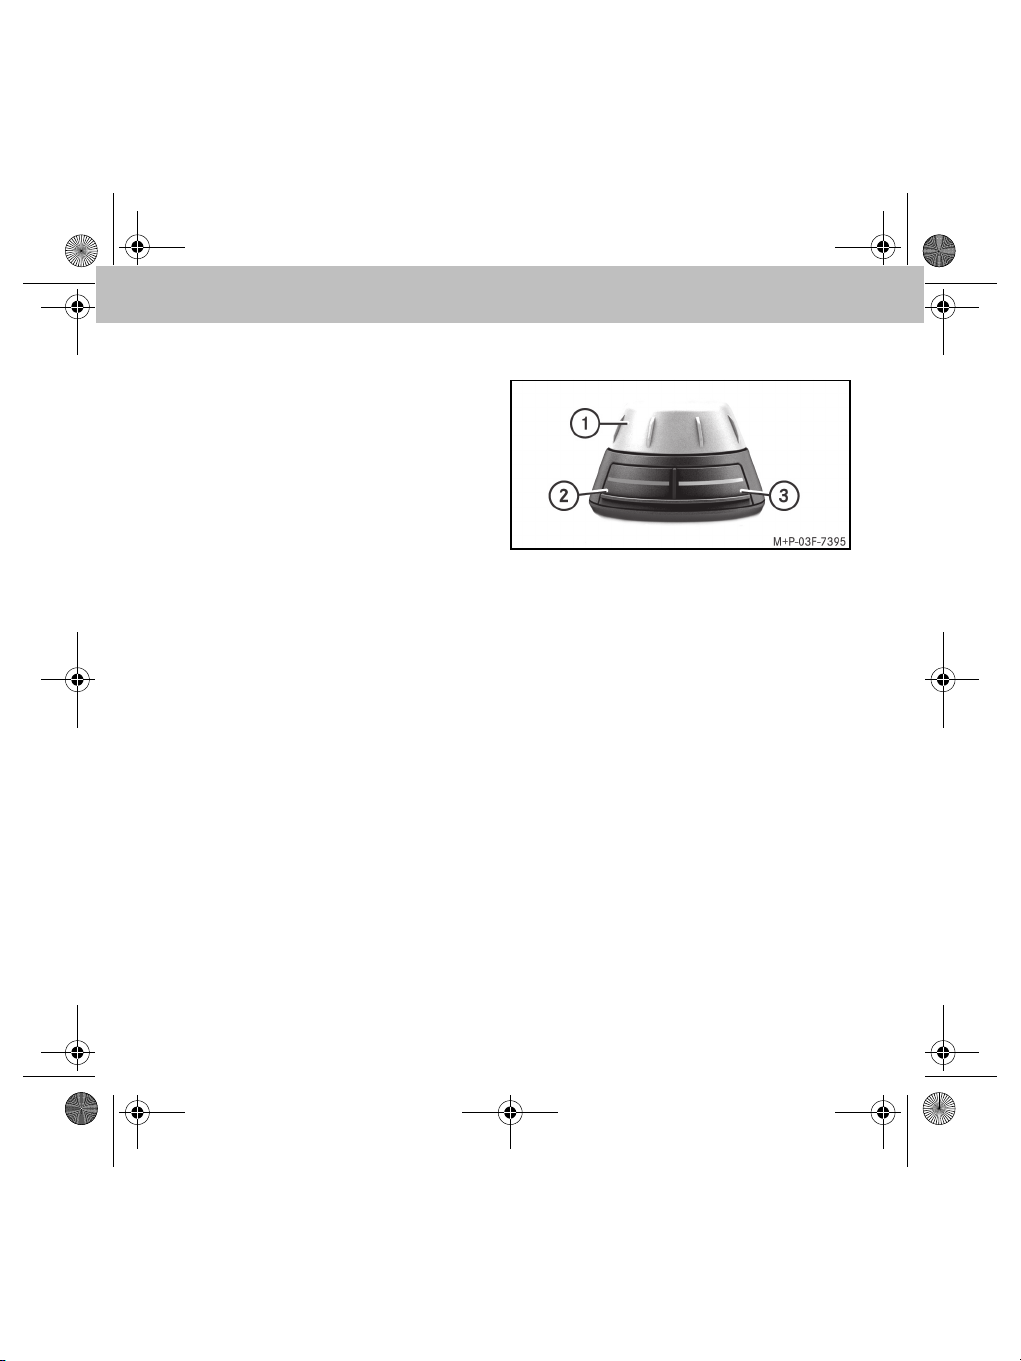
Unité de commande radio
1 Sélecteur :
• Navigation dans les menus
• Démarrage de la commande vocale
• Entrée de chiffres et de lettres
• Sélection du menu actif
2 Touche rouge :
• Refus d'un appel entrant
• Fin de communication
• Retour en arrière depuis un sous-menu
• Activation de la commande vocale du
téléphone
3 Touche verte :
• Accepter un appel entrant
• Sélection du menu actif
• Etablir la communication vers un numéro
sélectionné
46
Page 48
MBA_BA_book.book Seite 47 Mittwoch, 21. Januar 2009 9:52 09
Dispositif mains libres
Nota
Le dispositif mains libres dispose d'un économiseur d'écran. Au bout de 60 secondes
d'inactivité, l'affichage de l'heure est activé
(smart) ou la luminosité du visuel diminue
(Classe A/Classe B). Le visuel de navigation
peut être réactivé en actionnant l'unité de
commande radio. Ce faisant, lorsque vous
appuyez sur une touche, la fonction correspondante est exécutée.
Navigation avec l'unité de commande radio
Le sélecteur vous permet de naviguer jusqu'au
sous-menu de votre choix. Sélectionnez un
sous-menu avec le sélecteur, puis confirmez
votre choix en appuyant sur le sélecteur. Pour
sélectionner un sous-menu, il faut appuyer à
nouveau sur le sélecteur. Pour passer au niveau
de menu immédiatement supérieur, il suffit
d'appuyer sur la touche rouge de l'unité de
commande radio.
Symboles
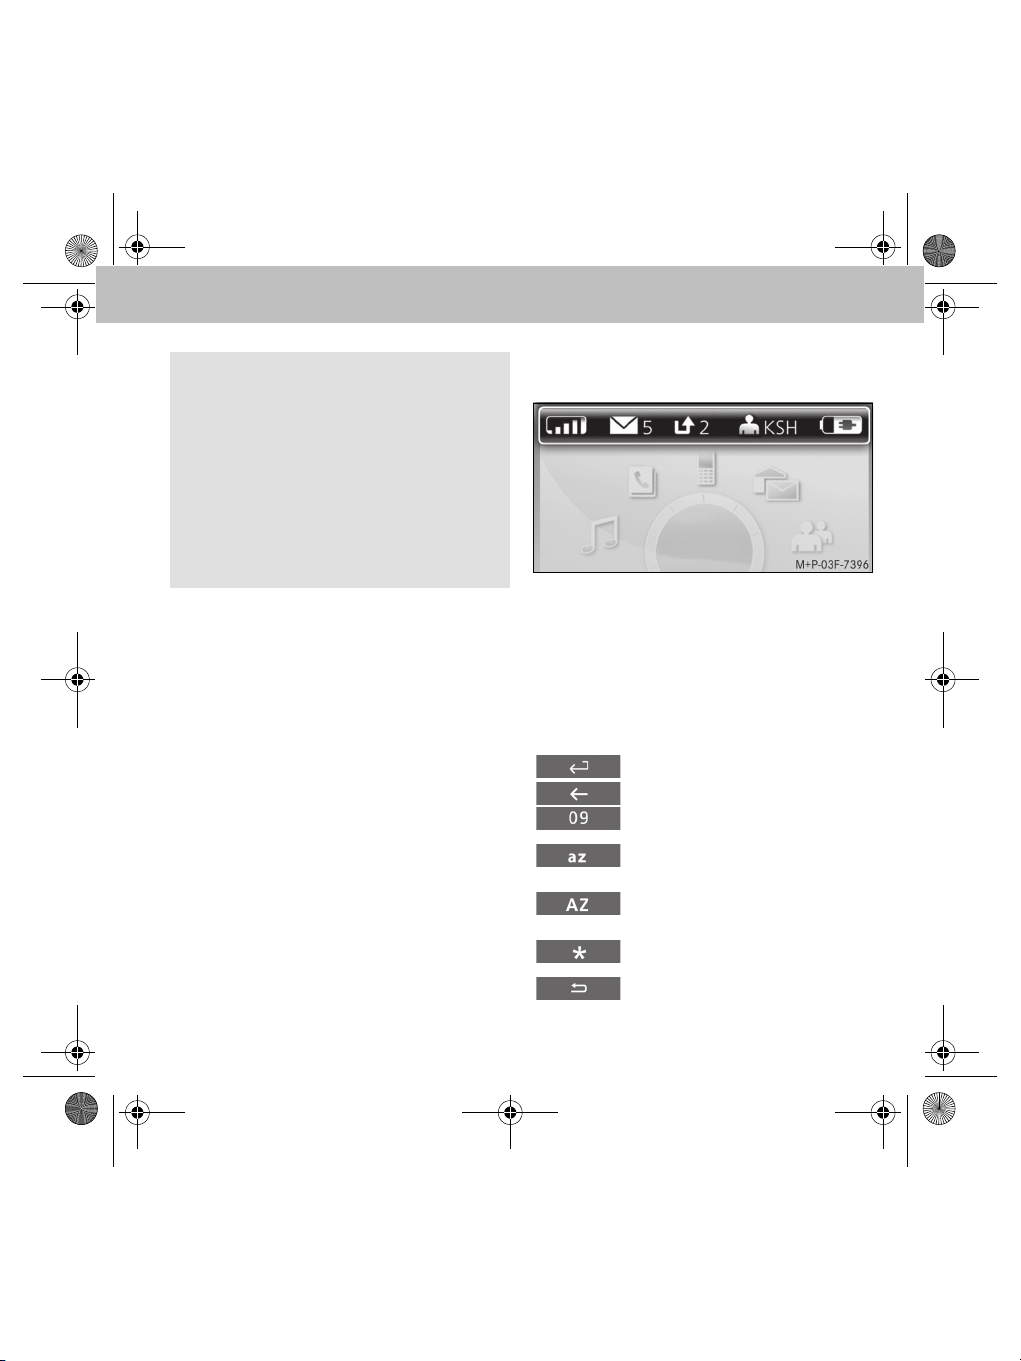
Affichage du statut
1 Puissance du signal (téléphone portable)
2 SMS reçus
3 Appels en absence
4 Initiales de l'utilisateur
5 Niveau de charge de la batterie du télépho-
ne portable
Clavier tactile
Confirmer l'entrée
Effacer le dernier caractère
Passer à la saisie de chiffres
Passer à la saisie de caractères en
minuscules
Passer à la saisie de caractères en
majuscules
Passer à la saisie de caractères
spéciaux
Quitter le clavier tactile
47
Page 49
MBA_BA_book.book Seite 48 Mittwoch, 21. Januar 2009 9:52 09
Dispositif mains libres
Options des menus
Option activée
Option désactivée
Types de numéros du répertoire téléphonique
Numéro de téléphone privé
Numéro de téléphone portable
Numéro de téléphone professionnel
Couplage du dispositif mains libres avec
le téléphone portable
GRisque d'accident
Couplez le dispositif mains libres au téléphone portable uniquement lorsque le véhicule
est à l'arrêt. Sinon, votre attention pourrait
être détournée de la circulation et vous risquez de provoquer un accident.
Lors de la première utilisation commune, le
dispositif mains libres et le téléphone portable
doivent être couplés.
Après le couplage, les deux appareils sont, lorsqu'ils se trouvent dans le véhicule, automatiquement reliés l'un à l'autre à chaque mise en
marche.
Nota
La procédure de couplage et l'établissement
d'une liaison autonome avec le dispositif mains
libres peuvent rendre des réglages nécessaires
au niveau du téléphone portable (voir la notice
d'utilisation du téléphone portable).
Pour garantir le succès du couplage, le téléphone portable et le dispositif mains libres
doivent être allumés et Bluetooth
téléphone portable à coupler doit se trouver
dans le véhicule.
®
activé. Le
48
Page 50
MBA_BA_book.book Seite 49 Mittwoch, 21. Januar 2009 9:52 09
Dispositif mains libres
1. Activez la fonction Bluetooth® sur le téléphone portable (voir la notice d'utilisation
du téléphone portable).
2. Tournez la clé de contact en position 1 ou 2
dans le contacteur d'allumage (voir la notice
d'utilisation du véhicule).
Le dispositif mains libres est mis en
marche.
3. Sélectionnez Gestion utilisateurs
dans le menu principal.
4. Sélectionnez Nouvel utilisateur.
Tous les téléphones portables disponibles
sont alors affichés.
Nota
Si le téléphone portable souhaité n'est pas affiché, sélectionnez à la place Coupler du
téléph. et recherchez les appareils Blue-
®
à partir du téléphone portable (voir la
tooth
notice d'utilisation du téléphone portable). Le
dispositif mains libres est reconnu via Blue-
®
sous le nom smart BT ou
tooth
MB Bluetooth.
5. Sélectionnez dans la liste le téléphone portable pour lequel vous souhaitez établir une
liaison.
®
Un code PIN Bluetooth
s'affiche sur le
visuel du dispositif mains libres.
6. Saisissez le code PIN Bluetooth
®
sur le téléphone portable lorsque le système vous le
demande.
7. Acceptez la demande de connexion.
8. Indiquez les initiales de l'utilisateur ou du
téléphone portable.
Une fois la connexion établie, le répertoire téléphonique est automatiquement transféré du
téléphone portable au dispositif mains libres.
Nota
Il est possible de coupler jusqu'à 10 téléphones portables avec le dispositif mains libres.
Cependant, seul un téléphone à la fois peut
être couplé.
Une fois la connexion établie, les fonctions
prises en charge par le téléphone portable
sont disponibles dans le menu principal.
49
Page 51
MBA_BA_book.book Seite 50 Mittwoch, 21. Januar 2009 9:52 09
Dispositif mains libres
Connexion du téléphone portable au
dispositif mains libres
Lorsque la clé est en position 1 ou 2, le dispositif mains libres recherche automatiquement le
téléphone portable qui a été connecté en
dernier et établit une liaison avec celui-ci.
Pour établir une liaison avec un autre téléphone
portable, celui-ci doit être sélectionné et activé
dans les paramètres utilisateurs, ou il doit à
nouveau être couplé.
Nota
Lorsque le contact est coupé, le dispositif
mains libres s'éteint et la liaison au téléphone
portable est coupée.
Si le contact est coupé alors qu'une communication téléphonique est en cours, celle-ci
n'est pas interrompue et peut se poursuivre.
Le dispositif mains libres s'éteint une fois la
communication terminée.
Vue d'ensemble des menus
Gestion utilisateurs (page 51) :
Réglages spécifiques à l'utilisateur,
comme « Modifier initiales », « Enregistrer utilisateur », « Déconnecter
utilisateur », etc.
Réglages (page 51) :
Réglages généraux pour le dispositif
mains libres, comme « Sonnerie », «
Boîte vocale », etc.
Lecteur iPod® (page 59) :
Commande de l'iPod
mains libres
Lecteur audio (page 60) :
Couplage d'appareils audio au dispositif mains libres et lecture de titres
musicaux
Répertoire téléphonique (page 58) :
Comprend les entrées transférées
depuis le téléphone portable
Listes d'appel (page 58) :
Comprend les listes des derniers numéros composés, des appels reçus et
des appels en absence
Messages (page 59) :
Comprend la liste des SMS téléchar-
gés depuis le téléphone portable
®
via le dispositif
50
Page 52

MBA_BA_book.book Seite 51 Mittwoch, 21. Januar 2009 9:52 09
Dispositif mains libres
Menu – Gestion utilisateurs
Le dispositif mains libres permet de gérer
jusqu'à 10 profils d'utilisateur. Pour chacun
d'entre eux, les données suivantes, entre
autres, sont enregistrées :
• Répertoire téléphonique
• Luminosité du visuel
• Sonnerie
• Langue d'affichage
• Réglages du volume sonore
• Listes d'appel
Création d'un nouveau profil d'utilisateur
Voir la section « Couplage du dispositif mains
libres avec le téléphone portable », page 48.
Réglages
• Sélectionnez Modifier initiales
pour modifier le nom de l'utilisateur.
• Sélectionnez Modifier couleur
d'icône pour modifier la couleur du
symbole de l'utilisateur.
• Sélectionnez Enregistrer utilisateur
pour déconnecter l'utilisateur actuel et
connecter un autre utilisateur.
Nota
Si l'utilisateur sélectionné n'est pas détecté
par le dispositif mains libres, le système
revient aux paramètres utilisateurs.
• Sélectionnez Déconnecter utilisateur
pour interrompre la liaison Bluetooth
cours entre le dispositif mains libres et le
téléphone portable.
• Sélectionnez Effacer utilisateur
pour supprimer du dispositif mains libres
toutes les données de l'utilisateur.
®
en
Menu – Réglages
• Sonnerie : les sous-menus Mélodie et
Volume sonore permettent de choisir
une sonnerie et d'en régler le volume sonore.
• Luminosité : les sous-menus
Luminosité et Luminosité en
mode veille permettent d'adapter l'éc-
lairage du visuel aux besoins de l'utilisateur.
• Réglages appels : si la fonction Prise
d'appel autom. est activée, les appels
entrants sont automatiquement acceptés
après trois sonneries.
• Sens de rotation : vous pouvez régler ici
le sens de fonctionnement du sélecteur (dans
le sens des aiguilles d'une montre ou dans le
sens inverse des aiguilles d'une montre).
51
Page 53
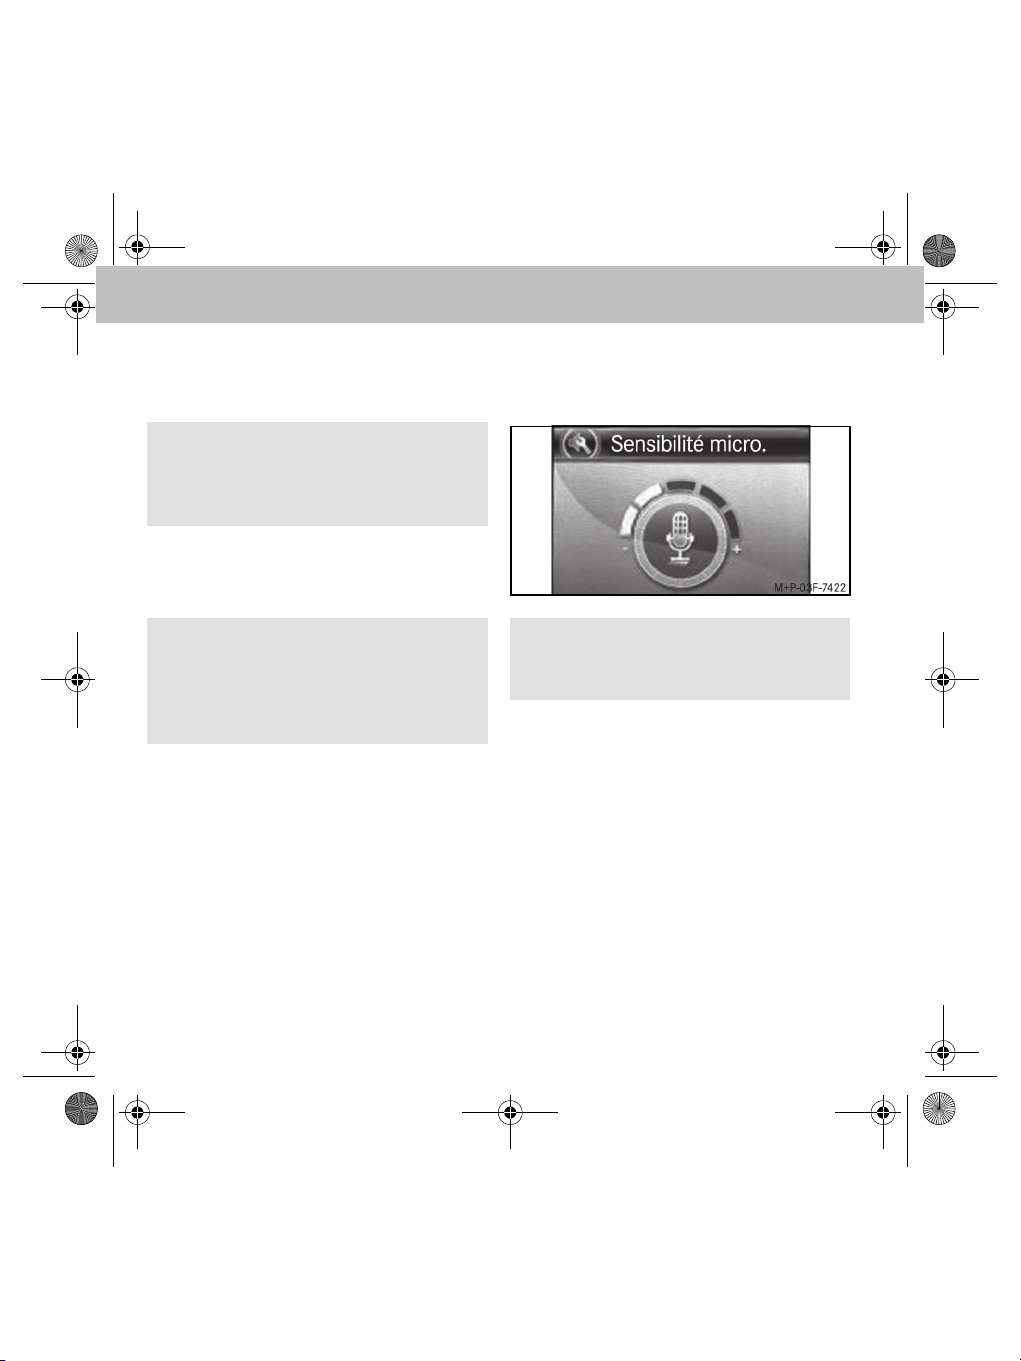
MBA_BA_book.book Seite 52 Mittwoch, 21. Januar 2009 9:52 09
Dispositif mains libres
• Temps d'inertie : permet de définir la
durée pendant laquelle le dispositif mains
libres reste actif une fois le contact coupé.
Nota
Il est recommandé de régler sur 0 la durée de
fonctionnement du dispositif mains libres
après coupure du contact.
• Réglages d'usine : remet tous les
réglages du dispositif mains libres sur les
valeurs par défaut.
Important !
La fonction Réglages d'usine supprime
tous les réglages utilisateur du dispositif
mains libres, y compris les données du
répertoire téléphonique.
• Info/état : fournit des informations sur
les versions logicielle et matérielle du dispositif mains libres.
• Langue : ce sous-menu permet de régler
la langue d'affichage.
• Langue détect. vocale : permet
d'activer (ou de désactiver) la commande vocale et de définir la Langue utilisée.
• Gestion audio :
• Sensibilité micro. : réglage
de la sensibilité du microphone
Nota
Il est recommandé de régler la sensibilité du
microphone comme indiqué sur l'illustration.
• Messages téléphoniques :
si cette fonction est activée, les messages vocaux du téléphone (par
exemple en cas de système de navigation intégré au téléphone) sont diffusées via le dispositif mains libres.
Le son de la radio est coupé lors des
messages vocaux.
• Réglages d'usine : remet tous
les réglages audio du dispositif mains
libres sur les valeurs par défaut.
52
Page 54
MBA_BA_book.book Seite 53 Mittwoch, 21. Januar 2009 9:52 09
Dispositif mains libres
• Sélectionnez Couper pour interrompre la
connexion Bluetooth
positif mains libres et le téléphone portable
et désactiver le dispositif mains libres.
Nota
Vous pouvez remettre le dispositif mains
libres en marche en appuyant sur une touche
de l'unité de commande radio.
®
en cours entre le dis-
Utilisation du téléphone
Lorsque la connexion Bluetooth® est activée
entre le dispositif mains libres et le téléphone
portable, vous pouvez composer un numéro par
commande vocale, via le menu ou directement
sur le téléphone portable.
GRisque d'accident
Lorsque vous téléphonez en conduisant,
tenez compte des dispositions légales du
pays dans lequel vous vous trouvez.
Si l'utilisation d'un téléphone portable
pendant la marche est autorisée par la loi,
téléphonez uniquement lorsque les
conditions de circulation le permettent.
Sinon, votre attention risque d'être
détournée de la circulation et vous risquez de
provoquer un accident, de vous blesser et de
blesser d'autres personnes.
Pour des raisons de sécurité, utilisez
impérativement le dispositif mains libres
pour téléphoner pendant la marche.
Si vous téléphonez en utilisant le dispositif
mains libres, restez attentif à la conduite,
fermez toutes les vitres et évitez tous les
bruits qui pourraient vous gêner.
Si vous souhaitez téléphoner sans utiliser le
dispositif mains libres, arrêtez-vous ou garezvous. Ne vous arrêtez pas ou ne stationnez
pas aux endroits où l'arrêt ou le
stationnement sont interdits.
53
Page 55

MBA_BA_book.book Seite 54 Mittwoch, 21. Januar 2009 9:52 09
Dispositif mains libres
Passer un appel
1. Composez le numéro sur le dispositif
mains libres :
• Sélection à partir du répertoire
téléphonique
• Sélection à partir des listes d'appel
• Possibilité de rappel à partir d'un
SMS reçu
• Saisie directe d'un numéro d'appel
Nota
Vous pouvez également sélectionner ou saisir
les numéros directement sur le téléphone portable.
2. Confirmez le numéro d'appel avec la touche
verte de l'unité de commande radio pour
établir la communication.
Sélection d'un numéro dans le répertoire
1. Sélectionnez Répertoire dans le menu
principal.
Une liste des contacts enregistrés dans le
répertoire téléphonique s'affiche.
2. Sélectionnez le contact souhaité et confirmez avec la touche verte de l'unité de
commande radio.
Une liste des numéros d'appel mémorisés
pour ce contact s'affiche alors.
3. Sélectionnez le numéro souhaité et confirmez avec la touche verte de l'unité de commande radio afin d'établir la communication.
Appel entrant
En fonction des réglages du téléphone et des
fonctions disponibles, les appels entrants sont
signalés par la sonnerie du téléphone portable
ou par une sonnerie configurée sur le dispositif
mains libres (voir page 51).
Le numéro et/ou le nom de l'appelant sont affichés sur le dispositif mains libres si le téléphone
portable prend en charge la fonction de présentation du numéro (voir la notice d'utilisation du téléphone portable).
Appuyez sur la touche verte de l'unité de commande radio pour prendre l'appel et sur la touche rouge pour le refuser.
Terminer une communication
Pour terminer une communication en cours,
appuyez sur la touche rouge de l'unité de
commande radio.
54
Page 56
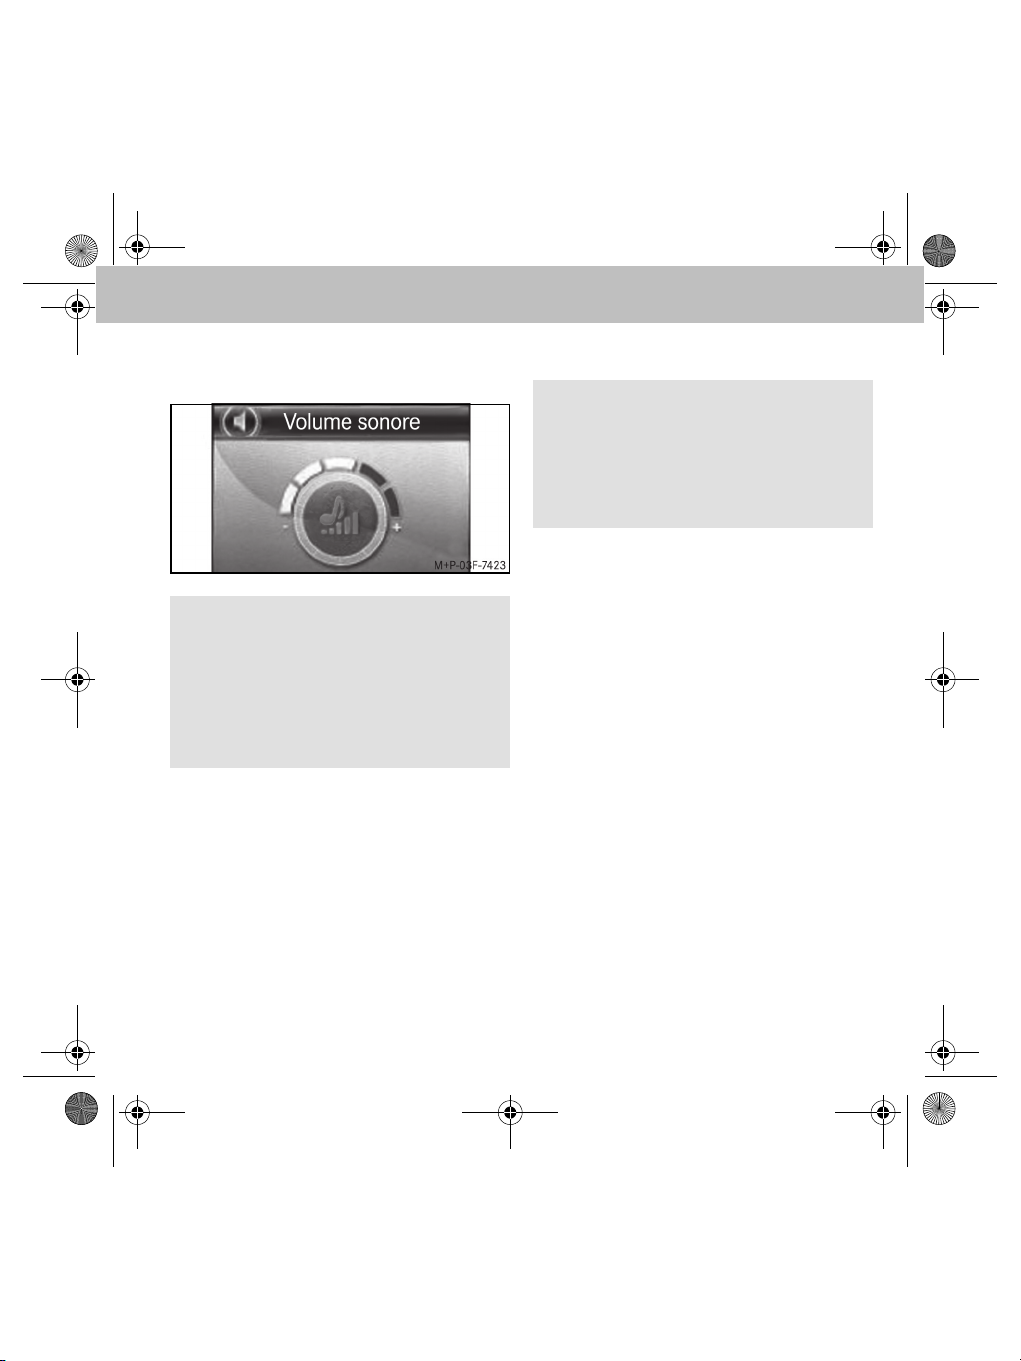
MBA_BA_book.book Seite 55 Mittwoch, 21. Januar 2009 9:52 09
Dispositif mains libres
Réglages
• Volume sonore des appels :
Nota
Il est recommandé de régler le volume sonore
comme indiqué sur l'illustration.
Il est possible de régler le volume sonore sur
la radio lorsqu'une communication est en
cours ou lorsque la fonction de reconnaissance vocale est activée.
• Coupure du son du microphone : l'option
Mute micro. permet de couper temporairement le microphone du dispositif mains
libres pendant une communication.
• Mode Privé : l'option Mode privé permet
de transférer temporairement une communication en cours sur le téléphone portable.
Numérotation vocale
Nota
Pour pouvoir utiliser la commande vocale,
une liaison Bluetooth® doit exister entre le
dispositif mains libres et le téléphone portable, mais aucune communication ne doit être
en cours.
Commande vocale du dispositif mains libres
1. Affichez le menu principal et appuyez sur le
sélecteur pendant plus d'une demi-seconde.
Le système dit Menu principal, indiquant
que le dispositif est prêt, et le message
Veuillez parler... apparaît sur le
visuel.
2. Utilisez une commande vocale :
• Nom : pour sélectionner un contact
mémorisé dans le répertoire téléphonique (voir page 56)
• Composer numéro : pour dicter
directement le numéro à composer
(voir page 57)
3. Etablissez la communication avec les commandes vocales Oui, Appeler ou Composer.
55
Page 57

MBA_BA_book.book Seite 56 Mittwoch, 21. Januar 2009 9:52 09
Dispositif mains libres
Commande vocale du téléphone portable
1. Appuyez longuement sur la touche rouge
de l'unité de commande radio.
La commande vocale propre au téléphone
est activée.
2. Sélection par commande vocale (voir la
notice d'utilisation du téléphone portable).
Interrompre la sélection par commande
vocale
• Appuyez longuement sur la touche rouge de
l'unité de commande radio
ou
• Commande vocale : Annuler
Réglages
Langue : sous Réglages 씮 Langue
détect. vocale 씮 Langue, sélectionnez
dans la liste de langues disponibles la langue
souhaitée pour la reconnaissance vocale.
Commandes vocales
Appeler/composer <Nom>
Cette commande vocale permet de sélectionner un nom du répertoire téléphonique.
Nota
Si le nom souhaité n'est pas reconnu, le dispositif mains libres répond Comment et vous
permet de recommencer.
Si le nom prononcé est reconnu, le système
demande si la communication doit être établie :
• Oui/Appeler/Composer : établissement de la
communication avec le numéro sélectionné
• Non/Retour : le numéro n'est pas composé
• Annuler/Annulation : la sélection par com-
mande vocale est interrompue sans exécution de la fonction
• Aide : explication des différentes commandes
vocales disponibles
Appeler/composer <Nom> selon un type
défini de numéros d'appel
Cette commande vocale permet, pour un nom
donné, de sélectionner un type de numéro spécifique d'une entrée du répertoire téléphonique.
56
Page 58

MBA_BA_book.book Seite 57 Mittwoch, 21. Januar 2009 9:52 09
Dispositif mains libres
Types de numéros d'appel :
•maison
•privé
•travail
•bureau
• téléphone mobile/portable
Si le nom et le type de numéro prononcés sont
reconnus, le système vous demande si la communication doit être établie :
• Oui/Appeler/Composer : établissement de la
communication avec le numéro sélectionné
• Non/Retour : le numéro n'est pas composé
• Annuler/Annulation : la sélection par com-
mande vocale est interrompue sans exécution de la fonction
• Aide : explication des différentes commandes
vocales disponibles
Composer numéro
Cette commande vocale permet de prononcer
directement le numéro à composer :
• +, *, #, 0, 1, ..., 9 : saisie du numéro
• Effacer tout : le numéro saisi est entièrement
effacé
• Effacer/Corriger/ Modifier : le dernier
chiffre/groupe de chiffres saisi est effacé
• Répéter : le numéro entré est lu par le
système
• Oui/Appeler/Composer : établissement de la
communication avec le numéro sélectionné
• Non/Retour : le numéro n'est pas composé
• Enregistrer : le numéro saisi est mémorisé
• Annuler/Annulation : la sélection par com-
mande vocale est interrompue sans exécution de la fonction
• Aide : explication des différentes commandes
vocales disponibles
Répétition d'appel
Cette commande vocale permet de composer à
nouveau le dernier numéro composé.
57
Page 59

MBA_BA_book.book Seite 58 Mittwoch, 21. Januar 2009 9:52 09
Dispositif mains libres
Répertoire téléphonique
Le sous-menu Répertoire permet de lire les
entrées du répertoire du téléphone portable.
Chargement du répertoire téléphonique
1. Sélectionnez Répertoire dans le menu
principal.
2. Sélectionnez Options 씮 Synchroniser.
3. Sélectionnez le répertoire souhaité du téléphone portable et confirmez votre choix
avec la touche verte de l'unité de commande radio :
• SIM
• Téléphone
• SIM et téléphone
Nota
La synchronisation peut être interrompue
avec la touche rouge de l'unité de commande
radio. Si l'interruption est confirmée avec
Oui, les entrées du répertoire téléphonique
synchronisées sont effacées.
Rechercher un contact dans le répertoire
téléphonique
Le clavier tactile permet de saisir le nom
recherché ou la première lettre d'un nom. Après
confirmation avec la touche verte de l'unité de
commande radio, la recherche est lancée en
utilisant ce nom ou cette lettre.
Listes d'appel
1. Sélectionnez Listes d'appel dans le
menu principal.
Les listes d'appel du téléphone portable
sont téléchargées.
2. Sélectionnez la liste d'appel souhaitée :
• Numéros composés
• Appels manqués
• Appels reçus
Nota
Si le téléphone portable ne prend pas en charge l'accès aux listes d'appel, une liste d'appel
est créée sur le dispositif mains libres.
58
Page 60
MBA_BA_book.book Seite 59 Mittwoch, 21. Januar 2009 9:52 09
Dispositif mains libres
SMS
Le dispositif mains libres prend en charge la
réception et l'envoi de SMS.
Nota
Si cette fonction n'est pas prise en charge via
Bluetooth® par le téléphone portable, le
sous-menu Messages ne peut alors pas
être sélectionné sur le dispositif mains libres.
Lecture d'un SMS
Les SMS reçus peuvent être consultés sous
Messages 씮 Lire message.
Lecture vocale d'un SMS
Sélectionnez le SMS reçu sous Messages 씮
Lire message et choisissez l'option Lire.
Envoi d'un SMS
1. Sélectionnez Messages dans le menu
principal.
2. Sélectionnez Nouveau message.
3. Sélection d'un SMS à partir des modèles
existants.
4. Entrez le numéro du destinataire ou sélecti-
onnez-le dans le répertoire téléphonique,
puis confirmez avec la touche verte de
l'unité de commande radio.
Lecteur iPod
Pour raccorder un iPod® au dispositif mains libres, vous avez besoin d'un adaptateur iPod®
ainsi que d'un câble adaptateur iPod®. Ces
accessoires sont disponibles dans les points de
service smart.
Connexion d'un iPod
libres
®
®
au dispositif mains
GRisque d'accident
Raccordez le dispositif mains libres à l'iPod®
uniquement lorsque le véhicule est à l'arrêt.
Sinon, votre attention pourrait être détournée de la circulation et vous risquez de provoquer un accident.
1. Réglez le système audio sur AUX (voir la
notice d'utilisation du système audio).
2. Connectez l'iPod
La liaison entre l'iPod® et le dispositif mains
libres est automatiquement établie une fois
que l'iPod
teur iPod®. Une fois la liaison établie, vous
pouvez immédiatement lire les titres musicaux enregistrés dans votre iPod
®
.
®
est raccordé au câble adapta-
®
.
59
Page 61
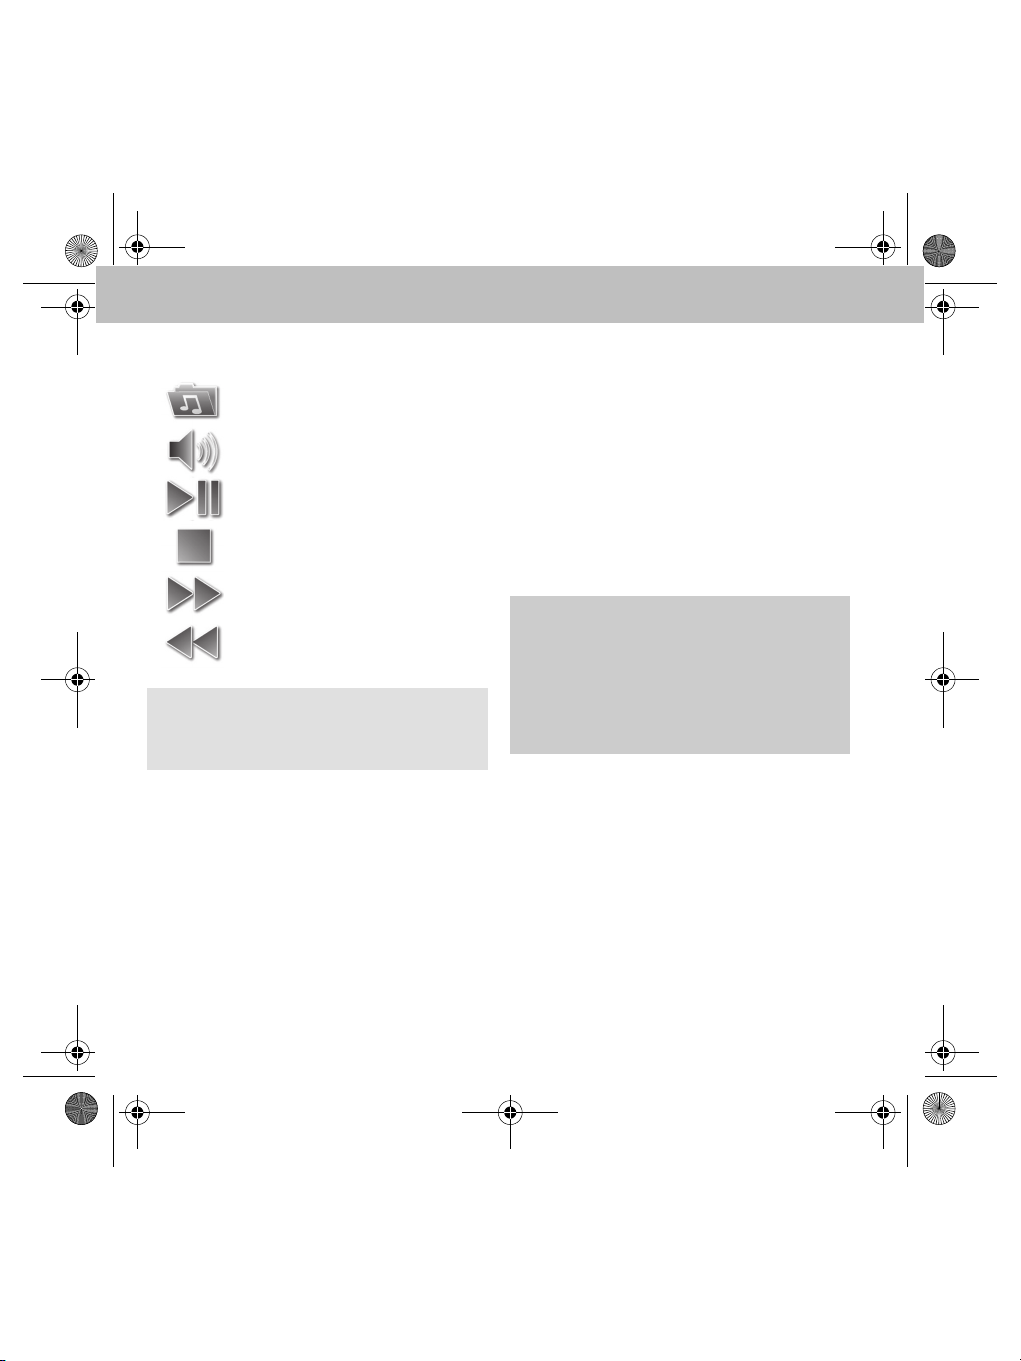
MBA_BA_book.book Seite 60 Mittwoch, 21. Januar 2009 9:52 09
Dispositif mains libres
Utilisation
Sélection du titre*
Réglage du volume sonore
Lecture, pause
Arrêt
Saut de titre en avant
Saut de titre en arrière
Nota
Pour lancer une recherche dans la liste de titres, il faut tout d'abord arrêter la lecture audio.
Chargement de l'iPod
L'iPod® est chargé via l'adaptateur iPod®. Vous
pouvez désactiver le chargement automatique
sous musique iPod® 씮 Options 씮
Réglages.
* La structure des dossiers et les éléments de
commande correspondent à ceux de l'iPod
®
Lecteur audio
Le lecteur audio permet de lire des fichiers audio depuis un appareil compatible avec le streaming audio Bluetooth® (par exemple un
lecteur MP3).
Il est possible de coupler jusqu'à 10 appareils
audio avec le dispositif mains libres. Cependant, seul un appareil à la fois peut être activé.
Couplage d'un appareil audio avec le
dispositif mains libres
GRisque d'accident
Couplez le dispositif mains libres à l'appareil
audio uniquement lorsque le véhicule est à
l'arrêt. Sinon, votre attention pourrait être
détournée de la circulation et vous risquez de
provoquer un accident.
®
1. Activez Bluetooth
(voir la notice d'utilisation de l'appareil
audio).
2. Tournez la clé de contact en position 1 ou 2
dans le contacteur d'allumage (voir la notice
d'utilisation du véhicule).
Le dispositif mains libres est mis en marche.
3. Sélectionnez Lecteur musique dans
le menu principal.
®
.
sur l'appareil audio
60
Page 62
MBA_BA_book.book Seite 61 Mittwoch, 21. Januar 2009 9:52 09
Dispositif mains libres
4. Sélectionnez Options 씮 Nouvel
appareil.
Tous les appareils audio disponibles sont
alors affichés.
5. Sélectionnez dans la liste l'appareil audio pour
lequel vous souhaitez établir une liaison.
6. Saisissez le code PIN Bluetooth
l'appareil audio lorsque le système vous le
demande.
Une fois le couplage terminé, toutes les
fonctions de lecture sont disponibles.
7. Réglez le système audio sur AUX (voir la
notice d'utilisation du système audio).
Nota
Si un lecteur MP3 est utilisé avec un adaptateur A2DP, cet appareil est automatiquement
couplé au dispositif mains libres. Pour cela, il
faut sélectionner l'option Coupler depuis
l'appareil lors de la recherche des appareils disponibles.
®
(0000) sur
Utilisation
Sélection de l'appareil
Réglage du volume sonore
Lecture, pause
Arrêt
Saut de titre en avant
Saut de titre en arrière
61
Page 63

MBA_BA_book.book Seite 62 Mittwoch, 21. Januar 2009 9:52 09
Dispositif mains libres
Remplacement des piles de l'unité de
commande radio
GAttention !
Il y a un danger d’explosion si la batterie est
remplacée d’une façon incorrecte.
Important !
Utilisez uniquement des piles au lithium de
type CR2477. Si vous utilisez un autre type
de piles, l'appareil risque de ne pas fonctionner correctement, voire d'être endommagé.
Le fabricant décline toute responsabilité en
cas de dommages dus à l'utilisation de piles
inadéquates.
La pile n'est pas rechargeable. Amenez vos
piles usagées dans un centre de recyclage
prévu à cet effet (par exemple dans un point
de service smart ou dans un magasin d'électronique spécialisé).
1. Tournez la partie inférieure de l'unité de
commande dans le sens des aiguilles
d'une montre et la partie supérieure dans
le sens inverse des aiguilles d'une montre.
2. Soulevez la partie supérieure.
3. Insérez la pile, pôle positif orienté vers le
bas, en oblique dans le compartiment des
piles et appuyez dessus jusqu'à ce qu'elle
s'enclenche.
4. Remettez la partie supérieure en place de
manière à ce que les contacts qui se trouvent au fond de l'unité de commande reposent sur les surfaces de contact de la
partie supérieure.
5. Placez les verrouillages dans les encoches
et tournez dans le sens inverse au sens
d'ouverture.
62
Page 64

Redaktion
Mercedes- Benz Accessories GmbH, Stuttgart · Ein Unternehmen der Daimler AG.
Änderungen von technischen Details gegenüber den Angaben und Abbildungen der Betriebsanleitung sind vorbehalten. Nachdruck, Übersetzung und Vervielfältigung, auch auszugsweise, sind
ohne schriftliche Genehmigung nicht erlaubt.
Redaktionsschluss: 19.01.2009
Titelbild: M+P- 03F- 7463
03F056- 08
Issued by
Mercedes- Benz Accessories GmbH, Stuttgart · A Daimler AG Company.
The manufacturer reserves the right to change technical details from those shown in data and illustrations contained in this Owner's Manual. Reprinting, translating and reproduction, in whole or in
part, are not permitted without our prior written consent.
As at: 19.01.2009
Title Illustration: M+P- 03F- 7463
03F056- 08
Rédaction
Mercedes- Benz Accessories GmbH, Stuttgart · Une entreprise du groupe Daimler AG.
Sous réserve de modification de détails techniques par rapport aux indications et illustrations de
cette notice d'utilisation. Toute reproduction, traduction ou publication, même partielle, interdite
sans notre autorisation écrite.
Fin de rédaction : 19.01.2009
Cliché de couverture : M+P- 03F- 7463
03F056- 08
 Loading...