


2
· Please do not use the phone in places with flammable or explosive materials.
· Please do not touch the phone with wet hands.
· Please do not use the phone for any other purposes.
· Any damages due to unauthorized disassembly and intentional damages by
users are not covered by the warranty.
· Please do not pull the power plug and adaptor when you unplug it.
· When the phone makes any strange noise, smell or smoke,
please unplug the adaptor and cable immediately and contact with service center.
· Please do not locate the product on wet or dusty place.
· Please do not press the product or put heavy weigh on it.
· Please do not put dust or other materials inside of the product or charger.
Precaution when using
· Please avoid installing in excessively hot, cold, dusty or humid places or in
locations with strong vibrations or exposed to direct sunlight.
· Because the phone generates heat when it operates, please do not install it in
locations where heat resistance or durability is low.
· Please do not use a damaged cord or plug, or loose outlet to prevent fire or
electric shock hazard.
· Please do not touch power outlet with wet hands. It can cause the electric shock.
· Please do not locate it on inclined places. It may inflict injury or break down by
dropping.
Precaution when installing
Please read the instruction carefully to protect yourself and others from
personal injury or damage to property.
To use the phone correctly and safely and prevent an accident, it is essential for
you to heed the warning and information provided. Keep the manual in an easily
accessible place after read it for future reference.
User Precaution

3
Precaution when setting
· It may result in some errors if you change specific settings after the phone
installed.
· Please give prior notice when you need to change the settings.
· Please use dehydrated soft cloth when you clean the phone.
· Please do not use chemicals such as benzene, thinner or etc.
· Please wipe the power plug with dry cloth if it is wet or dusty.
It may cause the fire or electric shock hazard.
Precaution when cleaning
· Please do not heat the product and do not place it in hot areas.
· Please do not place the product with magnetic objects such as magnet, TV,
monitor or speaker.
· Some afterimages symptom occurs to fix screen for a long time.
· Please backup your valuable data.

4
Contents
Components ··································································································
Buttons ··········································································································
Icons on the status line ···················································································
Installation and Power Connection ··································································
How to install phone according to internet using environment ························
How to access web pages ·············································································
Connecting Headset ·······················································································
Insert/Remove SD card ··················································································
How to Connect Extension ·············································································
Using the Stylus Pen ······················································································
Entering Text ··································································································
Beginning
08
10
11
12
15
17
18
18
19
20
21
Call Function ··································································································
BLF Function ·································································································
Extension Function ·························································································
Using Home ···································································································
Executing/Exiting Functions ···········································································
Basic Functions
24
30
32
33
36
Address Book ································································································
Gallery ············································································································
Internet ··········································································································
Email ·············································································································
Music ·············································································································
Additional Functions(Applications)
40
42
44
47
50

5
Settings
Ethernet configuration ····················································································
Sound ············································································································
Display ···········································································································
Applications ···································································································
Privacy ···········································································································
SD card & storage ··························································································
Language & keyboard ····················································································
Date & time ····································································································
Call settings ···································································································
Phone Management ·······················································································
About phone ··································································································
54
54
55
55
56
57
58
58
59
60
60
Firmware upgrade and Manage data ······························································
Size & Trait ·····································································································
Copyright certification & Disclaimers ·······························································
Trouble shooting ····························································································
Treatment before Disposal ··············································································
Warranty ········································································································
Damage Compensation ·················································································
Supplement
62
62
64
64
66
66
67

Beginning
1

Beginning
1
- Components
- Buttons
- Icons on the status line
- Installation and Power Connection
- How to install phone according to
internet using environment
- How to access web pages
- Connecting Headset
- Insert/Remove SD card
- How to Connect Extension
- Using the Stylus Pen
- Entering Text
Beginning
1
MIP2000 User’s Manual

8
· MIP2000 User’s Manual
Beginning
1
Basic components
· The components must be checked when the package is opened.
· Please contact the store where you purchased it if there are any missing items.
· Images cannot be matched and in some cases, items can be replaced.
※
Extension module and the bracket, screws are purchased separately.
▲
Body of MIP 2000
▲Receiver with connecting cable
▲Power adaptor▲Lan cable ▲User’s manual
▲Stylus Pen
▲Phone stand
COMPONENTS

9
MIP2000 User’s Manual ·
Beginning
1
Name of parts
▲
Back
▲
Side
▲
Front
Back
Home
Menu
3 Way Call
C F A
Head Set
VOL
▲/▼
Transfer
Mute
Pick Up
Numbers/Characters
Intercom
Hold
Redial/Call
Speaker phone
Message
Phone Book
Call Log
Back
Home
Menu
Direction Key
OK/Confirm
BLF Button
Ear Phone jack hole
Microphone jack
SD Card Slot
Charging Connector
Lan connecting port
PC Connecting port
EXT OUT
Handset Connecting Jack
NameNo.
25
26
28
29
30
31
32
27
4
8
5
9
6
16
1
2
3
19
24
18
22
23
21
10
17
20
7
12
13
14
11
15
25
26
28 29 30 31 32
27
1
2
3
24
22
23
8 9 10
16
18
17
19
21
20
4 5 6 7
11
12
13
14
15
10
Beginning
1
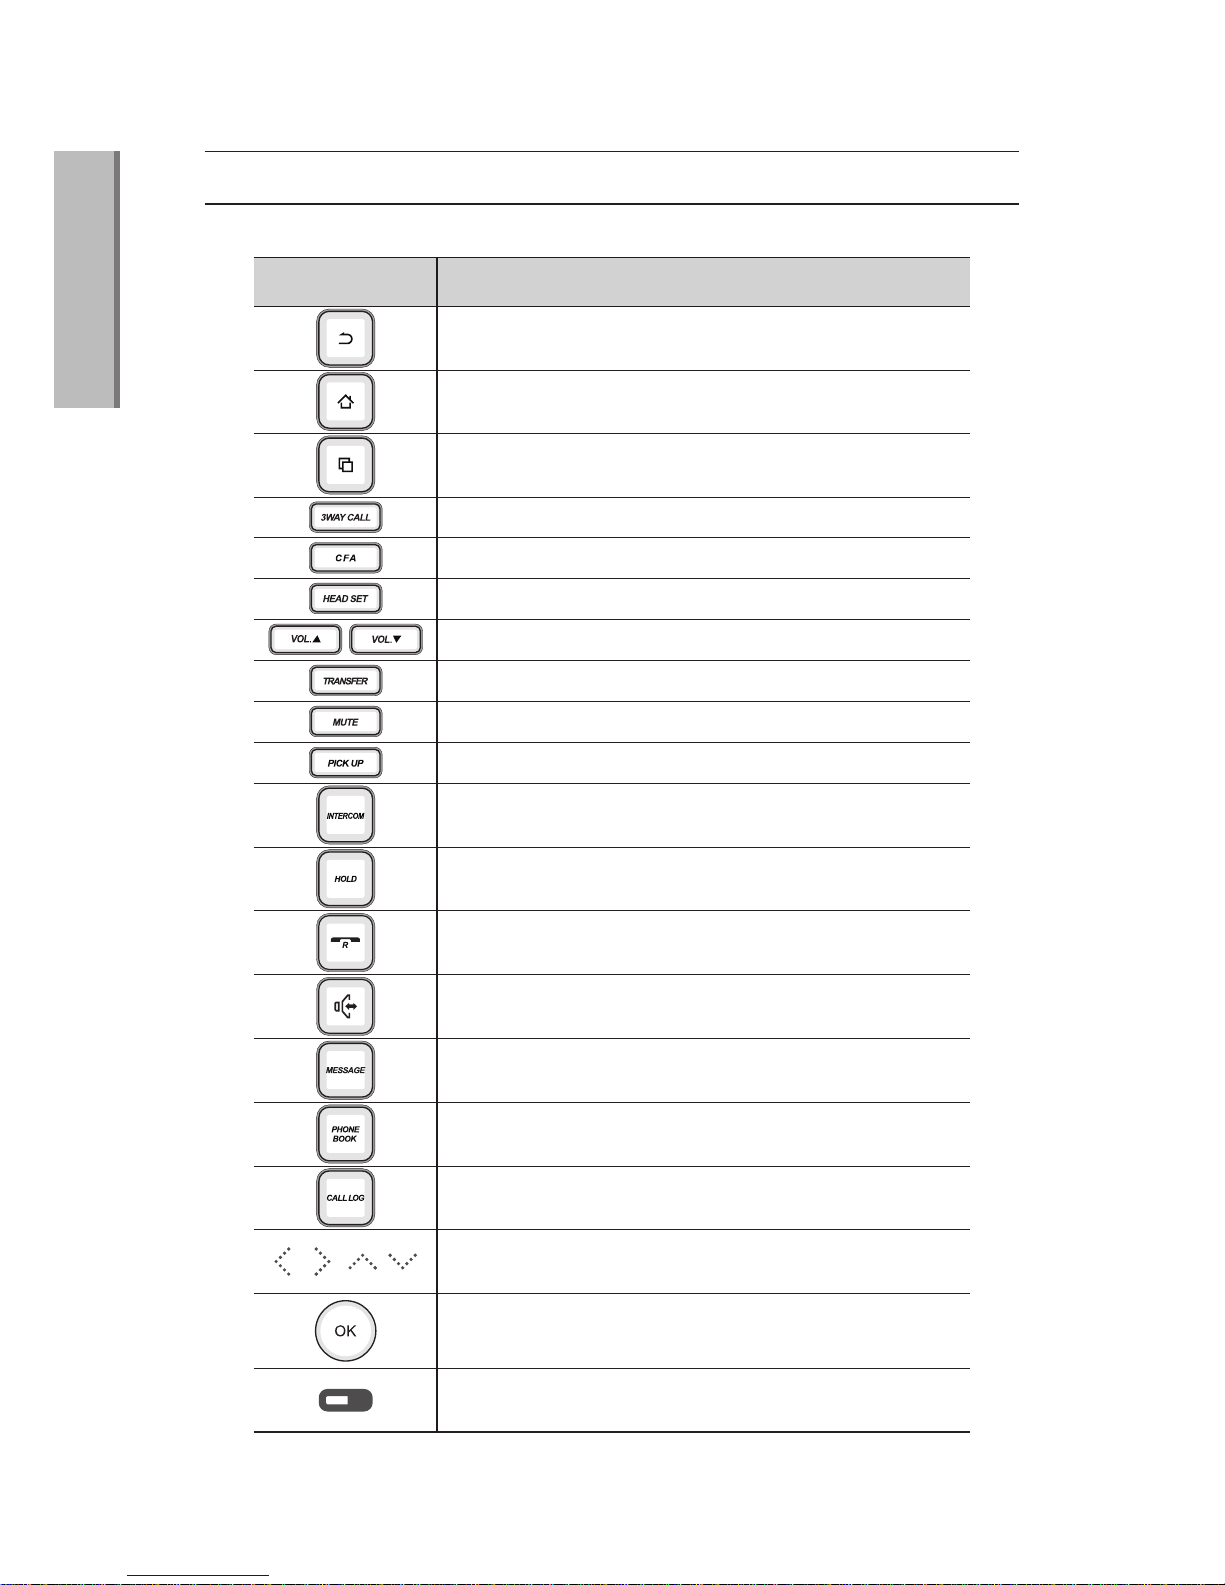
Buttons
Return to previous screen
Move to home screen
Appear Available Option menu on the bottom side
of the screen
Search the phone number or functions gradually
Apply the selected contents
Use Intercom function
Turn to hold mode during call
Call to the latest dialed number
Call to use speaker phone
Start to message menu
Join 3 different people and call together at once
Relocate an existing call to another Phone
Call with headset
Adjust the size of volume
Transfer a phone call to another telephone
Set the silent mode to mute your voice
Allow you to answer another ringing phone in the network
FuntionsButton
Search the phone numbers which is registered at
each button
Check the lists of out coming, Incoming and
missing calls
Phone numbers which is registered at each button and
Call status

11
Beginning
1
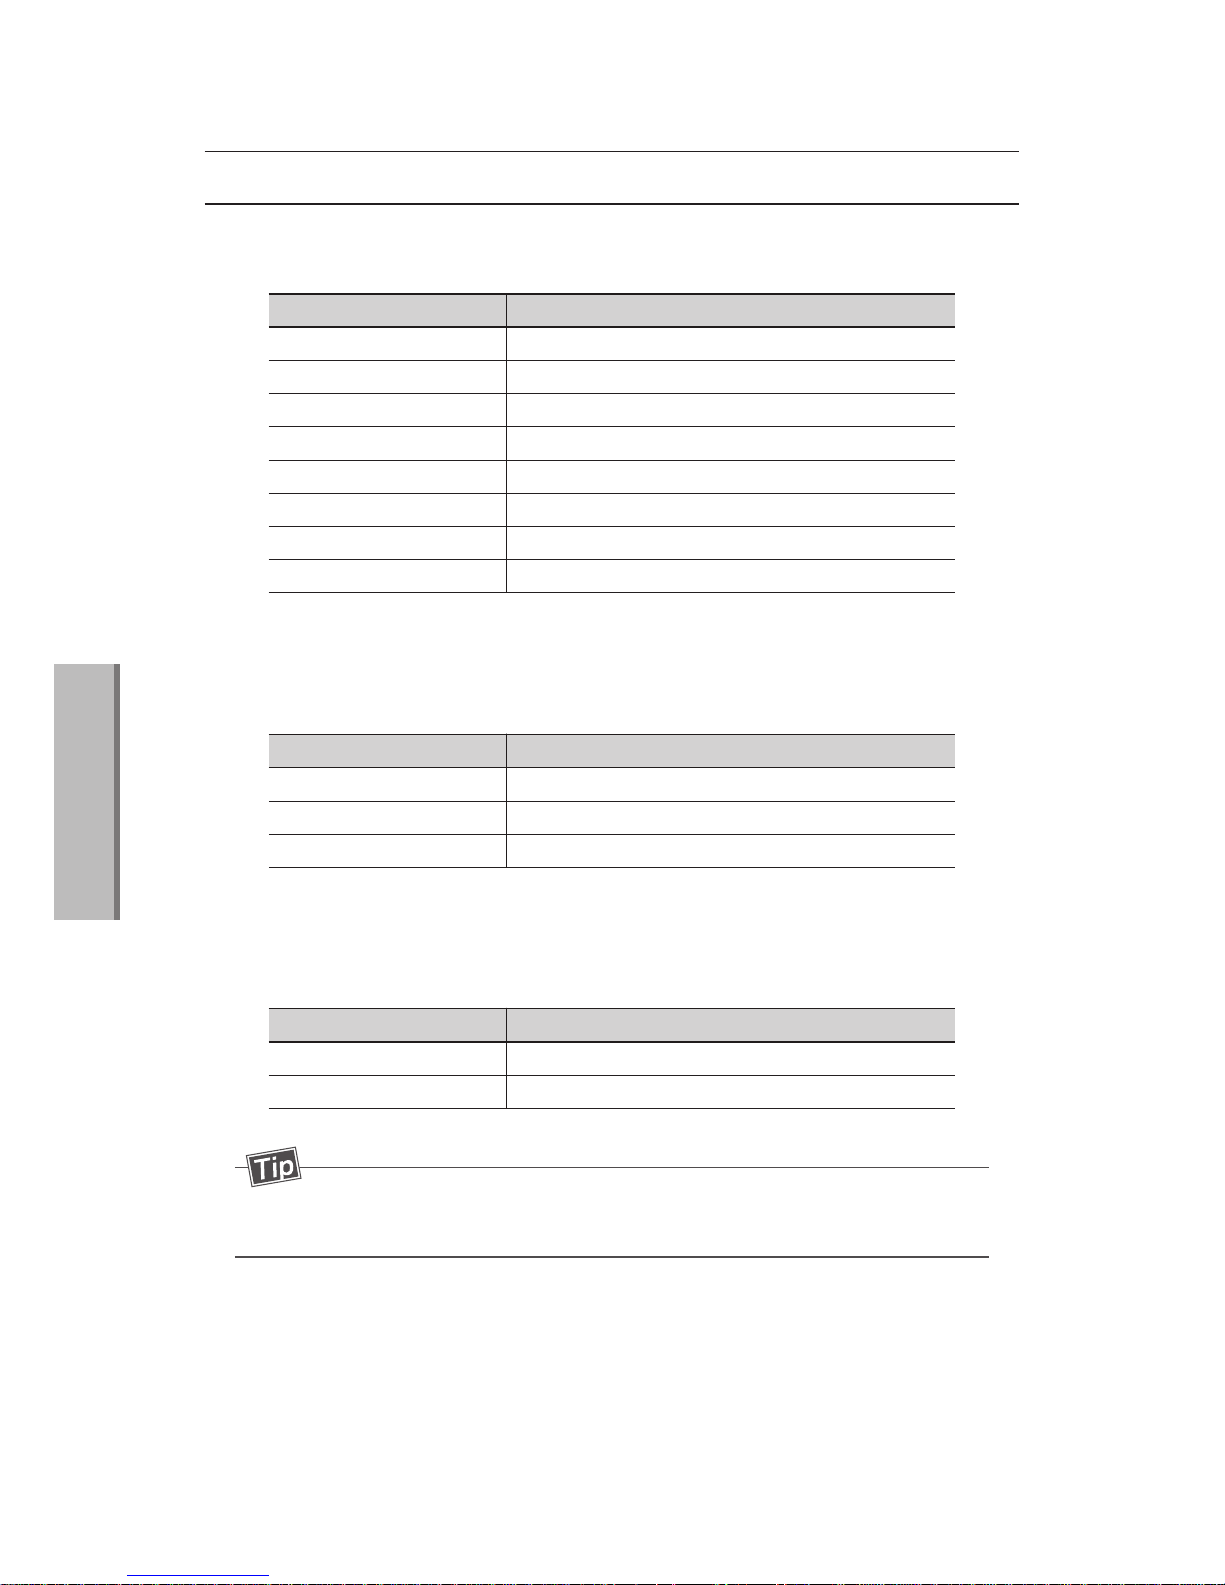
Icons on the status line
Internet connection available
Downloading files
Uploading files
Mute
Alarm set
New e-mail
System warning
Internal memory warning
External memory(SD Card) warning
Seeing more icons
Icon Explanation
· Users can check the condition through the Icons on the status line.
· Drag down the status line to see notification lists.
12
Beginning
1
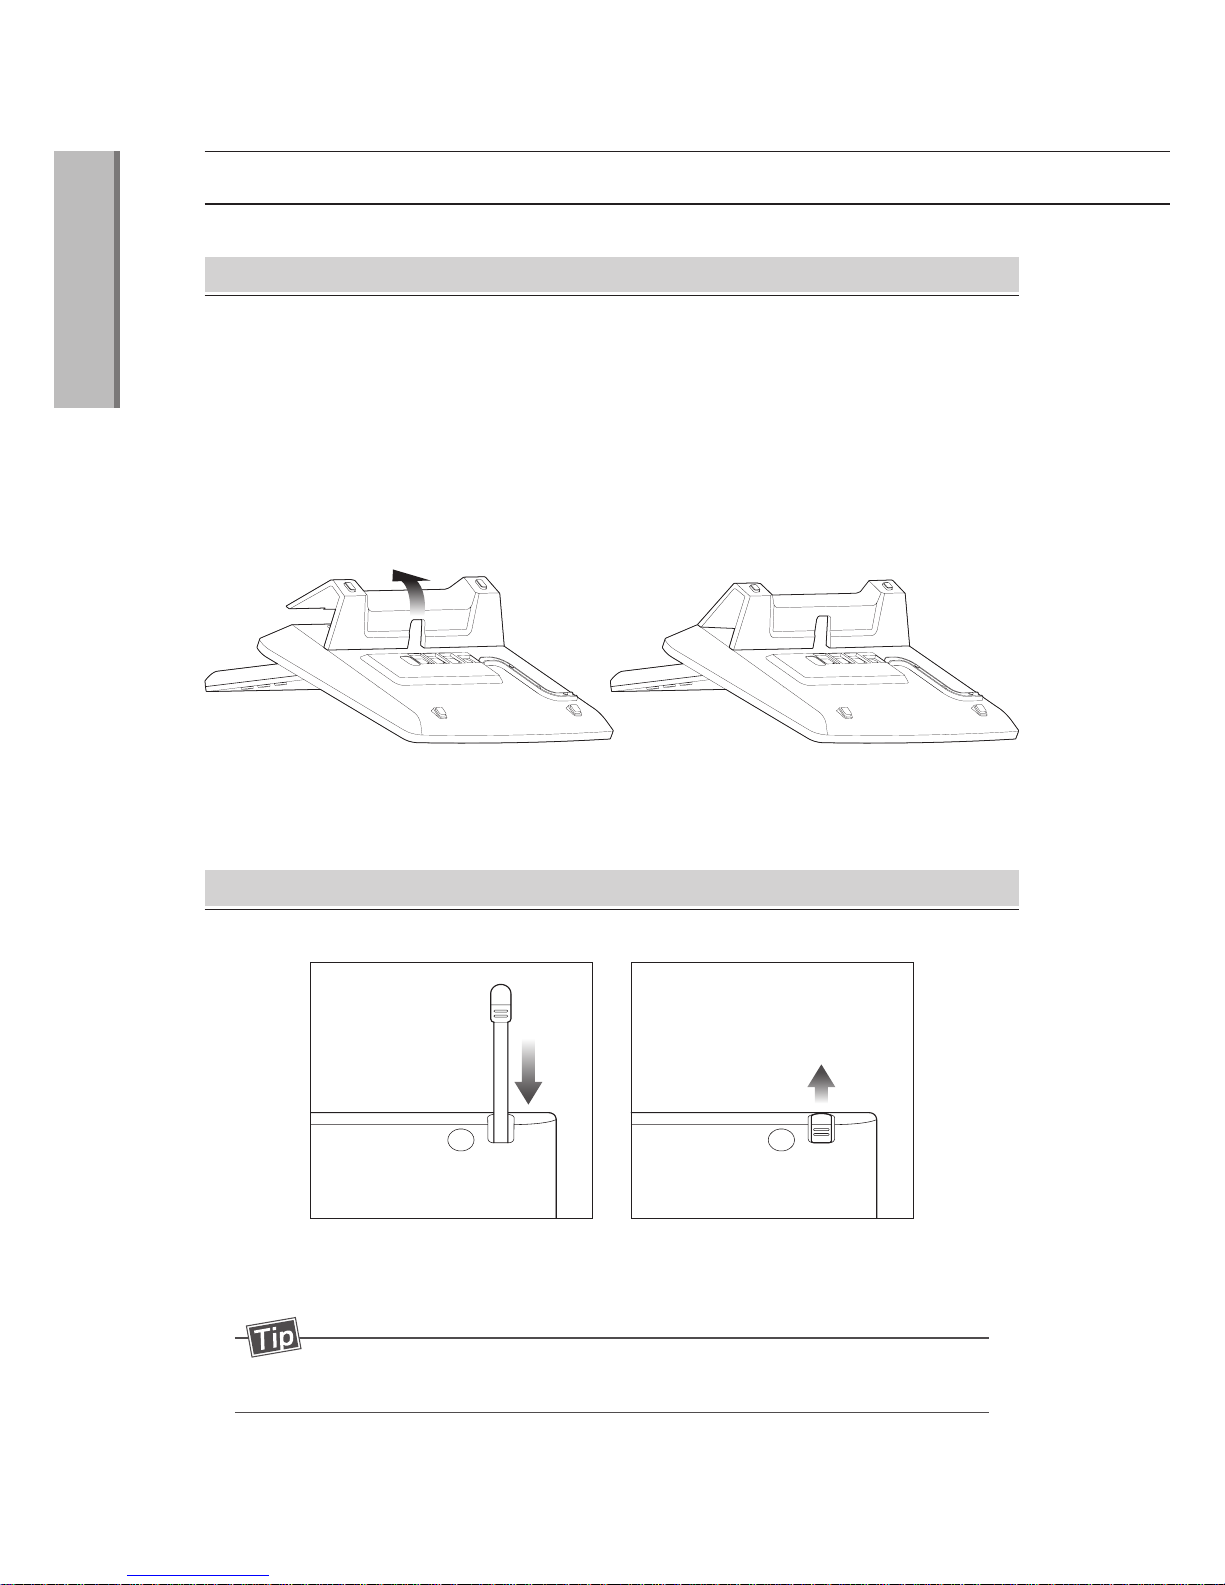
· The bottom of the body where the rest of the hole 4 is assembled by inserting
the Stand protruding portion.
· After inserting the two parts of bottom and pressing top, it will sounds “clicks”
and complete assembly.
· When separating, while press the top and remove the stand.
Installation and Power Connection
Setting Stand
· The enclosed stylus pen should be kept on the back of the screen.
· When Users use, Pulling can be used convenient.
Stylus Pen equipment
- Stylus pen is located on the rear LCD on the left.
13
Beginning
1
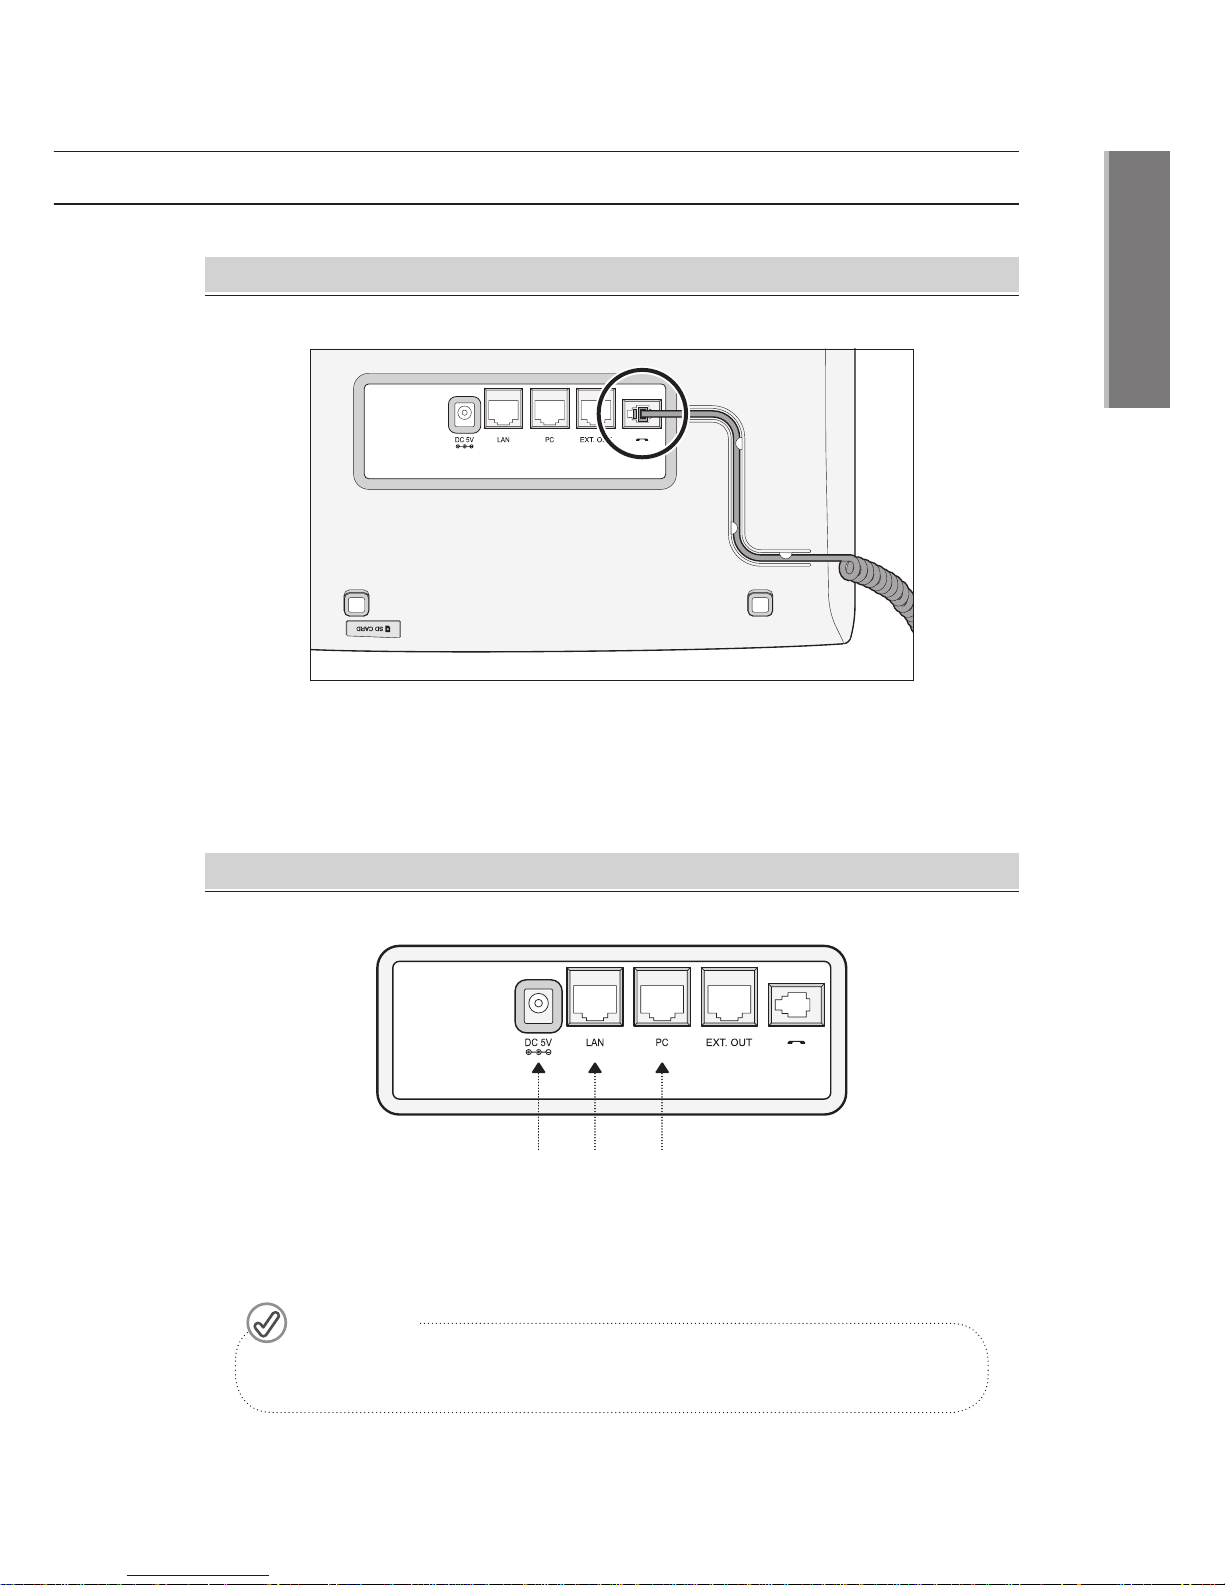
· Insert the enclosed handset connector on the rear of the handset, fastened
the code guide by curl code inserted.
Handset connection
· When user connect the adapter to provide power turned on, and disconnect the
power is turned off.
Power and Cable Connection
- When user turn off the power during the firmware upgrade may
cause a malfunction.
Caution!
Power
adapter
port
PC
connector
port
Lan
connector
port

14
Beginning
1
Installation and Power Connection
Screen angle adjustment
· Press the angle adjustment button on the back of the screen, angle adjustment is
available.
· Screen can be adjusted by 2 step angle, and please adjust the angle while
push the button. Without pressing the button during the adjustment of angle
will be concerned breakage.
1 step
▼
2 step
▼

15
Beginning
1
How to install phone according to
internet using environment
Customers who use Directly connected optic fiber LAN
How to connect optic fiber LAN to router
①
Connect internet line of optic fiber LAN to LAN port.
②
Connect computer line to PC port.
③
Connect power adaptor.
①
Connect internet line of WAN port of router to optic fiber LAN.
②
Connect LAN port of router to LAN port of phone.
③
Connect computer line to PC port.
④
Connect power adaptor.
LAN ① Internet line
PC ② Computer line
DC 5V ③ Power
L AN ② Internet line
wire/wireless router
PC ③ Computer line
① optic fiber LAN
(internet) line
DC 5V ④ Power

16
Beginning
1
Customers who use router with ADSL, VDSL, or cable modem
①
Connect WAN port and LAN port of modem.
②
Connect LAN port of phone and router.
③
Connect computer line to PC port.
④
Connect power adaptor.
※PPPoE setting is needed when ADSL is used.
Customers who use ADSL, VDSL or Cable modem
①
Connect internet line to LAN Port of modem and Phone.
②
Connect computer line to PC Port.
③
Connect Power adaptor.
※
PPPoE setting is needed when ADSL is used.
L AN ① Internet Line
ADSL, VDSL,
Cable modem
PC ② Computer Line
Internet Line
DC 5V ③ Power
ADSL, VDSL, Cable modem
L AN ② Internet Line
PC ③ Computer Line
① Optic fiber LAN
(internet) line
DC 5V ④ Power
wire/wireless router
How to install phone according to
internet using environment

17
Beginning
1
How to access web pages
Check IP Address
· Home → → Ethernet configuration → Ethernet Information → IP Address
Access web pages identified by IP address
· Enter http://IP address:8000 In the address bar on your internet browser.
Enter ID : user, Password :0000 and Login
· Enter ID : user, Password : 0000 and Login
Settings
- If you use a private IP, Telephone and computer must be on the
same network band for access.
For example, If your Computer IP is 192.168.10.2 and
Telephone IP must be 192.168.10.XX.

18
· MIP2000 User’s Manual
Beginning
1
Connecting Headset
Insert/Remove SD card
Plug in the headset to the headset jack on the left side of the device.
①
Check the SD card slot on
the bottom of device.
(SD Card is located on right
side of bottom)
②
Lightly press to insert SD card
like the picture below.
③
To remove the SD card, press
the inserted SD card again.
- Inserting upside-down SD card by force is the cause of
failures in the device.
- Please do not remove SD card while the device is running.
It may cause losing data or failures in the device.
- If SD card does not work, try formatting it.
- In case of formatting the SD card, FAT system format is
recommended.
- SD card is not included in the package, It must be purchased
separately.
- SD card can support up to 32GB.
19
MIP2000 User’s Manual ·
Beginning
1
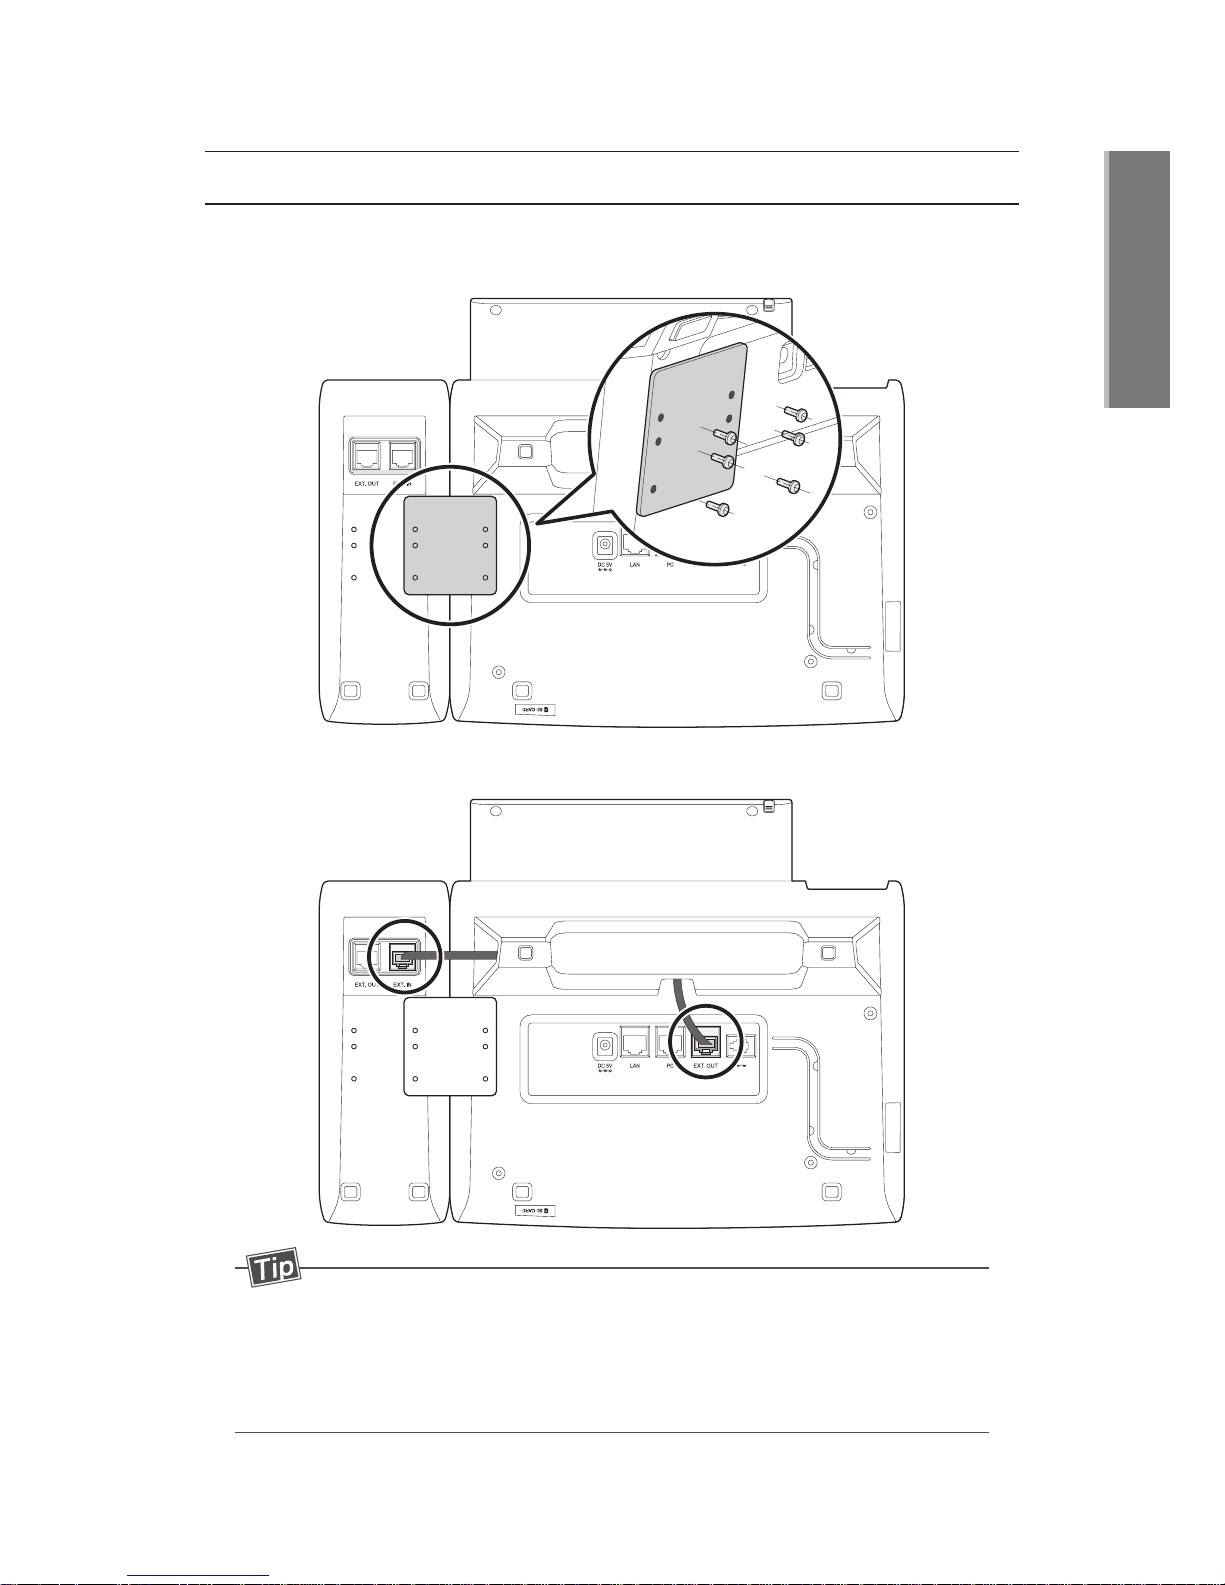
How to Connect Extension
- Extension is not included in the package, It must be purchased
separately.
- Extension can be extended to the shortcuts and how to connect
rest Extension also same as above order.
(Recommended only a two and Button numbers are 80.)
①
Screws on the back of the device connect to the Extension module and
the body.
②
Extension Module port connects to body EXT OUT.

20
Beginning
1
Using the Stylus Pen
MIP2000 is operated by pressing detect touch screen of impact sensing.
Users can use the Stylus pen to run or select the menu.
Use the stylus as follows.
Press
· Tap the menu or icon to run the program.
Long press
· Press an item for a while and drag it.
You can rearrange and delete the item.

21
Beginning
1
Using the Stylus Pen
Entering Text
With a keyboard, English, letters and symbols can be entered.
/
ABC/123 Shift mode to English or number
Keep the mode
For English, switch input mode from lowercase to
uppercase.
For number, switch input mode from number to symbol
No. Item Explanation
- Press an hold the button or double tap to shift to mode.
- Press and hold text to appear menu for correcting the text.
You can cut, copy or paste the text.
If Users use the sharp objects as nails besides the provided pen,
device may occurs scratch, behavior errors and faults.
Press down firmly on the screen, or if got to excessive shock may
cause damage to the sensor.
Caution!
1
1
2
2

Beginning
1

Beginning
1
- Call Function
- BLF Function
- Extension Function
- Using Home
- Executing/Exiting Functions
Basic Functions
2
MIP2000 User’s Manual

24
Basic Functions
2
Call Function
Phone screen
· Press the telephone number on the screen to use the call.
· Home →
Phone
Enter Number
Press the dial buttons or number of screen
Clear the entered
number
Select
(Entered Number will be erased, If press long)
Call log
Contacts
Favorites
[Call log] select
[Contacts] select
[Favorites] select
Item Explanation
25
Basic Functions
2
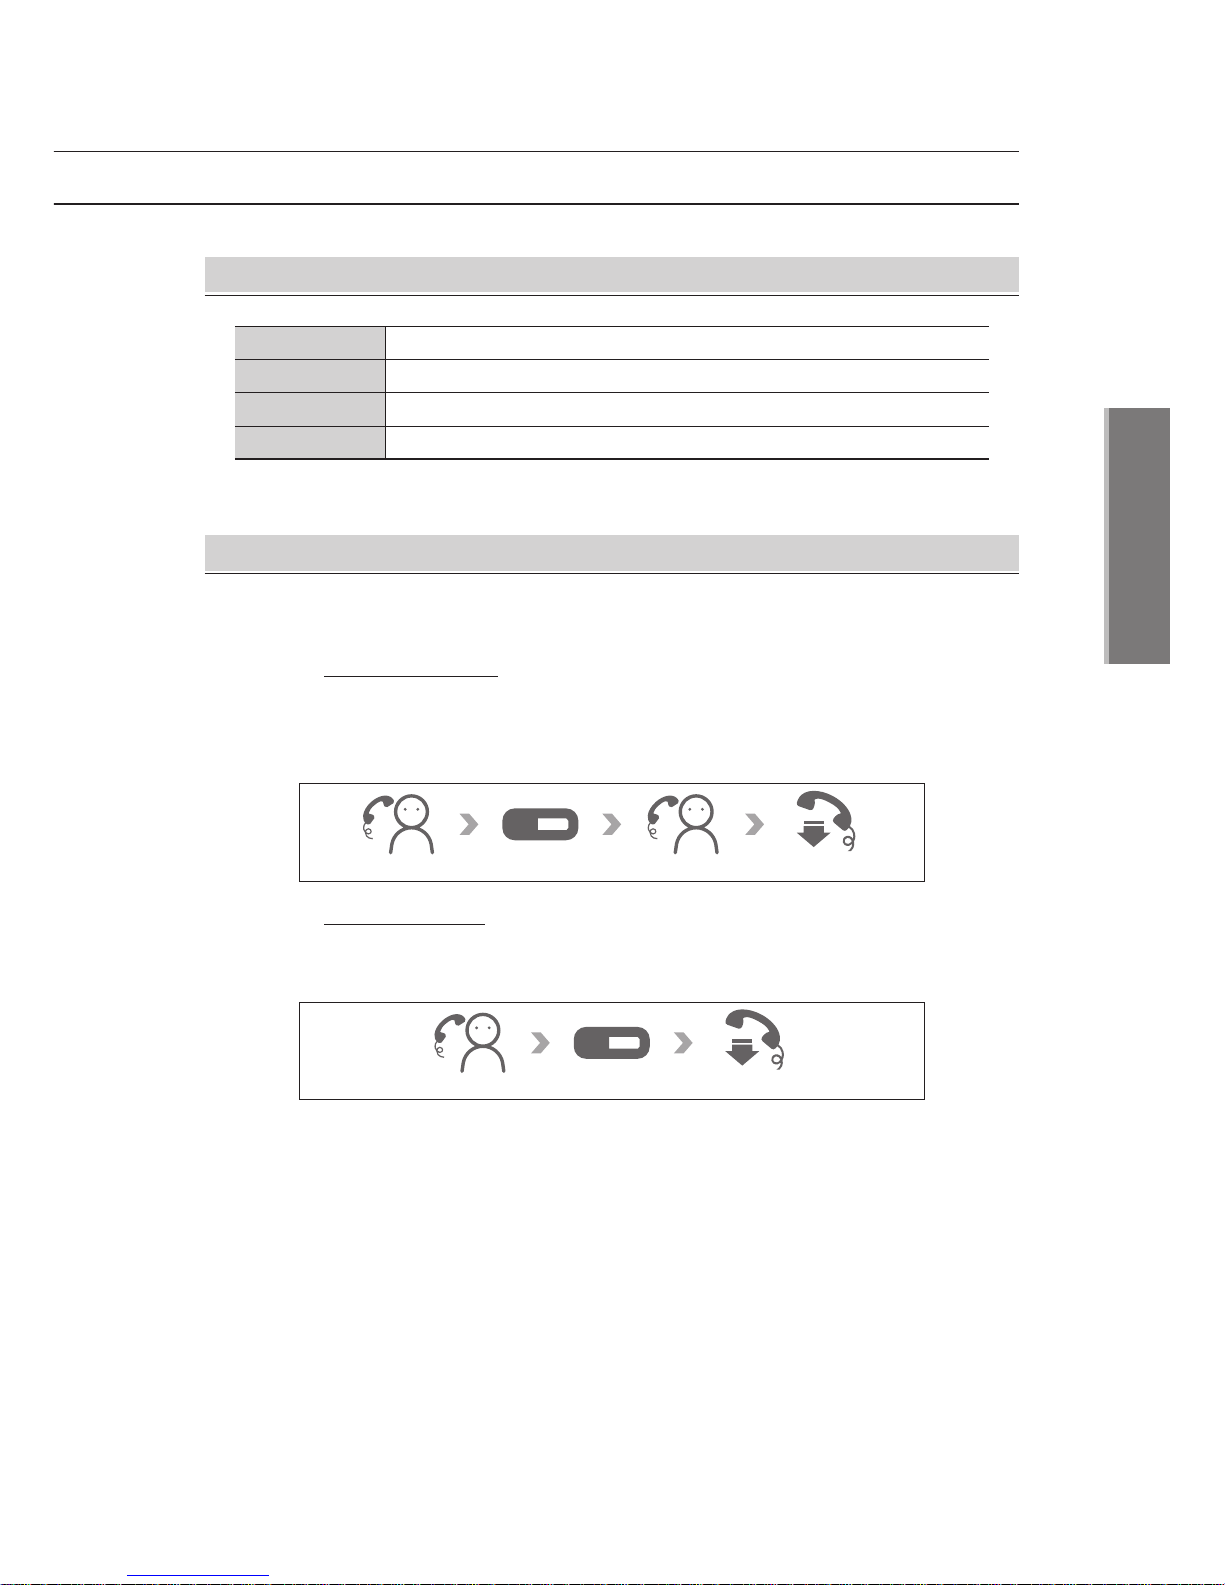
- Press [Hold] button while you call and press another phone numbers.
Press [Hold] button again to return to your previous call.
Make another call during an ongoing call
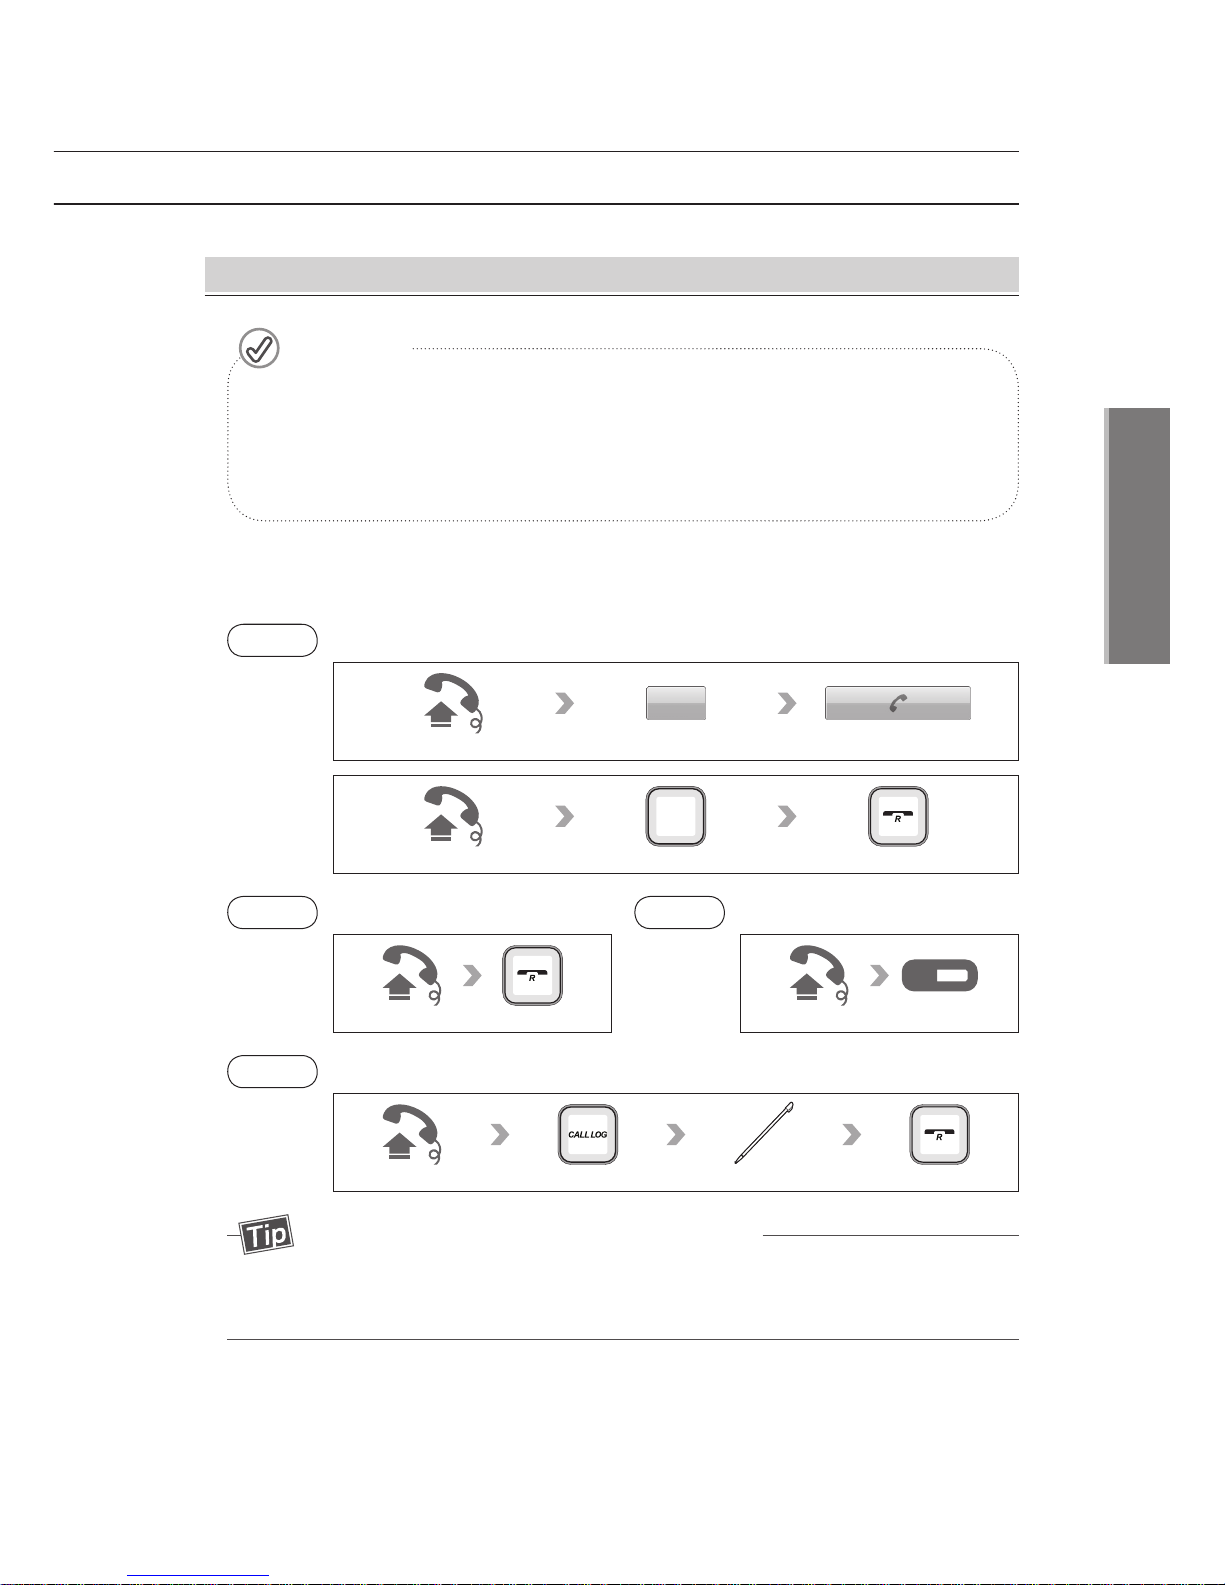
1
. Call through Handset
Make a call
Way 1
Calls by entering the phone number
Way 2
Calls by Recent dialing
Pick up the receiver
Way 3
Calls by Speed dial
Pick up the receiver
Way 4
Calls by call log
BLF Button
Pick up the receiver Select the item
Pick up the receiver Enter phone number
- Phone screen will appear when you pick up the phone or press the
speaker phone button.
Input the numbers and outgoing call is available only when screen
appears, If screen does not appear, outgoing call is unavailable even
input the number.
Caution!
Pick up the receiver Enter numbers on LCD Call button on LCD
26
Basic Functions
2
· You can call through speakerphone as pressing phone numbers and Redial button
or [ ] buttons.
(While using speaker phone to call, sound can be cut off.)
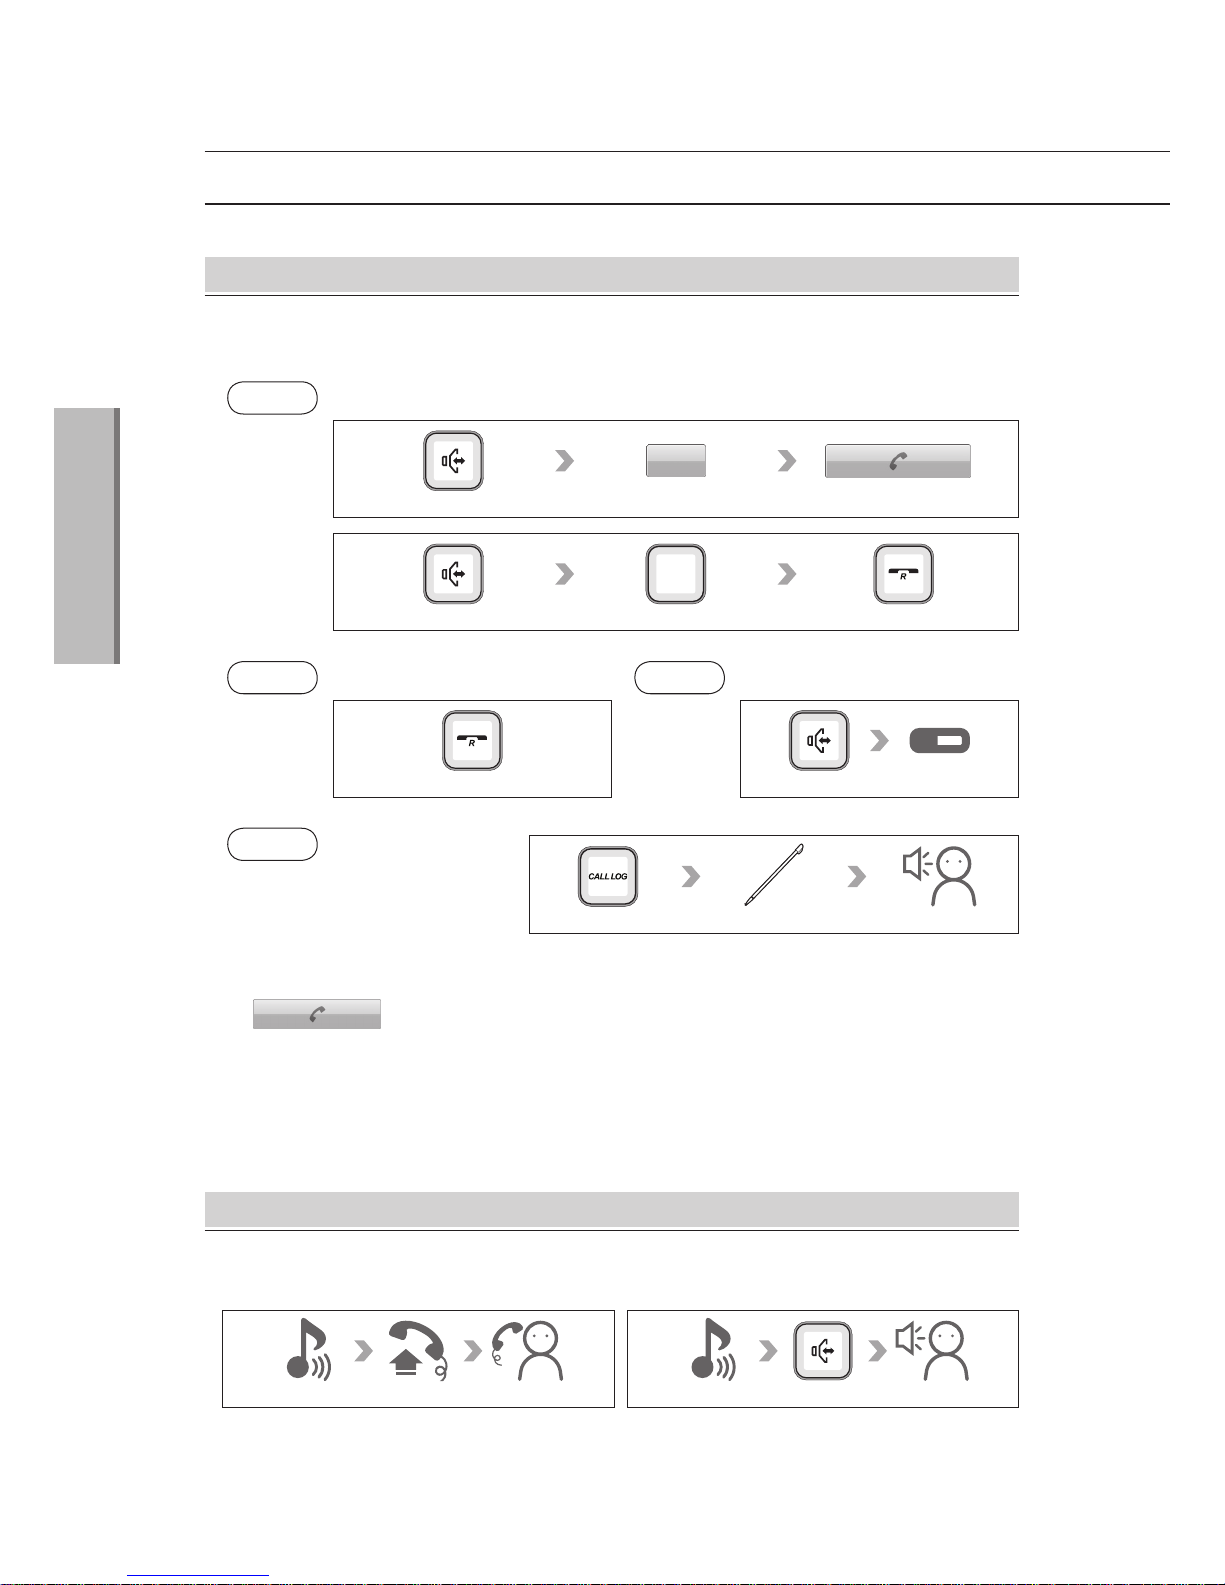
2
. Call through speaker phone.
Call through speaker phone.
Way 2
Calls by Recent dialing
Redial button
Way 3
Calls by Speed dial
BLF Button
Way 4
Calls by call log
Speaker phone call
Speaker phone button
Call Function
Answer a Call
2
. Call through speakerphone
1
. Call through handset
Phone ringing Speakerphone callhandset callPick up the receiverPhone ringing
Way 1
Call by Entering Phone number
Speaker phone button Enter numbers to call
Select the item
Speaker phone button Enter numbers on LCD Call button on LCD

27
Basic Functions
2
Conference Call
Method
1
. Make another call during an ongoing call
Allow you to join 2 different people and call together at once through
‘Make another call during an ongoing call’ and ‘Hold during call’.
Call Log
Press the [Call Log] button. You can check the lists of outgoing, incoming
and missing calls.
Select the item
Answer another call during an ongoing call
In this case, hold during call function has to be set.
After set the function, press [Answer] button again to return to your
previous call.
another incoming callDuring call answer the other call
During call
Make another call
Enter phone number to call
Method
2
. Answer another call during an ongoing call
another incoming callDuring call answer the another call

28
Basic Functions
2
Call Function
Pick Up
The function allows you to answer another ringing phone in the network.
To check ‘Pickup code’, you need to contact the manager.
Transfer
Method
1
. Transfer after call
You can call the other person inform about the call which you will transfer.
Method
2
. Transfer directly Transfer call to another person directly
Allow you to transfer a call to another telephone in group.
During call -Enter numbers to transfer
Enter numbers to transferDuring call
Phone book
Frequently used number can be registered to the phone book. For more
information regarding setting up is regarded to Contacts. (40 pages)
29
Basic Functions
2
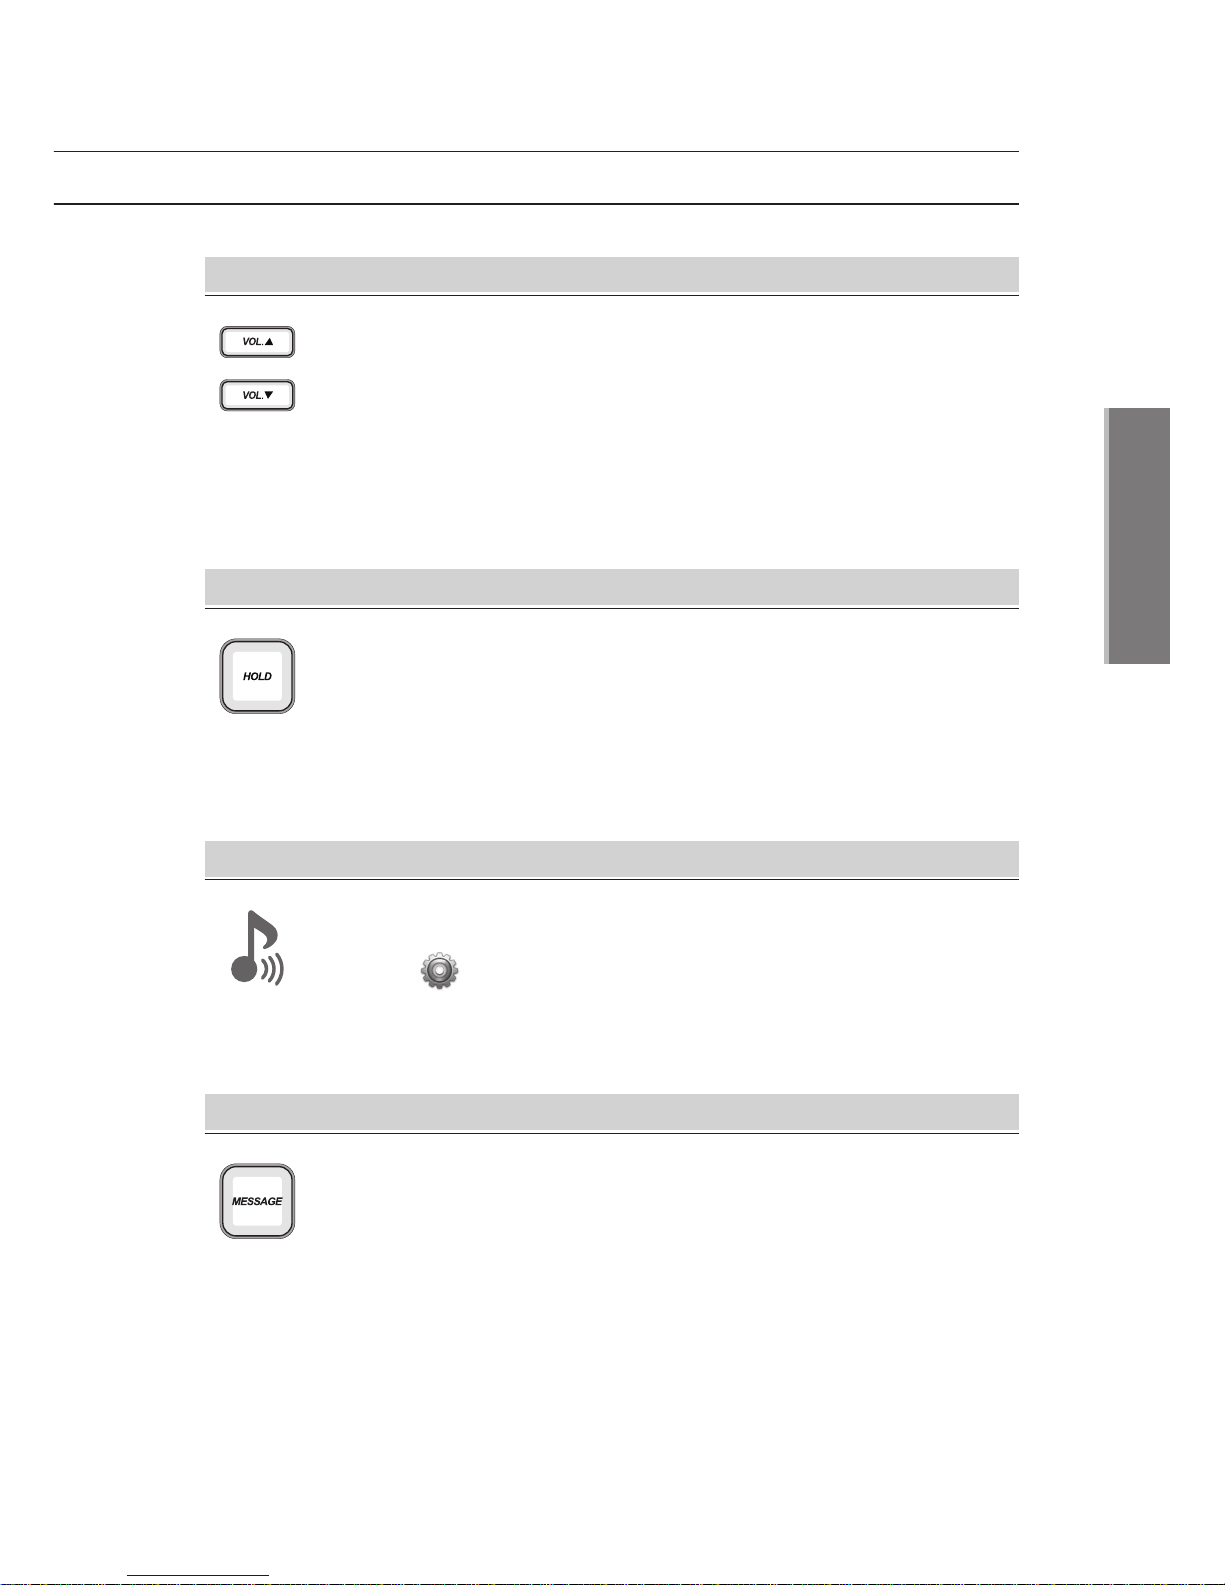
Adjust volume
· Adjust call volume : Put down the receiver and press volume(▲/▼)
buttons to adjust ringtone volume.
· Adjust ringtone volume : Pick up the receiver and press volume(▲/▼)
buttons to adjust.
· Adjust speaker volume : Press speaker phone and press volume(▲/▼ )
buttons to adjust.
Allow you to found and change ringtones easily.
· Home → → Sound → Phone ringtone
Settings
Ring type
Hold
You can hold incoming call if you cannot answer the call.
Message
You can send or receive short text message.
Please contact to service manager to use the service.
30
Basic Functions
2
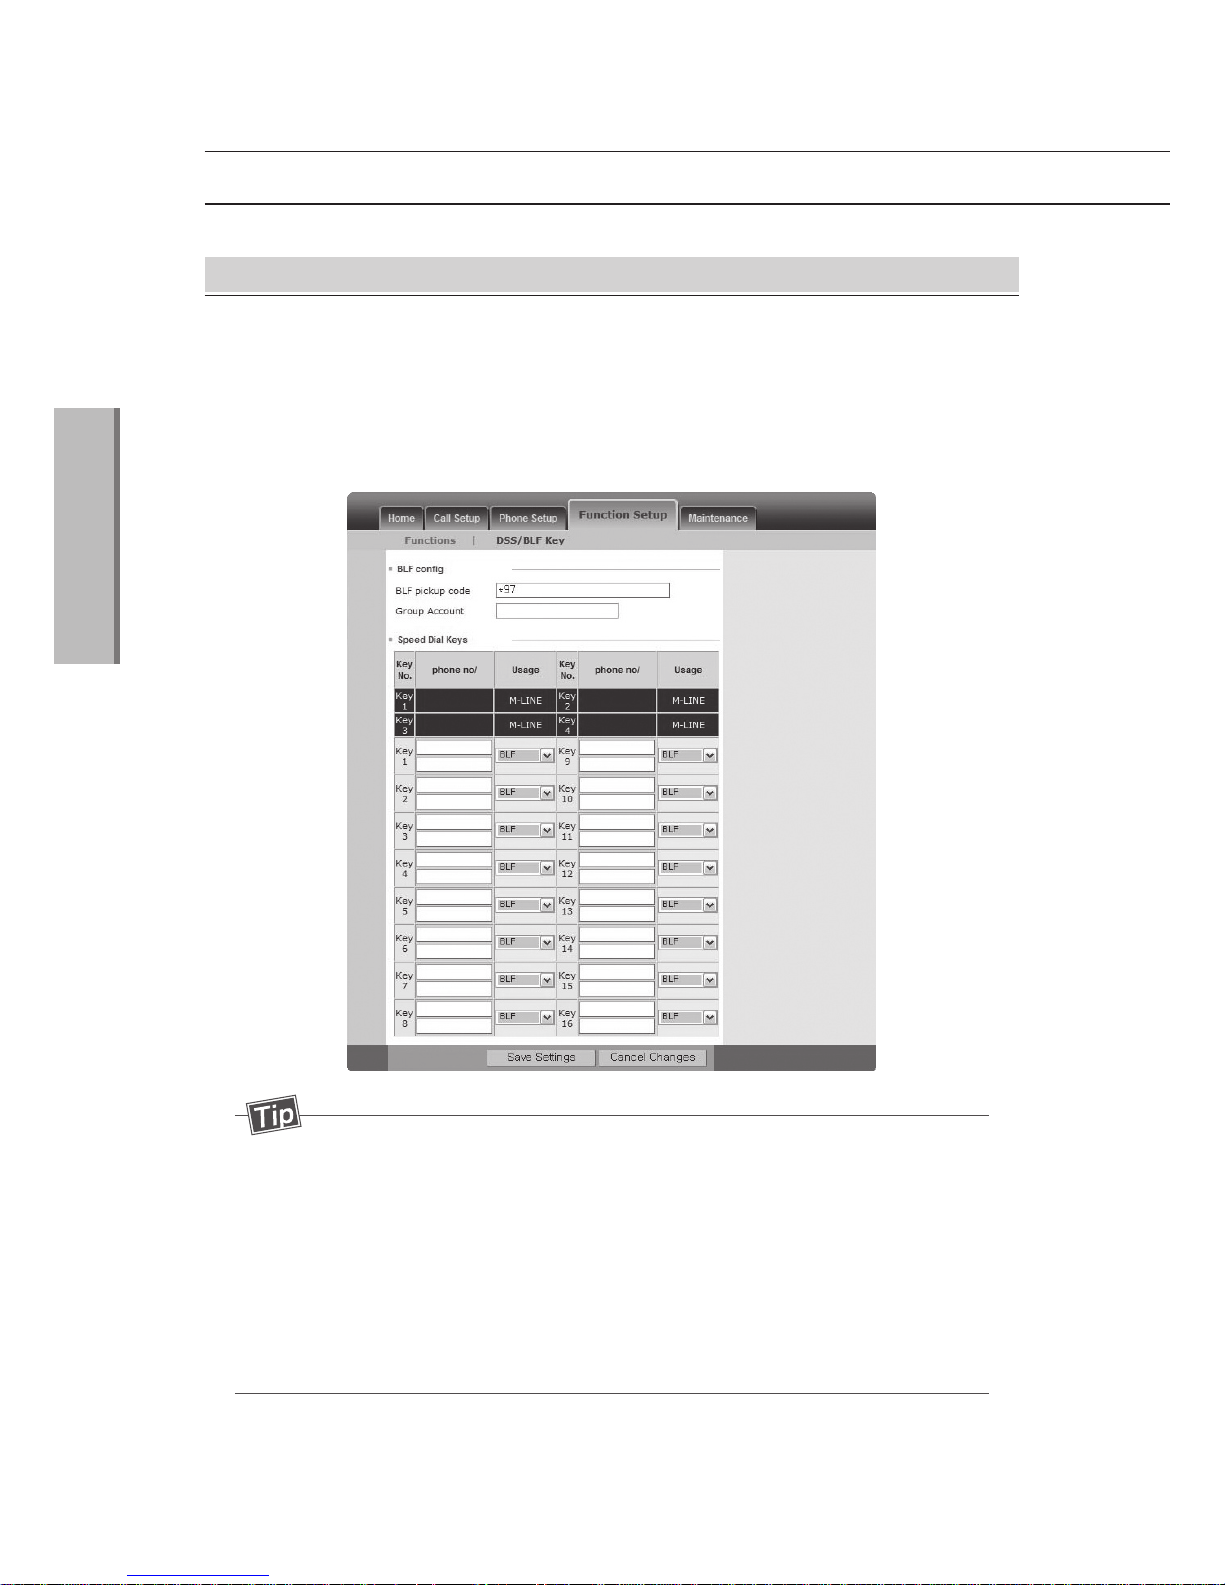
Setting BLF(Busy Lamp Field) Keys
BLF Function
① Access to the managing website.(Refer to page 17)
② Select Function Setup → DSS/BLF Key
③ Input the phone number for a BLF Key. And then change the usage to BLF.
④ Click the save button to save the settings.
(Click the cancel button, Information that you have entered will not be saved.
- BLF is available starting with number 5.
- Number 1 button is on the left top side of 20buttons on the right side
of the product and the order continues in a downward direction.
- Click the save button after clear or modify the stored number on that
page and then delete or modify function is possible.
- You can save the two numbers per one button. Press shortly the
button call first column number and Press longer the button call to
second column number.
31
Basic Functions
2
BLF Lamp status
Lamp status
Turn on
Turn off
Twinkling
Explanation
Registered number is busy status.
Registered number is not busy status.
Status of incoming call From Registered number
Using BLF button
Using1. Transfer
Using
2
. Pick up
①
Transfer after call
Press the BLF Button which registered number of transfer button
during a call. After hearing the dial tone and opponent receive the call,
Ask whether receive the call or not and replace the receiver.
② Transfer directly
Press the BLF Button which registered number of transfer button during
a call If you hear a dial tone immediately, replace the receiver.
Button lamp flashes when income the call from registered number on BLF.
Press the button to pick up the phone while holding a receiver.
During call New callBLF Button
During call BLF Button

32
Basic Functions
2
How to set Extension BLF
Extension Function
①
Access to the managing website.
②
Select Function Setup → DSS/BLF Key.
③
Select the second page you can save the number on the connected
extension BLF Number.
④
After Input the phone number for a BLF Key, change the usage to BLF
and then click save button to save the settings.
- Number 1 button is left side on the top of the Extension module,
and the order continues in a downward direction.
- Extension module is same as BLF function of P30.

33
Basic Functions
2
Home Screen Layout
Using Home
Site of present screen
Entire program
Short cut
Status line
Indicating present slide on the screen.
Showing the entire programs list.
Register display frequently used items.
Containing icons which show warning thing.
Alarm or status of Wi-Fi.
ItemNo. Explanation
4
4
1
1
2
2
3
3

34
Basic Functions
2
Using Home
Display submenu to add shortcut icon,
widget and folder on home screen.
Change home screen background pictures.
Search saved files, Programs or web pages.
Open or close the notification lists on the top of the screen.
Move to setting menu.
Wall paper
Search
Notifications
Settings
Add Folder
Name Explanation
Option Menu
· On the Home screen, Press the Menu button and option menu appears.
- You can add short icons, widgets or folders and change wallpaper
as long press the empty space on the home screen.

35
Basic Functions
2
Notice
· Drag down the status line to see notification lists.
- You can erase notification lists to tap delete button.

36
Basic Functions
2
Executing/Exiting Functions
Executing from home screen
· User can easily add frequent use items on the home screen for more convenience
use.
Deleting short Icons and folder
①
Long press a shortcut icon or widget you want to delete.
②
While you press it, drag the icon to trash can and take off your fingers.
Then the Icon will be deleted.
Adding folder
①
Use [Home→Menu→Add folder] menu or long press the empty space on the
home screen.
②
Select folder and choose program.
③
Icon of selected program will be displayed on the home screen.
- If there is no vacancy on the home screen, folder cannot be added.
37
Basic Functions
2
Executing from option menu
①
Tap [Menu] and option menu will be shown.
②
Select item on the option menu and the function will be executed.
Executing recent used programs
· Press and hold home key, and the function list will be shown by the order it used.
Execute program as selecting item.
- [More] will be shown if other option menus are hidden.
You can tap [More] and see hidden option items.
38
Basic Functions
2
Executing/Exiting Functions
Exiting Function
Through [Running Function] menu, you can close unused running programs,
Due to trait of Android OS, programs can be invisible on the screen
while it is running.
· Select [Home > > Application > Running Services].
· Select item you want to finish from the list.
· Tap [Stop] button to end the functions.
Settings
If you stop periodical executing programs like e-mail, you may not
get new e-mail arrival messages.
Caution!

- Address Book
- Gallery
- Internet
- Email
- Music
Applications
3
MIP2000 User’s Manual

40
Applications
3
Address Book
Executing
Executing from option menu
· Home → or
· Tap [Menu] and option menu will be shown.
· Select item on the option menu and the function will be executed.
Contacts

41
Applications
3
Search the saved address.
Add the new contact.
Displays telephone contacts.
Setting Account or synchronization.
Search
New contact
Display option
Account
Import/ Export
SD card to import your contacts, or Export for the internal,
SD Card.
Menu name Explanation
Add to Address
①
Press the Menu and select the new contact.
②
Press the Complete after enter the item.
42
Applications
3
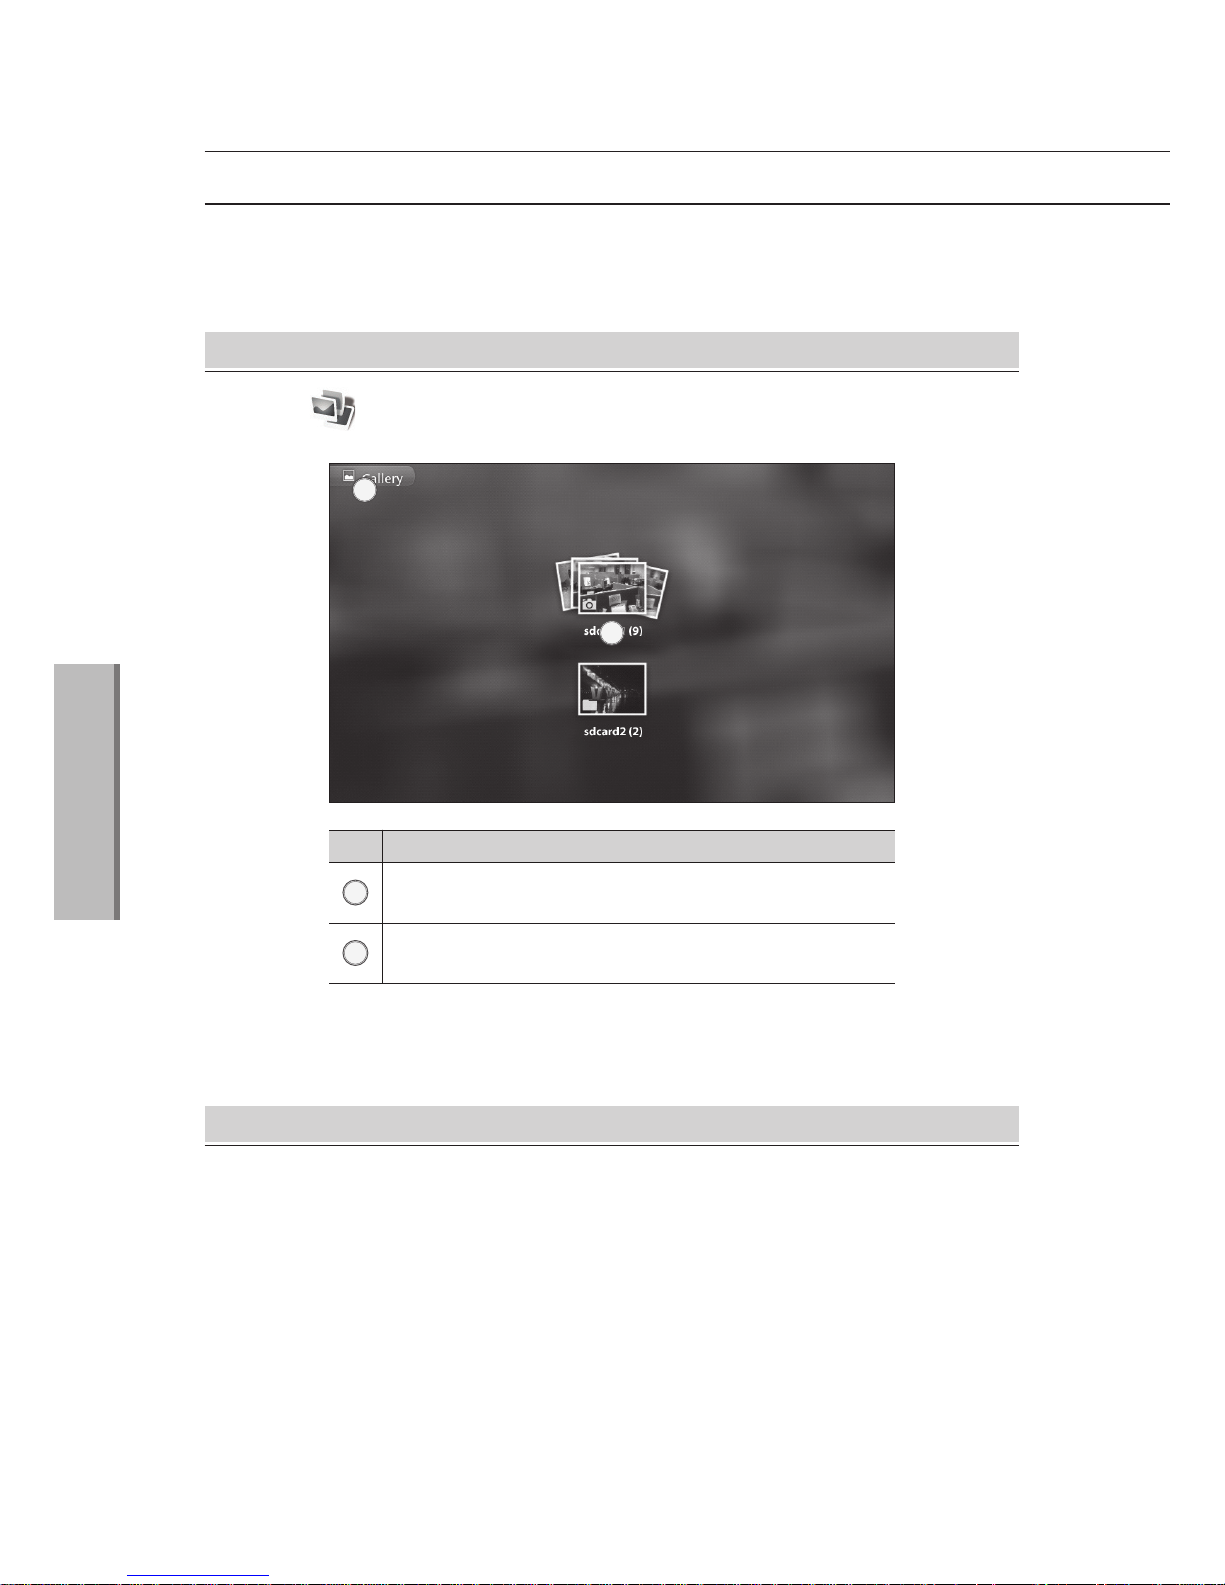
Gallery
Executing
· Home →
Viewing photos and Videos
①
Tap a folder where you saved photos or videos.
②
A list of photos or videos will be shown.
③
Tap the photos or video to see it in full screen.
· View and manage photos and videos which are saved at internal or external
memory.
Gallery
List of folders where your pictures or videos are
saved.
Present location. Tap to move to the chosen site.
ExplanationNo.
1
2
1
2

43
Applications
3
Managing photos and videos
①
Press and hold a folders or photo or video on the list and menu will be appeared.
②
Tap all items you want to change and tap [Function] to apply the function.
Editings photo
· With various functions, you can rotate or edit or cut photos.
· How to edit : All→ Choose photo →Menu→ Edit
- You can also see the menu as double tapping a folder or a photo
or a video on the list.
- For photo, tap [Additional work] and you can select it as wallpaper
or cut or rotate it.
Only [Detail] menu is available for folders and videos.
- Scroll side to side to check files in the folder.
- Following video file formats are supported : MP4
- Edited file will be saved as a new file.
- You can also add the widget on the home screen.
Please refer to page 20 for details.

44
Applications
3
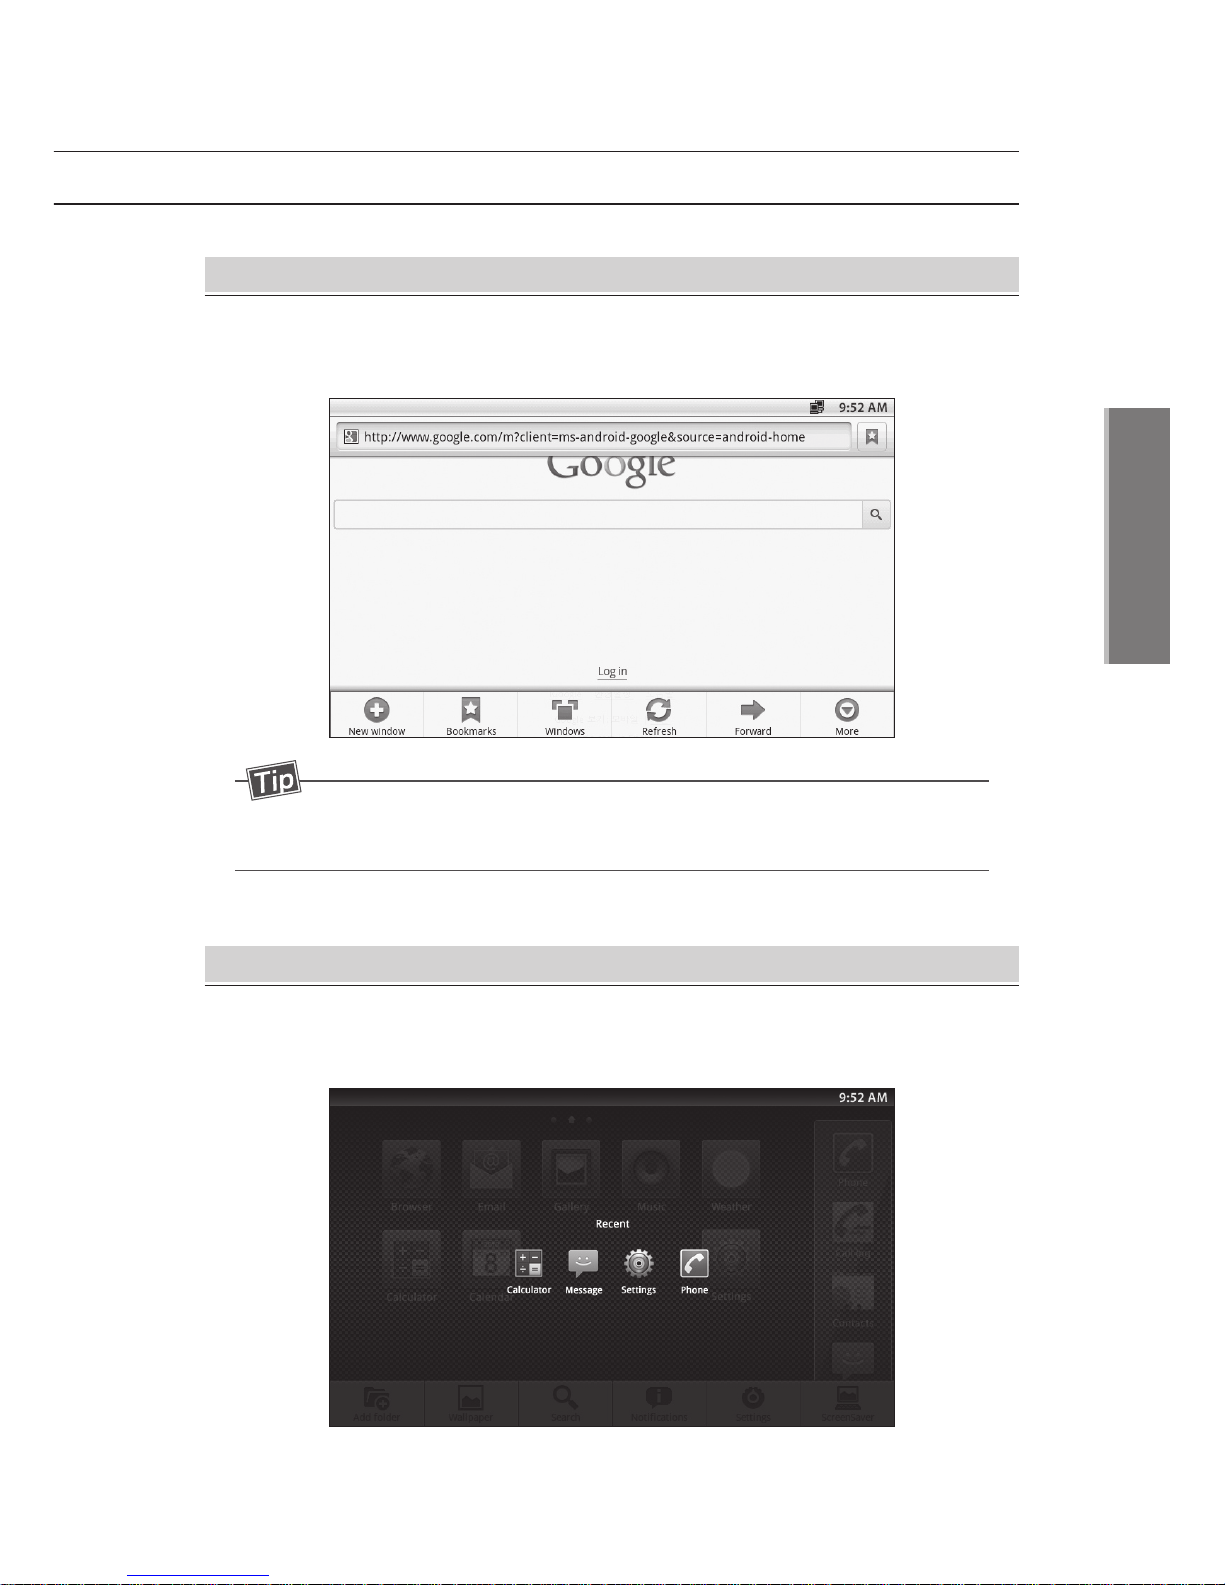
Opening webpages
· Home →
· Let you surf the web and view webpages and create bookmarks.
- Downloaded file via internet will be saved at [download] folder.
- Internet must be connected to see web site.
Browser
Move to the list of history, bookmarks and
frequent visiting site.
Mark address of present web.
Type the address you want to open
No. Explanation
1
2
1 2
Internet

45
Applications
3
· Page content settings
Set font size on webpages.
Zoom in or out webpages.
Set full-Screen mode of new popup.
Set encoding language and format.
Set to block popup windows.
Set to load or unload images.
Set the webpages to fit the screen.
Keep landscape orientation.
Set to run Java Script.
Set plug-in.
Set to open new window.
Set home page.
Text size
Default zoom
Open page in Overview
Text encoding
Block pop-up windows
Load images
Auto-fit pages
Landscape-only display
Enable Java Script
Enable plug-ins
Open in background
Set home page
ExplanationNo.
Internet Setting
· Menu → More → Settings
46
Applications
3
Internet
· Privacy settings
Delete cache memories.
Delete histories of visiting webpages.
Allow to save or road cookies.
Delete all cookie data.
Save data format.
Delete data format.
Check location information.
Delete all location information.
Clear cache
Clear history
Accept cookies
Clear all cookie data
Remember form data
Clear form data
Enable location
Clear location access
ExplanationNo.
· Advanced setting
Set advanced setting to each websites.
Reset the settings.
Website settings
Reset to default
ExplanationNo.
Saved all of passwords.
Delete all of ids and passwords.
Show security warning message.
Remember passwords
Clear passwords
Show security warnings
· Security settings
ExplanationNo.
- Files downloaded via internet will be saved at SD card/download
folder.
47
Applications
3
Email
Registering e-mail account
Sending E-mail
①
Enter your account information and tap [Next].
②
Tap your account type (POP3, IMAP, Exchange).
③
Enter receiving server configuration information and tap [Next].
④
Enter sending server configuration information and tap [Next].
⑤
Set account options and tap [Next].
⑥
Enter user’s name and tap [Confirm].
①
Tap [Menu > Sending message].
②
Type a name or email address. Title and message, and tap [Send].
Register your e-mail account and sent and receive e-mail.
Executing
· Home →
Email
- Ask type of the account to a manager of the e-mail service.
- Internet must to be connected to register e-mail account and
receive and see e-mails.
- E-mail server will be automatically checked when you enter
receiving and sending server configuration information.
- Tap [Menu> Add Cc/Bcc] If you want to copy or blind copy the
message to others.
- The message will be saved in the [Drafts mailbox] if you move to
other page while you type the message.

48
Applications
3
Email
Setting several e-mail accounts
Deleting E-mail account
Adding E-mail account
· Selecting account menu will appear if more than one e-mail is registered.
· You can check all of the mails or select one account which you want to check.
①
Tap [Menu > Account]
②
Press and hold the account you want to delete from the list and select
[Delete account].
③
Tap [OK] button on delete account confirmation message and the account will
be deleted.
①
Tap [Menu>Account]
②
Tap [Menu>Add Account] in the list.
③
Type your E-mail address and password, and tap [Next].
④
Select account type (POP3,IMAP,Exchange)/
⑤
Enter receiving server configuration information and tap [Next].
⑥
Enter sending server configuration information and tap [Next].
⑦
After setting up your account option, tap [Next]
⑧
Enter user’s name and tap [Confirm] to move the message box and recent
message are received automatically.
49
Applications
3
Accounting setting menu
· General settings
Enter or edit account name to identify the account.
Sender’s name attached on the mail.
Register or edit sign on the mail.
Account name
Name
Sign
Turn automatic e-mail checking services on/off
and set time interval.
Checking frequency
Set default account when you send an E-mail.
Default account
· Notification Setting
Set the incoming mail notification.
Select the sound for the notification.
E-mail alerts
Ringtones
· Server setting
Edit receiving server information.
Edit sending server information.
Receiving
Sending
- Internet must be connected to see Web-site.

50
· MIP2000 User’s Manual
Applications
3
· Tab Explanation
Play audio contents with the music player.
List of artist sorted by name is displayed with sub-lists of each
artists’ album.
List of albums sorted by name is displayed.
List of titles sorted by name is displayed.
List of recently add and lists created by user are displayed.
Album
Songs
Playlists
Now playing is only accessible during playing and going to the
player screen.
Now playing
Artist
Menu name Explanation
Executing
· Home →
Music
Music

51
MIP2000 User’s Manual ·
Applications
3
· Playing option icons
Playing music
①
Select songs you want to play via [artist, album, music, playlists] tabs.
②
Selected songs will play and every song will be added on ‘now playing list’.
Now paying list
Shuffle off
Shuffle on
Setting party shuffle
Repeat off
Repeat on
Repeat a current playing song
Icon Function

52
· MIP2000 User’s Manual
Applications
3
Executing option menu
· Press the menu button to set the functions.
- Press ▲/▼ button to adjust the media volume during playing music.
- Only MP3 files are supported.
- Music continues playing even the screen moves to home screen
during playing music.
- Tap [Pause] to stop music playing.
Music
Display a list.
Party shuffle on, off.
Add the Now playing list.
Delete songs.
Library
Party shuffle
Add to playlist
Delete
Menu Explanation

- Ethernet configuration
- Sound
- Display
- Applications
- Privacy
- SD card & storage
- Language & keyboard
- Date & time
- Call settings
- Phone Management
- About phone
Settings
4
MIP2000 User’s Manual

54
· MIP2000 User’s Manual
Settings
4
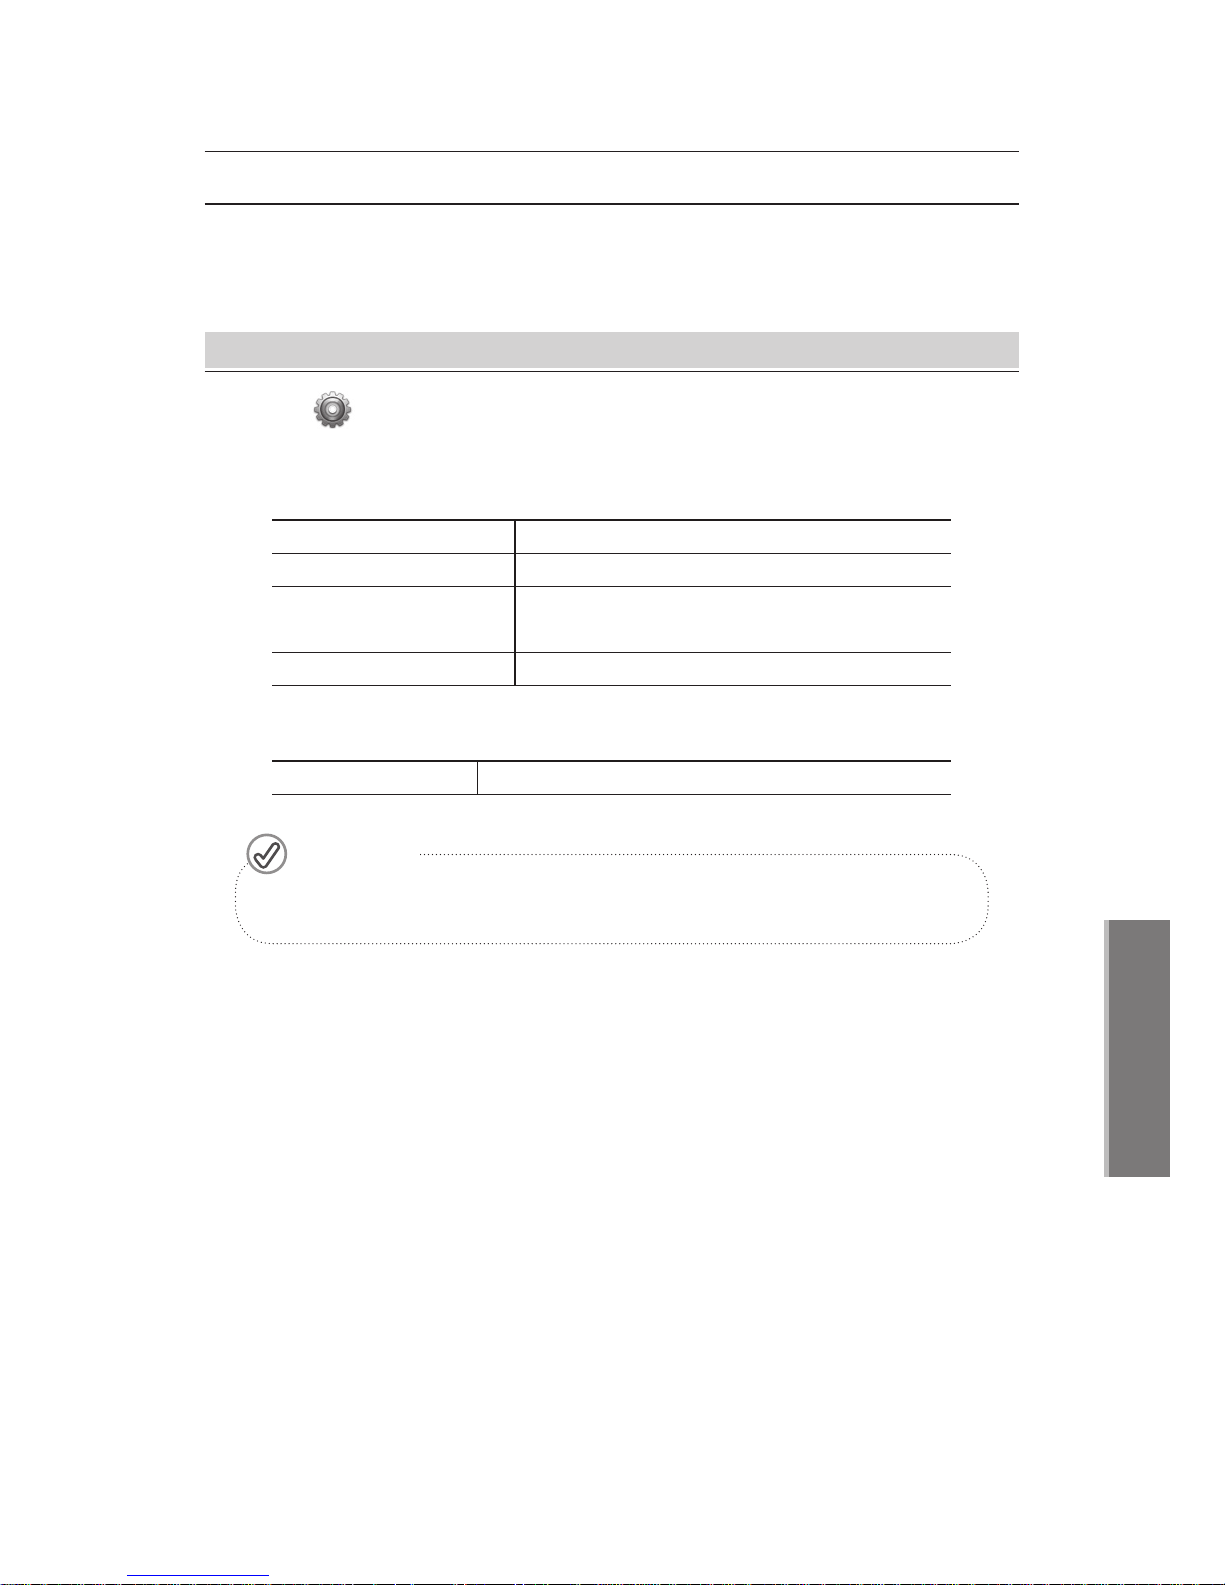
· You can change the Ethernet network device-related settings.
Ethernet configuration
· Ethernet network setting
Ethernet network on/off.
Set the Static/Dynamic IP.
Check the Ethernet setting.
Ethernet
Ethernet configuration
Ethernet Info
Setting
· Home → → Ethernet configuration
Settings
· Set volume and type of ringtones.
Sound
· Sound settings
Set the Silent mode.
Set the Ringtones and Media volume.
Set the incoming basic ringtone.
Silent mode
Volume
Phone ringtone
Setting
· Home → → Sound
Settings

55
MIP2000 User’s Manual ·
Settings
4
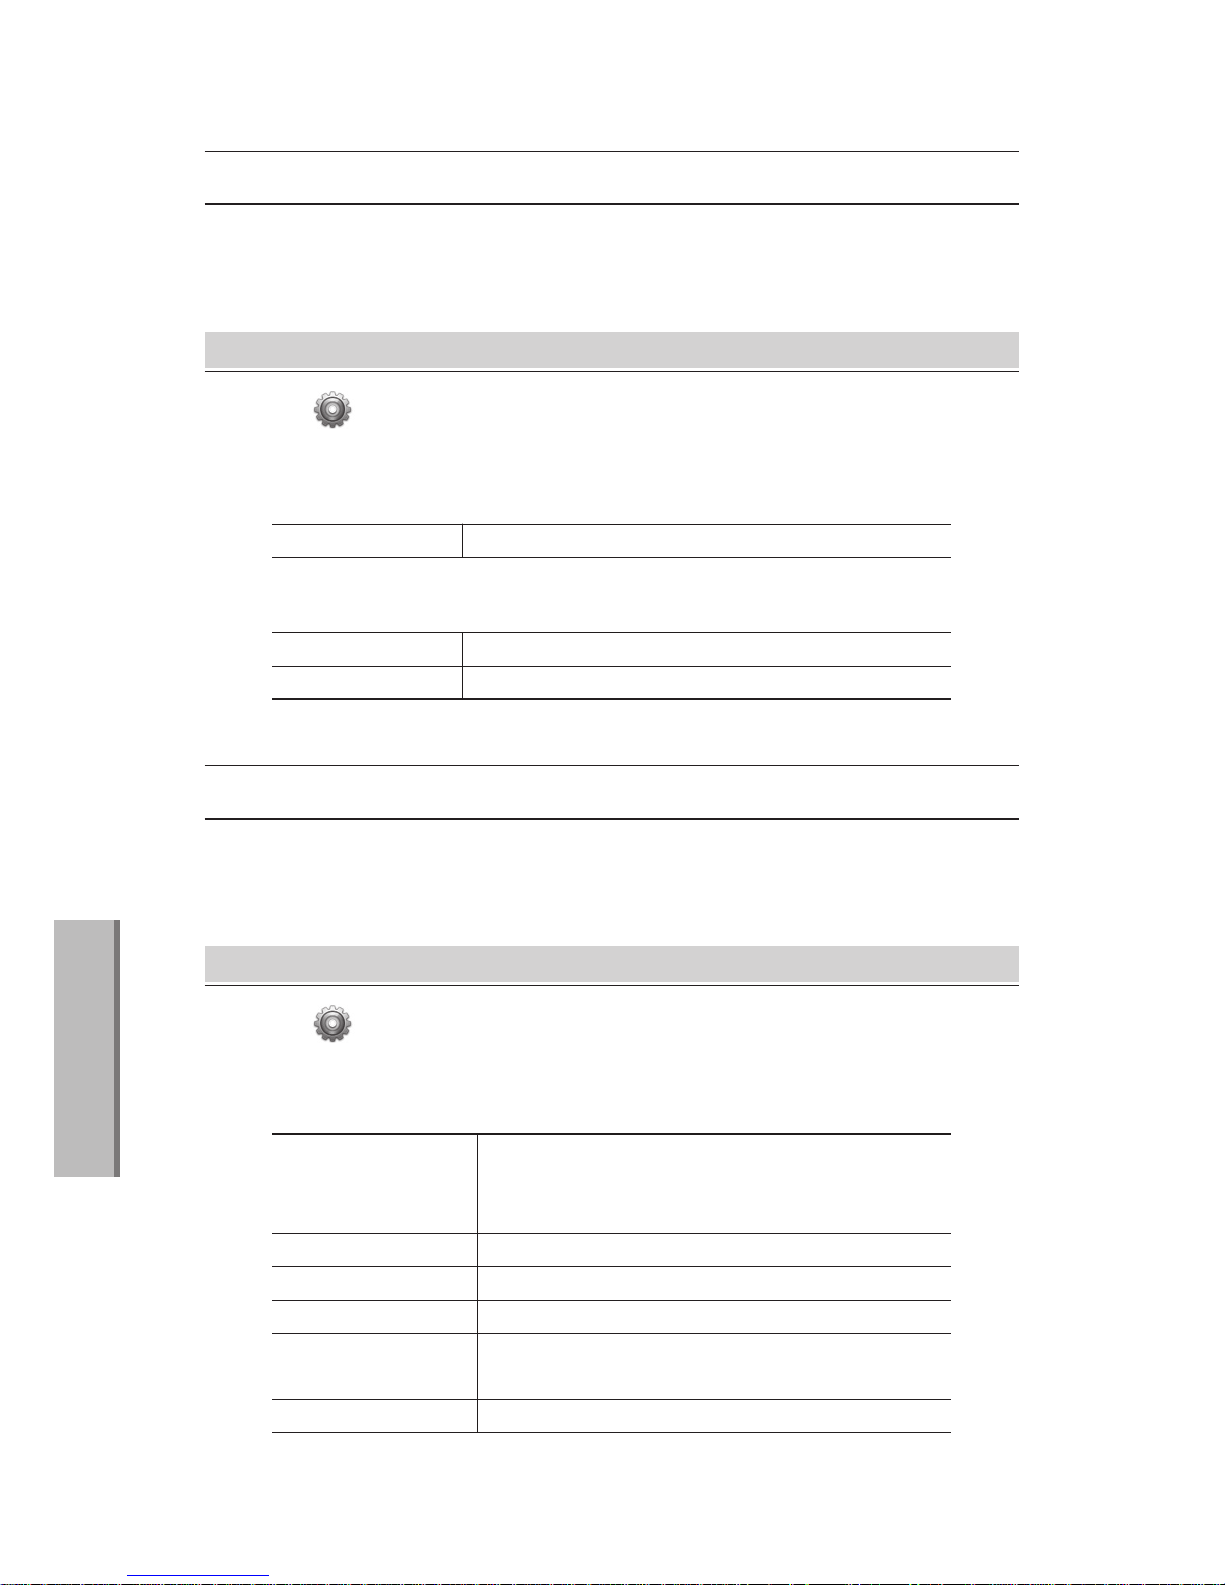
· Display setting
Set screen brightness.
Set the animation level during transition.
Set automatic backlight turning off time.
Brightness
Animation
Screensaver Setting
· Set screen bright and animation.
Display
Setting
· Home → → Display
Settings
· Application settings
· Manage applications and running services.
Applications
Allow to install non-market applications.
Unknown sources
Manage running services.
Running services
Manage and remove installed applications.
Manage
applications
Setting
· Home → → Applications
Settings
- Manufacturer is not responsible for personal information leakage
or data loss caused by installing and running unknown origin
applications.
Caution!
56
· MIP2000 User’s Manual
Settings
4
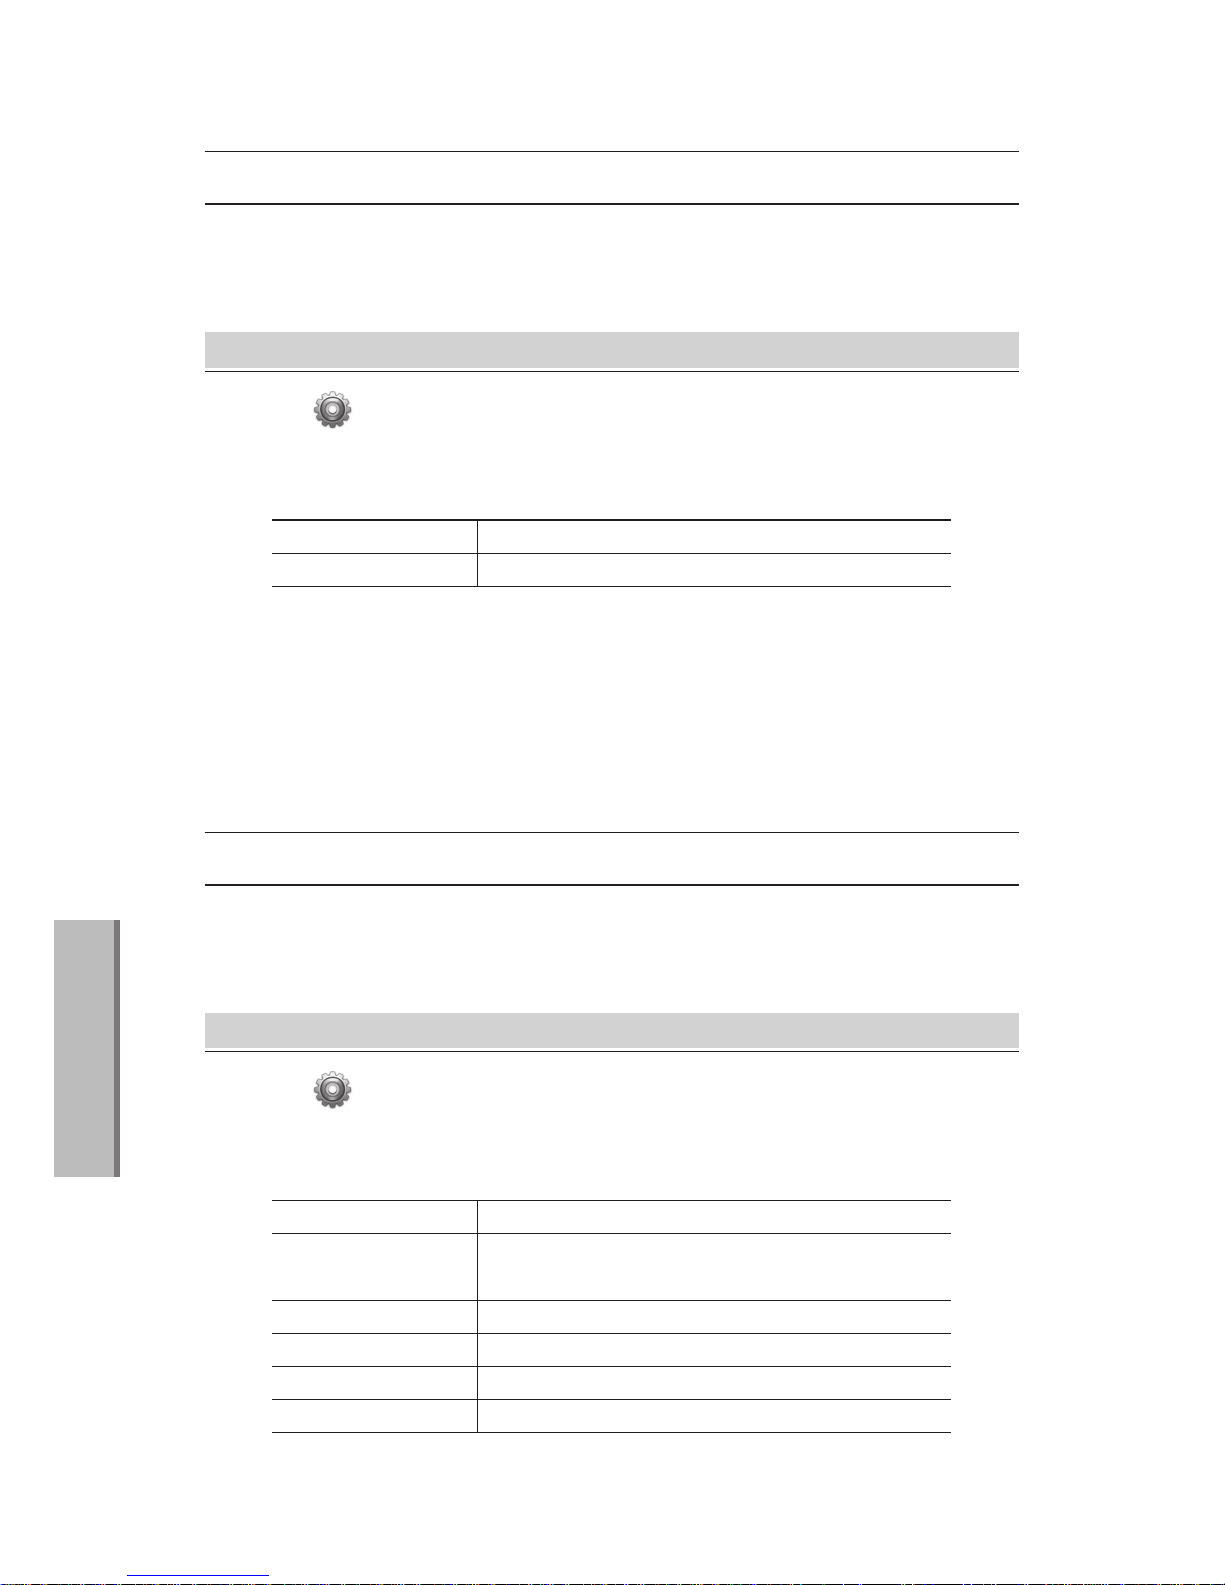
· Personal data
Delete personal data saved at system and applications.
Privacy
Eraser all data on device.
Factory data reset
Setting
· Home → → Privacy
Settings
- Google account, system, settings and downloaded applications
will be deleted.
Files saved at SD card will not be erased.
57
MIP2000 User’s Manual ·
Settings
4
· Internal phone storage
· SD card
Check space information of internal/External storage.
SD card & storage
Check available space of internal memory.
Available space
Check total space of SD card.
Check available space of SD card.
Total space
Available space
Format the SD card.
Format SD card
Mount and unmount the SD card for
safe removal.
Mount SD card
Setting
· Home → → SD card & storage
Settings
- Please backup valuable data before formatting internal memory
or SD card.
Caution!
58
· MIP2000 User’s Manual
Settings
4
· Language & keyboard settings
· Text settings
Select language
Select language to use.
· Set up language and keyboard.
Language & Keyboard
Setting
· Home → → Language & keyboard
Smart keyboard Pro
User dictionary
You can set the next input for English, number and symbol.
Add&remore words from user dictionary.
Settings
· Date and times settings
· Set up date and time.
Date & Time
Use automatic network-provided values. You cannot use
‘set date, select time zone, set time’ menus if you select
automatic mode.
Set up to use 24-hour format.
Use am/pm format before setting.
Automatic
Use 24-hour format
Select date formats.
Select date format
User sets up the date.
Select time zone.
User sets up the time.
Set date
Select time zone
Set time
Setting
· Home → → Date & Time
Settings

59
MIP2000 User’s Manual ·
Settings
4
· You can set the call-related.
Call settings
· Auto Area Number
Automatic area code setting and release.
Area code setting.
Auto Area Number
Area code
· DND
Setting do not disturb.
Do not disturb
· Call waiting
Allow you to answer another call during an
ongoing call.
Call waiting
· Intercom
Intercom number setting.
Intercom Number
Setting
· Home → → Call settings
Settings
· CFA
Busy call, No answer call forwarding Setting and off.
Enter a phone number to call forwarding.
Set the time when no answer call forwarding.
CFA
CFA Number
CFA Timer
60
Settings
4
· Executing reboot and running initialization.
Phone management
· Management
Restart device.
Modified the setting value of the first time of purchase.
Reboot
Initialize
Setting
· Home → → Phone management
Settings
· About device
· Check legal and system information.
About phone
Setting
Update system from SD card or internal memory.
Status
Set open source license or certificate.
Check Google legal information.
Legal information
Check model information.
Check android version.
Check filename.
Check firmware version.
Model Name
Android version
Firmware filename
Firmware version
· Home → → About phone
Settings

- Firmware upgrade and Manage data
- Size & Trait
- Copyright certification & Disclaimers
- Trouble shooting
- Treatment before Disposal
- Warranty
- Damage Compensation
Supplement
5
MIP2000 User’s Manual
62
Supplement
5
Firmware upgrade and Manage data
· Firmware can be upgraded through the wire service server automatically.
Firmware upgrade
· The stored data may be lost by the accidents such as breakdown or losing the
device. To prevent the inconvenience of losing data, please backup your personal
data to other media.
Manufacturer is not responsible for missing personal data.
Manage data
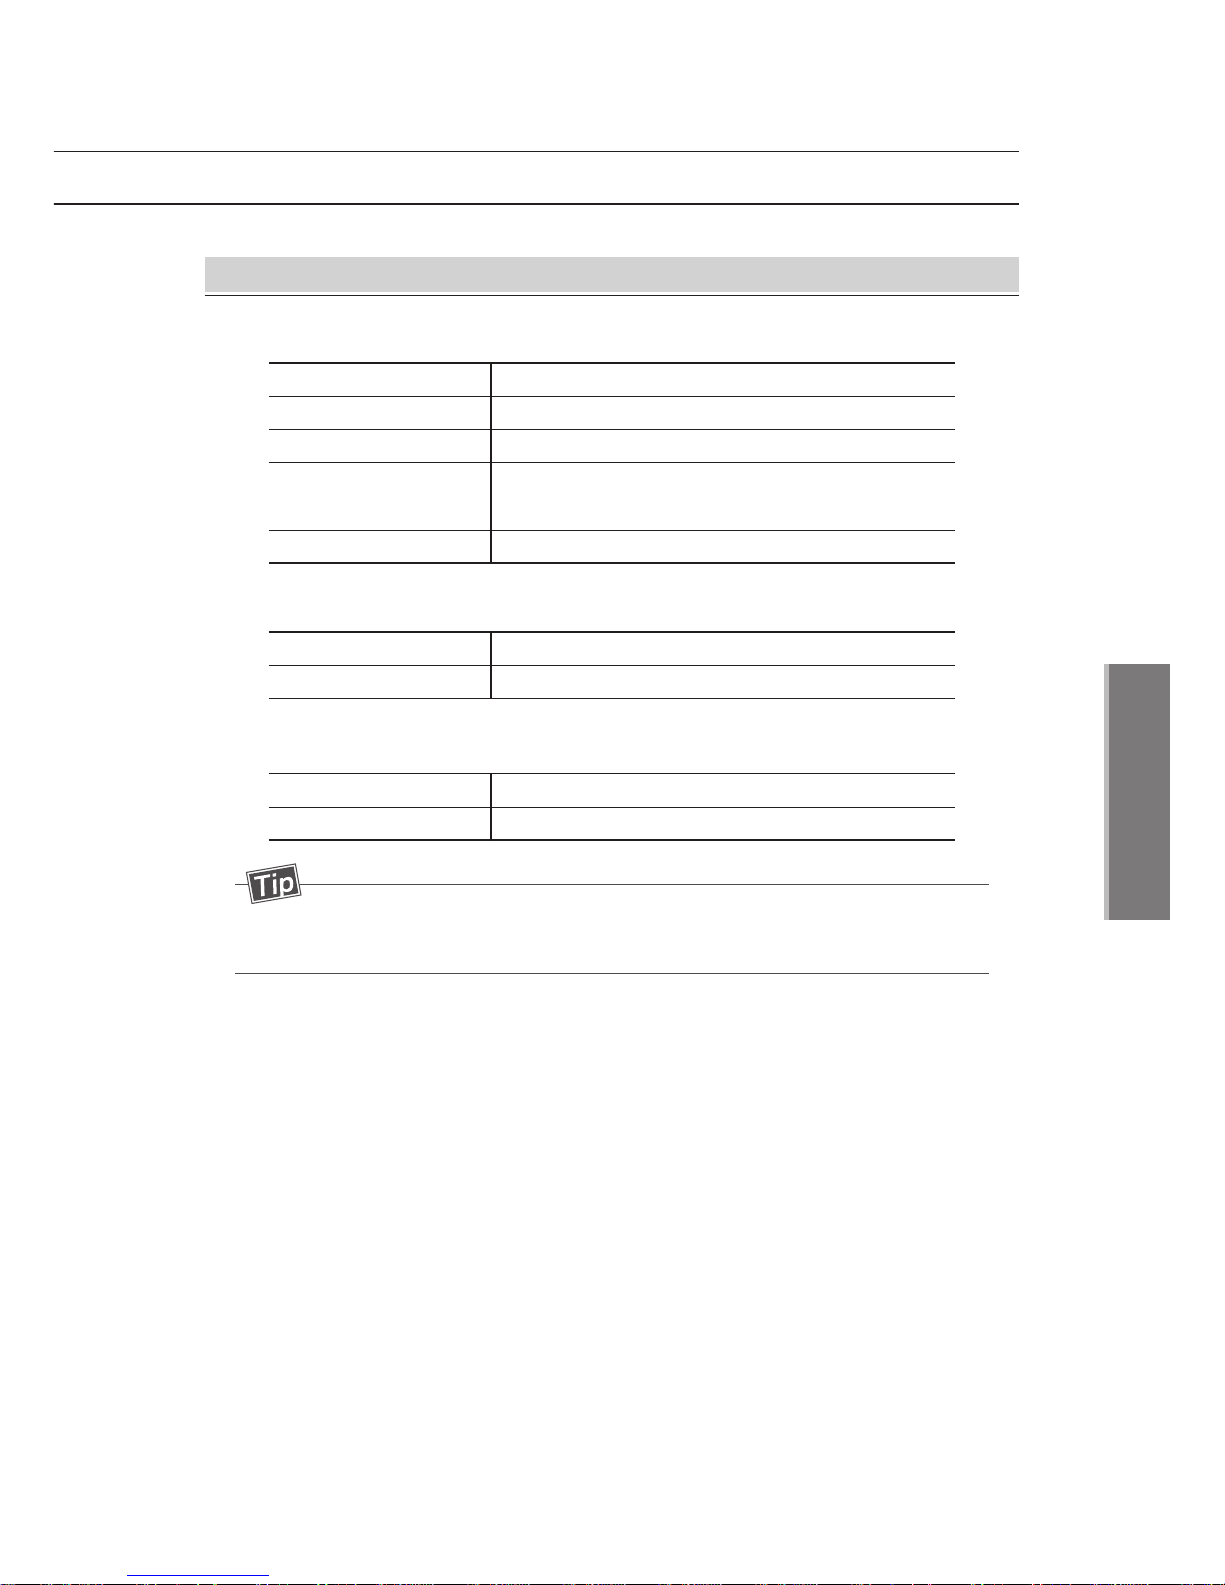
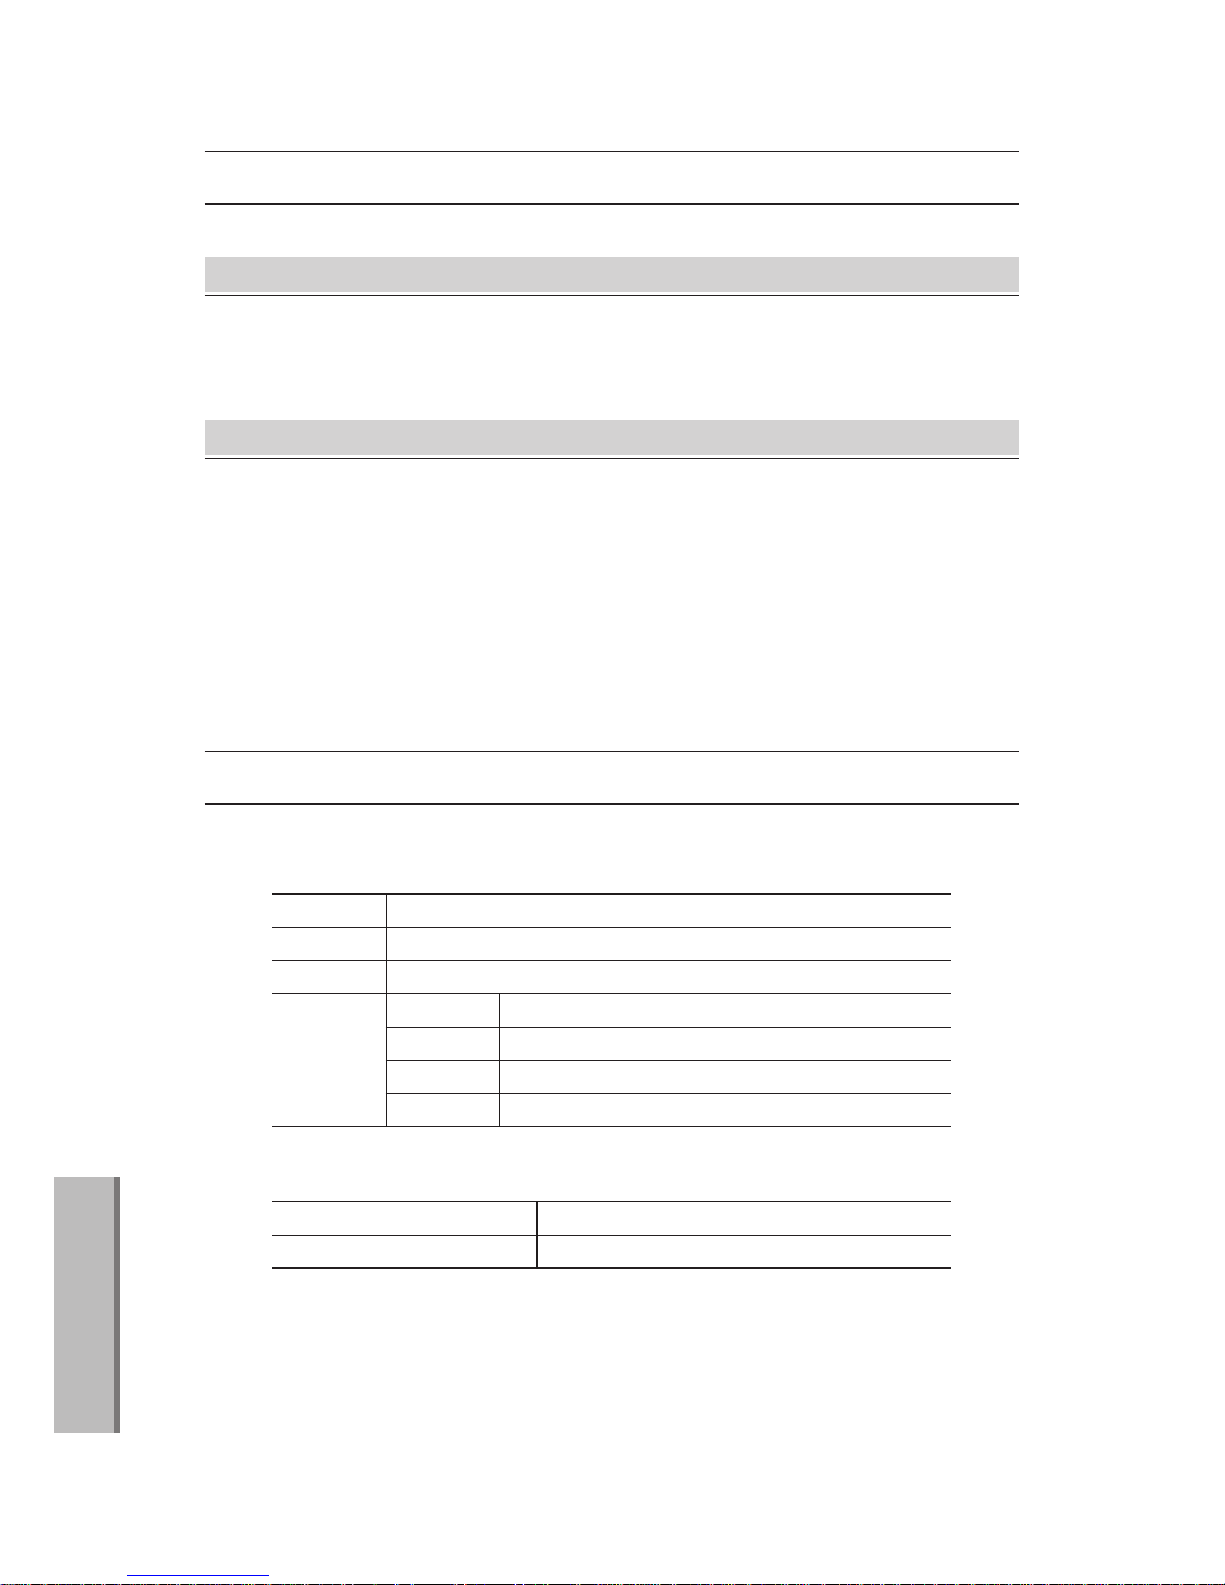
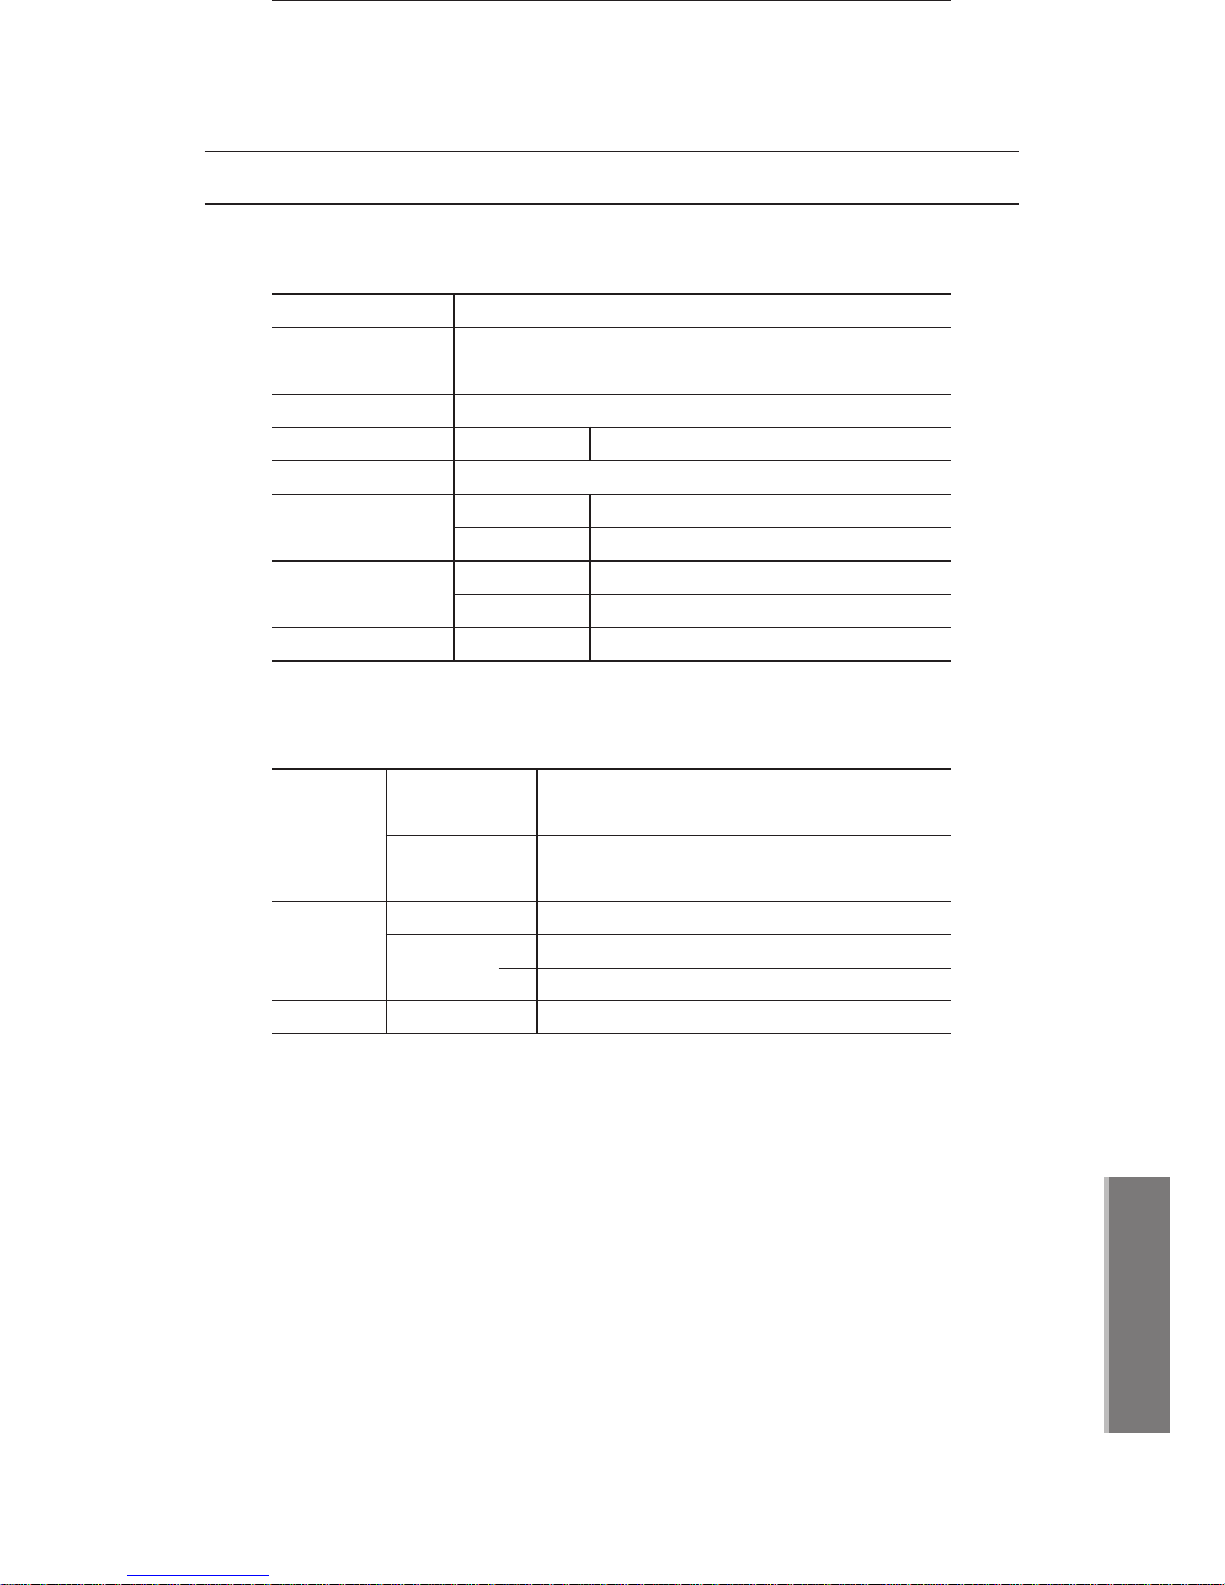
Size & Trait
· Exterior specifications
W:282, H:181, D:266(㎜)
1430g
Black
Size
Type
Resolution
Touch
177.8㎜ (7.0)
TFT
WVGA (800 x 400)
Resistive Touch
Size
Weight
Color
Display
· Operation specifications
-10℃ ~ +50
℃
0% ~ 95%
Operating temperatures
Operating relative humidity
63
Supplement
5
Size & Trait
· Detail specifications are variable according to using environment.
· Hardware specifications
· Multi-media specificatios
File Type
Supporting
file formats
Codec
MP4
MPEG4 SP/ ASP, H263, H264
Video
Audios
MP3, WMA, WAV, FLAC
JPEG, PNG, GIF
File TypeImages
Bit rate
MP3 : 8~320kbps
WMA : PCM 16bit stereo
Android 2.2 Froyo
BROADCOM BCM 11107KFBG IP Communication Chip,
500MHz ARM1176, 333MHz, teaklite 3 DSP
DDR2 SDRAM 256MB
Operating systems
CPU
RAM
External
Support SD Card slot (Maximum 32GB)
Memories
Internal
External
none
3.5mm Ear/Mic Jack, Extention Key
Speaker
Microphone
Internal 1W streo speaker
Internal Mic
Interface
Audio
Adapter
5V 2A
External power
Network
10/100/1000 BASE-T

64
Supplement
5
Copyright certification & Disclaimers
· This manual is protected by copyright law.
Copying, distributing or translating all or part of the manual, or changing it to
electronic media or printed form without the prior approval of publisher is
prohibited. Comply with the copyright laws is the responsibility of the user.
Copyright certification
· Manufacturer is not responsible for the damage caused by inappropriate use of
the equipment or accidental damage.
The manual is based on the current product specifications.
All specifications can be changed without prior notice.
Disclaimers
Trouble shooting
Press the power button.
Power does not turn on
Alcohol, benzene or other detergent is able to damage the
product. Clean it with eraser or soft cloth.
Product is polluted
Do not well see in direct sunlight. Use in shade or of the
brightness degree about available read the newspaper.
Screen does not
appear well
Try resetting the device. Please inquire of service center
if the device still does not work after resetting.
Buttons are not
selected or screen is
not working
The symptom occurs to fix screen for a long time.
Fixed screen can result in permanent damage and the damage is
also not covered by the warranty.
There are some
afterimages on the
screen
Check if you use one mode for a long time.
Fixed screen can result in permanent damage and
the damage is also not covered by the warranty.
There is boarder
on the scree
Symptoms Solution

65
Supplement
5
Trouble shooting
Check if the product is set to silent.(page 54)
There is no sound
The product makes the dripping noise when it is expanded or shrunk
by heat. The symptom is not relieved with any failures of the product.
There is dripping sound
from the product
In case of lost data due to resetting or breakdown,
the data cannot be restored without backup data.
Data is lost
Accessing internet is delayed or not connected depending on
network problem.
Internet is frequently
disconnected
Photos and videos taken from this device are basically
supported. Imported photos and videos from outside may not
normally play.
Photos, videos or
multimedia contents are
not played
Minimum crevice is necessary for smooth operation and because
of the crevice, there may be fine shake of the body of the device.
The crevice may become bigger then when it was designed by
mechanical friction.
There is a crack on
the appearance of the
product
Pick up group must be set, the pickup group settings,
please contact your service provider.
Pickup is not working
Pick up the phone and adjust the volume button.
Opponent’s voice is
heard far
On the put down the phone, Adjust the volume button.
It is impossible to intensify the volume using the extra device.
Ringtone is small
Internet phone deliver the voice through the using network.
Internet speed will be slow, if it is effected external effect.
There is noisy
on the line
There may be a line if the product is turned on after turned off for
a long time. This phenomenon does not affect to any system and
the product will normally operate.
There is a white line
on the screen
Product may generate heat because it requires a lot of current
during calling, playing game or surfing the internet.
This phenomenon does not affect to any system.
Product generates heat
In this case server setting is wrong or if it does not fit into the
service with wrong equipped OS, or network status.
There is composition problem on server cannot properly connect.
You should contact your service provider.
Phone is not registered
Symptoms Solution

66
Supplement
5
· Please follow the instructions when you dispose the product.
· When disposing of the product,
please contact the nearest local governments
for proper treatment.
Please dispose it in the right way that you are informed.
· Please inform administration office
if they provide free recycling service of the phone.
Treatment before Disposal
Warranty
The products which are produced and sold from Moimstone Co, Ltd are
guaranteed for 12 months from the date you purchased if the products have been
used in accordance with those specified in the documentation
· 12 months from the date of purchase
The products which failed in the production process are free exchanged or
repaired from the store you purchased.
· After 12 months
After the warranty, the repair and exchange service are continually offered
for ongoing products. Repair and transportation fees will be charged.
· Exceptions
① Lost or stolen
② Inadvertent damage of users
③ Abuse, misuse, and unauthorized repairs
④ Improper storage conditions
⑤ Natural Disasters
The warranty is based on Korean damage compensation law.
According to the conditions of other countries, details can be changed.

67
Supplement
5
Damage Compensation
· Free compensation services will be provided for manufacturer’s defects or
spontaneous failure within 12 months of warranty.
Free of charge
Free repair
Pay fee for repair
and exchange
Failures of
performance
and feature
when
the products
have been
used in the
normal state
Types of damage
Within warranty After warranty
Compensation
Major repair within 10 days from the
purchase
Major repair within 1 months from the
purchase
Exchange or
refund
Exchange or free
repair
Same defect occurs 3times
Same defect occurs 4times
Different defects occur 5times
Repair with charge
Repair with charge
Repair with charge
Refund the price
adding up
The case of the company does not
have parts of the product to repair
within retention period
10% of the amount
after depreciation
Refund the
amount after
depreciation
Repair-
able
case
Damages occurred during shipping or
installation
Exchange
Refund
Free repair
N/A
The case of the company has parts of
the product but repair is impossible
Refund the amount
after depreciation
Repair with charge
Exchange or
refund
Exchanging product required major
repair within 1month from exchanging
date.
The case of the company loss the
product customer request to repair.
The case of exchange is not possible
Impossible to repair
Impossible to repair

68
Supplement
5
Please read the manual carefully. Service fee will be charged when you request
non-broken product to fix.
· Fault of users or failure due to mishandling
- The fault occurred by unauthorized repairs
- Intentional or negligent failures of users
- Failure of user’s mishandling(Falling, flooding, excessive operating, etc)
- Damage due to using unauthorized part or accessory
· In other cases
- Natural disasters
- End of life of consumable parts
- The product is installed in a different way with the one documented in manual.
Service with charge
Damage Compensation

69
Supplement
5
MEMO

70
· MIP2000 User’s Manual
MEMO


 Loading...