

Mohu channels Quick Start Manual
PERSONAL TV GUIDE
QUICK START GUIDE
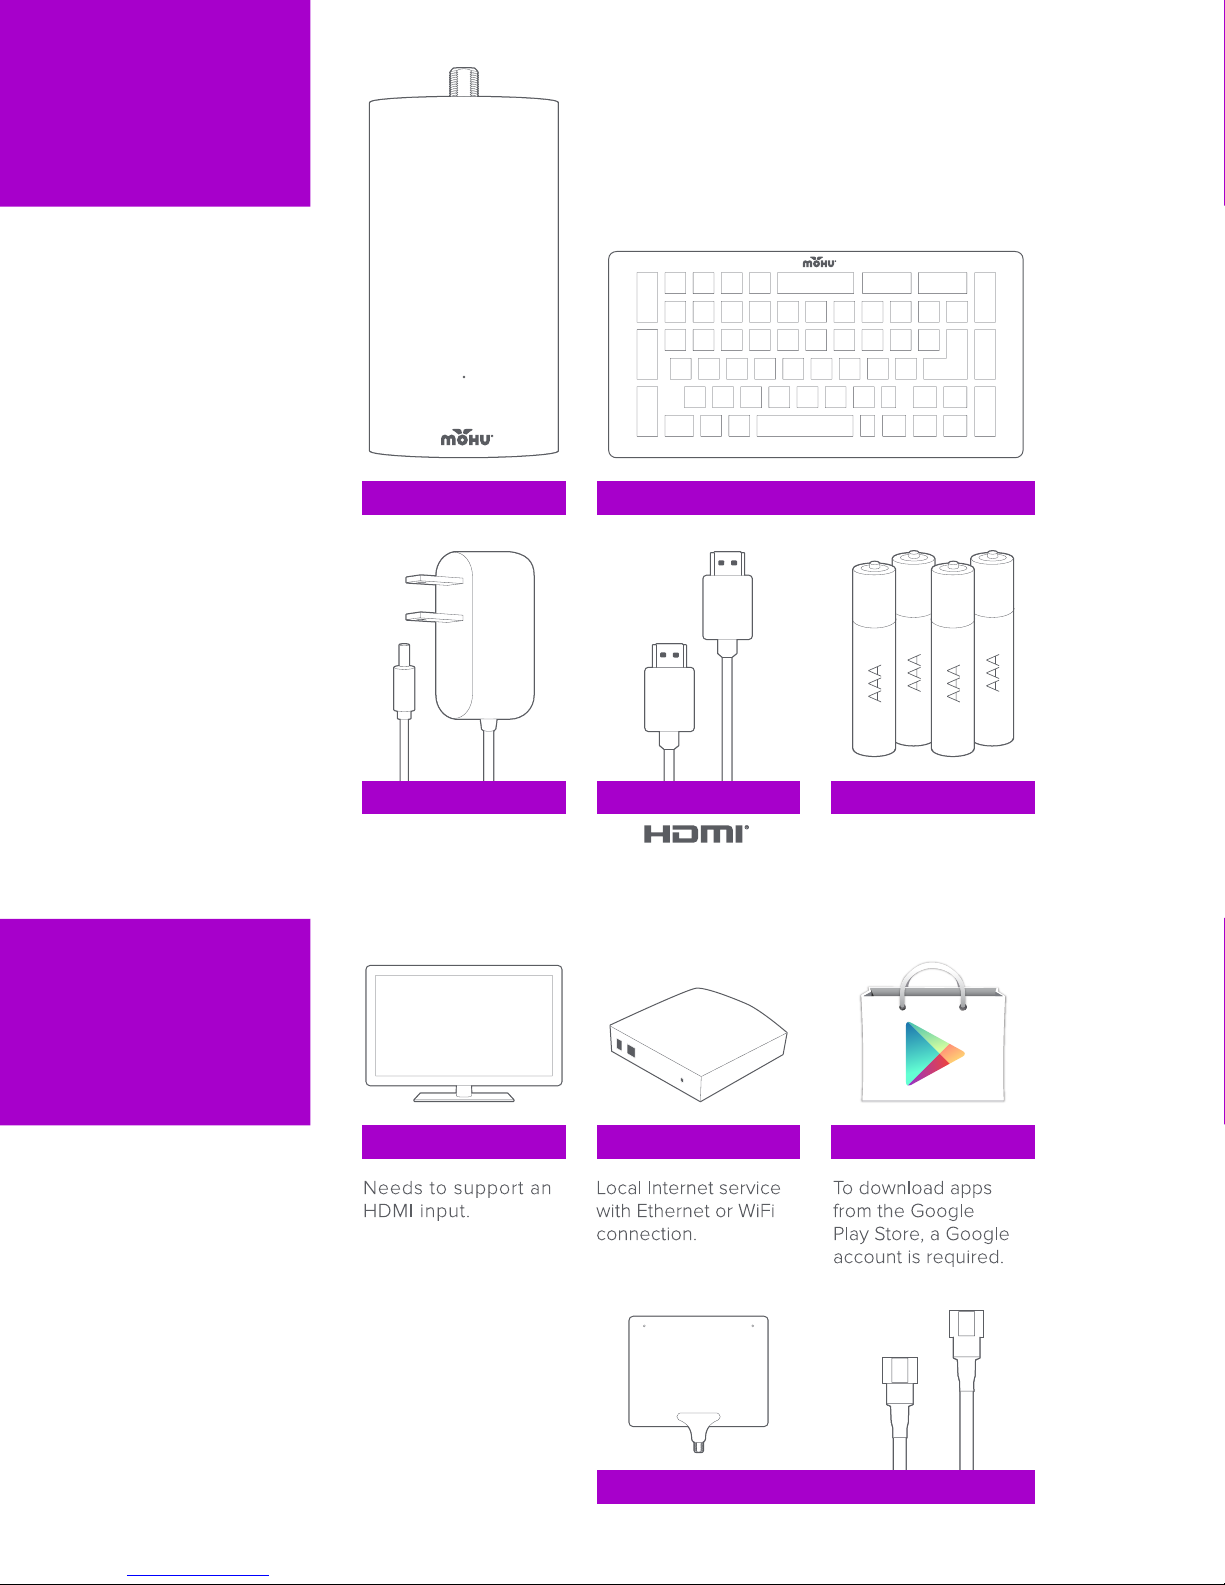
WHAT’S IN
THE BOX?
WHAT
ELSE DO
YOU
CHANNELS DEVICE
CHANNELS REMOTE
HDMI® CABLEPOWER ADAPTER
4 AAA BATTERIES
NEED?
GOOGLE ACCOUNTINTERNETTV / MONITOR
TV ANTENNA & COAXIAL CABLE
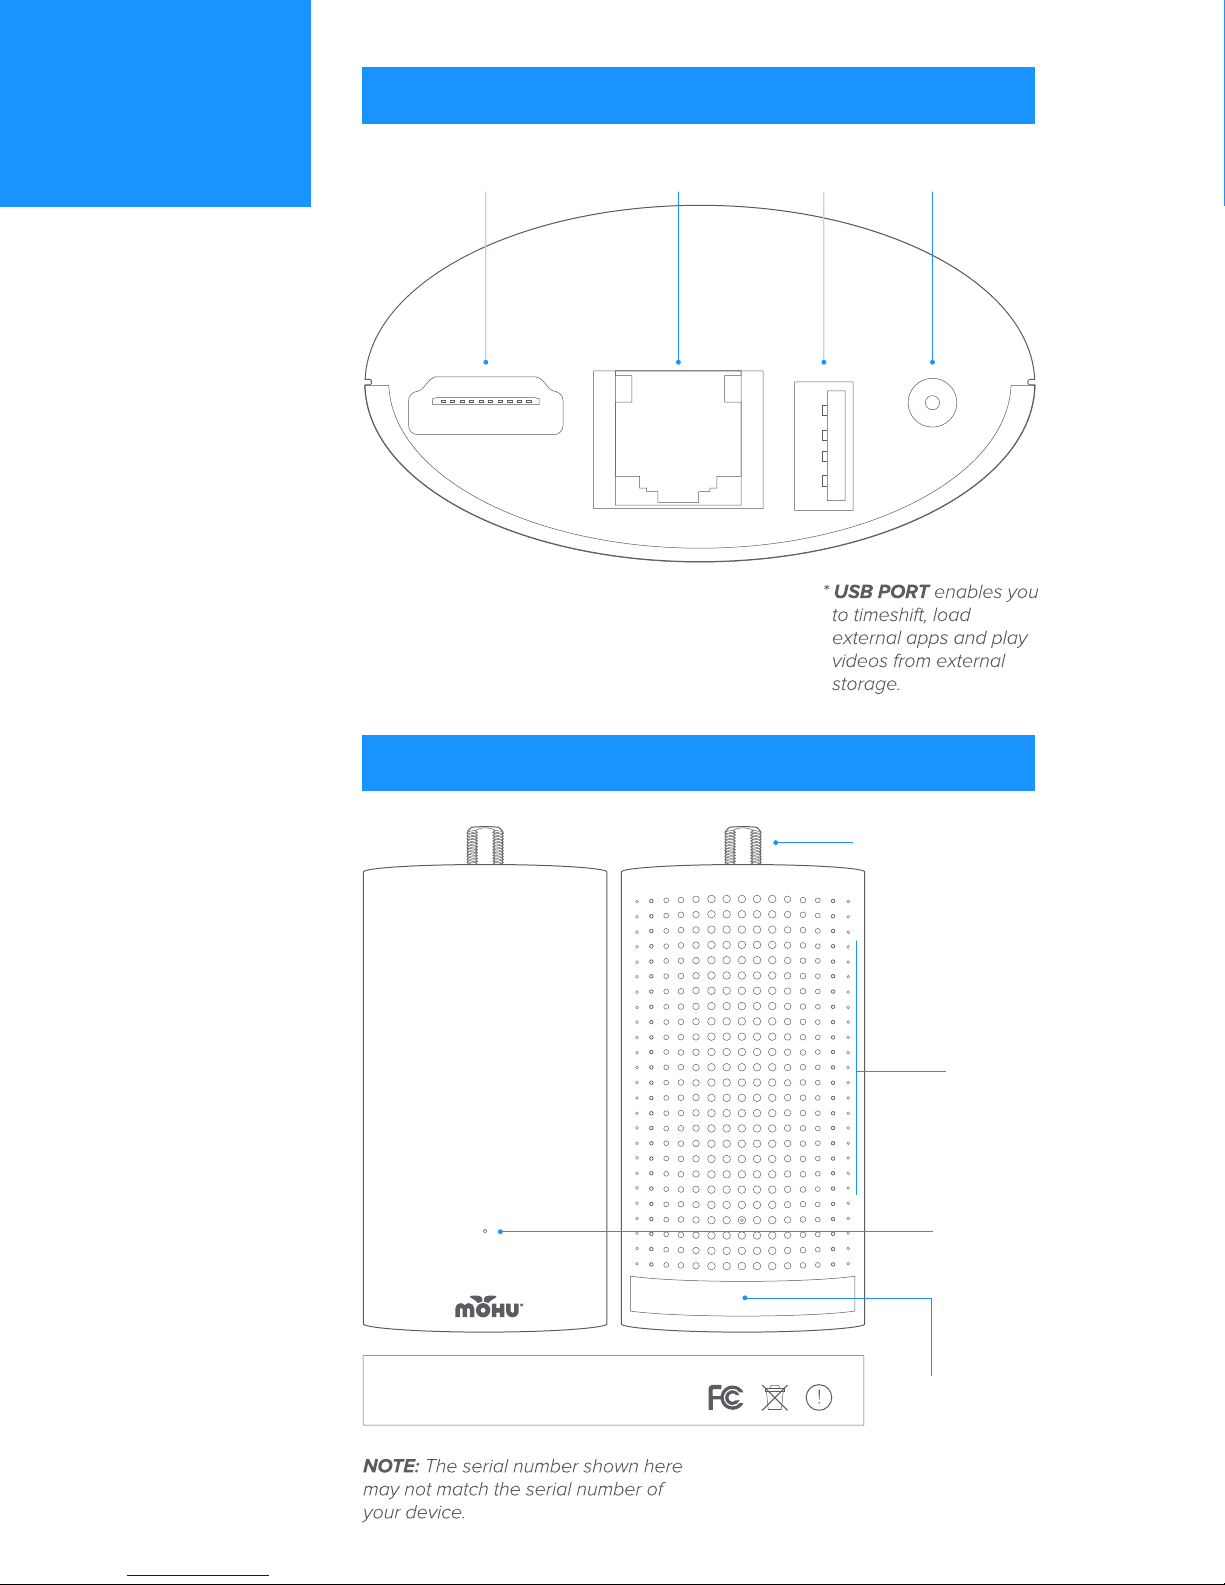
ABOUT
DEVICE
BOTTOM / PORTS
HDMI® PORT
USB PORT* POWER PORTETHERNET PORT
FRONT / BACK
COAXIAL CABLE
CONNECTOR
VENTS
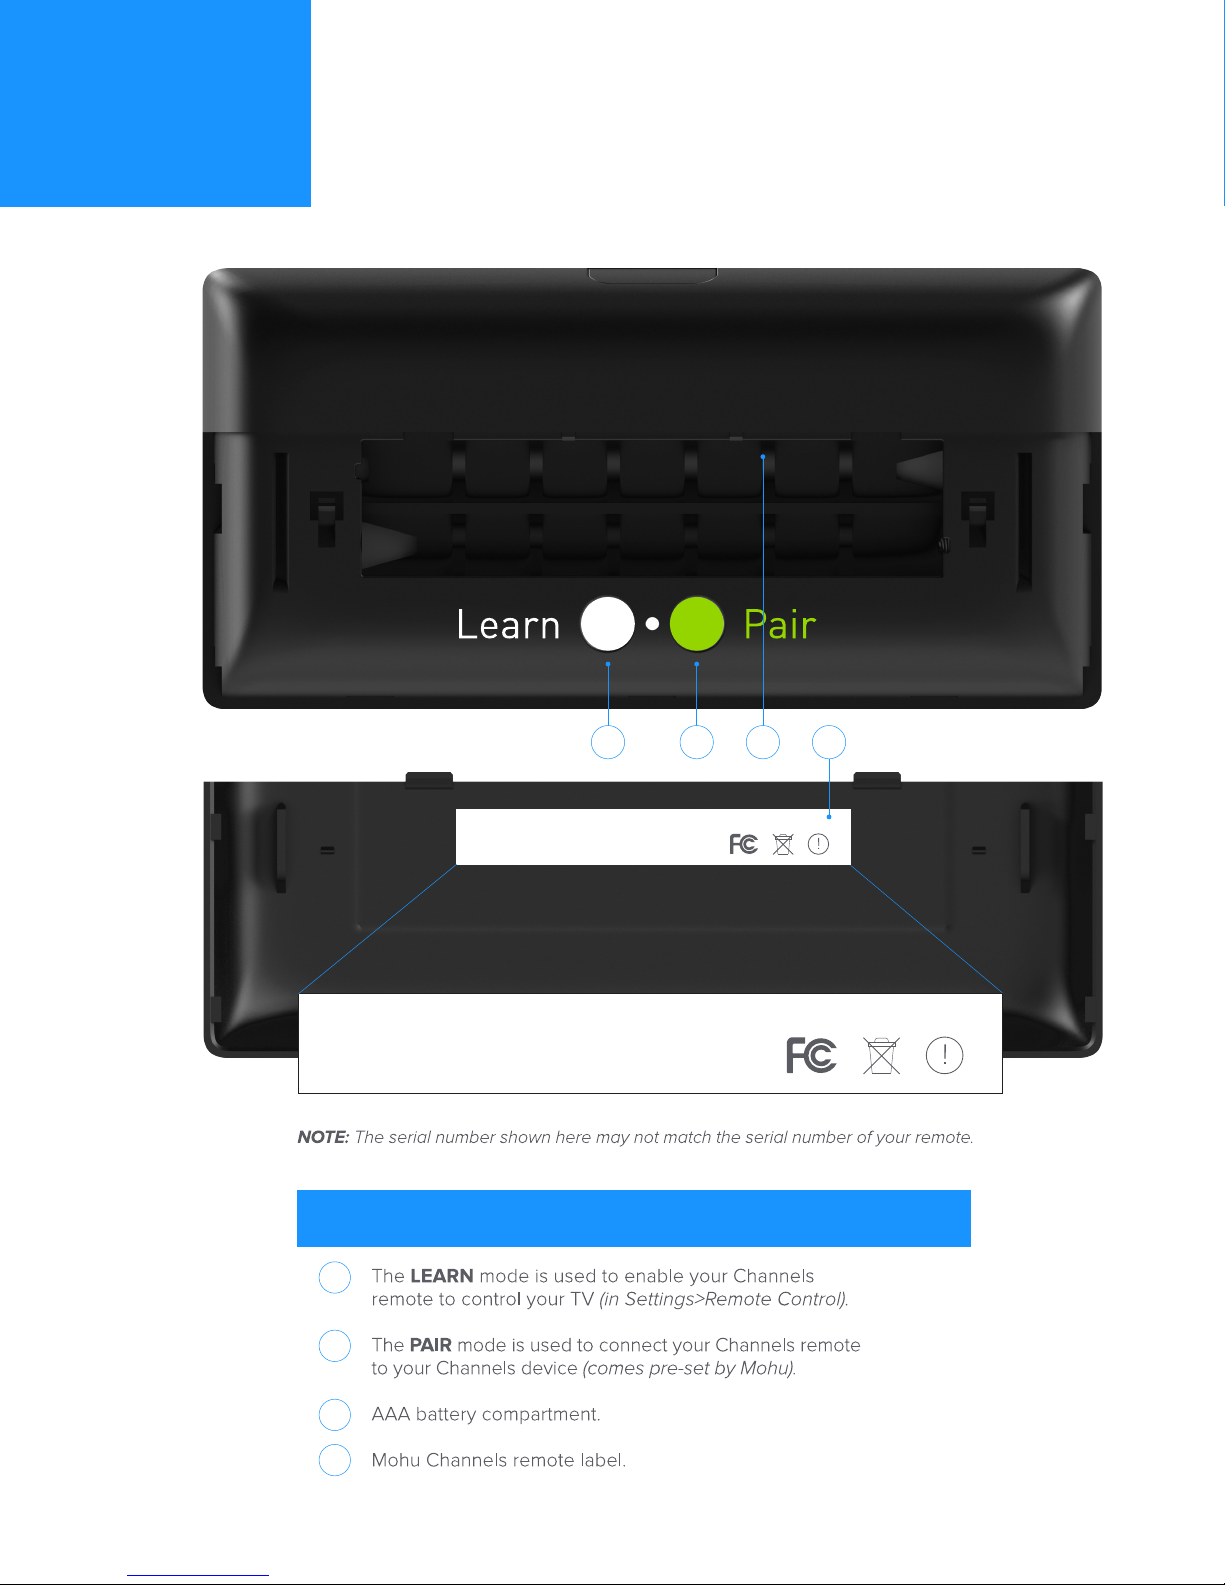
STATUS
LIGHT
Mohu Channels
Serial No.: MC011311-00001
FCC ID: 2ABUT-MHCHBOX01 IC: 11925A-MHCHBOX01
Model No.: MH-CHBOX01
MAC: D0:76:50:90:00:01
MOHU®
CHANNELS
LABEL
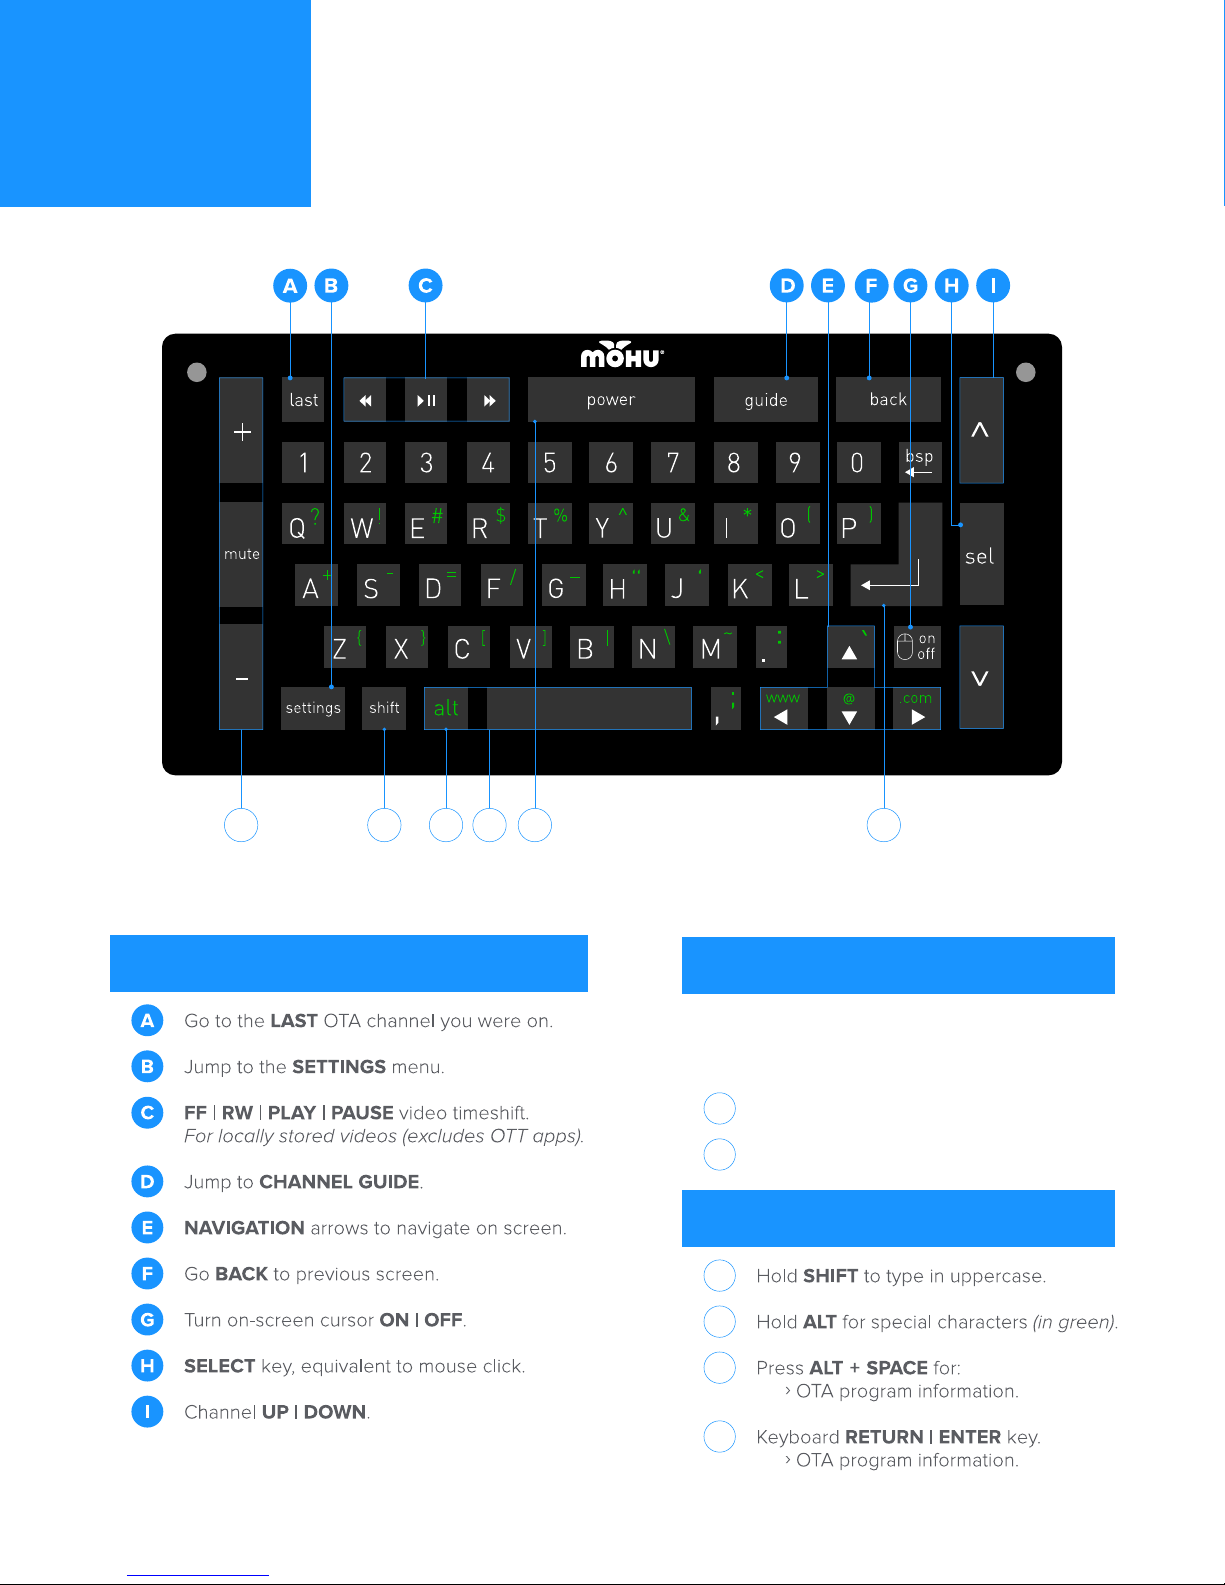
YOUR
REMOTE
PRIMARY FUNCTIONS
OM NL KJ
PROGRAMMABLE KEYS
The Channels remote can control your TV (or
other IR device). Setup with the
function.
Volume UP | MUTE | DOWN.
J
Turn TV ON | OFF.
K
QWERTY KEYBOARD CONTROLS
L
M
N
O
YOUR
REMOTE
Mohu Remote
Serial No.: MR-RF125-011311-00001
FCC ID: 2ABUT-MHCHRMT01 IC: 11925A-MHCHRMT01
Model No.: MH-CHRMT01
Mohu Remote
Serial No.: MR-RF125-011311-00001
FCC ID: 2ABUT-MHCHRMT01 IC: 11925A-MHCHRMT01
Model No.: MH-CHRMT01
BACK OF REMOTE FUNCTIONS
1
31 2 4
2
3
4
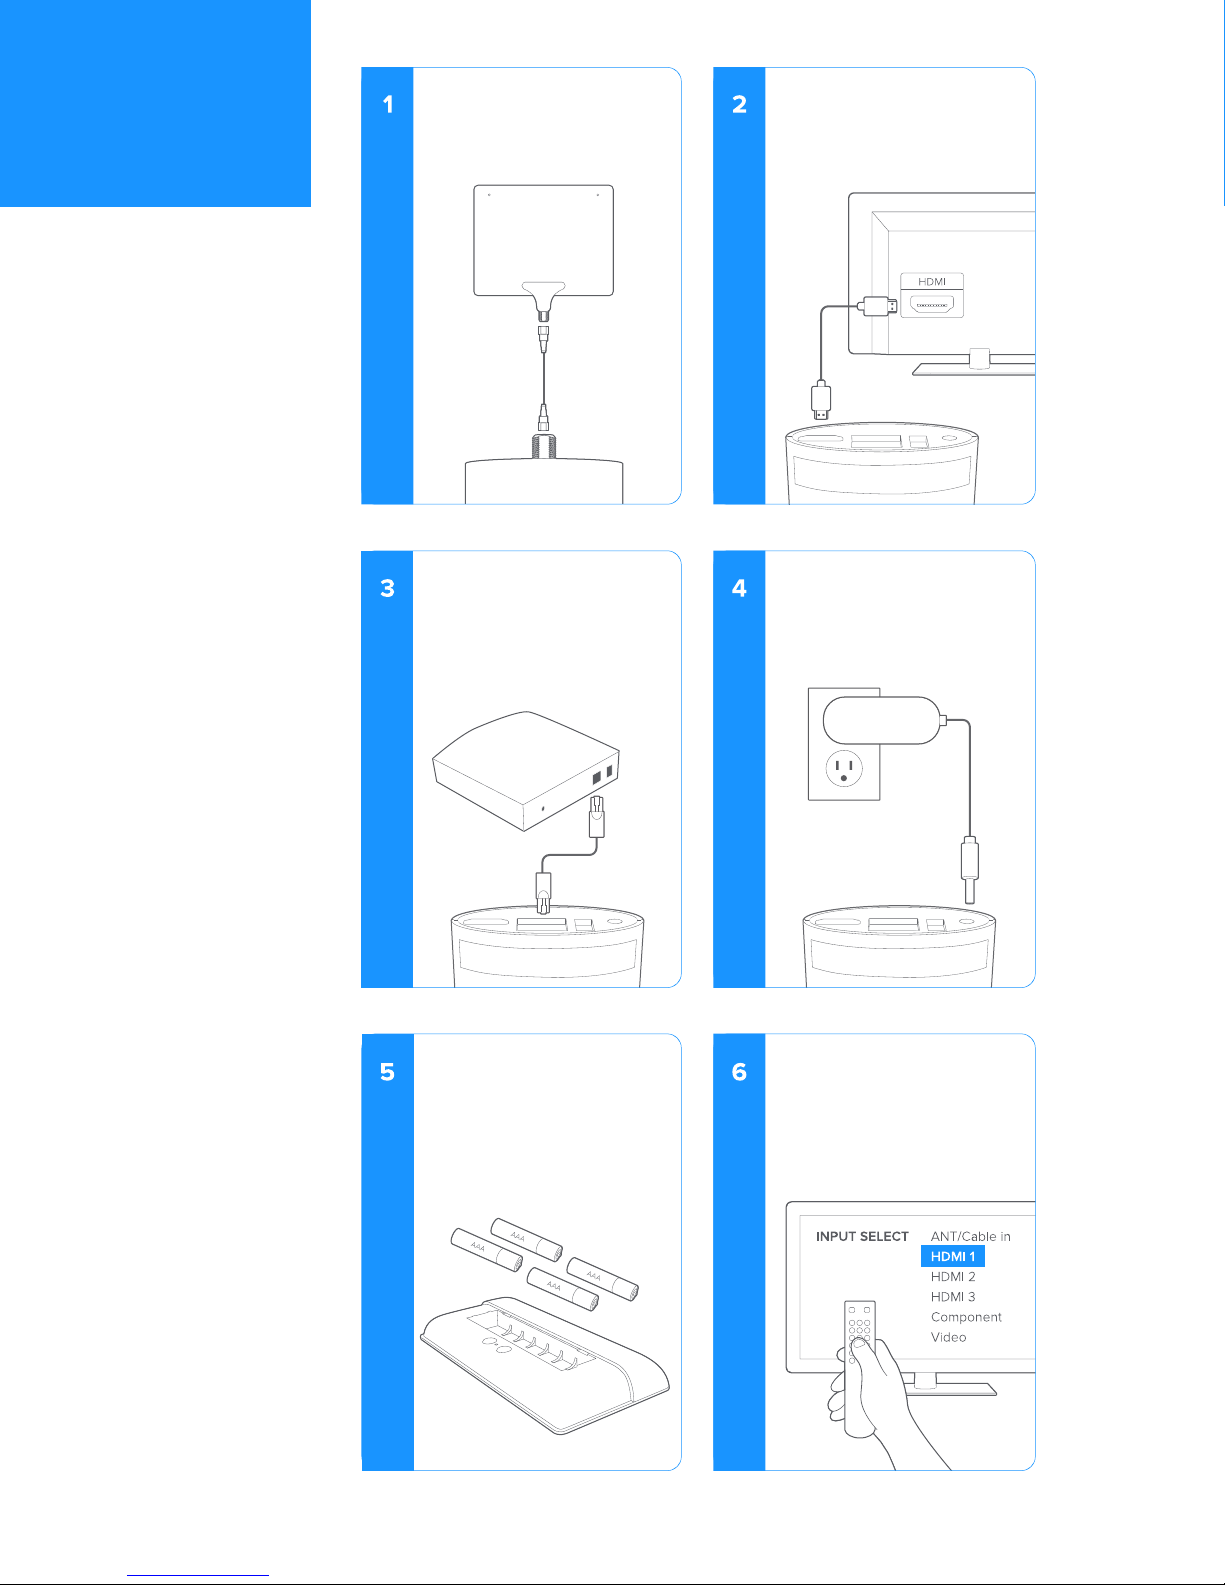
CONNECT
DEVICE
Connect your antenna
via coaxial cable to the
top of your Channels
device.
Plug your HDMI cable
from the Channels device
to the HDMI input on
your TV/monitor.
You can access the
Internet two ways:
Plug Ethernet in directly.
OR
Through WiFi.
(Discussed later in Setup.)
Slide o back cover of
your Channels remote
and insert four AAA
batteries into the remote
in the orientation labeled
in the battery compartment.
Plug in power adapter.
Turn on your TV/monitor
and go to the INPUT menu
on your TV. Select the
corresponding HDMI input
of your Channels device.
SET UP
DEVICE
After powering up your Channels device, a slideshow of quick
tips will cycle through before the startup screen appears. The
screen will automatically appear after 10 seconds
and take you into Step 1. The instructional video will then walk
you through the rest of .
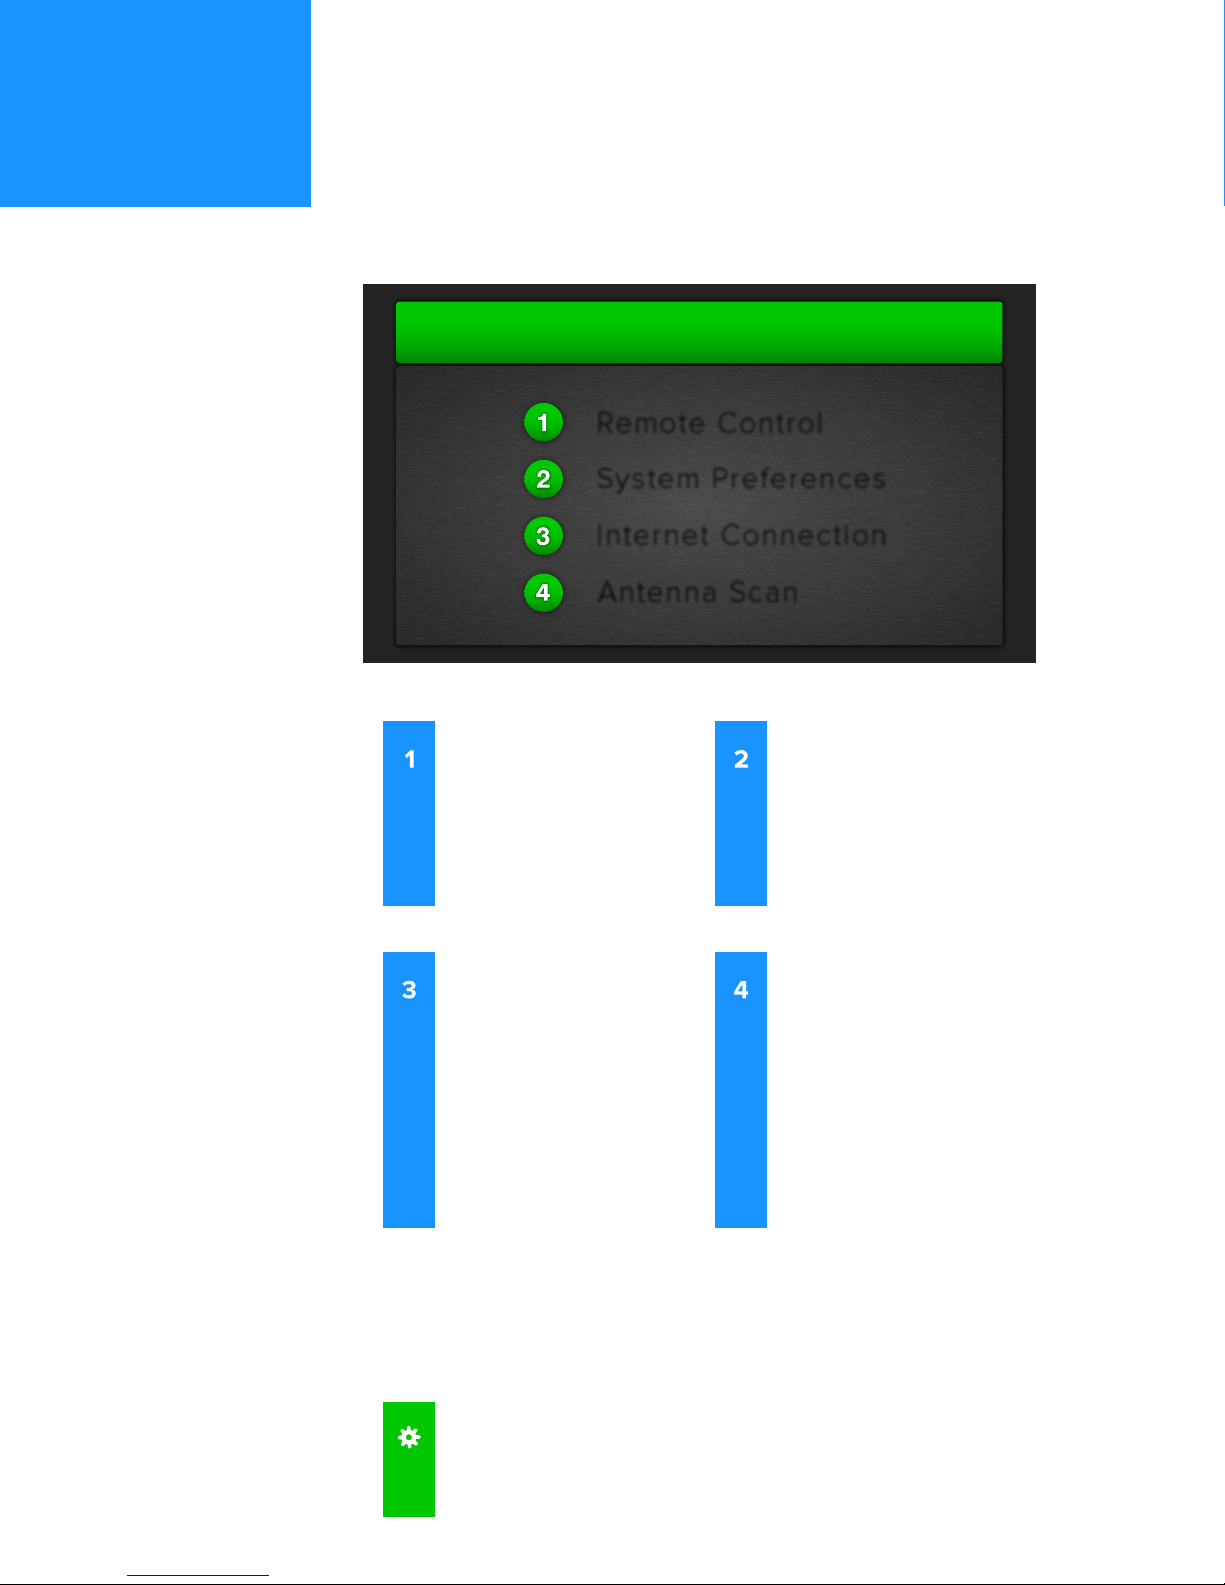
DEVICE SETUP
Remote Control
System Preferences
Internet Connection
Antenna Scan
REMOTE CONTROL
Enables you to control
your TV with your new
Channels remote.
INTERNET
CONNECTION
Choose Ethernet
or WiFi.
Skipping this step will
disable all web access
and streaming apps.
SYSTEM PREFERENCES
Set your time zone, display
clock and language.
ANTENNA SCAN
Checks with a built-in
channel listings in your
area.
Skipping this step will
disable OTA features.
To change in the future,
click on the gear icon in the top right of your .
 Loading...