

Page 1
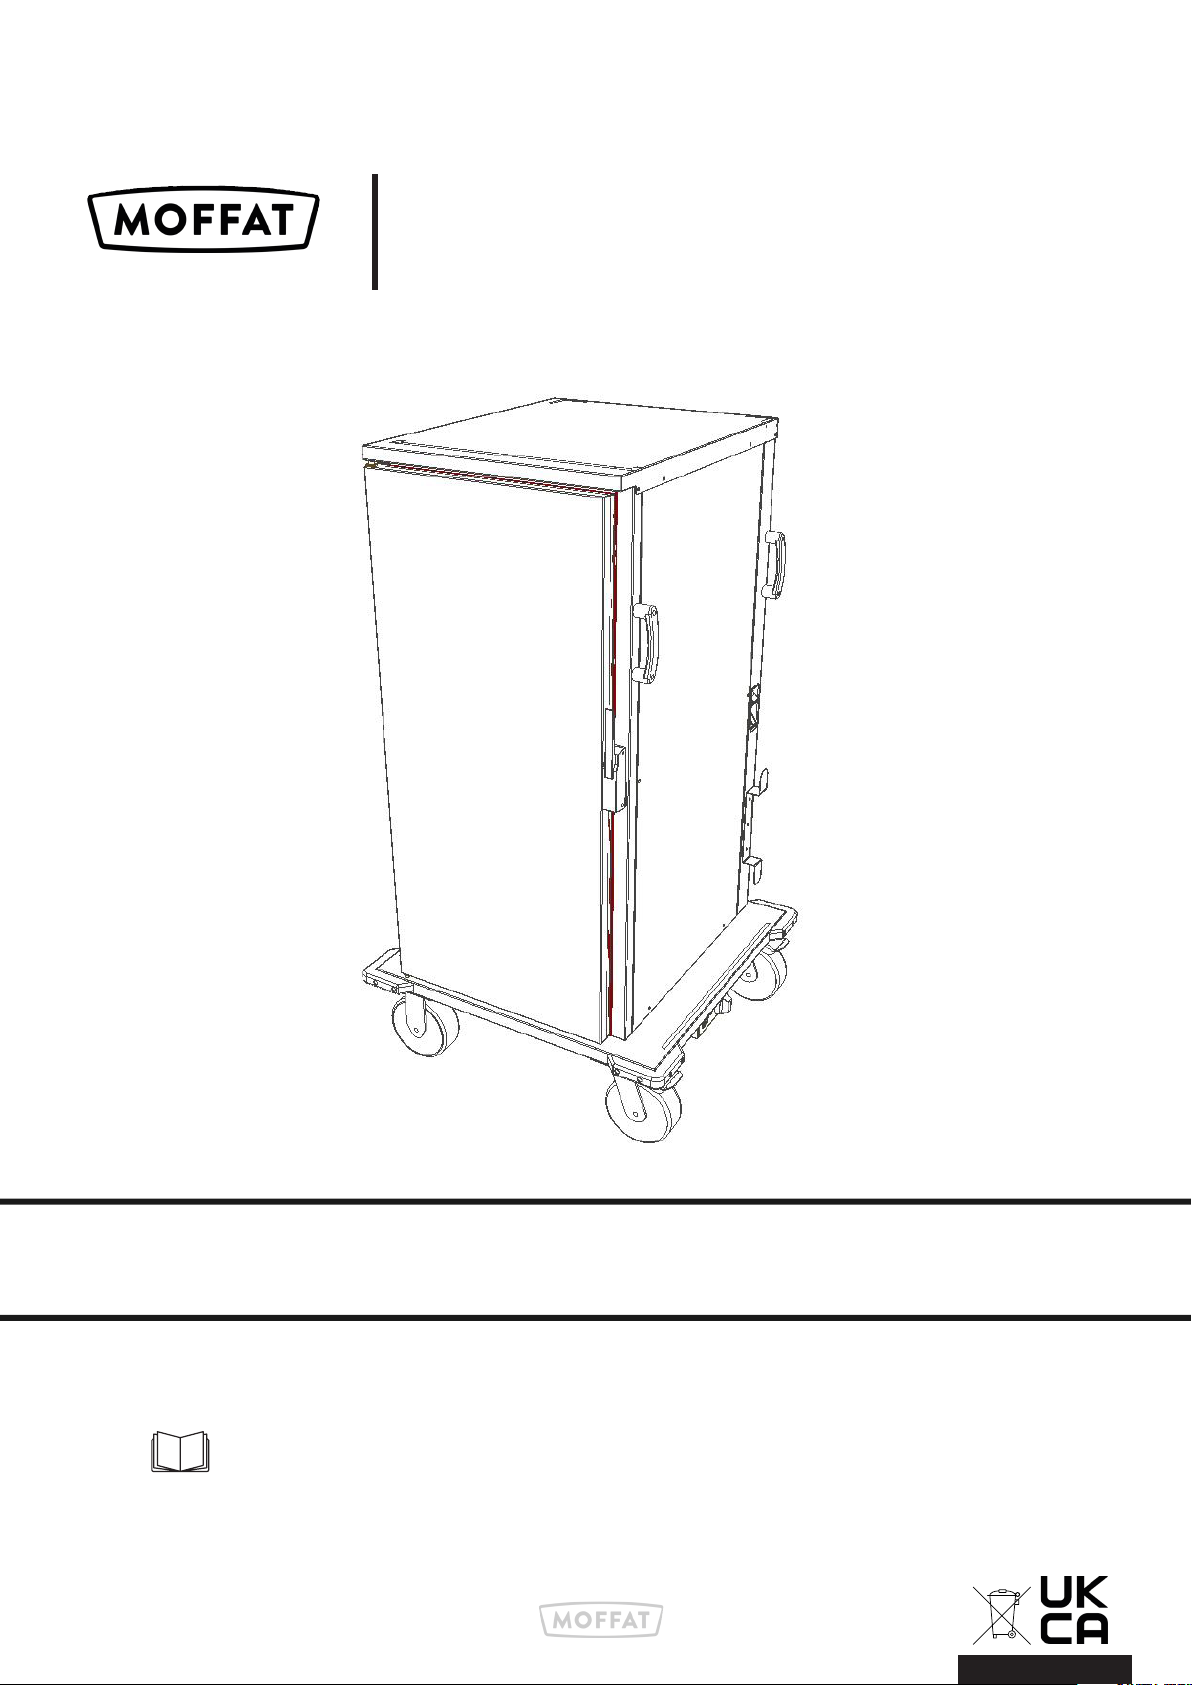
PF Trolley Hotline Banqueting
Operating & Service Manual
Please take the time to read and follow all safety, installation and
maintenance guidelines
Manual 033 Issue 001 July 2021
1
Page 2
These appliances are marked in compliance with the relevant regulations,
Voltage stated on unit data plate.
Warning! Please pay attention to sections of the manual displaying
this symbol.
Warning! Do not attempt to use a hose or water jet to clean this unit.
For cleaning instructions, refer to section 6.
The appliance must only be used for the purpose it was designed for and may
become unsafe if used for any other purpose. Operators should be trained. The
room where this trolley is used must be dry, clean with temperatures between 3°C
and 26°C and with a maximum relative humidity of 60%.
This unit is for indoor use only and has an IPX4 rating.
“If the supply cord is damaged, it must be replaced by the manufacturer, service agent
or suitably qualified person”
Appliance must be disconnected from the power supply during cleaning, maintenance
and part-replacement”.
Gastronorm Containers are not supplied with these units.
Shelves are available as an optional extra
Contents
1
2
Specifications & Dimensions
Electrical
page
3
3
3
4
5
2
Operation
Sahara Fan Installation & Removal
Cleaning
4 /5
6
7
Page 3
1: Specifications & Dimensions
Model
PF6
PF12
PF20
Weight
(kg)
70
89
130
2: Electrical
Before commencing, ensure that all regulations for fire are complied with.
This appliance must be earthed and damaged cables must be replaced by a
suitably qualified person!
Live (L1)
Length
740
740
740
1 Phase Cable
Brown
Width
730
730
730
Height
880
1360
1800
Power Rating
3 Phase Cable
Brown
(Kw)
0.9
1.9
1.9
Electrical
Supply
13amp
13amp
13amp
L2
L3
Neutral
Earth
X
X
Blue
Yellow & Green (Striped)
Yellow & Green (Striped)
Black
Grey
Blue
A mains cable, type H07RN-F, conforming to code designation 60245 IEC 57,
is supplied.
Should the supplied plug not be suitable for your socket outlet, it should be removed
from the cable by a qualified electrician and replaced with the appropriate type, ensuring
it’s protected with the correct rating of fuse.
Units that are part of a counter are pre wired in the factory for connection
on site, these counters depending on the customers specification
may be fitted with either an isolator or MCB unit. In accordance with
health and safety at work acts, BS codes of practice, IEE regulations,
building standards, fire precautions act, and local authority and building
regulatiowwns etc. all appliances/units over 3Kw require a qualified
electrician to install them.
Electrical supply cable type CEN LEC H07 RN-F must be installed using a
suitable isolating switch which has a minimum contact separation of 3mm
in all poles.
3
Page 4
3: Operation:
Hot storage cupboard with removable assisted ‘Sahara’ fan heating unit
(Refer to page 6 for details on how to remove Sahara fan).
Unit is fitted with a humidity tray for mosture retention and improved food preservation.
These units are not designed to heat up or cook cold food.
Before using the unit for the first time, it
needs to be checked that it’s perfectly level.
The correct Holding temperature is dependent on the food type,
amount of food in serving container, etc. Keep Doors Closed at all
times, only opening to load/unload cupboard contents.
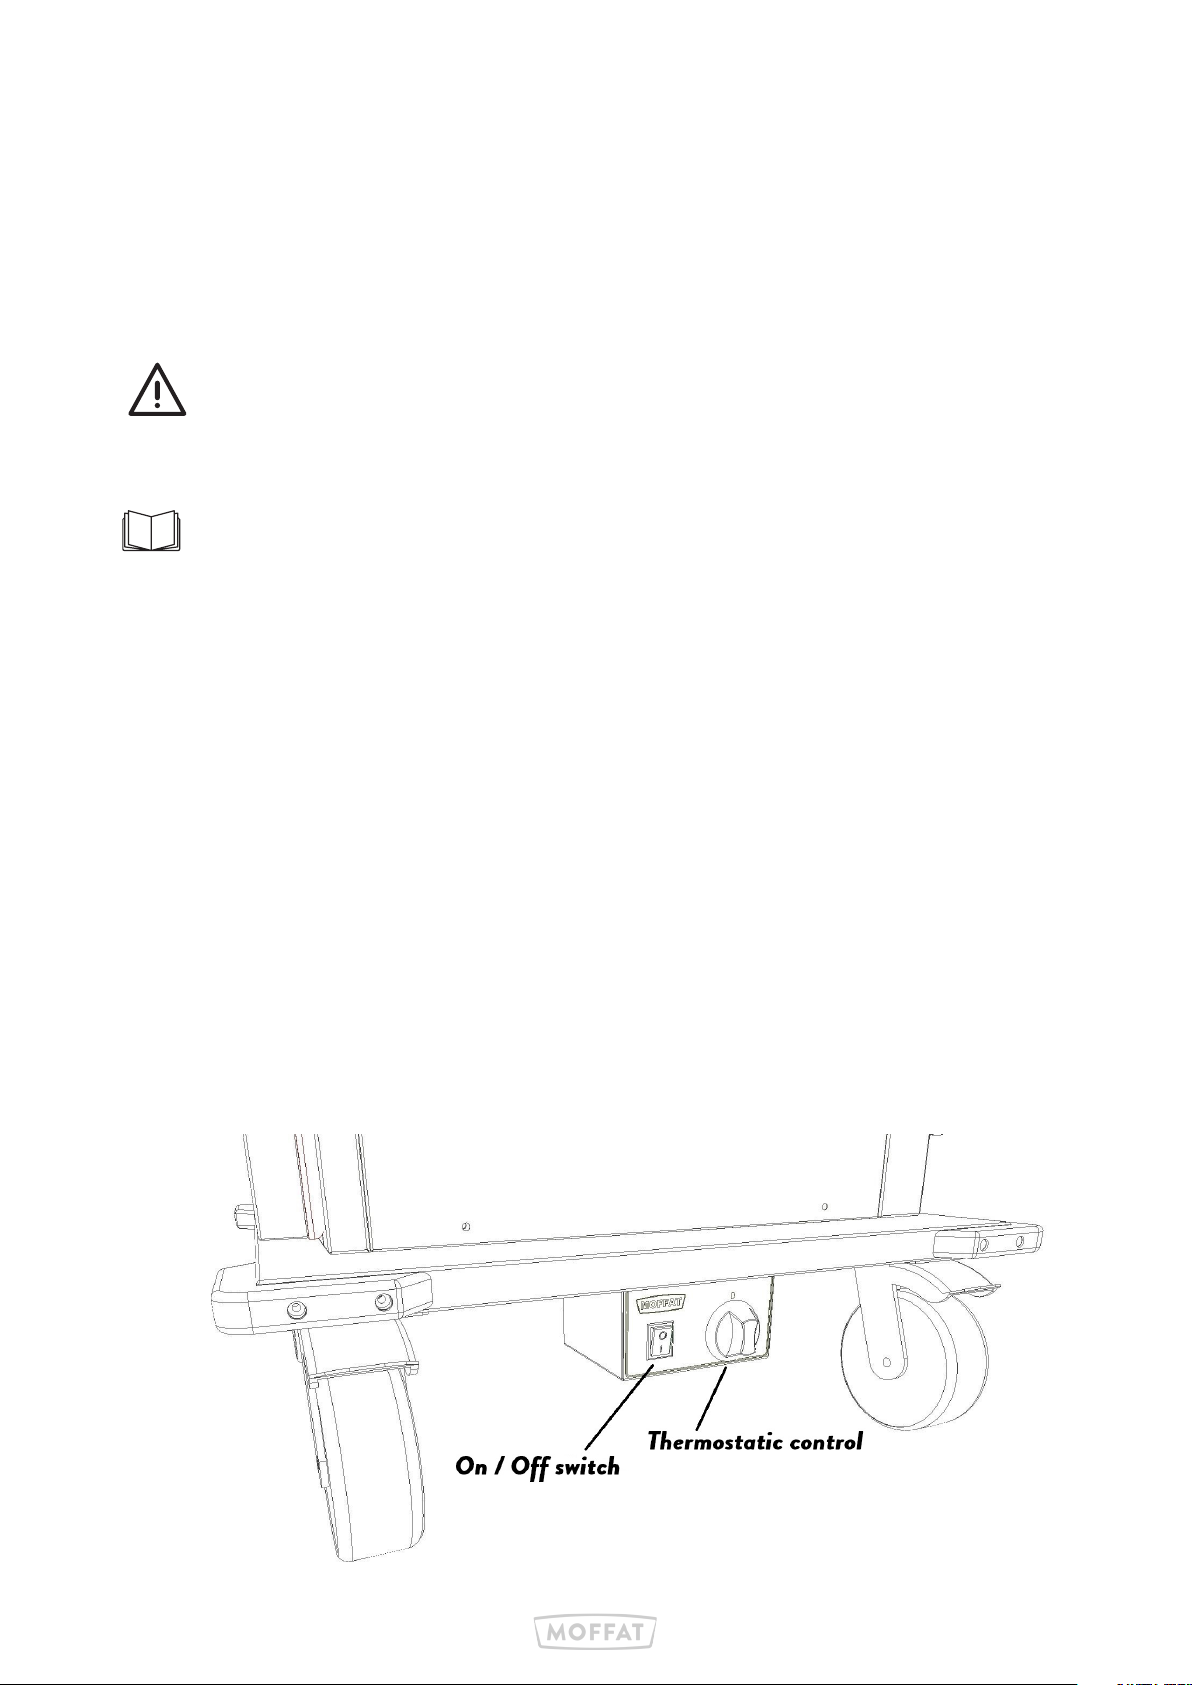
1. Connect plug to 13-Amp socket and switch on at mains socket.
2. Close doors & click the green neon on/o ’Mains’ switch to the on position.
(The switch will illuminate)
3. Turn the control knob ‘fully’ clockwise to highest temperature & leave for 30mins.
4. After this time period has elapse, readjust the cupboard temperature by turning knob anticlockwise to desired holding temperature.
Containers with ‘cooked’ food can now be loaded (Remember to close doors)
5. When serving is complete all switches should be turned o and the 13-Amp plug removed
from the socket.
6. To maintain the life of this product, all surfaces need cleaning regularly with a damp cloth.
Refer to page 11 of this manual for more info on cleaning.
4
Page 5
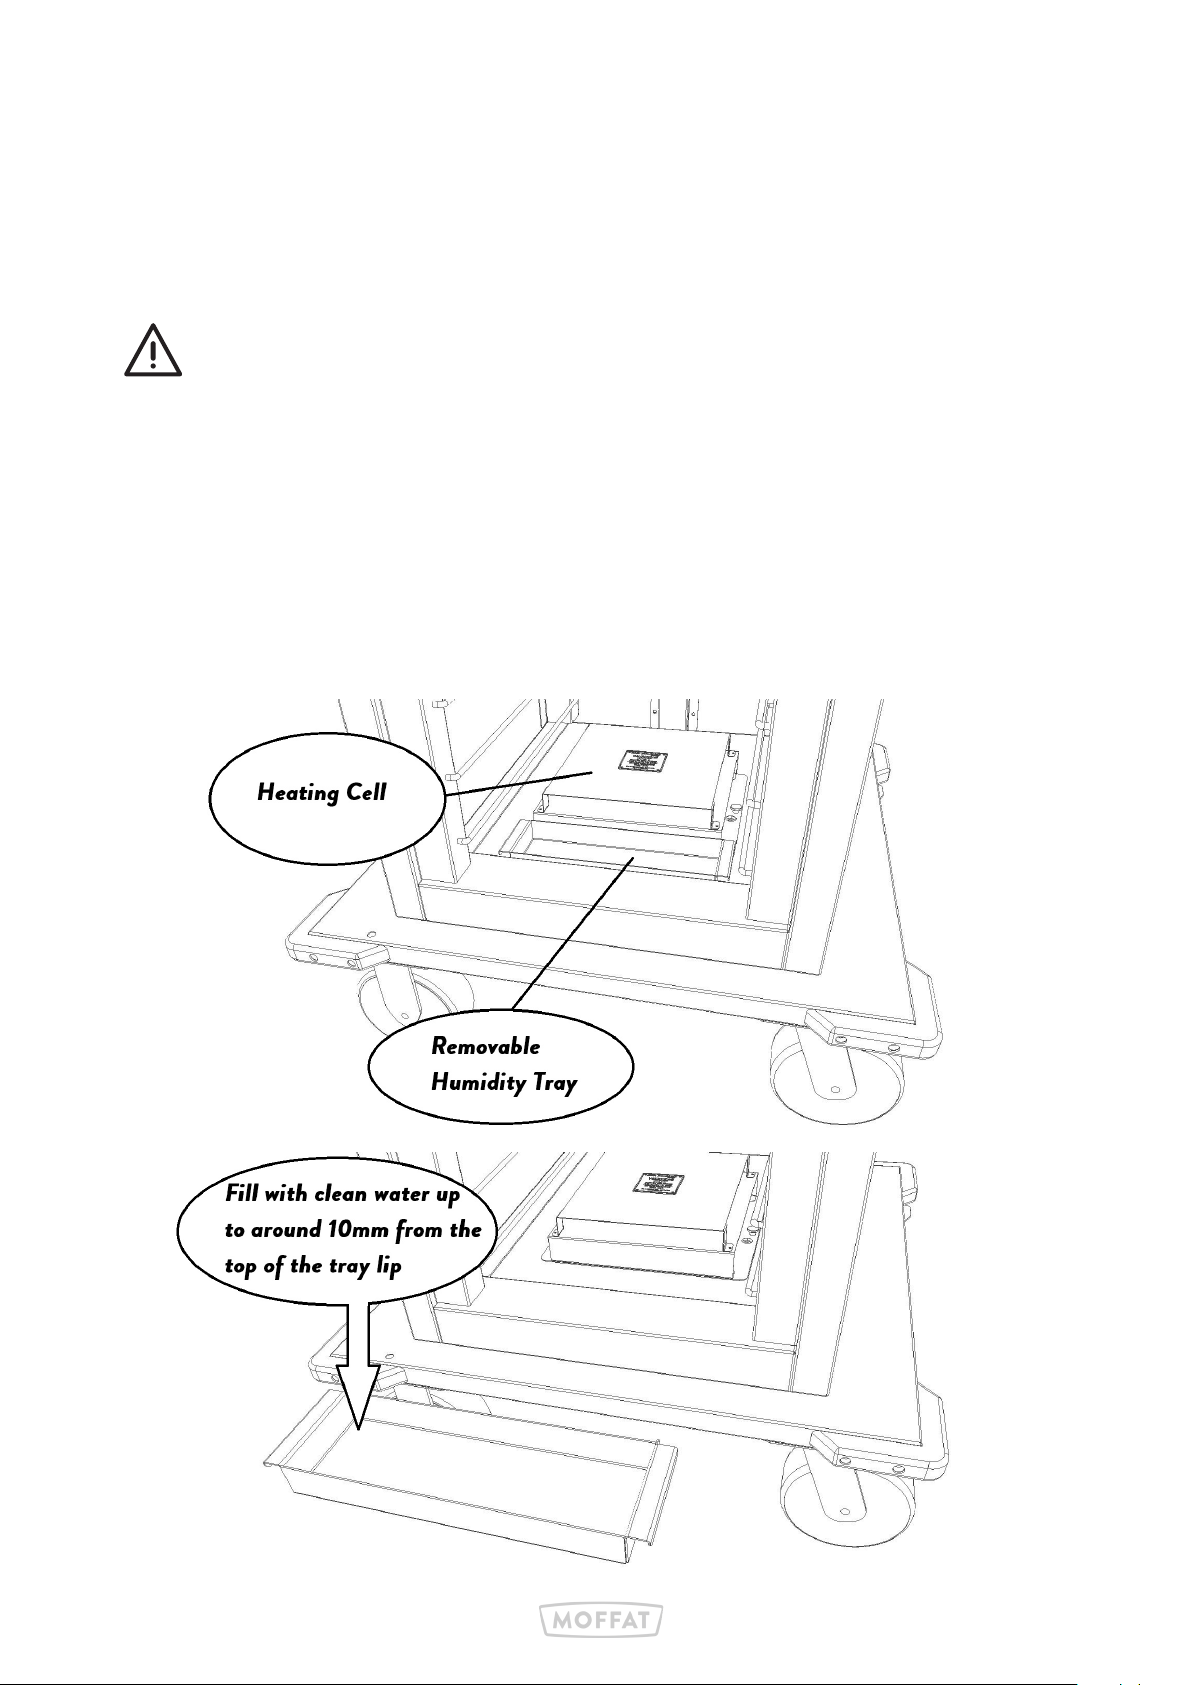
3: Humidity Tray
The trolley is supplied with a manual fill humidifier tray, this integral water bath provides humidity
to keep cetain food products mosit allowing longer holding times.
The humidifier tray can be removed and filled with water (Warm water if available)
Fill up to approximately 10mm from the top of tray lip.
Alternatively it can be filled in situ using a jug (As shown below).
In both instances care needs to be taken not to spill water onto the ‘Sahara fan’ which is situated
next to the tray.
Note: This tray will periodically need refilling due to evaporation.
Care must be taken to avoid pouring water into the Sahara Fan.
5
Page 6
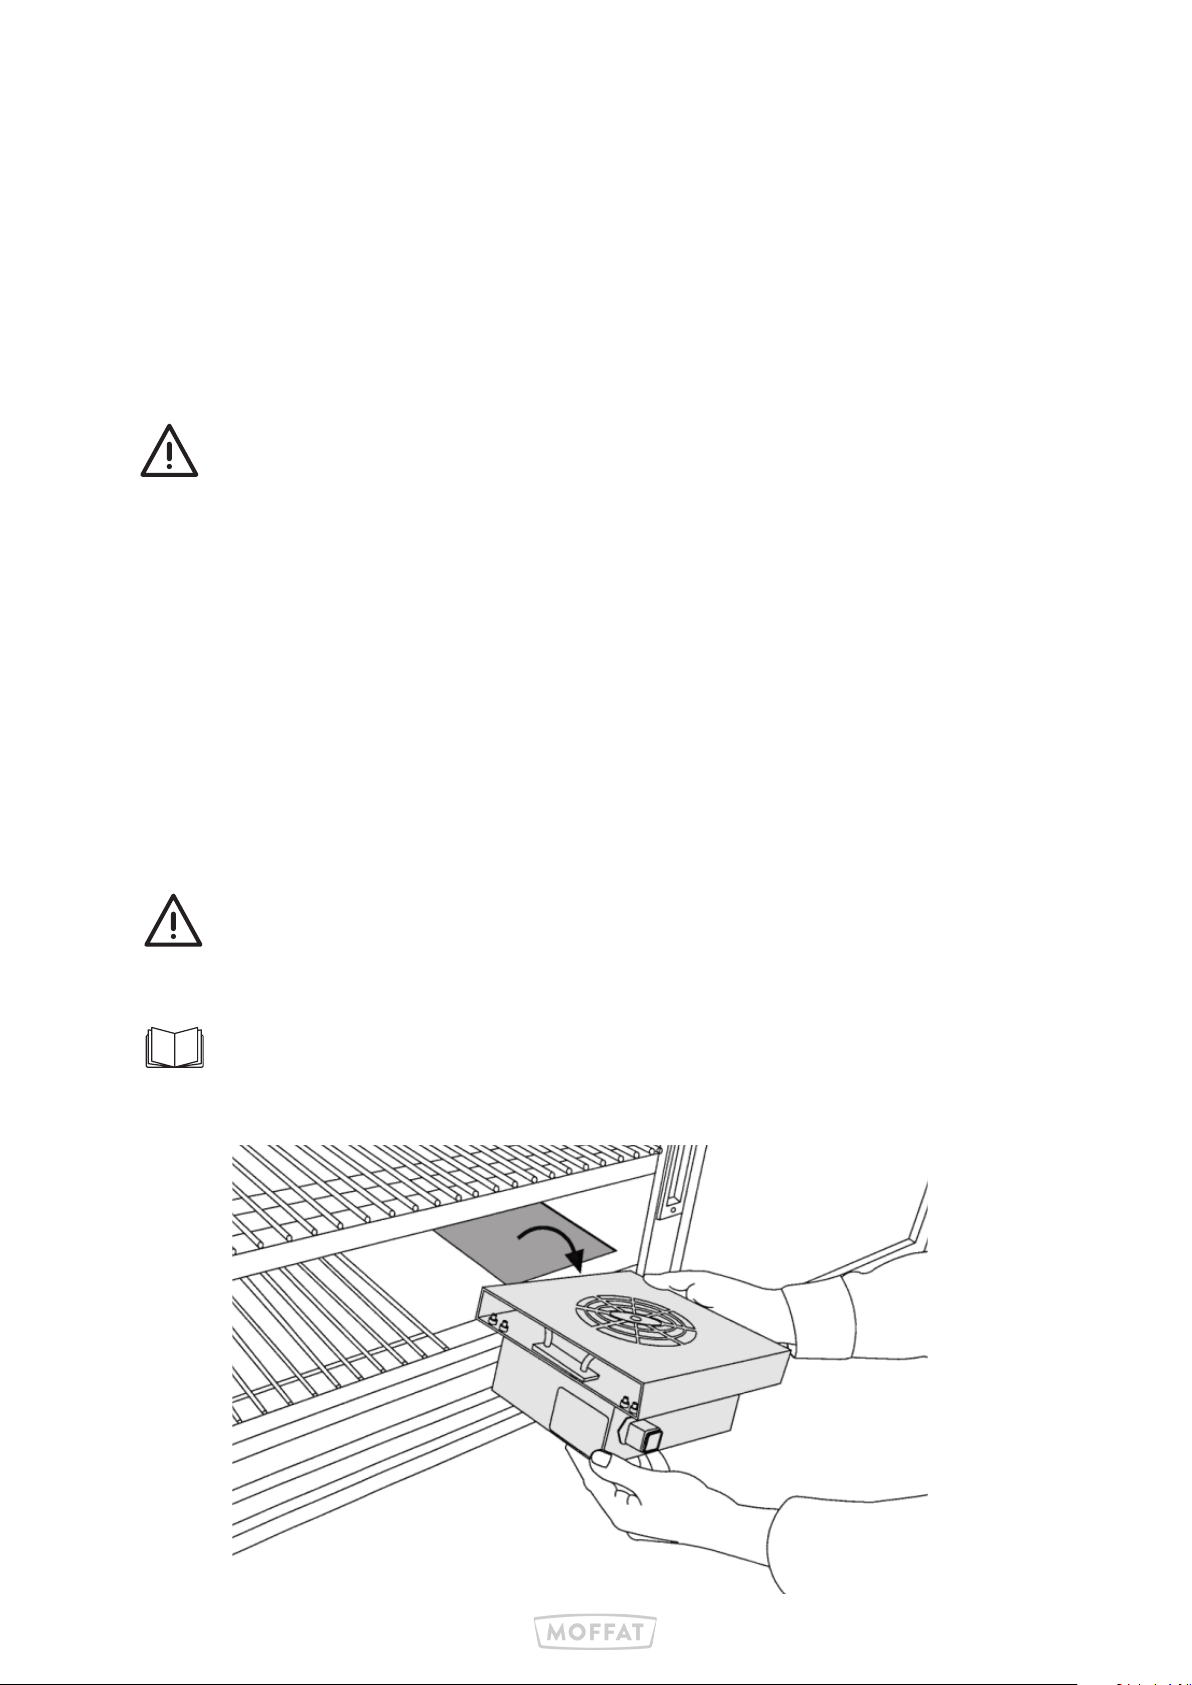
4: Sahara Fan Installation & Removal
The Sahara-Fan heater fitted provides excellent balanced heating coupled
with energy savings. The unit can be easily removed & replaced for cleaning or
maintenance as it has a simple bayonet & clip fastening system. The diagrams
below demonstrate the removal of the hot cupboard Sahara fan. As the fan
is located in the base of the cupboard, access to the Plug & socket is via the
underside of the unit (fig 4).
The Sahara Fan cell is an integral part of the appliance.
the fixing screw on each side provide earth bonding.
Disconnect the unit from th main power supply before removing the
fixing screws.
1. Locate the fixing clip on the ‘Male’ plug fitted to the Sahara fan press & unclip.
2. Pull the female socket o the plug
3. Remove as many rodded shelf sections as needed to allow access to the Sahara fan.
4. Remove the earth bonding fixings two on each side.
5. Lift out at a slight angle taking care not to damage the plug attached to the fan.
Fitting is a reversal of the above.
Warning: The earth bonding screws must be fitted before switching power back on
Although not shown in figure 5; the Sahara fan supplied has a
protective St/steel cover over the top air intake. This shields the
fan innards from any food or liquid spillage from above.
6
Page 7
5: Cleaning
Before attempting to clean the unit, please ensure that the unit is isolated from
the electric supply and allowed to cool down, with all food plates and other Dishes
removed from the unit.
Do not use a water jet or pressure spray to clean this appliance.
1. Disconnect trolley from mains and wait until appliance has cooled.
2. Wipe clean using hot, soapy water and soft, non-abrasive cloth. Ensure that the stainless steel
is wiped in straight strokes following the grain of the material.
3. Wipe dry using a clean cloth. Do not use scouring pads or abrasive cleaners of any type.
Shelving and select inner panels can be removed to allow a deeper internal clean. Ensure all
panels and fixings are replaced after cleaning operation.
4. Compartment should be washed and then dried with a cloth after each service.
5. Finish by carefully drying with a soft dry cloth or Kitchen Towels.
Do not use scouring pads or abrasive cleaners of any type.
Do not use Solvents, bleach, Caustic Cleaners or biological powders on any surface.
7
Page 8

Thank you for choosing E&R Moat!
Scan the QR code below to visit the website for further information:
E&R Moat Ltd.
Bonnybridge
FK4 2BS
Scotland
8
www.ermoat.co.uk
+44 (0) 1324 812272
sales@ermoat.co.uk
 Loading...