

Page 1
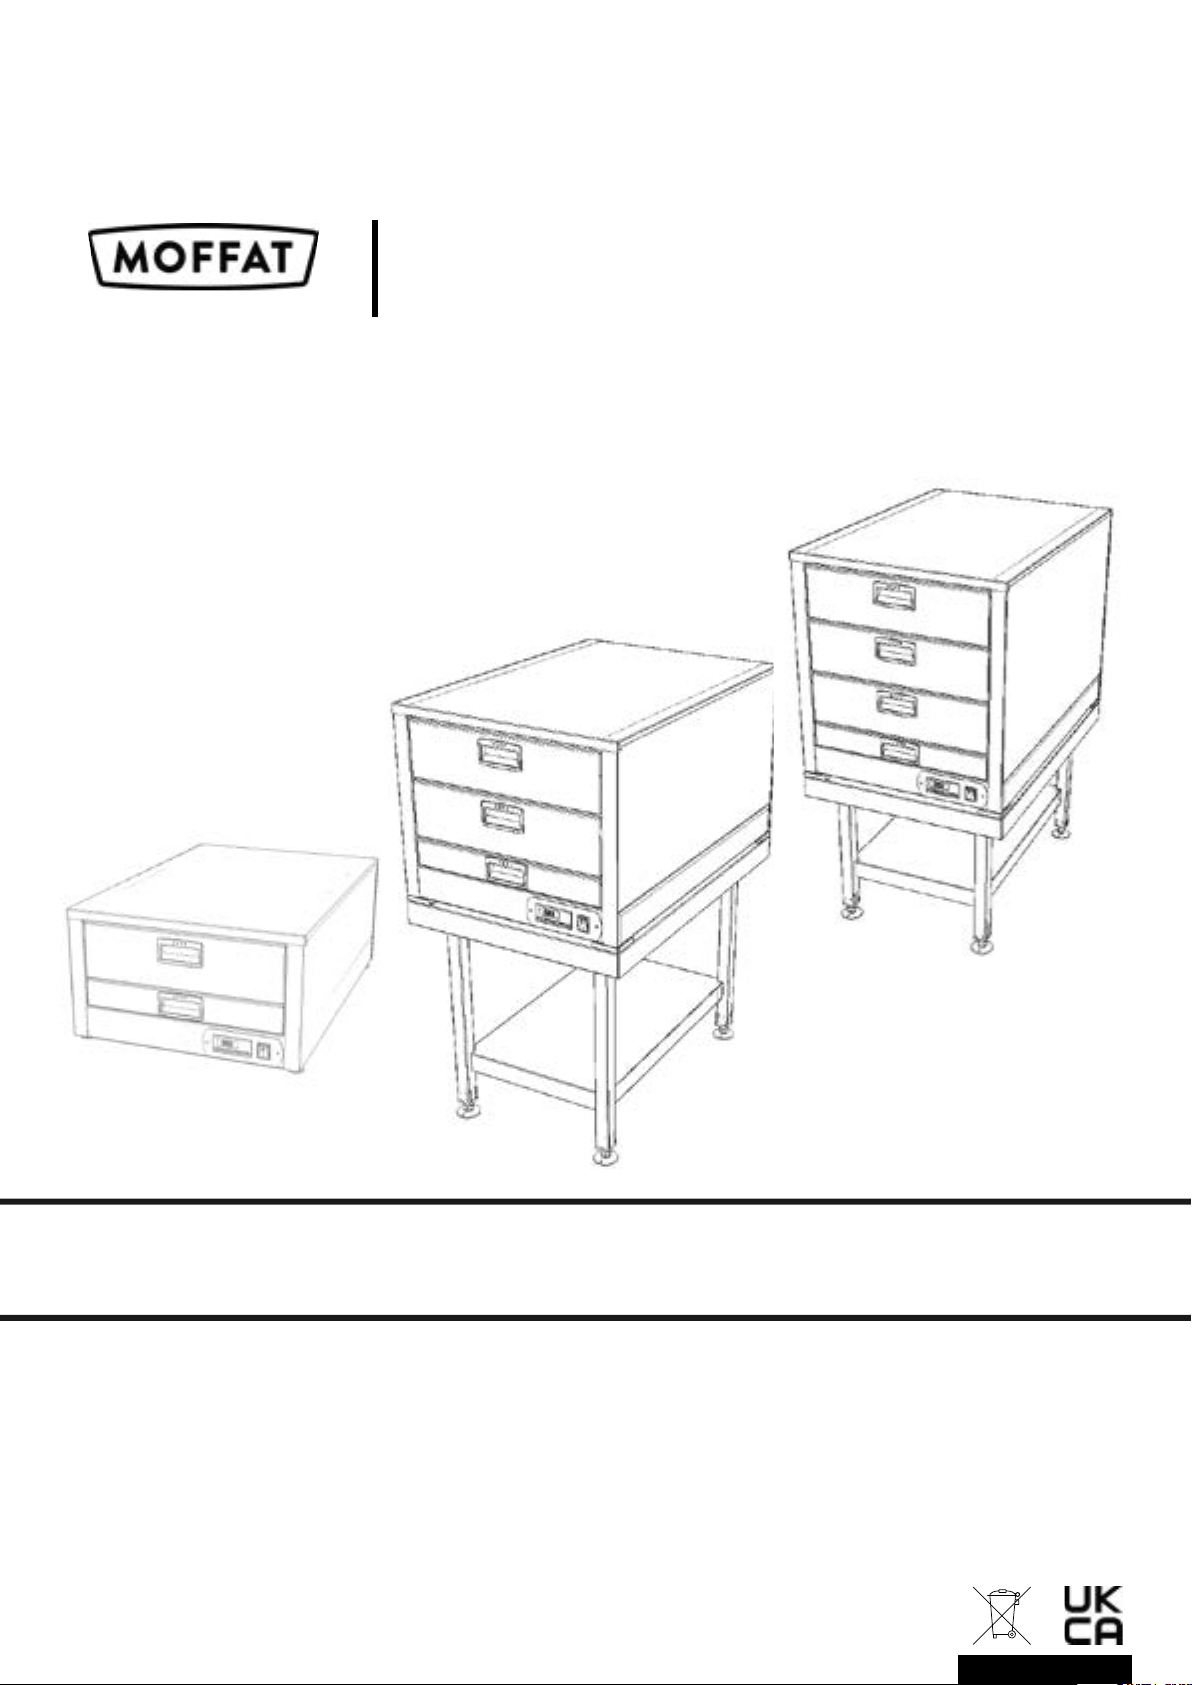
Heated Drawers
Models: GHD1, GHD2,GHD3,
Operating & Service Manual
Manual 026 Issue 003 January 2025
Page 2
To ensure the best results from this unit please take the time to read
and follow all safety, installation and maintenance guidelines carefully
before proceeding to install. Keep this manual in a safe place for future
consultation.
These appliances are marked in compliance with the relevant Low
Voltage & EMC Directives. Voltage stated on unit data plate.
Warning! Please pay attention to sections of the manual displaying this
symbol.
Warning! Do not attempt to use a hose or water jet to clean this unit. For
cleaning instructions, refer to section 15.
The appliance must only be used for the purpose it was designed for
and may become unsafe if used for any other purpose. Operators
should be trained. The room where this trolley is used must be dry,
clean with temperatures between 16°C and 25°C and with a maximum
relative humidity of 60%. This unit is for indoor use only and has an IPX4
rating.
Contents
1
2
Electrical Specification & General Installation
Specification & Operation
Cleaning
Page
3
4 / 5 / 6
7
Page 3
1: Electrical Specification
This appliance must be earthed and damaged cables must be
replaced by a suitably qualified person!
1 Phase Cable
Live (L1)
L2
L3
Neutral
Earth
A mains cable, type H07RN-F, conforming to code designation 60245
IEC 57, is supplied.
Yellow & Green (Striped)
Brown
X
X
Blue
2: General Installation
3 Phase Cable
Brown
Black
Grey
Blue
Yellow & Green (Striped)
Before installation please read the following points:
This equipment is designed to be operated by suitably qualified
persons. It is the responsibility of the Supervisor or equivalent to instruct
users, provide suitable P.P.E., Show the mains isolating switch location,
and inform users that parts may become hot, causing injury if touched.
1. Remove all packaging & plastic coatings from the appliance.
2. Check for any damage.
3. Assemble all parts, including drawer inserts etc.
4. Ensure all switches and thermostat controls are in the OFF position
5. Connect the mains input plug to the socket outlet.
6. Turn on and check the unit is functioning correctly.
3
Page 4
3: Operation
Model
GHD1
GHD2
GHD3
Designed to keep large quantities of food such as bread, meat and vegetables at safe
and hygienic temperatures, holding moist for extended periods.
Each drawer has a three removable GN1/3 inserts.
The unit is digital thermostatically controlled with a green illuminated on /o switch.
Supplied with a 2-meter-long cord set with moulded 13amp plug. [13A 230V 50Hz]
Operation:
• Remove the humidifier tray & fill with 0.4 litres of fresh water and refit the tray.
(see sketch page5)
Weight
(kg)
25
35
40
Dimensions
L X W X H (mm)
475 x 685 x 277
475 x 685 x 393
475 x 685 x 511
Electrical
Supply
13amp
13amp
13amp
Rating
(kw)
0.9
1.5
1.5
• Plug in the unit to an appropriate power socket & switch on.
• Switch on the unit using the green neon switch.
• Preheat the unit for 30 minutes before use.
• Recheck humidifier drawer, top up accordingly.
• Only place hot produce into the unit.
• Any produce not used with-in 60 minutes recheck for quality.
These units are not designed to cook or heat up cold food
4
Page 5
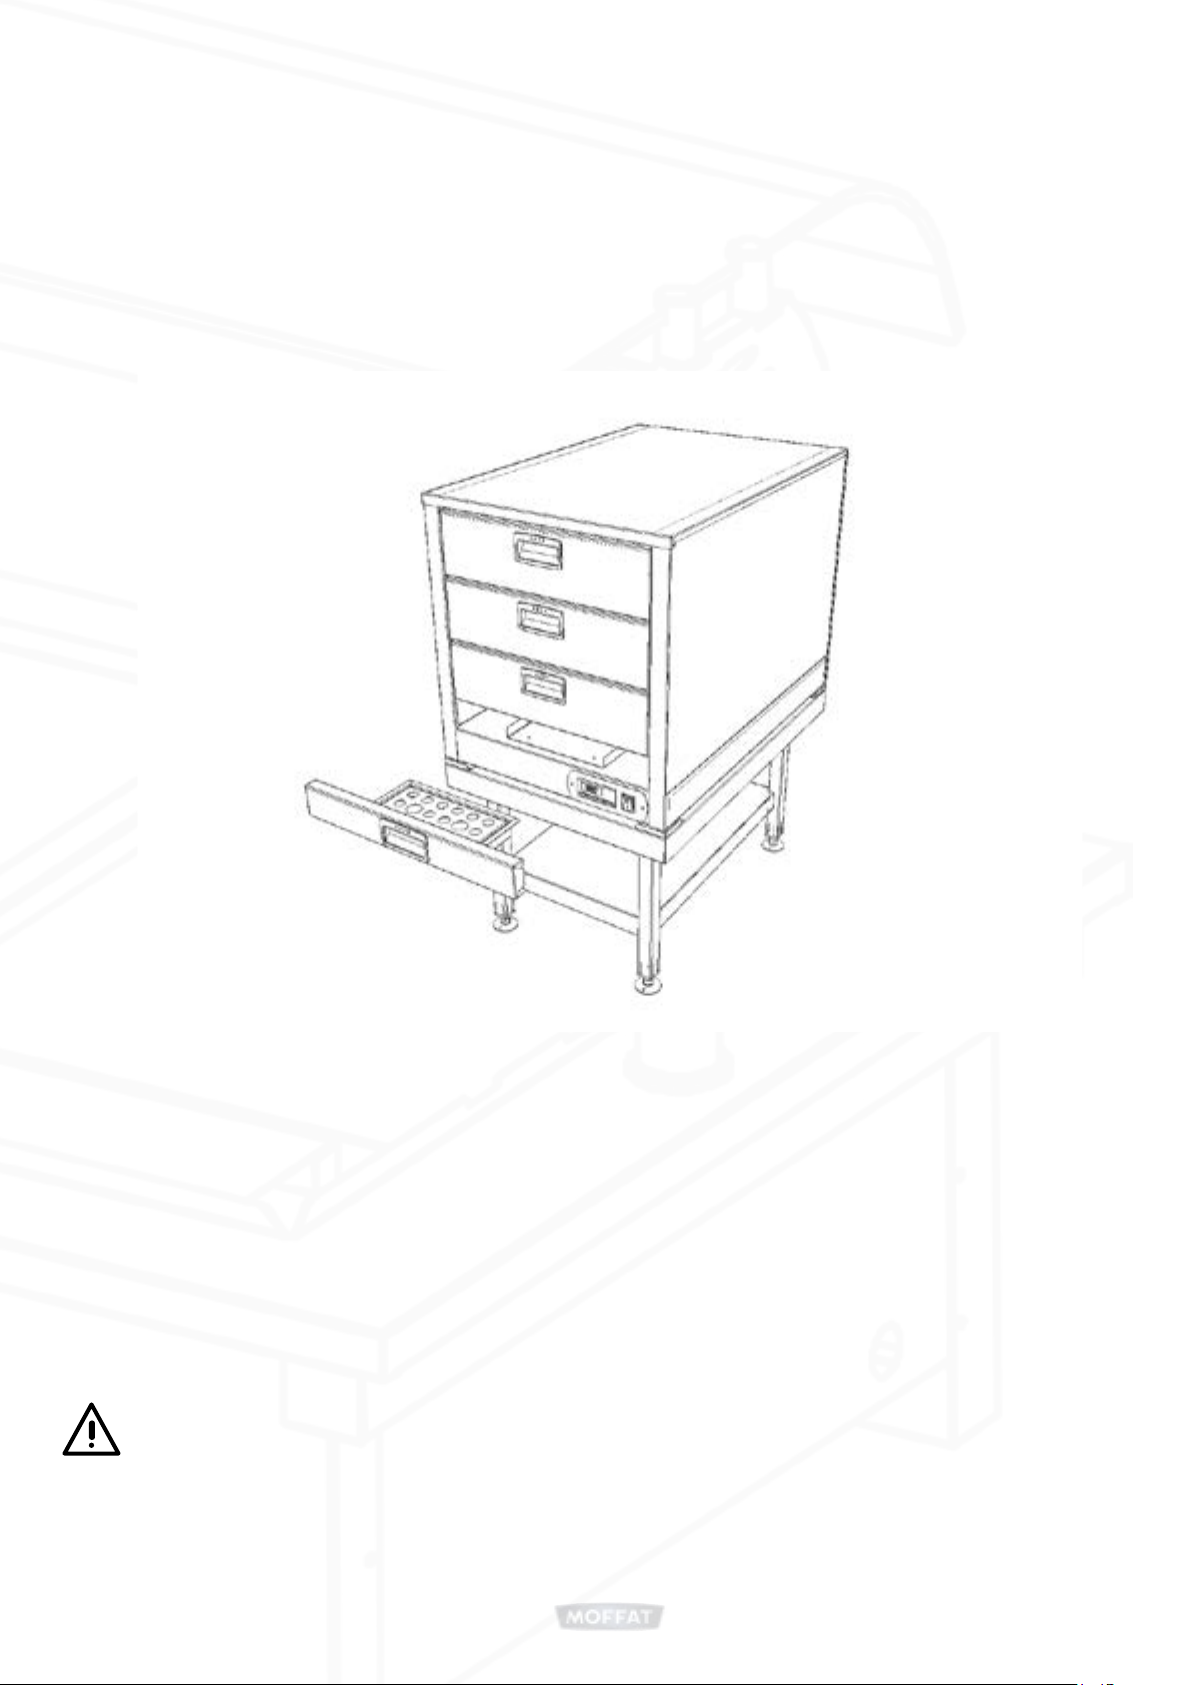
3: Operation
Pour 0.4 litres of water into
the humidity drawer.
Check regularly and top
up accordingly.
Be careful water may spill from the humidity tray when removing the tray.
5
Page 6
3: Operation
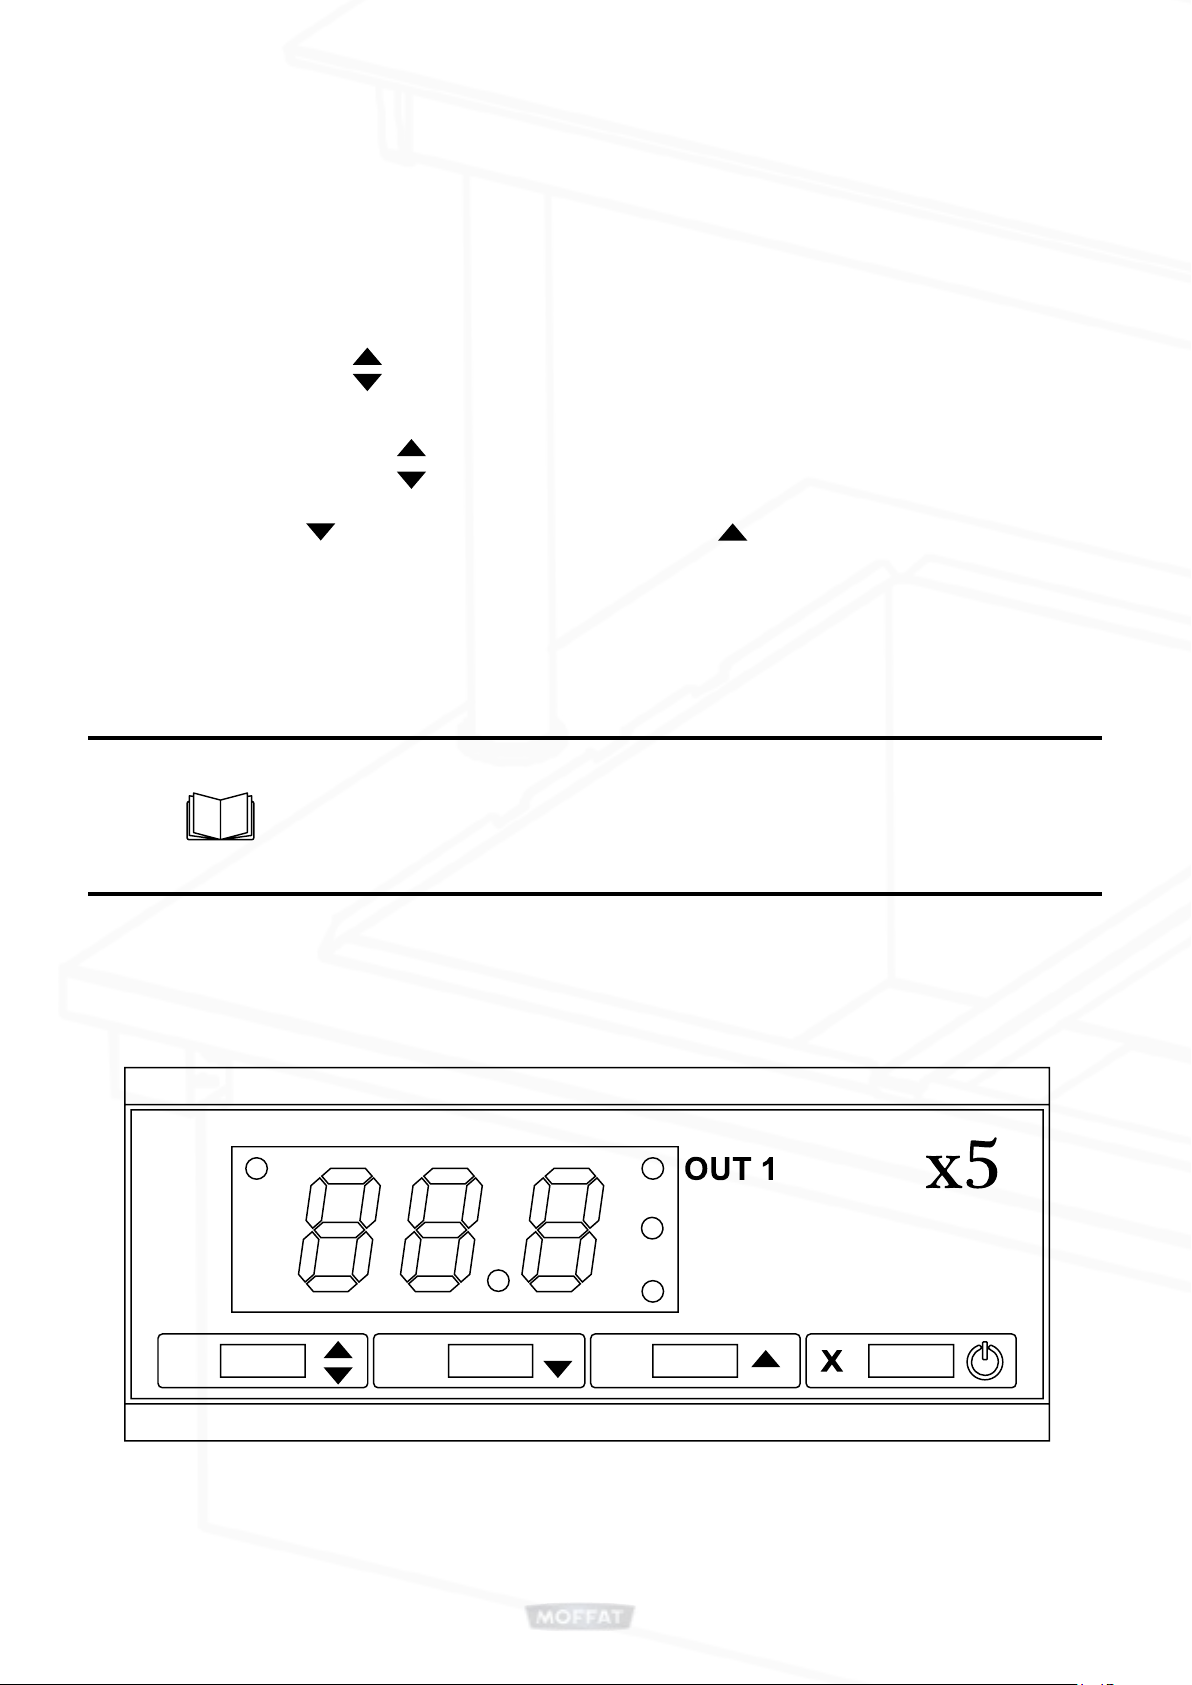
Changing The Temperature Setting
The set point is normally factory set to 85°C
but can be set to control anywhere between 0’C & 120’C.
• Press and hold the button until the temperature is shown in the screen
( 85°C is standard)
• Continue to hold in the and adjust temperature setting,
by pressing the to reduce the setting, or press to increase the setting
• Release both buttons and wait 10 seconds to save the temperature setting.
You cannot set it, out-with the 0’C to 120’C range
6
Page 7
4: Cleaning
These units will remain hot for a long period of time after use
Before attempting to clean the unit, please ensure that the Unit is isolated from
the electric supply and allowed to cool down, with all food plates and other
Dishes removed from the unit.
Do not use a water jet or pressure spray to clean this appliance.
1. Disconnect the unit from mains and wait until appliance has cooled.
2. Wipe clean using hot, soapy water and soft, non-abrasive cloth. Ensure that the
stainless steel is wiped in straight strokes following the grain of the material.
3. Wipe dry using a clean cloth. Do not use scouring pads or abrasive cleaners of
any type. Drawers and inserts can be removed to allow a deeper internal clean.
Ensure all panels and fixings are replaced after cleaning operation.
4. Wipe down with a damp, clean cloth.
5. Finish by carefully drying with a soft dry cloth or Kitchen Towels.
Do not use scouring pads or abrasive cleaners of any type.
Do not use Solvents, bleach, Caustic Cleaners
or biological powders on any surface.
Special care should be taken around electrical parts,
avoided excessive use of water.
7
Page 8
Thank you for choosing E&R Moat!
Scan the QR code below to visit the
E&R Moat website for further information:
E&R Moat Ltd.
Bonnybridge
FK4 2BS
Scotland
www.ermoat.co.uk
+44 (0) 1324 812272
sales@ermoat.co.uk
 Loading...