

Page 1
1. Remove the mounting bracket from the body by loosening the setscrew.
2. Position the assembled unit on the wall where desired.
3. Lightly mark the outline of each base.
4. Center a mounting bracket within each base outline with “UP” facing
you.
5. Mark the 2 large hole locations of each mounting bracket.
6. Attach each mounting bracket to the wall, using the wall anchors
provided
7. Mount each base on the corresponding mounting bracket. Check and
make sure that the base set screw hole(s) are facing down. Assemble a
set screw to each base. Use the allen wrench included in hardware kit
to tighten each set screw and secure the assembly to the mounting
bracket(s).
25300 AL MOEN D R IVE N ORTH OLMSTED , OH 44070
CORPORATE H EAD QUARTER S: (800) 321 -8809 FAX: (800) 848-6636
INTERNATI ONAL: (440) 962 -2000 FAX: (440) 962-2726
CUSTOMER SER VICE (USA): 800 -882-0116 FAX: (888) 379-2720
WWW.MOEN.COM
Copyright Creative Specialties International Literature #BA1451
Robe Hook is constructed of zinc.
YB9203BN – Robe Hook
Brushed Nickel Finish
YB9203CH – Robe Hook
Chrome Finish
Cleaning Instructions:
Stock Number:______________________Robe Hook
By Creative Specialties
Materials:
Installation Instructions:
Stock Numbers:
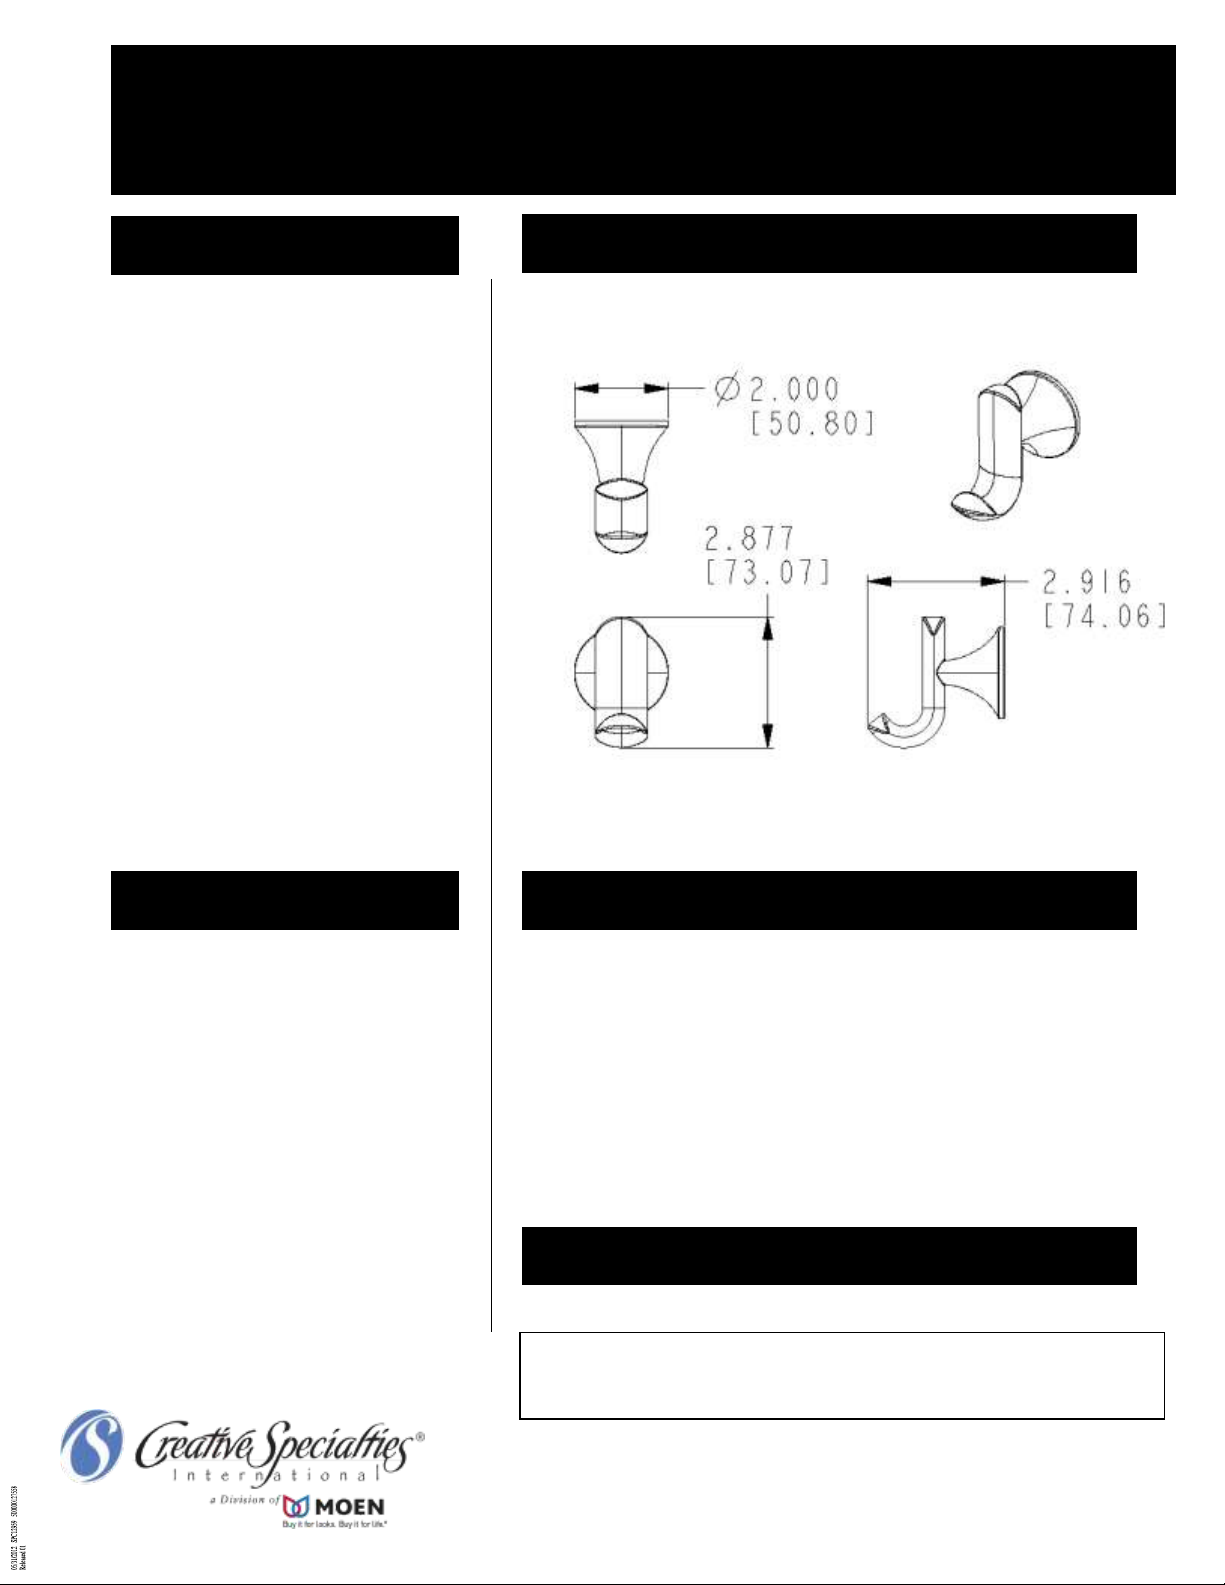
Dimensions:
Robe Hook
YB9203
Fina® Technical Specification
To preserve the fine finish of this product, clean only with a soft
damp cloth. Dry well. Do not use commercial or abrasive cleaners.
 Loading...