

Page 1
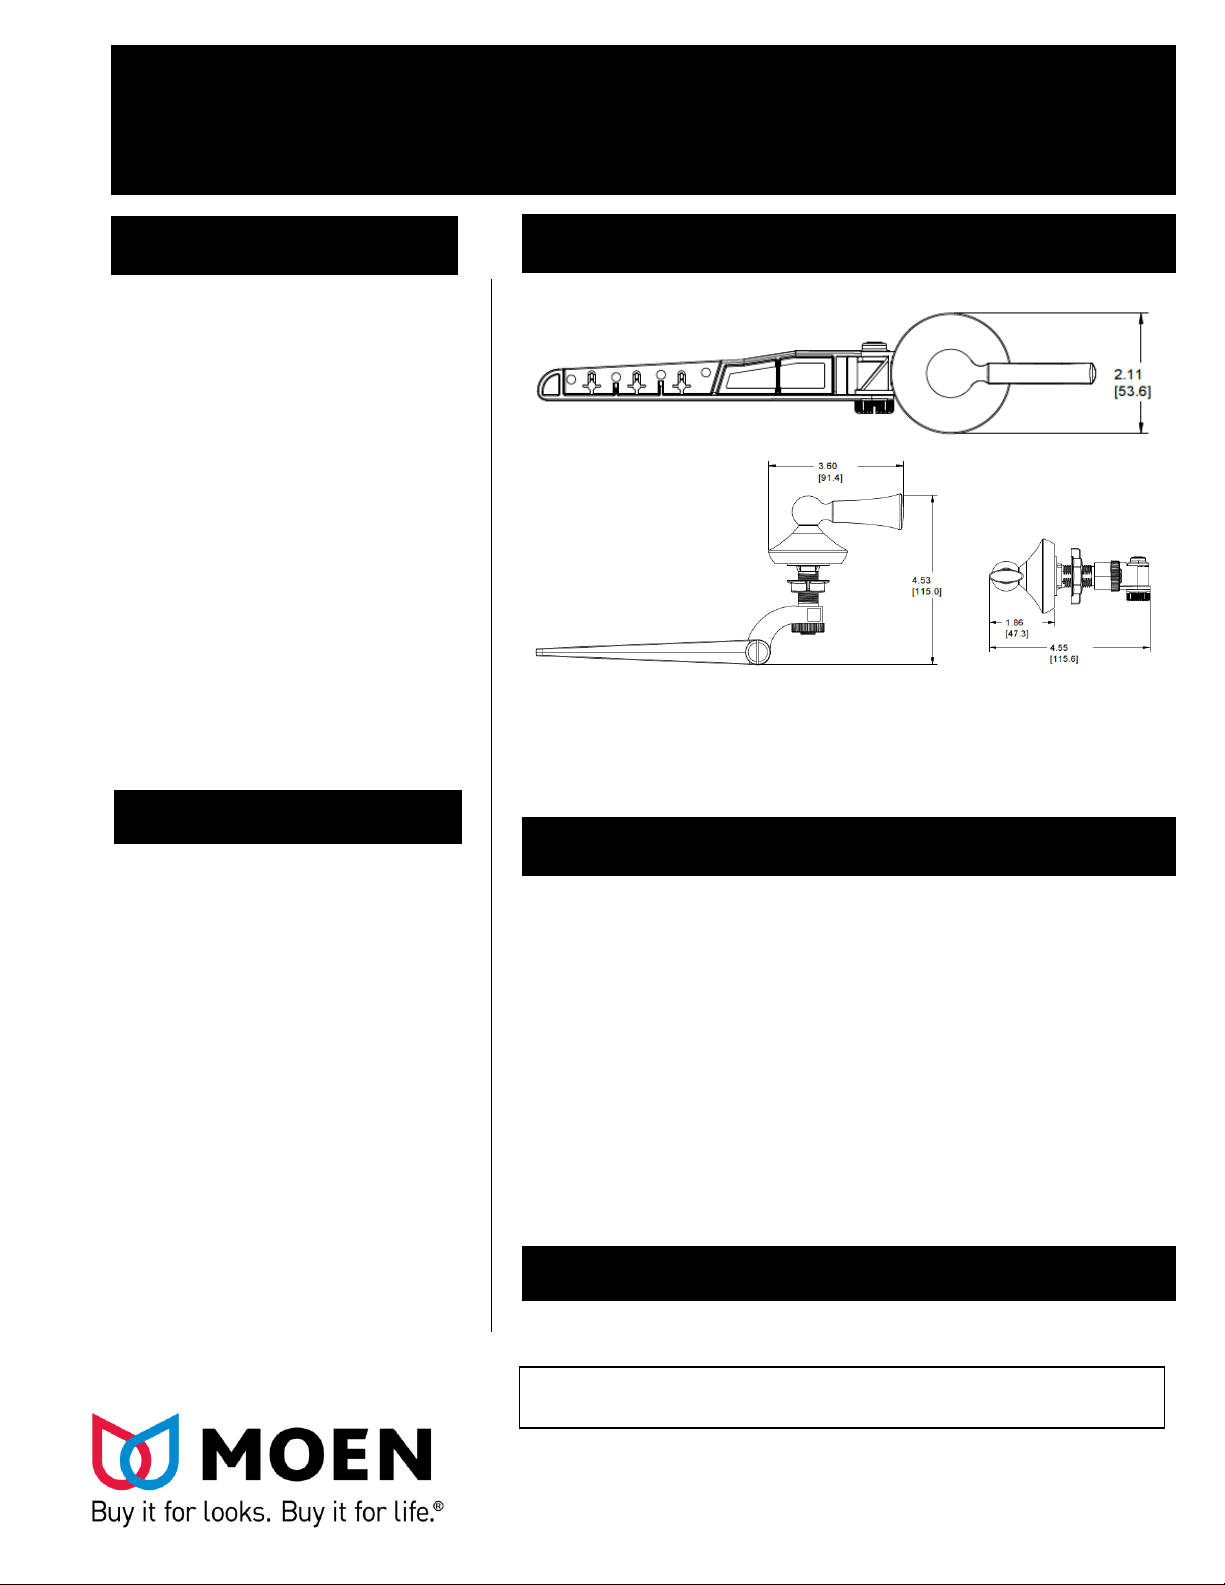
YB5201CH – Decorative Tank Lever
Chrome Finish
YB5201BN – Decorative Tank Lever
Brushed Nickel Finish
25300 AL MO EN DRIVE NORTH OLMS T E D , O H 44070
CORPORATE HEA D Q U A R T E R S : (800) 321 - 8809 FAX: (800) 848-6636
INTERNATIONA L: (440) 962-2000 FAX: (440) 9 6 2 -2726
CUSTOMER SERV ICE (USA): 800-882-0116 FAX: (888) 3 7 9 -2720
WWW.MOEN.COM
© 2014 Moen Incorporated. Moen is a registered trademark and Oxby is a trademark of
Moen Incorporated. All rights reserved.
Tank Lever is constructed of zinc.
The arm mechanism is constructed
of plastic.
Cleaning Instructions:
Stock Number: YB5201 Decorative Tank Lever
Materials:
Installation Instructions:
Stock Numbers:
Dimensions:
Decorative Tank Lever
YB5201
Wynford® Technical Specification
To preserve the fine finish of this product, clean only with a soft
damp cloth. Dry well. Do not use commercial or abrasive cleaners.
1. Remove existing tank lever.
2. Remove the arm mechanism from the new tank lever by loosening nut
3. Unscrew the tank nut. The thread for the tank nut is a left handed
thread.
4. Position the new tank lever through the tank hole. The tank lever handle
should be pointing away from the toilet bowl
5. Tighten nut. Depending on the curvature of the tank, there might be a
slight gap between the outside of the tank and the base of the lever.
6. Place the arm mechanism on the tank lever post. Adjust the arm up or
down as needed. Tighten nut to secure the arm in place.
7. Adjust the arm mechanism from side to side as needed. Make sure the
arm does not come into contact with the tank w all or the flush
mechanism. Tighten screw to lock the arm in place
8. Attach the flapper valve chain to one of the provided slots on the arm. Be
sure to eliminate any slack in the chain.
9. Make sure no water is leaking through the flapper when the handle is in
its normal position (not flushing)
 Loading...