

Page 1
Manual
01/2017 MN048014 EN
XP-503
panel PC
Page 2

Company Information
Eaton Industries GmbH
Hein
D
Germany
www.eaton.eu
www.eaton.com
Region North America
Eaton Corporation
Electrical sector
1111 Superior Ave.
Cleveland,
United States
877
www.eaton.com
Other regions
Please contact your local distributor or send an e
mail to:
automation@eaton.com
All proprietary names and product designations are brand names or trademarks
registered to the relevant title holders.
Break-Down Service
Please call your local representative:
http://www.eaton.eu/aftersales
or
Hotline After Sales Service:
+49 (0) 1805 223822 (de, en)
AfterSalesEGBonn@eaton.com
Manufacturer
-Möller-Straße 7-11
-53115 Bonn
Support
OH 44114
-ETN-CARE (877-386-2273)
Original
The German-language edition of this document is the original manual.
Translation of the original version.
All editions of this document other than those in German language are translations of the original
manual.
4th edition 2017, publication date 01/2017
© 2014 by Eaton Automation GmbH, CH-9008 St. Gallen
Author: Ivo Hengartner
Editor: Antje Panten-Nonnen
All rights reserved, also for the translation.
No part of this manual may be reproduced, stored in a retrieval system, or transmitted in any form or
by any means, electronic, mechanical, photocopying, micro-filming, recording or otherwise, without
the prior written permission of Eaton Industries GmbH, Bonn.
-
2 XP-503 01/2017 MN048014 EN www.eaton.com
Subject to alteration.
Page 3

Danger!
Dangerous electrical voltage!
Before commencing the installation
• Disconnect the power supply of the device.
• Ensure that devices cannot be accidentally restarted.
• Verify isolation from the supply.
• Earth and short circuit.
• Cover or enclose neighbouring units that are live.
• Follow the engineering instructions (AWA/IL) of the
device concerned.
• Only suitably qualified personnel in accordance with
EN 50110-1/-2 (VDE 0105 Part 100) may work on
this device/system.
• Before installation and before touching the device ensure
that you are free of electrostatic charge.
• The functional earth (FE) must be connected to the
protective earth (PE) or to the potential equalisation. The
system installer is responsible for implementing this
connection.
• Connecting cables and signal lines should be installed so
that inductive or capacitive interference does not impair
the automation functions.
• Install automation devices and related operating elements
in such a way that they are well protected against
unintentional operation.
• Suitable safety hardware and software measures should
be implemented for the I/O interface so that a line or wire
breakage on the signal side does not result in undefined
states in the automation devices.
• Ensure a reliable electrical isolation of the low voltage for
the 24 volt supply. Only use power supply units complying
with IEC 60364-4-41 (VDE 0100 Part 410) or HD 384.4.41 S2.
• Deviations of the mains voltage from the rated value must
not exceed the tolerance limits given in the specifications,
otherwise this may cause malfunction and dangerous
operation.
• Emergency stop devices complying with IEC/EN 60204-1
must be effective in all operating modes of the automation
devices. Unlatching the emergency-stop devices must not
cause restart.
• Devices that are designed for mounting in housings or
control cabinets must only be operated and controlled
after they have been installed with the housing closed.
Desktop or portable units must only be operated and
controlled in enclosed housings.
• Measures should be taken to ensure the proper restart of
programs interrupted after a voltage dip or failure. This
should not cause dangerous operating states even for a
short time. If necessary, emergency-stop devices should
be implemented.
• Wherever faults in the automation system may cause
damage to persons or property, external measures must
be implemented to ensure a safe operating state in the
event of a fault or malfunction (for example, by means of
separate limit switches, mechanical interlocks etc.).
Eaton Industries GmbH
Safety instructions
1
Page 4

2
Page 5

Table of Contents
Table of Contents
1 General ............................................................................................................................... 5
1.1 Purpose of this manual ....................................................................................................... 5
1.2 Additional documents .......................................................................................................... 5
1.3 List of revisions ................................................................................................................... 6
2 Description of device ........................................................................................................ 7
2.1 Function .............................................................................................................................. 7
2.2 Intended use ....................................................................................................................... 7
2.3 Device models ..................................................................................................................... 8
2.4 Marking ............................................................................................................................. 10
2.5 Marine approvals ............................................................................................................... 11
3 Safety instructions .......................................................................................................... 12
3.1 Basics ................................................................................................................................ 12
3.2 Precautionary statements ................................................................................................. 13
3.3 Mandatory requirements, personnel requirements ........................................................... 14
3.3.1 Occupational safety ........................................................................................................... 14
3.3.2 Personnel qualifications .................................................................................................... 14
3.3.3 Manual .............................................................................................................................. 14
3.3.4 Installation, maintenance, and disposal ............................................................................ 14
3.3.5 Prohibited use ................................................................................................................... 14
3.3.6 Prerequisites for proper operation ..................................................................................... 15
3.4 Device-specific hazards .................................................................................................... 16
4 Installation ....................................................................................................................... 20
4.1 Safety instructions ............................................................................................................. 20
4.2 Unpacking and checking the package contents ................................................................ 20
4.3 Storage and transportation ................................................................................................ 20
4.4 Installing ............................................................................................................................ 20
4.4.1 Temperature ...................................................................................................................... 21
4.4.2 Aeration and de-aeration ................................................................................................... 21
4.4.3 Mounting position .............................................................................................................. 22
4.4.4 Installation cut-out ............................................................................................................. 22
4.4.5 Fixing and sealing ............................................................................................................. 23
4.4.6 Conditions for marine approval ......................................................................................... 25
4.5 Preparing the device for operation .................................................................................... 26
4.6 Connecting the power supply ............................................................................................ 27
4.7 Using peripheral devices ................................................................................................... 28
4.8 External connections ......................................................................................................... 29
4.8.1 Ethernet connections ........................................................................................................ 29
4.8.2 USB connections ............................................................................................................... 30
4.8.3 DVI-I interface ................................................................................................................... 30
4.8.4 Serial interfaces ................................................................................................................ 31
XP-503 01/2017 MN048014 EN www.eaton.com 3
Page 6

Table of Contents
5 Commissioning and operation ...................................................................................... 32
5.1 Adding expansions to the XP-503 ..................................................................................... 32
5.1.1 General prerequisites ........................................................................................................ 32
5.2 Connecting peripheral devices .......................................................................................... 34
5.2.1 Interfaces .......................................................................................................................... 34
5.2.2 Periphery ........................................................................................................................... 36
5.3 Using the storage media ................................................................................................... 37
5.3.1 CFast memory card ........................................................................................................... 37
5.4 Using the XP-503 .............................................................................................................. 39
5.5 Safety Warnings ................................................................................................................ 39
5.5.1 Commissioning .................................................................................................................. 41
5.6 XP-503 with Windows Embedded Standard 7 .................................................................. 44
5.6.1 Protect Mode (Operated with two drives, C:\ and D:\) ....................................................... 44
5.6.2 Managing Accounts and Auto Logon functionality ............................................................ 47
5.6.3 Touch parameters ............................................................................................................. 49
5.6.4 License Eaton Galileo-Open Runtime ............................................................................... 51
5.6.5 License Eaton Visual Designer Runtime ........................................................................... 51
6 Maintenance and repairs ................................................................................................ 53
6.1 Safety instructions ............................................................................................................. 53
6.2 Maintenance ...................................................................................................................... 53
6.2.1 Cleaning the capacitive touch panel ................................................................................. 53
6.2.2 Battery ............................................................................................................................... 53
6.3 Repairs .............................................................................................................................. 53
7 Storage, transport and disposal .................................................................................... 55
7.1 Safety instructions ............................................................................................................. 55
7.2 Storage .............................................................................................................................. 55
7.3 Transport ........................................................................................................................... 55
7.4 Disposal ............................................................................................................................ 56
8 Technical data ................................................................................................................. 57
8.1 Dimensions for XP-503 with 25.65 cm (10.1") display ...................................................... 57
8.1.1 Front dimensions ............................................................................................................... 57
8.1.2 Device dimensions ............................................................................................................ 58
8.1.3 Fitting dimensions ............................................................................................................. 59
8.2 Dimensions for XP-503 with 39.6 cm (15.6") display ........................................................ 60
8.2.1 Front dimensions ............................................................................................................... 60
8.2.2 Device dimensions ............................................................................................................ 61
8.2.3 Fitting dimensions ............................................................................................................. 62
8.3 Dimensions for XP-503 with 54.6 cm (21.5") display ........................................................ 63
8.3.1 Front dimensions ............................................................................................................... 63
8.3.2 Device dimensions ............................................................................................................ 64
8.3.3 Fitting dimensions ............................................................................................................. 65
8.4 General ............................................................................................................................. 66
8.5 Directives and standards ................................................................................................... 70
8.6 Approvals .......................................................................................................................... 71
4 XP-503 01/2017 MN048014 EN www.eaton.com
Page 7

1 General
CAUTION
Installation requires qualified electrician
Before working with
Chapter 3 contains important information regarding your own personal safety, and
must be read and understood by everyone who will be working with the device.
WARNING
Incomplete manual copies
Working with individual pages taken out from the manual may lead to bodily injury
and property damage due to missing safety information.
Always work with the full document.
1.1 Purpose of this manual
This manual contains all the information you will need in order to use the XP-503 panel PC safely and
effectively. The manual is considered an integral part of the device and must always be readily
available in the device's close proximity.
This manual describes all the lifecycle stages for the device: transportation, installation,
commissioning, operation, maintenance, storage, and disposal. It does not, however, go over its
operating system or application software.
Target group
This manual is intended for engineers, electricians, and automation technicians. Electrical
engineering and physics-related knowledge and skills will be required in order to be able to
commission the corresponding devices.
1 General
1.1 Purpose of this manual
1.2 Additional documents
The following documents may also be helpful in relation to the use of this device:
[1] MN05010009Z-DE System Description Networks in Brief
(information on networks in general and on how to integrate PCs and panels into
networks)
[2] IL0480006ZU XP-503 Instruction Leaflet
Download Center
To download the documents, go to the Download Center - Documentation page by clicking on the
Customer Support tab on the Eaton website and then selecting the appropriate option:
www.eaton.eu/doc (search for the document number using the search field on the home page)
the device, make sure to read chapter 3, "Safety instructions."
Product information
For up-to-date information, please consult the product page on the Internet.
www.eaton.eu/xp500
XP-503 01/2017 MN048014 EN www.eaton.com 5
Page 8

1 General
Publication
Page
Keyword
New
Modificati
Delete
07/2014
New edition
11/2015
ATEX accreditation
09/2016
Marine approvals
01/2017
Additional device models
1.3 List of revisions
1.3 List of revisions
The following table only lists major modifications.
date
✓
✓
✓
✓
on
d
6 XP-503 01/2017 MN048014 EN www.eaton.com
Page 9

2 Description of device
2.1 Function
XP-503 panels can be used as control and monitoring devices.
XP-503 devices are the answer to the growing demand of machine and system manufacturers for
high-precision, cost-effective HMI solutions featuring industrial-grade capacitive multi-touch
technology. These devices are available in three widescreen display sizes: 10.1", 15.6", and 21.5".
Their slim design, featuring a non-reflective glass front, delivers a modern look. The robust, scratchresistant front and open device concept on the Panel PCs make them suitable for use in almost all
branches of industry involved in mechanical and plant engineering.
2.2 Intended use
XP-503 panel PCs are primarily intended for use in machine and system building applications. They
are suitable for use in industrial environments and are typically used for automation purposes.
2 Description of device
2.1 Function
XP-503 01/2017 MN048014 EN www.eaton.com 7
Page 10

2 Description of device
Device type
Part no.
Article no.
10.1" widescreen industrial panel PC (Galileo)
• Galileo Open Runtime License
XP-503-10-A10-A00-1B
174474
15.6" widescreen industrial panel PC (Galileo)
• Galileo Open Runtime License
XP-503-15-A10-A00-1B
174475
21.5" widescreen industrial panel PC (Galileo)
• Galileo Open Runtime License
XP-503-21-A10-A00-1B
174476
10.1" widescreen industrial panel PC (VD)
• Visual Designer runtime license
XP-503-10-A10-A00-1V
174477
15.6" widescreen industrial panel PC (VD)
• Visual Designer runtime license
XP-503-15-A10-A00-1V
174478
2.3 Device models
2.3 Device models
• PCT Multitouch
• 1.65 GHZ CPU
• 4 GB RAM
• M in. 32 GB of internal memory
• M in. 4 GB of CFast removable memory
• Windows Embedded Standard 7
• PCT Multitouch
• 1.65 GHZ CPU
• 4 GB RAM
• Min. 32 GB of internal memory
• M in. 4 GB of CFast removable memory
• Windows Embedded Standard
• PCT Multitouch
• 1.65 GHZ CPU
• 4 GB RAM
• M in. 32 GB of internal memory
• M in. 4 GB of CFast removable memory
• Windows Embedded Standard 7
• PCT Multitouch
• 1.65 GHZ CPU
• 4 GB RAM
• M in. 32 GB of internal memory
• M in. 4 GB of CFast removable memory
• Windows Embedded Standard 7
• PCT Multitouch
• 1.65 GHZ CPU
• 4 GB RAM
• M in. 32 GB of internal memory
• M in. 4 GB of CFast removable memory
• Windows Embedded Standard 7
8 XP-503 01/2017 MN048014 EN www.eaton.com
Page 11

21.5" widescreen industrial panel PC (VD)
• PCT Multitouch
• Visual Designer runtime license
XP-503-21-A10-A00-1V
174479
15.6" widescreen industrial panel PC (Galileo)
• ATEX certification II 3D Ex tc IIIC T70°C U
XP-503-15-A10-A01-1B
184582
10.1" widescreen industrial panel PC (Galileo)
• ATEX certification II 3D Ex tc IIIC T70°C U
XP-503-10-A10-A01-1B
184926
21.5" widescreen industrial panel PC (Galileo)
• ATEX certification II 3D Ex tc IIIC T70°C U
XP-503-21-A10-A01-1B
184927
• 1.65 GHZ CPU
• 4 GB RAM
• M in. 32 GB of internal memory
• M in. 4 GB of CFast removable memory
• Windows Embedded Standard 7
• PCT Multitouch
• 1.65 GHZ CPU
• 4 GB RAM
• M in. 32 GB of internal memory
• M in. 4 GB of CFast removable memory
• Windows Embedded Standard
• Galileo Open Runtime License
2 Description of device
2.3 Device models
• PCT Multitouch
• 1.65 GHZ CPU
• 4 GB RAM
• M in. 32 GB of internal memory
• M in. 4 GB of CFast removable memory
• Windows Embedded Standard
• Galileo Open Runtime License
• PCT Multitouch
• 1.65 GHZ CPU
• 4 GB RAM
• M in. 32 GB of internal memory
• M in. 4 GB of CFast removable memory
• Windows Embedded Standard
• Galileo Open Runtime License
Tab. 1 Device model s
XP-503 01/2017 MN048014 EN www.eaton.com 9
Page 12

2 Description of device
2.4 Marking
2.4 Marking
Nameplate
The device has a nameplate on rear. This nameplate makes it possible to identify the device and
includes the following information:
Manufacturer
Part Number
Required power supply
Article No. (Part No. or Art. No.)
Serial No.
Certification marks and information concerning the corresponding certification/approval
Layout of interfaces and controls
To get fast and effective support, make sure to always provide Customer Service with the following
information from the nameplate:
Article No. (Part No. or Art. No.)
Serial No.
10 XP-503 01/2017 MN048014 EN www.eaton.com
Page 13

2.5 Marine approvals
Temperature
B - Ambient temperature: 0°C to +55°C
B - Relative humidity up to 100 % at all relevant temperatures.
Vibration
A - Bulkheads, beams, deck, bridge, Acceleration amplitude: 0.7 g
EMC
A* - All locations except bridge and open deck
Input
Required protection according to DNV-GL Rules shall be provided upon
Location class
interface
Installations
EMC B
Power supply
Place interference filter
EMC A
No additional installations
The gasket installed inside the enclosure cover at the factory must be present in order to
provide stability against vibrations.
Obtained type approvals
XP-503 panels have been granted the required shipping classification by Det Norsk Veritas /
Germanischer Lloyd (DNV GL)
• DNV GL-CG-0339 type approval, November 2015 edition,
"Environmental test specification for electrical, electronic and programmable equipment and
systems"
Certificate No.: TAA00000NC
Location classes
Humidity
2 Description of device
2.5 Marine approvals
B* - All locations (including bridge and open deck)
installation on board
* Filters / Ferrites maybe required to fulfil. See installation restrictions
Installation restrictions
• Install and commission referring to manuals
• Screened communication cables improve EMC behavior
• PE connection of communication cables improve EMC behavior
(e.g. earth-connection kit: EATON ZB4-102-KS1)
see section 4.4.64.4.6 Conditions for marine approval.
XP-503 01/2017 MN048014 EN www.eaton.com 11
Page 14

3 Safety instructions
Read this chapter before working with the device. It contains important information
regarding your own personal safety, and must be read and understood by everyone
who will be working with the device.
3.1 Basics
3 Safety instructions
3.1 Basics
The device has been designed according to the state of the art and all generally accepted safety
rules and standards. However, this alone cannot eliminate all potential hazards, which is why it is
necessary for you to be aware of all hazards and residual risks.
Do not run the device unless it is in perfect technical condition. Make sure to always operate it as
specified in this document.
12 XP-503 01/2017 MN048014 EN www.eaton.com
Page 15
3.2 Precautionary statem ent s
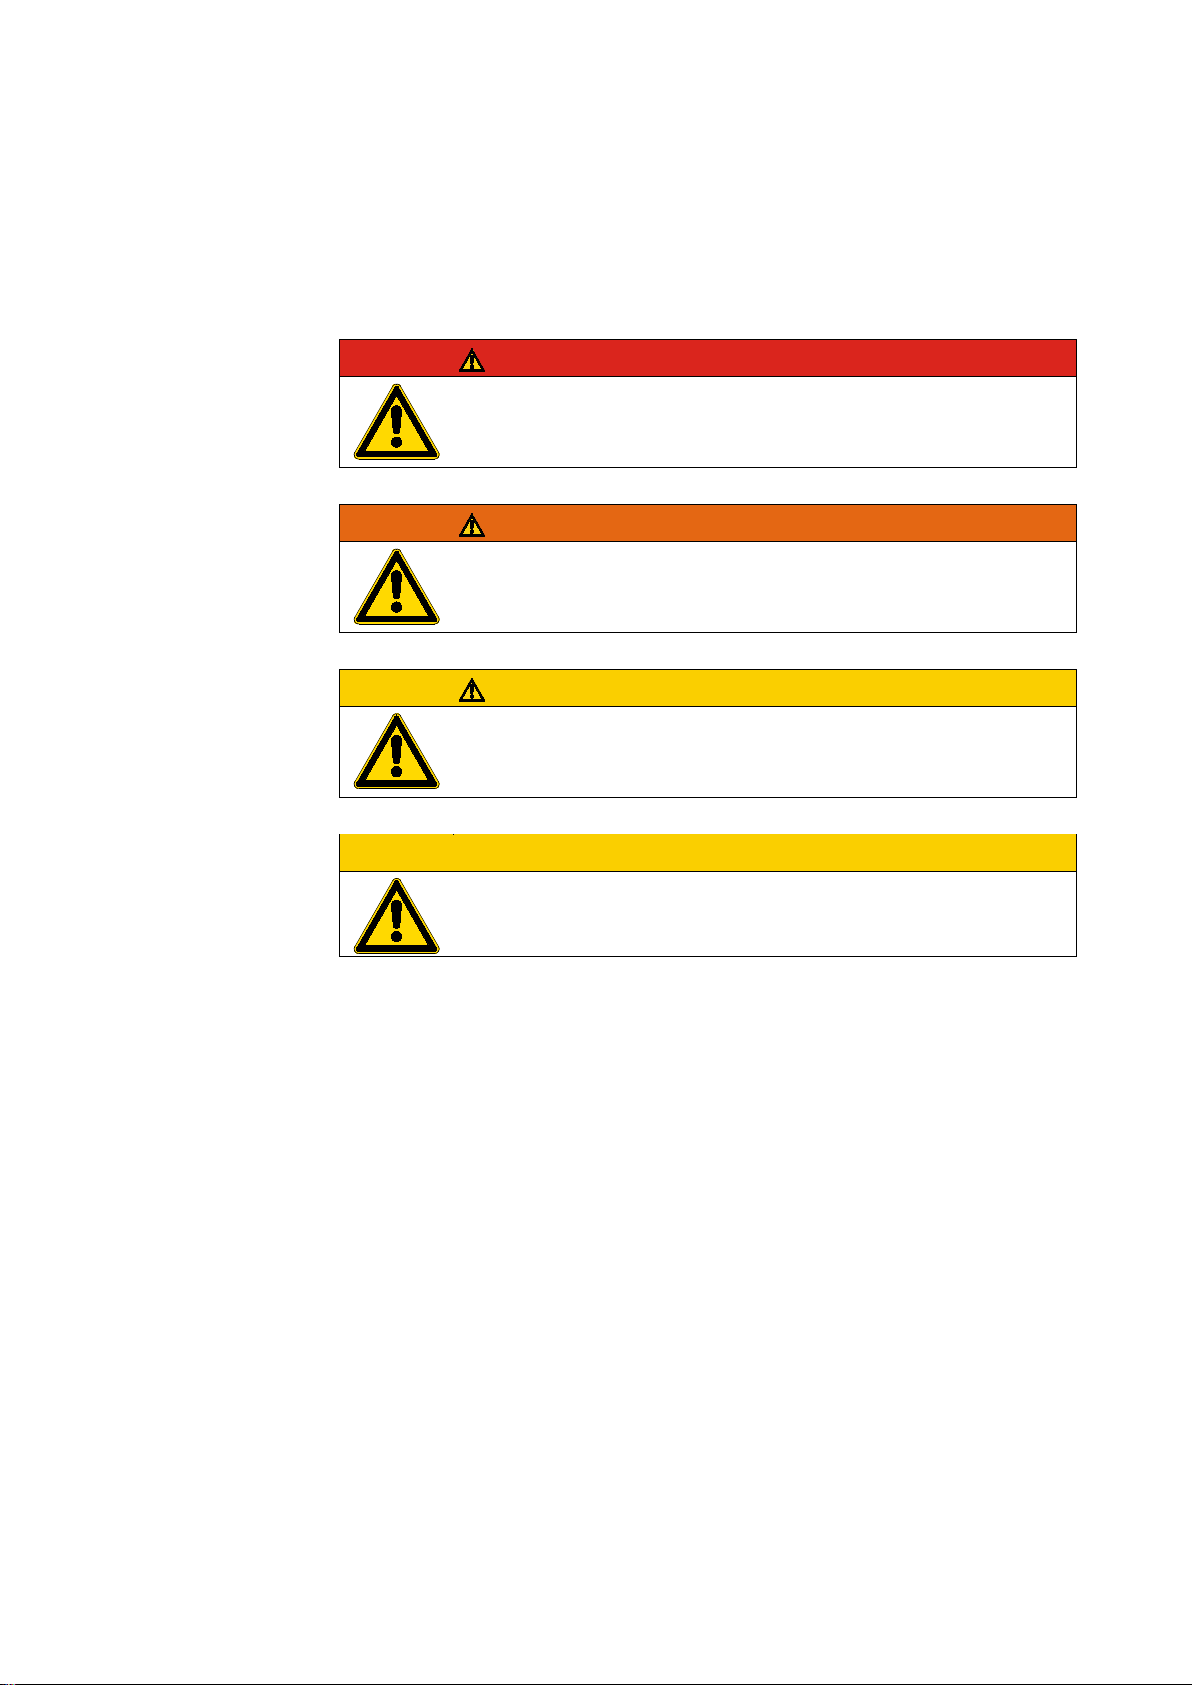
Danger
DANG
Indicates an imminent hazardous situation that will result in death or serious injury if
it is not avoided.
WARNING
WARNING signal word
Indicates a potentially hazardous situation that could result in death or serious injury
if it is not avoided.
CAUTION
CAUTION signal word
Indicates a potentially hazardous situation that could result in minor or moderate
injury if it is not avoided.
CAUTION
CAUTION signal word without warning sign
Indicates a situation that could res
Used to highlight useful information.
ER signal word
3 Safety instructions
3.2 Precautionary statements
ult in property damage if it is not avoided.
The hazard symbol used and the corresponding text will provide information regarding the specific
hazard and how to avoid or prevent it.
XP-503 01/2017 MN048014 EN www.eaton.com 13
Page 16
3 Safety instructions
WARNING
Incomplete manual copies
Working with individual pages taken out from the manual may lead to bodily injury
and propert
Always work with the full document.
3.3 Mandatory requirements, personnel requirements
3.3 Mandatory requirements, personnel requirements
3.3.1 Occupational safety
All generally accepted occupational health and safety rules and standards (internal and national)
must be complied with.
3.3.2 Personnel qualifications
The personnel responsible for installation, operation, maintenance, and repairs must have the
necessary qualifications for the work they will be performing. They must be appropriately trained
and/or briefed and be informed of all hazards and risks associated with the device.
3.3.3 Manual
Make sure that every person who will be working with the device, regardless of the lifecycle stage
involved, has read and understood the relevant sections of this manual.
3.3.4 Installation, maintenance, and disposal
Make sure that the device is connected, installed, serviced, and disposed of professionally and
all relevant standards and safety rules.
with
3.3.5 Prohibited use
It is strictly prohibited to use the device in order to implement safety-relevant functions (in the sense
of personal and machine protection).
y damage due to missing safety information.
in line
14 XP-503 01/2017 MN048014 EN www.eaton.com
Page 17

3.3 Mandatory requirements, personnel requirements
For more information on repairs, please refer to chapter 6.3.1, "Repairs."
3.3.6 Prerequisites for proper operation
In order for the device to be able to meet the contractually stipulated terms, the following must be
observed:
Only qualified personnel should be allowed to work with the device.
The personnel working with the device must have read the manual and must follow all the
instructions in it.
The required ambient conditions must be met.
Maintenance work must be carried out correctly.
Potentially explosive area, zone 22, only device type XP-503-…-A10-A01-1B:
o The XP-503-…-A10-A01-1B are designed for installation in the front of enclosures in
protection type "tc" (alternatively "ta" or "tb"). This installation must be tested and certified
separately.
o The maximum surface temperature at the outer surface is set to 70°C at the maximum
ambient temperature of 50°C.
o For safe installation, comply with the specification to holding brackets and tightening torque in
the Instruction Leaflet.
o The ground resistance of accessible metal parts must be less than 10
3 Safety instructions
9
ohms
We assume no liability for damages, consequential damages, and/or accidents caused by the
following:
Failure to follow occupational health and safety rules and standards
Device failures or function disturbances
Improper use and/or handling
Failure to follow the instructions in this manual
Alterations, changes, and repairs to the device
XP-503 01/2017 MN048014 EN www.eaton.com 15
Page 18

3 Safety instructions
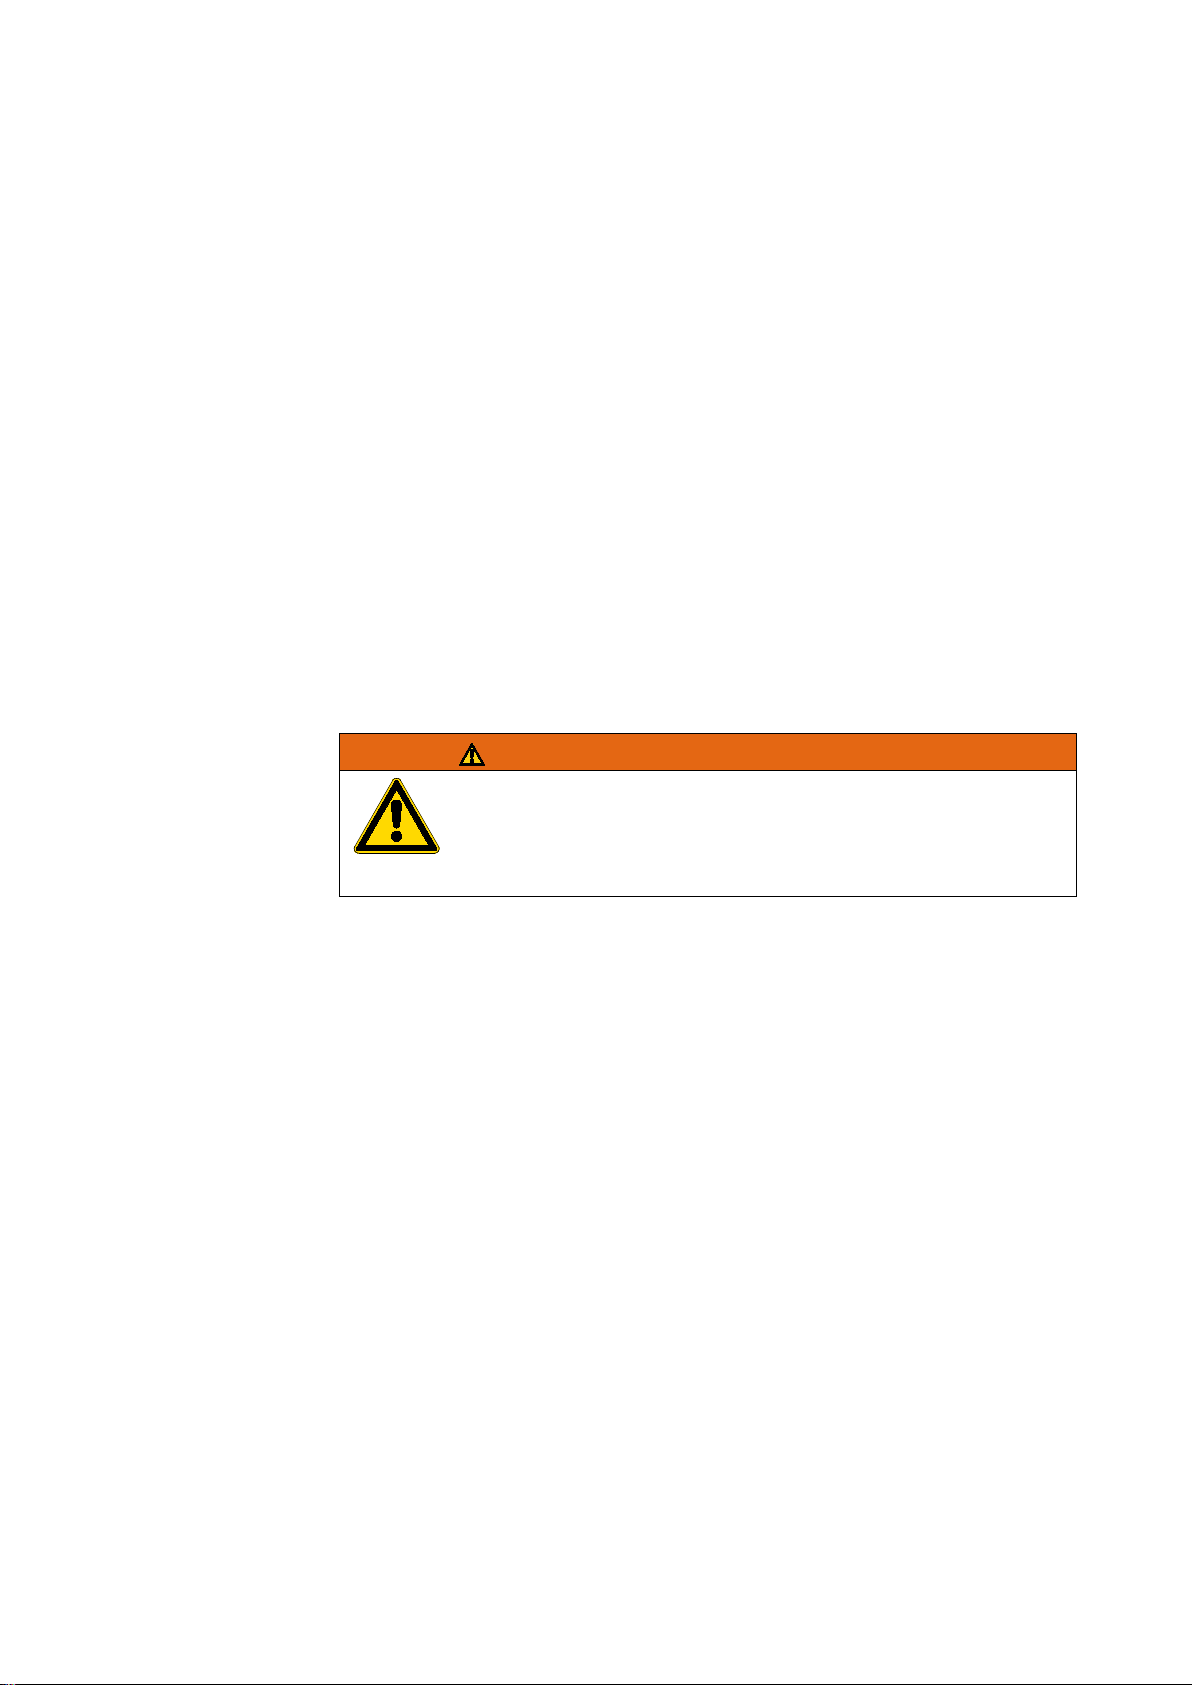
Danger
Explosion hazard
Death, serious injury, and property damage may occur if the device is being used in
a potentially explosive (classified) lo
connection is disconnected or the device is exposed to dangerous impacts or other
types of dangerous mechanical shock.
The XP
in protection type "tc" (al ter na tive ly "ta" or "tb" ). Th is insta ll atio n must be te sted a
certified separately. The maximum surface temperature at the outer surface is set to
70°C at the maximum ambient temperature of 50°C. The environment has to be
designed to avoid any bun ch di s cha rge . For s afe ins ta llat io n, compl y with the
specification to holding brackets and tightening torque in the Instruction Leaflet.
WARNING
Live parts inside the device
When the device is open, there will be an electric shock hazard if live parts are
touched.
WARNING
Stray currents
Large transient currents between the protective circuits of different devices may
result in fire or in malfunctions due to signal interference.
3.4 Device-specific hazards
3.4 Device-specific hazards
Use the device in the following environments only:
- Non-hazardous (non-explosive) area
- Hazardous (explosi ve) area , zo ne 22 (as defin ed in the AT E X Direc ti ve) ,
only device type:XP-503-15-A10-A01-1B (184582)
XP-503-10-A10-A01-1B (184926)
XP-503-21-A10-A01-1B (184927)
The ground resistance of accessible metal parts must be less than 109 ohms.
Make sure that the device is not exposed to dangerous impacts and other types
of dangerous mechanical shock.
De-energize the device before disconnecting plug connections.
Clean only with a clean soft antistatic damp cloth
When used in a potentially explosive atmosphere, zone 22
-503-…-A10-A01-1B are designed for insta llat io n in the fro nt of enc lo sures
cation and, during operation, an electrical plug
nd
16 XP-503 01/2017 MN048014 EN www.eaton.com
Do not open the device if it is not de-energized.
If necessary, route an equipotential bonding conductor, with a cross-sectional
area that is several times larger than that of the cable screen, parallel to the
cable.
Page 19
3 Safety instructions
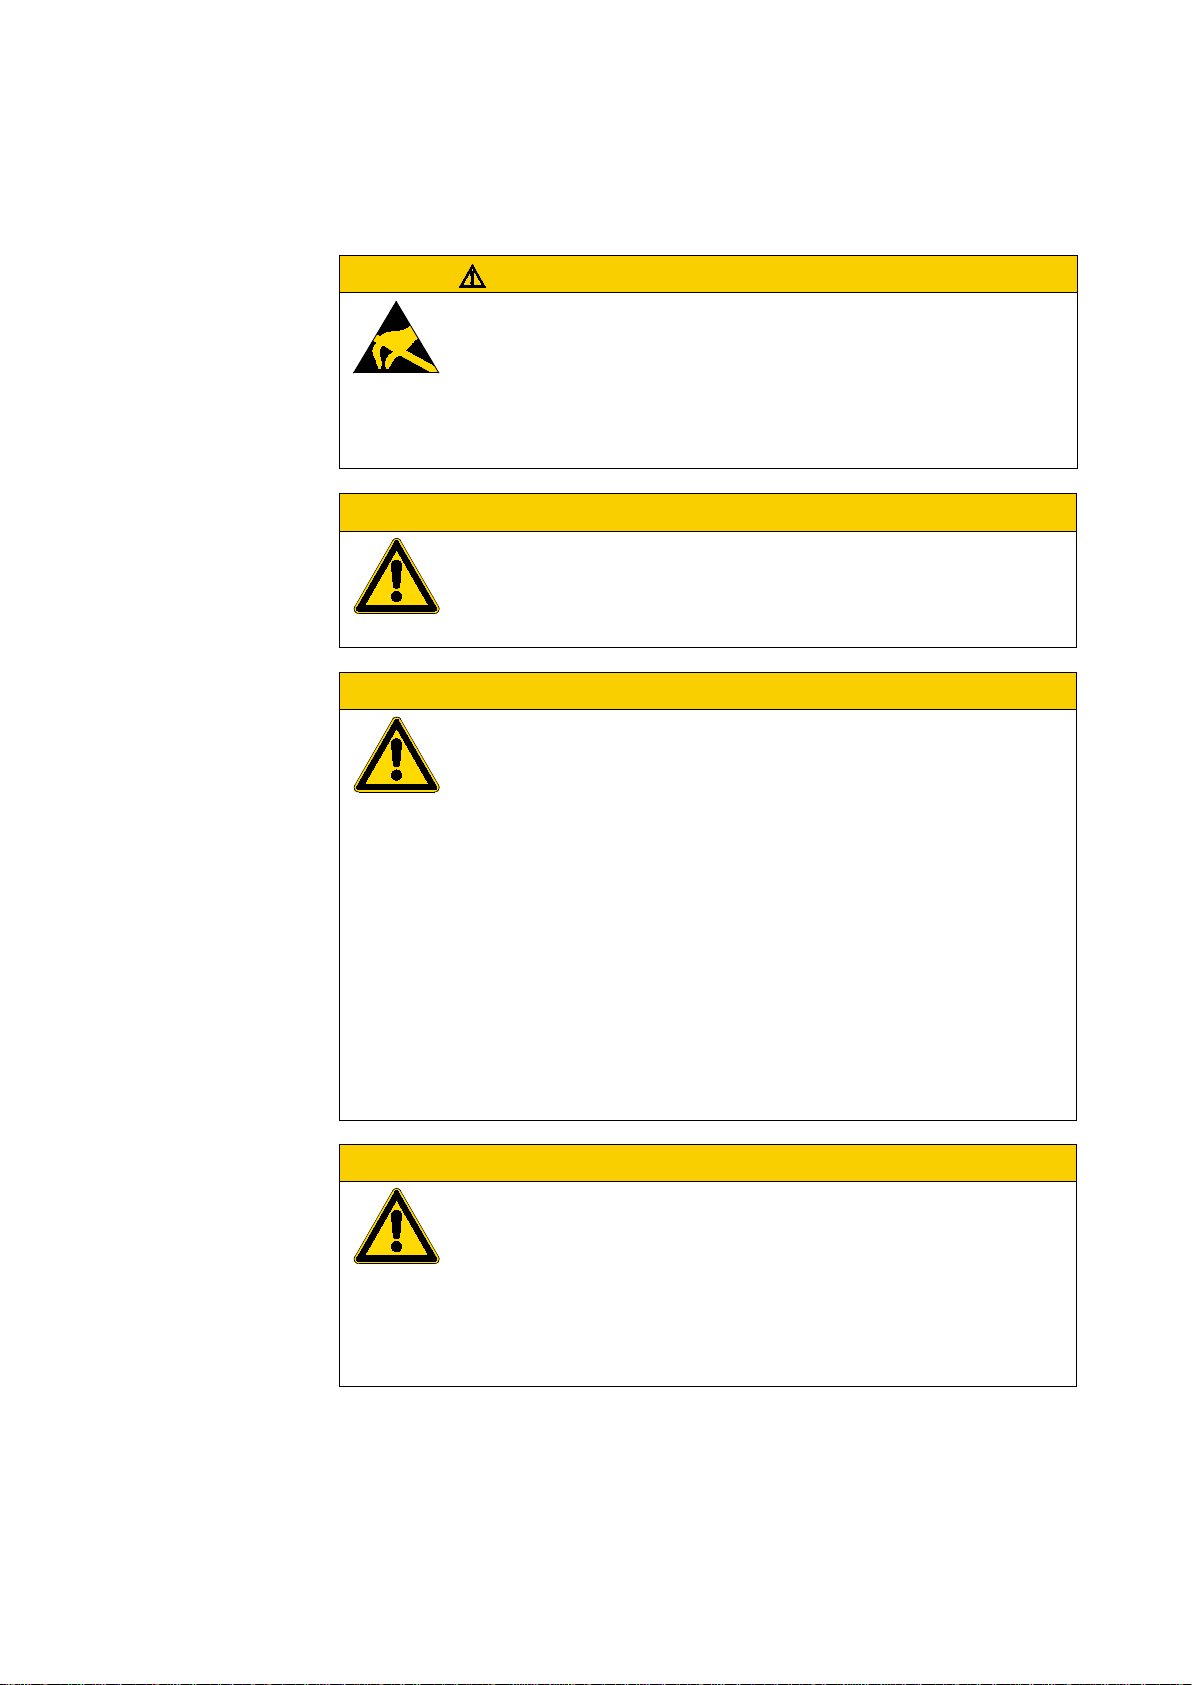
CAUTION
Electrostatic discharge
E
CAUTION
Non
The device may be damaged by potential differences.
CAUTION
Data loss
If an SSD, HD, or CFast card is being written to and a voltage drop occurs or the
drive/card is removed, data may be lost or the SSD, HD, or CFast card may be
ruined.
CAUTION
Stable mounting cut requ
An IP65 degree of protection will only be ensured if the control panel is stiff enough,
the device is properly mounted using its holding brackets, and the gasket has a
proper seat.
brackets included with the delivery must be used at its intended spot.
3.4 Device-specific hazards
lectrostatic discharges may damage or ruin assembly parts.
Do not touch components (e.g., pins) that are electrostatic-sensitive.
Discharge any static electricity from your body before touching the device
(e.g., by touching an earthed metal object).
-galvanically-isolated interfaces
The GND connections of all bus stations must be connected.
Insert SSDs, HDs, and CFast cards only when the device is
de-energized.
Avoid writing to SSDs, HDs, and CFast cards as much as possible. Reasons:
- The number of write cycles for SSDs, HDs, and CFast cards is limited
If there is a voltage drop while a write operation is in progress, data loss
-
is highly likely to occur.
Remove SSDs, HDs, and CFast cards only when the device is
de-energized.
Before switc hi ng off the dev i ce, m ake sur e th at th ere are no pro g ram s wri ting to
an SSD, HD, or CFast card.
Minimum sheet thickness of control panel panel where the device will be flush
mounted: 1.5 mm.
In order for the device to be properly mounted, every single one of the holding
.
ired
XP-503 01/2017 MN048014 EN www.eaton.com 17
Page 20
3 Safety instructions
CAUTION
Condensation in/on the device
If the device is or has been expose
fluctuations, air humidity), condensation may form on or inside the device,
short
CAUTION
UV light
Plastic
lifespan.
CAUTION
Cleaning the device
The device can be damaged by pointy or sharp objects, as well as by liquids.
3.4 Device-specific hazards
d to climatic fluctuations (temperature
-circuit hazard.
Do not switch on the device is there is condensation in or on it.
If the device has condensation in or on it, or if the device has been exposed to
temperature fluctuations, let the device settle into the existing ambient
temperature before switching it on do not expose the device to direct heat
radiation from heating appliances).
s may become brittle when exposed to UV light. This will reduce the device's
creating a
Protect the device from direct sunlight (UV radiation).
Do not use pointy or sharp objects (e.g., knives) to clean the
device.
Do not use any aggressive or abrasive cleaning products or
solvents.
Make sure that no liquids get into the device (short-circuit hazard).
18 XP-503 01/2017 MN048014 EN www.eaton.com
Page 21

3 Safety instructions
3.4 Device-specific hazards
XP-503 01/2017 MN048014 EN www.eaton.com 19
Page 22

4 Installation
Before installing and commissioning the device, make sure to read chapter 3, "Safety
instructions." Chapter 3 contains important information reg
safety.
Keep the original packaging so that you will be able to use it in the future if you need
to transport or ship the XP
the device.
If storing/transporting the device in cold weather conditions or in such a way that it
will be exposed to extreme differences in temperature, make sure that no
condensation forms on or inside the device.
The Panel PC XP
The following requirements and instructions must be observed without fail in order to
ensure that the XP-503 will run properly and will not be damaged.
4.1 Safety instructions
4 Installation
4.1 Safety instructions
4.2 Unpacking and checking the package contents
Unpacking
Check the XP-503's packaging for transit damage.
Carefully remove the packaging in order to avoid damaging the device.
-503. Make sure to also keep the documents enclosed with
arding your own personal
Verify
Check the package contents for visible transit damage.
Use the package insert to make sure that the contents are complete.
4.3 Storage and transportation
The XP-503 is sturdily built, but the components inside it are sensitive to excessively strong vibrations
and mechanical shock.
Accordingly, make sure to protect the XP-503 from excessively large mechanical loads.
The device should only be transported in its original packaging, complete with all shock-absorbing
parts.
4.4 Installing
-503 is approved for use in closed spaces.
When installing the XP-503, make sure to also consult the "Technical data" chapter.
20 XP-503 01/2017 MN048014 EN www.eaton.com
Page 23
4.4.1 Temperature
Abb. 1
Prior to commissioning:
- Slowly let the device settle into the existing ambient temperature.
- If there is condensation in or on the device, do not switch on the device until it is completely dry.
Avoid overheating during operation:
Do not expose the device to direct sunlight or other sources of heat.
The ambient air temperature during operation must not exceed the maximum limit value specified
in the "Technical data" chapter.
4.4.2 Aeration and de-aeration
Do not block the ventilation openings when mounting the device:
They are designed to allow air to circulate in order to cool the device.
The device uses natural convection-based passive cooling,
i.e., it does not use CPU or system fans.
The CPU and the power supply unit's power semiconductors are directly thermally connected to
the back of the display housing by means of a heat spreader or heat sink.
Make sure that there will be enough volume for air changes inside the control panel, etc. There
must be a clearance of at least 50 mm around the XP-503. The clearance behind it can be
reduced to 20 mm if necessary.
Make sure that there is enough air recirculation.
Example: XP-503-15
Th e following also applies t o other device versions as applicabl e.
4 Installation
4.4 Installing
Aeration and de-aeration
XP-503 01/2017 MN048014 EN www.eaton.com 21
Page 24

4 Installation
Abb. 2
Make sure that there is also sufficient clearance for removing the XP
mounting cutout.
4.4 Installing
4.4.3 Mounting position
The device is designed to be flush mounted in landscape mode.
It can be mounted in a perfectly vertical position or at an angle of up to ±10° in the directions shown
below.
If the device is not mounted in a perfectly vertical position, make sure that air will still be able to
circulate properly through the openings in the housing.
Example: XP-503-21
Th e following also applies t o other device versions as applicabl e.
Permissible mo unt i ng pos it io ns
4.4.4 Installation cut-out
The dimensions for the mounting cutout can be found in the"Fitting dimensions" section (for the
relevant device) of the "Mechanical dimensions" chapter
22 XP-503 01/2017 MN048014 EN www.eaton.com
-503 from the
Page 25

4.4.5 Fixing and sealing
CAUTION
Stable mounting cut required
An IP65 degree of protectio
the device is properly mounted using its holding brackets, and the gasket has a
proper seat.
brackets included with the delivery must be used at its intended spot.
Abb. 3
Flush mounting in cabinets, etc.
The XP-503 is designed to be flush mounted in control panels and swing frames.
The mounting cutout must be located in a position that ensures that webs or other
reinforcing elements in the control panel, etc. will stabilize it. If necessary, reinforcing
elements must be installed/added.
Minimum sheet thickness of control panel panel where the device will be flush
In order for the device to be properly mounted, every single one of the holding
4 Installation
4.4 Installing
n will only be ensured if the control panel is stiff enough,
mounted: 1.5 mm.
Example: XP-503-15
Th e following also applies t o other device versions as applicabl e.
Device holding br ack et s
Polyurethane foam gasket
Fixing and seali ng
XP-503 01/2017 MN048014 EN www.eaton.com 23
Page 26

4 Installation
Abb. 4
Abb. 5
4.4 Installing
IP65-tight flush mounting
- Peripheral gasket at the back of the front frame on the display housing
Polyurethane foam gasket
Material: RAKU-PUR 31-3117, black
Polyurethane foam gask et
Device holding bracket
- The purpose of the device holding brackets is to secure the flush-mounting panel PC onto a
control panel, etc. To this end, the brackets must be hooked into the display housing sideways
and screwed against the control panel door.
- Together with the polyurethane foam gasket, these holding brackets are the main element
involved in achieving an IP65 degree of protection.
- The holding brackets' intended locations have been selected in such a way as to ensure that the
brackets will push against the center of the peripheral polyurethane foam gasket.
- The holding brackets are included as accessories with the device.
1-mm stainless steel sheet
M4 x 25 DIN 914 Allen set sc rew, galvani zed
Device holding br ac ket
When tightening the M4 x 25 DIN 914 Allen set screw with torque: 0.6 – 0.7 Nm
24 XP-503 01/2017 MN048014 EN www.eaton.com
Page 27

4.4.6 Conditions for marine approval
Abb. 6 Power supply with EMC filter
The following DNV GL rules for shipping classification in accordance with DNV GL-CG-0339 type
approvals must be observed:
1 Complete and proper installation and commissioning in accordance with DNV GL rules and
Eaton requirements and specifications.
2 Installation of radio interference suppression filters for the 24-V-DC-supply.
Radio interference suppression filter for the 24-V-DC-supply
Additional interference filters must be installed for the power supply in order to adhere to the EMC B
provisions.
Integrate a radio interference suppression filter into the wiring.
Depending on the output, the following filters can be used:
• XT-FIL-1 radio interference suppression filter for 24-V-DC supply up to 2.2 A (Eaton article no.
285316) or
• XT-FIL-2 radio interference suppression filter for 24-V-DC supply up to 12 A (Eaton article no.
118980)
4 Installation
4.4 Installing
Grounding is ensured either by using
the filter's integrated contact fields onto a grounded metal plate
or using
a separate line to the filer's PE connection.
Depending on the current consumption or configuration, several filters may be used as well.
XP-503 01/2017 MN048014 EN www.eaton.com 25
Page 28

4 Installation
CAUTION
Interference
For all signal connections, use screened cables and metal connectors only.
All plug
This will improve their electrical shielding.
Signal cables must not be routed in the same cable duct with
Before commissioning the system, check all cable connections.
Make sure that all voltages and signals have the required values.
CAUTION
Safely diverting electrical interference currents
The device and the control panel must be conne
short a conductor length as possible.
The connection between the device and the control panel must have as low a
resistance as possible.
The earth connection must be implemented using a green and yellow cable with a
minimum cross-sectional area of 6 mm².
Emitted interference as per EN 55022:2010 Class A and EN 61000
WARNING
D
The device should only be run with safety extra
voltage with protective separation).
The power transformer must meet all applicable standards.
4.5 Preparing the device for operation
4.5 Preparing the device for operation
-proof connections for undisturbed operation
-in connections must be screwed or locked into place.
power cables.
cted to a central earth point with as
-6-4:2007
evices with a 24 V DC supply
-low voltage (functional extra-low
26 XP-503 01/2017 MN048014 EN www.eaton.com
Page 29

4.6 Connecting the power supply
CAUTION
Control required
Does the voltage fall within the permissible input range?
Functional earth: Connect the earth point to the cabinet's eart
M6 x 12 earthing stud on the back of the display housing
CAUTION
S
24 V DC (18
The applied voltage must meet the requirements for s
(SELV) set forth in IEC 60950 and
requirements for a low
Pay attention to the polarity!
Abb. 7
Before connecting the power supply
Supply voltage 24 V DC
afety extra-low voltages (SELV) necessary
– 36 V DC) supply for integrated DC/DC converter.
4 Installation
4.6 Connecting the power supply
h!
afety extra-low voltages
– in connection with the UL listing – the
-voltage source set forth in UL 508!
Example: XP-503-15
Th e following also applies t o other device versions as applica ble.
Bottom of ho using:
Connecting the 24 V DC supply voltage
Connection cable
For the power supply connection:
Copper conductor: 60° / 70°C
Cross section: 0.75 – 2.5 mm²
Tightening torque of 0.56 to 0.79 Nm (screws on plug section)
XP-503 01/2017 MN048014 EN www.eaton.com 27
Page 30

4 Installation
1 + +24 V DC
Supply voltage +24 V DC
2
N.C.
N.C.
not used
3 – 0V
Supply voltage 0 V
CAUTION
Disturbances
When using commercially available peripheral devices (e.g., with the USB port), it is
important to keep in mind that their EMC interference immunity parameters will
normally be designed
These devices are not suitable for operation in industrial environments!
4.7 Using peripheral devices
Plug-in connection for 24 V DC
On the back of the device, at the bottom of the housing:
Tab. 2 Plug-in connection for 24 V DC
Basic enclosur e MSTBA 2.5/ 3-G-5.08
3-pole, grid: 5.08 mm
Connector section MSTB 2.5/ 3-ST-5.08
Pin Signal Connection Configuration
Phoenix Cont act article no.: 1757255
3-pole, grid: 5.08 mm
Screw connection
Phoenix Cont act article no.: 1757022
Included as an acces s ory with the dev i ce!
Install the enclosed plug on a two-conductor cable and plug it into the socket at the bottom of the
housing. Pay attention to the polarity.
Connect the power supply cable to a 24-V power supply that meets the requirements for safety
extra-low voltages (SELV) set forth in IEC 60950 and – in connection with the UL listing – the
requirements for a low-voltage source set forth in UL 508!
The device is now ready to run on 24 VDC.
4.7 Using peripheral devices
With their peripheral ports, Eaton's devices make it possible to connect a variety of components.
in EMC
with office environments in mind.
28 XP-503 01/2017 MN048014 EN www.eaton.com
Page 31

4.8 External connections
The external interfaces described below can be accessed on the back of the device, at
the bottom of the housing.
1
TxD +
Transmit +
O
2
TxD –
Transmit –
O
3
RxD +
Receive +
I
4
N.C.
not used
---
5
N.C.
not used
---
6
RxD –
Receive –
I
7
N.C.
not used
---
8
N.C.
not used
---
LED yellow
Link
LED green
Activity
1
DB +
Bi-directio nal data B +
I/O
2
DB –
Bi-directio nal dat a B –
I/O
3
DA +
Bi-directio nal data A +
I/O
4
DD +
Bi-directio nal data D +
I/O
5
DD –
Bi-directio nal dat a D –
I/O
6
DA –
Bi-directio nal dat a A –
I/O
7
DC +
Bi-directional data C +
I/O
8
DC –
Bi-directio nal dat a C –
I/O
LED yellow
Link
LED green
Activity
2 x Ethernet
4.8.1 Ethernet connections
Two Ethernet connections, each with its own RJ45 port. The Ethernet controllers support transfer
rates of 10 Mbit/s, 100 Mbit/s, and 1 Gbit/s.
Configuration for the 10 Mbit/s and 100 Mbit/s operating modes
RJ 45 socket
8-pole, 2 LEDs
(CAT5e/6)
4 Installation
4.8 External connections
Pin Signal Description Input/Output
Tab. 3 Ethernet [10/100 Base-T]
Pinout for the 1000 Mbit/s operating mode
RJ 45 socket
8-pole, 2 LEDs
(CAT5e/6)
Tab. 4 Ethernet [1000 Bas e-T]
Pin Signal Description Input/Output
XP-503 01/2017 MN048014 EN www.eaton.com 29
Page 32

4 Installation
1
USB VCC
+5 V Power
2
USB –
Data –
3
USB +
Data +
4
GND
Ground
5
SS_RX –
twisted with RX +
6
SS_RX +
Data transmiss ion dev i ce to hos t
7
GND_DRAIN
Shield
8
SS_TX –
twisted with TX +
9
SS_TX +
Data transmission host t o device
2 x USB 3.0
1
Data 2 –
9
Data 1 –
17
Data 0 –
2
Data 2 +
10
Data 1 +
18
Data 0 +
3
Data 2/4 Shield
11
Data 1/3 Shield
19
Data 0/5 Shield
4
Data 4 –
12
Data 3 –
20
Data 5 –
5
Data 4 +
13
Data 3 +
21
Data 5 +
6
DDC Clock
14
+5v
22
Clock Shield
7
DDC Data
15
Ground (for +5V)
23
Clock +
8
VSYNC
16
Hot Plug Detect
24
Clock –
C1
Red
C3
Blue
C5
Ground
C2
Green
C4
HSYNC
4.8 External connections
4.8.2 USB connections
Two 9-pole USB ports, Type A, for connecting USB peripherals.
Type A USB
9-pole
Tab. 5 USB 3.0
4.8.3 DVI-I interface
DVI-I interface, conforming to the DVI-I (dual-link) standard, for connecting (with a digital or analog
signal) an external display unit.
DVI-I socket
(24+5)-pole
(dual link)
Pin Signal Description
Pin Signal Pin Signal Pin Signal
30 XP-503 01/2017 MN048014 EN www.eaton.com
Tab. 6 DVI-I
Page 33

4.8.4 Serial interfaces
1
DCD
TX –
DATA –
2
RXD
TX +
DATA +
3
TXD
RX +
N.C.
4
DTR
RX –
N.C. 5 GND
GND
GND 6 DSR
N.C.
N.C. 7 RTS
N.C.
N.C.
8
CTS
N.C.
N.C.
9
RI
N.C.
N.C.
Default setting: half
1
DCD
Data Carrier Detect
I
2
RXD
Receive Data
I
3
TXD
Transmit Data
O
4
DTR
Data Termin al Ready
O
5
GND
Signal Ground
---
6
DSR
Data Set Ready
I
7
RTS
Request to Send
O
8
CTS
Clear To Send
I
9
RI
Ring Indicator
I
RS 485/232
One serial interface on a 9-pole SUB-D plug that can be used as an RS 232, RS 422, or RS 485
port, configurable in the BIOS.
4 Installation
4.8 External connections
SUB-D plug
9-pole
Tab. 7 RS 485/232
Pin RS 232 RS 422 RS 485
-duplex RS 485
RS 232
One serial interface on a 9-pole SUB-D plug that can be used as an RS 232 port.
SUB-D plug
9-pole
Pin Signal Description Input/Output
Tab. 8 RS 232
XP-503 01/2017 MN048014 EN www.eaton.com 31
Page 34

5 Commissioning and operation
CAUTION
All cards and assembly parts are electrostatic
Follow all ESD safety instructions.
The symbol to the left is used to indicate the use of electrostatic
components.
CAUTION
Electronic a
Because of this, it is necessary to take precautions whenever handling the cards.
Please refer to the guidelines for electrostatic
information (ESD guidelines).
CAUTION
Please note:
Only service personnel should be allowed to open the XP
5.1 Adding expansions to the XP-503
5 Commissioning and operatio n
5.1 Adding expansions to the XP-503
5.1.1 General prerequisites Limitation of Liability
All technical data, certifications, and approvals will cease to apply/be void if expansions other than
those approved by Eaton are used.
We will not assume liability for functional limitations resulting from the use of third-party devices and
components.
Precautions
-sensitive.
-sensitive
ssembly parts are extremely sensitive to electrostatic discharges.
Before plugging in or disconnecting components or expansion modules,
disconnect the XP-503 from the power supply.
Before plugging in the cables, you will need to bring the static charge on your body
to the same potential as the charge on the XP-503 and the cables.
To do this, briefly touch the metal housing.
Discharge the electrostatic charge on your tools.
Wear an anti-static wrist strap when handling components.
Leave components and expansion modules in their packaging until
right before you install them.
Grab components and expansion modules from the edge only –
do not touch connection pins or traces.
Never run the XP-503 with the housing open.
-sensitive components for more
-503.
32 XP-503 01/2017 MN048014 EN www.eaton.com
Page 35

5 Commissioning and operation
Abb. 8
Note on marine approvals
The gasket installed inside the enclosure cover at the factory must be present in order to
provide stability against vibrations.
5.1 Adding expansions to the XP-503
Before opening
Shut down the operating system.
Disconnect the power supply.
Disconnect all connection cables from the XP-503.
Remove the CFast card
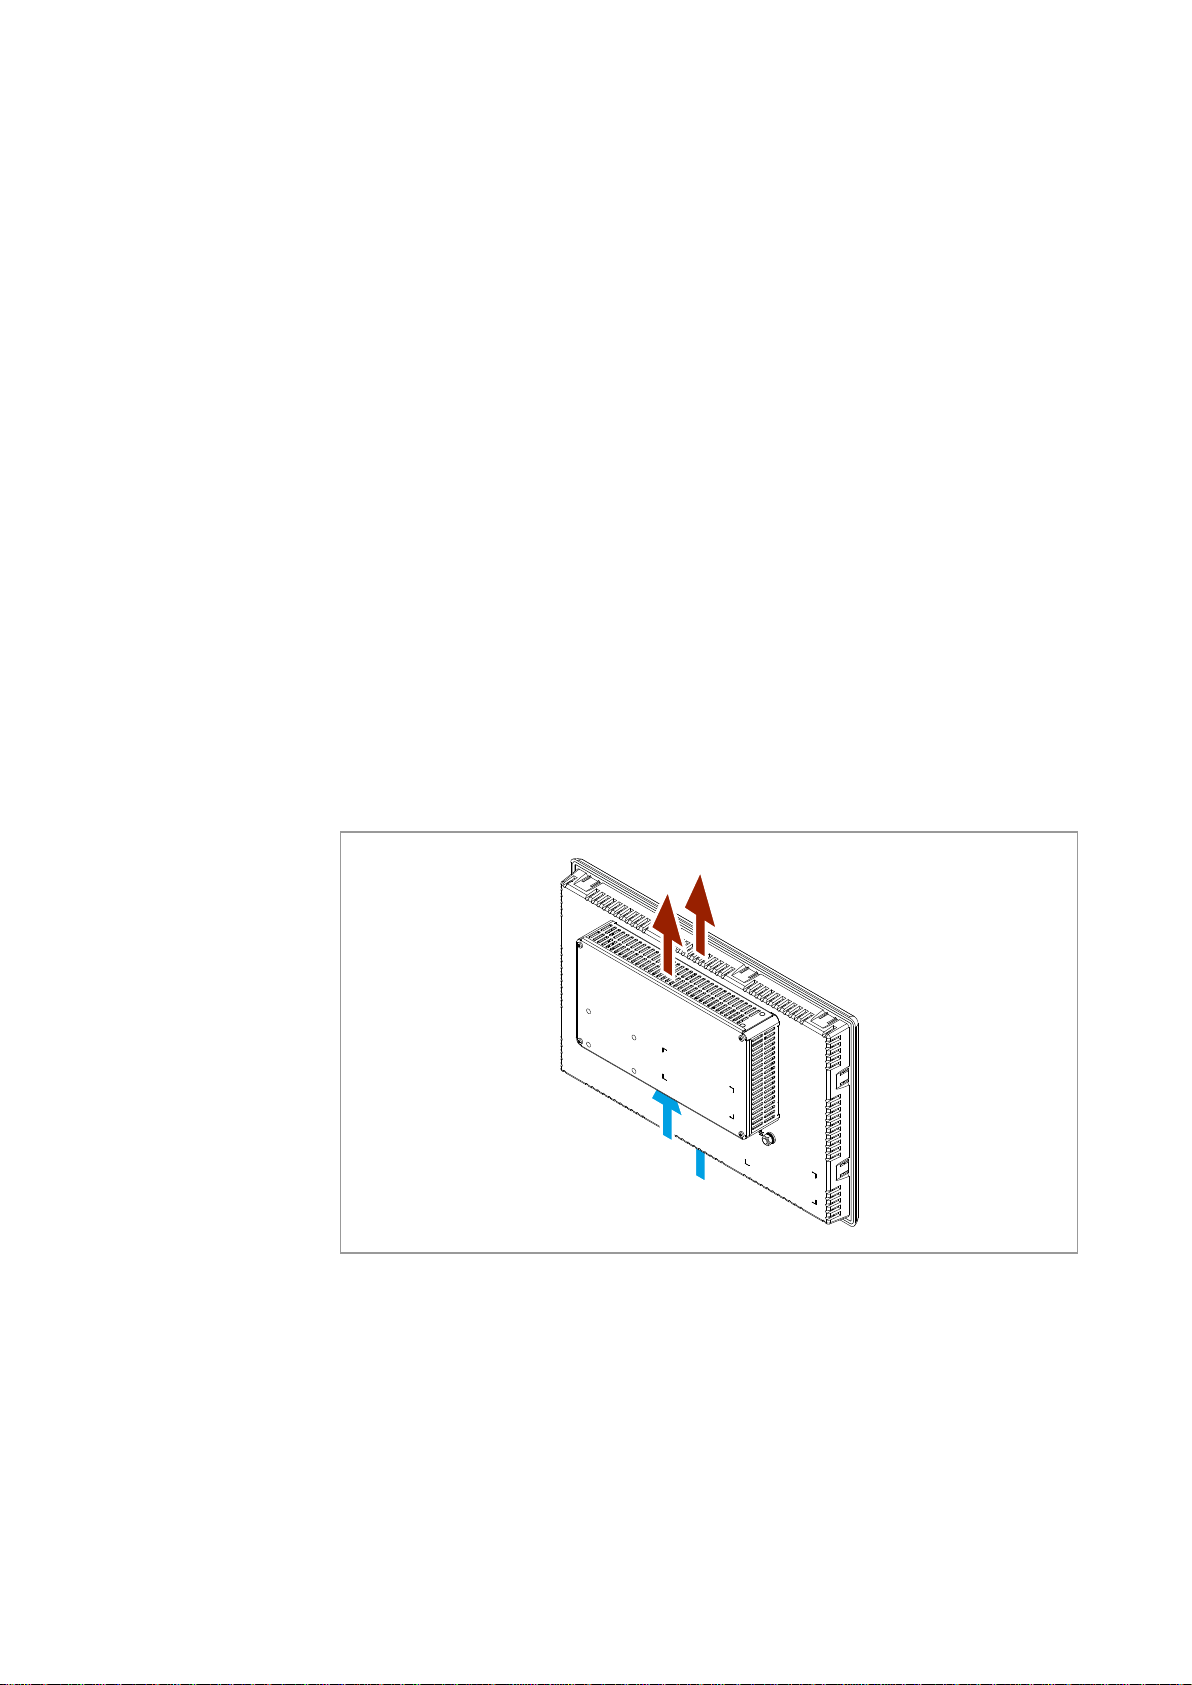
Open
Example: XP-503-15, The following also applies to other device versions as applicable.
Unscrew the four screws on the housing cov er :
Torx pan head s crews without plain unthreaded sh ank
RHS TORX Zn M3 x 5 ISO 7380-1
Opening the d evice
Close
Remove the cover from th e housing.
Please note:
The CFast adapter is screwed onto the cover and wir ed to
the board.
All service-relevant assembly parts, such as RAM,
mSATA, the CMOS battery, and the opti onal HDDs or
SSDs, can be accessed fro m the inside of the housing.
When closing the device, follow the same steps you used to open it, but in opposite order.
XP-503 01/2017 MN048014 EN www.eaton.com 33
Page 36

5 Commissioning and operation
Abb. 9
Do not plug in or disconnect any plugs during operation!
Before connecting peripherals, make sure they are designed for use in industrial
environments!
For the ports' layout, see the nameplate on the back of the housing.
The connections are standard contacts with the corresponding standard pinouts.
5.2 Connecting peripheral devices
5.2 Connecting peripheral devices
5.2.1 Interfaces Connection locations
The ports used to connect peripherals are located on the back of the housing.
These connections are accessible at the bottom of the housing (the housing does not need to be
opened in order to access these ports).
Example: XP-503-15, The following also appl ies to other device versi ons as applicable.
Interfaces:
2 x Ethernet, 2 x USB 3.0, DVI-I, RS 485, RS 232
Connection locations
34 XP-503 01/2017 MN048014 EN www.eaton.com
Page 37

5 Commissioning and operation
Abb. 10
3
Ethernet (LAN 2)
RJ 45 socket, 8-pole, 2 LEDs
6
Serial interfac e RS 48 5
Sub-D plug, 9-pole
5.2 Connecting peripheral devices
Connections layout
The connections listed below are the external interfaces on the computer board installed in the XP-
503. They can be found on the back of the device, at the bottom of the housing.
Example: XP-503-15, The following also appl ies to other device versi ons as applicable.
Bottom of housing:
Connections f or peripherals
No. Interface Plug design
1 DVI-I display port (digital/analog) DVI-I socket, (24+5)-pole
2 Ethernet (LAN 1) RJ 45 socket, 8-pole, 2 LEDs
4 USB 3.0 Port USB Type A, 9-pole
5 USB 3.0 Port USB Type A, 9-pole
7 Serial interface RS 232 Sub-D plug, 9-pole
Tab. 9 Interfaces
XP-503 01/2017 MN048014 EN www.eaton.com 35
Page 38

5 Commissioning and operation
Connect
(for industrial environments!).
An external keypad can be used simultaneously with the touch panel.
5.2 Connecting peripheral devices
5.2.2 Periphery
Keypad
The XP-503 has been designed to work with the following keypads:
USB keypad
A USB keypad can be connected to one of the USB interfaces.
It may be necessary to install a USB keypad driver the first time you use the keyboard.
Mouse
The XP-503 has been designed to work with a variety of mouse types:
Serial mouse
A serial mouse can be connected to the serial ports (RS 232). The matching mouse driver must be
installed and configured before being able to use the mouse.
USB mouse
A USB mouse can be connected to one of the USB ports.
It may be necessary to install a USB mouse driver the first time you use the mouse.
ed devices must have the CE mark
Printer
A printer can be connected to one of the USB ports and used once the corresponding printer driver
has been installed.
USB flash drive
A USB stick can be plugged into one of the USB interfaces.
Display
An external display unit can be connected to the DVI-I interface.
Ethernet network
The XP-503 can be connected to various computer networks using the two RJ45 ports that serve as
Ethernet ports.
Ethernet is a standard used for local networks, and requires twisted-pair cables in order to connect
the computers.
36 XP-503 01/2017 MN048014 EN www.eaton.com
Page 39

5.3 Using the storage media
Note the specification for the CFast memory, at least 4GB.
Cover
Knurled screw
Abb. 11
CAUTION
Before changing the card, the device must be disconnected from the power
supply
A cover must be used to prot
The card will come out from the bottom of the slot!
The CFast card can be inserted and changed without opening the housing.
5.3.1 CFast memory card
The CFast slot can be accessed at the bottom of the housing. The card adapter is screwed onto the
housing's cover and is connected to a SATA interface on the board. A cover prevents the card itself
from falling out. The card will come out from the bottom of the slot!
Before changing the card, the device must be disconnected from the power supply.
Example: XP-503-15, The following also appl ies to other device versi ons as applicable.
5 Commissioning and operation
5.3 Using the storage media
CFast memory card locati on
XP-503 01/2017 MN048014 EN www.eaton.com 37
ect the card from falling out.
Page 40

5 Commissioning and operation
Loosen the thumbscrew (k nurled head screw) and remove
Abb. 12
5.3 Using the storage media
Changing the CFast memory card
Example: XP-503-15, The following also appl ies to other device versi ons as applicable.
the CFast slot's cover.
To insert a card, push it in until you feel it lock int o place.
38 XP-503 01/2017 MN048014 EN www.eaton.com
To remove a card, push on the card so that it will be
released and will jump out of the chase.
Changing the CFast memor y card
Page 41

5.4 Using the XP-503
WARNING
Malfunctions when using a touch panel with multi
There is always the p
panel. These errors may result in bodily injury or property damage.
The following precautions will help prevent the accidental use of the malfunctions:
Before performing maintenance work, disconnect it from the power supply.
WARNING
Incorrectly using the multi
Performing ge
errors and, consequently, in bodily injury.
Before using the device, make sure you are thoroughly familiar with the Windows
operating system's multi
using and its functions. Make sure that the gestures you perform on the multi
display will be recognized by the application. It may be necessary to practice certain
gestures beforehand.
Touch panel
Projected capacitive touch panel (PCT)
Multi-touch capable
4-point touch operation
2-point touch operation when using the EMC touch sensitivity setting
The device features a touch panel with multi-touch capabilities. It is controlled by means of touching,
inching, and gestures, all of which require the operator to touch the screen with their fingertips. More
specifically, gestures can be carried out using multiple fingers at the same time.
5.5 Safety Warnings
Using the XP-503 entails additional risks associated with using a touch panel device with multi-touch
capabilities
5 Commissioning and operation
5.4 Using the XP-503
Observe the following instructions in order to keep you and others safe and avoid property damage.
-touch capabilities
ossibility of an operator making errors when using the touch
Do not, under any circumstance, use the touch panel to control safety-relevant
functions.
Before cleaning the device, switch to a safe operating mode.
-touch functions
stures incorrectly on the touch panel can result in system operation
-touch functions, as well as with the application you will be
-touch
XP-503 01/2017 MN048014 EN www.eaton.com 39
Page 42

5 Commissioning and operation
WARNING
Risk of functions being
soiling
If the device's touch panel is soiled, any conductive material present in the dirt may
trigger unexpected operator actions. When functions are triggered incorrectly in the
system, bodily injury and
Keep the touch panel clean at all times and take suitable measures in order to
protect it from soiling.
Before using the device, check which types of potential soiling may accumulate on
the touch panel and which functions may be triggered incorrectly as a result.
WARNING
Potential damage when installing and operating the device
Scratches and other damage on the device's glass panel may trigger unexpected
operator actions. When functions are triggered incorrectly in the sy
injury and property damage may occur.
Make sure that the glass panel is not damaged during installation or use.
WARNING
Dangerous currents when installing and connecting the device
Connecting the device incorrectly may result in dange
being produced.
Always connect the protective conductor before anything else.
5.5 Safety Warnings
triggered accidentally by conductive material in
property damage may occur.
rous currents and overvoltage
stem, bodily
40 XP-503 01/2017 MN048014 EN www.eaton.com
Page 43

5 Commissioning and operation
WARNING
Performing gestures incorrectly on the touch panel with multi
capabilities
If gestures are performed incorrectly on the touc
they may not be recognized or they may be recognized incorrectly. When this
occurs, the device will either not respond to the operator's input or will respond in a
wrong or unexpected way.
Observe the following when u
you have entered.
Note:
Taking appropriate precautions will make it possible to prevent other malfunctions
while the device is running.
5.5 Safety Warnings
-touch
sing the touch panel with multi-touch capabilities:
The touch panel responds to contact on its surface, not to pressure.
If using a stylus:
Make sure to specifically use a capacitive touch panel stylus.
If using your fingers:
- Make sure to only use your fingertips.
- Do not use your fingernails to operate the touch panel.
Do not use thick gloves when operating the touch panel,
e.g., work gloves.
You may wear the following types of gloves:
- Thin cotton gloves,
- Rubber-coated gloves
- Latex gloves
- Capacitive touch panel gloves
Touch the touch panel perpendicularly, not at an angle.
Make sure you do not touch the screen accidentally,
e.g., with your knuckles or by leaning against the display or using it for support.
Make sure to always keep the touch panel clean.
Always check to make sure that the device has recognized the operator actions
h panel with multi-touch capabilities,
5.5.1 Commissioning Windows operating system
XP-503 01/2017 MN048014 EN www.eaton.com 41
Page 44

5 Commissioning and operation
CAUTION
Updating the display required
If the hibernation function is used, the image shown on the device may change aft
the device wakes up from hibernation.
Disabling hibernation
To disable hibernation in the Windows operating system, go to
"Start
the appropriate options.
CAUTION
If the touch panel is displaying available functions before the screen saver starts
running, this first contact may cause the corresponding functions to be triggered.
Disabling the screen saver
To disable the screen saver in the Windows operating system, go to
"Start
through the appropriate options.
CAUTION
Make sure that important operating fun
multiple fingers at the same time
Important operating functions must be programmed in such a way that they can only
be triggered by gestures requiring multiple fingers on the touch panel at the same
time.
5.5 Safety Warnings
SleepTime
Screen saver
Control PanelHardware and SoundPower Options" and navigate through
Not intended triggeringing of functions
A wake-up event will cause the operating system to resume and the screen saver
to stop running. In devices with multi-touch capabilities, touching the touch panel
once will cause the operating system to resume (i.e., trigger a wake-up event).
Control PanelAppearance and PersonalizationDisplay" and navigate
er
ctions can only be triggered by using
42 XP-503 01/2017 MN048014 EN www.eaton.com
Page 45

Static touch panel contact
CAUTION
Time out
Contacts and gestures in which fingers do not move on the touch panel for more
than 10 seconds will be recognized as "static contact."
If the device detects this type of contact, the desired function will
no longer b
disruptions caused by soiling on the touch panel (e.g., saline solution on the glass
panel).
Avoiding static contact and continuing to run intended functions
move your finger(s) slightly during the process.
CAUTION
If you do touch it, make sure to move your finger(s) slightly!
5 Commissioning and operation
5.5 Safety Warnings
e carried out after approx. 10 seconds. This is intended to prevent
After approx. 10 seconds, touch the corresponding icon on the touch panel again
and check the results.
If you will be using an operator action for an extended continuous period of time,
Static contact during booting
If there is static contact on the touch panel during booting, this may result in
functional restrictions.
This can be prevented by taking the following measures:
Do not touch the touch panel during booting!
XP-503 01/2017 MN048014 EN www.eaton.com 43
Page 46

5 Commissioning and operation
5.6 XP-503 with Windows Embedded Standard 7
5.6 XP-503 with Windows Embedded Standard 7
The XP-503 standard devices are pre-installed with the Microsoft Windows Embedded Standard 7
operating system. If your XP-503 is not a standard device or is operated with a different operating
system these operating system specific descriptions may or may not apply to your device.
The general functions of the Windows Embedded Standard 7 operating system can be found in the
®
open-access system descriptions from Micro soft
.
The following instructions describe only specific functions of the XP-503 standard devices operating
with the Windows Embedded Standard 7 operating system.
5.6.1 Protect Mode (Operated with two drives, C:\ and D:\)
The Eaton XP-503 family of products running the Windows Embedded Standard 7 operating system
have a unique and exclusive Protect Mode™ feature that safeguards the integrity of files stored on
the C:\ drive of your operating system. This feature ensures that data and operating system files
cannot be modified by anyone or corrupted by unexpected power disruptions. As a result, you can be
confident that the XP-503 meets your rigorous industrial environmental requirements and can be
protected against all unauthorized alterations.
If Protect Mode is enabled, file write operations such as "delete," "edit," and "create new" will be
executed in temporary memory only. When the device is restarted, these write operations will be
deleted and the protected data storage medium will have all its original data intact, i.e., the device will
always start in its original state. This means that any file changes that need to be made on drive C:\
(operating system settings, installed software) must be carried out either with Protect Mode disabled
or using the appropriate special Protect Mode functions in order to save the changes permanently.
This applies to the following settings:
Operating system functionality
Time/date data
Ethernet port settings
Windows registry settings
Windows driver installations
Visualization runtime software and communications drivers
Visualization project files
The Protect Mode feature is based on the Windows Embedded EWF (Enhanced Write Filter)
function. Descriptions of the detailed manual operations can be found on the Internet.
44 XP-503 01/2017 MN048014 EN www.eaton.com
Page 47

5 Commissioning and operation
If Protect Mode is active and extensive changes are made to the C:
software installations), volatile memory may become full resulting in system errors.
Extensive changes to C:
Mode disabled.
5.6 XP-503 with Windows Embedded Standard 7
Protect-Mode data organization
C:\ drive
Protected by Protect Mode when enabled
Files to be installed and changed only at initial device setup and should remain unchanged under
normal operation.
Other drives (such as D:\)
Not protected, even when Protect Mode is enabled
Files to be stored through normal operations: process data, trends, recipes, alarm lists, ...
\ drive (e.g.
Protect Mode Save Operation
When the Protect Mode is active the unit is protected against any changes to data stored on the C:\
drive. In order to save desired data changes to the C:\ drive the Protect Mode Save operation must
be run
\ drive (software installations) must be executed with Protect
It is good practice to shut down and re-start the XP-503 in preparation of making permanent changes
to the C:\ drive. This step will ensure that all data stored in volatile memory is cleared so that no
unexpected corruption or changes will take place on your C:\ drive. Once the XP-503 has been
restarted, make your changes and then save the changes by selecting “StartAll
ProgramsEatonProtect Mode Manager”. From the Protect Mode Manager window select the
“Protect Mode Save” tab and click on the “Commit” button.
Once the Protect Mode Save operation has been launched, the changes that affect the C:\ drive will
be saved and then the device will automatically shut down and then restart, back in Protect Mode.
XP-503 01/2017 MN048014 EN www.eaton.com 45
Page 48

5 Commissioning and operation
We recommend to operate the device always with protect mode activated.
5.6 XP-503 with Windows Embedded Standard 7
Disabling Protect Mode
Protect Mode is active and enabled at the factory but it is possible for the user to disable the Protect
Mode feature. Reasons for doing so include the need to install a software program that is very large
or one that requires multiple reboots to complete its installation.
To do so, open Protect Mode Manager by selecting “StartAll ProgramsEatonProtect Mode
Manager”. From the Protect Mode Manager window select the “Advanced” tab and click on the
“Disable Protect Mode Save” button. The system will then reboot and flush any pending changes to
the protected C:\ drive. Upon reboot Protect Mode will be disabled and while in this mode the XP unit
will behave like any other Windows PC, meaning that it is subject to all forms of malware including
viruses, and adware and it must be shut down through the normal Windows shutdown mechanism to
prevent potential corruption of the operating system.
It is recommended that the XP-503 unit be removed from any plant network while Protect Mode is
disabled and that all media used for software installation to be connected to the unit are scanned for
malware prior to attachment.
Enabling Protect Mode
Once all desired changes have been made the user should place the XP unit back in Protect Mode
through the Advanced tab of the Protect Mode Manager utility (StartAll ProgramsEaton
Protect Mode Manager) by clicking on the “Enable Protect Mode Save” button. This will force a
reboot and return the XP-503 unit to its normal protected state.
46 XP-503 01/2017 MN048014 EN www.eaton.com
Page 49

5.6 XP-503 with Windows Embedded Standard 7
All changes made to the C:
saved or committed so that the next time the XP
changes will be retained. Refer to the “Protect Mode” section for additional
information.
5.6.2 Managing Accounts and Auto Logon functionality
Managing Accounts
There is an “Administrator” user account set up on your Eaton XP-503 unit when shipped from the
factory.
User: „Administrator“
Password: „Administrator“ (passwords are case sensitive)
The XP-503 is set up to automatically log in to the Administrator account, which is why the normal
Windows Security dialog box does not appear upon boot-up.
Modifying an Account Name or Password
You can modify the “Administrator” and any other account name password from the “User Accounts”
utility in “Control Panel” (Start Control PanelUser Accounts).
Once the Administrator password has been successfully modified you must follow the Account Auto
Logon Feature section in order to continue to automatically log in to the Administrator account at
boot-up.
\ drive when Protect Mode is active must be
5 Commissioning and operation
-503 is restarted the
Account Auto Logon Feature
The Account Auto Logon function can be used if you want the device to start directly with a user
profile already logged in so that application software can be used right away. When you use this
option, a user login dialog box will not appear at the beginning and the aforementioned user profile
will be automatically logged in. By default, the "Auto Logon" function will be enabled for the
"Administrator" user.
If you want to change the “Auto Logon” features, refer to the descriptions below.
Windows: “Start(Run”, type “control userpasswords2” and press OK.
XP-503 01/2017 MN048014 EN www.eaton.com 47
Page 50

5 Commissioning and operation
5.6 XP-503 with Windows Embedded Standard 7
Following dialog box appears:
Use the Check box “Users must enter a user name and password to use this computer” to
enable/disable the “Auto Logon” feature.
Check box “checked”: ( „Auto Logon“ is not activated
Check box empty: ( „Auto Logon“ is enabled,
when enabling a dialog box appears for you
to enter the username and password.
48 XP-503 01/2017 MN048014 EN www.eaton.com
Page 51

5.6.3 Touch parameters
The XP-503's touch panel has three sensitivity settings available. To select one of them, use the
routine described below:
Option "1": Default (factory setting)
For example: fingertips, no gloves
Option "2": Gloves
Sensitivity setting for controlling the touch panel while wearing gloves
Option "3": EMC
No functional restrictions if EMC interference is up to 20% higher than
normal, e.g. highly EMC loaded environment through devices with
electromagnetic fields
Set parameters
In the Windows operating system, go to “StartAll ProgramsEatonTouchParameter”.
The cmd window will open.
5 Commissioning and operation
5.6 XP-503 with Windows Embedded Standard 7
Select the setting you want to use:
1 Standard
2 Glove
3 EMC
Confirm by pressing the Enter key.
The program will start.
XP-503 01/2017 MN048014 EN www.eaton.com 49
Page 52

5 Commissioning and operation
5.6 XP-503 with Windows Embedded Standard 7
Once the program is successfully completed, the following line will appear:
"Firmware update Success."
The program will return to the starting screen.
Select '0'.
Press the Enter key
to exit the program.
50 XP-503 01/2017 MN048014 EN www.eaton.com
Page 53

5.6 XP-503 with Windows Embedded Standard 7
5.6.4 License Eaton Galileo-Open Runtime
XP-503 device types, which are licensed for Eaton Galileo Open Runtime, are licensed at the factory
for the Galileo runtime software and enabled with 340 license points. Shipped from the factory only
the license is installed on the device, the Galileo Open runtime software and the project files need to
be transferred by the Galileo Development Software tools to the XP-503 (device selection Galileo
Open) from the development PC. For further information on these tools consult the Galileo software
manuals.
5.6.5 License Eaton Visual Designer Runtime
XP-503 device types, which are licensed for Eaton Visual Designer runtime, are licensed at the
factory for Eaton Visual Designer runtime and enabled with 4000 Tags, 5 drivers, and one each of the
three web client types (Thin Client, Secure Viewer, and Mobile Access). Shipped from the factory the
license is installed on the device and a recent version of Visual Designer runtime is installed. Further
information about Visual Designer and how to update the software version and download the runtime
project consult the Visual Designer software manual and help files.
5 Commissioning and operation
XP-503 01/2017 MN048014 EN www.eaton.com 51
Page 54

5 Commissioning and operation
5.6 XP-503 with Windows Embedded Standard 7
52 XP-503 01/2017 MN048014 EN www.eaton.com
Page 55

6 Maintenance and repairs
Before working with the device, make sure to read chapter 3, "Safety instructions."
Chapter 3 contains important information regarding your own personal safety,
CAUTION
Clean only with a clean soft antistatic damp cloth
6.1 Safety instructions
6.2 Maintenance
Capacitive touch devices do not require maintenance. However, the following work may need to be
carried out:
Cleaning the capacitive touch panel when soiled.
6.2.1 Cleaning the capacitive touch panel
6 Maintenance and repairs
6.1 Safety instructions
Carefully clean the capacitive touch panel with a clean, soft, antistatic damp cloth.
If there are any spots that are proving difficult to get off, spray a little dishwashing liquid on the
damp cloth first.
6.2.2 Battery
The battery in the device can be replaced.
6.3 Repairs
The device should only be opened by the manufacturer or by an authorized repair center.
For repairs, please contact your vendor or Eaton's Technical Support.
Use the original packaging to ship the device.
Cleaning the device
The device can be damaged by pointy or sharp objects, as well as by liquids.
Do not use any pointy or sharp objects (e.g., knives) to clean
the device.
Do not use aggressive or abr as ive cle an ing pro du ct s or so lven ts .
Prevent liquids from getting into the device (short-circuit hazard).
XP-503 01/2017 MN048014 EN www.eaton.com 53
Page 56

6 Maintenance and repairs
6.3 Repairs
54 XP-503 01/2017 MN048014 EN www.eaton.com
Page 57

7 Storage, transport and disposal
Before installing and commissioning the device, make sure to read chapter 3, "Safety
instructions." Chapter 3 contains important information regarding your own personal
safety,
7.1 Safety instructions
7.2 Storage
The ambient conditions for storage need to be met.
7.3 Transport
When transporting or shipping the device, make sure that the device is not damaged (use appropriate
packaging).
7 Storage, transport and disposal
7.1 Safety instructions
All ambient conditions need to be met during transportation and shipping as well.
Check the device for transit damage after arrival.
XP-503 01/2017 MN048014 EN www.eaton.com 55
Page 58

7 Storage, transport and disposal
Danger
Explosive and toxic materials
The lithium battery inside the device may explode if handled incorrectly.
Dispose
of the device professionally.
Assembly part
Material characteristic
Display housing
Aluminium die-cast
Powder
RAL 9006, white aluminum
Housing
Galvanized sheet steel
Sheet thickness 1 mm
Cover glass
Tempered glass across the entire surface
(tempered soda
Non
Designer bezel with direct
RAL 9005 jet black
Thickness: 3 mm (XP
Thickness: 3 mm (XP
Thickness: 4 mm (XP-503-21)
Battery
Lithium CR2032, 3.0 V, 220 mAh, Panasonic
Battery weight
3.4 g
SVHC Substance
1.2-dimethoxyethane: ethylene glycol dimethyl ether (EGDME)
Substance weight
2-4 %
Electrical components
Various
Packaging
Material characteristic
Outer packaging
Cardboard
Inner packaging
7.4 Disposal
7.4 Disposal
Devices no longer being used must be professionally disposed of as per local standards or returned
to the manufacturer or relevant sales department.
Materials used in the device
-spray painted surface
Tab. 10 Materials used in the device
Materials used in the packaging
Tab. 11 Materials used in the packaging
-lime glass)
-glare surface (chemically micro etched); gloss: 85
-to-glass printing
-503-10)
-503-15)
56 XP-503 01/2017 MN048014 EN www.eaton.com
Page 59

8.1 Dimensions for XP-503 with 25.65 cm (10.1") display
Abb. 13
8 Technical data
8.1 Dimensions for XP-503 with 25.65 cm (10.1") display
8.1.1 Front dimensions
XP-503-10
8 Technical data
XP-503-10 – front dimensions
XP-503 01/2017 MN048014 EN www.eaton.com 57
Page 60

8 Technical data
Abb. 14
ISO 2768mK
8.1 Dimensions for XP-503 with 25.65 cm (10.1") display
8.1.2 Device dimensions
XP-503-10
XP-503-10 – device dimens ions
general tolerances
58 XP-503 01/2017 MN048014 EN www.eaton.com
Page 61

8.1.3 Fitting dimensions
Abb. 15
ISO 2768mK
XP-503-10
Recommend ed mo unti ng cutout
8 Technical data
8.1 Dimensions for XP-503 with 25.65 cm (10.1") display
XP-503-10 – fitting dimensio ns
general tolerances
XP-503 01/2017 MN048014 EN www.eaton.com 59
Page 62

8 Technical data
Abb. 16
8.2 Dimensions for XP-503 with 39.6 cm (15.6") display
8.2 Dimensions for XP-503 with 39.6 cm (15.6") display
8.2.1 Front dimensions
XP-503-15
XP-503-15 – front dimensions
60 XP-503 01/2017 MN048014 EN www.eaton.com
Page 63

8.2.2 Device dimensions
Abb. 17
ISO 2768mK
XP-503-15
8 Technical data
8.2 Dimensions for XP-503 with 39.6 cm (15.6") display
XP-503-15 – device dimens ions
general tolerances
XP-503 01/2017 MN048014 EN www.eaton.com 61
Page 64

8 Technical data
Abb. 18
ISO 2768mK
8.2 Dimensions for XP-503 with 39.6 cm (15.6") display
8.2.3 Fitting dimensions
XP-503-15
Recommend ed mo unti ng cutout
XP-503-15 – fitting dimensio ns
general tolerances
62 XP-503 01/2017 MN048014 EN www.eaton.com
Page 65

8.3 Dimensions for XP-503 with 54.6 cm (21.5") display
Abb. 19
8.3 Dimensions for XP-503 with 54.6 cm (21.5") display
8.3.1 Front dimensions
XP-503-21
8 Technical data
XP-503-21 – front dimensions
XP-503 01/2017 MN048014 EN www.eaton.com 63
Page 66

8 Technical data
Abb. 20
ISO 2768mK
8.3 Dimensions for XP-503 with 54.6 cm (21.5") display
8.3.2 Device dimensions
XP-503-21
XP-503-21 – device dimensions
general tolerances
64 XP-503 01/2017 MN048014 EN www.eaton.com
Page 67

8.3.3 Fitting dimensions
Abb. 21
ISO 2768mK
XP-503-21
Recommend ed mo unti ng cutout
8 Technical data
8.3 Dimensions for XP-503 with 54.6 cm (21.5") display
XP-503-21 – fitting dimensio ns
general tolerances
XP-503 01/2017 MN048014 EN www.eaton.com 65
Page 68

8 Technical data
Component
description
Device syst em
Flush
Built-in device
Secured with the help of holding brackets
Enclosure material
Industrial housing design built to m eet EMC requirements
Aluminium die-cast
Powder-spray painted surface
RAL 9006, white aluminum
Galvanized sheet steel
Sheet thickness 1 mm
Cover glass
Tempere
(tempered soda
Non-glare surface (chemically m icro etched); gloss: 85
Designer bezel wi th dir ec t
RAL 9005 jet black
Thickness: 3 mm (XP-503-10)
Thickness: 3 mm (XP
Thickn
Keypad
Projected capacitive touch panel (PCT)
Multi-touch capable, 4-point touch op erat i on
PCT sensor l aminated on the back of the glass panel
ITO-based touch s ensor
Touch controller connected to computer board via USB interface
Safe PCT function by using a function al earth with as low a resis tance as possible:
minimum cros s
8.4 General
8.4 General
Display housing
(incl. front frame)
Computer housing
-mounting pa nel PC
d glass across the entire surface
-lime glass)
-to-glass printing
-503-15)
ess: 4 mm (XP-503-21)
Tab. 12 Technical data
66 XP-503 01/2017 MN048014 EN www.eaton.com
-sectional area of 6 mm²
Page 69

8 Technical data
Display
10.1"
Color active
25.65 cm (10.1")
Visible screen area
222.72 mm x 125.28 mm
WSVGA / 1024 x 600 pixels
16:9 Viewing range [left/right/above/below]
normally 70°/70°/70°/ 50°
262144 colors
normally 500:1
Brightness
normally 55 0 cd/m²
Backlight
Single LED (side
Life point
50000 h
15.6"
Color active
Screen size diagonal
39.6 cm (15.6")
Visible scr een area
344.232 mm x 193.536 mm
WXGA / 1366 x
Format
16:9
Viewing range [left/right/above/below]
normally 85°/85°/80°/ 80°
16.7 million c olors
Contrast ratio (Normally)
normally 500:1
Brightness
normally 300 cd/m²
LED Life point
50000 h
21.5"
Color active
Screen diagonal
54.6 cm (21.5")
WUXGA / 1920 x 1080 pixels
Format
16:9
normally 89°/89°/89°/ 89°
16.7 million c olors
Contrast ratio (Normally)
normally 5000:1
Brightness
normally 300 cd/m²
Technology
LED
Life point
50000 h
8.4 General
Part no.
Screen size diagonal
Display resolution [W x H]
Format
Color resolut ion
Contrast ratio (Normally)
Technology
Part no.
Display resolution [W x H]
Color resolut ion
-matrix TFT-LCD
-light type)
-matrix TFT-LCD
768 pixels
Backlight
Technology
Part no.
Visible scr een area
Display resolution [W x H]
Viewing range [left/right/above/below]
Color resolution
Backlight
Tab. 13 Technical data
-matrix TFT-LCD
476.64 mm x 268.11 mm
XP-503 01/2017 MN048014 EN www.eaton.com 67
Page 70

8 Technical data
Cooling
Fanless CPU and system cooling, natural convect ion-based pass iv e cool i ng
Comp
Single
3.5" card format (102 mm x 147 mm)
AMD Radeon H D 8000 chipset
BIOS AMI UEFI
CPU
AMD eKabini GX-217GA DC (1.6 GHz)
Dual-core version of "eKabini" of the SoC (Sy stem on Chip) G-series
Cache memor y
1 x base (204
4 GB
1 x 4 GB DDR3-1333 SDRAM SO-DIMM
External Interfaces
2 x Ethernet 10/100/1000 MBit/s
2 x USB 3.0
1 x DVI-I
1 x serial: RS 485/232, configurable in BIOS;
1 x serial: RS 232
Flash memory
Industrial flash technology
mSATA
1 x mSATA (int ernal)
Min. 32 GB
1 x CFast slot (externally accessible)
Min. 4 GB
Operating s ystem
Windows Embedded Standard 7 Kit “P” (64
Galileo Runti me License
...-1V
Windows Embedded Standard 7 Kit “P” (32-Bit)
Visual Designer runtim e license
8.4 General
uter platfor m
CFast
…-1B
-board computer
-pin DDR3 SO-DIMM, 1066/1333 MHz), m ax. 8 GB
default sett ing: half-duplex RS 485
-Bit)
Tab. 14 Technical data
68 XP-503 01/2017 MN048014 EN www.eaton.com
Page 71

8 Technical data
Supply voltage
24 V DC 1)
18..36 V DC (SELV)
The applied voltage must meet the requi rements for safety extra
set forth in IEC 60950 and
low
Power consumption
XP-503-10
max. 1.2 A
max. 1.5 A
max. 1.7 A
Mechanical di me nsi o ns
Depends on the specific device vers ion
Weight
2.70 kg XP-503-15
4.95 kg
7.55
Ambient air temperature
Operation
0 ºC to +50 ºC [system with CFast, SSD, mSATA memory]
+5 ºC to +50 ºC [system with HDD]
-
Relative humidi t y
10% … 90%, non
Ambient air
Free of corrosive gases
Burn
24 h burn
48 h burn-in [system with HDD]
8.4 General
XP-503-15
XP-503-21
XP-503-10
XP-503-21
(vertical ±10° mo unt i ng pos it io n)
Storage
-in test
– in connection with the UL listing – the requirements for a
-low voltages (SELV)
-voltage s ource set forth in UL 508!
kg
(with natural convection)
(with natural convection)
20 ºC to +60 ºC
-condensing
-in [system without HDD]
Tab. 15 Technical data
XP-503 01/2017 MN048014 EN www.eaton.com 69
Page 72

8 Technical data
Degree of protection / tightness
IP65 in the fr ont as per EN 6 0529-1
IP20 in the fr ont as per EN 6 0529
NEMA12 as per NEMA 250-2003
EMC As per 2004/ 108/EC EMC Directive
Emitted inter ference
As per EN 55022:2010 Class A and EN 610 00-6-4:2007
Devic
Interference immunity
As per EN 55024:2010 and EN 61000-6-2:2005
EN 61131-2:2007
product safety
UL 508
CSA C22.2 No. 142-M1987
RoHS
As per 2011/ 65/EC RoHS Directive
All assembly parts an d components used are RoH S-compliant.
Vibration resistance (during operation)
EN 60068-2-6
Mechanical shock resistance (during
operation)
EN 60068
Free fall
EN 60068-2-32
Explosion pr otection (i n relation t o CE),
only type
ATEX Direct ive 94/9 EG 2014/34/EG
IEC/EN 60079
IEC/EN 60079
8.5 Directives and standards
8.5 Directives and standards
XP-503-…-A10-A01-1B
Explosive atmospheres: equipment general requirements
Explosive atmospheres: equipment dust
ignition protec t ion by encl os ure «t »
-1
es meeting this standar d m ay not be us ed in residential areas.
-2-27
-0:2012 + A11:2013
-31:2014
Tab. 16 Directives and standards
70 XP-503 01/2017 MN048014 EN www.eaton.com
Page 73

8.6 Approvals
UL
cULus (UL 508)
EMC CE Product saf ety
CE
Explosion pr otection (i n relation t o CE),
only type XP
(184582)
II 3D Ex tc IIIC T70°C U
(U = Identification for Ex
Zo
Special conditions for safe use („U“)
The XP
protection t ype "tc" (alternatively "ta" or "tb"). This installation must be tested and
certified separately.
The maximum surface temperature at the outer sur face is set to 70°C at the maximum
ambient tem perature of 5 0°C.
For safe installation, c omply with the specification to holding brackets and tighteni ng
torque in the I nstructio n Leaflet
DNV GL Marine
(shipping classificat ion)
Type approval
installed in the wiring
Certificate No.: TAA00 000NC
8 Technical data
8.6 Approvals
-503-…-A10-A01-1B
approval
Tab. 17 Aapprovals
-parts, regarding EN 60079-0:2012+A1:2013, 29.9g)
ne22, Categ ory 3D
-503-…-A10-A01-1B are designed for installation in the front of e nclosures i n
IL048006ZU.
– provided that a radio interference suppression filter for the device is
Type-Approval DNVGL-CG-0339, Edition November 2015,
XP-503 01/2017 MN048014 EN www.eaton.com 71
Page 74

Eaton is dedicated to ensuring that reliable, efficient and safe power is
available when it’s needed most. With unparalleled knowledge of
electrical power management across industries, experts at Eaton
deliver customized, integrated solutions to solve our customers’ most
critical challenges.
Our focus is on delivering the right solution for the application. But
decision makers demand more than just innovative products. They
turn to Eaton for an unwavering commitment to personal support that
makes customer success a top priority. For more information, visit
www.eaton.eu
.
Eaton Adressen weltweit:
www.eaton.com/Worldwide Sites
E-Mail: info-bonn@eaton.com
Internet: www.eaton.eu/xp500
Eaton Industries GmbH
Hein-Moeller-Str. 7–11
D-53115 Bonn
© 2014 by Eaton Corporation
All rights reserved
MN048014 EN Doku 01/17
 Loading...