

MMOODDIIXX HHDD--335
5
MMoobbiillee DDIISSCC && MMPPEEGG44 PPllaayyeerr
UUsseerr GGuuiiddee
DTS INFOCOM CO., LTD.

TTaabbllee ooff CCoonntteennttss
Warranty and Limited Liability
Warnings and Safety Introductions
Copyright Notice
Caring for MODIX HD-35
Main Features
Technical Specifications
Product Introduction
Accessories Check-up
Names of each part
Names of Remote Control Buttons
Connections
1. Installation of Hard Drive
2. AC cord connection and disconnection.
3. Connecting to PC
4. Disconnecting from PC
5. Connecting to TV
6. Connecting to Audio System
Settings
1. Video Settings
2. Audio Settings
3. Initial Setting
4. Advanced Setting
5. Hard Disk Formatting
6. Firmware updates
Playing MPEG4 Video Files
Playing MP3 music
Viewing Photos
Creating and playing Playlist
Trouble Shooting
FAQ

FCC RF
INTERFERENCE STATEMENT
NOTE :
This equipment has been tested and found to comply with the limits for a Class B
digital device, pursuant to Part 15 of the FCC Rules. These limits are designed to
provide reasonable protection against harmful interference in a residential
installation.
This equipment generates, uses and can radiate radio frequency energy and, if not
installed and used in accordance with the instructions, may cause harmful
interference to radio communications. However, there is no guarantee that
interference will not occur in a particular installation.
If this equipment does cause harmful interference to radio or television reception
which can be determined by turning the equipment off and on, the user is
encouraged to try to correct the interference by one or more of the following
measures.
- Reorient or relocate the receiving antenna.
- Increase the separation between the equipment and receiver.
- Connect the equipment into an outlet on a circuit different from that to which the
receiver is connected.
- Consult the dealer or an experienced radio, TV technical for help.
- Only shielded interface cable should be used.
Finally, any changes or modifications to the equipment by the user not expressly
approved by the grantee or manufacturer could void the users authority to operate
such equipment,
THIS DEVICE COMPLIES WITH PART 15 OF THE FCC RULES. OPERATION IS SUBJECT TO THE
FOLLOWING TWO CONDITIONS: (1) THIS DEVICE MAY NOT CAUSE HARMFUL INTERFERENCE,
AND (2) THIS DEVICE MUST ACCEPT ANY INTERFERENCE RECEIVED, INCLUDING
INTERFERENCE THAT MAY CAUSE UNDESIRED OPERATION.
FCC ID : SGBHD-35 MADE IN SEOUL, KOREA

WWaarrrraannttyy aanndd LLiimmiitteedd LLiiaabbiilliittyy
This product is sold with a limited warranty and specific remedies are available to the original purchaser in the
event the product fails to conform to the limited warranty. Manufacturer’s liability may be further limited in
accordance with its sales contract.
In general, the manufacturer shall not be responsible for product damages caused by natural disasters, fire,
static discharge, misuse, abuse, neglect, improper handling or installation, unauthorized repair, alteration or
accident. In no event shall the manufacturer be liable for loss of data stored on disk media.
MANUFACTURER SHALL NOT BE LIABLE FOR ANY SPECIAL, INCIDENTAL OR CONSEQUENTIAL
DAMAGES. EVEN IF INFORMED OF THE POSSIBILITY THEREOF IN ADVANCE.
ModiX licensor(s) makes no warranties, express or implied, including, without limitation, the implied
warranties of merchantability and fitness for a particular purpose, regarding the licensed materials.
ModiX’s licensor(s) does not warrant, guarantee or make any representations regarding the use or the
results of the use of the licensed materials in terms of its correctness, accuracy, reliability,
correctness or otherwise. The entire risk as to the results and performance of the licensed materials
is assumed by you. The exclusion of implied warranties is not permitted by some jurisdictions. The
above exclusion may not apply to you.
In no event will ModiX’ licensor(s), and their directors, officers, employees or agents (collectively ModiX’
licensor) be liable to you for any consequential, incidental or indirect damages (including damages for loss of
business profits, business interruption, loss of business information, and the like) arising out of the use of
inability to use the licensed materials even if ModiX’ licensor has been advised of the possibility of such
damages. Because some jurisdiction do not allow the exclusion or limitation of liability for consequential or
incidental damages, the above limitations may not apply to you.
Please see your sales contract for a complete statement of warranty rights, remedies and limitation of liability.
Furthermore, warranty does not apply to:
Damages or problems resulting from misuse, abuse, accident, alteration or incorrect electrical current or
voltage.
Any product tampered-with or damaged warranty seal or serial number label.
Any product without a warranty or serial number label.
Batteries and any consumable items delivered with or in the equipment.
WWaarrnniinnggss aanndd SSaaffeettyy IInnssttrruuccttiioonnss
CAUTION
Read these instructions carefully and pay attention to all warnings and guidelines.
To prevent risks of electric shock, this unit must only be opened by qualified service personnel.
Power off and disconnect the power supply cable before opening the unit.
WARNING
To prevent fire or shock hazard, do not expose the unit to rain or moisture.
Use of this product is for personal use only. Copying CDs or loading music, video, or picture files for sale or
other business purposes is or may be a violation of copyright law. Copyrighted materials, works of art, and/or
presentations may require authorization to be fully or partially recorded. Please be aware of all such
applicable laws concerning the recording and use of such for your country and jurisdiction.
Copyright Notice
Copyright ModiX © 2003 All rights reserved.
This document may not, in whole or part, be copied, photocopied, reproduced, translated or reduced to any
electronic medium or machine-readable form without prior consent, in writing, from ARCHOS. All brands and
products names are registered trademarks and the property of their respective owners. Specifications are
subject to change without notification. Errors and omissions accepted. Images and illustrations may not
always match contents. Copyright ® ModiX. All rights reserved.
Disclaimer of warranty: to the extent allowed by applicable law, representations and warranties of noninfringement of copyrights or other intellectual property rights resulting from the use of the product under

conditions other than as here above specified, are hereby excluded.
Caring for MODIX HD-35
The ModiX HD-35 is an electronic product that needs to be treated with care.
Do not subject it to shock
Do not subject it to heat. Be careful that the surface it is on, is a flat clear surface. Placing the ModiX
HD-35 on a pillow, blanket, or carpet will restrict the necessary ventilation that it needs. This increase
in operating temperature may cause damage to the device.
Keep the ModiX HD-35 far away from water and excessively humid areas
Keep the ModiX HD-35 away from high electromagnetic fields
Keep any connected cords to the ModiX HD-35 neatly arranged. This light product could fall if a chord
is accidentally pulled by a child.
Keep it plugged into the AC adapter/charge while connected to your computer
*depending on how much manipulation the user does while the ModiX is playing
Main Features
Take your home entertainment to the next level with the ModiX HD-35, Potable USB HDD Storage
MPEG-4 Player. Based on the Sigma Designs EM8500 state-of-theart single chip Media Processor, it
has the ability to playback MPEG4 AVI movies, MPG movie, MP3 Audio files and JPEG picture files. It
means that you can show your favorit MPEG4 movies and photos right on the TV screen. This includes
the pictures developed at the photo shop and any photos you have scanned and saved on a Thia
Player yourself.
Multimedia Playback
Play MPEG4 AVI, DivX, MPG, DAT, MP3, JPEG files on a television or video projector
·
High Resolution Video Output
Selectable Scaling of High Definition Resolutions 480p, 720p and 1080i
3D digital Audio Output
Support Dolby Digital 5.1CH/AC-3 surround audio output through Optical port.
Playlist Enabled
Equiped with a playlist editor that has the ability to run a multimedia slideshow
Excellent USB2.0 HDD Storage
Store MPEG4, MP3, JPEG or any type of data files through USB2.0 interface and at high speed of
480Mbps.
Compatible with High Capacity of HDD upto 2 Tera (same as 2000GB)
Easy Firmware Upgrade
Downloade the new firmware from the website, www.dtsinfo.co.kr, and upgrade easily.
Car-theater System
Enjoy your favorite MPEG4 Movie and MP3 music in side of your car during driving.

Technical Specifications
Storage capacity of ModiX HD-35: 2 Tera (=2000GB) hard drive
Interface to Computer: USB 2.0 standard, USB 1.1 compatible
Music Playback: MP3 decoding 30 to 320 kbits/s, CBR & VBR.
Photo Viewing: JPEG files, any size.
Video Playback: up to 1,920x1080i pixels @ 25 frames/sec (NTSC/PAL) / MPEG-4 Simple Profile
compliant. AVI (DivX* 3.11, 4.0 & 5.0 & XviD) MP3 stereo or AC-3 sound tracks, near DVD picture quality.
Audio Output: Stereo analog Line-OUT/ Digital Line-Out (SPDIF) via optical SPDIF
Video Output: Component (Pr/Pb/Y), S-Video ouput, Composite video (for television), NTSC or PAL TV
standard.
Scalability: downloadable firmware updates from Internet (www.dtsinfo.co.kr).
Power: external AC/DC Adapter (110-240V AC50Hz/60Hz, 2A).
Dimensions: 203 x 115 x 47 mm
Weight: 550g
Operating Temperature: 5 °C to 35 °C, storage temperature: -20 °C to 45 °C
PC System Requirements: Pentium 233 MHz or higher. Windows 98SE, ME, 2000, XP (Home and
Professional). 64 MB RAM.
Macintosh System Requirements: MacOS 9.2 or X, iMac, G3 or higher. USB 1.1 speed only
Package Includes: Modix HD-35 Multimedia, Remote Controller, USB cable, AC/DC adapter, Batteries,
audio/video output cable, drivers on CD, User Manual.
*DivX is a trademark of DivXNetworks, Inc.
Product Introduction
1. Accessories
Caution
The present product can be used under the AC
110~120V
If you observe a problem in the product, do not
open the cover to avoid electric shock or fire
The use of unauthorized voltage of fuse can cause
a Fire
Caution
You can deform or break the remote control by
dropping or throwing it, Its direct exposure to the
liquid substances or heat can also cause trouble.
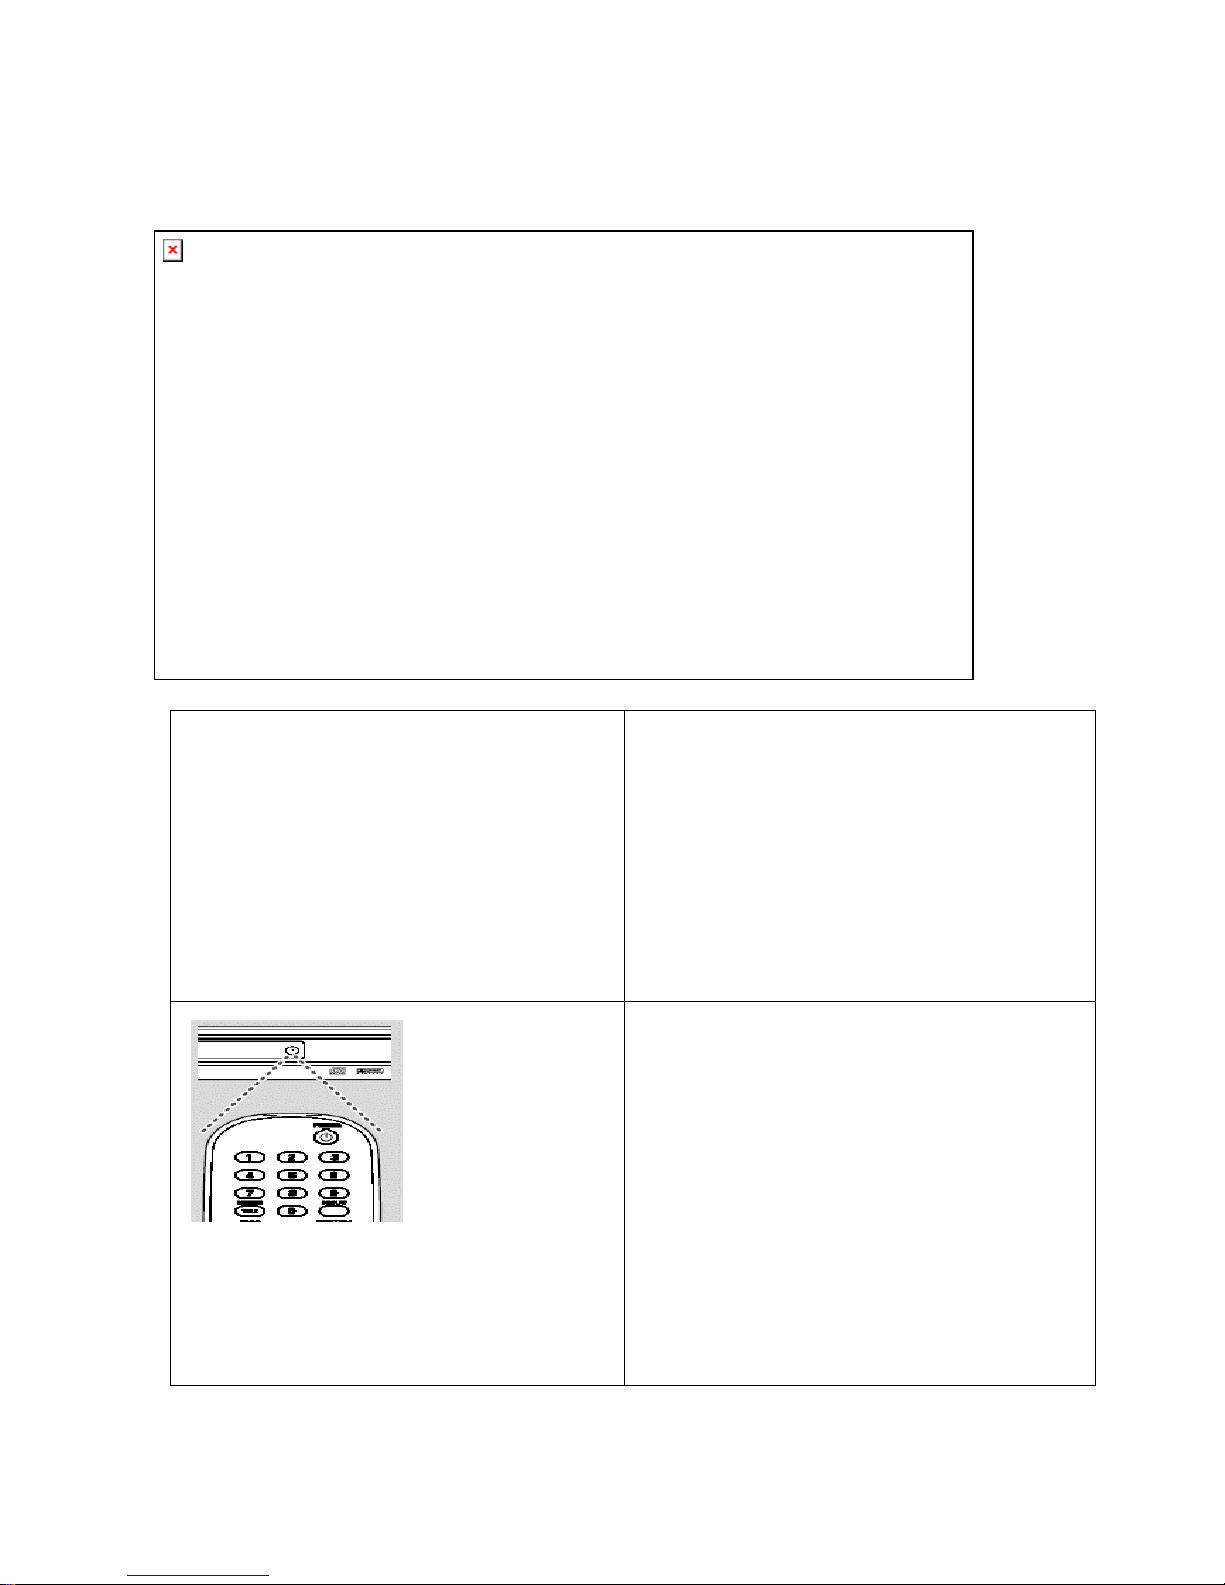
Manipulate the remote
control toward the
receiption sensor.
The remote control
works within 7m and
30’ toward each side
from the reception
sensor of the set. It
may not work stay out
of this range
The battery is AAA standard. Check if they are
inserted correctly.
Take out the batteries when you do not use the
remote control for a long time. If not, the leaking liquid
can damage the batter circuit.

2. Names of each part
Front
Rear

3. Remote Controller
Power : Press to switch on the unit or to switch back to standby mode.
Open/Close : Used to open or to close the disc-tray. Use it to load and
unload the disc.
Stop : To stop playing a movie (DivX/MPEG-4, DVD, VCD, SVCD),
audio (CDDA, mp3) and JPEG.
Play/Pause : Press button to play movies, audio files, JPEG files (slide
show) Press while playing to pause and toggle between the two.
Fwd /Rew : Press this key to fast forward /rewind a disc or file. (mute
during process) The amount of times you press the button will
determine the speed of the reverse function. (To resume normal play,
press the PLAY button.)
Prev/ Next : For DVD - Go to the next/previous chapter.
For VCD, CDDA, DivX™/ MPEG4 - Go to the next/previous track.
For JPEG - Go to the next/previous image.
Slow : Press this key to activate slow motion (SVCD/VCD/DVD) (mute
during process).
Return : Go back to the system main menu from the audio, video,
photo or playlist screen.
Up/Down/Left/Right Use the buttons to navigate through the on-screen
menus. Highlight a menu item Right arrow: by pressing the arrow
buttons and select a highlighted item by pressing the enter button.
Enter : Used to activate a selected item or keyed in numbers. When the
zoom function is activated, press enter to toggle pan/scan and zoom.
GOTO : Time search, to go to a specific time in a video.
Setup : Used to enter the user setup menu from the introduction screen.
Zoom : Used to activate and de-activate the zoom function.
Repeat : Press once to repeat a title. Press twice to repeat the chapter.
N/P : To choose between different outputs.
OSD : To display the file information. (Bit rate, file length, file size. Etc.)
Vol +/Vol - : To control the volume up or down.
Mute : To switch off sound during playback in any mode.
Step : To watch an DVD, VCD or SVCD frame by frame.
Scroll : To scroll up and down, left and right on an image or video file.
PBC : Used to toggle between PBC ON/OFF.
Random : To start random play.
A - B : Used to set an initial point and also to set an ending point of a
chosen section.
Menu : Used to go to the DVD menu screen.
Title : Used to go to the ‘Chapter selection menu.’
Audio : Used to change language.
Subtitle : Choose between available subtitles.
Angle : Use this button to access various camera angles on a DVD disc
(only if the DVD features angle capabilities.

CCoonnnneeccttiioonnss
1. Installation of Hard dirve
① Carefully lift the top cover from the Enclosure base and locate the IDE port and power port situated on
the rear face of the hard drive. Plug the IDE cable and power cable into the appropriate port of ensuring
that they fit securely.
② Position the hard drive onto the
Enclosure base unit carefully
④ Secure the cradle with the four retaining
screws.
③ Cover the hard drive with the top cover
again.

2. AC cord connection & disconnection
Plug the AC/DC adopter in the wall outlet having connected its opposite end to the power input slot on the
backside of the player.
In order to disconnect,
① Press the Stop button before unplugging the AC cord
② Press the Power button to turn the set off. The power is shut off if the light is off.
③ Unplug the AC cord from the wall outlet
CAUTION !
If you unplug the AC cord while the player is operating, it can cause mechanincal trouble or damage the Hard
drive.
The use of unauthorized or prolonged cords can burn the wire and cause a fire

3. Connecting to your PC
Windows ME, 2000, XP (Home/professional) and Macintosh OS 9.2 and above do not require any special
installation of software drivers. The ModiX HD-35 will be recognized as a Mass Storage Device and mount
automatically within a few seconds of being connected. For PCs running Windows operating systems, you
will see a new drive letter, such as E: in My Computer. For Macintosh, you will see a new Hard Drive Icon on
your desktop. Note also that when the ModiX HD-35 is connected to a computer. You should always use the
AC adapter when connected.
Preferred Connection Order (all computers):
① Use the power adapter
② Plug USB cable into ModiX HD-35
③ Turn on the ModiX HD-35– wait until it completely boots up
④ Plug other end of cable into already running computer
Installing Drivers for Windows 98SE
When you first plug a Jukebox Multimedia into a computer running Window 98SE, it will recognize the
hardware and ask to have drivers installed. Follow the instructions below.
1. Windows 98SE has recognized a new piece of
hardware (ModiX HD-35) and starts its wizard.
Click on Next
.
2. Click on the button Search for the best driver.
Open up the CD tray on your computer and insert
the included Archos CD-ROM and then close the
tray. Now click on Next.
3. Uncheck the box Floppy disk drives if it is
checked, and then check the box Specify a
location. Type in the drive letter of your CD
player (usually D:) followed by: /Drivers (for JBM
120 & AV140) or /Win98SE (for JBM 20). Click on
Next and Windows will then load the correct
drivers.
4. Windows will now go and copy from the CD to
your computer’s hard drive, all the files it needs to
make the USB connection operational. Click on
Next to tell Windows to install the driver.
5. Windows will indicate when it has finished
copying the drivers. Click on Finish. Do not unplug
ModiX HD-35 from the computer.
7. Once finished, the computer will
automatically recognize the connected device
(ModiX HD-35). It will be seen as another drive in
your file management system.

4. Disconnecting from your PC
WARNING: You must properly disconnect (unmount) your Jukebox from the computer before disconnecting the
cable to avoid loss of data or freezing the computer and/or ModiX HD-35. DO NOT SIMPLY PULL OUT THE
USB CABLE AT ANY TIME.
To unmount ModiX HD-35 hard drive, click on the save remove icon (a green arrow) and follow the instructions.
Wait until you get a message saying that you can safely unplug the device before disconnecting the USB cable.
Attention: The operating system will not allow you to disconnect ModiX HD-35 if you have an open file from it in
a running application. You will have to close all open ModiX HD-35 files in any running application.
Warning: Failure to safely unmount the hard drive and disconnect ModiX HD-35 as explained may cause the
operating system or ModiX HD-35 to freeze and/or lose data.
1. Safe remove icon next to clock
2. Click to Eject (unmount) ModiX HD-35
3. Click OK, verify the message, then unplug cable (computer or ModiX HD-35 side)
5. Connecting to TV
The Player can be connected in different ways -Composite, S-Video, Component.You only need to
connect one video connection from the following options. The connection depends on the outlets
available on your TV set and the capabilities of your TV system.
NOTE !
Do NOT connect the AC power plug to the wall outlet before completing system connections.
Connect the video output of the MODIX directly to your TV.
Whichever method you use, be sure to set the TV to the correct video input type (AV Mode) and channel.
Using Composite Video jack (CVBS)
• Composite Video is an easy way of transferring
video signals via a phono cable.
Use the composite video cable (yellow) to connect
the DVD Player’s CVBS (VIDEO) jack to the video
input jack (or labeled as A/V In, Video In, Composite
or Baseband) on the TV (cable supplied).
Using S-Video jack
S-Video is another way of connecting the DVD Player
to the TV set.
Using the S-Video cable connect one 4-Pin Din plug
to the S-Video out connector on the MODIX and the
other 4-Pin DIN to the S-Video in on the TV.
NOTE !
Do not connect Component and S-Video at the same time. There’s happening some noise on the display.
If TV display is black and white, set the video mode as NTSC C/S-Video.
Using Component Video jack

• A so-called YPbPR is another way of connecting
the DVD to your TV set. Use a Component Video
cable that has 3x RCA plugs at each end, one for Y
(green), one for Pb (blue) and one for Pr (red). At
one end of the cable connect one Y RCA plug to
the Y (green) connector on the MODIX, one Pb RCA
plug to the Pb (blue) connector on the MODIX and
one Pr RCA plug to the Pr (red) connector on the MODIX. Take the other end of the cable and connect the
Y (green), Pb (blue) and Pr (red) plugs to the corresponding Progressive Scan inputs on the TV.
NOTE !
Progressive Scan is available and requires a special type of cable and a special TV set.
66.. CCoonnnneeccttiinngg ttoo AAuuddiioo SSyysstteemm
Conventional/analogue audio connections:
To hear the sound of this Player through your TV,
use the audio cables (white/red) to connect AUDIO
OUT (L/ R) jacks of the DVD Player to the
corresponding AUDIO IN jacks on the TV (cable
supplied).
Advanced/digital audio connection
The digital multi-channel connection provides the
best sound quality (Dolby Digital and AC3). It
requires a multi-channel A/V receiver that supports
one or more of the audio formats. Connect the
Player’s digital audio outlets (optical) to the
corresponding input on the amplifier. - Special
cables are required for this purpose. Next, change
the DVD player’s settings on the “Audio settings” menu. Refer to your amplifier’s instruction manual for
more information on correct setup.
CAUTION !
If the audio format of the Digital does not match the capabilities of your receiver, the receiver will produce a strong,
distorted sound or no sound at all.

SSeettttiinnggss
After everything is connected properly, plug in the AC power cord to the power outlet. If the player is
correctly connected to your system, MODIX logo appears on your TV, when you turn on the Player.
If the ModiX logo does not appear and Picture is distorted, when you start the Player, Please check as
follows;
① Recheck the cable connections. Try connecting your TV set using the Composite Video cables.
Composite Video always produces a picture
② Set your TV at A/V mode. Refer to the equipment owner’s manual for detail.
③ Make sure your TV set support progressive video input before setting this player to progressive
mode. Otherwise, a black screen will be shown on your TV.
At this time, press (N/P) button repeatedly
until you see the
normal screen.
You can always access the SETUP menu and adjust the MODIX
to your specific requirements and hardware. When MODIX
appears on the main screen, press the SETUP button and a
menu will appear with the available options.
Note:
Use the arrow buttons on the remote control to move the rectangular frame to the language you wish to
select and press ENTER.and if you press SETUP again, the setup will be saved.
11.. VViiddeeoo SSeettttiinngg
The Player can be connected in different ways -Composite, S-Video, Component, HD-Component. You
only need to select one video connection from the following options. The connection depends on the
outlets available on your TV and the capabilities of your TV system.
If your TV’s :
Picture is distorted.
Picture is black and white only.
Picture is not full screen, or part of the border is not visible.
Setup the video output setting correctly.
Note :
Make sure your TV set must support progressive video input before setting this player to progressive mode. Otherwise,
a blank screen will show on your TV. Press (N/P) button repeatedly to show the normal screen by this time until you
see the menu again.
Progressive Scan is available and requires a special type of cable and a special TV set.
After connecting to 1080i mode, screen flicking is a normal thing and interlaced mode is suitable for
moving picture not for documentation and graphic works

22.. AAuuddiioo SSeettttiinngg
For 2CH Stero sound output and if you plug stereo
analogue jact, Select Analog/DPCM option on the setup
menu.
For AC3 Dolby Digital surround output, connect the
digital output (optical) to an amplifier. And Select
“Encoded Digital” option on the setup menu.
33.. IInniittiiaall SSeettttiinngg
TV Type
Set the aspect ratio of the Player according to the TV you have connected.
This screen presents two different types of TV formats: 4:3 (normal) or 16: 9: (wide screen).
4 : 3 Letter Box / 4 : 3 Pan Scan / 16 : 9 / MP4 4 : 3 Full / MP4 16 : 9 Full
Note:
MP4 Full mode is only activating at AVI Playback.
Language Settings
You can select your own preferred language settings.
Supported Languge: Korean, English
Default
Setting the ‘Default’ function will reset all options and your personal settings to the factory defaults and all
your personal settings will be erased.
CAUTION !
When default function is activated, all settings will be reset to factory defaults.
44.. AAddvvaanncceedd SSeettttiinngg
File Auto Play
ModiX HD-35 recognises the format and automatically starts
playing the files
On (With Folder) / On (Without Folder) / Off
AVI Move Setting
MOVE X: you can move the movie by Times(2X, 4X, 8X, 16X,
32X)
MOVE MIN: you can move the movie by Minute(1, 5, 10, 15,
20minutes)
*Whenever you finished every setting, You must press “Setup” button before you exit from the setup mode
to main screen as follows;

This menu only appears for MP3 audio, DIVX MPEG-4 (video
and audio), and JPEG photo/picture files play automatically.
Press cursor key choose the media format to be played. Press
Enter to confirm/play your selection.
5. Hard Drive Formatting
1) USING PartitionMagic S/W
PowerQuest® PartitionMagic® is a utility that lets you quickly and easily create, delete, merge, or convert file
systems of partitions on your hard disk without destroying existing data. So that you can convert NTFS file
system into FAT32 suitable for ModiX HD-35 without destroying existing data.
① Installing PartitionMagic
Be noted that this is not a shared program. You must purchase this program.
② Running PartitionMagic
③ Selecting a Hard Disk and Partition
④ Creating Partitions
If you have a new HDD Disc, create partitions as belows;
A. Select a block of unallocated space.
B. Click Partition Create.
C. From the Create as drop-down list,
select Primary Partition.
D. From the Partition Type drop-down
list, select the FAT32.
E. (Optional) Enter a label for the new
partition.
F. In the Size box, enter the desired size
for the partition. Or, in the percent of
unallocated space box, enter the
desired percent of unallocated space
for the partition.
G. If the size you specified for the new
partition is smaller than the available
unallocated space, you can position
the partition at the beginning (recommended) or end of the unallocated space. In the Position box, click
Beginning of free space or End of free space.
H. In the Cluster size drop-down list, choose a cluster size of 32K.
I. In the Drive Letter box, note the drive letter that will be assigned to the new partition after you reboot, or
(for NT-based operating systems) select the drive letter you want.
J. Click OK.

⑤ Converting Partitions (NTFS partitions to FAT32)
If you already have a HDD disc, do as bellows. You will lose file system-specific information when
converting from NTFS to FAT.
A. Select the partition you want to
convert.
B. Click Partition Convert.
C. Under Convert to, choose FAT32
and Primary Partition..
D. Click OK.
⑥ Resizing Clusters
A. Select the partition where you want
to resize clusters.
B. Click Partition -> Advanced ->
Resize Clusters.
C. Change to Recommended Cluster
Sizes(32K) from the New cluster
size drop-down list.
D. Click OK.
NOTE:
If there’s severe stopping when you use hdd rack, do resizing cluster size.

2) Creating FAT32 Volumes in Windows XP
The Disk Management snap-in in Windows XP is a tool for managing your hard disks and the volumes or
partitions that they contain. Use Disk Management to create new FAT32 volumes, or format an existing volume to
use the FAT32 file system. You can format basic and dynamic volumes to use FAT32.
Create a FAT32 Partition
To create a new FAT32 partition in Windows XP, follow these steps:
A. Log on as Administrator or as a member of the Administrators group.
B. Click Start, then right-click My Computer, and then click Manage.
C. In the console tree, click Disk Management.
D. In the Disk Management window, do one of the following:
i. To create a new partition, right-click unallocated space on the basic disk where you want to create
the partition, and then click New Partition.
-or-
ii. To create a new logical drive in an extended partition, right-click free space on an extended partition
where you want to create the logical drive, and then click New Logical Drive.
E. In the New Partition Wizard, click Next.
F. Click the type of partition that you want to create (Primary partition, Extended partition, or Logical
drive), and then click Next.
G. Specify the size of the partition in the Partition size in MB box, and then click Next.
H. Assign a drive letter or drive path to your new partition or logical drive, and then click Next.
I. Click Format this partition with the following settings, and then do the following:
i. Click FAT32 in the File system box.
ii. Type a name for the volume in the Volume label box.
If you want, you can also change the disk allocation unit size, or specify whether you want to
perform a quick format.
J. Click Next.
K. Confirm that the options that you selected are correct, and then click Finish.
The new partition or logical drive is created and appears in the appropriate basic disk in the Disk Management
window.
Format an Existing Volume to Use FAT32
A. Click Start, then right-click My Computer, and then click Manage.
B. In the console tree, click Disk Management.
C. In the Disk Management window, right-click the volume that you want to format (or reformat), and then
click Format.
D. In the Format dialog box, do the following:
i. Click FAT32 in the File system box.
ii. Type a name for the volume in the Volume label box.
If you want, you can also change the disk allocation unit size, or specify whether you want to
perform a quick format.
E. Click OK
NOTE:
Although the FAT32 file system supports hard disks up to 250GB in size, some hard disks may not be
able to contain bootable partitions that are larger than 7.8 GB because of limitations in your computer's
basic input/output system (BIOS) INT13 interface. Please contact your hardware manufacturer to
determine if your computer's BIOS support the updated INT13 extensions.

3) Creating FAT32 Drives in Microsoft Windows 98
In Windows 95 OSR2, Windows 98, and Windows Me, if you run the Fdisk tool on a hard disk that is over 512
megabytes (MB) in size, Fdisk prompts you whether or not to enable large disk support. If you answer "Yes"
(enabling large disk support), any partition you create that is larger than 512 MB is marked as a FAT32 partition.
Windows 98 and Windows Me also include a FAT32 conversion tool that you can use to convert an existing drive
to the FAT32 file system. To use the conversion tool, follow these steps:
A. Click Start, point to Programs, point to Accessories, point to System Tools, and then click Drive
Converter (FAT32).
B. Click Next.
C. Click the drive that you want to convert to the FAT32 file system, and then click Next.
D. Follow the instructions on the screen.
To convert a drive to the FAT32 file system, use the following steps.
NOTE: Before you convert to the FAT32 file system, uninstall any utilities or tools that protect or encrypt the
Master Boot Record (MBR) or partition table (for example, uninstall Bootlock included with Symantec Norton Your
Eyes Only).
Method 1
A. Click Start, point to Programs, point to Accessories, point to System Tools, click Drive Converter
(FAT32), and then click Next.
B. In the Drives box, click the drive you want to convert to the FAT32 file system.
C. Click Next, and then click OK.
D. Click Next, click Next, and then click Next again.
E. When the conversion is complete, click Finish.
Method 2
At a command prompt, type cvt drive: /cvt32 and then press ENTER, where drive is the drive you want to
convert to the FAT32 file system.
6. FirmWare Updates
At our website, you can update the Player’s firmware/operating system with the latest new features. To do
so, download the software from the support section at the www.modix.co.kr website. Then copy to any HDD
folder on a HDD Drive and just enter the *.duh file. See our website under support for additional information.
NOTE: only undate lastest firmware virsion.you can check setup display right below.
1. Download firmware *.duh file from Manufacturer’s or
Dealer’s website.
2. Just copy *.duh file into HDD any drive folder
3. Connect the player with TV
4. Power on the player side.
5. Go to “PHOTO” mode
6. Select the *.duh firmware where you stored directory
and press ENTER button.
7. Just follow the instructions on the TV Screen
8. Update finished. Restart player.

Playing MPEG4/DivX (.avi) & MPEG(.mpg .dat) files
ModiX HD-35 recognises the format and automatically starts
playing the files when you select the target file and press the
ENTER button to play. (Yellow – Folder, white – File)
DivX: DivX4.x and 5.x comply with this standard, except GMC (Global
Motion Compensation) and QP (Quarter Pixel) features.
MPEG-4: All video codecs that comply with specifications of ISO-
MPEG4.
Possible experience encountered:
It is normal to experience pixelation during MPEG- due to clarity of digital contents internet downloading.
Some files may be distorted during playback due to the configuration and characteristics of the disc.
If you are having trouble playing a certain movie, stop to play and try a different one. Improper formatted file
will not play on this player.
Playing MP3 Music
When you select any MP3 music in the Audio Category, You can listen the music
Possible experience encountered:
It is normal to experience an occasional “skip” while listening to your MP3 discs.
Viewing Photos
The Player is able to display pictures of type JPEG (progressive
JPEG not supported) on a television. To view a photo, simply
highlight it and click on Play. The Player will read just the picture
size to fit the screen. However, it can only resize in certain steps.
Thus your images may not always fill the entire television screen.
To fill up the entire screen, pictures should be in multiples of
resolution 600x800 (PAL TV output) and 600x384 (NTSC TV
output). Use the Auto Play mode [A] while viewing pictures to
show picture thumbnails and to go directly to the picture you
want

Creating and playing Playlist
The playlist feature has been added for you to playback a
combination of files that you would like to play. You may select
a combination of movies (MPEG-4), music (MP3), and/or
pictures (JPEG).

Trouble Shooting
If you have troubles getting your computer to recognize (mount) the ModiX HD-35 as an external hard drive,
check the following.
If using Windows 98SE, you must first install the drivers from the included CD-ROM.
If using a USB hub, try connecting without using the hub (some hubs are not powered and may not work with
the ModiX HD-35)
If using a USB port in the front of your computer, try a USB port in the back. Front USB ports are often from
non-powered hubs
Do not connect to a USB port repeated through a keyboard
Your USB driver software may be out of date. Find your USB chipset type by going to My Computer >
Properties > Device Driver > Universal Serial Bus (USB) Controllers > Host Controller. You may have a
chipset VIA, Intel, SIS or another. It is possible that you do not have the latest software drivers for these
chipsets. For VIA updates, check out www.viaarena.com. For Intel check out www.intel.com. For SIS, cancel
the driver and reinstall the Windows default USB controller drivers.
If using a laptop computer and a docking station, try connecting without the docking station.
First connect the interface cable to the ModiX HD-35 while it is off, start up the ModiX HD-35, then once the
ModiX HD-35 has finished booting up, connect the other end of the USB cable to a running computer.
Starting up the ModiX HD-35 with it already connected via the USB 2.0 interface cable may the ModiX HD-35
to be unrecognized by the computer.
Shut off and reboot the computer and the ModiX HD-35 and then try connecting again in the preferred order
mentioned above.
If Macintosh OS 10.1.x says it cannot mount the volume, you can use Disk Utility to reformat ModiX HD-35
hard drive to type MS DOS FAT32. However, files will only be readable from a Macintosh, not a Windows
machine.
Make sure in your system BIOS the USB port is checked “ON” not “Off” Usually just on old machines.
In Win98SE make sure in the Config.sys if there is a line “last drive = ” that it be last drive = z: Usually just on
old machines.

FAQ
:: Video
Can I use WMA or Ogg sound in a DivX, Xvid or RMP4 container?
WMA, AAC, Ogg-vorbis and similar audio codecs will not be played back.
ModiX HD-35 only support MP3, AC3 or PCM as sound codec in video files
What happens if a new DivX codec is released etc. DivX 6 , will the MODIX be able to
When a new DviX codec is release the player will be able to play it as long as it is an official DivX codec and it is in the
ISO mpeg 4 standard
I cannot FF/FR in DivX?
Please update to the latest Firmware
the support for FF/FR was implemented in latest firmware.
The FF/FR is using Iframes so this can be a bit jumpy.
I have problems playing DivX 3.11 with Mp3 VBR sound?
This can be an interleaving issue, please run the file through a program like virtual Dub. Run a direct stream copy of both
Audio and video.
I have problems playing DivX 3.11 with Ac3 sound?
This can be an interleaving issue, please run the file through a program like virtual Dub. Run a direct stream copy of both
Audio and video.
Some of my DivX / Xvid and RMP4 files do not have any sound?
This can be caused by many things, make sure that you have set the SPDIF out correctly in the players setup menu, that
the file actually have sound or it can be because the file uses an unsupported audio codecs.
Is there something i can do about these freezes in DivX 3.11?
The only thing you can do is to convert the files to another format.
Some of my DivX 3.11 freezes in high action scenes or when there is a lot going on in the picture
This can occur and it do not mean that there is something wrong with the player it is simply because of the motion level
in the movie, the player will proceed with playing the movie after a few seconds.
What Mpeg 4 formats do the MODIX support?
ModiX HD-35 support DivX 3.11 low and fast motion, but in high action scenes freezes may occur. DivX 4.12 , DivX
5.xx , Xvid and RMP4
How do i use progressive scan?
Before you can use progressive scan you need to have component cable, Progressive Scan is available and requires a
special type of cable and a special TV set
My TV can only use component without progressive what do I do ?
You have to use a component cable. You also need to enter the player’s setup by pressing the setup button and go to
the video menu and set component out.
My picture is in black and white?
Enter the setup menu and go to the video menu and change the settings here to fit your TV screen, this usually happens
if the player is set to use s-video instead of Componet.
:: Audio
Which audio codes are supported in DivX / XVID or RMP4 by the MODIX?
ModiX HD-35 supports the following MP3 sound. Ogg Vorbis and WMA is not supported.

Does the MODIX support Winamp or other playlists?
ModiX HD-35 do not support any playlist.
Can i use ID3 tags on the MODIX?
Yes
ModiX HD-35 supports ID3 -tag's.
I have several cd's with MP3 albums with a JPEG image of the cover and the MODIX only finds the pictures on the cd?
ModiX HD-35 support mixed file content from latest firmware version. In some of the old firmware versions the player
only finds the JPEG image files.
I have a cd filled with MP3's and the MODIX cannot read it?
Make sure that the CD is a closed session and that the folder which you are trying to play is not containing over 1024
files. The MODIX can handle up to 1024 files in each directory.
Which MP3 bitrates do the MODIX support?
The MODIX support's bitrates between 32 and 320 kbps and it can also use Variable bitrates.
How can I get sound over my digital amp and my TV at the same time?
This is not possible on the
ModiX HD-35, you have to choose between either digital or analog sound.
I have no sound on my
ModiX HD-35 even after I have updated the firmware?
Ensure that the player is setup for your equipment. You can check the settings by pressing the setup button on the
remote control and go to the audio menu and now make sure that the SPDIF out is setup correctly.
RAW is use together with the SPDIF or the optical out and are Digital
PCM is used with the RCA stereo connection.
:: Picture
Some of my JPEG images will not be shown on my MODIX?
This can be because the pictures are larger than 720 x 576, the player can only handle pictures which are similar to this
resolution or smaller.
My MODIX is vary slow to load my Jpeg pictures?
This is because of the file size, if the pictures are vary big/large then it might take a few seconds before the player will
show the picture.
My MODIX will not show all the JPEG files i have on my cd?
ModiX HD-35 supports up to 1024 images per folder, if there is folder containing over 1024 files then ModiX HD-35 will
not be able to use this folder or cd.
I use the newest firmware version and my JPEG image has black edges in the side of the picture?
ModiX HD-35 zoom's the picture according to the aspect ratio, so if the picture is not in the PAL or NTSC standard the
player will make these black edges.
:: Firmware
Do I have to install all firmware updates?
No you only have to install the latest firmware to get all the new features and bug fixes
Can I upgrade my MODIX with the firmware for an other player?
THIS IS NOT POSSIBLE AND WE WARN YOU DONT DO THIS
This will install a formware that dont have support for the hartware in the player, the mpeg board must be replaced, any
you need to send it in for repair at your own expense.
I have no picture on my new player or after i firmware updated my player?
This may sometimes occur when the player goes into the "setup" menu at start up, this can sometimes be corrected by

pressing the N/P button repeatedly or Firmware update the player again. You can also use the composite out this will
output, it will always work, and you can now change the settings to fit your TV.
How do I check which firmware that is installed on my MODIX?
You can check which firmware version is installed by pressing the setup button on the remote control and then the
player will write the firmware version in right-below of the setup menu
Can I install an older firmware on my MODIX than the one i have installed?
No ! This will not be possible, because it can create a lot of problems after you have downgraded your player so please
do not try !!
If you want to you can reinstall the firmware.
I get an error when I try to update the firmware?
This is usually caused by the burning, and can be corrected by updating the version of the burning application to the
newest version. please try to update the player again.
Which version should i choose PAL or NTSC?
This depends on your TV if it can use pal, NTSC or both. pal is used in Europe and NTSC is usually used in the US.
I have a MODIX can I update this player?
Yes! The MODIX is firmware updateable; you can download new firmware from manufacturer’s or Dealer’s website.
Please contact to our dealer in your area.
 Loading...