

MCP15-542.0
5H081676A
October, 2011
IMPORTANT
1. Disconnect power supply before installing the
accessory to prevent the unit from operating during
installation.
2. The use of this manual is specifically intended for a
qualified installation and service agency. All installation
and service of these kits must be performed by a
qualified installation and service agency.
3. These instructions must also be used in conjunction
with the Installation and Service Manual originally
shipped with the appliance, in addition to any other
accompanying component supplier literature.
Power Supply Input:
24 Vac (powered from unit)
Power Consumption:
1 Watt Maximum
Operating Conditions:
32°F to 122°F
10 to 85% Relative Humidity
(non-condensing)
Index of Protection:
IP30 (NEMA Type 1)
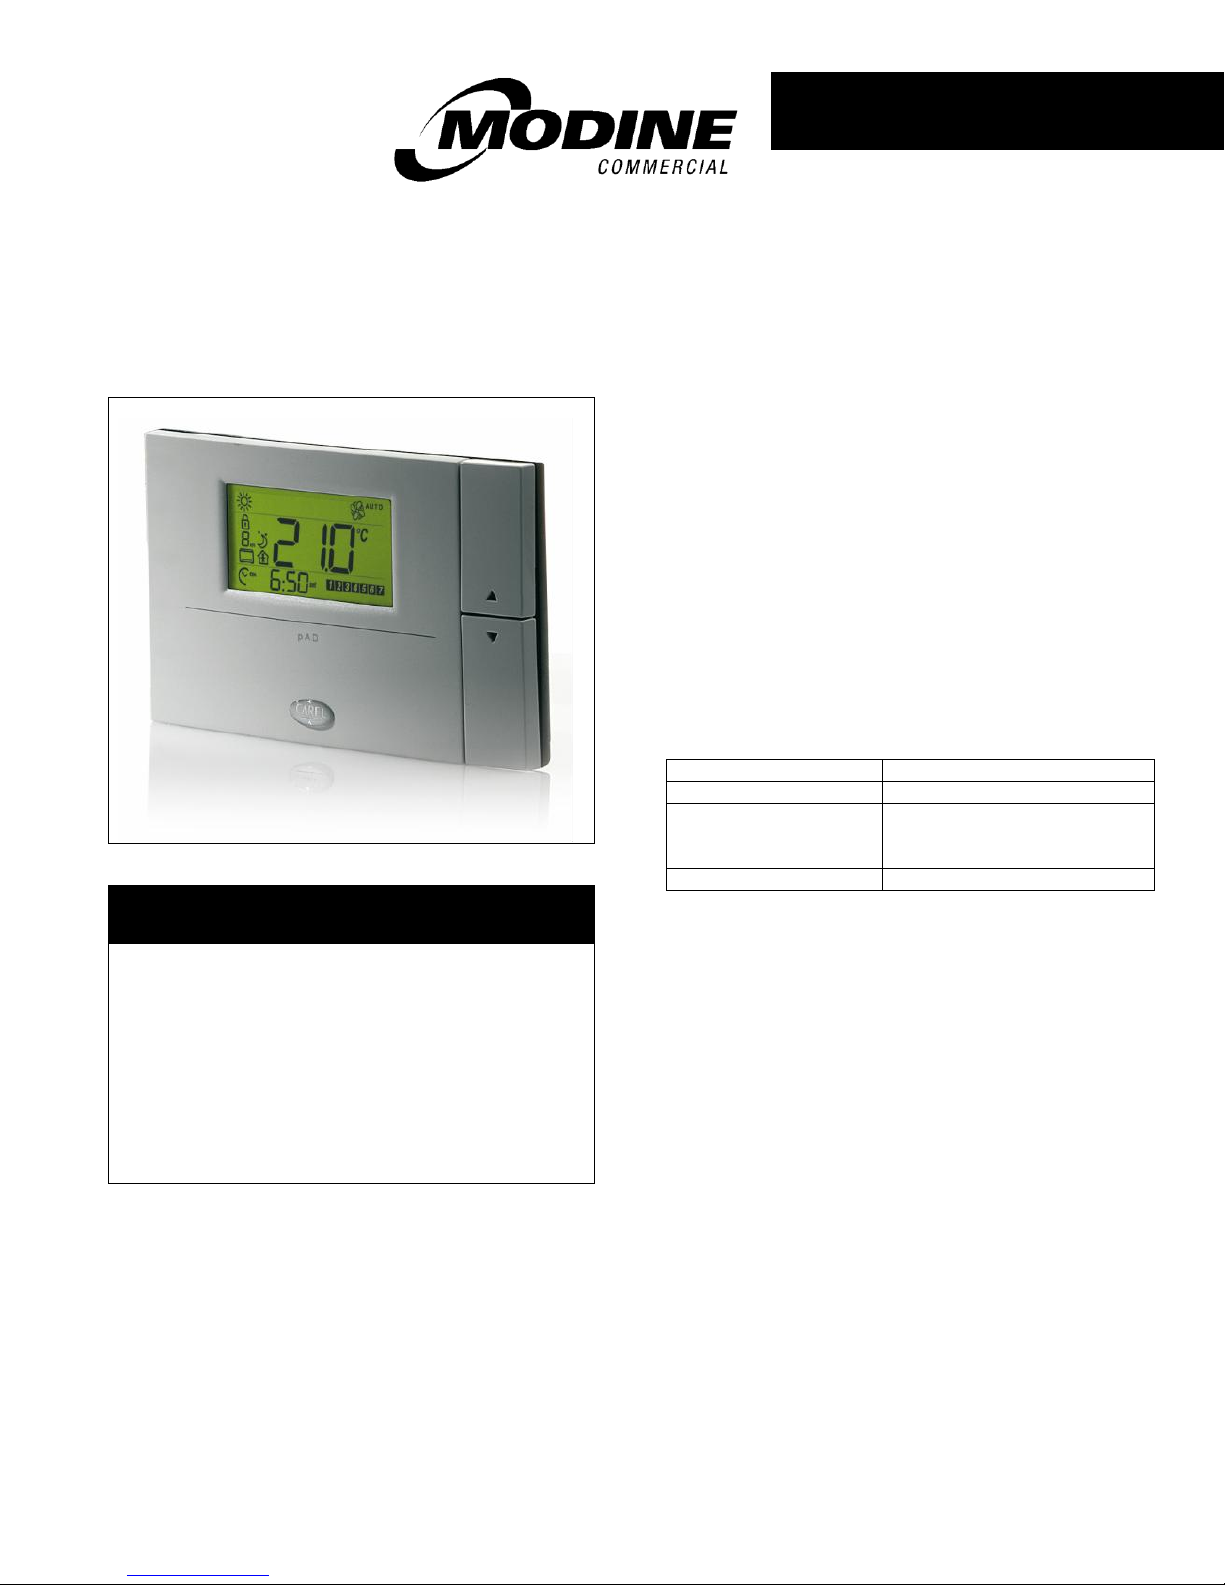
Carel pAD Digital Wall Stat/Humidity Sensor
INSTALLATION INSTRUCTIONS
Carel pAD digital wall stat/humidity sensor
commercial packaged ventilation system units
model MPR
Application
The Carel pAD (Ambient Display) wall thermostat/humidity
sensor is used in conjunction with the Carel pCO3 controller
mounted on model MPR Packaged Rooftop Commercial
Ventilation units.
Functions of the pAD include:
Change temperature and humidity set points
Clock display
Alarm indication
Time clock override
Display of icons (refer to page 3)
Specifications
THIS MANUAL IS THE PROPERTY OF THE OWNER.
PLEASE BE SURE TO LEAVE IT WITH THE OWNER WHEN YOU LEAVE THE JOB.
INSTALLATION – Carel pAD Digital Wall Stat/Humidity Sensor
Terminal on pAD
Terminal on Main Unit or
pCO3 Controller
G (24 Vac)
503 (on unit)
G0 (ground)
500 (on unit)
Rx/Tx+ (positive pLAN)
Rx/Tx+ (on pCO3 – J11 block)
Rx/Tx- (negative pLAN)
Rx/Tx- (on pCO3 – J11 block)
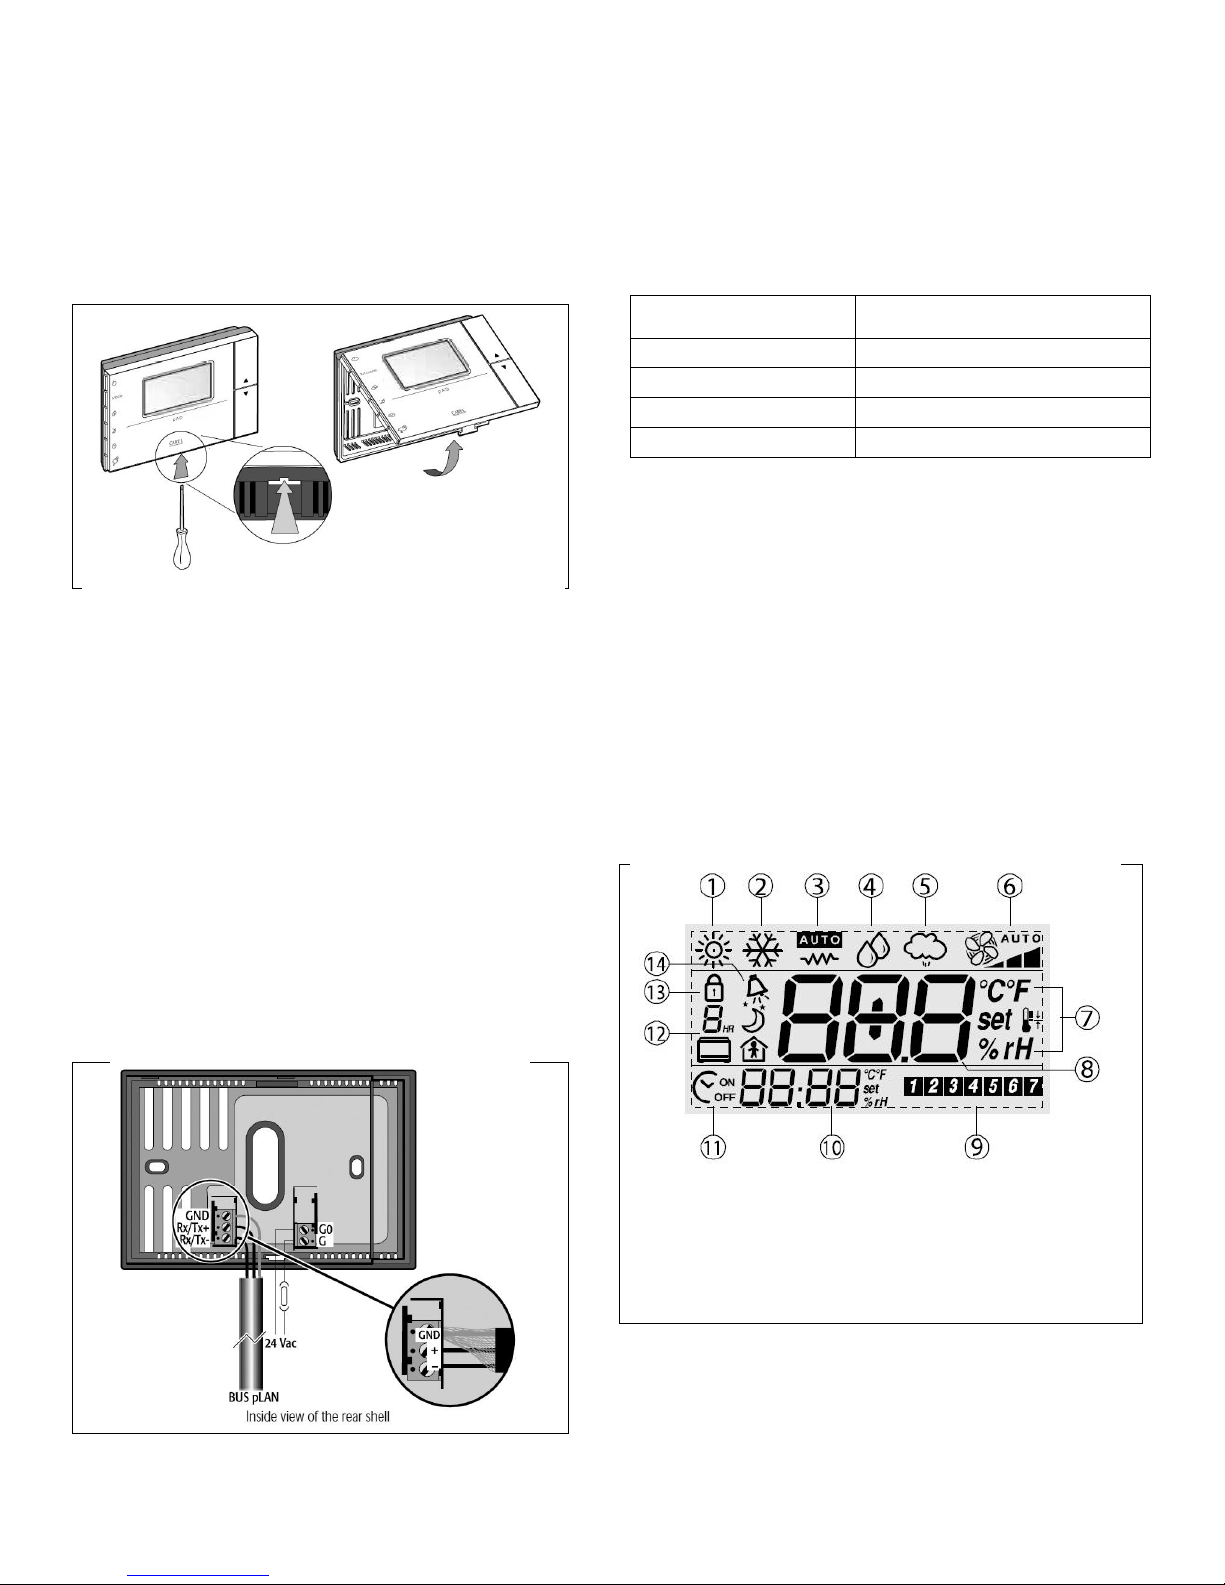
1 – Cooling Mode
2 – Heating Mode
3 – Auto
4 – Dehumidification Mode
5 – Humidification Mode
6 – Fan Speed
7 – Units of Measure
8 – Temp/Humidity Setpoint
9 – Day of the Week
10 – Time/Temp/Humidity Setpoint
11 – ON/OFF Time
12 – Occupied Override Time
13 – pAD Locked
14 – Active Alarm Indication
Installation
1. Separate the sensor from its base by pushing the white
tab at the bottom of the sensor and pull the white body
from the gray base by hinging it up from the bottom.
Refer to Figure 2.1.
Figure 2.1 – Separating the Sensor from the Base
2. Locate and mount the sensor in the conditioned space,
considering the following:
Mount in a location representative of the space
temperature. Do not locate on an outside wall or
near supply grills, windows, or other devices that
could cause incorrect temperature readings.
Mounting height will depend on personal
preferences and applicable codes.
If required, the sensor can be mounted in a well-
ventilated thermostat cover.
The sensor base will mount on a standard 2” x 4”
electrical box mounted sideways.
3. Connect the control wiring to the base terminals,
running the wiring through the hole in the center of the
base. The recommended control cable is 18-22 AWG
4-Core Twisted Pairs. Refer to Figure 2.2.
Figure 2.2 – Control Wiring to pAD Sensor Base
4. Connect the control wiring to the terminals on the model
MPR unit, or on the pCO3 controller mounted on the
model MPR unit, using Table 2.1 to cross-reference the
correct connections.
Table 2.1 – Terminal to Terminal Wiring Connection
5. Holding the sensor on the outer edge of the enclosure,
reinstall the sensor on the base by hooking the top of
the sensor into the base and hinge down, making sure
the pins line up. DO NOT force the sensor into place or
touch the components on the back of the sensor.
6. For the pAD Sensor to function correctly, the pAD
setting must be enabled in the pCO3 microprocessor
controller. This can be found under “Manufacturing
Settings” using the keypad (See pCO3 manual).
Display Features
Figure 2.3 shows the operation icons on the display of the
pAD and what they indicate. Note that not all are used with
model MPR applications.
Figure 2.3 – pAD Display Features
2 MCP15-542.0
Not used with model MPR.

INSTALLATION – Carel pAD Digital Wall Stat/Humidity Sensor
POWER
Used to Turn Unit On and Off (if enabled in the
pCO3)
MODE
Used to Reset an Alarm Condition (no other
function)
HUM
Display & Change the Humidity Setpoint
SLEEP
Unoccupied Override
CLOCK
Not Used (Time Set By pCO3)
TEMP
Display Alternative Information
UP
Change Cooling, Heating, or Humidity Setpoints
DOWN
Code
Default
Description
Ad01
4
pLAN Address (do not change)
Ad02
1
Not Used (Rev 1.3 pAD only)
Br01
0
pLAN Baud Rate (do not change)
Br02
0
Not Used (Rev 1.3 pAD only)
En01
0
Enable Buzzer 1=on 0=off
Pco1
0.0
Temperature Calibration -9.9 to +9.9
Fr01
pAD Firmware Revision Number
Prot
1
Not Used (Rev 1.3 pAD only)
Button Features
The pAD has several buttons to control certain functions.
Refer to Figure 3.1 for the buttons and button functions (note
that not all are used with model MPR applications):
Figure 3.1 – pAD Button Features
Operation
With the display and button features, basic unit control
and/or monitoring can be performed. Under normal
operation the display will show:
Current Time (Supplied from the pCO3 controller)
Current Day (Supplied from the pCO3 controller)
Current Room Temperature, Humidity, Cooling
Setpoint or Heating Setpoint.
Current Room Humidity Level
Current Mode (Occupied or Unoccupied)
Compressor / Fan Speed
Using the buttons on the pAD, adjustments can be made to
these currently displayed conditions. Note that only
occupied setpoints can be changed. The setpoint
adjustment range can be limited in the pCO3 controller using
a service keypad (see pCO3 microcontroller manual).
Adjusting the Temperature and/or Humidity Setpoints:
To change the temperature setpoint, use the “Up” or
“Down” arrows to change the value. This changes the
Cooling Setpoint. The Heating Setpoint will be 4°F below
the Cooling Setpoint. For example, if the Cooling Setpoint is
74°F, the Heating Setpoint will automatically be set to 70°F.
To change the humidity setpoint, press the “Hum” button
and the Humidity setpoint will be displayed. Use the “Up” or
“Down” arrows to change the setpoint.
Unoccupied Mode Override to Occupied Mode:
In unoccupied mode you can press the “Sleep” button to
activate Occupied Override. Each press of the button
increases the override time by an hour. To cancel, wait a
few seconds then press the “Sleep” button once and the
override will be canceled.
Clearing Alarms:
The pAD will display Remote Alarm from the pCO3, if an
alarm occurs the “Bell” symbol will flash and the main
display will alternate between the temperature & “Alr”. To
clear an alarm, press the “Mode” button. Note that active
alarms cannot be cleared and Service Personnel must be
called to determine the source of the alarm and correct.
Programming the Sensor:
The sensor ships from Modine fully programmed. If changes
are required follow the instructions below.
Note: This should only be done by a qualified service
technician.
Press “UP” and “DOWN” together until “PAR” is displayed
in the main screen. While still holding the “UP” arrow,
release the “Down” arrow, then press the “TEMP” button.
To cycle through the values, use the “UP” and “DOWN”
arrows. To make a change, press the “TEMP” button, the
display will flash, and then make the change using the “UP”
and “DOWN” buttons. When done, press the “TEMP”
button.
To finalize the operation, press & hold “TEMP” until the
normal display is returned, then press resume. If this is not
done the changes will not be made.
Table 3.1 – Default pAD Program Parameters
MCP15-542.0 3

Modine Manufacturing Company has a continuous product improvement program,
and therefore reserves the right to change design and specifications without notice.
Commercial Products Group Modine Manufacturing Company 1500 DeKoven Avenue Racine, Wisconsin, USA 53403-2552
Phone: 1.800.828.4328 (HEAT) www.modinehvac.com
© Modine Manufacturing Company 2011 MCP15-542.0
 Loading...