

Modern Fan Co DC Slim Installation Instructions Manual

MODERN FAN COMPANY
Customer Service
M-F 8am - 4pm (PST)
(ph) 888.588.3267
www.modernfan.com
(1) Remove and identify contents of carton.
DC Slim Fan- Installation instructions
Should you have any questions or difficulty installing your new fan,
please contact Modern Fan Co. customer service immediately.
Note: Power supply must be turned off prior to any contact with electrical
wires. It is recommended that a licensed electrician be hired to install your
ceiling fan.
Important: The DC Slim can only be controlled with the #DCR remote
control (included with the fan) in combination with an on/off switch at a
wall location. Dimmers, rheostats, fan speed or other controls are not
compatible and may not be used with this fan.
DC Slim
half
ball
remote
handset
hugger
canopy
blades
batteries
hugger
mounting
plate
lamp
socket
plate
light
diffuser
coupling
cover
down
rods
balancing
kit
fan bodymotor housing
hanging
bracket
canopy
hardware
kit
Determine if you will suspend your fan using a down rod or the hugger kit,
both of which are included with your fan. The hugger kit is recommended
for 8’ (eight foot) ceilings, while a down rod is usually better suited for higher
ceilings. While building codes require fan blades to be 7’ (seven feet) or
higher above the floor, a longer down rod will generally improve airflow and
efficiency when ceiling heights allow. For hugger installation, proceed to
step (2) below. For down rod installation, skip to step (10).
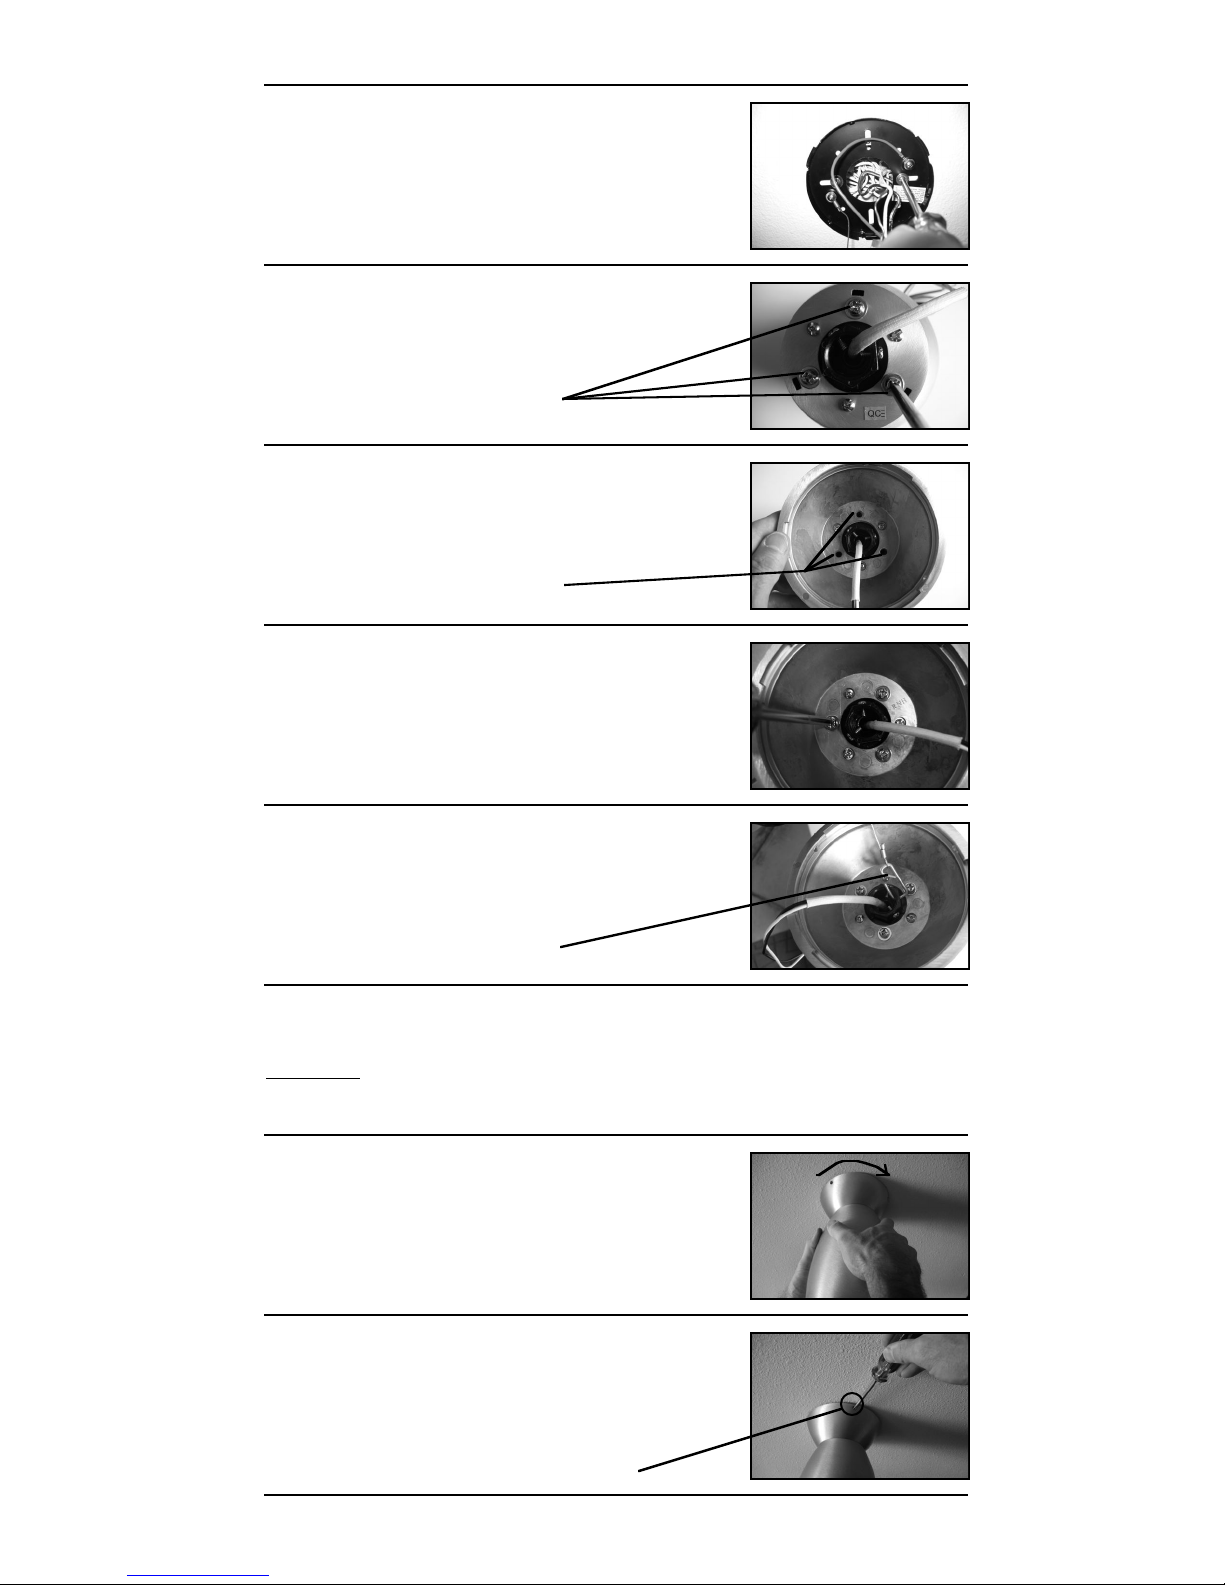
(4) Place hugger canopy on top of fan body so
that larger holes fit over small screw heads and
smaller holes are aligned with open screw holes
from step (3).
(3) Remove the three larger screws and washers
from the top of the fan body/motor housing. Set
aside for use in step (5).
three larger screws
open screw holes
(6) Using security cable and hook, suspend fan
from hugger mounting plate. The suspension
hook should be inserted through the open hole on
the fan motor coupler.
(5) Using larger screws and washers from step (3),
secure hugger canopy to fan body/motor housing.
security cable
and hook
(2) Using machine screws and washers from the
hardware package or existing screws in junction
box, securely attach hugger mounting plate to
ceiling junction box.
(9) Insert and firmly tighten three canopy screws
from hardware package.
Note- Do not tighten down set screws until all
three are partly screwed in.
(7) Using wire nuts included in hardware kit, make wire connections to
power supply in junction box: black to hot and white to neutral. Excess wire
can be trimmed prior to making connections for easier wire management.
CAUTION: power must be turned off at switch location or at circuit breaker
prior to handling wires. DO NOT perform wire connections with live/hot
wires.
set screw
(8) Taking care not to pinch, cut or damage wires,
lift fan to hugger mounting plate so that tabs and
slots are aligned. Rotate fan until the three holes
on hugger canopy are aligned with holes on
hugger mounting plate. There is a “stop” in place
that will guide this alignment.
Skip to step (22) for installation of blades, light kit and operational
instructions.
Installation of fan using hugger kit:
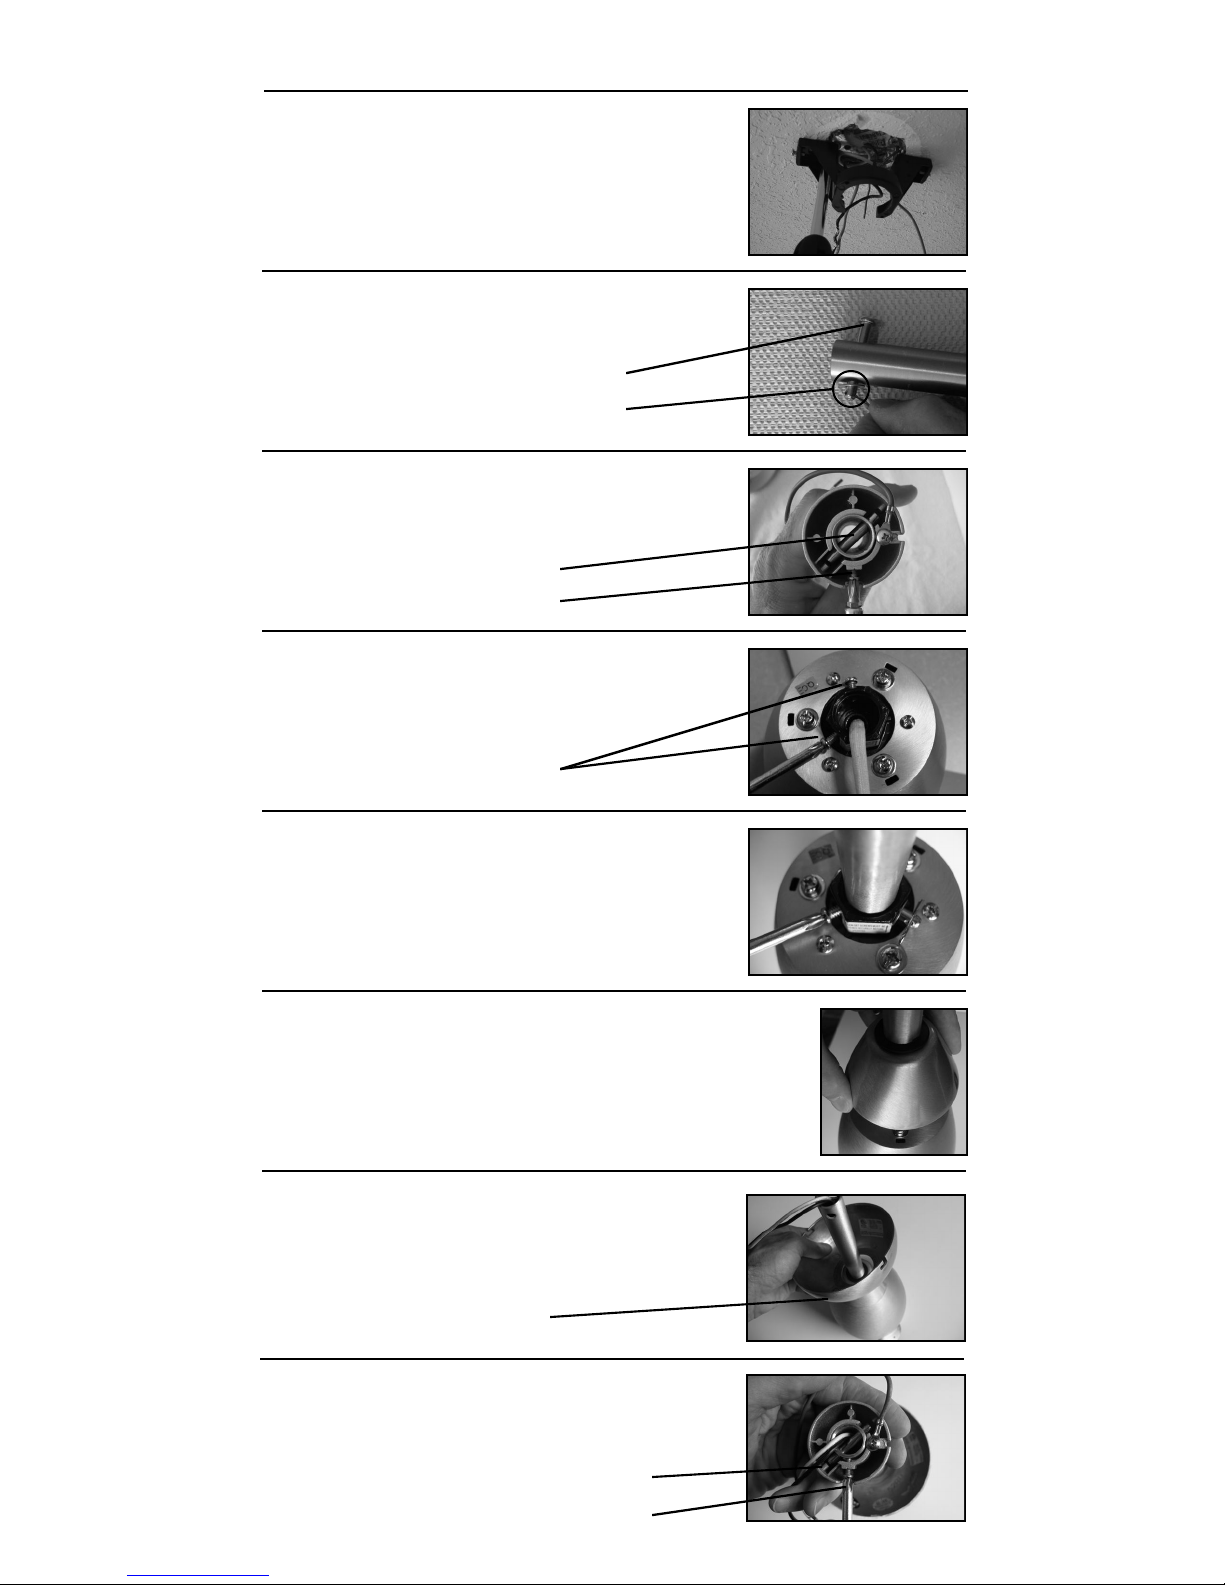
(10) Using machine screws and washers from
hardware package or existing screws in junction
box, securely attach hanging bracket to ceiling
junction box.
(14) Run fan wires through selected down rod.
Install stopper pin, cotter pin and washer from step
(11) through hole in coupler. Then firmly tighten
set screws on fan collar against down rod.
Note: If ceiling height allows, using a longer down
rod will increase airflow and efficiency.
(13) Slightly loosen two screws where down rod is
to be installed in step (14).
(12) Remove stopper pin and half ball from small
down rod by loosening set screw on half ball. Set
parts aside for reinstallation in step (17).
stopper pin
set screw
set screws
(11) Remove the cotter pin, washer and stopper
pin assembly from the small down rod and set
aside for step (14).
cotter pin & washer
stopper pin
(15) Slide coupling cover over down rod until
seated against fan body, aligning posts on cover
with holes on top of fan body/motor housing.
(16) Slide fan canopy over down rod and carefully
rest on top of fan body.
canopy
(17) Reinstall half ball from step (12) on end of
down rod. Be sure that stopper pin is inserted
through down rod and seated in half ball. Tighten
set screw against down rod.
stopper pin
set screw
Installation of fan using a down rod :
 Loading...