

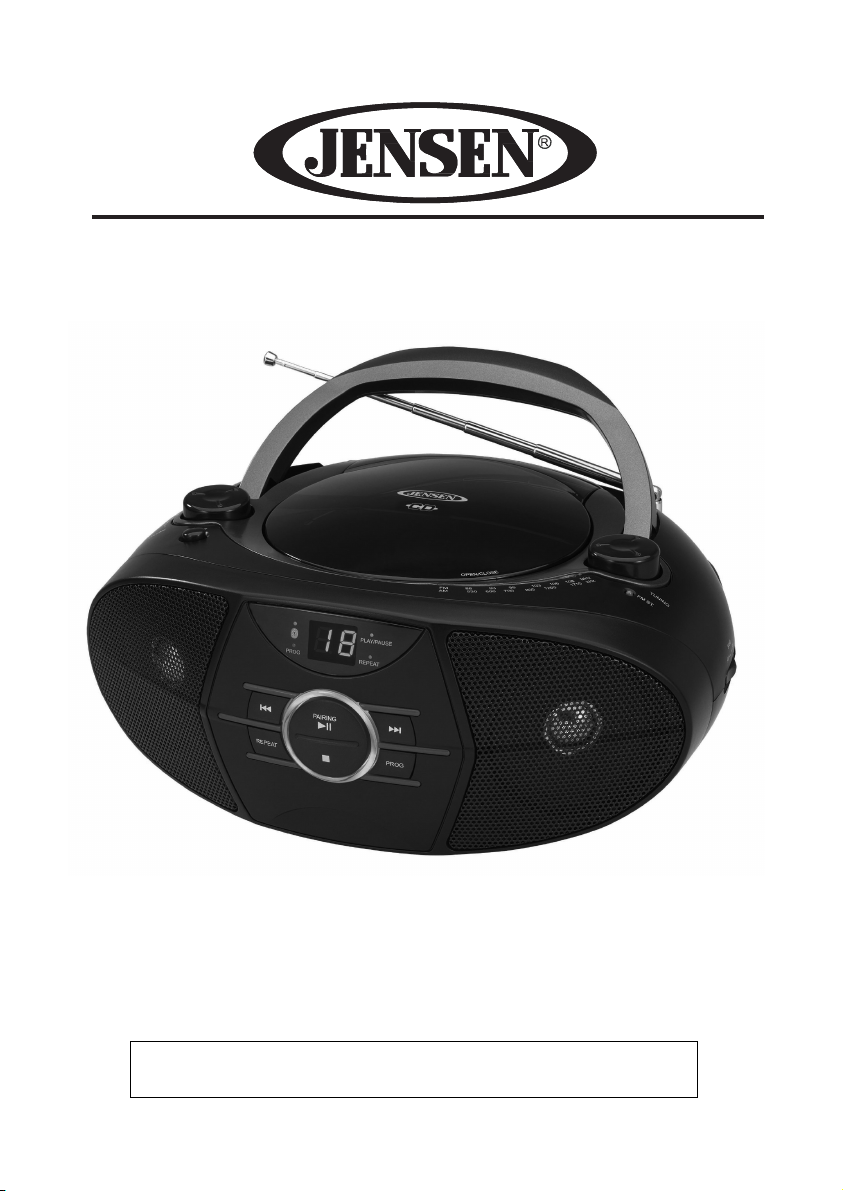
PORTABLE STEREO COMPACT DISC
AM/FM STEREO RADIO AND BLUETOOTH
USER MANUAL
MODEL CD-560
PLAYER
WITH
Please read this Manual carefully before using the
unit
and retain it for future reference
E-1
WA
RNING
TO PREVENT FIRE OR SHOCK HAZARD, DO NOT USE THIS PLUG WITH AN
SION CORD, RECEPTACLE OR OTHER OUTLET UNLESS THE BLADES CAN BE
INSERTED TO PREVENT BLADE EXPOSURE. TO PREVENT FIRE OR
HAZARD, DO NOT EXPOSE THIS APPLIANCE TO RAIN OR
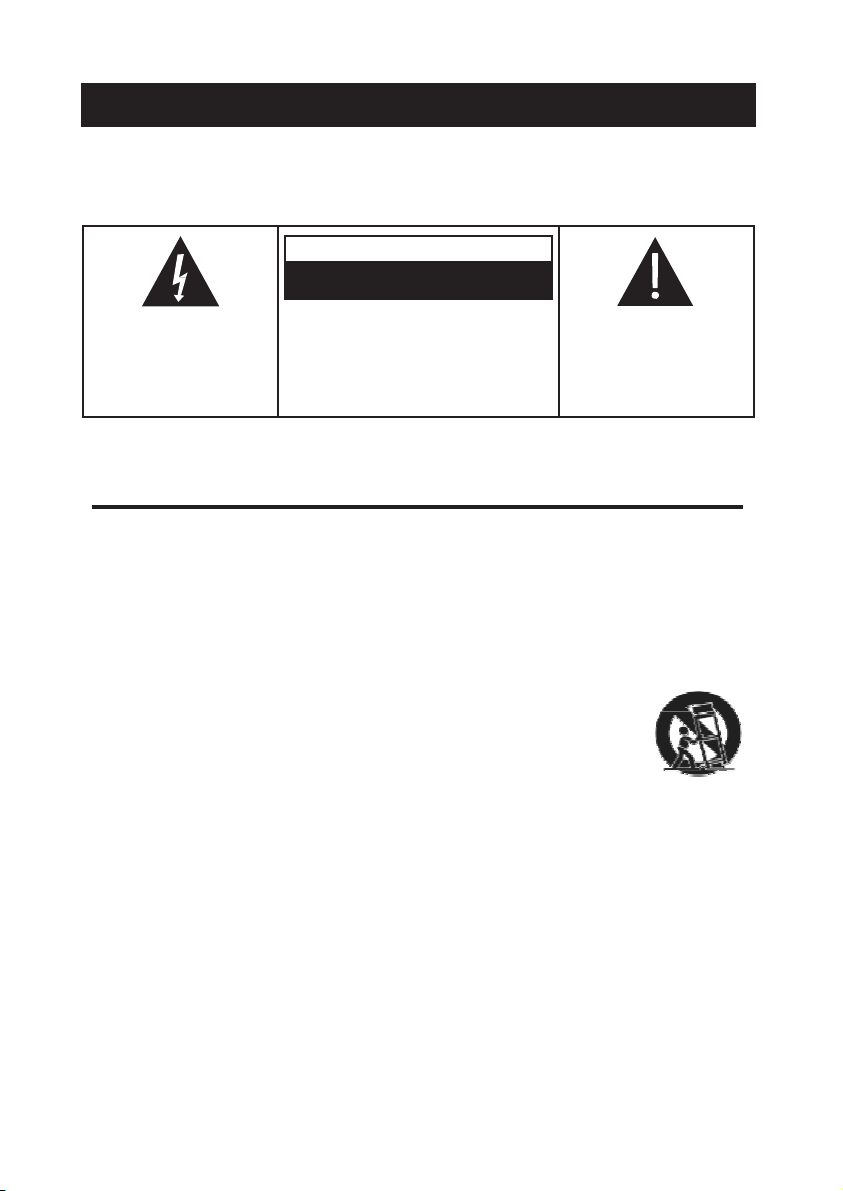
The lightning flash and
arrow head within the
triangle is a warning sign
alerting you of “dangerous
voltage” inside the product.
CAUTION
RISK OF ELECTRIC
DO NOT OPEN
CAUTION: TO REDUCE THE RISK OF
ELECTRIC SHOCK DO NOT
REMOVE COVER (ON BACK), NO
USER SERVICEABLE PARTS INSIDE.
REFER SERVICING TO QUALIFIED
SERVICE PERSONNEL.
SHOCK
The Caution Marking is located at the bottom enclosure of the
MOISTURE.
The exclamation point
within the triangle is a
warning sign alerting you
of important instructions
accompanying the product.
apparatus.
The Rating Plate is located at the bottom enclose of the apparatus.
EXTEN-
FULLY
SHOCK
IMPORTANT SAFETY
1. Read these
2. Keep these
3. Heed all
4. Follow all
5. Do not use this apparatus near
6. Cleaning-Unplug this product from the wall outlet before cleaning. Do not use liquid
cleaners
7. Do not block any ventilation openings. Install in accordance with the
manufacturer’s instructions.
8. Do not place this product on an unstable cart, stand, tripod, bracket,
table. The product may fall, causing serious injury to a child or adult,
serious damage to the product. Use only with a cart, stand, tripod,
or table recommended by the manufacturer, or sold with the product.
mounting of the product should follow the manufacturer’s instructions,
should use a mounting accessory recommended by the m anufacturer.
product and cart combination should be moved with care-quick stops, excessive force
and
9. Do not install near any heat sources such as radiators, heat registers, stoves, or
other
10. Do not defeat the safety purpose of the polarized or grounding-type plug. A polarized
plug
and a third grounding prong. The wide blade or the third prong is provided for your
safety. If
replacement of
11. Protect the power cord from being walked on or pinched particularly at plugs,
convenience
12. Only use
13. Unplug this apparatus during lightning storms or when unused for a long periods of
14. Refer all servicing to qualified service personnel. Servicing is required when the
apparatus
damaged, liquid
has been exposed
instructions.
instructions.
warnings.
instructions.
or aerosol cleaners. Clean only with dry
uneven surfaces may cause the product and cart combination to
apparatus (including amplifiers) that product
has two blades with one wider than the other. A grounding type plug has two blades
the
provided plug does not fit into your outlet, consult an electrician for
receptacles, and the point where they exit from the
attachments/accessories
has been damaged in any way, such as power-supply cord or plug is
the
obsolete
has
been spilled or objects have fallen into the apparatus, the apparatus
to
rain or moisture, does not operate normally, or has been
water.
outlet.
specified by the
INSTRUCTIONS
cloth.
or
and
bracket,
Any
and
A
heat.
manufacturer.
overturn.
apparatus.
dropped.
time.
E-2
15. This appliance shall not be exposed to dripping or splashing water and that no object
filled
16. Do not overload wall outlet. Use only power source as
17. Use replacement part as specified by the
18. Upon completion of any service or repairs to this product, ask the service technician
19. Power Sources - This product should be operated only from the type of power
20. Object and Liquid Entry - Never push objects of any kind into this product through
21. Damage Requiring Service - Unplug this product from the wall outlet and refer servicing
a) When the power-supply cord or plug is
b) If liquid has been spilled, or objects have fallen into the
c) If the product has been exposed to rain or
d) If the product does not operate normally by following the operating instructions.
e) If the product has been dropped or damaged in any way,
f) When the product exhibits a distinct change in performance - this indicates a need
23. Mains plug is used as disconnect device and it should remain readily operable during intended
24. Battery shall not be exposed to excessive heat such as sunshine, fire or the like.
25. Excessive sound pressure from earphones and headphone can cause hearing loss.
with liquids such as vases shall be placed on the
manufacturer.
to
perform safety
source
indicated on the marking label. If you are not sure of the type of power supply to
your
home,
to operate
openings
result in a fire
to
qualified service personnel under the following
Adjust
only those controls that are covered by the operating instructions as an
improper
extensive
for service.
use. In order to disconnect the apparatus from the mains completely, the mains plug
should be disconnected from the mains socket outlet completely.
adjustment of other controls may result in damage and will often require
checks.
consult your product dealer or local power company. For products intended
from
battery power, or other sources, refer to the operating
as they may touch dangerous voltage points or short-out parts that could
or
electric shock. Never spill liquid of any kind on the
damaged,
work
by a qualified technician to restore the product to its normal
This symbol indicates that this product incorporates
insulation between hazardous mains voltage and
accessible
parts.
conditions:
water,
apparatus.
indicated.
product,
double
user
and
instruction.
product.
operation.
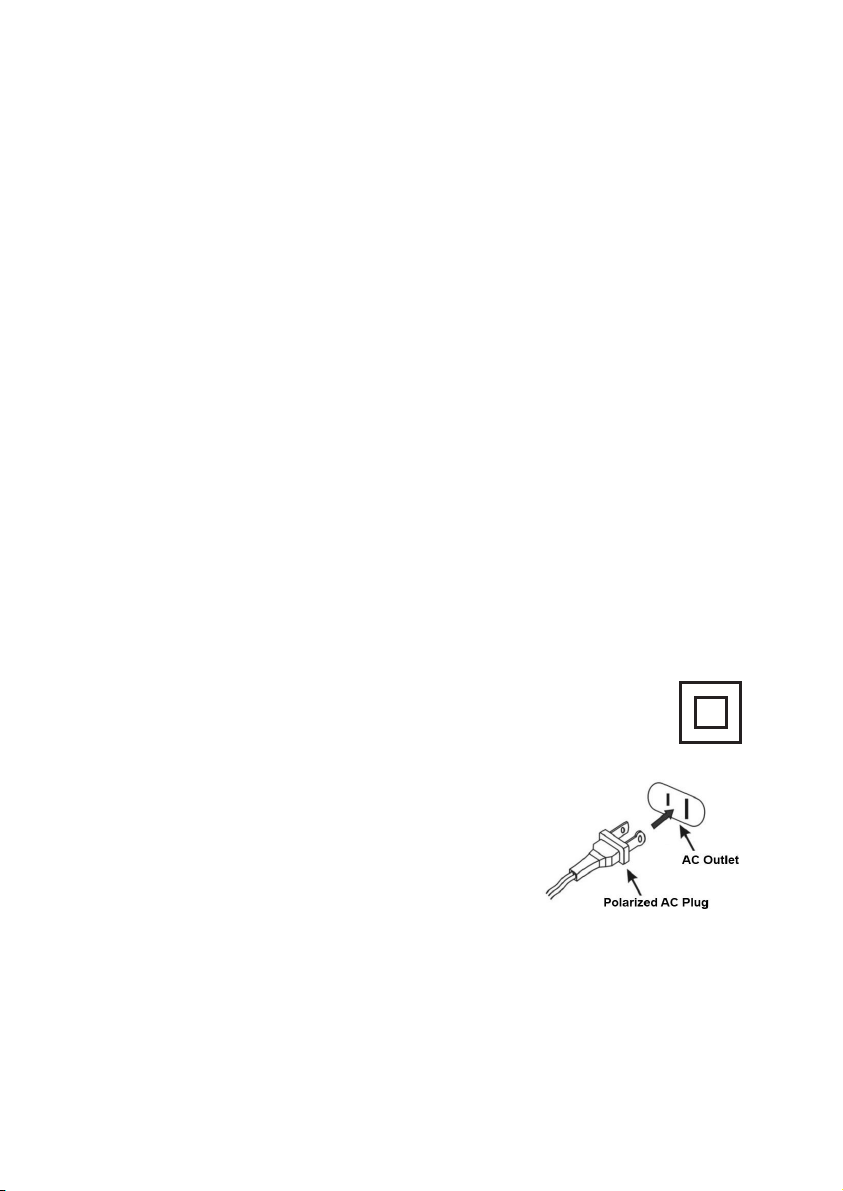
CAUTION:
TO PREVENT ELECTRIC SHOCK,
MATCH WIDE BLADE OF PLUG TO WIDE
SLOT, FULLY INSERT
SAVE THESE INSTRUCTIONS
E-3
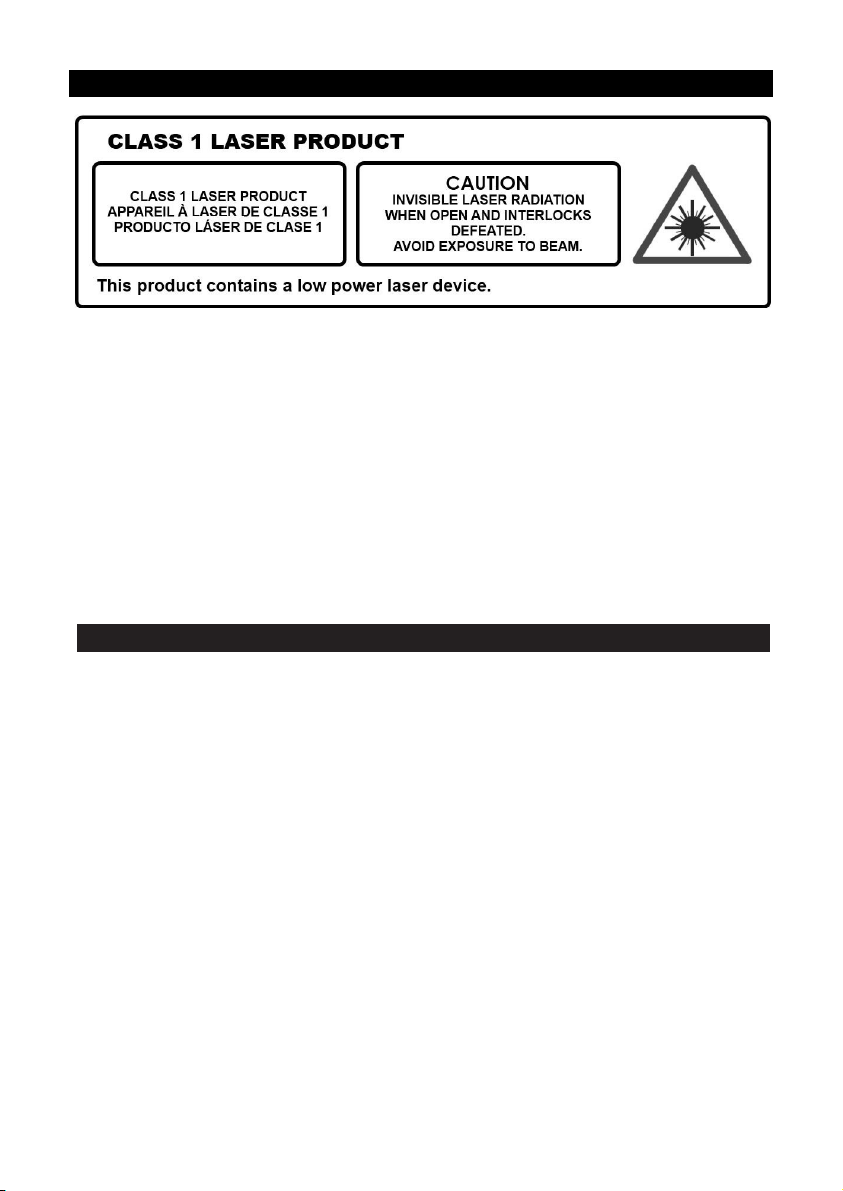
CAUTION
Follow the advice below for safe
ON PROTECTION AGAINST LASER ENERGY EXPOSURE
•
As the laser beam used in this compact disc player is harmful to the eyes, do not attempt
disassemble the
•
Stop operation immediately if any liquid or solid object should fall into the
•
Do not touch the lens or poke at it. If you do, you may damage the lens and the player
not operate
•
Do not put anything in the safety slot. If you do, the laser diode will be ON when the CD
is still
•
•
Should any trouble occur, remove the power source and refer servicing to qualified
open.
If the unit is not to be used for a long period of time, make sure that all power sources
disconnected from the unit. Remove all batteries from the battery compartment, and
the AC cord from the wall outlet. Make it a practice to remove the AC cord by grasp ing
main body and not by pulling the
This unit employs a laser. The use of controls or adjustment or performance of
other than those specified here may result in exposure to hazardous
casing.
properly.
COMPLIANCE WITH FCC REGULATIONS
This device complies with Part 15 of the FCC Rules. Operation is subject to the following two
conditions:
(1) This device may not cause harmful interference, and
(2) This device must accept any interference received, including interference that may cause
undesired operation.
This equipment has been tested and found to comply with the limits for a Class B Digital Device,
pursuant to Part 15 of the FCC Rules. These limits are designed to provide reasonable protection
against harmful interference in a residential installation. This equipment generates, uses and can
radiate radio frequency energy and, if not installed and used in accordance with the instructions,
may cause harmful interference to radio communications. However, there is no guarantee that
interference will not occur in a particular installation. If this equipment does cause harmful
interference to radio or television reception, which can be determined by turning the equipment off
and on, the user is encouraged to try to correct the interference by one or more of the following
measures:
- Reorient or relocate the receiving antenna.
- Increase the separation between the equipment and receiver.
- Connect the equipment into an outlet on a circuit different from that to which the receiver is
connected.
- Consult the dealer or an experienced radio/TV technician for help.
WARNING
Changes or modifications to this unit not expressly approved by the party responsible
for compliance could void the user's authority to operate the equipment.
operations.
cord.
to
cabinet.
may
door
are
unplug
the
radiation.
procedures
personnel.

E-4
PROTECT YOUR
This system is equipped with non-skid rubber ‘feet’ to prevent the product from
moving when
rubber material specially
furniture. However certain types of oil based
or cleaning sprays may cause the rubber ‘feet’ to soften, and
rubber residue on the
To prevent any damage to your furniture we strongly recommend that you
purchase small
improvement centers everywhere,
rubber ‘feet’ before you place the product on fine
you
operate the controls. These ‘feet’ are made from non-migrating
formulated
furniture.
self-
adhesive felt pads, available at hardware stores and home
DEAR JENSEN®
Selecting fine audio equipment such as the unit you've just purchased is only the
start of
the fun and excitement
Electronic Industries Association's
the most out of your equipment by playing it at a safe level.
come through loud and clear without annoying blaring or distortion and,
importantly, without affecting your sensitive hearing. Sound can be deceiving.
Over time
sounds "normal" can
this by setting your equipment at a safe
To
• Start your volume control at a low
• Slowly increase the sound until you can hear it comfortably and clearly, and
• Once you have
Taking a minute to do this now will help to prevent hearing damage or loss in the
future.
We Want You
Used wisely, your new sound equipment will provide
a lifetime
damage from loud noise
until it is too late, this manufacturer and
Electronic Industries Association's Consumer
Electronics Group
exposure to excessive
Customer's Record:
The serial number of this product is found on its bottom cover. You should note
the serial
purchase to aid in identification
Model Number : CD-560 Serial Number :
your
your
establish
without
leave it
distortion.
there.
After
of
number
musical enjoyment. Now it's time to consider how you can maximize
your
equipment offers. This manufacturer and the
hearing "comfort level" adapts to higher volumes of sound. So what
actually
a safe level:
established a comfortable sound level :
all, we want you listening for a
Listening
fun and enjoyment. Since hearing
recommend you avoid prolonged
noise.
of this unit in the space provided as a permanent record of your
be loud and harmful to your hearing. Guard against
For a Lifetime
is
often undetectable
in the
FURNITURE!!
to avoid leaving any marks or stains on your
furniture
and
apply these pads to the bottom of the
CUSTOMER
Consumer
level
BEFORE your hearing
setting.
lifetime.
the
the event of theft of
polishes, wood preservatives,
leave
marks or a
wooden furniture.
Electronics Group want you to get
One
that lets the sound
most
adapts.
Set the dial and
loss.

E-5
LOCATION OF CONTROLS
1
AUX IN JACK
2
CD DOOR
3
VOLUME KNOB
4
BASS BOOST BUTTON
5
FM STEREO INDICATOR
6
TUNING KNOB
7
HANDLE
8
FM ANTENNA
9
LED DISPLAY
10
BLUETOOTH INDICATOR
11
PROGRAM INDICATOR
12
SKIP/SEARCH
BACKWARD BUTTON
13
REPEAT BUTTON
14
STOP BUTTON
15
PROGRAM BUTTON
16
SKIP/SEARCH FORWARD
BUTTON
17
PAIRING, PLAY/PAUSE
BUTTON
18
REPEAT INDICATOR
19
PLAY/PAUSE INDICATOR
20
FUNCTION SELECTOR
21
AC POWER SOCKET
22
BAND SELECTOR
23
BATTERY
COMPARTMENT

E-6
POWER
The CD-560 operates using standard 120V~ 60Hz AC household power or 8 x “C”
size (UM-2) batteries (Not included).
A. BATTERY
For best performance and longer operating time, we recommend the use of alkaline
batteries.
1. Remove the Battery
2. Following the polarity (+ and -) diagram as
shown inside the battery compartment, insert
8
‘C’
size (UM-2)
3. Replace the Battery Door.
BATTERY WARNING
1. Be sure that the batteries are installed
correctly. Wrong polarity may damage the
2. (a) Do not mix old and new
(b) Do not mix alkaline, standard (carbonzinc) or rechargeable (nickel-cadmium)
3. If the unit is not to be used for an extended period of time, remove the batteries.
Old or
warranty.
4. Do not dispose of batteries in fire, batteries may explode or
5. Do not try to recharge batteries not intended to be recharged; they can
overheat and
rupture.( Follow battery manufacturer’s directions ).
B. AC POWER
1. Insert one end of power cord to the AC Socket (#21) at the back of the
2. Connect the power cord to AC power
3. When the unit is operated from AC power source, the internal battery source
will
automatically be
OPERATION
leaking
Door.
batteries.
batteries.
batteries can cause damage to the unit and may void the
CONNECTION
disconnected.
SOURCES
unit.
batteries.
source.
leak.
CD-560.

RADIO RECEPTION
1. Set the Function Selector (#20) to "RADIO". The POWER Indicator (#12) will
light
2. Set the Band Selector (#22) to "AM" or "FM" for the desired radio band.
3. Turn the Tuning Knob (#6) to select the desired radio station.
4. Adjust the Volume Control (#3) to obtain the desired sound level from the
Built-in Speakers.
5. To turn the Radio off, set the Function Selector (#20) to the “OFF” position.
TIPS FOR BEST RECEPTION
AM – The AM antenna is located inside the cabinet of the unit. If AM reception is
weak, change the position of unit until the internal antenna picks up the
strongest signal.
FM – If a stereo broadcast program is being received, the FM STEREO
INDICATOR (#5) will light. During FM or FM Stereo reception, always
keep the FM TELESCOPIC ANTENNA (#8) fully extended for best
performance. However, if FM reception is weak, try repositioning the unit
near an open window until you get the best reception.
CD OPERATION
NOTE: THIS UNIT NOT ONLY PLAYS COMMERCIAL COMPACT DISCS BUT
ALSO SELF-COMPILED CD-RW DISCS.
Notes on CD-R/RW Discs
• Because of the non-standardized format definition/production of CD-R/RW
recordings, playback quality & performance is not guaranteed.
• Manufacturer is not responsible for the playback of CD-R/RW discs due to
recording conditions such as PC performance, writing software, media
properties etc.
• Do not attach a label or seal to either side of the CD-R/RW disc. It may cause
a malfunction.
PLAYING A CD
1. Open the CD Door (#2) by pressing down where the OPEN/CLOSE is
indicated on the CD Door (#2).
2. Carefully place an audio CD with its label side upward in the CD
compartment and close the CD Door by pressing on the CD Door (#2) where
OPEN/CLOSE is indicated on the CD Door (#2).
3. Set the Function Selector (#20) to the CD position. The LED Display (#9) will
briefly display flashing “- -” and the total number of tracks on the CD will
appear on the LED Display (#9) after a few seconds.
4. Press the Play/Pause
track. The Play/Pause Indicator (#19) will light steadily.
Button (#7). The CD will start playing from the first
E-7

5. Adjust the Volume Control (#3) to obtain the desired sound level from the
Built-in Speakers.
6. To pause playback, press the Play/Pause Button (#17). The
Play/Pause Indicator (#19) will flash. To resume playing, press the
Play/Pause Button (#17) again.
7. You can choose to play your favorite track directly by pressing either the
Skip/Search Forward Button (#16) or Skip/Search Backward
Button (#12). The LED Display (#9) will indicate the correct track number
selected.
8. To locate a particular section within a track, press and hold the Skip/Search
Forward Button (#16) or Skip/Search Backward Button (#12)
until the section is found. Release the button to continue playing your
selection.
( The SEARCH function does not apply to Bluetooth operation. )
9. To stop playing, press the Stop ■ Button (#14).
10. When you wish to turn off the CD Player, set the Function Selector
(#2 0 ) to the "OFF" position.
REPEAT MODE
REPEAT 1
When the REPEAT button (#13) is pressed once, the Repeat Indicator (#18)
will light and flash
REPEAT ALL
When the REPEAT
light steadily. The whole disc will be played repeatedly.
CD PROGRAM PLAY MODE
This function allows the CD tracks to be played in programmed sequence.
NOTE: Program can only be set in STOP mode.
1.
Load the CD Disc you wish
2.
Make sure the unit
3.
Press the Program
and the "PROG"
4. Press Skip/Search Forward Button (#16) or Skip/Search Backward
Button (#12) until the desired track number is reached.
5.
Press the Program
6.
Repeat the
7. To
play the stored sequence, press
8.
After
all
. The current track will be played repeatedly.
button (#13)
is in
Button (#15)
indicator (#11)
Button (#15) to
(4) & (5)
memory tracks have
steps until
is pressed twice, the repeat indicator (#18) will
to program.
STOP
mode.
once, location "01"
will
blink.
store
the selection.
you
have entered
the Play/Pause Button (#17).
been
played, the CD will
will
show
on
the LED Display (#9)
all
the
tracks you want to program.
stop automatically.
E-8

NOTE:
1. When 20 tracks of
programmed tracks’ numbers will show on the LED display sequentially. Then the location
“01” show on LED Display and flash. You can press Play/Pause to start the program
playback. Or repeat the
2. If
you
want to cancel
during playback or once in STOP mode.
The Repeat function
To Repeat Programmed
1. During program play, press
specifically programmed tracks.
2. Press the
Press the
3.
You can play other music sources (iPod, MP3 or other digital audio players)
through the speakers of this unit by connecting the AUX IN Jack (#1) to your
external player’s audio out jack or headphone jack.
1. Plug one end of an audio cable (not included) into the AUX IN Jack (#1) and
the other end of the cable to the headphone jack of your digital audio player.
2. Set the Function Selector (#20) to /AUX IN.
3. Start playing the device you plugged into the AUX IN Jack (#1).
4. Slowly adjust both the volume controls of your CD-560 and the external
device until you reach a comfortable listening level.
5. Turn off your iPod, MP3 player etc. when finish listening.
6. Set the Function Selector (#20) to the “OFF” position to turn CD-560 off and
unplug the AUX IN Jack.
Note :
•
If you connect CD-560 to the Line-Out Jack of your external device, you
only need to adjust the VOLUME CONTROL of your CD-560. If you connect
to the Headphone Jack of your external device, you may need to adjust
both the volume controls of your external device and CD-560 to obtain the
desirable listening level.
•
Remember to turn off the CD-560 when you have finished listening. Don't
forget to switch off the power of your external audio device as well.
CD music
the
also applies to programmed track playback.
REPEAT button (#13)
STOP Button (#14) twice
have been programmed,
(4) & (5)
steps to change the track number you wish.
program memory, press the STOP Button (#14) twice
Tracks
REPEAT button (#13)
again will repeat all the programmed tracks.
to cancel program playback
AUX IN operation
the
memory is full. The
once will repeat the
.
E-9

PLAYING FROM A BLUETOOTH DEVICE
Pairing a Bluetooth enabled device with the CD-560.
1. Set the Function Selector (#20) to the /AUX IN position. The BLUETOOTH
INDICATOR (#10) will flash slowly and “Dew Drop” sound will be heard.
( Make sure no audio cable is connected to the AUX IN jack )
2. Turn on the Bluetooth function of your device and enable the search or scan
function to find the CD-560.
3. Select "CD-560" from the device list when it appears on your device screen. If
required, enter the pass code “0000” to pair (link) CD-560 with your device.
4. If you are pairing (linking) your computer to the speaker using Bluetooth, you
may need to set the CD-560 as your computer’s default sound device.
5. After pairing CD-560 with your Bluetooth device successfully, The
INDICATOR (#10) will light steadily.
6. If you want CD-560 change to pair with another Bluetooth device, press and
hold Pairing,
Play/Pause Button (#17) 5 seconds. The
INDICATOR
(#10) will flash and “Dew Drop” sound will be heard. CD-560 will go into
Pairing/Discoverable mode. Repeat steps 2 & 3.
Now you can play music from your Bluetooth device wirelessly to CD-560.
1. Selecting your favorite song, press
device or
Play/Pause Button (#17)
Play/Pause Button
on your Bluetooth
on CD-560 to play or pause the
Bluetooth device playback.
2. Press Skip Forward Button (#16) or Skip Backward Button (#12)
to select the Next or Previous track.
( The SEARCH function does not apply to Bluetooth operation )
3. Slowly adjust both the volume controls of your CD-560 and your Bluetooth
device until you reach a comfortable listening level.
Note :
1. Refer to the manual of your cell phone, tablet PC, computer or other Bluetooth
enabled devices for Bluetooth operation since it may vary from model to model.
2. If your Bluetooth enabled device does not support A2DP profile, it will not play the
music through the speaker, even if paired (linked).
3. Remember to turn off the CD-560 when you have finished listening, s
Function Selector (#20) to the “OFF” position
et the
4. Don't forget to switch off the power of your external audio device as well.
BASS BOOST OPERATION
1. To enhance the low frequency sound, press the BBS BUTTON (#4) once
(button in) to activate.
2. Press the BBS Button (#4) again (button out) to turn the Bass Boost off.
E-10

CARE AND MAINTENANCE
1. Clean your unit with a damp (never wet) cloth. Solvent or detergent should
never be used.
2. Avoid leaving your unit in direct sunlight or in hot, humid or dusty places.
3. Keep your unit away from heating appliances and sources of electrical
noise such as fluorescent lamps or motors.
4. If drop-outs or interruptions occur in the
music during CD play, or if the CD fails to
play at all, its bottom surface may require
cleaning. Before playing, wipe the disc
from the center
cleaning cloth.
outwards with a good soft
E-11

TROUBLE SHOOTING
If you experience difficulties in the use of this music system please check
the following or call
1-800-777-5331
for Customer Service and Support.
PROBLEM
No sound in
The unit does reset
operation of any
Radio poor
CD cannot
No sound when playing
audio
via
general
Volume not
to
button
reception
read
The disc is
Bluetooth
POSSIBLE
Mains supply is not
correctly connected.
Under the influence
electrostatic phenomenon,
product may malfunction
require user to
Weak radio aerial
Interference caused by
the
equipment like TVs,
recorders,
thermostats,
lamps (TL) engines
The disc is upside
The CD player is in
mode
Your Bluetooth device
has
The volume control of
Bluetooth device is set at
too low.
The volume control of main
unit
CAUSE
adjusted.
vicinity of
computer,
dirty
been paired
is set at too
disconnect.
electrical
fluorescent
of
signal.
video
etc.
down.
Pause
low.
and
your
REMEDY
Adjust the Volume
Connect the mains
supply properly.
Turn off the unit,
disconnect
the
and reconnect
seconds.
Aim the aerial for best
reception:
telescopic antenna.
Keep the unit away from
electrical
equipment.
Clean or replace the
Turn it over so that the
label
is
face
Release the Pause Mode
by
pressing the Play/Pause
button.
According to the
"Bluetooth
Increase the volume of
Bluetooth
Increase the volume of
main
unit to adjust the
VOLUME control.
knob.
the
mains plug,
after
a few
Fully extend the
disc.
up.
operation"
device.
your
TECHNICAL SPECIFICATION
Power Supply
Battery Size
Power
consumpt
Dimensions
Net
Weight
Radio Frequency Coverage
Speaker Power
Speakers impedance
ion 16 W
(H × W
×D)
Output
AC120V~60Hz
UM-2 or C-Size Batteries x 8
135mm x 330mm x
1.215
FM: 87.5 – 108MHz AM: 530 – 1710
2 X 1.5W
8
Ohms
kg
RMS
230mm
pcs
KHz
IMPORTANT: Due to
continual revision
specifications
and
improvement
are subject to change
without
on our
products design,
further
notice
.
E-12

SPECTRA GREEN NOTICE
At Spectra, environmental and social responsibility
is a core value of our business. We are dedicated
to continuous implementation of responsible
initiatives with an aim to conserve and maintain the
environment through responsible recycling.
Please visit us at http://www.spectraintl.com/green.htm for more information on
Spectra’s green initiatives or to find a recycler in your area.
Bluetooth® is a registered trademark of Bluetooth SIG, Inc.
90 DAY LIMITED WARRANTY AND SERVICE VALID IN THE U.S.A. ONLY
SPECTRA MERCHANDISING INTERNATIONAL, INC. warrants this unit to be free from defective
materials or
purchase and provided the
or transferable. Our obligation under this
unit or any part thereof, except batteries, when it is
Department, accompanied by proof of the date of original consumer purchase, such as a duplicate
copy of a sales receipt.
You must pay all shipping charges required to ship the product to SPECTRA for warranty service. If
the product is repaired or replaced under warranty, the return charges will be at SPECTRA’s
expense. There are no other express warranties other than those stated herein.
factory workmanship for a period of 90 days from the date of original customer
product is utilized within the U.S.A. This warranty is not assignable
warranty is the repair or replacement of the defective
returned to the SPECTRA Service
This warranty is valid only in accordance with the conditions set forth below:
1. The warranty applies to the SPECTRA product only while:
a. It remains in the possession of the original purchaser and proof of purchase is demonstrated.
b. It has not been subjected to accident, misuse, abuse, improper service, usage outside the
descriptions and warnings covered within the user manual or non-SPECTRA approved
modifications.
c. Claims are made within the warranty period.
2. This warranty does not cover damage or equipment failure caused by electrical wiring not in
compliance with
provide reasonable care and
3. Warranty of all SPECTRA products applies to residential use only and is void when products
are used in nonresidential environment or installed outside the United States.
This warranty gives you specific legal rights, and you may also have other rights which vary from
state to state. TO OBTAIN SERVICE please remove all batteries (if any) and pack the unit carefully
and send it freight prepaid to SPECTRA at the address shown below. IF THE UNIT IS RETURNED
WITHIN THE WARRANTY PERIOD shown above, please include a proof of purchase (dated
cash register receipt) so that we may establish your eligibility for warranty service and repair of the
unit without cost. Also include a note with a description explaining how the unit is defective. A
customer service representative may need to contact you regarding the status of your repair, so
please include your name, address, phone number and email address to expedite the process.
electrical codes or SPECTRA user manual specifications, or failure to
necessary maintenance as outlined in the user manual.
E-13

IF THE UNIT IS OUTSIDE THE WARRANTY PERIOD, please include a check for $3
the cost of repair, handling and return postage. All out of warranty returns must be sent prepaid.
It is recommended that you contact SPECTRA first at 1-800-777-5331 or by email at
custserv@spectraintl.com for updated information on the unit requiring service. In some cases the
model you have may be discontinued, and SPECTRA reserves the right to offer alternative options
for repair or replacement.
SPECTRA MERCHANDISING INTERNATIONAL, INC.
4230 North Normandy Avenue,
Chicago, IL60634, USA. 1-800-777-5331
To register your product, visit the link on the website below to enter your information.
http://www.spectraintl.com/wform.htm
1213 Made in China
0.00
to cover
E-14
 Loading...