

Page 1
CR66D
ROCHESTER
www.crosleyradio.com
910-245000-0250-200
Page 2
38
ESPA OL
Crosley Radio, Inc. garantiza que este producto está libre de defectos de materiales y mano
de obra en condiciones normales de uso por un período de un año desde la fecha original de
compra. Esta garantía no es transferible. Si se determina que el producto está defectuoso
durante el período de garantía, la unidad será reparada o reemplazada a exclusivo criterio de
Crosley Radio. Esta garantía cubre defectos de fabricación y los producidos por el uso normal
del consumidor y NO cubre daños ni fallas resultantes de abuso, accidente, alteraciones, uso
incorrecto, descuido, uso anormal y rotura, mantenimiento inadecuado, uso comercial o poco
razonable, daño causado por aumentos de tensión, mal manejo, accidentes, eventos de fuerza
mayor o intentos de reparación por parte de un agente de servicio no autorizado. Tampoco
están cubiertos los daños superficiales, los cables ni las antenas.
En caso de que este producto no funcione de manera satisfactoria, se recomienda comunicarse
primero con nuestro equipo de soporte técnico a fin de que lo asistan para asegurarse de que
la unidad funcione correctamente.
Soporte técnico y preguntas sobre el producto
LLAME SIN CARGO AL: 1-888-CROSLEY
(1-888-276-7539)
Si realmente se determina que la unidad ya no puede operarse, comuníquese con el minorista
que le vendió el producto. En muchos casos, el minorista podrá ofrecer una unidad de reemplazo
sin cargo dentro del alcance de su política de devolución. Si la fecha de devolución del minorista
expira, comuníquese directamente con Crosley Radio para participar en el programa de protección
de un año.
Programa de garantía de 1 año de Crosley
LLAME SIN CARGO AL: 1-800-926-7801
Deberá comunicarse con nuestras oficinas de lunes a viernes de 8 a. m. a 5 p. m. Hora del
Este para obtener un número de autorización de devolución (Return Authorization, RA). Recibirá
instrucciones para enviar la unidad (a su cargo) a nuestras oficinas en su embalaje original (o
sustituto razonable para evitar que se dañe). Deberá marcar claramente su número de RA en
la parte exterior del embalaje e incluir el recibo de venta original (o una copia) que indique la
fecha de compra, el monto pagado y el lugar de compra. También deberá incluir su nombre
completo, dirección de envío y número de contacto durante el día. Se le solicitará que incluya
un cheque o giro postal por cualquier tarifa de gestión y reenvío aplicable. Un asesor de Crosley
confirmará las tarifas asociadas con el peso y el tamaño de envío del producto. Los productos
devueltos no se enviarán a apartados de correo. Crosley Radio no será responsable por las
demoras ni los reclamos sin procesar resultantes de la falla del comprador para proporcionar,
en todo o en parte, la información necesaria.
No se ofrecen garantías expresas con excepción de las que se indican anteriormente.
El recibo de compra del comprador es la única prueba de derecho de garantía.
Esta garantía otorga al comprador derechos legales específicos, además de cualquier derecho que pueda
variar de un estado a otro.
De acuerdo con la “Moss-Magnuson Warranty Act” de 10 de julio de 1975, esto se denomina “garantía
limitada” que no compromete de manera alguna los altos estándares de calidad y mano de obra de Crosley
Radio.
GARANTÍA LIMITADA DEL FABRICANTE
ENGLISH
IMPORTANT SAFETY INSTRUCTION
1. Read Instructions - All the safety and operating instructions should be read before the product is operated.
2. Retain instructions - The safety and operating instructions should be retained for future reference.
3. Heed Warnings - All warnings on the product and in the operating Instructions should be adhered to.
4. Follow Instructions - All operating and use instructions should be followed.
5. Cleaning - Unplug this product from the wall outlet before cleaning. Do not use liquid cleaners or aerosol cleaners.Use
a damp cloth for cleaning.
6. Attachments - Do not use attachments not recommended by the product manufacturer as they may cause hazards.
7. Water and Moisture - Do not use this product near water - for example, near a bath tub, wash bowl, kitchen sink, or
laundry tub; in a wet basement; or near a swimming pool; and the like.
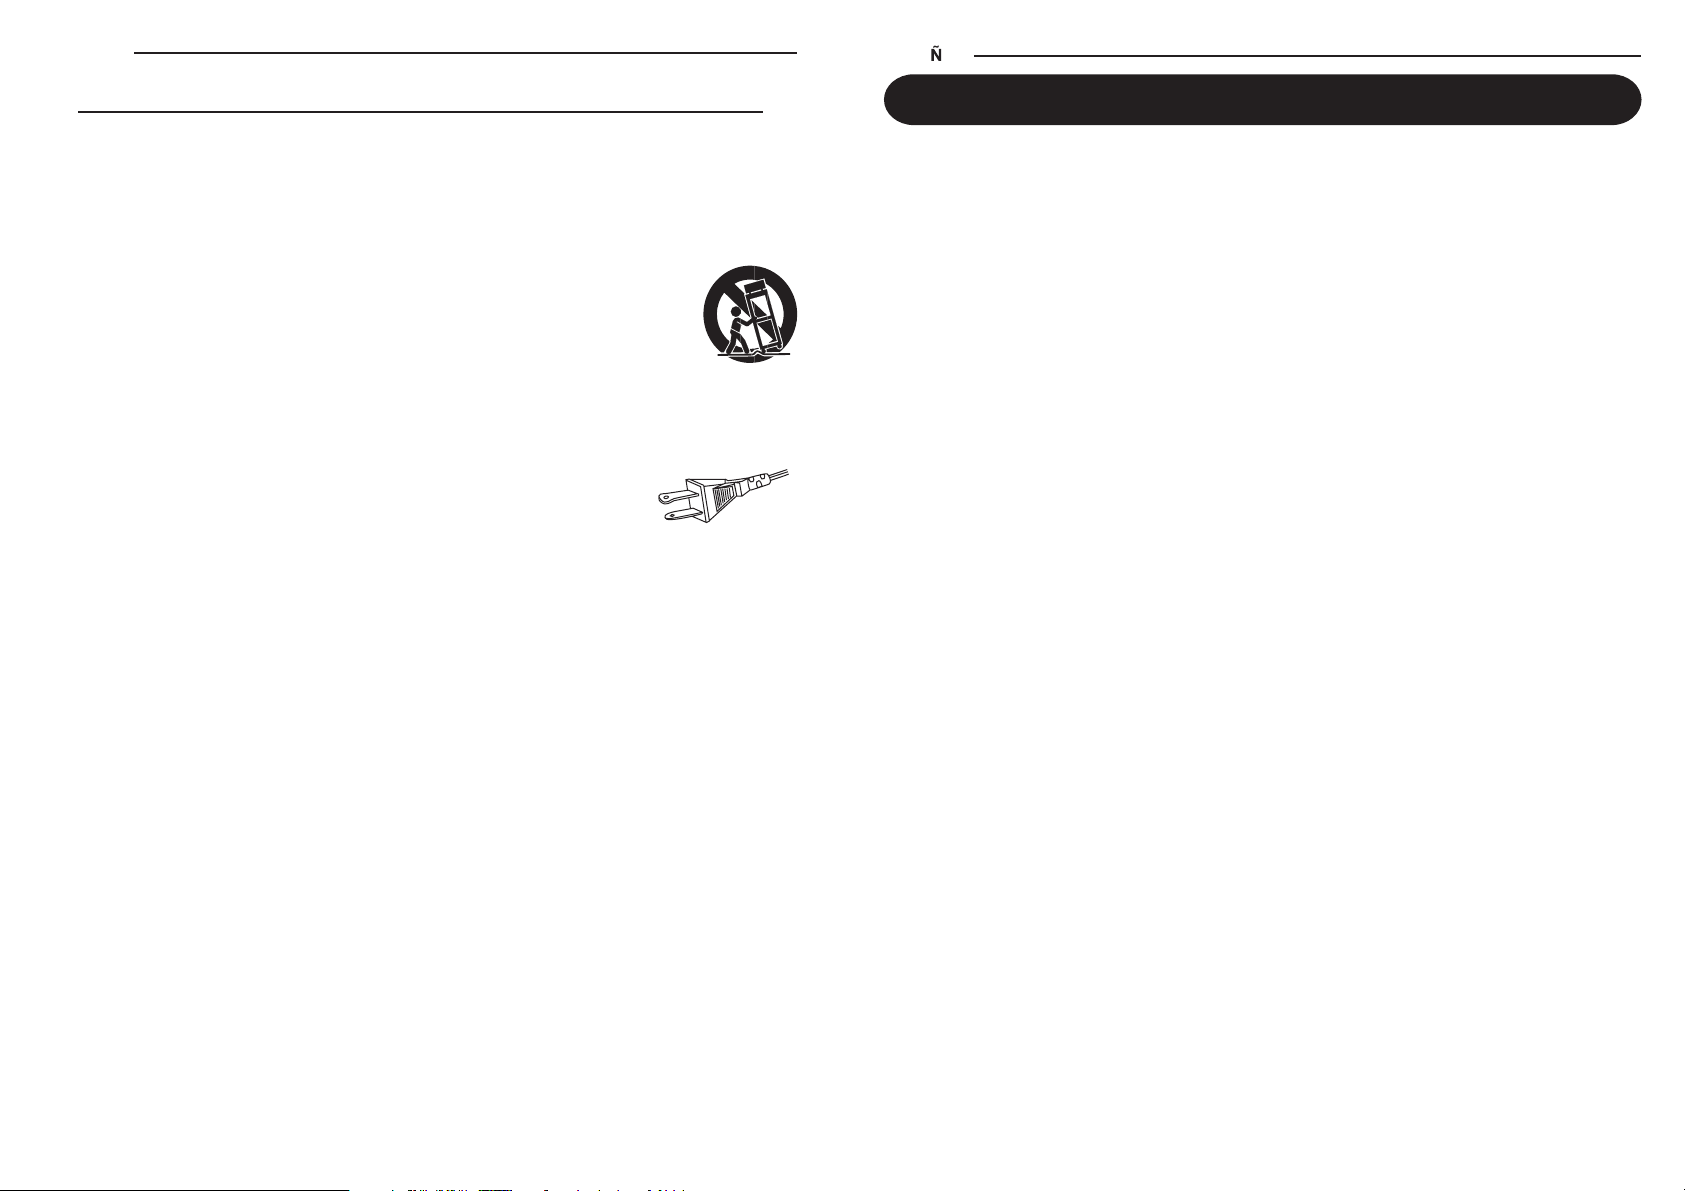
8. A product and cart combination should be moved with care. Quick stops, excessive force, and uneven
surfaces may cause the product and cart combination to overturn.
9. Ventilation - Slots and openings in the cabinet are provided for ventilation and to ensure reliable
operation of the product and to protect it from overheating, and these openings must not be blocked
or covered, The openings should never be blocked by placing the product on a bed, sofa, rug, or
other similar surface. This product should not be placed in a built - in installation such as a bookcase
or rack unless proper ventilation is provided or the manufacturer's instructions have been adhered to.
10. Power Sources - This product should be operated only from the type of power source indicated on the marking label,
if you are not sure of the type of power supply to your home. Consult your product dealer or local power company.For
products intended to operate from battery power, or other sources, refer to the operating instructions.
11. Grounding or Polarization - This product may be equipped with a polarized alternating-current line plug (a plug having
one blade wider than the other). This plug will fit into the power outlet only one way. This is a safety feature. If you
are unable to insert the plug fully into the outlet try reversing the plug, If the plug should still fail to fit, contact your
electrician to replace your obsolete outlet. Do not defeat the safety purpose of the polarized plug.
12. Power - Cord Protection - Power - supply cords should be routed so that they are not likely to
be walked on or pinched by items placed upon or against them, paying particular attention to
cords at plugs, convenience receptacles, and the point where they exit from the product.
13. Lightning - For added protection for this product during a lightning storm, or when it is left
unattended and unused for long periods of time, unplug it from the wall outlet and disconnect
the antenna or cable system. This will prevent damage to the product due to lightning and power - line surges.
14. Power Lines - An outside antenna system should not be located in the vicinity of overhead power lines or other electric
light or power circuits, or where it can fall into such power lines or circuits. When installing an outside antenna system,
extreme care should be taken to keep from touching such power lines or circuits as contact with them might be fatal.
15. Overloading - Do not overload wall outlets, extension cords, or integral convenience receptacles as this can result
in a risk of fire or electric shock.
16. Object and Liquid Entry - Never push objects of any kind into this product through openings as they may touch
dangerous voltage points or short - out parts that could result in a fire or electric shock. Never spill liquid of any kind
on the product.
17. Servicing - Do not attempt to service this product yourself as opening or removing covers may expose you to dangerous
voltage or other hazards. Refer all servicing to qualified service personnel.
18. Damage Requiring Service - Unplug this product from the wall outlet and refer servicing to qualified service personnel
under the following conditions;
a. When the power-supply cord or plug is damaged.
b. If liquid has been spilled, or objects have fallen into the product.
c. If the product has been exposed to rain or water.
d. If the product does not operate normally by following the operating instructions. Adjust only those controls that
e. If the product has been dropped or damaged in any way.
f. When the product exhibits a distinct change in performance - this indicates a need for service.
19. Replacement Parts - When replacement parts are required, be sure the service technician has used replacement
parts specified by the manufacturer or have the same characteristics as the original part. Unauthorized substitutions
may result in fire, electric shock, or other hazards.
20. Safety Check - Upon completion of any service or repairs to this product, ask the service technician to perform safety
checks to determine that the product is in proper operating condition.
21. Wall or ceiling Mounting - The product should be mounted to a wall or ceiling only as recommended by the manufacturer.
22. Heat - The product should be situated away from heat sources such as radiators. Heat registers, stoves, or other
products (including amplifiers) that produce heat.
WARNING: Changes or modifications to this unit not expressly approved by the party responsible for compliance could
void the user’s authority to operate the equipment.
NOTE: This equipment has been tested and found to comply with the limits for a Class B digital device, pursuant to Part
15 of the FCC Rules. These limits are designed to provide reasonable protection against harmful interference in a residential
installation. This equipment generates, uses, and can radiate radio frequency energy and, if not installed and used in
accordance with the instructions, may cause harmful interference to radio communications. However, there is no guarantee
that interference will not occur in a particular installation. If this equipment does cause harmful interference to radio or
television reception, which can be determined by turning the equipment off and on , the user is encouraged to try to correct
the interference by one or more of the following measures:
- Reorient or relocate the receiving antenna.
- Increase the separation between the equipment and receiver.
- Connect the equipment into an circuit different from that to which the receiver is connected.
- Consult the dealer or an experienced radio TV technician for help.
PLEASE READ CAREFULLY ALL THE FOLLOWING IMPORTANT SAFEGUARDS
THAT ARE APPLICABLE TO YOUR EQUIPMENT
AC
Polarized Plug
are covered by the operating instructions as an improper adjustment of other controls may result in damage and
will often require extensive work by a qualified technician to restore the product to its normal operation.
1
Page 3
2
Specification
Frequency Range : AM 525 - 1710 KHz
: FM 87.5 - 108.5 MHz
Power Supply : AC 120V ~ 60Hz
Power Consumption : 18W
Antennas : External antenna for FM
: Built-in ferrite bar for AM
Speaker : 4" Dynamic type x 2
Replacement Needle : NP1
*
DESIGN AND SPECIFICATIONS SUBJECT TO CHANGE WITHOUT NOTICE.
•Marking plate was located on bottom enclosure
CAUTION:
TO REDUCE THE RISK OF ELECTRIC SHOCK, DO NOT REMOVE COVER (OR
BACK). NO USER - SERVICEABLE PARTS INSIDE. REFER SERVICING TO
QUALIFIED SERVICE PERSONNEL.
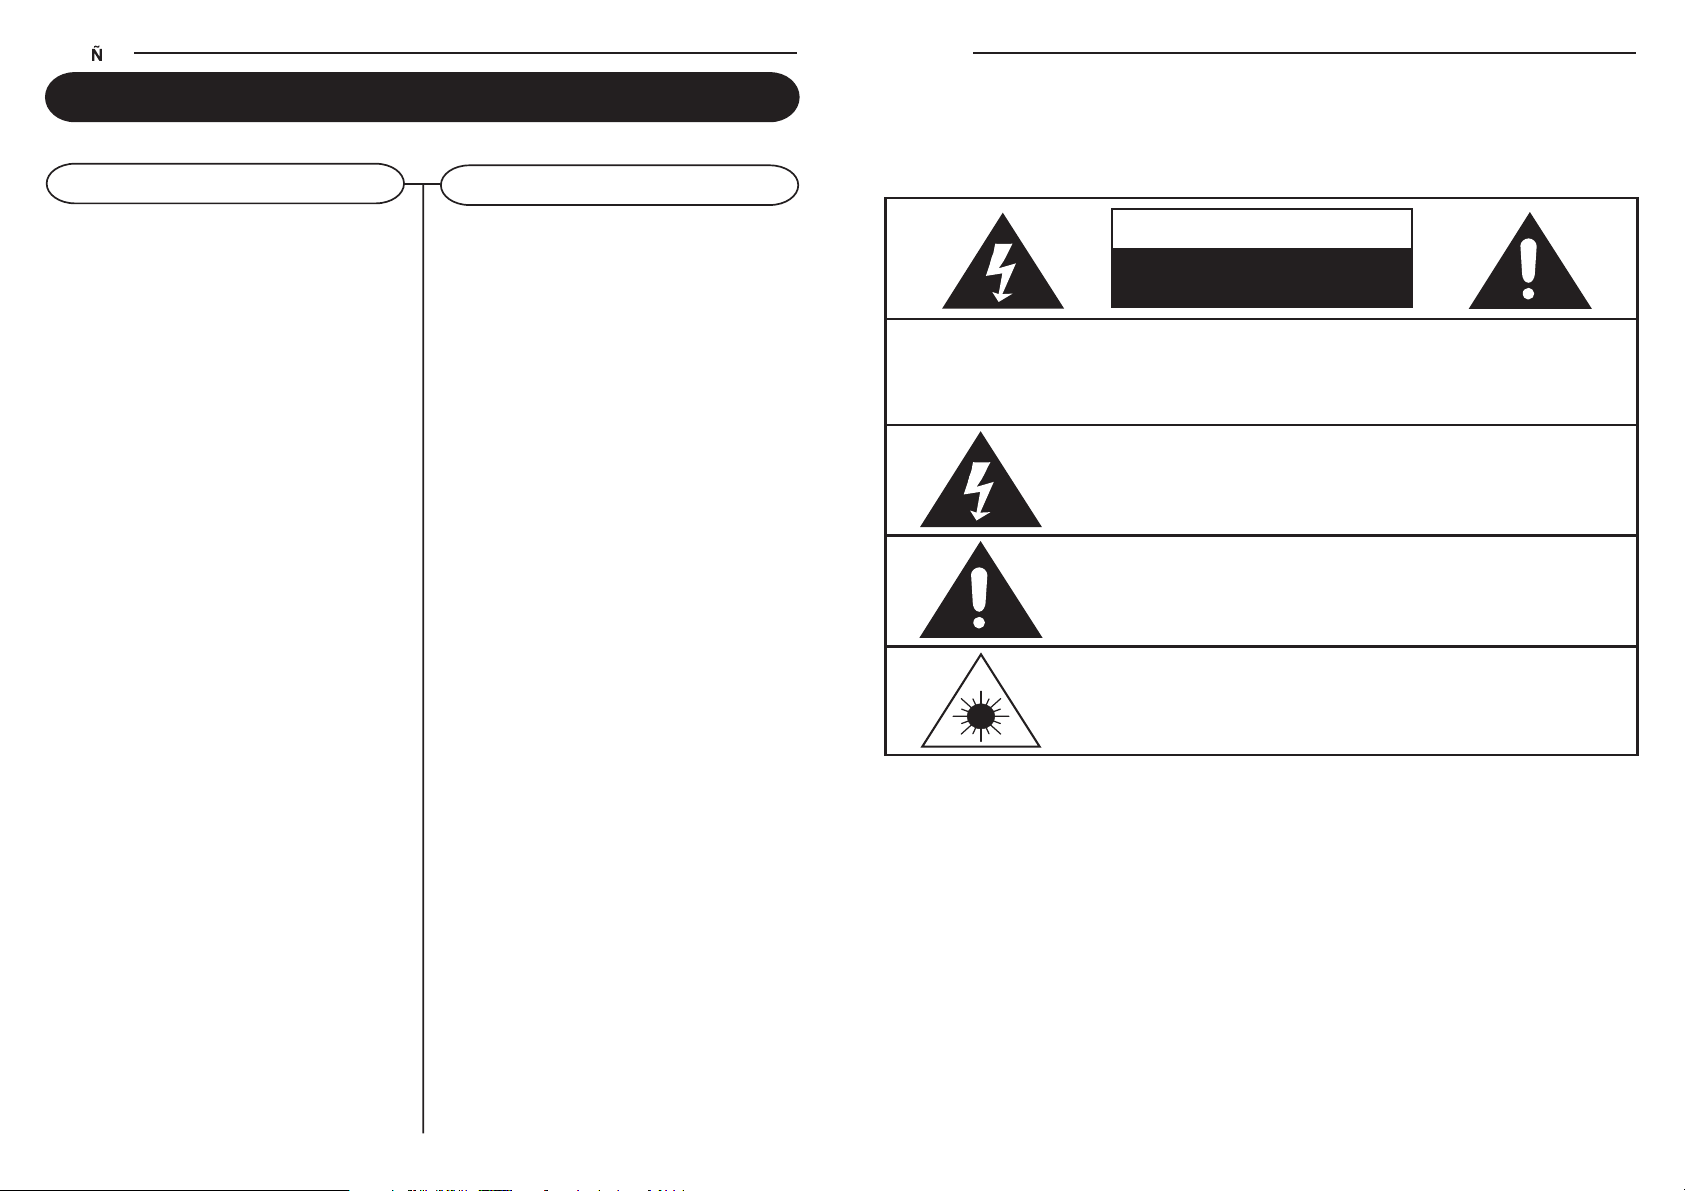
The lighting flash with arrowhead symbol, within an equilateral triangle, is
intended to alert user to the presence of uninsulated "dangerous voltage"
within the product's enclosure that may be of sufficient magnitude to constitute
risk of electric shock to persons.
The exclamation point within an equilateral triangle is intended to alert user
to the presence of important operating and maintenance (servicing) instruction
in the literature accompanying the appliance.
CAUTION
For Compact Disc Units Only:
INVISBLE LASER RADIATION WHEN OPEN AND INTERLOCK FAILED
OR DEFEATED. AVOID DIRECT EXPORSURE TO LASER BEAM.
WARNING:
To reduce the risk of fire or electric shock, do not expose this appliance to rain or moisture.
CAUTION:
Use of controls or adjustments or performance of procedures other than those specified may
result in hazardous radiation exposure.
RISK OF ELECTRIC SHOCK
DO NOT OPEN
CAUTION
ENGLISH
ESPA OL
Cómo Conectar los Equipos Auxiliares
ENTRADA LÍNEA EN
1 Puede conectar componentes externos a su
unidad mediante la entrada línea en.
2 Enchufe el cable auxiliar al CONECTOR DE
ENTRADA LÍNEA EN ubicado en la parte
posterior del tocadiscos.
3 Enchufe el otro extremo del cable línea en al
conector de salida del componente externo
deseado.
4 Controle el nivel del volumen del componente
externo.
5 Consulte el manual del operador para conocer
el funcionamiento correcto del componente
externo.
Generalidades
Guía para resolver los problemas
¿No hay energía?
1 Verifique que el aparato está conectado
correctamente.
2 Verifique que el BOTÓN VOLUMEN –
MARCHA/PARO está en la posición MARCHA.
¿No hay sonido?
1 Verifique el nivel del sonido con girar el BOTÓN
VOLUMEN – MARCHA/PARO.
¿El Tocadiscos no funciona?
1 Verifique que el SELECTOR DE FUNCIÓN
está regulado en el modo tocadiscos [phono].
2 Mueva el braZO ACÚSTICO lijeramente
hacia la derecha hasta que Usted escuche un
clic para activar el tocadiscos
3 Verifique que se ha quitado la tapa de protección
blanca de la aguja.
4 Verifique que el lector de casetes no está en
marcha.
¿El lector de CD no funciona?
1 Verifique que el CD se ha metido correctamente
(lado etiqueta hacia arriba).
2 Verifique que la superficie del CD está limpia.
3 Verifique que el SELECTOR DE FUNCIÓN
está regulado al modo CD.
4 Verifique que el CD no es virgen.
37
Page 4
Lectura programada
36
1 Para repetir una sola pista, seleccione el número
de la pista deseada y presione la tecla TOCAR
para comenzar la pista. Presione la tecla
REPETIR una vez para repetir esta pista.
El INDICATOR REPETIR va a parpadear.
2 Para repetir todas las pistas, presione la tecla
TOCAR para comenzar el CD. Entonces,
presione la tecla REPETIR dos veces para
repetir todas las pistas. Cuando el CD llega al
fin, va a recomenzar otra vez desde el comienzo.
El INDICATOR REPETIR va a quedar
encendido.
3 Para cancelar la operación de repetición,
presione la tecla REPETIR varias veces
hasta que el INDICATOR REPETIR se
apague.
Repetir la Selección
Uso del Bluetooth
1 Verifique que el CD está parado.
2 Presione la tecla PROGRAMA. La pantalla
va a mostrar "01" y el INDICADOR PROGRAMA
va a parpadear.
3 Presione la tecla BUSCAR PARA ADELANTE
ó la tecla BUSCAR PARA ATRÁS para
seleccionar la pista deseada.
4 Presione la tecla PROGRAMA una segunda
vez para entrar en memoria el número de la
pista seleccionada.
5 Repite las etapas 3 y 4 arriba para programar
otras pistas en memoria.
6 Presione la tecla TOCAR para comenzar la
lectura programada. El INDICADOR
PROGRAMA será encendido.
7 Para borrar la secuencia programada, presione
la tecla PARO dos veces o hasta que el
INDICADOR PROGRAMA se apague. Las
pistas programadas se borrarán también
cuando se abre la PUERTA TIROIR CD.
NB: Un máximo de 20 pistas pueden ser
programadas en memoria en cualquier
secuencia.
Operación del Lector CD
ESPA OL
El Bluetooth le permite establecer una conexión
inalámbrica entre un dispositivo (como un teléfono
inteligente) y la unidad. Esto le permite al usuario
reproducir y controlar las pistas directamente desde
el dispositivo activado con Bluetooth.
El usuario debe asegurarse de que el dispositivo
sea compatible con Bluetooth (con capacidades
de reproducción de medios), como un teléfono
inteligente Android
® o un iPhone® de Apple con
capacidad Bluetooth. El usuario también debe
asegurarse de que los archivos de audio cargados
en el dispositivo sean compatibles para poder
reproducirlos en la unidad. Una vez que haya
confirmado estos pasos, el usuario puede conectar
el dispositivo a la unidad.
1 Encienda la unidad girando la PERILLA
GIRATORIA DE VOLUMEN Y ENCENDIDO/
APAGADO situada en el panel frontal a la
posición de ENCENDIDO.
2 Gire el INTERRUPTOR DE FUNCIONES al
modo (Bluetooth).
3 El indicador de la Pantalla LED parpadeará
para indicar que está buscando un dispositivo
cercano con Bluetooth activado para
conectarse.
4 En su dispositivo con Bluetooth activado,
busque dispositivos cercanos. Cuando su
dispositivo encuentre a CR66D, conéctelo a
este dispositivo.
No debería solicitarle un PIN.
5 Cuando la unidad se haya conectado
exitosamente a su dispositivo con Bluetooth
activado, su dispositivo le indicará que están
conectados y la luz indicadora del Bluetooth
de la unidad dejará de parpadear y se iluminará
continuamente.
ENGLISH
Welcome Table of Contents
Thank you for purchasing the Crosley Rochester
(CR66D). Before operating this unit, please read
this manual thoroughly and retain it for future
reference.
About This Manual
Instructions in this manual describe the control
functions of the CR66D.
Getting Started
Control Locators....................... 4,5
Unpacking................................. 6
Power Source........................... 6
Base Operation
Turntable Operation.................. 7
Accessory: Adapter for 45 rpm
.................................................. 7
Cassette Operation.................. 8
Radio Operation....................... 8
CD Operation
Playing a CD............................. 9,10
Programmed Playback............. 10
Using your Bluetooth.............. 10
Connecting Optional Equipment
LINE IN Input ......................... 11
General
Troubleshooting Guide............ 11
Warranty................................... 12
3
Page 5
4
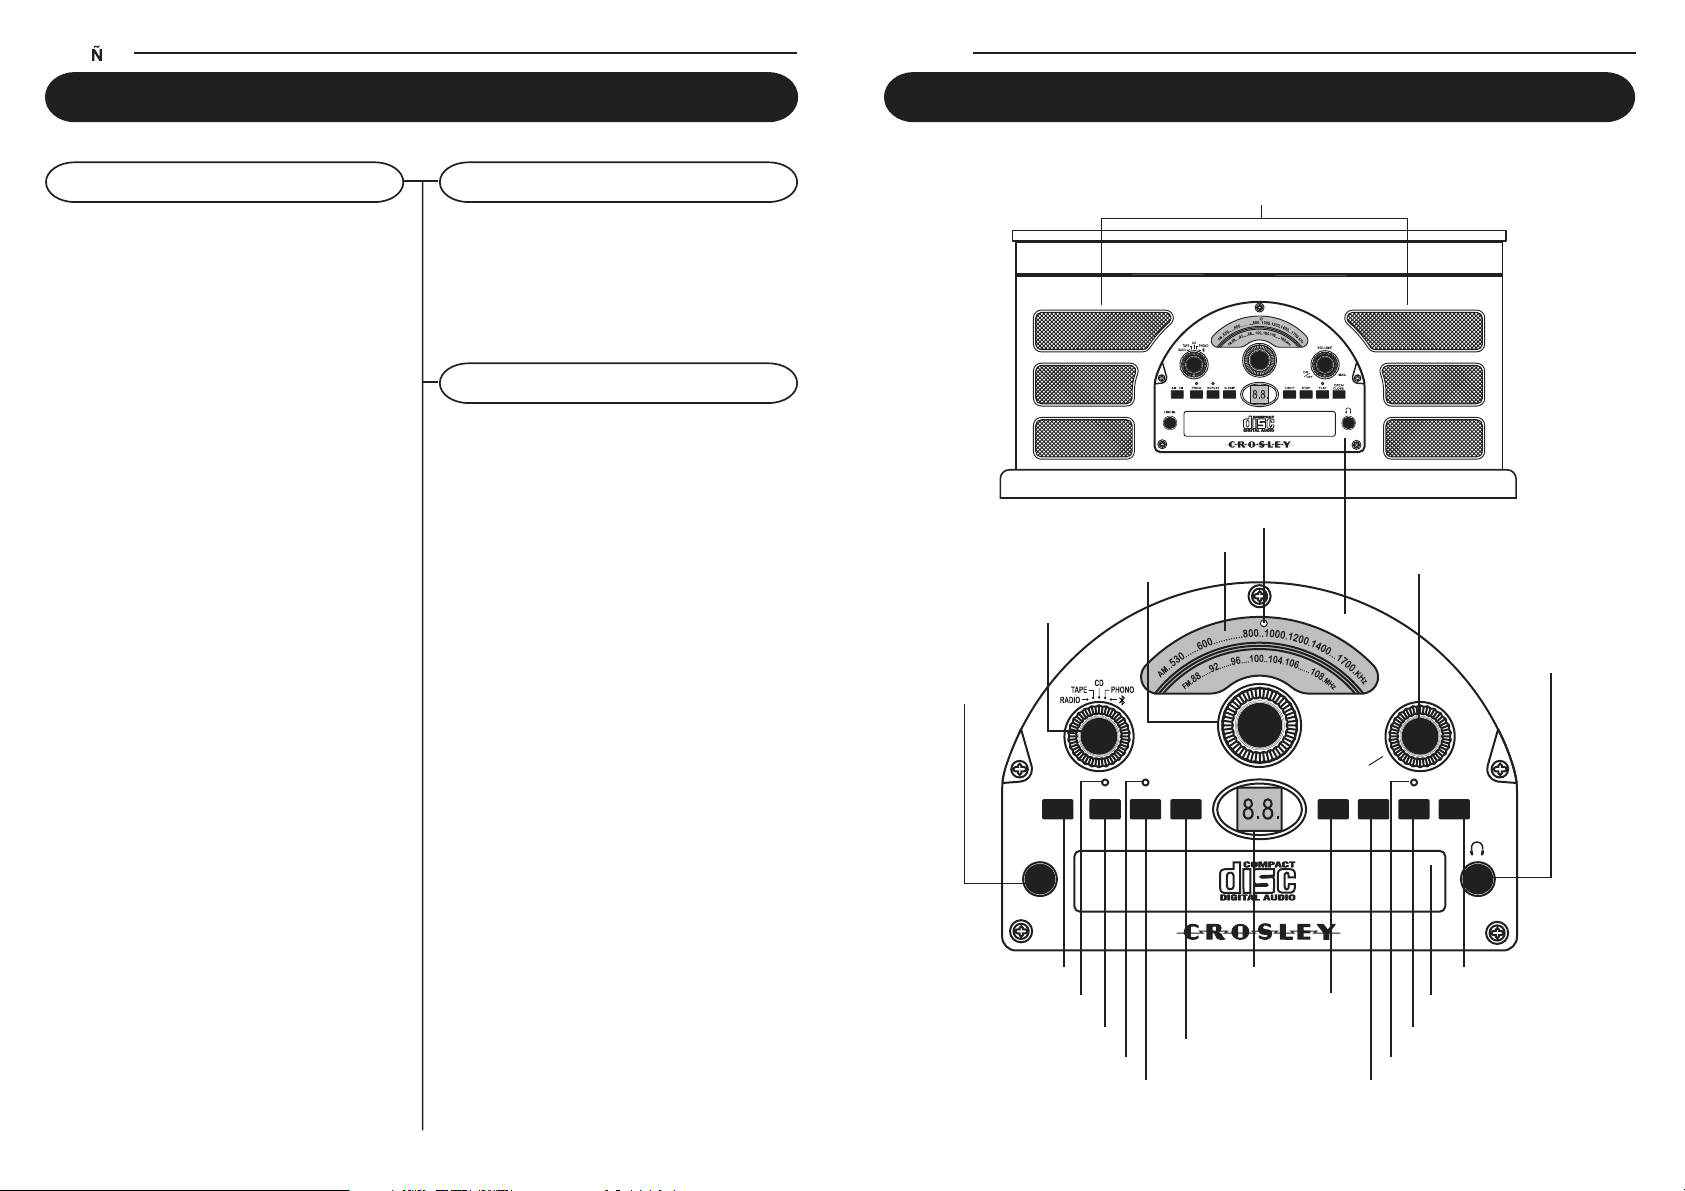
Control Locators
Unit Controls
SPEAKER
FUNCTION SWITCH
TUNING KNOB
DIAL SCALE ON/OFF-VOLUME
ROTARY KNOB
HEADPHONE JACK
AM/FM BAND SWITCH
PROGRAM BUTTON
REPEAT BUTTON
BACKWARD
SKIP BUTTON
LED DISPLAY
FORWARD
SKIP BUTTON
STOP BUTTON
PLAY INDICATOR
OPEN/CLOSE BUTTON
CD DOOR
PLAY/PAUSE BUTTON
LINE IN JACK
ENGLISH
PROGRAM INDICATOR
REPEAT INDICATOR
BLUETOOTH INDICATOR
AM FM PROG. REPEAT B.SKIP F.SKIP STOP PLAY
OPEN/
CLOSE
MAX.
OFF
ON
LINE IN
VOLUME
Buscar para Adelante y para Atr
ás
ESPA OL
Operación del Lector CD
Tocar un CD
1 Regule el SELECTOR DE FUNCIÓN (2) al modo
Tuner
2 Presione la tecla ABRIR/CERRAR para abrir el
cajoncito CD. Coloque un CD en el alojamiento
del lector con el lado etiqueta hacia arriba.
3 Presione la tecla ABRIR/CERRAR una segunda
vez para cerrar el cajoncito CD. La pantalla va
a mostrar “__ __” brevamente y entonces va a
mostrar el número total de las pistas. Va a
mostrar “ 00 “ cuando no hay CD en el cajoncito.
4 Presione la tecla TOCAR para comenzar la
lectura. El INDICADOR TOCAR va a encender.
5 Regule el BOTÓN DE VOLÚMEN -
MARCHA/PARO al volumen deseado.
6 Para pausar la música, presione la tecla TOCAR/
PAUSAR. El INDICADOR TOCAR va a
parpadear. Presione la tecla TOCAR/PAUSAR
una segunda vez para comenzar la música de
nuevo.
7 Para parar la lectura, presione la tecla PARO.
El INDICADOR TOCAR va a apagarse.
1 Presione la tecla BUSCAR PARA ADELANTE
ó la tecla BUSCAR PARA ATRÁS para escoger
una pista.
2 Presione la tecla TOCAR para comenzar
a tocar la pista escogida.
Buscar para Adelante y para
Atr
ás durante la Lectura
LECTURA
1 Presione y mantenga la tecla BUSCAR PARA
ADELANTE ó la tecla BUSCAR PARA
ATRÁS para navegar para adelante o para
atrás en la pista escogida.
2 Suelte la tecla una vez que la posición deseada
en la pista se haya alcanzada y la lectura
comenzará de nuevo automaticamente.
35
Page 6
34
Operación de la Radio
Antena. Para la recepción FM, el aparato está
equipado con una ANTENA FM EN ALAMBRE .
Oriente el alambre hasta obtener una recepción
nítida sin interferencia. Para la recepción AM, el
aparato está equipado con una antena ferrita
direccional incorporada. Oriente el aparato para
hallar la posición donde se recibe la mejor recepción.
No hay que conectar la ANTENA FM EXTERNA
a una antena al exterior.
Antena
Operación del Lector de Casetes y de la Radio
Tocar un Casete
1 Regule el SELECTOR DE FUNCIÓN al modo
Tuner
2 Regule le SELECTOR MODULACIÓN para
seleccionar la banda deseada (AM/FM).
3 Selectione la estación de radio deseada con
girar el SELECTOR DE ESTACIONES.
4 Regule el BOTÓN DE VOLÚMEN -
MARCHA/PARO al volumen deseado.
1 Regule El SELECTOR DE FONCIÓN al modo
CASETE.
2 Introduzca una banda casete pregrabada en la
puerta de casete. La banda va a deslisarse
en el lector de casetes y comenzará a tocar.
3 Regule el BOTÓN DE VOLÚMEN
MARCHA/PARO al volúmen deseado.
4 Para avanzar la banda rápidamente, presione
la tecla EXPULSAR CASETE / AVANCE
RÁPIDO a medio camino. Presione esta
tecla EXPULSAR una segunda vez para
parar el avance rápido y comenzar la música
de nuevo.
5 Para parar la música y expulsar el casete,
presione la tecla EXPULSAR CASETE /
AVANCE RÁPIDO a fondo.
6 Cuando un lado del casete acaba de tocar, la
banda se parará automaticamanete
NB: Hay que sacar el casete del lector cuando
no se escucha ó cuando él acaba de tocar.
ESPA OL
ENGLISH
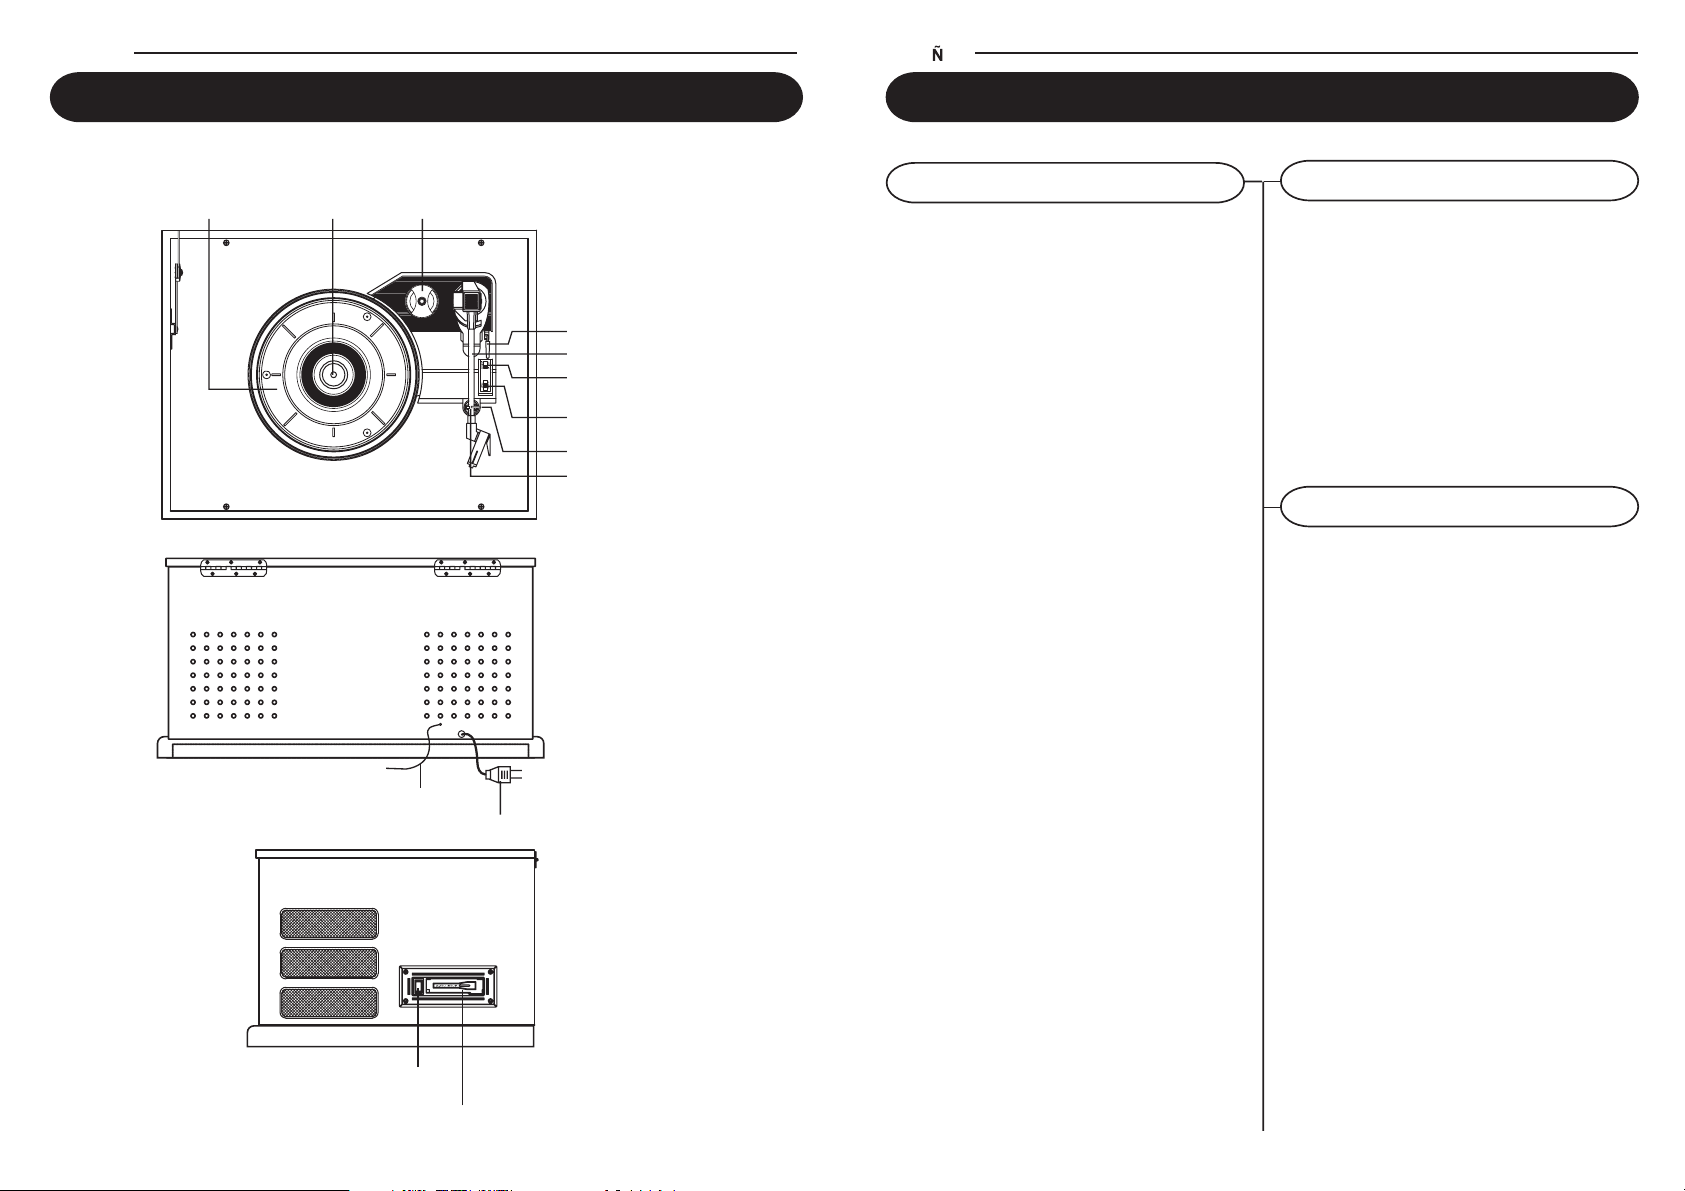
Unit Controls
TURNTABLE ADAPTER FOR 45 RPM RECORD
Control Locators
SPINDLE
CUE LEVER
TONE ARM
AUTO STOP CONTROL SWITCH
SPEED CONTROL SWITCH
1
/
, 45, 78 RPM)
(33
3
TONE ARM REST
SECURITY HOOK
EXTERNAL ANTENNA
AC POWER PLUG CORD
CASSETTE EJECT / FAST FORWARD
CASSETTE DOOR
5
Page 7

6
AC
Polarized Plug
1
Unwind the AC POWER CORD at the back
of the unit and connect it to a power outlet.
2 Plug A/C cord into appropriate outlet.
3 This product is equipped with a polarized
alternating current line plug (a plug having one
blade wider than the other). This plug will fit into
the power outlet only one way. This is a safety
feature, If you are unable to insert the plug fully
into the outlet, try reversing the plug. If the plug
should still fail to fit, contact you electrician to
replace your obsolete outlet. Do not defeat the
purpose of the polarized plug.
Getting Started
1 Remove packing materials from unit.
Note: Save all packing materials.
2 Remove plastic bag covering radio.
3 Remove plastic safety cover from A/C plug.
4 Remove tie from A/C cord and untie antenna
wire on back of radio.
5 Open lid and remove styrofoam shipping
material from turntable.
6 Remove black tie-wrap from under the tone
arm.
7 Remove white protective needle cover by gently
pulling towards the front of the unit.
8 Untie the FM antenna and allow it to hang down
in a straight line for optimum FM reception. If
you have trouble tuning in an FM station, move
the external FM antenna for best reception. Do
no connect FM antenna to outside antenna.
Power SourceUnpacking
ENGLISH
Headphones Jack Operation
1 Connect headphones to the HEADPHONE
JACK.
2 Adjust volume to the desired listening level.
NOTE: When using headphones, the sound to the unit
speakers will be cut off.
The sound from all speakers is cut off.
Headphone Jack
NOTE: Headphones not included with unit.
Operación del Tocadiscos
Adaptador para
discos 45 RPM
ESPA OL
Operación de Base
Encienda el aparato con girar el SELECTOR DE
VOLÚMEN MARCHA/PARO ubicado en la parte
delantera a la posición MARCHA.
1 Regule el SELECTOR DE FUNCIÓN al
modo Tocadiscos [Phono].
2 Ponga el SELECTOR DE VELOCIDAD a
la velocidad correcta (33-1/3, 45 ó 78 rpm).
Coloque su disco en el tocadiscos.
3 Utilice el LEVA-BRAZO para levantar el brazo
acústico de su soporte.
4 Ponga el brAZO ACÚSTICO por encima del
disco al punto donde Usted quiere que comience
la música. Regule el BOTÓN DE VOLÚMEN
MARCHA/PARO al volúmen deseado.
5 Deslice el INTERRUPTOR DE CONTROL DE
DETENCIÓN AUTOMÁTICA para escoger la
función de detención automática.
6 Cuando se termine la reproducción del disco,
el BRAZO DEL TOCADISCOS se detendrá
automáticamente. Debe regresar el BRAZO
DEL TOCADISCOS al SOPORTE DEL BRAZO
DEL TOCADISCOS manualmente.
NB: El tocadiscos y el lector de casetes
funcionan los dos del mismo modo. Verifique
que el lector de casetes se encuentra en el
modo PARADO cuando Usted desea
escuchar un disco.
Accesorio:
Este adaptador le permite tocar los discos 45 rpm.
1 Ponga el ADAPTADOR en el eje.
2 Coloque su disco 45 rpm suavemente en el
tocadiscos.
3 Siga las instrucciones en la sección operación
del tocadiscos para tocar su disco.
33
Page 8

32
Unpacking
Ficha Polarizada CA
1 Desenrolle el CORDÓN DE ENERGÍA CA de
la parte de atrás del aparato.
2 Conecte el cordón de energía CA a un
tomacorriente apropiado.
3 Este aparato está equipado de una ficha
polarizada de cordón de energía en corriente
alternativa (una ficha con una broca más ancha
que la otra). Esta ficha puede enchufarse en el
tomacorriente en un solo sentido. Esto es un
dispositivo de seguridad. Si la ficha no entra en
el tomacorriente, hay que darla media vuelta y
intentar de enchufarla de nuevo. Si aún la ficha
no quiere entrar en el tomacorriente, contacte
a su electricista para cambiar su tomacorriente
obsoleto. No trate de deformar el dispositivo de
seguridad de la ficha polarizada.
4 Introduzca 2 baterías AAA (no incluídas) en
el control remoto.
Cómo Comenzar
Fuente de energía
ESPA OL
1 Quite los materiales de embalaje del aparato.
NB. Guarde todos los materiales de embalaje
para el caso de mudanza ó devolución del
aparato.
2 Quite la funda de plástico del aparato.
3 Quite la tapa de protección de plástico de la
ficha del cordón de energía.
4 Quita la atadura del cordón de energía y
desenrolle la antena de alambre en la parte de
atrás del aparato.
5 Abra la tapa y quite el embalaje de transporte
de styrofoam del tocadiscos.
6 Quite la atadura negra por debajo del brazo
acústico.
7 Quite la banda y la tapa de protección blanca
de la aguja con jalar hacia el frente del aparato.
8 Quite el clip de retención del brazo acústico
con empujarlo lijeramente a la derecha. Esto
desbloquea el brazo acústico del soporte. Hay
que bloquear el clip de retención para el
transporte del aparato a otro lugar.
9 Desenrolle la antena FM en alambre y déjela
caer derecho para abajo para la mejor recepción
FM. En el caso que Usted tiene problemas con
sincronizar una estación FM, oriente el alambre
hasta obtener una recepción nítida sin
interferencia. No hay que conectar la antena FM
a una antena al exterior.
Operación del Enchufe audífonos
1 Conecte los audífonos en el enchufe audífonos.
2 Regule el volúmen al nivel de escucha deseado.
NB: Cuando se usa los audífonos, el sonido está
cortado a los parlantes del aparato.
NB: Los audífonos no son incluídos con el
aparato.
Enchufe (Jack)
Audífonos/Auriculares
El sonido está cortado a todos los parlantes.
ENGLISH
Turntable Operation
Turntable Operation
Turn the unit on by rotating the ON/OFF-VOLUME
ROTARY KNOB located on the front panel to the
ON position.
1 Rotate the FUNCTION SWITCH to select
PHONO mode.
2 Set the SPEED CONTROL SWITCH to desire
speed (33 1/3,45 or 78 rpm). Place the
record on the turntable.
3 Use the CUE LEVER to raise the tone arm off
its rest.
4 Move the tone arm over the record and use the
cue lever to lower it to the point you want the
record to start. Adjust the ON/OFF-VOLUME
ROTARY KNOB to the desired listening level.
5 Slide the AUTO STOP CONTROL SWITCH
to choose the auto stop function.
6 At the end of the record, the TONE ARM will
stop automatically. You must return the TONE
ARM to TONE ARM REST manually.
Accessory: ADAPTER FOR 45 RPM
This adaptor allows you to play 45 RPM records.
1 Place the 45 RPM adaptor over the spindle.
2 Gently place your 45 RPM record onto the
turntable.
3 Follow the steps under turntable operation to
play your record.
7
Page 9

8
Radio Operation
Antenna: for FM reception, the unit is provided with
a FM WIRE ANTENNA, move the wire until the
reception is clear and with no interferences. For AM
reception, the unit is provided with a directional buildin ferrite antenna. Rotate the set to find the position
in which the best reception is obtained. Do not
connect the EXTERNAL FM ANTENNA to any
outside antenna.
Antenna
Cassette & Radio Operation
Cassette Operation
1 Rotate the FUNCTION SWITCH to select RADIO
mode.
2 Set the AM/FM BAND SWITCH to the desired
band (AM or FM).
3 Select the desired radio station by rotating
TUNING KNOB.
4 Adjust the ON/OFF-VOLUME ROTARY KNOB
to the desired sound level.
1 Rotate the FUNCTION SWITCH to TAPE
position.
2 Insert a prerecorded tape through
the
CASSETTE
DOOR. Tape will slide into the cassette
mechanism and start playing.
3 Adjust the volume level by turning the VOLUME
KNOB.
4 For fast forwarding, press the CASSETTE
EJECT/F.F half way in. Pressing again, will stop
the fast forwarding and return the cassette to
the playing mode.
5 To stop and eject the cassette, press the
CASSETTE EJECT/F.F in completely.
6 When one side of the tape finishes playing, the
cassette will automatically stop.
NOTE: Remove the tape from the unit when it
is not in use or stopped.
ENGLISH
ESPA OL
Ubicación de los Mandos
Mandos en el Aparato
TOCADISCOS ADAPTADOR PARA DISCOS 45 RPM
EJE
LEVA BRAZO ACÚSTICO
BRAZO ACÚSTICO
INTERRUPTOR DE CONTROL DE
DETENCIÓN AUTOMÁTICA
SELECTOR DE VELOCIDADES
1
, 45, 78 RPM)
/
(33
3
SOPORTE - BRAZO ACÚSTICO
CLIP DE RETENCIÓN BRAZO ACÚSTICO
ANTENA EXTERNA
TECLA EXPULSAR CASETE /
AVANCE RÁPIDO
PUERTA CASETE
CORDÓN DE ENERGÍA CA
31
Page 10

30
Ubicación de los Mandos
Mandos en el Aparato
SELECTOR DE FUNCIÓN
SELECTOR DE ESTACIONES
INDICADOR DE ESTACIONES BOTÓN VOLUMEN –
MARCHA/PARO
ENCHUFE (JACK)
AURÍCULARES /
AUDÍFONOS
PARLANTE
LÍNEA EN
ESPA OL
SELECTOR DE MODULACIÓN
TECLA PROGRAMAR
TECLA REPETIR
TECLA BUSCAR
PARA ATRÁS
PANTALLA LED
TECLA BUSCAR
PARA ADELANTE
TECLA PARO
INDICADOR TOCAR
TECLA ABRIR/CERRAR
PUERTA CAJONCITO CD
TECLA TOCAR/PAUSAR
INDICADOR DE PROGRAMAR
INDICADOR REPETIR
INDICADOR DE BLUETOOTH
AM FM PROG. REPEAT B.SKIP F.SKIP STOP PLAY
OPEN/
CLOSE
MAX.
OFF
ON
LINE IN
VOLUME
ENGLISH
CD Operation
Playing A CD
1 Rotate the FUNCTION SWITCH to CD mode.
2 Press the OPEN/CLOSE BUTTON to open the
CD DOOR. Place a disc in the tray with the
labeled side of the disc facing up.
3 Press the OPEN/CLOSE BUTTON again close
the CD DOOR. The display will show “— —“ for
a few seconds, then the total number of tracks
on the disc will be displayed. “00” will be shown
when there is no disc inside the unit.
4 Press the PLAY BUTTON to start playback.
The PLAY INDICATOR will light up.
5 Adjust the VOLUME ROTARY KNOB to the
desired volume level.
6 To pause playback, press the PLAY/PAUSE
BUTTON. The PLAY INDICATOR will flash.
Press the PLAY BUTTON again to resume
playback.
7 To stop playback, press the STOP BUTTON.
The PLAY INDICATOR will go off.
Skip Forward And Skip Reverse
1 Press the FORWARD SKIP BUTTON or the
BACKWARD SKIP BUTTON to select a track.
2 Press the PLAY BUTTON to start playing
the selected track
Search Forward And Reverse During Play
PLAYBACK
1 Press and hold the FORWARD SKIP BUTTON
or the BACKWARD SKIP BUTTON to search
forward or backward though the selected track.
2 Release the button at the desired point, playback
will resume automatically.
9
Page 11

Repeat Playback
Using your Bluetooth
10
1 To repeat a single track, choose the track that
you want to repeat, then press the PLAY BUTTON
to start the track. Press the REPEAT BUTTON
once to repeat this track.The REPEAT INDICATOR
will flash.
2
To repeat all tracks, press the PLAY BUTTON
to
start the CD. Press the REPEAT BUTTON
twice
to repeat all tracks. Once the CD ends, it will
start over again from the beginning of the CD.
The REPEAT INDICATOR will remain on.
3 To erase the repeat function, press the REPEAT
BUTTON again until the REPEAT INDICATOR
is off.
1 Press the PROGRAM BUTTON. " 01" will shown
on the display and the PROGRAM INDICATOR
will flash.
2 Press the FORWARD SKIP BUTTON or the
BACKWARD SKIP BUTTON to select a track.
3 Press the PROGRAM BUTTON again to store
the selected track number.
4 Repeat steps 2 and 3 above to program other
tracks.
5 Press the PLAY BUTTON to start Programmed
playback. The PROGRAM INDICATOR will be
on.
6 To erase the programmed sequence, press the
STOP BUTTON twice or until the PROGRAM
INDICATOR is off. Programmed tracks will also
erase when the
CD DOOR
is opened.
NOTE: Maximum of 20 tracks can be
programmed to play in any order.
CD Operation
ENGLISH
Programmed Playback
Bluetooth enables a wireless connection between
a device (such as a smart phone) and the unit,
enabling the user to play and control tracks direct
from their Bluetooth enabled device.
The user must ensure that they have a compatible
Bluetooth enabled device (with media playing
capabilities) such as an Android
® Smartphone or
Apple iPhone
® with Bluetooth capability. The user
must also ensure that they have loaded compatible
audio files on to the device in order to play through
the unit. Once these have both been confirmed,
the user can connect their device to the unit.
1 Turn the unit on by rotating the ON/OFF-
VOLUME ROTARY KNOB located on the front
panel to the ON position.
2 Turn the FUNCTION SWITCH to the
(Bluetooth) mode.
3 The LED Display indicator will flash indicating
that it is searching for a nearby Bluetooth
enabled device to connect too.
4 On your Bluetooth enabled device, search for
nearby devices. When your device finds
CR66D connect to this device. There should
be no requirement for a PIN.
5 When the unit has connected to your
Bluetooth enabled device successfully, your
device will indicate that they are connected
and the indicator light on the Bluetooth.
the unit will stop flashing and continuously
illuminate.
ESPA OL
Bienvenue Índice de materias
Gracias por su compra de Crosley Rochester
(CR66D). Antes de poner su aparato en marcha,
haga el favor de leer este manual completamente
y guárdelo en lugar seguro para todo uso posterior.
El propósito de este manual
Las instrucciones en este manual describen las
funciones de mando del modelo CR66D.
Cómo comenzar
Ubicación de los mandos............ 30,31
Desempacar .................................... 32
Fuente de energía ........................... 32
Operación de Base
Operación del Tocadiscos................ 33
Accesorio: Adaptador 45 rpm ......... 33
Operación del Lector de Casetes.... 34
Operación de la Radio..................... 34
Operación USB/SD.......................... 35
Operación de Lector de CD
Tocar un CD..........................…....... 35,36
Lectura programada......................... 36
Uso del Bluetooth.......................... 36
Conexión de los Equipos Anexos
ENTRADA LÍNEA EN ................... 37
Generalidades
Guía para resolver los problemas .... 37
Garantía.............................................. 38
29
Page 12

28
Especificaciones técnicas
Gama de Frecuencias : AM (PO) 525 - 1710 KHz
: FM (GO) 87,5 – 108,5 MHz
Fuente de energía : CA 120V ~ 60Hz
Consumo : 18W
Antenas : Antena FM (GO) externa
: Antena AM (PO) Incorporada – Barra ferrita
Velocidades : 33-1/3, 45, 78 rpm
Parlantes : 4 pulgadas – tipo dinámico x 2
Aguja de recambio : NP1
Batería para control remoto : CR2025
* EL FABRICANTE SE RESERVA EL DERECHO DE CAMBIAR LA CONCEPCIÓN
Y LAS ESPECIFICACIONES SIN PREAVISO.
ESPA OL
•Plaqueta con aviso ubicada al fondo de la caja
¡
ATENCIÓN !
PARA RÉDUCIR LOS RIESGOS DE CHOQUE ELÉCTRICO, NO EXPONGA ESTE APARATO
A LA LLUVIA NI A LA HUMEDAD.
ATTENTION:
L’emploi des commandes ou réglages ou la mise en opération de procédures autres que celles
spécifiés peuvent avoir comme résultat l’exposition aux radiations dangereuses.
¡ ATENCIÓN ! PARA REDUCIR LOS RIESGOS DE CHOQUE ELÉCTRICO, NO QUITE LA TAPA (Ó LA PARTE
DE ATRÁS). EL INTERIOR NO CUENTA CON NINGÚN COMPONENTE A REPARAR POR EL USUARIO.
CONFÍE SU APARATO SOLAMENTE AL PERSONAL DE SERVICIO CALIFICADO.
El símbolo de rayo con punto de flecha al interior del triángulo equilateral lleva el propósito
de poner al usuario sobre aviso de la presencia de «voltaje peligroso» no aislado al interior
de la caja del aparato que es suficientemente grave para causar un riesgo de choque
eléctrico a las personas.
El signo de admiración al interior del triángulo equilateral lleva el propósito de poner al
usuario sobre aviso de la presencia de instrucciones importantes concernientes a la
operación y al mantenimiento que se encuentran en el manual del usuario librado con el
aparato.
¡ ATENCIÓN !
Esto aplica solamente a los aparatos con CD
RADIACIÓN LASER INVISIBLE CUANDO ESTÁ ABIERTO Y EL CERROJO DE SEGURIDAD
FALLÓ Ó FUE VENCIDO. EVITE TODA EXPOSICIÓN DIRECTA AL RAYO LASER
RIESGOS DE CHOQUE
ELÉCTRICO NO ABRIR
¡
ATENCIÓN !
ENGLISH
Connecting Optional Equipment
LINE IN Input
Troubleshooting
1 You can connect external components to your
unit by using the Line in Input.
2 Plug Auiliary cable into the LINE IN JACK on
the back of the turntable.
3 Plug the other end of the Line in cable into the
output jack on your desires external component.
4 Check the volume level of your external
component.
5 See operator manual for correct operation of
the external component.
There is no Power
1 The AC plugged is not well connected.
2 Check to see that the ON/OFF volume knob is
in the on position.
There is no Sound
1 Check the volume level by turning the volume
knob.
Turntable will not work
1 Make sure the function switch is set to phono.
2 Try moving the tone arm to the right until you
hear a click.
3 Make sure the protective needle cover is
removed.
CD does not play
1 Check to make sure CD is inserted correctly
(label side facing up).
2 Check that the surface of the CD is clean
3 Make sure function switch is set to CD.
11
Page 13

12
Crosley Radio, Inc. warrants the product to be free from defects in material and
workmanship under normal use for a period of one year from the original date of
purchase. This warranty is not transferable. If the product is determined to be defective
during the warranty period, the unit will be repaired or replaced at Crosley Radio’s sole
discretion. This warranty covers manufacturing defects and normal consumer use and
does NOT cover damage or failure as a result of abuse, accident, alterations, misuse,
neglect, abnormal wear and tear, inadequate maintenance, commercial or unreasonable
use, damage caused by power surges, mishandling, accident, acts of God or attempted
repair by an unauthorized service agent. Also not covered are cosmetic damages,
cords and antennas.
Should this product fail to function in a satisfactory manner, it is best to first contact
our technical support team for assistance to ensure it is being operated properly.
Tech Support and Product Questions
CALL TOLL FREE: 1.888.CROSLEY
(1.888.276.7539)
If it is indeed determined that the unit is no longer operational, please contact the
retailer from which it was purchased. In many cases, your retailer will be able to provide
a replacement unit at no charge within the scope of their return policy. If the retail return
period has expired, please contact Crosley Radio directly to participate in the one year
protection program.
Crosley 1 Year Warranty Program
CALL TOLL FREE: 1.800.926.7801
You will need to contact our offices M-F 8am-5pm EST to obtain an RA (Return
Authorization) Number. You will be instructed to send the unit (at your cost) to our
offices in its original packaging (or reasonable substitute to prevent damage.) You will
need to clearly mark your RA number on the outside packaging and include the original
sales receipt (or a copy) indicating date of purchase, amount paid, and place of
purchase. You will also need to include your full name, shipping address and daytime
contact number. You will be instructed to include a check or money order for any
applicable return shipping and handling fees. A Crosley advisor will confirm the fees
associated with your product’s shipping size/weight. Returned products will not be
shipped to PO Boxes. Crosley Radio will not be responsible for delays or unprocessed
claims resulting from a purchaser’s failure to provide any or all of the necessary
information.
There are no express warranties except as listed above.
The purchaser’s bill of sale is the only proof of warranty entitlement.
This warranty gives the purchaser specified legal rights in addition to any rights which may vary
from state to state.
In accordance with the “Moss-Magnuson Warranty Act” of July 10, 1975, this is termed a “limited
warranty” which in no way compromises Crosley Radio’s high standards of quality and workmanship.
LIMITED MANUFACTURERS WARRANTY
ENGLISH
ESPA OL
AVISO IMPORTANTE DE SEGURIDAD
POR FAVOR LEA CON MUCHO CUIDADO LAS PRÉCAUCIONES SIGUIENTES QUE SE APLICAN À SU EQUIPO.
1. Léa las instrucciones – Hay que leer todas las instrucciones sobre la operación y los avisos de seguridad antes de poner el
2. Guarde las instrucciones – Hay que guardar las instrucciones en lugar seguro para uso posterior.
3. Respete las advertencias – Hay que seguir todas las advertencias de seguridad impresos en el aparato y en las instrucciones escritas.
4. Siga las instrucciones – Hay que seguir todas las instrucciones para la operación del aparato.
5. Limpieza – Desenchufe el aparato del tomacorriente antes de limpiarlo. No utilice productos de limpieza líquidos ó aerosoles.
6. Accesorios – No utilice accesorios que no son autorizados por el fabricante del producto porque pueden causar riesgos.
7. Agua y humedad – No utilice este aparato en la proximidad del agua – por ejemplo, cerca de una tina, de un
8. Hay que desplazar el aparato con precaución en el caso que se encuentra sobre una base. Las paradas
9. Ventilación – La caja del aparato lleva ranuras y aberturas para la ventilación, para asegurar una
10. Fuentes de energía – Este aparato debe alimentarse solamente con el tipo de energía indicado en la etiqueta. En el caso de
11. Puesta a tierra o polarización – Este aparato está equipado de una ficha polarizada de cordón
12. Energía – Protección de los cordones – Coloque los cordones de energía de manera que no se pisen o que no se aprieten
13. Rayos – Para dar más protección a su aparato durante las tormentas con relámpagos ó cuando se encuentra sin uso durante
14. Líneas de transmisión – No hay que colocar un sistema de antena exterior en la proximidad de líneas de transmisión eléctrica
15. Sobrecargo – No sobrecargue los tomacorrientes, los cordones ó los tomacorrientes multiples. Toda falta de respetar esta
16. Introduccion de objetos ó de líquido. No introduzca jamás cualquier objeto por las ranuras ó las aberturas que pueda venir en
17. Reparación – No tente de reparar este aparato usted mismo porque al abrir la caja usted corre el riesgo de venir en contacto
18. Daños que necesitan una reparación – Desenchufe el aparato del tomacorriente y contacte al personal de servicio calificado
19. Piezas de repuesto – En el caso que Usted necesita piezas de repuesto, hay que verificar que el técnico ha puesto las piezas
20. Verificación de seguridad– al momento de hacer servicio ó reparaciones en este aparato, pida al técnico de servicio de hacer
21. Fijación a la pared ó en el techo – El aparato debe fijarse solamente según los consejos del fabricante.
22. Calor – El aparato debe situarse a distancia de fuentes de calor tales como los radiadores, las bocas de aire caliente, cocinas
ADVERTENCIA: Todo cambio ó modificación a este aparato que no está especificamente aprobado por la persona responsable
puede cancelar la autoridad del usuario a usar el equipo.
AVISO: Este equipo ha sido objeto de ensayos y se ha declarado conforme a los límites de un aparato digital de Clase B, según
la Sección 15 del reglamento FCC. Estos límites son concebidos para proteger contra las emisiones perjudicales en una instalación
residencial. Este equipo genera, utiliza y puede emitir energía de frecuencia radio y puede ser la fuente de emisiones perjudicales
que enturbian las comunicaciones radio en el caso de no ser instalado y utilizado según las instrucciones. Con decir esto, no hay
garantía que la interferencia no resulta de una instalación específica. Si este equipo causa interferencia, perjudica a la radio ó a la
recepción de televisión, se puede determinar apagando y encendiendo el equipo. El usuario está alentado a corregir la interferencia
por una ó varias de las siguientes maneras:
- reorientar la antena de recepción ó cambiarla de lugar
- aumentar la distancia entre el equipo y el receptor
- conectar el equipo a un circuito diferente del que el receptor está connectado.
- consultar al vendedor ó a un técnico de televisión calificado para consejos.
AVISO: El fabricante no se hace responsable de cualquier interferencia de radio ó de televisión que resulte de modificaciones no
autorizadas a este aparato. Tales modificaciones pueden cancelar la autoridad del usuario a usar el equipo.
aparato en marcha.
Utilice un trapo seco.
fregadero, de un lavadero, en un sótano húmedo ó cerca de una piscina ó cualquier ambiente similar.
demasiado bruscas, la fuerza excesiva ó las superficies irregulares pueden causar la caída del aparato.
operación fiable y para impedir que se sobrecaliente. No hay que tapar ni cubrir estas aberturas.
No hay que poner el aparato sobre una cama, un sofá, una alfombra ó cualquier otra superficie
que pueda tapar estas aberturas. No hay que poner el aparato en un estante ó en un muestrario
a menos de asegurar una ventilación adecuada y seguir las instrucciones del fabricante.
que Usted no esté seguro del tipo de energía disponible para su casa, haga el favor de consultar a su vendedor ó a su compañía
de energía. En el caso de productos para operación con baterías u otras fuentes de energía, consulte con el manual del usuario.
de energía en corriente alternativa una ficha con una broca más ancha que la otra). Esta ficha
puede enchufarse en el tomacorriente en un solo sentido. Esto es un dispositivo de seguridad.
Si la ficha no entra en el tomacorriente, hay que darla media vuelta y intentar de enchufarla de
nuevo. Si aún la ficha no quiere entrar en el tomacorriente, contacte a su electricista para
cambiar su tomacorriente obsoleto. No trate de deformar el dispositivo de seguridad de la ficha polarizada.
por objetos en la proximidad ó colocados de por encima. Hay que poner una atención especial en los cordones dónde entran
en los tomacorrientes, en los tomacorrientes multiples y también dónde salen del aparato mismo.
ratos largos, hay que desenchufarlo del tomacorriente y también desconectar la antena ó el sistema de cable. Esto evita los
daños al producto debidos a los rayos ó a los sobrecargos de energía.
u otros circuitos de voltaje ó de luces dónde el sistema de antena corra el riesgo de caer sobre tales líneas. Al momento de
hacer la instalación de un sistema de antena exterior hay que poner mucha atención en no venir en contacto con estas líneas,
lo que puede resultar en riesgo de muerte.
advertencia puede causar un incendio ó un choque eléctrico.
contacto con los puntos de voltaje ó hacer corto-circuito que puede causar un incendio ó un choque eléctrico. No derrame
jamás ningún líquido sobre el aparato.
con el voltaje ó con otros riesgos. Confíe toda reparación al personal de servicio calificado.
en las circunstancias siguientes:
a. Cuando el cordón de energía está dañado.
b. Cuando se ha derramado algún líquido ó un objecto alguno se ha caído al interior.
c. Cuando el aparato ha sido expuesto a la lluvia ó al agua.
d. Cuando el aparato no funciona normalmente con seguir las instrucciones de uso. Toque solamente los mandos que son
indicados en las instrucciones de uso, puesto que con tocar los otros mandos usted puede causar daños y muchas veces
esto puede necesitar la intervención de un técnico calificado para poner el aparato en marcha.
e. Cuando se ha dejado caer el aparato ó cuando se ha dañado de cualquier manera.
f. Cuando el aparato cambia abruptamente de funcionamiento – esto indica la necesidad de reparación.
especificadas por el fabricante ó que estas piezas tengan las mismas características de las piezas de orígen. Las substituciones
no autorizadas pueden causar un incendio, un choque eléctrico u otros riesgos.
una verificación de seguridad para confirmar que el aparato está en buenas condiciones de marcha.
u otros aparatos (y también los amplificadores) que desprenden calor.
Ficha Polarizada CA
27
Page 14

26
CR66D
ROCHESTER
www.crosleyradio.com
Manual del Usuario
Manuel d’Utilisateur
CR66D
ROCHESTER
13
www.crosleyradio.com
Page 15

14
Fiche polarisée CA
FRANÇAIS
AVIS IMPORTANT DE SÛRETE
VEUILLEZ LIRE ATTENTIVEMENT LES PRÉCAUTIONS SUIVANTES QUI S’APPLIQUENT À VOTRE ÉQUIPEMENT.
1. Lisez les instructions – Il faut lire toutes les instructions sur l’opération et les avis de sûreté avant de mettre l’appareil en marche.
2. Conservez les instructions – Il faut garder les instructions en lieu sûr pour utilisation ultérieure.
3. Respectez les avertissements – Il faut suivre tous les avertissements de sûreté imprimés sur l’appareil et dans les instructions écrites.
4. Suivez les instructions – Il faut suivre toutes les instructions pour l’opération de l’appareil.
5. Nettoyage – Débranchez l’appareil de la prise murale avant de le nettoyer. N’employez pas de produits de nettoyage liquides
ou aérosols. Utilisez un chiffon sec.
6. Accessoires – N’utilisez pas d’accessoires qui ne sont pas autorisés par le fabricant du produit car ils peuvent provoquer
des dangers.
7. Eau et humidité – N’utilisez pas ce produit à proximité de l’eau – par exemple, près d’une baignoire, d’un lavabo, d’un évier,
d’une cuve à lessive, dans une cave humide ou près d’une piscine ou toute situation similaire.
8. Il faut déplacer l’appareil avec précaution au cas où il se trouve sur un chariot. Des arrêts trop vifs,
la force excessive ou des surfaces inégales peuvent provoquer une chute de l’appareil.
9. Ventilation – Le coffret de l’appareil est équipé de fentes et d’ouvertures pour la ventilation, pour
assurer une opération fiable et pour empêcher qu’il ne surchauffe. Il ne faut pas boucher ou couvrir
ces ouvertures. Il ne faut pas placer l’appareil sur un lit, un sofa, une moquette ou n’importe quelle
autre surface qui puisse boucher ces ouvertures. Il ne faut pas placer l’appareil sur une étagère ou
dans un rack à moins d’assurer une ventilation adéquate et suivre les instructions du fabricant.
10.Sources d’alimentation – Cet appareil doit être alimenté seulement par le type d’alimentation indiqué sur l’étiquette. Au cas
où vous ne seriez pas sûr du type d’alimentation disponible à votre domicile, veuillez consulter votre revendeur ou votre
société fournisseur d’énergie. Dans le cas de produits conçus pour opérer avec des piles ou d’autres sources d’énergie,
rapportez-vous à l’avis d’opération.
11.Mise à la terre ou polarisation – Cet appareil peut être équipé d’une fiche polarisée de cordon d’alimentation en courant
alternatif (une fiche dont une broche est plus large que l’autre). Cette fiche ne peut être
branchée sur la prise murale que dans un seul sens. Ceci est un dispositif de sûreté.
Au cas où vous ne réussiriez pas à brancher la fiche complètement sur la prise, faites
pivoter la fiche d’un demi tour et essayez de nouveau. Si la fiche ne rentre toujours pas
dans la prise, contactez votre électricien afin de remplacer votre prise désuète. Ne cherchez
pas à déjouer le dispositif de sûreté de la fiche polarisée.
12.Alimentation – Protection des cordons – Placez les cordons d’alimentation de telle façon que l’on n’y marche pas dessus
ou qu’ils ne soient pas coincés par des objets à proximité ou placés au dessous de ceux-ci. Il faut prêter une attention
particulière aux cordons là où ils rentrent dans des prises, dans des multiprises, et là d’où ils sortent du produit même.
13. Foudre – Pour donner plus de protection à votre appareil lors d’orages avec éclairs ou bien quand il se trouve sans utilisation
pendant des périodes prolongées, veuillez le débrancher du secteur et aussi débranchez l’antenne ou le système du câble.
Ceci évitera des dommages au produit dus à la foudre ou aux surcharges d’alimentation.
14.Lignes de transmission – Il ne faut pas situer un système d’antenne extérieure dans le voisinage des lignes de transmission
électriques ou d’autres circuits de tension ou de lumière ou là où le système d’antenne risque de tomber sur de telles lignes.
Lors de l’installation d’un système d’antenne extérieure il faut faire très attention à ne pas venir contacter ces lignes, ce
qui pourrait causer danger de mort.
15.Surcharge – Ne surchargez pas les prises murales, les rallonges ou les multiprises. Tout manquement à cet avertissement
peut provoquer un incendie ou un choc électrique.
16.Introduction d’objets ou de liquide. N’introduisez jamais d’objet quelconque par les fentes ou les ouvertures qui risque
d’entrer en contact avec des points de voltage ou de faire un court-circuit qui peut provoquer un incendie ou un choc
électrique. Ne déversez jamais de liquide quelconque sur l’appareil.
17. Réparation – Ne cherchez pas à réparer cet appareil vous-même car à l’ouverture du coffret vous risquez d’entrer en contact
avec le voltage ou d’autres dangers. Confiez toute réparation au personnel de service qualifié.
18.Dommages qui demandent une réparation – Débranchez l’appareil de la prise murale et adressez-vous au personnel de
service qualifié dans les circonstances suivantes:
A. Quand le cordon d’alimentation ou la fiche est endommagé.
B. Quand on a déversé du liquide ou quand des objets sont tombés à l’intérieur.
C. Quand l’appareil a été exposé à la pluie ou à l’eau.
D. Quand l’appareil ne marche pas normalement en suivant le mode d’emploi. Réglez seulement les contrôles qui sont
mentionnés dans le mode d’emploi, car tout maniement des autres contrôles peut provoquer des dommages et peut
souvent demander l’intervention d’un technicien qualifié pour remettre l’appareil en marche.
E. Quand on a fait tomber l’appareil ou quand il a été endommagé autrement.
F. Quand l’appareil change abruptement de performance – ceci indique le besoin de réparation.
19.Pièces de rechange – Au cas où vous auriez besoin de pièces de rechange, veuillez vérifier que le technicien s’est servi
de pièces spécifiées par le fabricant ou que ces pièces ont les mêmes caractéristiques que celles d’origine. Des substitutions
non autorisées peuvent provoquer un incendie, un choc électrique ou d’autres dangers.
20.Vérification de sécurité – Lors du service ou des réparations sur cet appareil, demandez au technicien de service de bien
vouloir faire une vérification de sécurité pour confirmer que l’appareil est en bon état de marche.
21.Montage sur mur ou plafond – L’appareil doit être monté seulement selon les conseils du fabricant.
22.Chaleur – L’appareil doit être situé à distance de sources de chaleur telles que radiateurs, bouches d’air chaud, cuisinières
ou autres appareils (y compris les amplificateurs) qui dégagent de la chaleur.
AVERTISSEMENT: Tout changement ou modification à cet appareil qui n’est pas spécifiquement approuvé par la personne
responsable peut annuler l’autorité de l’utilisateur à se servir de l’équipement.
AVI S: Cet équipement fait l’objet d’essais et a été déclaré conforme aux limites d’un appareil numérique de Classe B, selon
la Section 15 du règlement FCC. Ces limites sont conçues pour protéger contre les émissions parasites dans une installation
résidentielle. Cet équipement génère, utilise et peut émettre de l’énergie à fréquence radio et peut être à la source d’émissions
parasites qui brouillent les communications radio au cas où il n’est pas installé et utilisé selon les instructions. Ceci dit, aucune
garantie que des émissions parasites ne résultent d’une installation particulière. Au cas où des émissions parasites à la réception
radio ou télévision en résulteraient, on peut confirmer que l’appareil en est la source en activant le bouton marche/arrêt.
L’utilisateur peut ensuite éliminer ces émissions en choisissant une ou plusieurs des méthodes suivantes:
· Réorienter l’antenne de réception ou la changer de place
· Éloigner l’équipement du récepteur
· Brancher l’équipement sur un circuit différent de celui sur lequel le récepteur est branché
· Consulter le revendeur ou un technicien de télévision qualifié pour des conseils.
AVIS: Le fabricant n’est pas responsable de toute interférence de radio ou télévision qui résulterait de modifications nonautorisées à cet appareil. De telles modifications peuvent annuler l’autorité de l’utilisateur à se servir de l’équipement.
FRANÇAIS
Crosley Radio, Inc. garantit que le produit est exempt de vices matériels et de fabrication s’il
est soumis à une utilisation normale pendant une période d’un an à compter de la date d’achat
originale. Cette garantie n’est pas transférable. Si le produit est jugé défectueux pendant la
période de garantie, l’appareil sera réparé ou remplacé, et ce, à la discrétion de Crosley Radio.
Cette garantie couvre les défauts de fabrication et une utilisation normale par un consommateur,
mais NE couvre PAS les pannes ou les dommages causés par un abus, un accident, une
altération, un usage inapproprié, la négligence, une usure anormale, un entretien inadéquat,
une utilisation commerciale ou déraisonnable, une surtension, une mauvaise manipulation, un
accident, une catastrophe naturelle ou une tentative de réparation par un agent de service non
autorisé. Les dommages cosmétiques ainsi que les dommages aux cordons d'alimentation et
aux antennes ne sont également pas couverts.
Si ce produit ne fonctionne pas de manière satisfaisante, il est préférable de d’abord communiquer
avec notre équipe d’assistance technique pour obtenir du soutien afin de s’assurer qu’il est
utilisé correctement.
Veuillez contacter le revendeur auprès duquel l’appareil a été acheté s’il est déterminé qu’il n’est
effectivement plus opérationnel. Dans de nombreux cas, votre détaillant sera en mesure de
vous fournir un appareil de remplacement sans frais dans le cadre de sa politique de retour. Si
la période de retour au détail est expirée, veuillez communiquer directement avec Crosley Radio
pour participer au programme de protection d’un an.
Vous aurez besoin de contacter nos bureaux du lundi au vendredi de 8 h à 17 h HNE pour
obtenir un numéro AR (autorisation de retour) Vous serez chargé d’envoyer l’appareil (à vos
frais) à nos bureaux dans son emballage original (ou un substitut raisonnable pour éviter tout
dommage). Vous devrez marquer clairement votre numéro AR sur l’emballage extérieur et inclure
le reçu de vente original (ou une copie) indiquant la date d’achat, le montant payé et le lieu
d’achat. Vous aurez aussi besoin d’inclure votre nom complet, votre adresse de livraison et votre
numéro de téléphone de jour. Vous recevrez comme instruction d’inclure un chèque ou un
mandat-poste pour couvrir les frais d’expédition de retour et de manutention applicables. Un
conseiller Crosley confirmera les frais d’expédition liés à la taille et au poids de votre produit.
Les produits retournés ne seront pas expédiés à des boîtes postales. Crosley Radio ne sera
pas responsable des retards ou des réclamations non traitées résultant de la défaillance de la
part d’un acheteur de fournir l’ensemble ou une partie des informations nécessaires.
Il n’existe aucune garantie expresse autre que celles citées ci-dessus.
La preuve d’achat du consommateur est la seule preuve du droit à la garantie.
Cette garantie donne à l’acheteur des droits légaux spécifiques en plus de droits qui peuvent
varier d’un État à l’autre.
Conformément à la loi « Moss-Magnuson Warranty Act » du 10 juillet 1975, il s’agit de ce que
l’on appelle une « garantie limitée », ce qui ne compromet en rien les normes élevées en matière
de qualité de la fabrication de Crosley Radio.
GARANTIE LIMITÉE DU FABRICANT
Soutien technique et questions sur le produit
APPELEZ SANS FRAIS : 1-888-CROSLEY
(1-888-276-7539)
Programme de garantie d’un (1) an de Crosley
APPELEZ SANS FRAIS : 1-800-926-7801
25
Page 16

24
Connecter les Équipements Auxiliaires
Guide pour résoudre les problèmes
Il n’y a pas d’alimentation
1 Vérifiez que l’appareil est branché correctement.
2 Vérifiez que le bouton VOLUME –
MARCHE/ARRÊT est en position MARCHE.
Il n’y a pas de son
1 Vérifiez le niveau du volume en tourant le bouton
de VOLUME.
Le Tourne-disque ne marche pas
1 Vérifiez que le SÉLECTEUR DE FONCTION
est réglé en position mode tourne-disque
[phono].
2 Faites déplacer le bras de lecture légèrement
vers le côté droit jusqu’à ce que vous entendiez
un clic pour activer la platine.
3 Vérifiez que la protection a été enlevée de la
tête de lecture.
4 Vérifier que le lecteur de cassette n’est pas en
train de jouer.
Le Lecteur CD ne marche pas
1 Vérifiez que le CD est mis correctement (côté
étiquette vers le haut).
2 Vérifiez que la surface du CD est propre.
3 Vérifiez que le SÉLECTEUR DE FONCTION
est réglé sur CD.
4 Vérifiez que le CD n’est pas vierge.
Généralités
ENTRÉE LIGNE
1 Vous pouvez connecter des composants
externes à votre appareil en utilisant l'entrée
ligne.
2 Branchez le câ'ble auxiliaire dans la prise
d'ENTRÉE LIGNE située à l'arrière du
tourne-disque.
3 Branchez l'autre extrémité du câble ligne dans
la prise de sortie du composant externe
souhaité.
4 Vérifiez le niveau du volume de votre composant
externe.
5 Voir le manuel de l'utilisateur pour la bonne.
FRANÇAIS
FRANÇAIS
AVERTISSEMENT :
Pour éviter des risques d’incendie ou de choc électrique, n’exposez pas cet appareil à la pluie
ni à l’humidité.
ATTENTION !
Toute utilisation des contrôles ou des réglages ou des performances des procédures autres
que ceux spécifiés peuvent résulter dans l’exposition hasardeuse aux rayonnements.
POUR RÉDUIRE LES RISQUES DE CHOC ÉLECTRIQUE, N’ENLEVEZ PAS LE COUVERCLE (OU
LE DOS). L’INTÉRIEUR NE CONTIENT AUCUN COMPOSANT À RÉPARER PAR L’UTILISATEUR.
CONFIEZ VOTRE APPAREIL SEULEMENT AU PERSONNEL DE SERVICE QUALIFIÉ.
• Marking plate was located on bottom enclosure
Le symbole de l’éclair avec la pointe de flèche à l’intérieur d’un triangle
équilatéral a pour but d’alerter l’utilisateur de la présence de «voltage
dangereux» non isolé à l’intérieur du coffret du produit qui est suffisamment
grave pour causer un risque du choc électrique aux personnes.
Le point d’exclamation à l’intérieur d’un triangle équilatéral a pour but d’alerter
l’utilisateur de la présence d’instructions importantes sur l’opération et
l’entretien dans le manuel de l’utilisateur livré avec l’appareil.
ATTENTION !
S’applique seulement aux appareils avec CD
RAYONNEMENT LASER INVISIBLE SI OUVERT ET VERROUILLAGE DE SECURITÉ
DÉJOUÉ. ÉVITEZ TOUTE EXPOSITION DIRECTE AU FAISCEAU LASER
ATTENTION !
RISQUES DE CHOC ÉLECTRIQUE
NE PAS OUVRIR
ATTENTION !
Spécifications techniques
Gammes des Fréquences : AM (PO) 525 - 1710 KHz
: FM (GO) 87,5 – 108,5 MHz
Source d’alimentation : CA 120V ~ 60Hz
Consommation : 18W
Antennes : Antenne FM (GO) externe
: Antenne AM (PO) Incorporée – Barre ferrite
Vitesses : 33 1/3, 45, 78 Tours
Haut-parleur : 4 pouces Type dynamique x 2
Tête de lecture de rechange : NP1
*LE FABRICANT RÉSERVE LE DROIT DE CHANGER LA CONCEPTION ET
LES SPÉCIFICATIONS SANS PRÉAVIS.
15
Page 17

16
À propos de ce manuel
Bienvenue Table des matières
FRANÇAIS
Merci de votre achat de Crosley Rochester
(CR66D). Avant de mettre votre appareil en marche,
veuillez bien lire ce manuel complètement et gardezle en lieu sûr pour toute utilisation ultérieure.
Les instructions dans ce manuel décrivent les
fonctions de contrôle du modèle CR66D.
Comment commencer
Emplacement des contrôles............ 17,18
Déballage........................................ 19
Source d’alimentation..................... 19
Opération de Base
Opération du Tourne-disque…….... 20
Accessoire: Adaptateur 45 tours ... 20
Opération du Lecteur Cassettes..... 21
Opération de la Radio.....………..... 21
Opération Lecteur de CD
Jouer un CD..........................….......22,23
Lecture programmée......................... 23
Utilisation de votre Bluetooth......... 23
Connexion des Équipements
Annèxes
ENTRÉE LIGNE .............................. 24
Généralités
Guide pour résoudre les problèmes... 24
Garantie................……............…….... 25
FRANÇAIS
Répéter la Sélection
Operación del Lector CD
1 Pour répéter une seule piste, sélectionnez la
piste que voulez répéter, puis appuyez sur la
touche JOUER pour commencer la piste.
Appuyez sur la touche RÉPÉTER une fois pour
répeter cette piste. L’INDICATEUR RÉPÉTER
va clignoter.
2 Pour répéter toutes les pistes, appuyez sur la
touche JOUER pour commencer le CD.
Ensuite, appuyez sur la touche RÉPÉTER deux
fois pour répeter toutes les pistes.
Quand le CD finit de jouer, il recommencera à
jouer de nouveau du commencement.
L’INDICATEUR RÉPÉTER restera allumé.
3 Pour annuler la fonction répéter, appuyez sur
la touche RÉPÉTER jusqu’à ce que
l’INDICATEUR RÉPÉTER s’éteigne.
Lecture programm
ée
1 Vérifier que le CD est arrêté.
2 Appuyez sur la touche PROGRAMME.
L’écran va aficher "01" et l’INDICATEUR
PROGRAMME va clignoter.
3 Appuyez sur la touche RECHERCHER EN
AVAN T ou la touche RECHERCHER
EN ARRIÈRE pour sélectionner la piste
souhaitée.
4 Appuyez sur la touche PROGRAMME une
deuxième fois pour mettre le numéro de la
piste sélectionnée en mémoire.
5 Répétez les étapes 3 et 4 ci-dessus pour
programmer d’autres pistes en mémoire.
6 Appuyez sur la touche JOUER pour
commencer la lecture programmée.
L’INDICATEUR PROGRAMME sera allumé.
Utilisation de Bluetooth
Bluetooth permet de connecter un appareil (p. ex.,
un téléphone intelligent) et l’unité, permettant à
l’utilisateur de lire et de contrôler les pistes
directement depuis son appareil Bluetooth.
L’utilisateur doit disposer d’un appareil compatible
Bluetooth (disposant de capacités de lecture
multimédia). Les téléphones intelligents Android
ou Apple iPhoneMD par exemple, sont compatibles
Bluetooth. L’utilisateur doit également s’assurer
de charger des fichiers audio compatibles sur son
appareil afin de pouvoir les lire sur l’unité. Une fois
ces deux points confirmés, l’utilisateur est prêt à
connecter son appareil à l’unité.
1 Allumez l’unité en tournant le BOUTON
ROTATIF ON/OFF–VOLUME situé sur le
panneau avant en position ON.
2 Tournez le SÉLECTEUR DE FONCTION au
mode (Bluetooth).
3 Le voyant à affichage DEL clignotera pour
indiquer qu’il recherche un appareil Bluetooth
à proximité auquel se connecter.
4 Sur votre appareil Bluetooth, recherchez des
appareils à proximité. Lorsque votre appareil
trouve CR66D, connectez-vous. Aucun code
PIN ne devrait être nécessaire.
5 Lorsque l’unité sera connectée à votre appareil
Bluetooth, votre appareil confirmera la
connexion et le voyant Bluetooth de l’unité
cessera de clignoter et sera allumé en
permanence.
MD
7 Pour effacer la séquence programmée, appuyez
sur la touche STOP deux fois ou jusqu’à ce que
l’INDICATEUR PROGRAMME est éteint. Les
pistes programmées seront effacées aussi
quand la PORTE TIROIR CD est ouverte.
NB: Un maximum de 20 pistes peuvent être
programmées en mémoire pour jouer en
n’importe quelle séquence..
23
Page 18

22
Jouer un CD
Rechercher en Avant et en Arri
ère
Rechercher en Avant et en Arri
ère
pendant la Lecture
Opération du Lecteur CD
1 Réglez le SÉLECTEUR DE FONCTION au mode
CD.
2 Appuyez sur la touche OUVRIR/FERMER pour
ouvrir le tiroir CD. Placez un CD dans le logement
du plateau avec le côté étiquette vers le haut.
3 Appuyez sur la touche OUVRIR/FERMER une
deuxième fois pour fermer le tiroir CD. L’écran
va afficher “__ __ ” pendant quelques secondes,
puis il va afficher le nombre total des pistes. Il
affichera « 00 » quand il n’y a pas de disque
CD dans le tiroir.
4 Appuyez sur la touche JOUER pour commencer
la lecture. L’INDICATEUR JOUER va s’allumer.
5 Réglez le BOUTON VOLUME MARCHE/ARRÊT
au niveau du volume souhaité.
6 Pour faire pauser la musique, appuyez sur la
touche JOUER/PAUSER. L’INDICATEUR
JOUER clignotera. Appuyez sur la touche
JOUER/PAUSER une deuxième fois pour
recommencer la musique.
7 Pour arrêter la lecture, appuyez sur la touche
ARRÊT. L’INDICATEUR JOUER s’éteindra.
1 Appuyez sur la touche RECHERCHER EN
AVANT ou la touche RECHERCHER EN
ARRIÈRE pour sélectionner une piste.
2 Appuyez sur la touche JOUER pour
commencer à jouer la piste sélectionnée.
Lecture
1 Appuyez sur et maintenez la touche
RECHERCHER EN AVANT ou la touche
RECHERCHER EN ARRIÈRE pour naviguer
en avant ou en arrière dans la piste
sélectionnee.
2 Lâchez la touche à l’endroit souhaité et la lecture
recommencera automatiquement.
FRANÇAIS
FRANÇAIS
Emplacement des Commandes
Commandes sur l’Appareil
HAUT-PARLEUR
SÉLECTEUR DE FONCTION
SÉLECTEUR DE STATIONS
INDICATEUR DE STATIONS BOUTON VOLUME –
VOYANT BLUETOOTH
LIGNE
AM FM PROG. REPEAT B.SKIP F.SKIP STOP PLAY
LINE IN
MARCHE/ARRÊT
JACK CASQU
VOLUME
ON
OFF
OPEN/
CLOSE
MAX.
SÉLECTEUR DE MODULATION
INDICATEUR DE PROGRAMME
TOUCHE PROGRAMME
INDICATEUR RÉPÉTER
TOUCHE RÉPÉTER
AFFICHAGE LED
TOUCHE RECHERCHER
EN AVANT
TOUCHE RECHERCHER
EN ARRIÈRE
TOUCHE ARRÊT
17
TOUCHE OUVRIR/FERMER
PORTE TIROIR CD
TOUCHE JOUER/PAUSER
INDICATEUR JOUER
Page 19

18
Emplacement des Commandes
Commandes sur l’Appareil
FRANÇAIS
TOUCHE ÉJECTER CASSETTE /
AVANCE RAPIDE
PORTE CASSETTE
ANTENNE EXTERNE
CORDON D’ALIMENTATION CA
BRAS DE LECTURE
PLATINE ADAPTATEUR POUR DISQUES 45 TOURS
RELÈVE - BRAS DE LECTURE
SÉLECTEUR DE VITESSE
(33
1
/
3
, 45, 78 TOURS)
REPOSE - BRAS DE LECTURE
CLIP DE RETENUE BRAS DE LECTURE
AXE
COMMUTATEUR DE COMMANDE
À ARRÊT AUTOMATIQUE
FRANÇAIS
Opération du Lecteur de Cassette et de la Radio
Jouer une Cassette
1 Réglez le SÉLECTEUR DE FONCTION au
mode CASSETTE.
2 Introduisez une bande cassette pre-enregistrée
dans la porte de cassette. La bande va se glisser
dans le lecteur de cassette et commencera à
jouer.
3 Réglez le BOUTON VOLUME MARCHE/ARRÊT
au niveau du volume souhaité.
4 Pour avancer la bande rapidement, appuyez
sur la touche ÉJECTER CASSETTE / AVANCE
RAPIDE à mi-chemin. Appuyez sur cette touche
une deuxième fois pour arrêter l’avance rapide
et recommencer l’opération de lecture.
5 Pour arrêter la musique et éjecter la cassette,
appuyez sur la touche ÉJECTER CASSETTE
/ AVANCE RAPIDE à fond.
6 Lorsqu’une face de la cassette finit de jouer, la
bande s’arrêtera automatiquement.
NB: Il faut enlever la cassette du lecteur quand on
ne l’écoute pas ou quand elle arrête de jouer.
Opération de la Radio
1 Réglez le SÉLECTEUR DE FONCTION au
mode Tuner
2 Réglez le SÉLECTEUR MODULATION pour
sélectionner la bande souhaitée (AM/FM).
3 Sélectionnez la station de radio souhaitée en
tournant le SÉLECTEUR DE STATIONS.
4 Réglez le BOUTON VOLUME -
MARCHE/ARRÊT au niveau du volume
souhaité.
Antenne
Antenne. Pour la réception FM, l’appareil est équipé
d’une ANTENNE FM EN FIL. Orientez le fil jusqu’à
obtenir une réception nette sans parasites. Pour la
réception AM, l’appareil est équipé d’une antenne
ferrite directionnelle incorporée. Orientez l’appareil
pour trouver la position où on reçoit la meilleure
réception. Ne branchez pas l’ANTENNE FM
EXTERNE sur une antenne à l’extérieur.
21
Page 20

20
Opération de Base
Opération du Tourne-Disque
Mettez l’appareil sous tension en tournant le
SÉLECTEUR DE VOLUME - MARCHE/ARRÊT
situé au panneau de devant en position MARCHE.
1 Réglez le SÉLECTEUR DE FONCTION au mode
Tourne-disque [Phono].
2 Mettez le SÉLECTEUR DE VITESSE à la
vitesse souhaitée (33-1/3, 45 ou 78 tours).
Placez votre disque sur la platine.
3 Servez-vous du RELÈVE – BRAS DE LECTURE
pour lèver le bras de lecture de son repose.
4 Faites déplacer le bras de lecture par-dessus
le disque au point où vous voulez faire démarrer
le disque. Réglez le BOUTON DE VOLUME
MARCHE/ARRÊT au volume souhaité.
5 Faites glisser le COMMUTATEUR DE
COMMANDE À ARRÊT AUTOMATIQUE pour
choisir la fonction d’arrêt automatique.
6 Le BRAS DE LECTURE s’arrête
automatiquement à la fin du disque. Vous devez
remettre le BRAS DE LECTURE sur le
SUPPORT DU BRAS DE LECTURE
manuellement.
Accessoire:
Adaptateur pour
disques 45 tours
Cet adaptateur vous permet de jouer des disques
45 tours.
1 Mettez l’adaptateur sur l’axe.
2 Placez votre disque 45 tours doucement sur la
platine.
3 Suivez les instructions dans la section opération
du tourne-disque pour jouer votre disque.
FRANÇAIS
FRANÇAIS
Comment Commencer
Déballage
1 Enlevez les matériaux d’emballage de l’appareil.
NB: Gardez tous les matériaux d’emballage.
2 Enlevez la housse en plastique de l’appareil.
3 Enlevez la cache en plastique de la fiche du
cordon d’alimentation..
4 Desserez l’attache du cordon d’alimentation et
desserez l’antenne en fil au dos de l’appareil.
5 Ouvrez le couvercle et enlever l’emballage de
transport en styrofoam du tourne-disque.
6 Enlevez l’attache noire du dessous du bras de
lecture.
7 Enlevez la bande et la protection blanche de la
tête de lecture en la tirant vers le devant de
l’appareil.
8 Lâchez le clip de retenue du bras de lecture en
le poussant légèrement à droite. Ceci débloque
le bras de lecture de son repose-bras. Rebloquez
le clip de retenue lors du transport de l’appareil
à un autre endroit.
Source d’alimentation
1 Déroulez le CORDON D’ALIMENTATION CA
(28) du dos de l’appareil.
2 Branchez le cordon d’alimentation CA sur une
prise appropriée.
3 Cet appareil est équipé d’une fiche polarisée
de cordon d’alimentation en courant alternatif
(une fiche dont une broche est plus large
que l’autre). Cette fiche ne peut être
branchée sur la prise murale que dans un
seul sens. Ceci est un dispositif de sûreté.
Au cas où vous ne réussiriez pas à brancher
la fiche complètement sur la prise, faites
pivoter la fiche d’un demi-tour et essayez de
nouveau. Si la fiche ne rentre toujours pas
dans la prise, contactez votre électricien afin
de remplacer votre prise désuète. Ne
cherchez pas à déjouer le dispositif de sûreté
de la fiche polarisée.
Op
ération du Jack Casque
Fiche Polarisée CA
9 Desserrez le fil d’antenne FM et laissez-le
pendre en ligne droite pour la meilleure
réception FM. Au cas où vous auriez des
problèmes à régler sur une station FM,
changez l’antenne externe FM pour
améliorer la réception. Ne branchez pas
l’antenne FM sur une antenne dehors.
1 Branchez le casque sur le Jack Casque
2 Réglez le volume au niveau souhaité.
NB: Lorsque l’on se sert du Jack Casque, le
son sera coupé aux haut-parleurs.
NB: Le casque n’est pas inclus.
Jack Casque
19
 Loading...