

Specifications:
Wingspan: 900mm (35.4”)
Overall Length: 810mm (31.9”)
Includes:
• Painted fibreglass fuselage
• Factory built and covered balsa wings and tail
• Assembled ducted fan unit and motor
• Pushrods and linkages
• Clear hinge tape
• Bungee launching system
!
IMPORTANT!
NOT A TOY!
Radio controlled model!
This high performance model
must be assembled and operated
according to the instructions.
May cause serious injury to persons or
property if not used responsibly.
Unsuitable for children under 14 years.
http://www.jperkinsdistribution.co.uk
http://www.modelengines.com.au
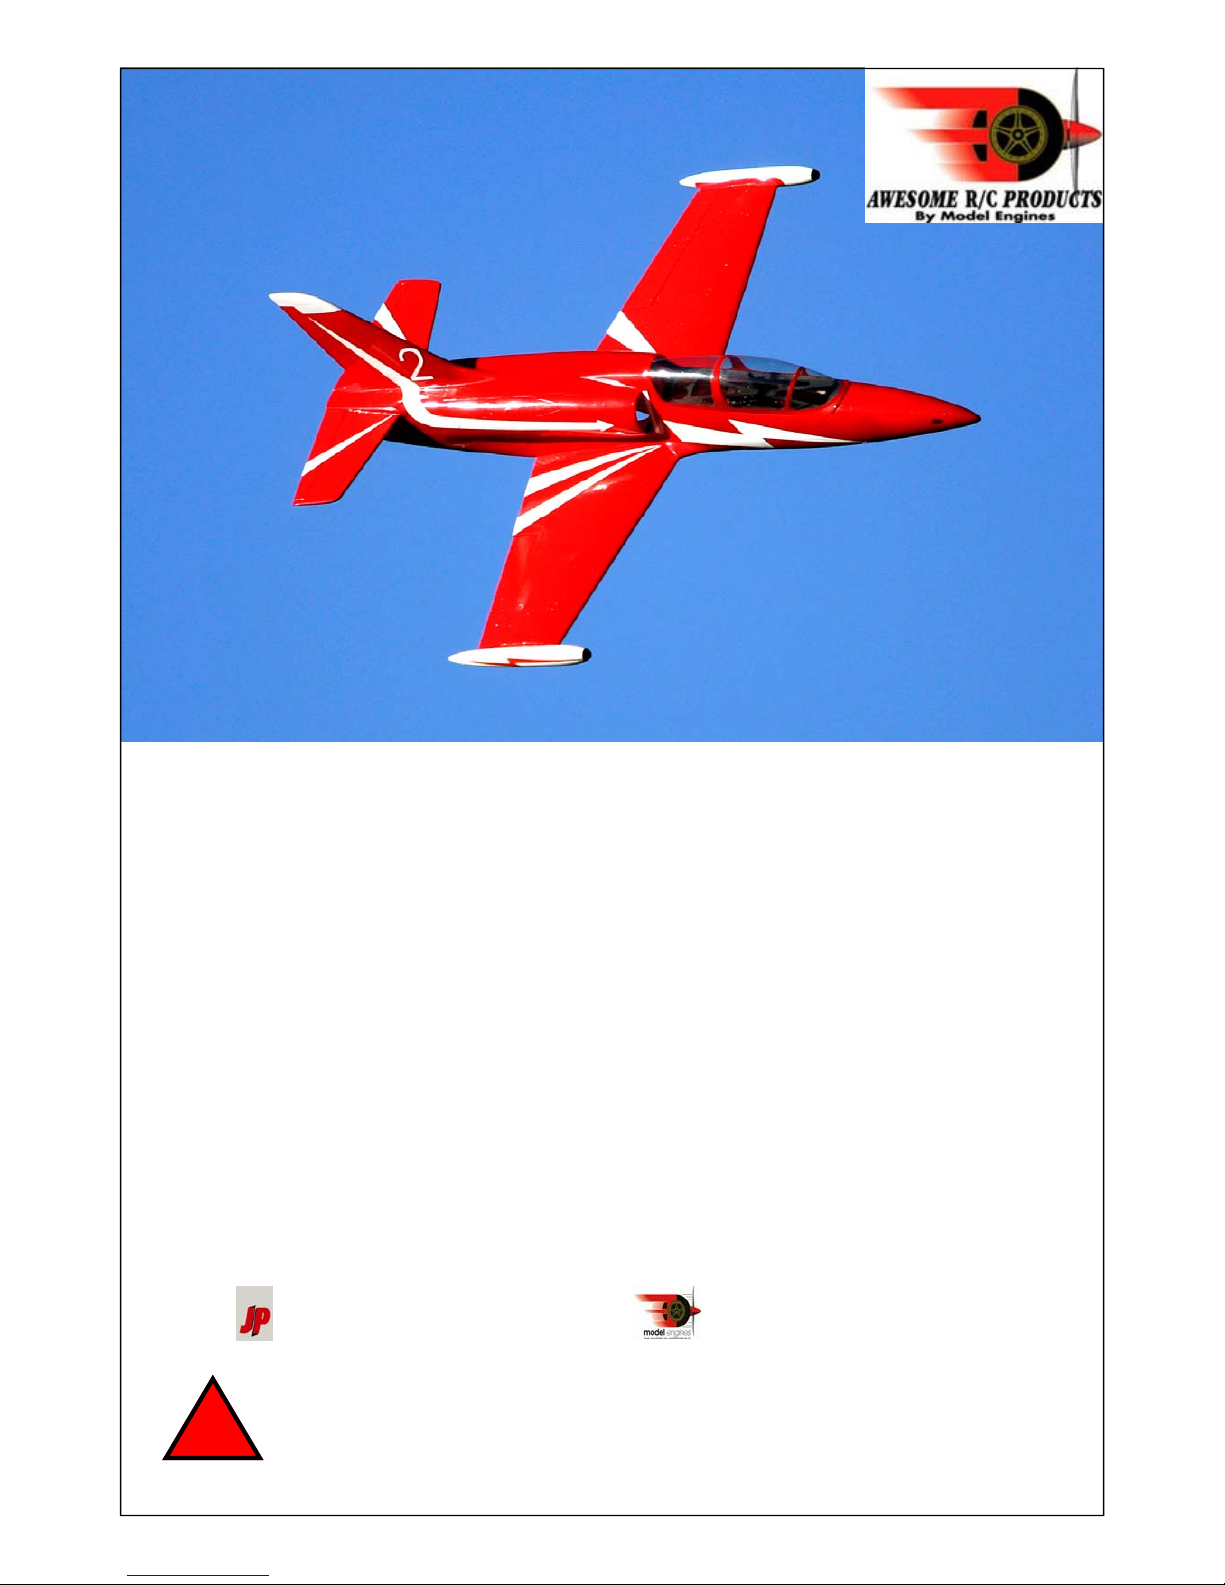
L-39
EDF
Electric Ducted Fan
Instruction Manual

Items Required:
Minimum - Four channel radio control system
3 x micro servos
1 x brushless speed controller (35A minimum) for 3 cell operation. 50A min. for
4 cell operation.
2 x 30cm (12”) servo extension lead
1 x short ‘Y’ lead
1 x 11.1V or 14.8V 2100 to 2500mah high discharge Li-Po battery pack
Masking tape
Double sided tape
Medium CA adhesive
Silicon adhesive
Velcro and/or cable ties
Various modelling tools e.g knife, pliers, screwdrivers, drills etc.
!
Warnings!
• Radio Control Models are not toys and serious injury to persons or damage
to property can result if not used in a responsible manner
• It is not recommended for children under 14 years and should only be flown
by experienced radio control pilots
• It is recommended that this model only be flown at dedicated radio control
flying sites
• Read all instructions carefully prior to assembling and before flying this
model. Seek advice should any information be unclear. You assume all risk
and responsibility when using this model
In the UK, please observe the principles of safety as outlined by the governing
body for model flying, the British Model Flying Association (BMFA).
www.bmfa.org
In Australia, please observe the guidelines for the safe operation of radio
control models as outlined by the Model Aircraf t Association of Australia (MAAA).
www.maaa.asn.au
GUARANTEE/WARRANTY
J.Perkins Distribution Ltd and Model Engines (Aust.) Pty. Ltd. Guarantee this product to be free from manufacturing and
assembly defects for a period of 90 days from the time of purchase. This does not affect your statuary rights. This warranty
is not valid for any damage or subsequent damage arising as a result of a crash, misuse, modification or for damage or
consequential damage arising as a result of failure to observe the procedures outlined in this manual. Operation of this
model is carried out entirely at the risk of the operator. Please note that, whilst every effort is made to ensure the accuracy
of instructions and material included with this product, mistakes can occur and neither J.Perkins Distribution Ltd/Model
Engines (Aust.) Pty. Ltd nor it’s distributors will be held liable for any loss or damage arising from the use of this model or
for any loss or damage arising from omissions or inaccuracies in the associated instructions or materials included with this
product.
We reserve the right to modify the design of this product, contents and manuals without prior notification.
© 2008 J.Perkins Distribution Ltd, Lenham, Kent, UK ME17 2DL. www.jperkinsdistribution.co.uk
Model Engines (Aust.) Pty. Ltd., Noble Park, Victoria 3174, Australia. www.modelengines.com.au
All rights reserved. E&OE
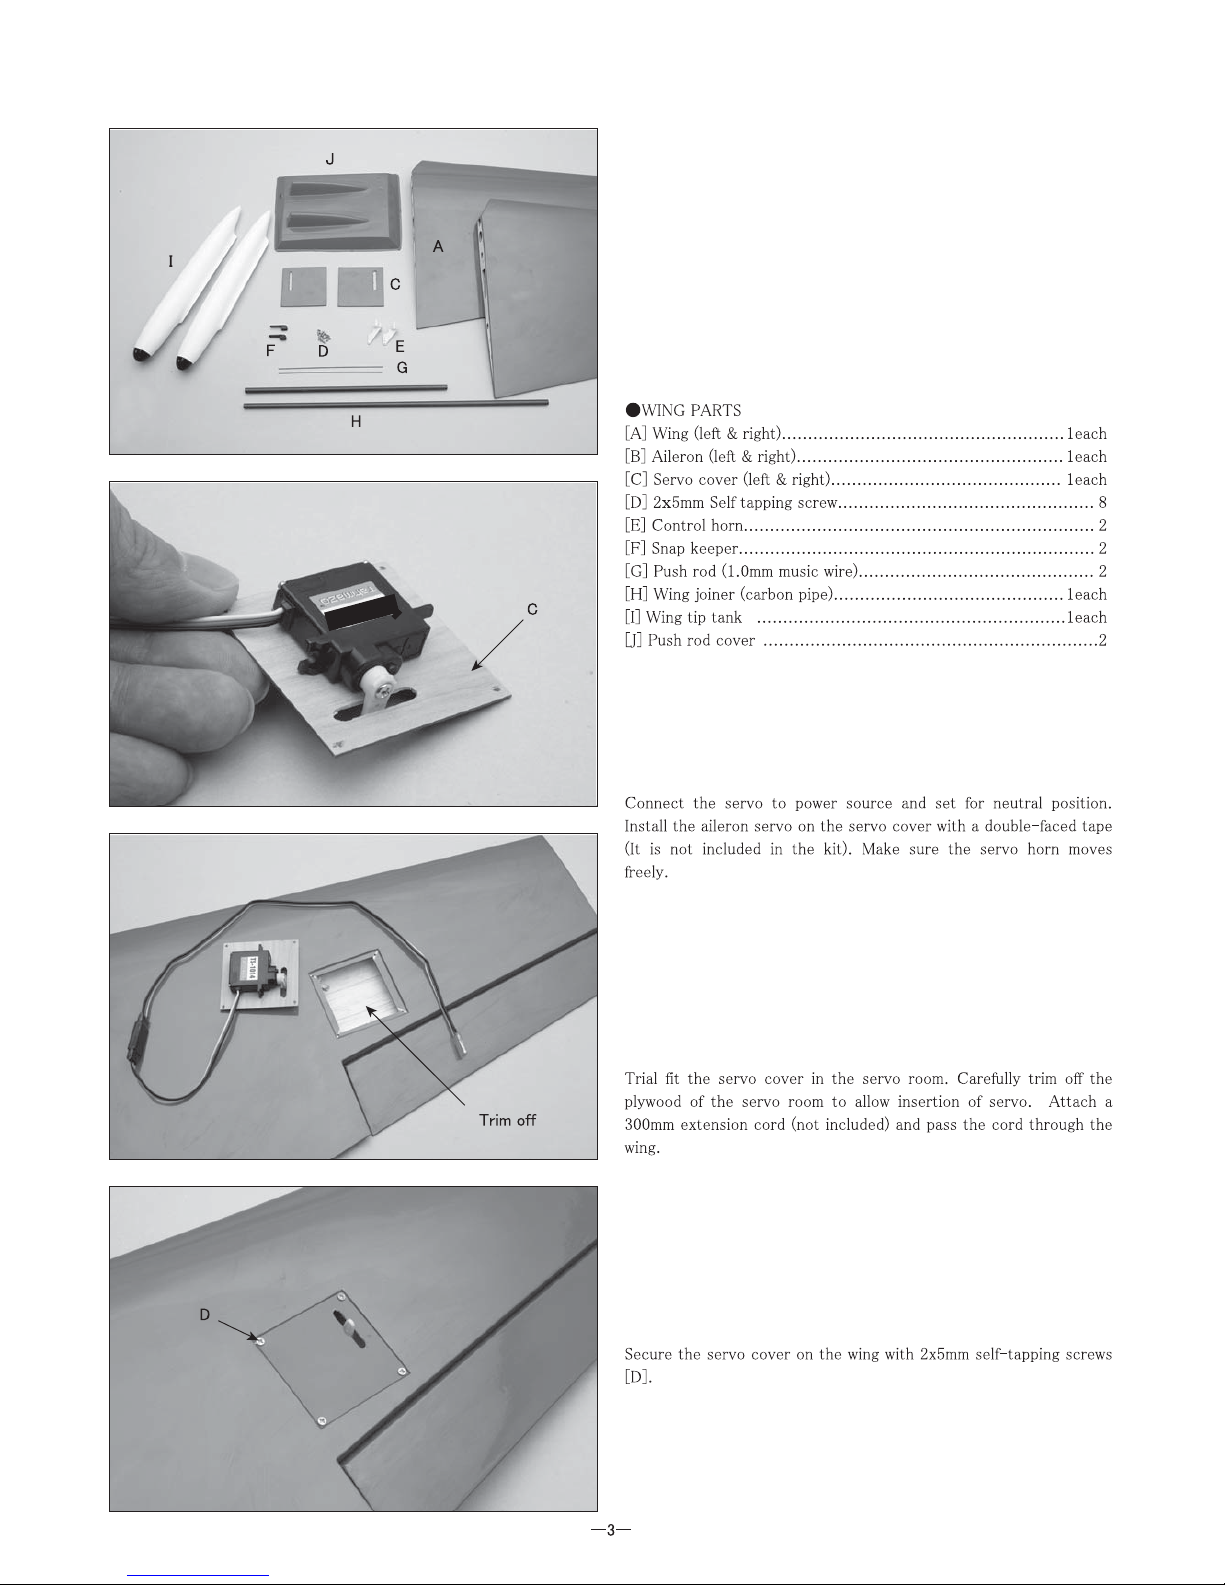
Wing Assembly.

Wing Assembly.
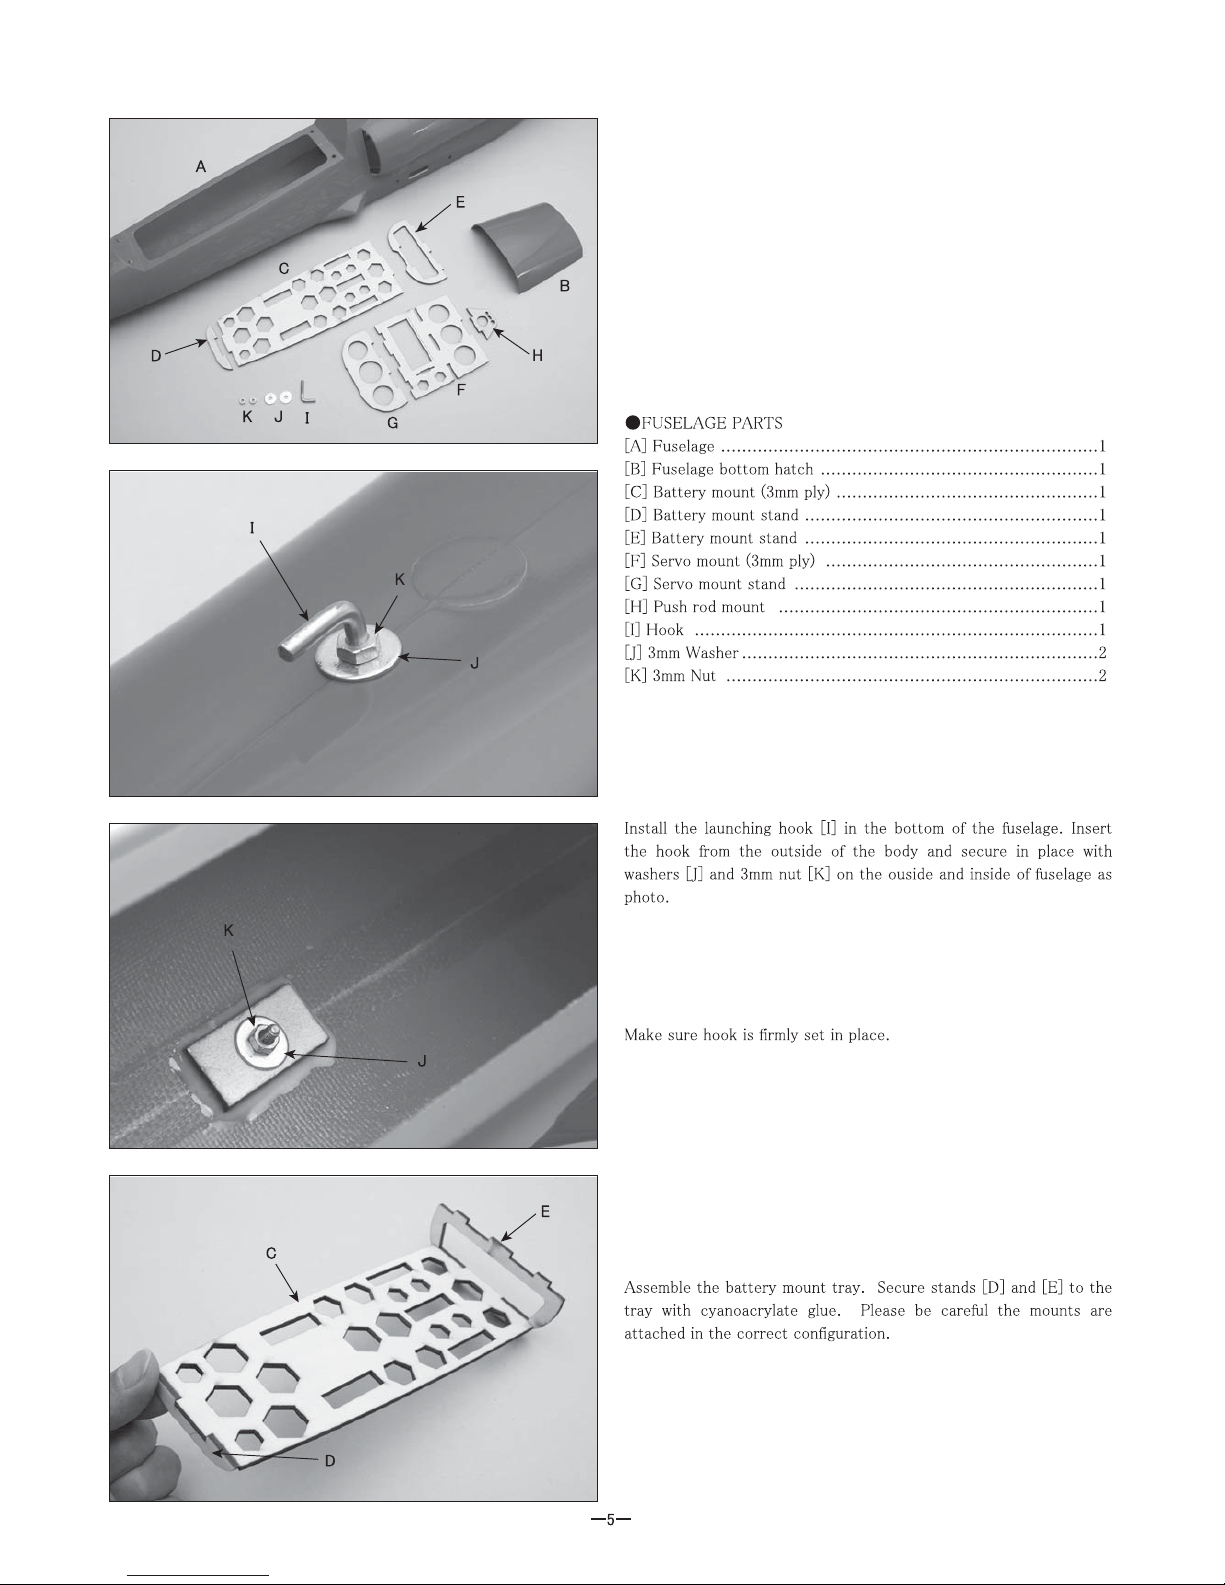
Fuselage Assembly.
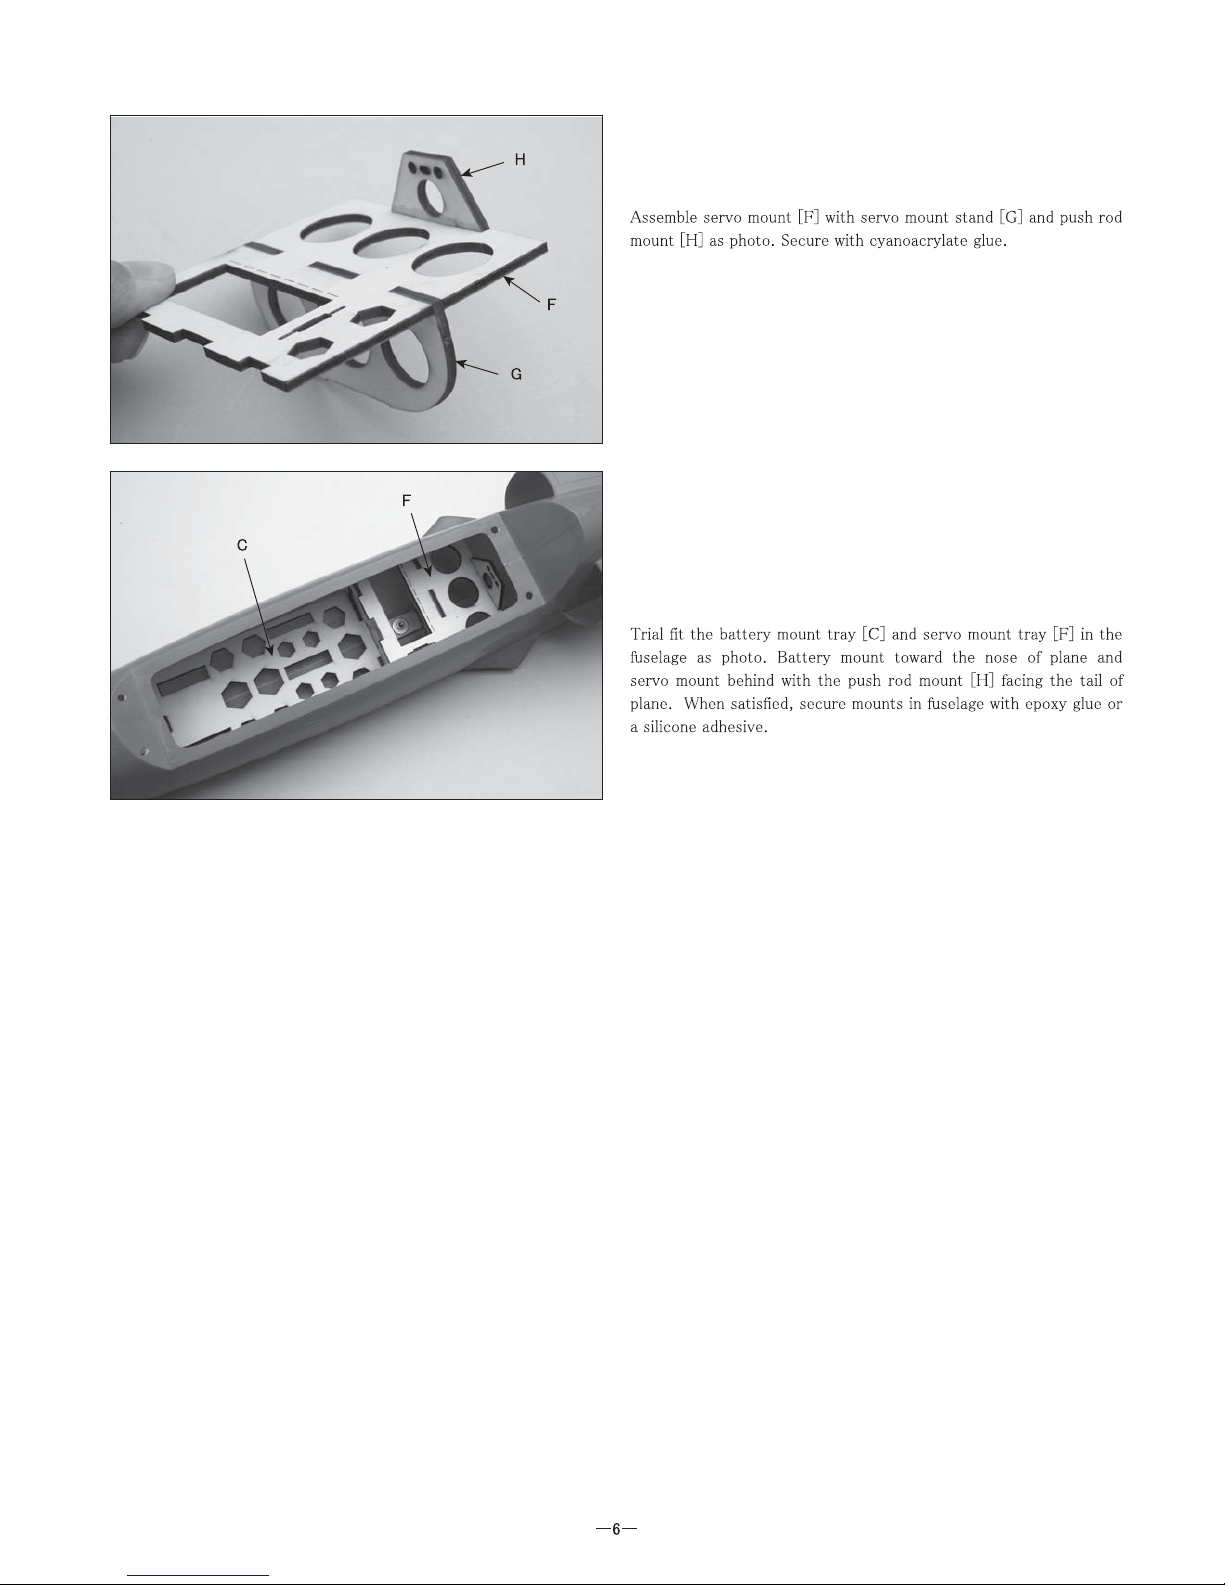
Fuselage Assembly.

Stabiliser Assembly.

Stabiliser Assembly.

Stabiliser Assembly.

Wing Assembly.

Elevator Linkage.
Trim off excess
Switch
Receiver

apply tape
shape edges
Canopy Assembly.

Canopy Assembly.

Control Throws.
Set the control throws as follows:
Elevator - 6mm up & down
Ailerons - 5mm up & down
Centre of Gravity (C.G).
C.G
The Centre of Gravity is indicated by a
small triangle on the fuselage side
approximately 65mm back from the
leading edge of the wing.
Balance the model with the battery pack
installed ready for flight.
Launching The Model
The bungee launching system consists of a
length of rubber tubing and a length of nylon
cord with a metal ring at each end.
Stake the rubber tubing end of the bungee
firmly into the ground. Unwind the bungee, but
do not apply any tension to the rubber cord at
this stage.
Hook the metal ring at the nylon cord end of
the bungee onto the launching hook on the
underside of the model.
Making sure that the model is headed directly
into the wind, walk back 12 paces, gently
stretching the rubber tubing. Have an
assistant hold the model as shown with the
nose pointing slightly upwards. Apply full
power and direct the assistant to release the
model.

BUNGEE LAUNCH SAFETY INFORMATION
IMPORTANT: PLEASE READ BOTH SIDES OF THIS SHEET BEFORE FLIGHT
This is a potentially dangerous tool, even when used correctly. The pilot assumes all responsibility for any harm or damage caused
from the use of this bungee and uses it at their own risk.
This bungee is not intended for use by beginners. Please seek help from an experienced pilot if at any time you are unsure.
When used correctly a bungee is an invaluable tool to launch models, it will minimise the risk of a slow launch which can cause
your model to stall or crash into the ground.
TYING THE BUNGEE CORD TO THE STAKE
We recommend that you use a Bowline knot to tie the Bungee to the stake. This knot forms a secure loop that will not jam and is easy
to tie and untie. You will also need to use this knot to tie the end of the bungee to the white extension cord using two bowline knots
(one on the end of the bungee cord and one on the end of the extension cord) and to secure the extension cord to the metal hoop.
HOW TO TIE A BOWLINE KNOT:
1. Form an eye in the cord with the free end of the cord running on top.
2. Run the free end up through the eye and make a loop above the eye around the standing end of the bungee cord.
3. Feed the loose end back down through the eye and hold in place. Pull the standing end of the cord to tighten down the knot.
WHERE TO TIE THE KNOTS:
1. Tie a bowline knot around the eye of the stake.
2. Tie a bowline knot in the other end of the bungee cord. Then tie another bowline knot at one end of the extension cord to secure the
extension cord to the bungee cord.
3. The last bowline knot is used to secure the extension cord to the metal loop which will hook onto the plane.
Warning: Always check the security of the knots before use.

BUNGEE LAUNCH SAFETY INFORMATION CONT...
IMPORTANT: PLEASE READ BOTH SIDES OF THIS SHEET BEFORE FLIGHT
ANCHORING THE BUNGEE STAKE
■ When choosing the position for the bungee stake, choose ground that is solid.
■ Do not choose ground that is soft, such as soft mud or sand where the bungee is likely to come loose under pressure during the
launch.
■ Ensure the stake is secured fully in the ground at an angle of about 45 degrees to the ground and opposite to the direction of launch,
see image below.
LAUNCHING THE MODEL
■ Please refer back to the model manual for instructions on how to launch.
WARNING: Once you have taken the slack out of the bungee cord stretch it no further than 12 paces (8
1
/4 metres). This is a rough
guide of distance and the bungee cord should not be stretched beyond it’s elasticity limit.
WARNING: Ensure there are no people or animals in front of the launch area.
WARNING: Check all control surfaces before launching.
VITAL SAFETY INFO
DANGER - If the bungee stake is not anchored securely it can fly out of the ground and can cause serious injury or damage to the
launcher or other people. Always test the stake security before launching.
DANGER - Cord can perish over time. Always check the condition of the bungee cord before each launch.
DANGER - Knots can become loose between launches. Always check the security of all knots before each launch.
DANGER - If the bungee cord is stretched over the limit stated the bungee stake could be put under too much stress and this could
cause it to fly out of the ground.
DANGER - If you have never used a bungee launch system before seek the advice of a modeller who has experience of this type of
system.
DANGER - Wear protective eyewear and clothing when using a bungee launch.
DANGER - Never launch your model near children or animals. Ensure there are no people or animals in front of the launch area.

 Loading...