

Moda Light Moda Mini Graze Interior, MODA MINI GRAZE INT COLOR 0-10V Installation Instructions Manual
INSTALLATION
1 1/2” (38 MM)1 1/2” (38 MM)
Must be installed by a qualified electrician in accordance with all national and local electrical and construction codes and
1
regulations by a person familiar with the construction and operation of the product and the hazards involved. Failure to comply
with the following installation instructions will void the warranty and may result in serious injury or possible death. Ensure power
is off before installation, verify electrical plan first and read all installation instructions prior to installation. With the constant
development of our products please check our website (www.modalight.com) for any possible changes to the installation of this
product.
Debe ser instalado por un electricista calificado de acuerdo con todos los códigos y reglamentos eléctricos y de construcción nacionales y locales, por una
persona familiarizada con la construcción y el funcionamiento del producto y los riesgos involucrados. El incumplimiento de las siguientes instrucciones de
instalación anulará la garantía y puede provocar lesiones graves o la muerte. Asegúrese de que la energía esté apagada antes de la instalación, verifique
primero el plan eléctrico y lea todas las instrucciones de instalación antes de instalar. Con el constante desarrollo de nuestros productos, visite nuestro website
(www.modalight.com) para todos posibles cambios en la instalación de este producto.
Doit être installé par un électricien qualifié conformément à tous les codes et réglementations électriques et de construction nationaux et locaux par une
personne connaissant bien la construction et le fonctionnement du produit et les risques encourus. Le non-respect des instructions d’installation suivantes
annulera la garantie et pourrait entraîner des blessures graves ou la mort éventuelle. Assurez-vous que l’alimentation est coupée avant l’installation, vérifiez
d’abord le plan électrique et lisez toutes les instructions d’installation avant l’installation. Avec le développement constant de nos produits s’il vous plaît consulter
notre site web (www.modalight.com) pour toutes les modifications possibles à l’installation de ce produit.
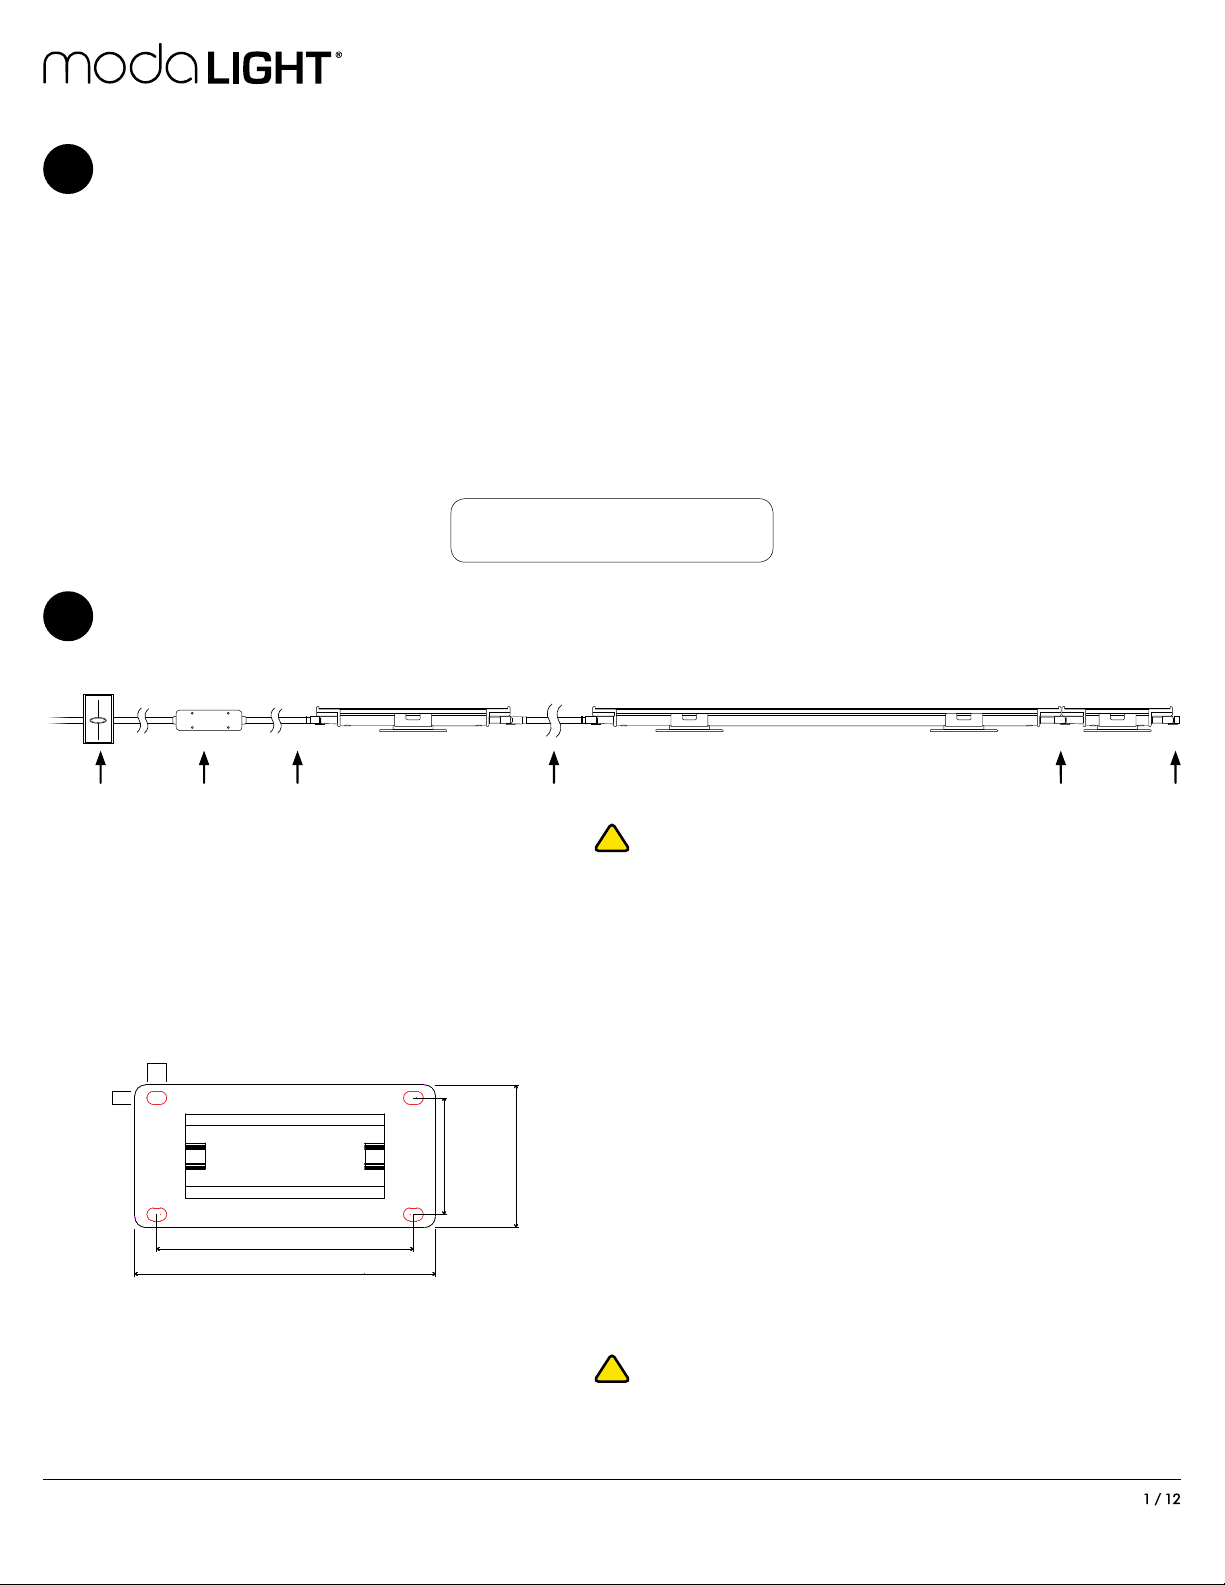
Verify electrical plan and ensure all hardware is present
2
Verificar plan electrico y verifique que todo el equipo esté presente
Vérifier le plan électrique et assurer que tout le matériel est présent
MODA MINI GRAZE® INTERIOR COLOR ELV
DRY/DAMP LOCATION INSTALL
INSTALACIÓN DE LUGARES SECOS/HÚMEDOS
INSTALLATION EMPLACEMENT SEC/HUMIDE
Dimmer
(Optional)
1/8”
(3.5mm)
Moda Bridge
(Optional)
7/32” (5.25mm)
Leader
Cable
Mounting Bracket
(Bottom View)
2 11/16” (68.25mm)
3 5/32” (80mm)
Jumper Cable Fixture to
!
Max Continuous Run: See section 15
Continuidad Máxima: Vea sección 15
Run continue Max: Voir la section 15
1 7/32”
(31mm)
1 1/2”
(38mm)
!
Mounting Bracket can be moved to the left or right of the fixture
El soporte se puede mover hacia la izquierda o hacia la derecha del accesorio
Le support de montage peut être déplacé vers la gauche ou la droite de l’appareil
Fixture
Terminator
Connection
Overall fixture length
with connectors:
6in - 6 27/32” (174.18mm)
1ft - 1’ 15/32” (317.10mm)
4ft - 4’ 1/2” (1.23m)
8ft - 8’ 1/2” (2.45m)
Due to continuous improvements and innovations, specifications may change without notice.
Please refer to our website for current technical data. These figures are provided as a guideline
only and may vary with differing power supplies and installations. All rights reserved. E&OE.
VDC 01/2/2019
955 White Drive Las Vegas, NV 89119 | T: 702 407 7775
F: 702 407 7773 | www.modalight.com | © 2019
1 / 12
INSTALLATION
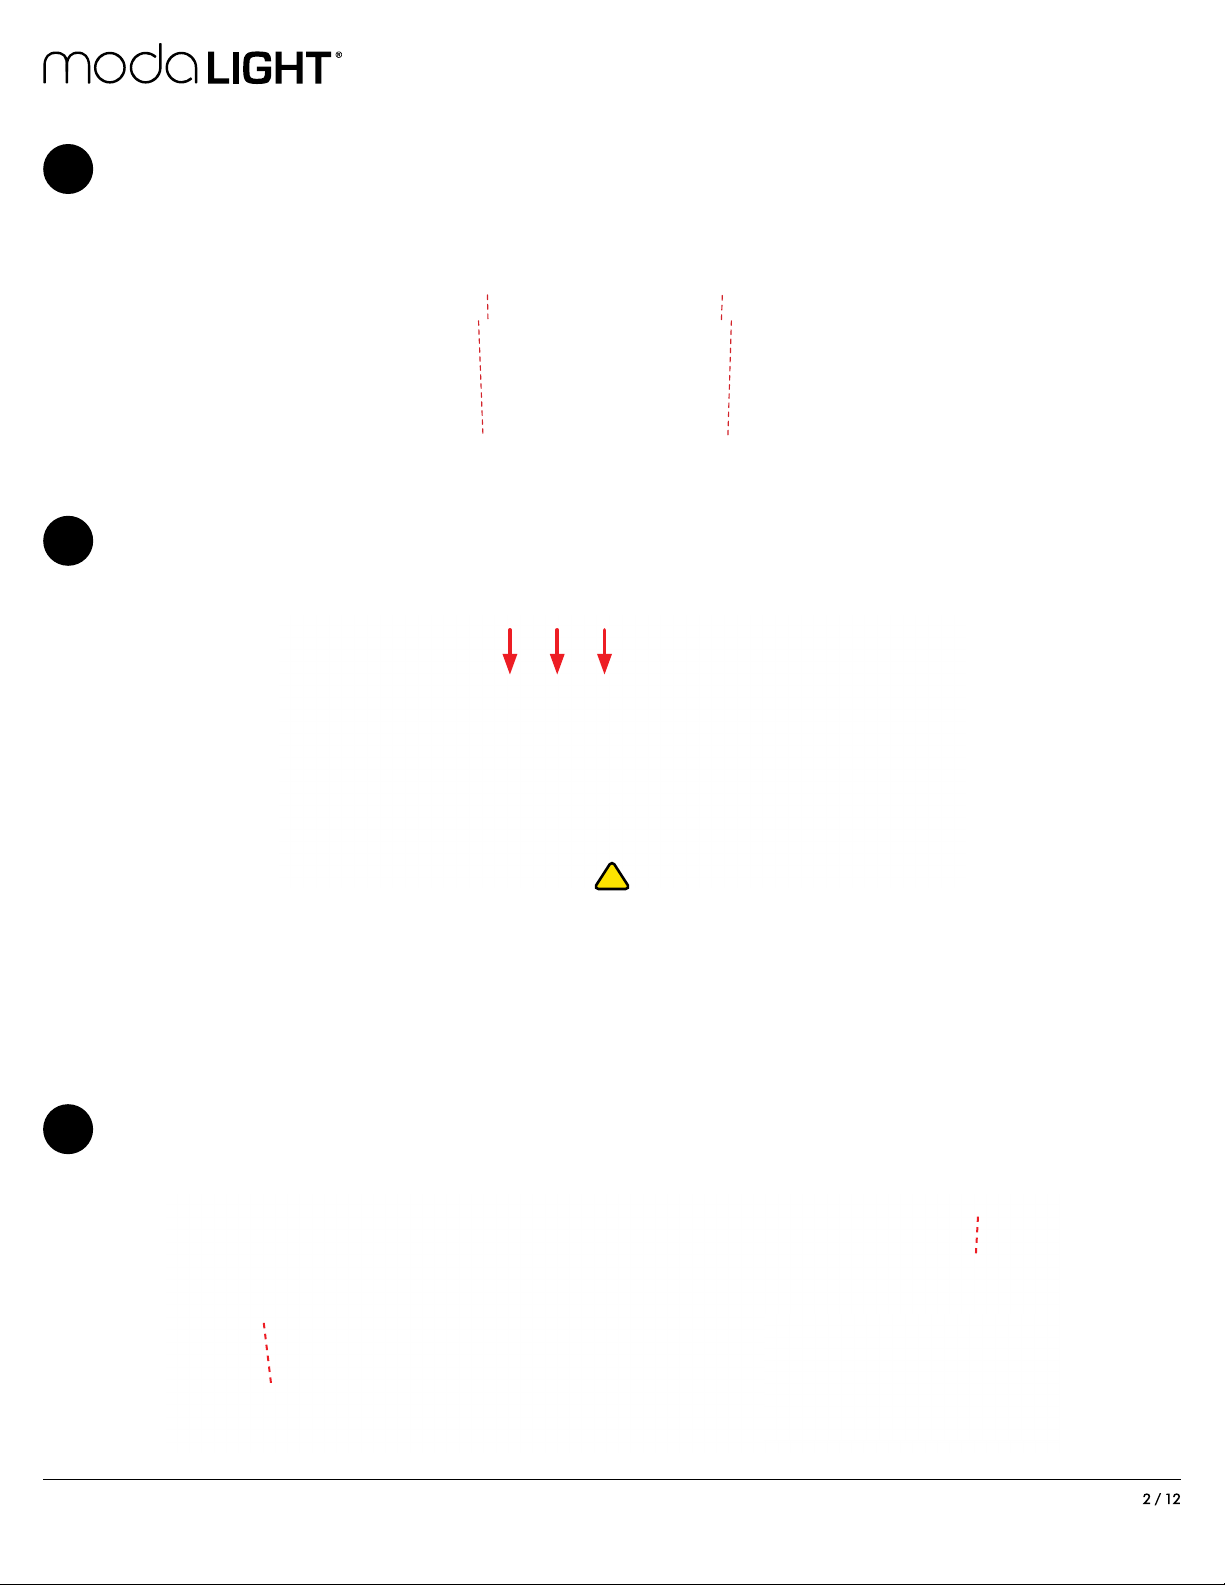
Mount to surface using the 4 screw holes on the bracket
3
Monte a superficie utilizando los 4 agujeros para tornillos en el soporte
Mont à la surface en utilisant les 4 trous de vis sur le support
Push down on bracket to rotate to desired angle, then release
4
Empuje hacia debajo sobre el soporte para rotar al ángulo deseado, y luego suelte
Appuyez sur le support pour le faire pivoter à l’angle souhaité, puis relâchez-le
MODA MINI GRAZE® INTERIOR COLOR ELV
!
Bracket is self locking, do not rotate like a conventional bracket. Place on a flat surface and push down
on bracket to release locking mechanism then release once desired position has been reached.
El soporte se autobloquea, no rote como un soporte convencional. Coloque en superficie plana y empuje hacia debajo sobre el soporte para
Support est auto-bloquante , ne tournent pas comme un support classique. Placer sur une surface plane et pousser vers le bas sur le support
liberar el mechanismo de bloqueo, luego suelte cuando aya alcanzado la posición deseada.
pour libérer le mécanisme de verrouillage puis relâcher une fois la position désirée est atteinte.
For a straight run of fixtures, use Moda Mini Graze Interior Mounting Track
5
Para un tramo recto de los accesorios , utilice la canal de montaje Moda Mini Graze Interior
Pour une course rectiligne de luminaires , utiliser Moda Mini Graze Interior piste de montage
170º Rotation
Due to continuous improvements and innovations, specifications may change without notice.
Please refer to our website for current technical data. These figures are provided as a guideline
only and may vary with differing power supplies and installations. All rights reserved. E&OE.
VDC 01/2/2019
955 White Drive Las Vegas, NV 89119 | T: 702 407 7775
F: 702 407 7773 | www.modalight.com | © 2019
2 / 12

INSTALLATION
Snap Moda Mini Graze Interior mounting track then slide to connect fixtures
6
Encaje Moda Mini Graze Interior en el canal de montaje y luego deslice para conectar accesorios
Accrochez Moda Mini Graze Interior dans la piste puis faites glisser pour connecter les appareils
Screw Moda Mini Graze Interior into the mounting track
7
Atornille Moda Mini Graze Interior al canal de montaje
Vissez Moda Mini Graze Interior dans la voie de montage
MODA MINI GRAZE® INTERIOR COLOR ELV
Minimum end to end spacing is 1/8” (3.5mm)
Espacio minimo de extremo a extremo es 1/8” (3.5mm)
L’espacement minimal entre les extrémités est 1/8” (3.5mm)
8
Use appropriate mounting screws suitable for each surface
Use tornillos de montaje adecuados para cada superficie
Utilisez des vis de montage appropriées pour chaque surface
Tight torque may damage bracket
Mucha torsión puede dañar el soporte
Un couple serré peut endommager le support
Wiring
Cablería
Cables
UL / cUL Non-dimming UL / cUL ELV Dimming
!
!
Ceiling mounted
Instalación en techos
Plafond monté
UL/cUL CE/CCC*
Live 100-277V Black Brown
Neutral White Blue
Ground Green Green/Yellow
*Not illustrated
LEADER CABLE100-277V AC LEADER CABLE100-277V AC
ELV DIMMER
Due to continuous improvements and innovations, specifications may change without notice.
Please refer to our website for current technical data. These figures are provided as a guideline
only and may vary with differing power supplies and installations. All rights reserved. E&OE.
VDC 01/2/2019
955 White Drive Las Vegas, NV 89119 | T: 702 407 7775
F: 702 407 7773 | www.modalight.com | © 2019
3 / 12

INSTALLATION
Wiring Moda Bridge
9
Cablería Moda Bridge
Cables Moda Bridge
0-10V
Dimmer
MODA MINI GRAZE® INTERIOR COLOR ELV
A B
A
100-
277V AC
Input
UL/cUL CE/CCC*
Live 100-277V Black Brown
Neutral White Blue
Ground Green Green/Yellow
0-10V / Data + Purple Black
0-10V / Data - Grey Grey
*Not illustrated
C
ELV Output
B
C
Input
0-10V Input
Output
UL/cUL CE/CCC*
Live 100-277V Black Brown
Neutral White Blue
Ground Green Green/Yellow
*Not illustrated
!
NOT SUITABLE FOR AN IP67 AND IP68
No es adecuado para instalación de IP67 y de IP68
Ne convient pas pour l’installation IP67 et IP68
Due to continuous improvements and innovations, specifications may change without notice.
Please refer to our website for current technical data. These figures are provided as a guideline
only and may vary with differing power supplies and installations. All rights reserved. E&OE.
INSTALLATION
IF MODA BRIDGE IS MOUNTED OUTSIDE
USE SUITABLE WET LOCATION WIRE NUTS
Si el MODA Bridge es montado en el exterior, utilize
sujetadores de cables a prueba de liquidos.
Si MODA BRIDGE est monté à l’extérieur, utiliser un
!
endroit humide approprié
!
MODA BRIDGE NEEDS TO BE MOUNTED AT
LEAST 3 FEET HIGH FROM THE GROUND
Moda Bridge debe de estar montado al menos a 3ft
del suelo
Moda Bridge doit être monté à au moins 3ft du sol
955 White Drive Las Vegas, NV 89119 | T: 702 407 7775
F: 702 407 7773 | www.modalight.com | © 2019
!
AVOID DIRECT SUNLIGHT
Evite la luz solar directa
Évitez la lumière directe du soleil
VDC 01/2/2019
4 / 12
 Loading...