

DEMINERALIZZATORE D’ACQUA
WATER DEMINERALIZER
DEMINERALISATEUR D’EAU
UMKEHROSMOSEANLAGE
DESMINERALIZADO
R DE AGUA
Manuale Operatore
User Manual
Manuel d’utilisation
Bedienerhandbuch
Manual Operador
®
®
Via Saliceto, 22 • 40012 Castel Maggiore (BO) Italy • www.mocom.it
cod. 97050402


ITALIANO
DEMINERALIZZATORE D’ACQUA
Manuale Operatore
WATER DEMINERALIZER
User Manual
DEMINERALISATEUR D’EAU
Manuel d’utilisation
UMKEHROSMOSEANLAGE
Bedienerhandbuch
DESMINERALIZADOR DE AGUA
Manual Operador
ENGLISHFRANÇAIS DEUTSCH ESPAÑOL


i
ENGLISH
WATER DEMINERALIZER
USER MANUAL
REVISIONS
The following table lists subsequent editions/revisions of the manual.
The “Description” field brief explains the subject of the latest revision.
Code Rev. Date Description
D#0MDAA1000X 0 09-2005 First issue
D#0MDAA1000X 1 10-2006 Modified resin filter assembly and maintenance procedures
D#0MDAA1000X 2 06-2007 Modified the external graphics
D#0MDAA1000X 3 05-2008 New hydraulic and electrical drawing
New installation and maintenance procedures
97050402 4 05-2011 Address and code updating on Mocom use and maintenance manuals
97050402 5 07-2011 Correcting the board setting indication
TABLE OF CONTENTS
INTRODUCTION ................................................................................................................................................................ 1
APPLICABLE EUROPEAN DIRECTIVES ............................................................................................................... 1
INTENDED USE ...................................................................................................................................................... 1
PURPOSE OF THE MANUAL ................................................................................................................................. 2
GENERAL DIRECTIONS ........................................................................................................................................ 2
PACKAGE CONTENT........................................................................................................................................................ 3
SIZE AND WEIGHT ................................................................................................................................................. 3
HANDLING THE PRODUCT ................................................................................................................................... 3
CONTENT DESCRIPTION ...................................................................................................................................... 3
PRODUCT INFORMATION ................................................................................................................................................ 4
INTRODUCTION ..................................................................................................................................................... 4
GENERAL FEATURES ........................................................................................................................................... 4
FRONT PANEL ....................................................................................................................................................... 5
REAR PANEL .......................................................................................................................................................... 5
FUNCTIONING ........................................................................................................................................................ 5
INSTALLATION ................................................................................................................................................................. 6
INTRODUCTION ..................................................................................................................................................... 6
POWER SUPPLY .................................................................................................................................................... 6
SIZE OF EMBEDDING CHAMBER ......................................................................................................................... 6
GENERAL INSTALLATION PRECAUTIONS .......................................................................................................... 7
POWER SUPPLY .................................................................................................................................................... 7
INSTALLATION ONTO A WALL .............................................................................................................................. 8
HYDRAULIC AND ELECTRICAL CONNECTIONS ................................................................................................. 9
Initial installation ................................................................................................................................................. 9
Purging the internal hydraulic circuit .................................................................................................................. 9
Case 1: Direct connection to a sterilizer series Millenium ................................................................................ 11

ii
Case 2: Connection to an external feeding tank (optional) ............................................................................... 12
Case 3: Connection to an electric-type drawing tap (option) ............................................................................ 13
FIRST STARTUP .............................................................................................................................................................. 14
MILLDROP CONNECTED TO THE STERILIZER SERIES MILLENNIUM ............................................................ 14
MILLDROP CONNECTED TO THE FEEDING TANK ............................................................................................ 14
MILLDROP CONNECTED TO THE MANUAL DRAWING TAP ............................................................................. 15
STAND-BY STATUS .............................................................................................................................................. 15
APPENDIX A – TECHNICAL CHARACTERISTICS ........................................................................................................ 16
SUMMARY TABLE ................................................................................................................................................. 16
CHARACTERISTICS OF THE DEMINERALISED WATER ................................................................................... 17
APPENDIX B - MAINTENANCE ....................................................................................................................................... 18
INTRODUCTION .................................................................................................................................................... 18
ORDINARY MAINTENANCE PROGRAMME......................................................................................................... 18
GENERAL MAINTENANCE PROCEDURES ......................................................................................................... 18
REPLACING THE FILTERS ................................................................................................................................... 19
Resin filter cartridges ........................................................................................................................................ 19
Osmotic membrane and active carbon filter cartridge ....................................................................................... 20
REPLACING THE FLOW RESTRICTOR ............................................................................................................... 22
DISPOSAL AT END-OF-LIFE ................................................................................................................................ 22
APPENDIX C – TROUBLESHOOTING ............................................................................................................................ 23
INTRODUCTION .................................................................................................................................................... 23
ANALYSIS AND RESOLUTION OF PROBLEMS .................................................................................................. 23
APPENDIX D - DIAGRAMS .............................................................................................................................................. 25
ELECTRIC DIAGRAM ............................................................................................................................................ 25
HYDRAULIC DIAGRAM ......................................................................................................................................... 26
APPENDIX G – DECLARATION OF CONFORMITY ....................................................................................................... 27
APPENDIX H - NOTES ..................................................................................................................................................... 28
APPENDIX Z – TECHNICAL ASSISTANCE .................................................................................................................... 29

INTRODUCTION
1
ENGLISH
INTRODUCTION
Symbols
Dear Client
Thank you for choosing this product from M.O.COM. Srl. We hope that you will find it
completely satisfactory.
This manual describes all procedures for the correct installation and use of the
equipment.
Should you have any questions or suggestions concerning this product or our support, do
not hesitate to contact us.
NOTE
PAY SPECIAL ATTENTION; NOTES FOR PROPER INSTALLATION AND MAINTENANCE
PROCEDURES AND USE METHODS
.
WARNING
THIS SYMBOL INDICATES A POTENTIAL DANGER OF INJURY.
FOLLOW THE PROCEDURES DESCRIBED IN THE MANUAL TO
AVOID INJURING THE USER AND/OR OTHERS.
DANGER
THIS SYMBOL SIGNALS A POSSIBLE DANGER FOR PEOPLE.
FOLLOW THE SUGGESTED PROCEDURE IN ORDER TO PREVENT
POSSIBLE DAMAGE TO USERS AND/OR OTHERS.
THE MATERIAL THE DEMINERALIZER IS COMPOSED OF MUST BE
DISPOSED ACCORDING TO THE DIRECTIVE 2002/96/CEE
APPLICABLE
EUROPEAN
DIRECTIVES
The product described in this manual is manufactured in accordance with the highest
safety standards and doesn't represent any danger for the operator if used according to
the following instructions. The product is in accordance with the following European
Directive as applicable:
2006/95/CE
, for the approximation to the legislation of the Members States related to
low voltage equipment.
2004/108/CE, for the approximation to the legislation of the Members States related to
the electromagnetic compatibilità.
INTENDED USE
Important notes
The equipment is meant for professional use and can be employed only the purpose it
was designed for, that is the demineralization of the public water, and its use for the
water steam sterilizer feeding.
WARNING
THE DEVICE MUST ONLY BE USED BY QUALIFIED PERSONNEL.
IT MAY NOT BE USED OR HANDLED BY INEXPERT AND/OR
UNAUTHORIZED PERSONNEL FOR ANY REASON.
NOTES
THE INFORMATION INCLUDED IN THIS MANUAL IS SUBJECT TO CHANGE WITHOUT
NOTICE
.
M.O.COM. S
RL SHALL NOT BE RESPONSIBLE FOR DIRECT, INDIRECT,
ACCIDENTAL OR CONSEQUENTIAL DAMAGE OR OTHER DAMAGES RELATED TO
THE SUPPLY
/USE OF THIS INFORMATION.
T
HIS DOCUMENT MAY NOT BE REPRODUCED, ADAPTED OR TRANSLATED, IN
WHOLE OR IN PART
, WITHOUT THE PRIOR, WRITTEN AUTHORIZATION OF
M.O.COM. SRL
IS REGISTERED TRADEMARK OF M.O.COM. SRL.
INTRODUCTION
2
PURPOSE OF THE
MANUAL
The purpose of this manual is to provide directions for:
- becoming familiar with the product;
- its appropriate installation;
- its secure and efficient employment.
The appendixes provide information regarding:
- technical characteristics;
- maintenance procedures;
- analysis and solution of problems;
- further miscellaneous documentation.
GENERAL
DIRECTIONS
The product must always be used in compliance with the procedures set out in this
manual and never for purposes that are different from the foreseen ones.
WARNING
THE USER IS RESPONSIBLE FOR ALL LEGAL OBLIGATIONS
LINKED TO THE PRODUCT’S INSTALLATION AND USE. IF THE
PRODUCT IS NOT INSTALLED OR USED PROPERLY, OR CORRECT
MAINTENANCE/ SERVICING IS NOT CARRIED OUT, IT SHALL NOT
BE POSSIBLE TO DEEM THE MANUFACTURER RESPONSIBLE FOR
ANY POSSIBLE BREAKAGE, MALFUNCTIONING, DAMAGES TO
THINGS, OR INJURIES TO PERSONS.
Please observe the following precautions in order to avoid injury or property damage; in
particular:
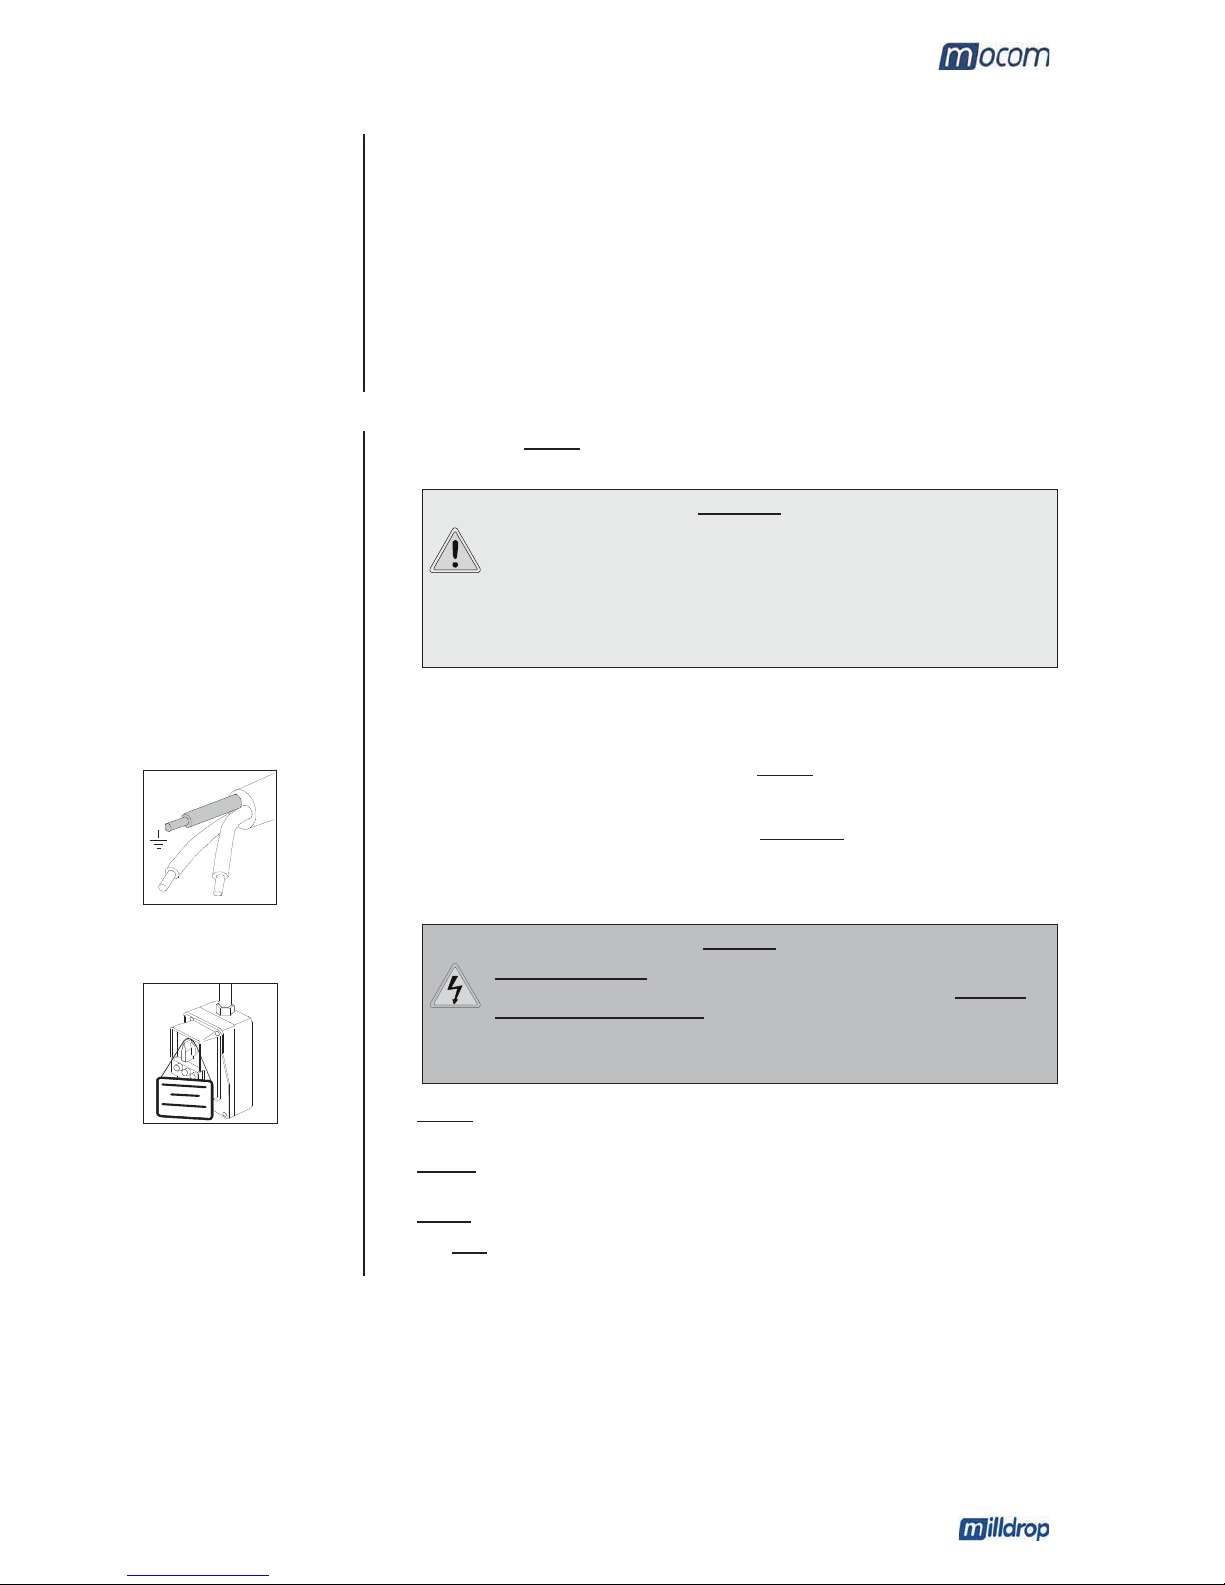
- Before connecting the power supply cable, ensure
that nominal mains voltage is
equal to the one indicated on the label. Voltages differing from indicated ones, may
damage the apparatus’s electric parts.
- Be sure the electric plant is provided with a grounding
conforming to laws and/or
rules in force.
- When getting started, carry out the “hydraulic circuit purging” so that possible
processing residuals will be expelled (see “Initial installation”).
DANGER
ALWAYS REMOVE THE MAINS CABLE FROM THE POWER OUTLET,
BEFORE CARRYING OUT ANY KIND OF MAINTENANCE. SHOULD
THAT NOT BE POSSIBLE, OR WHENEVER THE EXTERNAL
BREAKER IS FAR AWAY OR, AT ANY RATE, NOT VISIBLE TO THE
MAINTAINER, PLACE A WORK IN PROGRESS SIGN ON THE
EXTERNAL BREAKER AFTER TURNING IT OFF .
- Do not remove any label or nameplate from the device; should you need any new
ones, apply for them.
- Do not
use corrosive products, acids, steel wool or brushes for cleaning the
equipment.
- Do not
wash the equipment with direct water jets.
- Use only
original spare parts.
PACKAGE CONTENT
3
ENGLISH
PACKAGE
CONTENT
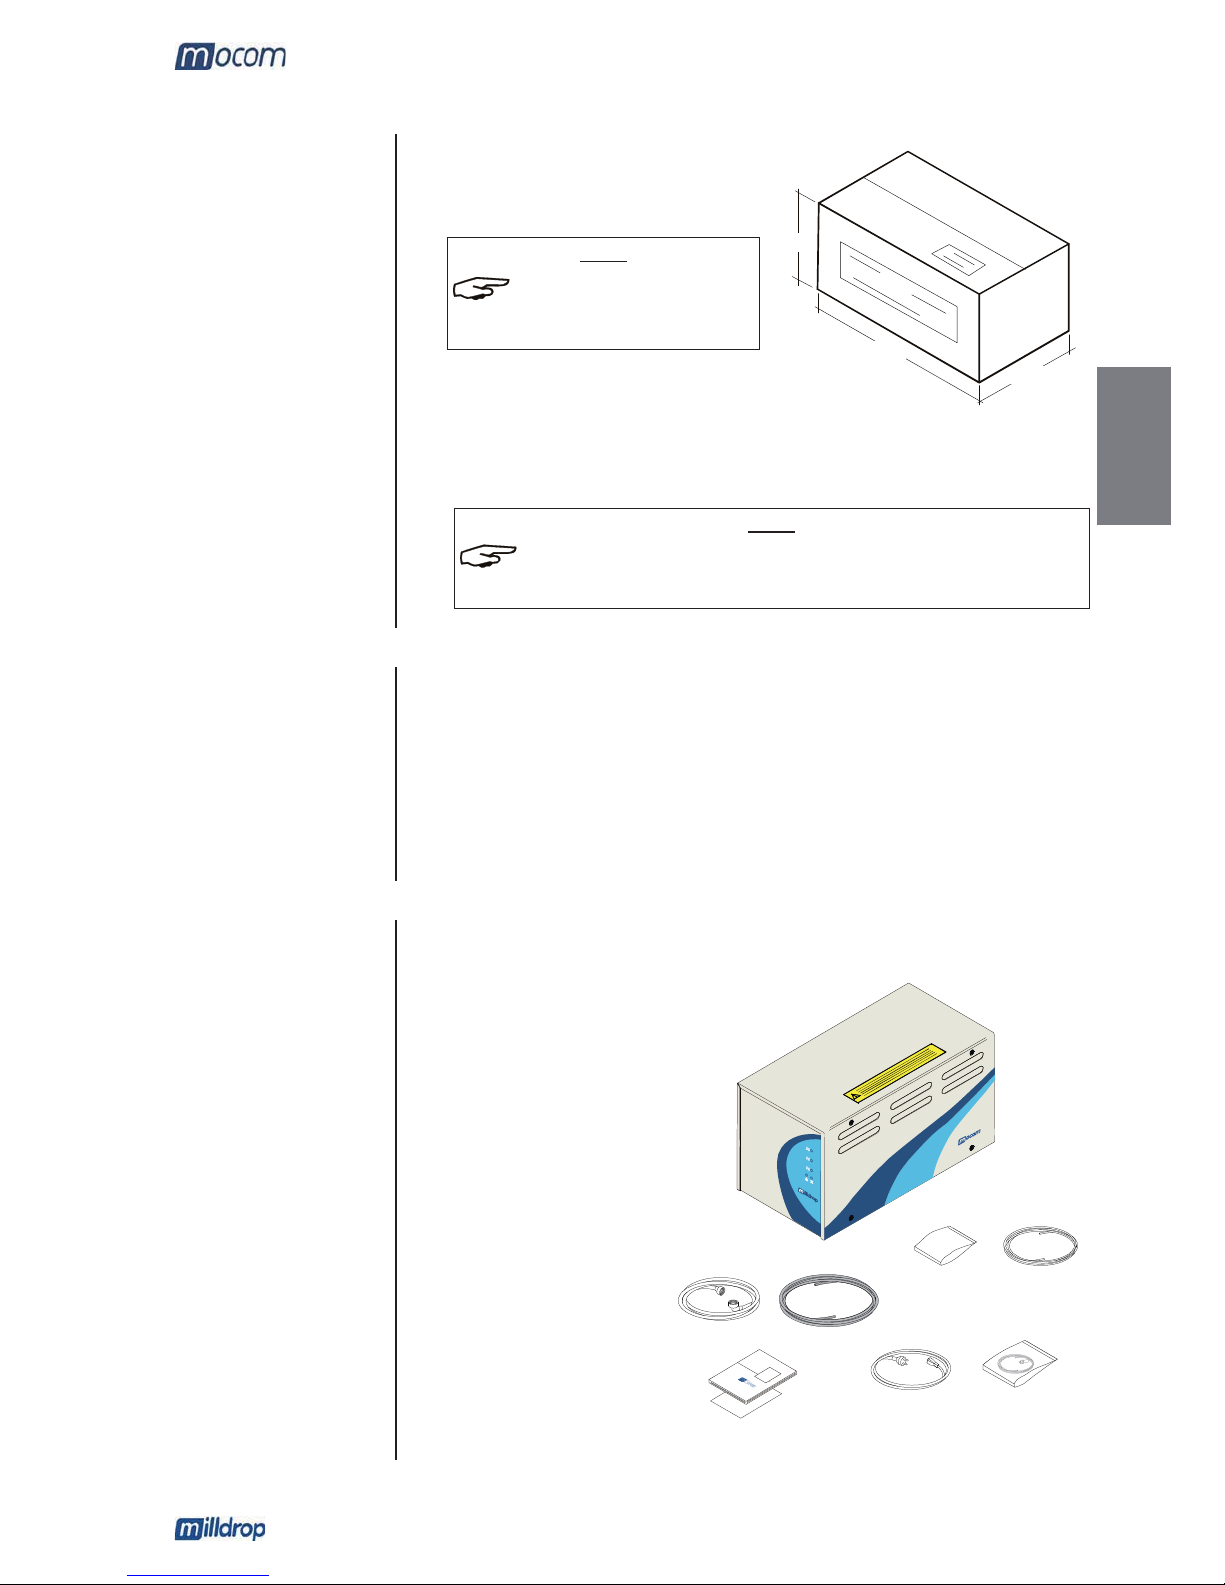
SIZE AND WEIGHT
Package:
Overall weight about 18 Kg
Once the package is opened, check that:
- the supply matches the specifications of the order (see the accompanying
document);
- there is no obvious product damage.
NOTE
SHOULD THE SUPPLY BE ERRONEOUS, ANY PART BE MISSING OR THERE BE
DAMAGES OF ANY KIND
, INFORM THE RETAILER AND THE TRANSPORTER THAT
CARRIED OUT DELIVERY AT ONCE AND IN DETAIL
.
HANDLING THE
PRODUCT
The product must be handled according to directions provided on the packaging.
We recommend to transport and store the device at temperatures not lower than 5°C.
Prolonged exposure to low temperature can damage the product.
Keep the original packaging and use it whenever the device is to be transported. The use
of different packaging could damage the product during shipment.
Keep the plugs mounted on the demineralizer’s pipe fittings (to be reapplied in case of
subsequent shipment).
CONTENT
DESCRIPTION
The package contains the following items:
• Demineralizer equipment (Ref. 1):
• Kit for the installation of the
draining pipe (Ref. 2);
• Draining pipe (red) - Ref. 3;
• Feeding pipe (blue),
complete with gaskets –
Ref. 4;
• Reinforced silicone pipe
(Ref. 5) for connecting
Milldrop to sterilizer,
external tank or tap;
• Power supply cable – Ref.
6;
• Kit (Ref. 7) containing:
start/stop signal cable, nr. 2
pipes union, nr. 4 clamps,
jack plug and key for
purging tap;
• Operator’s Manual and
Warranty Certificate – Ref.
8.
NOTE
C
HECK THE INTEGRITY OF THE
PACKAGE UPON RECEIPT
.
330
570
320
4
5
6
7
8
1
2
3
PRODUCT INFORMATION
4
PRODUCT
INFORMATION
INTRODUCTION
“Milldrop” is M.O.COM.’s proposal in the field of water demineralization for water steam
sterilizer.
It is a sophisticated apparatus but easy to use, and adaptable to the user requirements by
means of different installation possibilities.
Thanks to the reverse osmosis membrane and resin filter, the equipment “transforms” the
water coming from water works into qualitatively excellent demineralized water.
“Milldrop” – which is considerably easy to use and small in size - represents the ideal
equipment to be put next to any water steam sterilizer.
GENERAL
FEATURES
“Milldrop” is a water demineralizer based on the reverse osmosis principle.
The equipment includes:
- active carbon filter, having a duration of about 800 liters of demineralized water
produced;
- two resin filters having a duration of about 500 liters of demineralized water
produced,
- osmotic membrane which, if regularly checked, can last more than 800 liters of
demineralized water produced.
NOTE
T
HE LIFETIME OF FILTERS AND OSMOTIC MEMBRANE DEPENDS ON THE QUALITY OF
THE WATER FEEDING THE
MILLDROP.
The limit values for the feeding water are reported in the following table:
Element/Feature Value
Turbidity < 1 NTU
Cholrine < 0.1 ppm
Ph 2-11
Salt density < 5 SDI
Specific conductivity at 20°C < 1000 µS/cm
Iron < 0.1 ppm
Temperature < 35°C
Total hardness < 30°F
NOTE
FOR A SPECIFIC HARDNESS HIGHER THAN 25°F, THE USE OF A RESIN SWEETENER
AND SALTS REGENERATION IS RECOMMENDED
; THIS IS REQUIRED IF THE
HARDNESS IS HIGHER THAN
30°F.
The equipment operation is controlled by an electronic board which also monitors any
alarm (leak and lack of water, quality of the output water, etc.).
“Milldrop” may be installed on a work plane, hung to a wall or set inside the washbasin
piece of furniture.
“Milldrop” offers different installation possibilities:
- direct connection to the sterilizer series Millennium (provided with automatic filling
feature and start/stop interface);
- direct connection to an external tank with automatic water filling feature (possibility
to connect up to 3 sterilizers);
- direct connection to a drawing tap (provided with electric button), to fill manually little
tanks.
For extra details please refer to chapter “Hydraulic connections”.
PRODUCT INFORMATION
5
ENGLISH
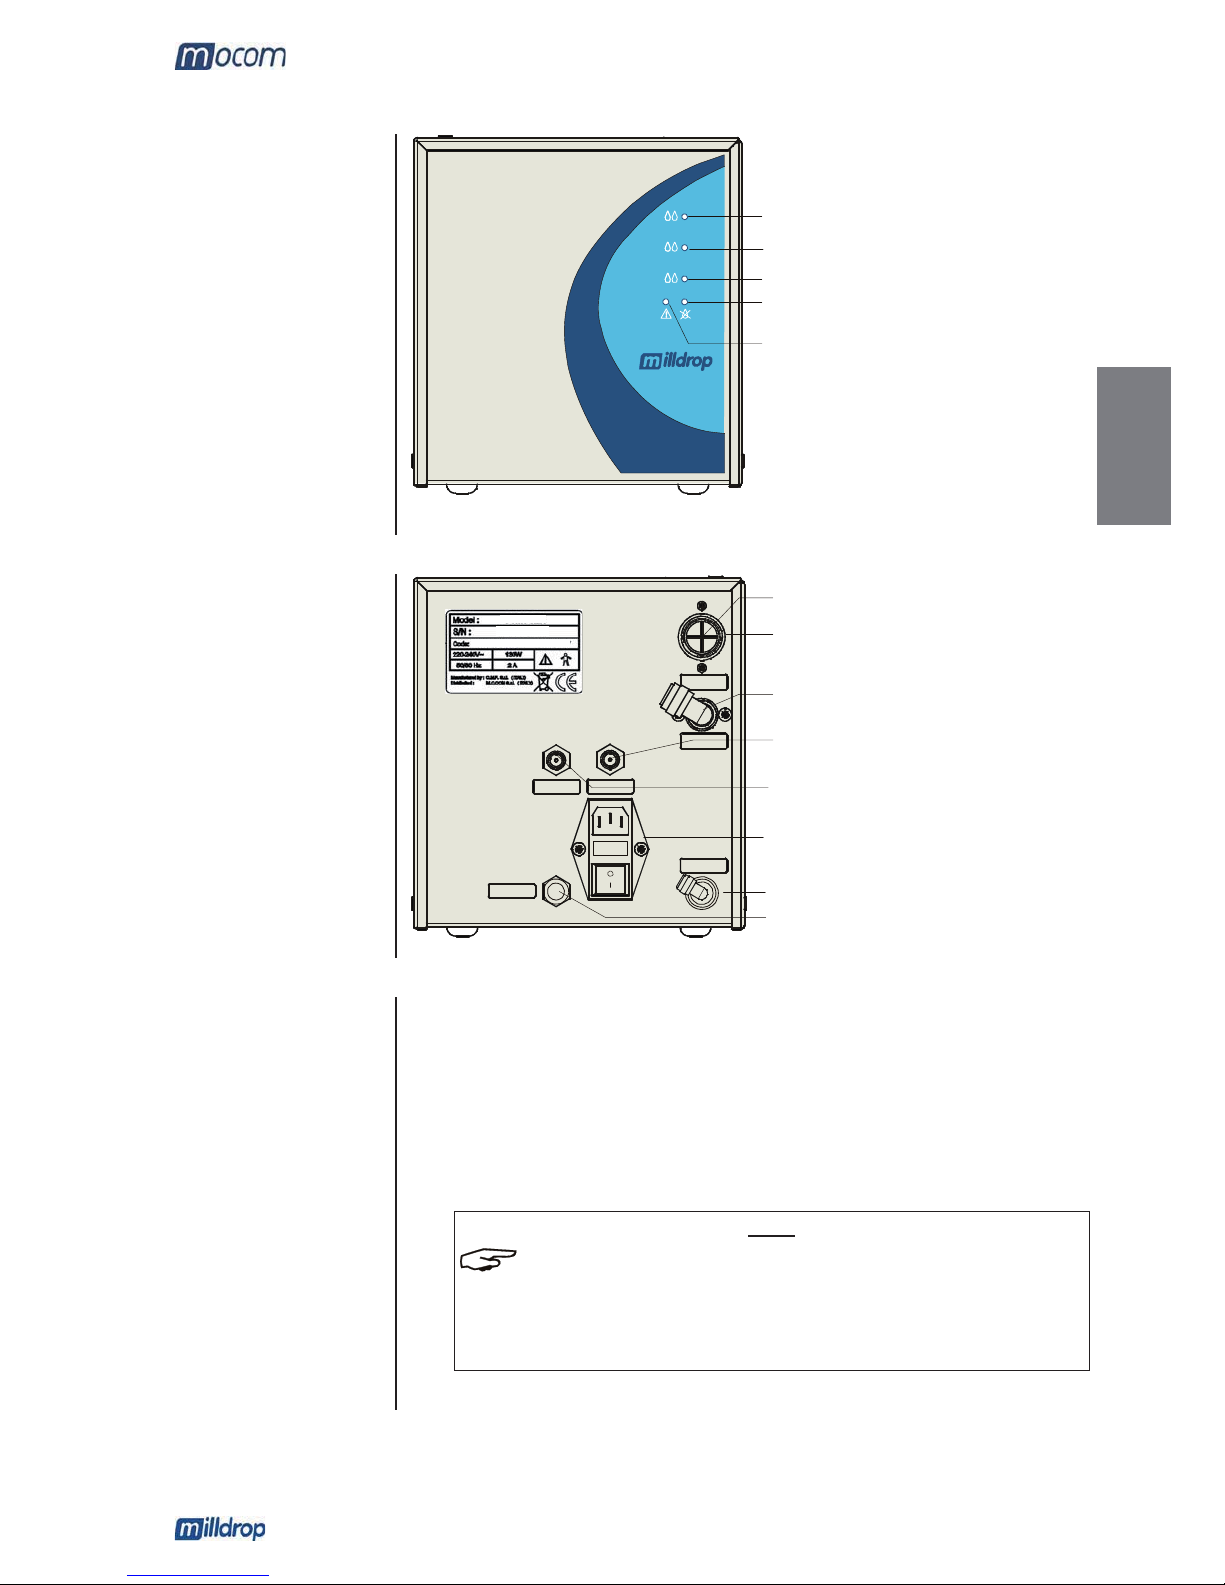
FRONT PANEL
REAR PANEL
A
C
B
S
L
T
MILLDROP
08 MD 0021
WWMD00D000 Year: 2008
FUNCTIONING
The Milldrop operation is very easy and automatic in any use.
1) Directly connected to a Millennium series sterilizer, it operates at the start of the
sterilizer’s water feeding pump, and until the pump stops.
2) Connected to the external tank, it starts working as the water level in the tank goes
down the maximum threshold, and stops as it is again reached.
3) Connected to the drawing tap (provided with electric device), it starts working as you
press the tap’s button and stops pressing it again.
NOTE
IF CONTINUALLY RUNNING FOR A TIME EXCEEDING 20 MINUTES, MILLDROP SHALL
STOP AUTOMATICALLY
.THE STOP IS SIGNALED BY THE BLINKING OF THREE
QUALITY WATER LED
’S AND THE ACOUSTIC INTERMITTENT ALARM.
TO RESTART THE DEMINERALIZER FROM A STOP STATUS, TURN IT OFF AND ON
AGAIN
.
t
green LED – good quality of the outlet water
yellow LED– sufficient quality
red LED– poor quality
red LED– lack of inlet water or low pressure
red LED– internal water leak
Solenoid valve filter
A - Connector and solenoid valve of the
water inlet
C – Quick connector for permeation product
S – Connector for sterilizer’s start/stop
cable
T – Connector for feeding tank/drawing tap
start/stop cable or purging jack plug
(service)
220Vac input – Fuses – Mains switch
B - Draining quick connector
L - Purging tube quick connector

INSTALLATION
6
INSTALLATION
INTRODUCTION
The correct and careful installation is the first
and fundamental step in achieving the good
demineralizer operation, long life and complete utilization of its features.
Moreover, this precaution will avoid the danger for physical injury or property damage, not
to mention equipment malfunctions and faults. So, please follow the instructions in this
chapter scrupulously
.
NOTE
T
HE TECHNICAL SERVICE (SEE APPENDIX Z) IS AT YOUR DISPOSAL FOR ANY
DOUBT YOU MAY HAVE OR FURTHER INFORMATION YOU MAY REQUIRE
.
THE DEMINERALIZER HAS PASSED THE REQUIRED TESTS BEFORE BEING
DELIVERED
.SO IT DOES NOT REQUIRE ANY ADDITIONAL CALIBRATION AT THE
GETTING IN SERVICE
.
POWER SUPPLY
The electrical system the demineralizer will be connected to, must be suitably
dimensioned basing on the power requirements of the device. See the nameplate located
on the backside of the equipment.
WARNING
VERIFY THE ELECTRIC PLANT’S CONFORMITY, AND THAT IT IS
GROUNDING PROVIDED.
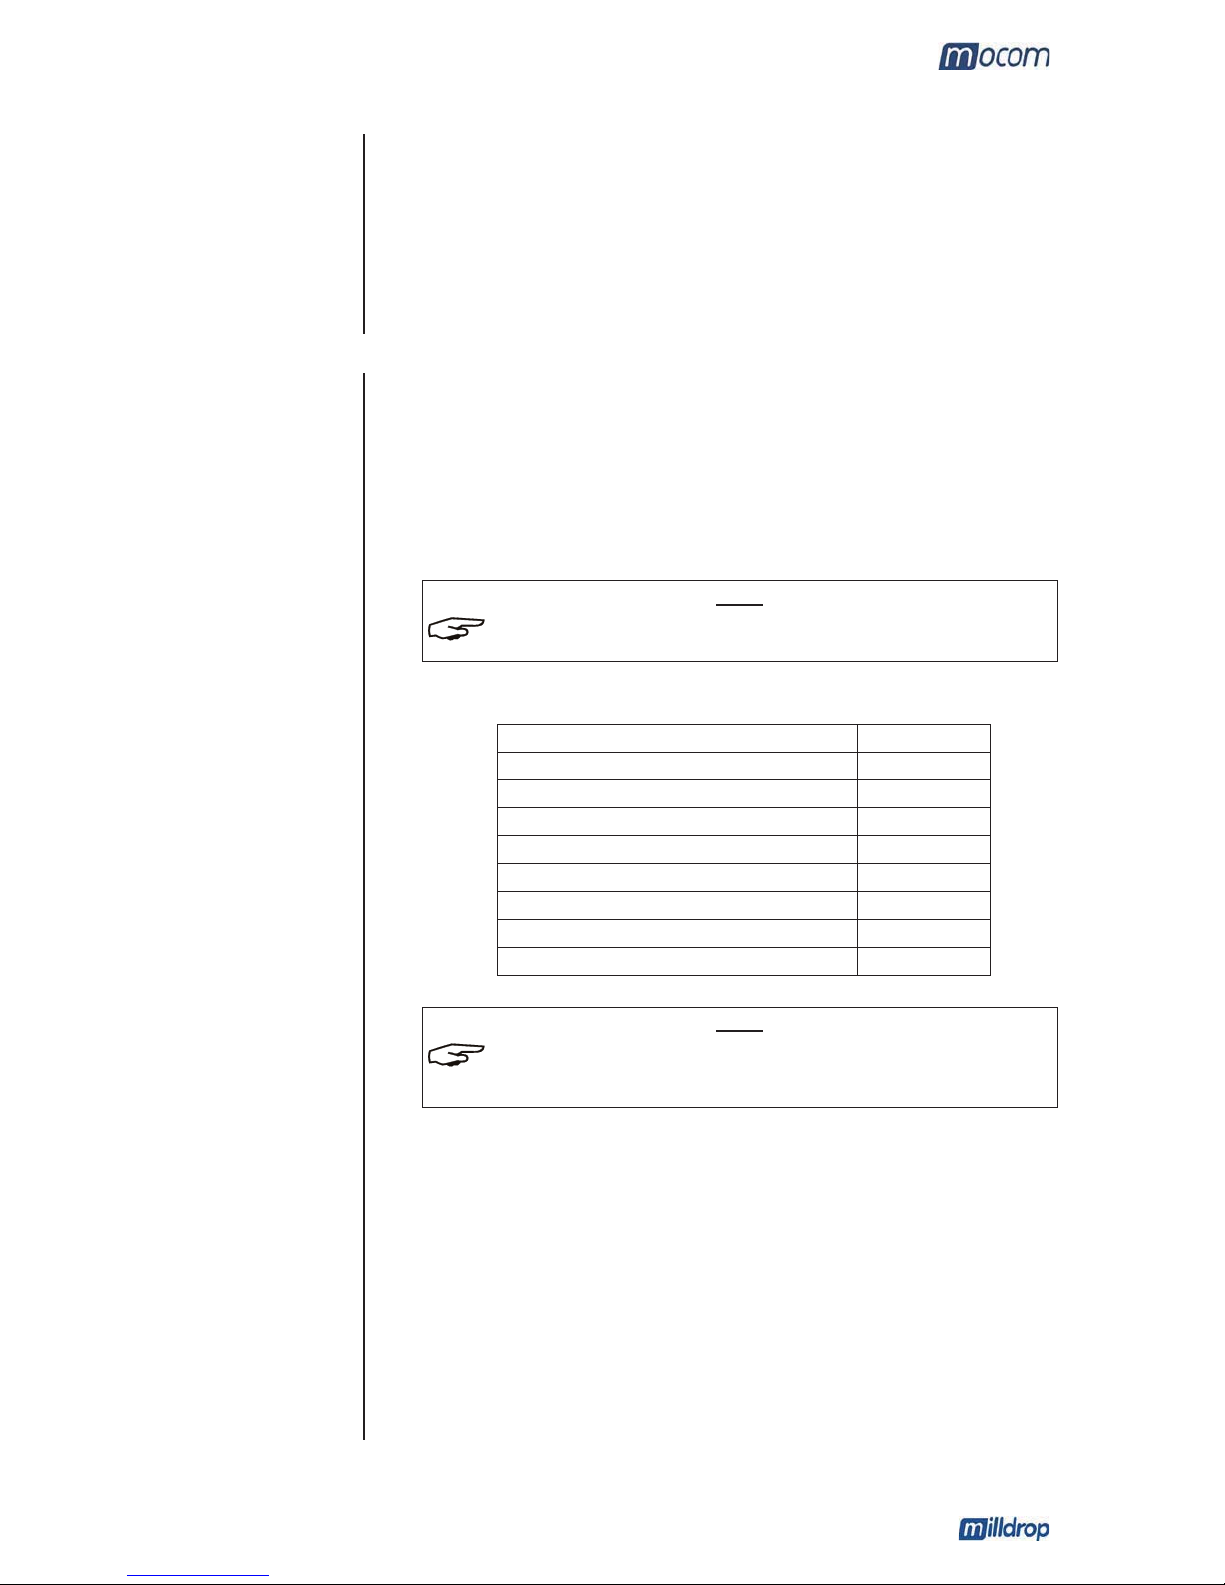
SIZE OF
EMBEDDING
CHAMBER
When installing the demineralizer inside a cabinet, adequate space all around the device
must be foreseen in order to provide an effective ventilation, as well as an opening in the
back to allow the passage of the power cord and piping.
The built-in compartment should have the following minimum dimensions:
- Height 280 mm
- Width 270 mm
(free space on the ventilation grid
side)
- Depth 480 mm
(plus a space for rear connections
and front panel free view)
WARNING
COMPARTMENT DIMENSIONS LESS THAN THOSE SHOWN MAY
COMPROMISE THE CORRECT AIR CIRCULATION AROUND THE
DEVICE AND AN ADEQUATE COOLING, CAUSING CONSEQUENT
PERFORMANCE DETERIORATION AND/OR POSSIBLE DAMAGE.
NOTE
I
F THE MAINS SWITCH REMAINS INACCESSIBLE, USE A MAINS SOCKET
INCORPORATING AN ON
/OFF SWITCH.
REFER TO APPENDIX A(TECHNICAL CHARACTERISTICS) FOR COMPLETE
TECHNICAL DATA
.
280
270
480

INSTALLATION
7
ENGLISH
GENERAL
INSTALLATION
PRECAUTIONS
Obey the following warnings for the correct operation of the device and/or avoid
dangerous situations
:
- Install the demineralizer on a flat surface
;
- Leave adequate space for ventilation (at least 5 cm on the of the ventilation grid
side).
- Do not install near cisterns, wash-basins, etc. to avoid direct contacts with water or
liquids, possible short circuits and/or potentially dangerous situations for the
operator;
- Do not install in excessively humid
or poorly ventilated places;
- Do not install in places with gas
or inflammable and/or explosive vapors;
- Install the unit so that the power cord is not
bent or crushed. It must run freely all
the way to the mains socket.
- Install the unit so that any external fill/drain piping is not
bent or crushed. The length
of the reinforced silicone tube connecting Milldrop to the sterilizer or tank, shall not
exceed 2 meters, otherwise performance quality could fall or, what is worse, the
demineralizer itself could not operate properly.
POWER SUPPLY
The demineralizer must be connected to a mains socket of power adequate for the
absorption required, and provided with ground connection in compliance with current laws
and/or standards.
The mains socket must be suitably protected by a circuit breaker having the following
characteristics:
- Nominal current 5 A
- Differential current 0,03 A
NOTE
THE MANUFACTURER WILL NOT BE LIABLE FOR DAMAGES CAUSED BY INSTALLING
THE UNIT ON INADEQUATE ELECTRICAL SYSTEM AND
/OR NOT GROUNDED.
If you need to replace the power cord plug, use a type of equal characteristics or, at any
rate, adequate to the equipment power requirements. The user is entirely responsible for
the choice and replacement of the plug.
DANGER
CONNECT THE POWER CORD DIRECTLY TO THE SOCKET.
DO NOT USE EXTENSIONS CORDS, ADAPTERS OR OTHER
ACCESSORIES.

INSTALLATION
8
INSTALLATION
ONTO A WALL
Milldrop can be placed on a working plane, mounted on the Millrack system (see the
relating User Manual) or installed on a wall (see Fig. A-B-C). In this last case, proceed as
follows:
1. Remove the screws (1) and the lid (A). Figure A
2. Remove the screws (2-3) and the side panel (B). Figure A
3. Position the panel (B) on the wall where Milldrop has to be installed and mark the
wall by a pencil in the mounting slots (C). Figure B
NOTE
THE DEMINERALIZER MUST BE INSTALLED PERFECTLY HORIZONTAL, OTHERWISE
THE ANTI
-FLOODING SYSTEM COULD NOT PROPERLY FUNCTION.ON CHOOSING
THE INSTALLATION POINT
, CONSIDER THE ROOM NECESSARY FOR REAR PIPING,
FOR THE FRONT PANEL FREE VISION AND FOR THE ADEQUATE VENTILATION (SEE
PARAGRAPH
GENERAL INSTALLATION PRECAUTIONS).
4. Bore the holes corresponding the marks just made. Figure C.
NOTE
B
EFORE DRILLING, BE SURE THAT NO PIPING OR ELECTRIC CABLES ARE INSIDE
THE WALL
.
5. Reassemble the side panel (B), fasten the screws (2 and 3).
6. Insert the screw anchors (4) in the holes, the screws (5) in the panel’s slots and
screw down. (Note: items 4 and 5 are not supplied) – see Figure C.
7. Reassemble the lid (A) and fasten the screws (1).
A
B
2
3
1
Figure A Figure B
Figure C

INSTALLATION
9
ENGLISH
HYDRAULIC AND
ELECTRICAL
CONNECTIONS
Initial installation
Purging the internal
hydraulic circuit
See Figures D, E:
1. Use the kit supplied (Page 3, Ref. 2) and install the draining bracket onto the
washbasin’s siphon where you wish to install the Milldrop draining pipe; carry out an
hole Ø 6 mm in the siphon across the bracket’s fitting.
2. Insert the red pipe in the ring nut , plug it in the bracket’s fitting, and fasten the ring
nut.
Figure D
3. Cut the red pipe long enough to reach the draining connection B on the rear panel of
the demineralizer.
NOTE
THE PIPING MUST NOT BE BENT, SQUASHED OR HAVE A PARTICULARLY TORTUOUS
ROUTE
, OTHERWISE PERFORMANCE WILL BE QUALITATIVELY VERY LOW OR, WHAT
IS WORSE
, THE DEMINERALIZER ITSELF SHOULD MALFUNCTION.
4. Take the plug out the draining quick connector (see picture) and connect the red pipe
(keep the plug!).
5. Install a tap (not supplied) provided with male connector ¾” on the water outlet and
near the demineralizer. Check the pressure value of the water works (see Appendix
A).
6. Connect the feeding blue pipe (supplied) between the tap outlet and the water inlet
“A” on the rear panel of the demineralizer, check for the presence of gaskets, and
fasten both the pipe’s ring nuts.
7. Open the tap and check for no leaks.
1. Remove the plastic plug from the quick connector “C” on the rear panel of the
demineralizer and connect the supplied pipe-union.
2. Mount the reinforced silicone pipe on the pipe-union, tight by clamps.
3. Place the opposite end of the silicone pipe inside a wash-basin.
Figure E
Gasket
Blue pipe
Pipe-union
Red pipe
to draining siphon
to wash-basin
Reinforced
silicon
pip
e
TAP
Clamp
drill Ø6
red pipe
Siphon
Plug
Take out the plug by
keeping the ring still
Quick connector
ring nut

INSTALLATION
10
See Figure F:
4. Plug the key (supplied with the kit - page 3, Ref. 7) in the fitting of the purging tap
positioned under the Milldrop equipment and turn the tap on "Service Mode" position.
5. Plug the purging jack (supplied with the kit - Page 3, Ref. 7) in the connector "T".
6. Connect the mains cable and switch on the demineralizer.
7. The water will start to flow from the silicone tube connected to the quick connector “L”;
let to drain for about 10 minutes.
WARNING
This hydraulic circuit purging procedure allows to eliminate the
maintenance liquids from the osmotic membrane, avoiding that the
liquids are passing from and damaging the resin filter.
8. Switch off the equipment.
9. Take the purging jack out the connector “T”.
10. Plug again the key in the fitting of the purging tap and back it on "Normal Mode"
position.
11. Take the plastic plug out the quick connector “C” (keep the plug!)
12. Remove the pipe-union and silicone tube from the quick connector “L” and connect it
to the quick connector “C”.
WARNING
Close the quick connector “L” with the plastic plug.
Check for the tightness.
Continue the installation by carrying out the specific hydraulic connections according to
the use required.
Figure F
ke
y
purging jack
purging tap fitting
ended the purging,
move pipe-union and
silicone tube to the
quick connector “C”

INSTALLATION
11
ENGLISH
Case 1:
Direct connection to a
sterilizer series
Millenium
See Figure G:
Keep the DIP1 position on the electronic board unchanged (see diagram on page 25):
- Make sure that the position is as indicated in the
figure. If not, correct it.
1. Cut the silicone pipe (connected to the quick connector “C” on the demineralizer rear
panel) long enough to reach the pipe-union installed on the sterilizer’s automatic
feeding point, connect and tight by clamps.
NOTE
THE PIPES MUST NOT BE BENT, SQUASHED OR HAVE A PARTICULARLY TORTUOUS
ROUTE
.THE LENGTH OF THE FEEDING SILICONE TUBE MUST NOT EXCEED 2
METRES, OTHERWISE THE GENERAL PERFORMANCE SHOULD DECREASE OR THE
DEMINERALIZER ITSELF SHOULD MALFUNCTION
.
2. Connect the supplied start/stop signal cable between the connector “S” on the
demineralizer rear panel and the female jack connector on the sterilizer.
Figure G
(from the tap)
water inlet
to draining siphon
Start/Stop
cable
Clamp
Silicone pipe
jack
j
ack connecto
r
Sterilizer series
Millennium
ON
OFF
DIP1
1
2
3
4

INSTALLATION
12
Case 2:
Connection to an
external feeding tank
(optional)
See Figure H:
Keep the DIP1 position on the electronic board unchanged (see diagram on page 25):
- Make sure that the position is as indicated in the
figure. If not, correct it.
1. Plug the supplied pipe fitting in the inlet point (label “Milldrop”) of the tank.
2. Cut the silicone pipe (connected to the quick connector “C” on the demineralizer rear
panel) long enough to reach the pipe-union installed on the tank’s inlet (label
“Milldrop”), fit and tight by clamps.
NOTE
T
HE PIPES MUST NOT BE BENT, SQUASHED OR HAVE A PARTICULARLY TORTUOUS
ROUTE
.THE LENGTH OF THE FEEDING SILICONE TUBE MUST NOT EXCEED 2
METRES, OTHERWISE THE GENERAL PERFORMANCE SHOULD DECREASE OR THE
DEMINERALIZER ITSELF SHOULD MALFUNCTION
.
3. Plug a supplied pipe-union in one of the three outlets available on the tank (label M1,
M2 or M3), fit a silicone pipe and tight by clamps.
4. Cut the silicone pipe long enough to reach the pipe-union installed on the sterilizer’s
automatic feeding point, fit and tight by clamps.
5. Connect the start/stop signal cable (provided with the demineralizer) between the
jack connector “T” on the demineralizer rear panel and the female jack connector on
the tank’s level sensor cabling.
6. The tank is provided with a tap for drawing manually the permeation product. If the
user wishes to use also this feature, connect the supplied pipe fitting to the drawing
tap.
F
M
I
L
L
D
R
O
P
Figure H
Feeding tank
Clamps
Silicone pipe
Silicone pipe
Start/Stop cable
to draining siphon
Clamps
(from the tap)
water inlet
Drawing tap
pipeunion
j
ack
connecto
r
« T »
ON
OFF
DIP1
1
2
3
4

INSTALLATION
13
ENGLISH
Case 3:
Connection to an
electric-type drawing
tap (option)
See Figure I:
Configure DIP1 on the Milldrop electronic board as follows (see diagram on page 25):
- Remove the external cover and the protection of the
electronic board.
- Change the setting of the DIP1 switches as shown in
the figure
- Refit the covers.
1.
Install the drawing tap (with electric button) where desired (anyhow, near the
demineralizer).
2.
Plug the supplied pipe fitting on the drawing tap’s outlet, cut the silicone pipe
installed on the outlet C of the demineralizer so that it is long enough to reach
the pipe fitting of the tap, and tight by clamps.
NOTE
THE PIPING MUST NOT BE BENT, SQUASHED OR HAVE A PARTICULARLY TORTUOUS
ROUTE
.THE SILICONE TUBE’S LENGTH MUST NOT EXCEED 2 METRES, OTHERWISE
PERFORMANCE WILL BE QUALITATIVELY VERY LOW OR
, WHAT IS WORSE, THE
DEMINERALIZER ITSELF SHOULD MALFUNCTION
.
3. Connect the start/stop signal cable of the drawing tap between to the connector “T” on
the demineralizer rear panel p.
Figure I
Clamp
Drawing tap
Silicone pipe
To the draining
siphon
Start/Stop cable
Pipe-union
(from the tap)
water inlet
ON
OFF
DIP1
1
2
3
4

FIRST STARTUP
14
FIRST STARTUP
MILLDROP
CONNECTED TO
THE STERILIZER
SERIES
MILLENNIUM
Once properly installed, proceed with the following additional startup operations and
checks according with the Milldrop use.
Turn on the demineralizer and then the sterilizer.
Ended the initial test of the sterilizer, enter the SETUP menu, select “Filling Options” and
the mode “AUTOMATIC” (see the Operating Manual of the sterilizer).
Check that demineralizer starts to work as the sterilizer’s automatic feeding pump starts,
and stops at the same time as the pump.
NOTE
T
HE EQUIPMENT WILL STOP AUTOMATICALLY IF THE DELIVERY OF WATER LASTS
UNINTERRUPTEDLY FOR MORE THAN
20 MINUTES.TO RESTART THE MILLDROP
OPERATION TURN OFF AND ON THE EQUIPMENT AGAIN
.
MILLDROP
CONNECTED TO
THE FEEDING TANK
The demineralizer starts immediately as turned on (if the tank is empty or with water
under the maximum level).
As reached the maximum water level in the tank (signaled through the level sensor), the
demineralizer stops automatically.
NOTE
S
TARTING AT EMPTY TANK, THE MILLDROP OPERATION MIGHT BE STOPPED BY
THE PROTECTION TIME
-OUT OF 20 MINUTES AND BEFORE THE WATER INSIDE THE
TANK HAS REACHED THE MAXIMUM LEVEL
.IN THIS CASE, TURN OFF AND ON AGAIN
TO RESTART THE EQUIPMENT OPERATION AND WATER FILLING UP
.
Turn on the sterilizer.
Ended the sterilizer initial test, enter the SETUP menu, select “Filling Options” and the
mode “AUTOMATIC” (see the Operating Manual of the sterilizer).
If the water level into the sterilizer’s internal tank is lower the minimum, the automatic
feeding pump starts promptly.
In this case, the demineralizer will start a few seconds after the start of the sterilizer’s
pump (i.e. as the tank’s float, by lowering, triggers the demineralizer by the start/stop
command), and will stop as the tank’s float reaches again the maximum level.
NOTE
THE EQUIPMENT WILL STOP AUTOMATICALLY IF THE DELIVERY OF WATER LASTS
UNINTERRUPTEDLY FOR MORE THAN
20 MINUTES.TO RESTART THE MILLDROP
OPERATION TURN OFF AND ON THE UNIT AGAIN
.
In case of manual water drawing also from the tank’s tap, ensure that the water remaining
in the tank is sufficient to warrant the water need of sterilizer(s) connected to the tank,
considering also the time necessary to restore a sufficient level into the tank:
- one sterilizer connected, the remaining water must be at least 2 liters .
- two sterilizers connected, the remaining water must be at least 4.5 liters.
- three sterilizers connected, the remaining water must be at least 7 liters.

FIRST STARTUP
15
ENGLISH
MILLDROP
CONNECTED TO
THE MANUAL
DRAWING TAP
Press the tap’s button to start the water delivery.
Press 2 seconds again the tap’s button to stop the water delivery.
NOT
A
WAIT 10 SECONDS BEFORE PRESSING AGAIN THE TAP’S BUTTON TO RESTART
WITH THE WATER DELIVERY
.
NOTE
THE EQUIPMENT WILL STOP AUTOMATICALLY IF THE DELIVERY OF WATER LASTS
UNINTERRUPTEDLY FOR MORE THAN
20 MINUTES.TO RESTART THE MILLDROP
OPERATION TURN OFF AND ON THE UNIT AGAIN
.
STAND-BY STATUS
Over the first startup operations, the demineralizer sets in stand-by status.
In such a condition, the turning on of alarm LED will have no influence on the
demineralizer subsequent starting, except the alarm “Internal leak” that will stop the
demineralizer and prevents it from operating.
In this case, turn off the demineralizer and call the Technical Service.
NOTE
THE TECHNICAL SERVICE (SEE APPENDIX Z) IS AT YOUR DISPOSAL FOR ANY
DOUBT YOU MAY HAVE OR FURTHER INFORMATION YOU MAY REQUIRE
.

APPENDIX A – TECHNICAL DATA
16
APPENDIX A – TECHNICAL CHARACTERISTICS
SUMMARY TABLE
Device REVERSE OSMOSIS WATER DEMINERALIZER
Model
Milldrop
Manufacturer
C.M.F. S.r.l.
Via E.Ellero, 9
33080 Cusano di Zoppola (PN [=Province of Pordenone]) -
ITALY
for
M.O.COM. Srl
Via Saliceto, 22
40013 Castel Maggiore (BO)
Italy
Power supply voltage
220 – 240 V ~
Mains frequency
50/60 Hz
Mains fuses
2x F 3,15A 250V
Protection fuse on the electronic board
T 3,15A 250V
External size (LxHxD) 220 x 235 x 415 mm (rear connections excluded)
Nominal power
130 W, 2A max
Insulation class
Class I
Utilization
Internal use
Environment operating conditions
Temperature: +15°C ÷ +35°C
Relative humidity: 90% non-condensing
Net weight
14 Kg
Outlet flow rate
25 lt/h
Inlet pressure
1 ÷ 4 bar
Working pressure
Max 10 bar (at pump outlet)
Tap water temperature
+10°C ÷ + 35°C
Resin filter cartridge life (average value) about 500 l (depending on the quality of the inlet water)
Osmotic membrane and active carbon filter
life (average value)
about 800 l (depending on the quality of the inlet water)

APPENDIX A – TECHNICAL DATA
17
ENGLISH
CHARACTERISTICS OF THE DEMINERALISED WATER
FILTERING CHARACTERISTICS
The following table shows the demineralizer’s average filtering characteristics, compared with values stated
by the standards EN 285 and EN 13060.
Element/Characteristic
Unit of
measure
Value at the
inlet
Value at the
outlet
Value according
to
EN 13060/EN 285
Ph value - 7,6
6,3
5 - 7
Conductivity at 20°C µS/cm 435
1,8
<15
Dry residue mg/l 345
2
<10
Cadmium mg/l Cd <0.01
<0.003
<0.005
Iron mg/l Fe 0.32
0.03
<0.2
Manganese mg/l Mn 0.03
<0.003
<0.1
Nickel mg/l Ni <0.01
<0.003
<0.1
Lead mg/l Pb <0.05
<0.02
<0.05
Copper mg/l Cu 0.02
0.006
<0.1
Zinc mg/l Zn 0.56
0.02
<0.1
Chlorides mg/l Cr 3.7
<0.05
<2
Phosphates mg/l P 0.01
<0.01
<0.5
Silicon oxide mg/l SiO2 5,7
<0.10
<1
Appearance - colorless, transparent, without sediments
Hardness mmol/l 2.57
<0.005
<0.02
NOTE
T
HE VALUES SHOWN IN THE COLUMN “OUTLET WATER” ARE INDICATIVE AND REFERRED TO VALUES OF
THE COLUMN
“INLET WATER”.

APPENDIX B – MAINTENANCE
18
APPENDIX B - MAINTENANCE
INTRODUCTION
In addition to the procedures for the correct use, it needs the user performs an ordinary
maintenance in order to guarantee safe and efficient operation over the entire life of the
equipment.
The ordinary maintenance hereafter described consists in easy manual activities and
preventive maintenance interventions.
ORDINARY
MAINTENANCE
PROGRAMME
The table summarizes the maintenance required to maintain the demineralizer operating
at its peak efficiency.
WEEKLY
Clean and disinfect the external surfaces
YEARLY
(or earlier if the limit of
500 litres has been
reached
Replace the resin filter cartridges
YEARLY
(or earlier if the limit of
800 litres has been
reached
Replace osmotic membrane and
active carbon filter
DANGER
ALWAYS REMOVE THE MAINS CABLE FROM THE POWER OUTLET,
BEFORE CARRYING OUT ANY KIND OF MAINTENANCE.
SHOULD THAT NOT BE POSSIBLE, OR WHENEVER THE EXTERNAL
BREAKER IS FAR AWAY OR, AT ANY RATE, NOT VISIBLE TO THE
MAINTAINER, PLACE A WORK IN PROGRESS SIGN ON THE
EXTERNAL BREAKER AFTER TURNING IT OFF .
GENERAL
MAINTENANCE
PROCEDURES
With reference to the above table, let's take a summary look at the various maintenance
to be performed:
- Clean all the external surfaces using a clean cotton cloth dampened with water plus,
possibly, a neutral detergent. Dry the surfaces and remove any residue before using
the equipment.
- To disinfect the external surfaces, use denatured alcohol, as well as detergents
containing a minimum percentage of sodium hypoclorite (or equivalent substances).
- Yearly or whenever necessary, replace the exhausted filters with new ones having
the same characteristics. For this maintenance, call the Technical Service (see
Appendix Z).
NOTE
S
HOULD THE DEMINERALIZER BE FORESEEN UNUSED FOR A TIME LONGER THAN
20 DAYS, WE SUGGEST TO EMPTY THE EXTERNAL FEEDING TANK, IF CONNECTED.
.

APPENDIX B – MAINTENANCE
19
ENGLISH
REPLACING THE
FILTERS
Resin filter cartridges
For filters replacement follow the procedures reported below.
See Figures L and M:
1. Turn off Milldrop, remove the mains cable and disconnect pipes and cable from the
use side (sterilizer, feeding tank or drawing tap).
2. Turn off the water tap feeding the Milldrop.
3. Remove the screws (1) and take off the lid (A).
4. Remove the screws (2) and take off the side panel (B) (if possible).
5. Lift and extract the filters assembly (C) from its bearings, disconnect pipes Ø8 (3
and 4) from the quick connectors on both ends of the resin filter cartridges.
6. Replace both cartridges, taking care to install them in the correct position and with
the arrows towards the bottom of the unit (Fig. M).
NOTE
T
O DISCONNECT A PIPE FROM ITS QUICK CONNECTOR, PULL OUT THE PIPE WHILE
KEEPING THE LOCK RING STILL
.
A
B
2
3
1
C
3
4
Figure L
Figure M
7. Reconnect the pipes respecting the original positions, open the water tap feeding
the Milldrop.
8. Carry out the purging of the hydraulic circuit as follows:
a: pull the pipe-union (and its connected pipe) out the quick connector “C”.
b: plug an other supplied pipe-union in the quick connector “C”, mount a silicon
pipe (not supplied) and place the opposite end inside a wash-basin.
c verify that the jack of the start/stop cable coming from the sterilizer, tank or
drawing tap is disconnected from the Milldrop; plug the purging jack in the “T”
connector.
d. connect the mains cable and switch on the Milldrop.
e. the water will start to flow from the silicone tube connected to the quick
connector “C”; let to drain for about 10 minutes.
9. Turn off Milldrop, remove the purging jack from the “T” connector, mount the
equipment lids and restore the hydraulic and electric connections.
C
A
rrows

APPENDIX B – MAINTENANCE
20
Osmotic membrane
and active carbon filter
cartridge
The osmotic membrane and the active carbon filter cartridge have the same duration, and
therefore must be both replaced at the expiry.
Replace first the osmotic membrane
.
See Figure N
1. Turn off Milldrop, remove the mains cable and the hydraulic and electric connection
with the equipment (sterilizer, tank or drawing tap).
2. Proceed as for the resin filter cartridges, and remove the whole filter assembly (A)
from its supports to access the osmotic membrane assembly (B).
3. Disconnect the pipes Ø8 (1) and (2) from their quick connectors and replace the
osmotic membrane.
NOTE
T
O DISCONNECT A PIPE FROM ITS QUICK CONNECTOR, PULL OUT THE PIPE WHILE
KEEPING THE LOCK RING STILL
.
4. Reconnect the pipes respecting their original position.
Figure N
5. Carry out the purging of the hydraulic circuit as for the first installation (see page 9);
let to drain the water for about 10 minutes.
WARNING
The hydraulic circuit purging procedure allows to eliminate the
maintenance liquids from the osmotic membrane, avoiding that the
liquids are passing from and damaging the resin filter
6. Check for no leaks in the equipment and on the quick connectors.
A
B
1
2
1

APPENDIX B – MAINTENANCE
21
ENGLISH
Replace now the active carbon filter cartridge.
See Figure O
1. Turn off MILLDROP and remove the mains cable.
2. Disconnect the quick elbow Ø10 (1) and “T” Ø10 (2) connectors and replace the
carbon filter cartridge (A) taking care to install it in the correct position and with the
arrow towards the bottom of the unit (Fig. O).
NOTE
T
O DISCONNECT A PIPE FROM ITS QUICK CONNECTOR, PULL OUT THE PIPE WHILE
KEEPING THE LOCK RING STILL
.
3. Reconnect the pipes respecting their original position.
Figure O
4. Carry out the purging of the hydraulic circuit as for the resin filter cartridges:
a: pull the pipe-union (and its connected pipe) out the quick connector “C”.
b: plug an other supplied pipe-union in the quick connector “C”, mount a silicon
pipe (not supplied) and place the opposite end inside a wash-basin.
c verify that the jack of the start/stop cable coming from the sterilizer, tank or
drawing tap is disconnected from the Milldrop; plug the purging jack in the “T”
connector.
d. connect the mains cable and switch on the Milldrop.
e. the water will start to flow from the silicone tube connected to the quick
connector “C”; let to drain for about 10 minutes.
5. Turn off Milldrop, remove the purging jack from the “T” connector, mount the
equipment lids and restore the hydraulic and electric connections.
A
1
2
A
rrow

APPENDIX B – MAINTENANCE
22
REPLACING THE
FLOW RESTRICTOR
See Figure P:
1. Turn off Milldrop and remove the mains cable.
2. Turn off the water tap feeding the Milldrop, remove the equipment lid and the side
panel.
3. Disconnect the “flow restrictor” from the red pipes Ø6 and replace with a new one.
NOTE
T
O DISCONNECT A PIPE FROM ITS QUICK CONNECTOR, PULL OUT THE PIPE WHILE
KEEPING THE LOCK RING STILL
.
WARNING
Install the new device with the arrow marking the flow direction
towards the bottom of the equipment.
4. Reassembly the equipment lids, connect the mains cable and turn on the unit.
5. Open the water feeding tap and check for no leaks.
6. Reassemble the board protection panel and the lid, fasten the screws.
Figure P
DISPOSAL AT ENDOF-LIFE
In accordance with Directives 2002/95/ EC, 2002/96/ EC and 2003/108/ EC, regarding
the reduction in use of dangerous substances in electrical and electronic equipment, as
well as waste disposal, such equipment may not be disposed of as normal urban waste
and must be separated accordingly. When purchasing a new, equivalent piece of
equipment, the old piece of equipment that has reached its end-of-life must be handed
over to the reseller for proper disposal. As regards reuse, recycling and other forms of
recovery of the above mentioned waste, the manufacturer carries out the functions
defined in the individual national legislations.
The proper collection and separation of such equipment for recycling, treatment and
disposal helps avoid any possible negative effects on the environment and health and
facilitates the recycling of the materials of which the equipment is made. The crossed out
rubbish can symbol indicates that the product, at the end-of-life, must be collected
separately from other types of waste.
WARNING!
Improper disposal of the product results in the application of sanctions which are
defined by individual national laws.
“Flow restrictor”
Red pipes Ø6

APPENDIX C – TROUBLESHOOTING
23
ENGLISH
APPENDIX C – TROUBLESHOOTING
INTRODUCTION
If you run into a problem or alarm while using the equipment, you should not be immediately concerned.
It may not, in fact, be related to a breakdown but, more probably to an anomalous situation, often merely transitory (such
as a blackout), or incorrect use.
In any case, it is important to first identify the cause of the anomaly and then take suitable corrective action, either
autonomously or with the help of the Technical Support Department (see Appendix Z).
For this purpose, below, we provide instructions for diagnosing and resolving general problems.
At the starting on
It is possible that at the start of operation, and also in normal condition, the red LED (signaling poor outlet water quality)
lights for a few seconds; this situation is normal.
On the contrary, if the LED remains lit for a time longer than 45 seconds (matched with the acoustic alarm), the
equipment enters in blocking status; in this case it will be necessary to replace the resin filter and/or the osmotic
membrane.
This fault condition is preceded by an intermediate phase during which Milldrop, even if correctly operating, turns on the
yellow LED (matched with the acoustic alarm) to signal that the filter replacement is coming near.
Milldrop unused for a few days
Should the equipment be unused for a few days, the red LED could remain lit for a time longer than 45 seconds at the
subsequent starting on, so resulting in the blocking of the equipment. In this case switch off the unit and switch on it
again. If the problem occurs again, replace the filter.
NOTE
SHOULD YOU FORESEE NOT TO USE THE EQUIPMENT FOR MORE THAN 20 DAYS, WE SUGGEST TO EMPTY
THE EXTERNAL TANK WHENEVER PROVIDED
.
ANALYSIS AND RESOLUTION OF PROBLEMS
If your demineralizer is not working correctly, please make the following checks before calling the Technical Support
Department:
PROBLEM POSSIBLE CAUSE PROPOSED SOLUTION
The demineralizer
does not
power-on.
The power cord is not plugged-in. Plug it in.
There is no voltage at the socket.
Check the cause of the lack of voltage at
the socket and fix it.
The main switch and/or differential switch are
OFF.
Turn the switch ON.
The mains fuses or the on-board fuse are
blown.
Replace with new fuses of same rating
value. (See Summary Table in Appendix
A).
Alarm:
water leak (red LED
blinking)
Water leak inside the equipment.
Remove the water leak cause and dry the
internal parts well.
Electronic board failure. Replace the electronic board.

APPENDIX C – TROUBLESHOOTING
24
PROBLEM POSSIBLE CAUSE PROPOSED SOLUTION
Alarm:
lack of water (red
LED blinking)
Entry tap closed. Open the tap.
Water work pressure insufficient. Check the water pressure.
Solenoid valve filter clogged up Clean the filter (see rear view, page 5).
Pressure switch failure. Replace the pressure switch.
Inlet solenoid valve failure. Replace the solenoid valve.
Active carbon filter clogged up. Replace the active carbon filter.
Alarm:
Poor outlet water
quality (red LED
blinking)
Resin filters depleted. Replace the resin filter assembly.
Osmotic membrane depleted.
Prepare to replace the osmotic membrane
shortly
Alarm:
Sufficient outlet
water quality (yellow
LED blinking)
Resin filters almost depleted. Prepare to replace the resin filters shortly.
Osmotic membrane almost depleted.
Prepare to replace the osmotic membrane
shortly.
Alarm:
Continuous operation
over 20 minutes
(water quality LED’s
are flashing and
intermittent buzzer
sounds)
Purging jack in the quick connector “T”
Remove the jack and plug in the start/stop
cable
Starting on with tank empty Turn off and on the demineralizer
Feeding tank’s float failure. Replace the float.
Pump failure. Replace the pump.
Drawing tap button failure Check the cause.
Osmotic membrane clogged up.
Carry out the hydraulic circuit purging or
replace the osmotic membrane it
Alarm:
Conductivity probe
disconnected or
probe sensor without
water (green LED
flashing and
intermittent buzzer)
Water not yet in circulation Effettuare un prelievo di acqua
Conductivity sensor without water
Check the connection of the pipe on the
quick connector “C” and perform a water
drawing
Conductivity probe cable disconnected Reconnect the cable
Conductivity probe failure Replace the probe
The demineralizer
does not deliver any
water.
Continuous working time exceeding 20
minutes.
Turn off the demineralizer and turn on
again (or push again the tap’s button).
Start/stop signal cable detached Connect the cable.
Feeding tank’s float failure. Replace the float.
Alarm signaling for inlet water lack or internal
leak
Remove the problem.
Lack of the power supply. Remove the cause.
Alarm signaling for poor outlet water quality. Replace the resin filter assembly.
Pump failure. Replace the pump.
Low outlet flow rate
Pump failure. Replace the pump.
Resin filter and/or active carbon filter clogged
up.
Replace the resin filter and/or the active
carbon filter.
Osmotic membrane clogged up.
Cleanse the osmotic membrane or replace
it.

APPENDIX D - DIAGRAMS
25
ENGLISH
APPENDIX D - DIAGRAMS
ELECTRIC DIAGRAM
Probe terminal
board
+5V
Ground
Tem
p
erature
Water leak sensor
Pressure switch –NC contact
Start/Stop signal (tank/tap)
Sonda
Probe
Electric valve
Pump
230 Vac
Transformer
Fusible
Start/Stop signal (sterilizer)
Configuration
dip-switch

APPENDIX D - DIAGRAMS
26
HYDRAULIC DIAGRAM
8
9
10
11
1
2
3
4
5
6
7
Legend:
1 – Water inlet solenoid valve 5 – Membrane assembly 9 – Conductivity probe
2 – Activated carbon filter assembly 6 – Resin filter assembly 10 – Purging tap
3 – Pressure switch 7 – Flow restrictor 11 – Quick connector plug
4 – Pump assembly 8 – Draining union
WATER INLET
DEMINERALIZED
WATER OUTLET
FLOW
Drain
FLOW
FLOW

APPENDIX G – DECLARATION OF CONFORMITY
27
ENGLISH
APPENDIX G – DECLARATION OF CONFORMITY

APPENDIX H - NOTES
28
APPENDIX H - NOTES

APPENDIX Z – TECHNICAL ASSISTANCE
29
ENGLISH
APPENDIX Z – TECHNICAL ASSISTANCE
FOR ANY REQUEST FOR
TECHNICAL SERVICE FOR THE PRODUCT,
WHETHER IN OR OUT OF WARRANTY,
DIRECTLY CONTACT THE
TECHNICAL SUPPORT DEPARTMENT
OF THE DEALER OR RESELLER
THAT SUPPLIED THE PRODUCT.
M.O.COM. Srl is completely available to customers to provide any technical information about the product as well as to
offer suggestions and advice on steam sterilization procedures.
In this regard, please refer to the following address:
M.O.COM. Srl
Via Saliceto, 22
40013 Castel Maggiore (BO)
Italy
website www.mocom.it
 Loading...