

Page 1
ASSEMBLY INSTRUCTIONS
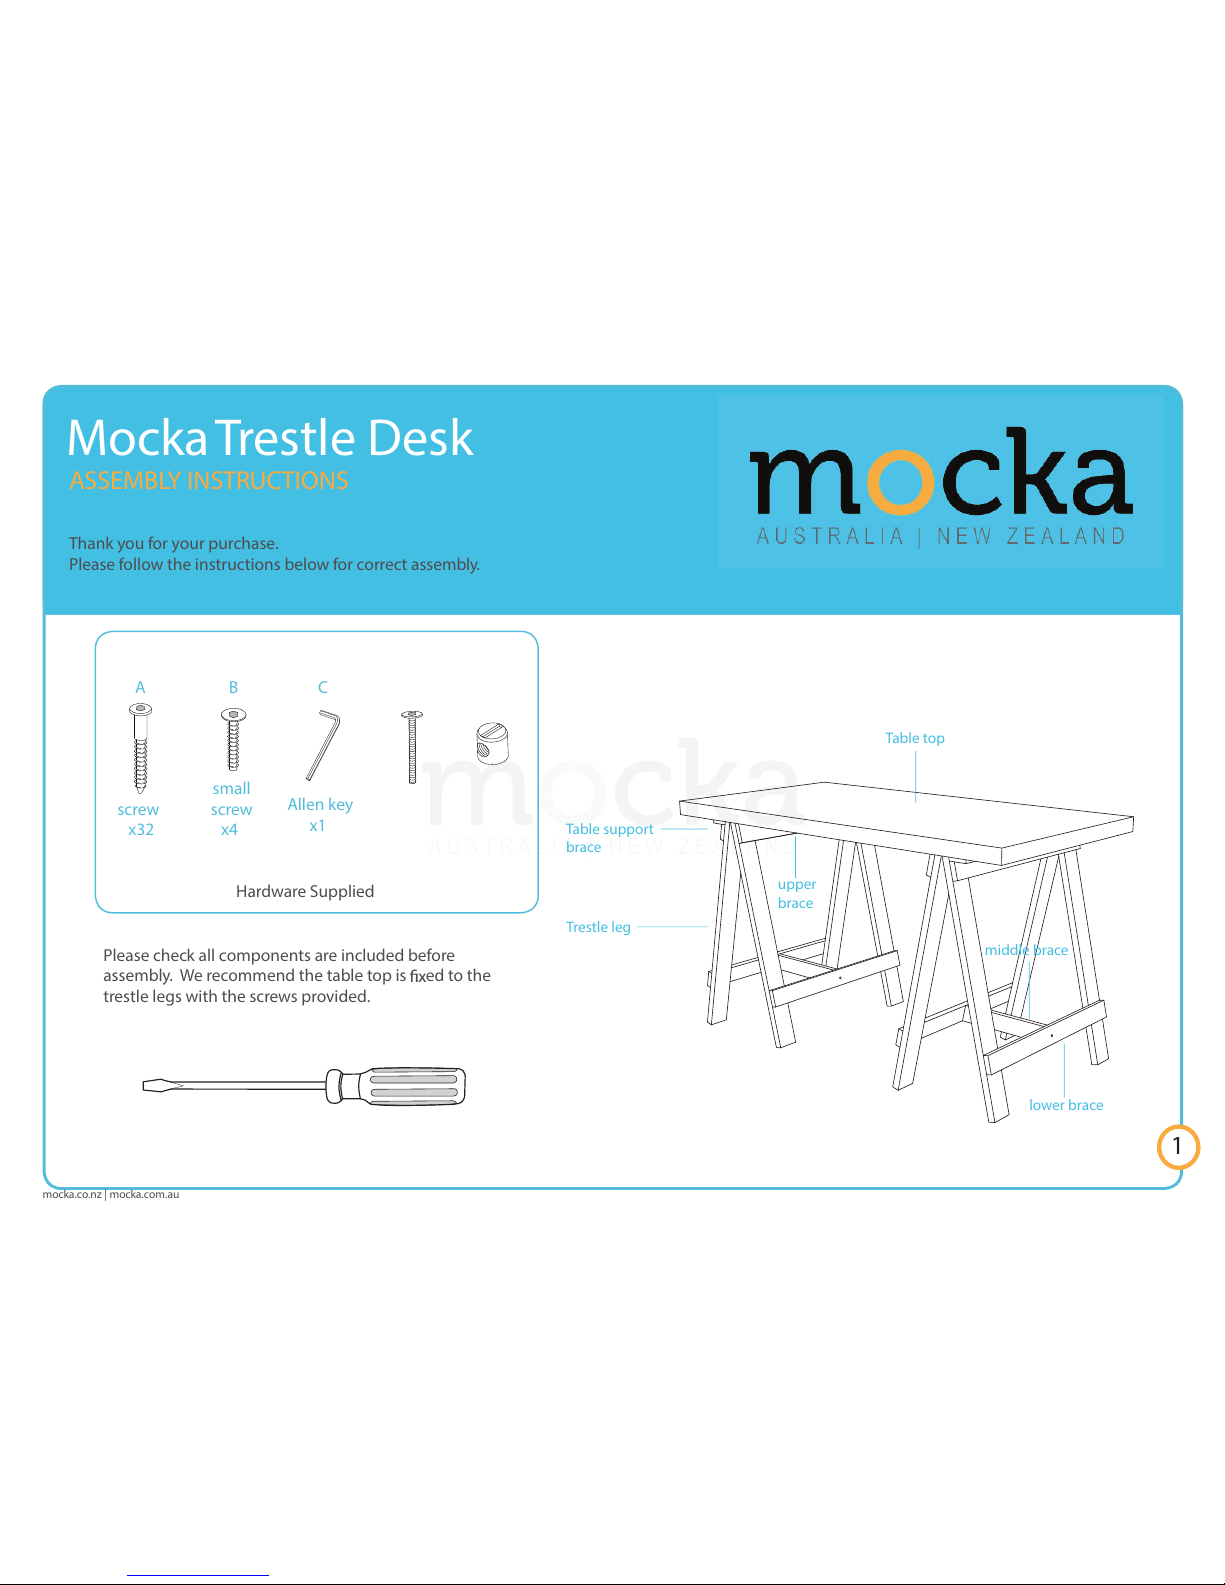
Thank you for your purchase.
Please follow the instructions below for correct assembly.
Mocka Trestle Desk
mocka.co.nz | mocka.com.au
1
Please check all components are included before
assembly. We recommend the table top is
ed to the
trestle legs with the screws provided.
Table top
Trestle leg
middle brace
lower brace
Table support
brace
upper
brace
Hardware Supplied
CA
x1
Allen key
x32
screw
B
x4
small
screw
E
D
Flathead screwdriver required
nut
x4
screw
x4
Page 2
ASSEMBLY INSTRUCTIONS
Mocka Trestle Desk
mocka.co.nz | mocka.com.au
2
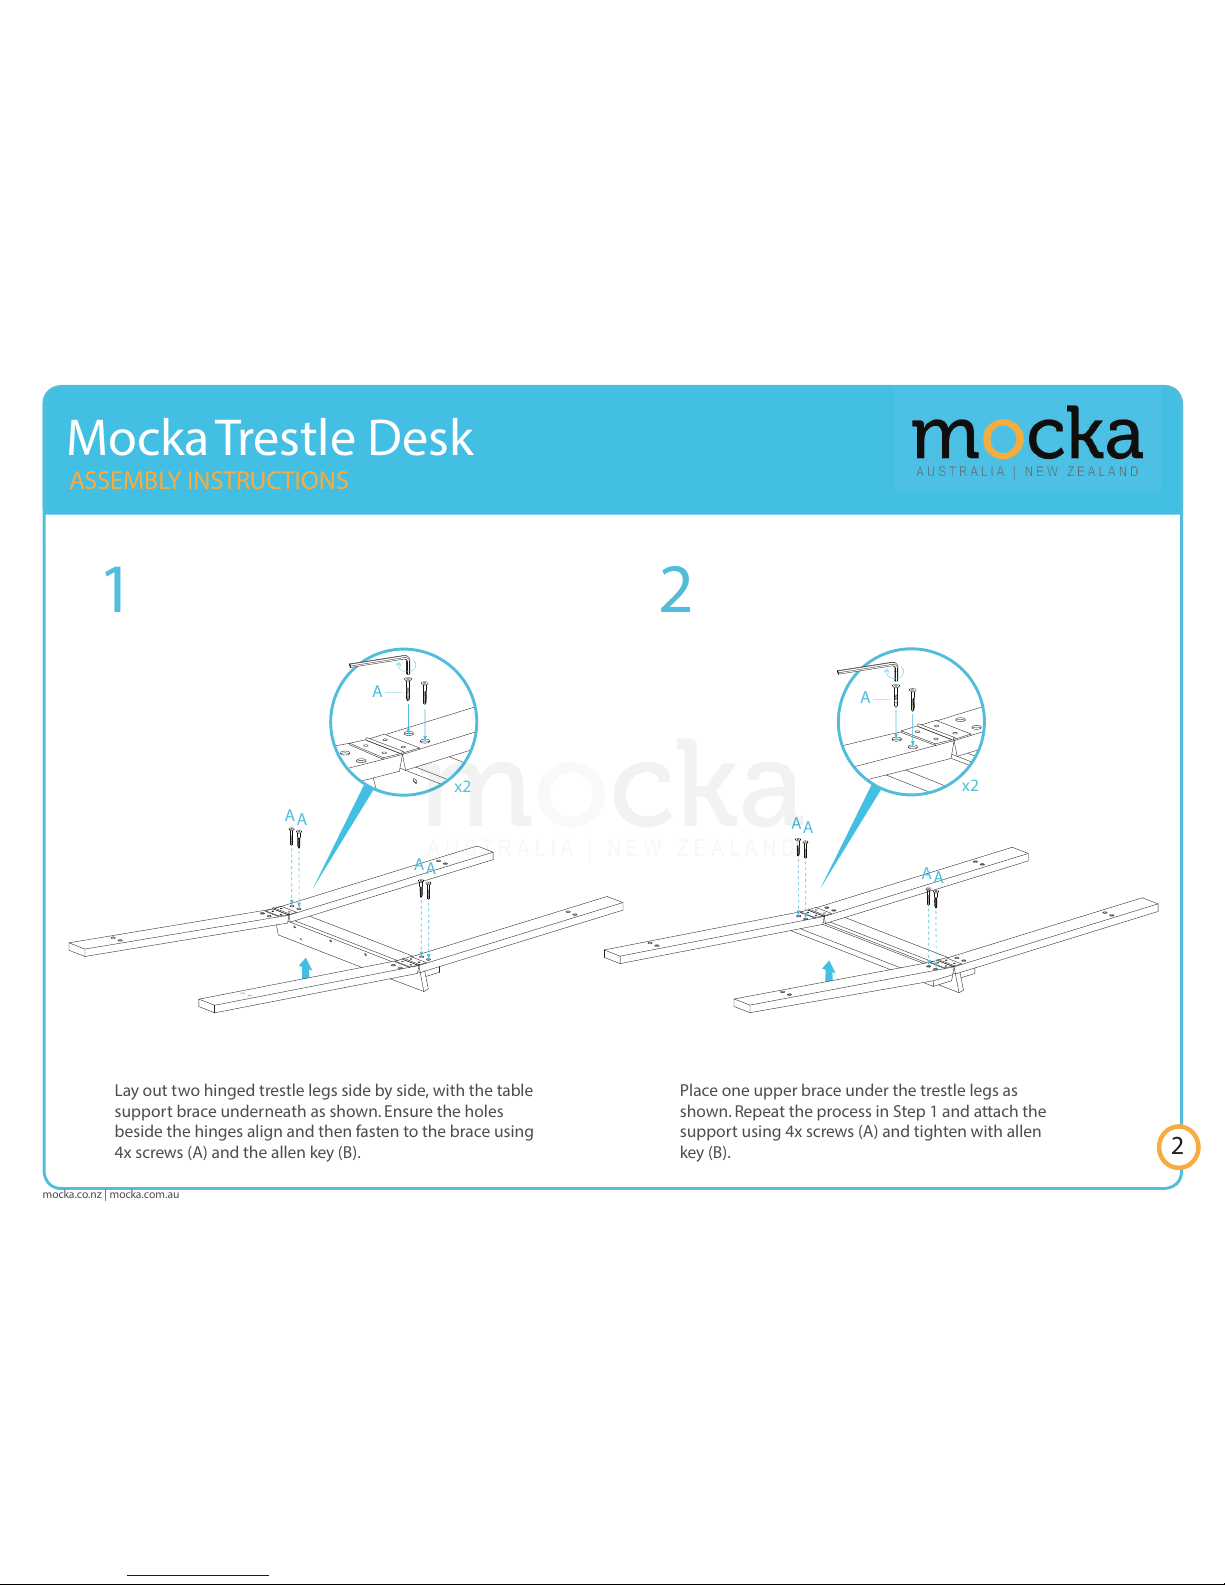
1
Lay out two hinged trestle legs side by side, with the table
support brace underneath as shown. Ensure the holes
beside the hinges align and then fasten to the brace using
4x screws (A) and the allen key (B).
Place one upper brace under the trestle legs as
shown. Repeat the process in Step 1 and attach the
support using 4x screws (A) and tighten with allen
key (B).
2
A
A
x2
A
x2
A
A
A
A
A
A
A
Page 3

ASSEMBLY INSTRUCTIONS
Mocka Trestle Desk
mocka.co.nz | mocka.com.au
3
3
4
Place two lower leg braces under both the trestle legs
at each end as shown. Align the pre-drilled holes in
the legs with holes in the braces. Attach both braces in
place using 8x screws (A) and allen key (B).
Fold and lift the whole trestle stand upright as shown
above. Ensure that it stands safely and all screws are
tight.
x4
A
A
A
A
A
A
A
A
A
Page 4

ASSEMBLY INSTRUCTIONS
Mocka Trestle Desk
mocka.co.nz | mocka.com.au
4
5 6
Place a leg brace between the two lower braces as
shown, aligning with the pre-drilled centre holes. Attach
in place using 2x screws (D) and 4x nuts (E). Tighten the screws
with the allen key (C) and the nuts with the athead screwdriver.
Repeat Steps 1 to 5 to assemble the second trestle
stand. Securely tighten all screws and bolts before
proceeding to the next step.
x2
D
D
D
E
E
E
Page 5

ASSEMBLY INSTRUCTIONS
Mocka Trestle Desk
mocka.co.nz | mocka.com.au
5
Carefully lower the table top into position above the two
trestle stands. Shift legs so their holes align with the screw
holes in the underside of the table top. Fasten table top to
supports from below using 4x small screws (B).
7 8
All done! Regularly check all screws are suitably
tightened. Enjoy!
B
B
B
B
 Loading...