

WARNING: Any furniture that is not anchored to a wall has the potential
to tip over in certain circumstances, i.e. if a child attempts to climb up on
the furniture or in the event of an earthquake. Accordingly, we
recommend that all furniture is anchored to a wall. We supply a free
safety wall anchor with all furniture sold and we recommend these are
used to prevent your product tipping. The fixing device provided should fit
most wall types, but please note that different wall materials may require
different fixing devices from those supplied.
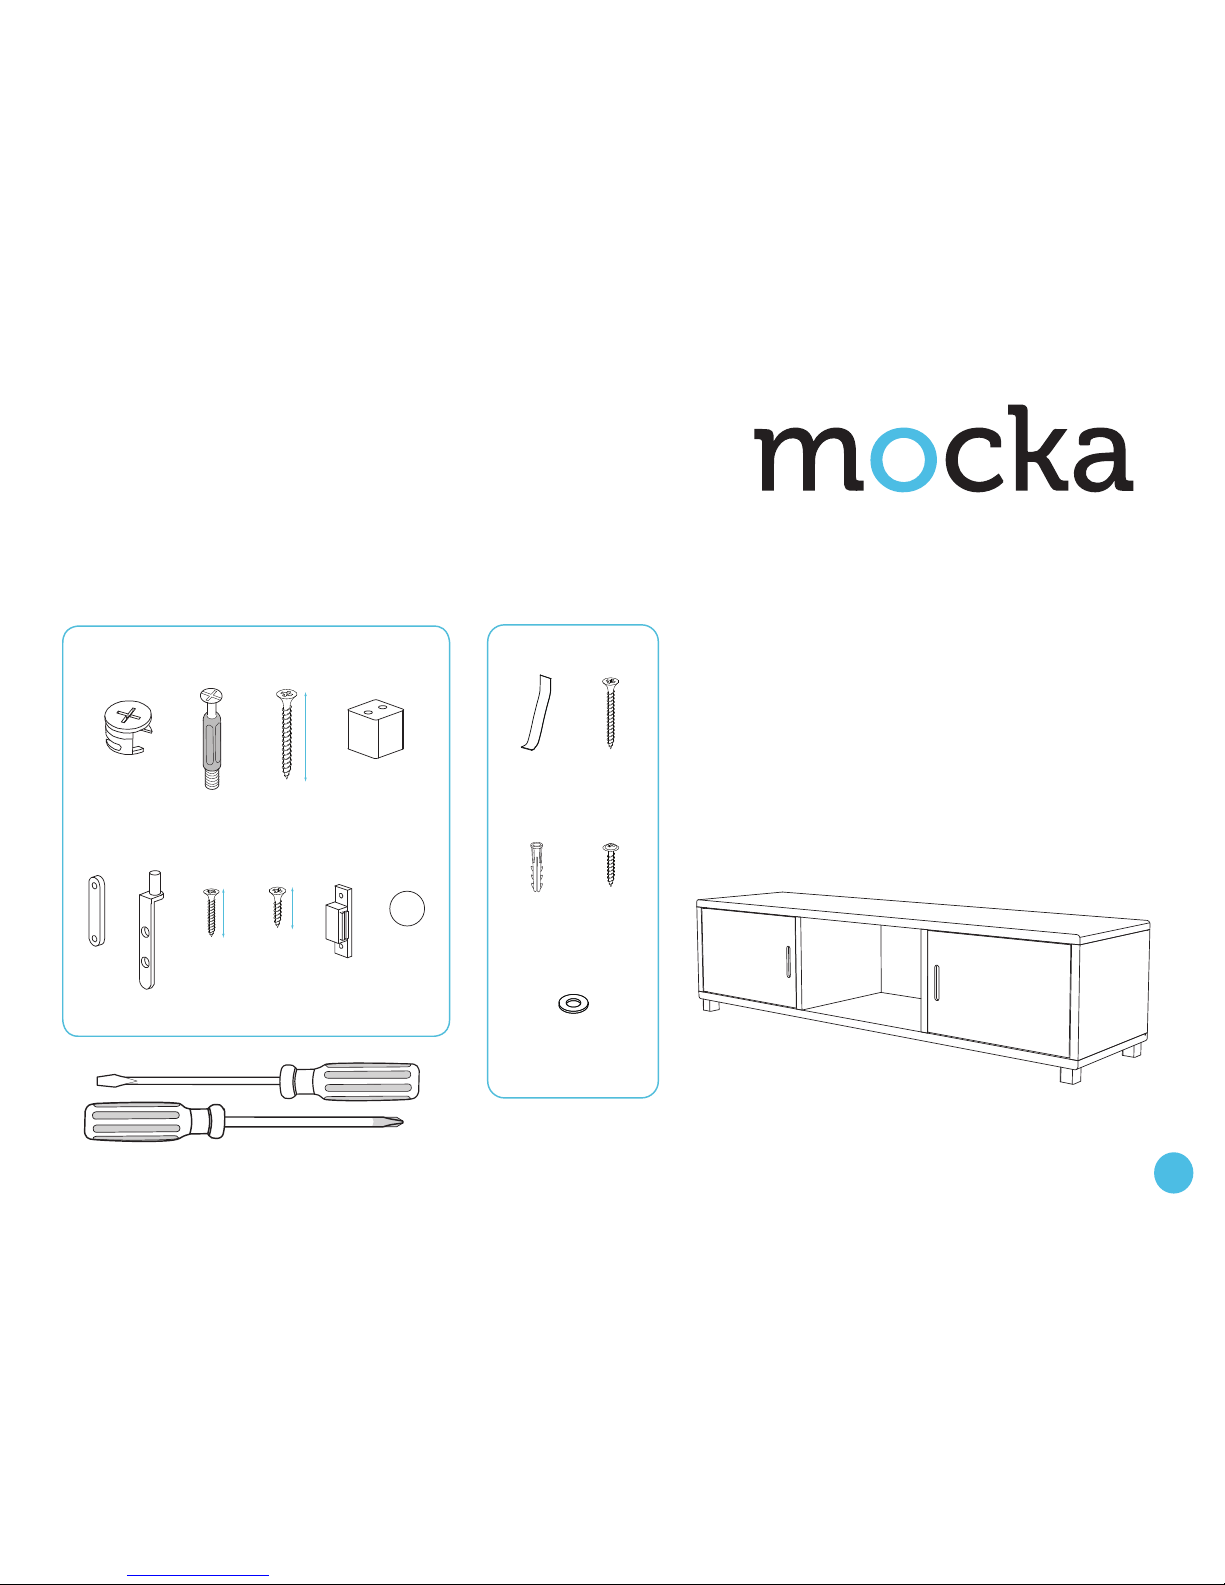
Phillips & flathead screwdrivers required
Hardware Supplied
x16
B
A
x16
C
D
E
F G
H
I
J
x12
x6
x2
x4
x4
x12
x2
x16
8 mm
12 mm
35 mm
x1
washer
Z
Wall
Screw
r/washer
screw
x1
Y
wall
anchor
x1
X
Safety
Strap
W
Wall Strap
Mocka Essentials Entertainment Unit
1
mocka.co.nz | mocka.com.au
Assembly Instructions
Thank you for your purchase.
Please follow the instructions below for correct assembly.
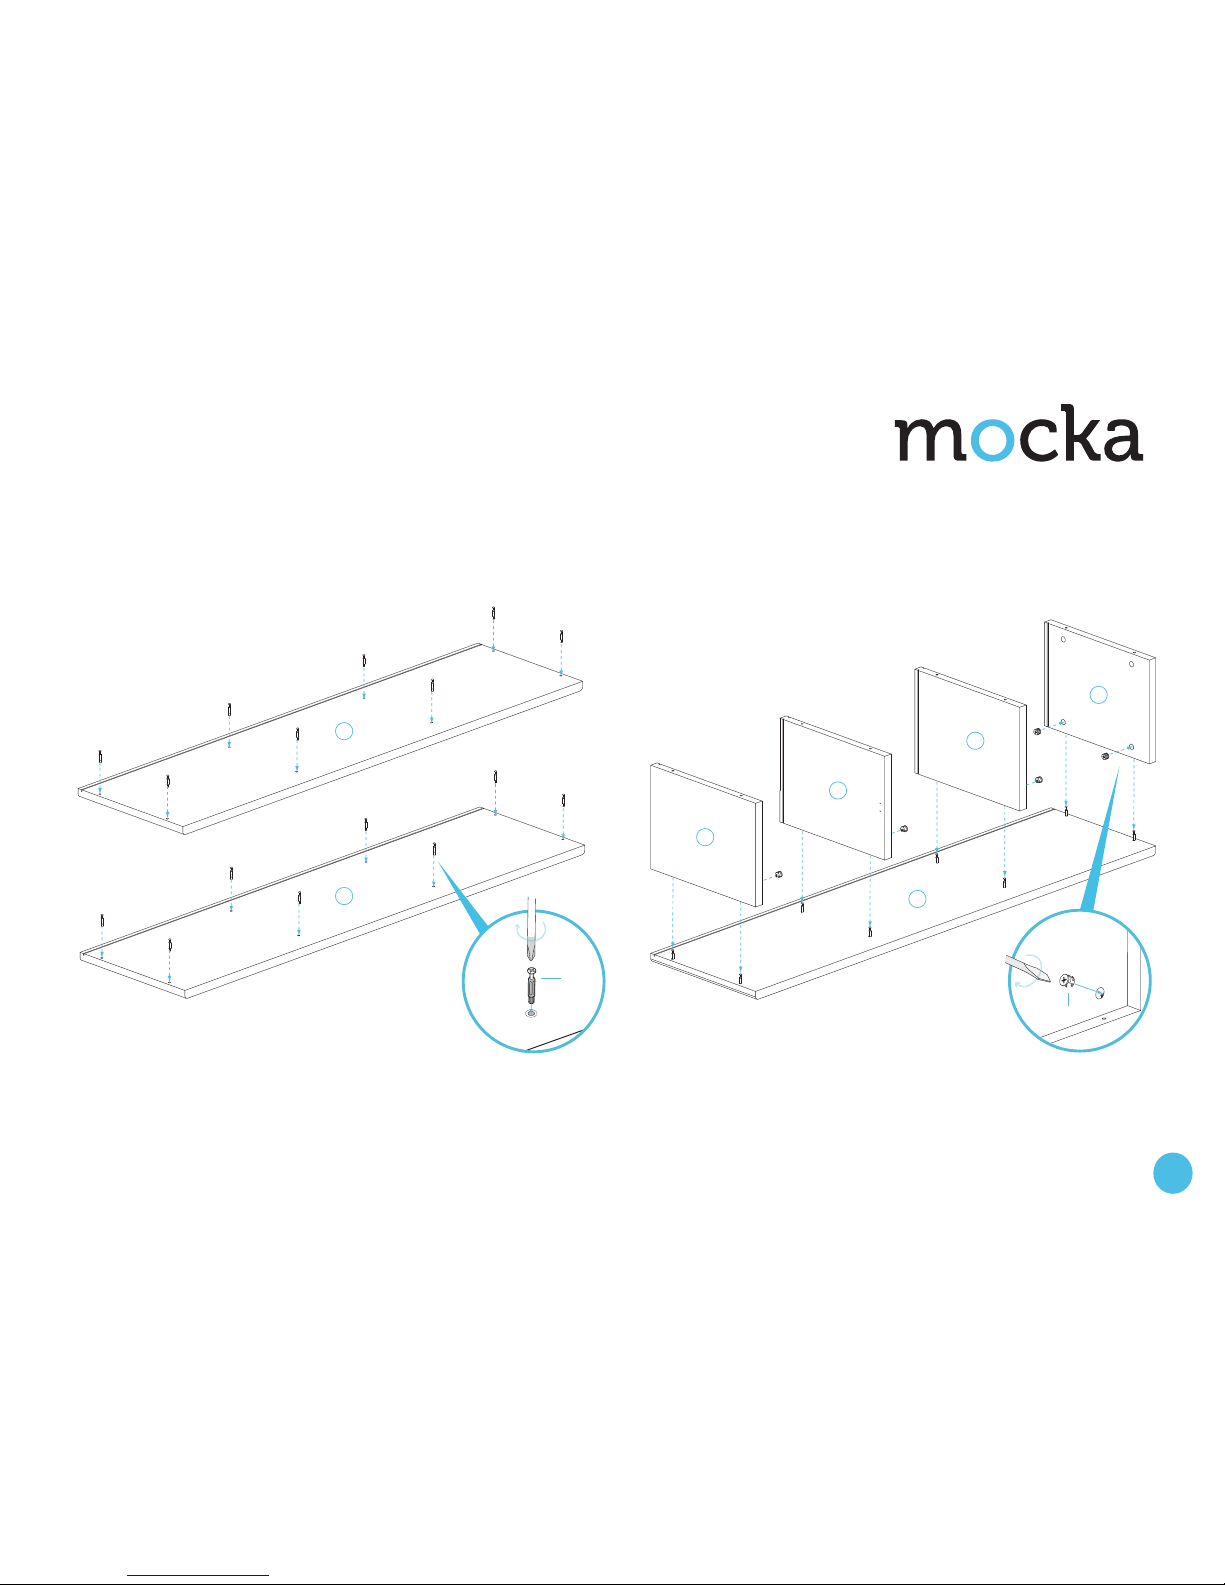
1
2
First screw in hardware (B) into holes in both top and bottom panels [3
& 6].
Slide four vertical panels [1 & 2] onto the screw tops in the correct
position as shown. Ensure grooves in panels are all aligned at rear.
Insert hardware (A) into the lower holes in side of panels and tighten with
screwdriver.
A
x8
B
x6
B
B
B
B
B
B
B
B
A
x2
Ax2
A
A
B
B
B
B
B
B
B
B
3
6
Ax2
6
1
2
1
2
Mocka Essentials Entertainment Unit
2
mocka.co.nz | mocka.com.au
Assembly Instructions

3
4
Slide in rear back panels [4 & 5] between vertical panels as shown.
Screw in the two magnetic clips (I) into holes in the central panels using
screws (G).
Mount door hinge pins (F) to cupboard doors [7]. Place doors into
position as shown, aligning hinge pins with holes in the top panel.
F
x4
H
F
x2
G
I
F
F
4
5
4
7
7
Mocka Essentials Entertainment Unit
3
mocka.co.nz | mocka.com.au
Assembly Instructions

5
6
Place base panel [3] with hardware (B) already attached into holes on
top of vertical panels. Insert 8x hardware (A) into remaining holes in all
verticals panels [1 & 2] and tighten with screwdriver.
Attach all feet (D) to the base panel [3] using 2x screws (C) in each.
Ensure all screws are tightened with a screwdriver.
A
x8
D
D
C
D
A
A
A
A
A
A
A
A
3
3
Mocka Essentials Entertainment Unit
Assembly Instructions
4
mocka.co.nz | mocka.com.au

Jolt Wardrobe
ASSEMBLY INSTRUCTIONS
5
mocka.co.nz | mocka.com.au
7
8
Flip the unit over carefully so feet sit on the floor. Fasten clip plate (E)
to the cupboard door using screws (H). Check both doors swing
closed.
Use (J) to cover holes where hardware (A) is used.
x2
H
E
Hx2
Hx2
Mocka Essentials Entertainment Unit
Assembly Instructions
5
mocka.co.nz | mocka.com.au

9
10
Attach safety strap (W) to the top of the back side of the unit using
screw (Y). Tighten with a screwdriver. Once assembled lift furniture
into place, do not drag.
Move the unit into the desired location up against a wall. Use a drill to
create a small hole lining up with the top of the safety strap (W). Fasten
to wall using wall anchor (X), washer (Z) and a wall screw. Ensure unit is
balanced and steady before use. You’re done, enjoy!
Y
W
r/washer
screw
w
X
Z
W
x1
wall
anchor
wall
screw
Washer
Strap
Safety Strap
Mocka Essentials Entertainment Unit
Assembly Instructions
6
mocka.co.nz | mocka.com.au
 Loading...