

Page 1

IMPORTANT!
KEEP FOR FUTURE REFERENCE:
WARNING: Never leave your child unattended in the
highchair. Strict adult supervision is required at all times.
WARNING: Ensure the safety strap is in use at all times to
avoid the child slipping downwards and causing injury. We
recommend the use of the shoulder and waist harness for
added safety and to avoid injury caused by falls – this is
available on our website.
WARNING: Do not use the highchair unless components are
correctly fitted and adjusted.
WARNING: Ensure the highchair is positioned away from
objects or structures that can cause injury. Be aware of the
risk of open fire and other sources of strong heat, such as
electric bar fires, gas fires etc, in the vicinity of the highchair.
The highchair should not be used until the child can sit up
unaided. Do not use the highchair if any part is broken, torn
or missing.
Tray
Seat
Legs
Please note: the highchair has a one year
warranty. This warranty does NOT cover the
clips/prongs on the tray. Care must be taken when
inserting/removing the tray to avoid damage.
Designer Highchair
1
mocka.co.nz | mocka.com.au
Assembly Instructions
Thank you for your purchase.
Please follow the instructions below for correct assembly.
Page 2
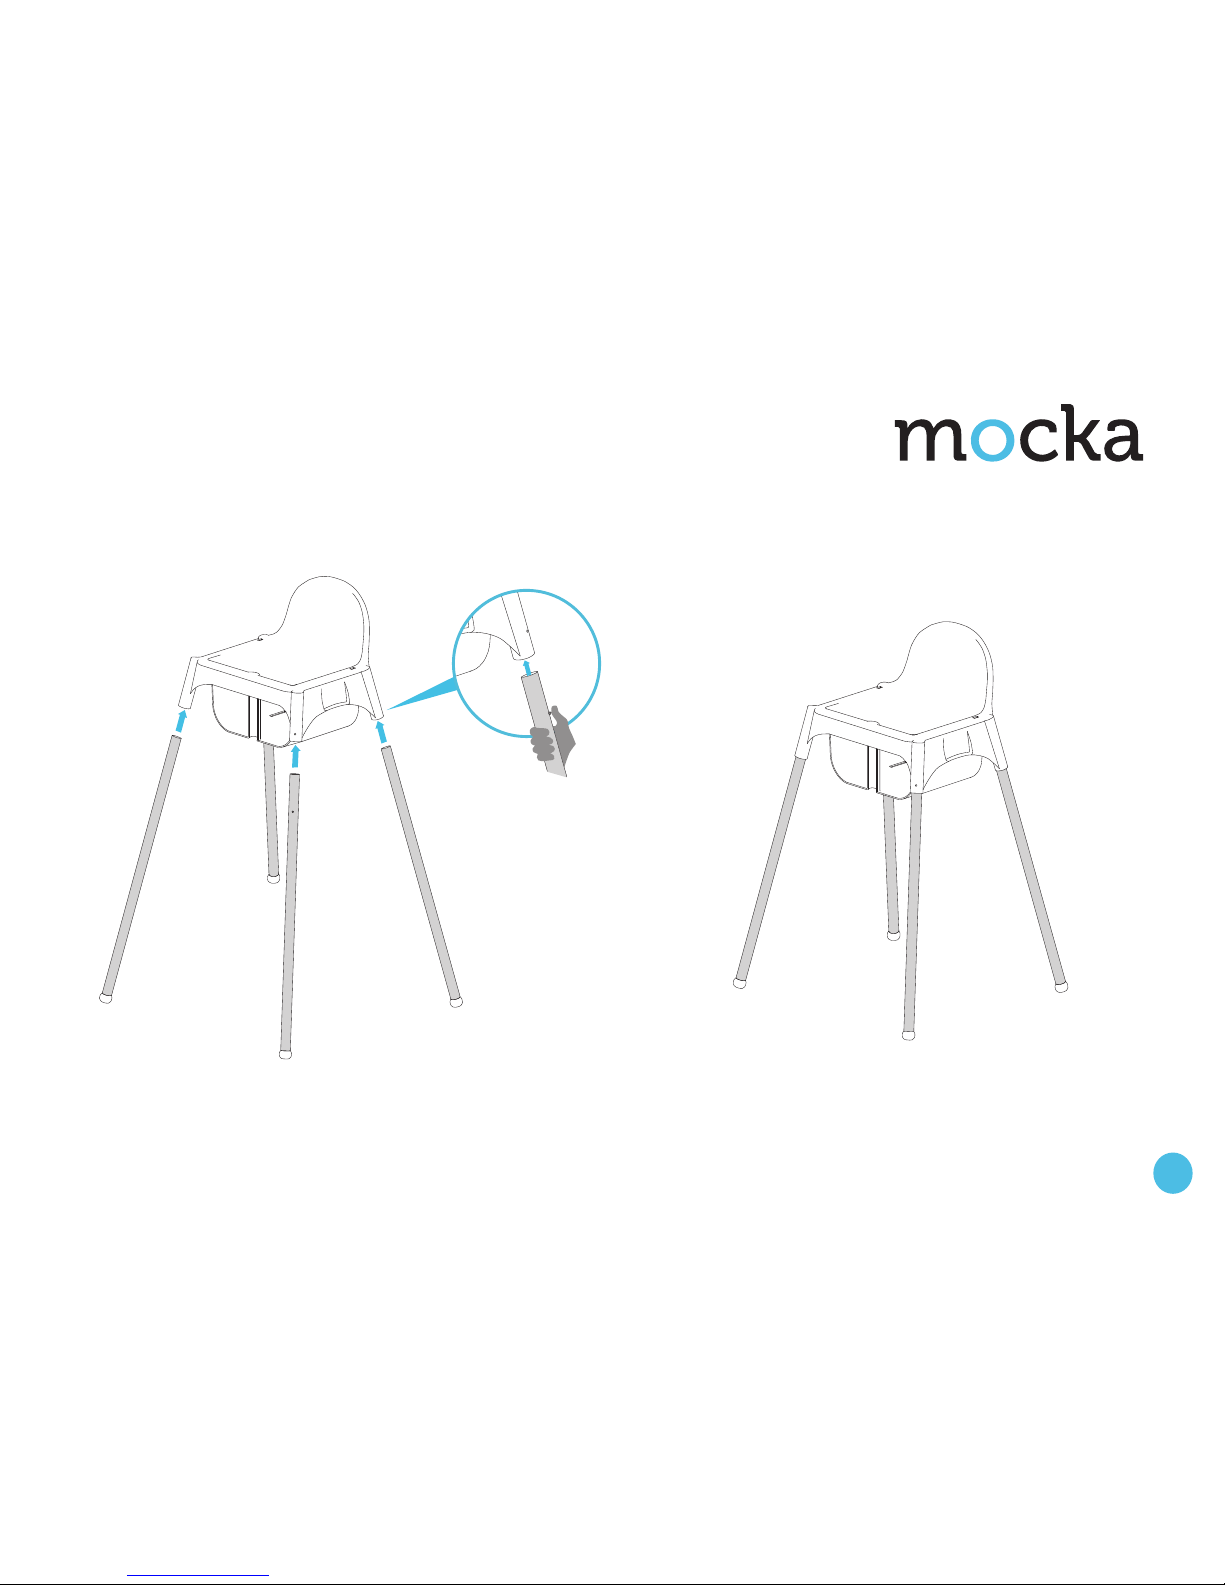
1
2
Slot all four legs into the corners of the highchair seat. Press in spring
button in the top of each leg and ensure it clicks into place in the hole
in the seat.
Check all legs are attached and locked in place in the seat.
x4
Designer Highchair
2
mocka.co.nz | mocka.com.au
Assembly Instructions
Page 3

3
4
Attach the tray to the highchair seat by first sliding in corner prongs
before pressing down on tray to clip in place. Take care when
inserting/removing the tray to avoid damage.
All done! Regularly check the lap strap to ensure it is always secure and
tight around your child’s stomach. Always ensure there is adult
supervision at all times. Enjoy!
Tray
x1
Tray
Please make sure that the
prongs on the tray are inserted
holes located on the side of the
highchair), then push the tray
down to align with the chair.
To remove, simply reverse the
instructions, ie carefully lift the
front of the tray, then remove.
Designer Highchair
3
mocka.co.nz | mocka.com.au
Assembly Instructions
Page 4

5
6
A. Attach the anchor straps to the harness. Place the complete
harness inside the seat of the highchair and push the two ends down
through the seat holes.
B. Pull the anchor straps tight underneath and tie a reef knot.
C. Carefully seat child in the highchair and slip arms and shoulders
through harness.
D. Clip the front buckles together as shown. Adjust straps to ensure a
snug fit around child’s shoulders and chest.
C
D
A
B
x2
Harness Harness
Designer Highchair
Assembly Instructions
4
mocka.co.nz | mocka.com.au
 Loading...