

A B
C
D
E F
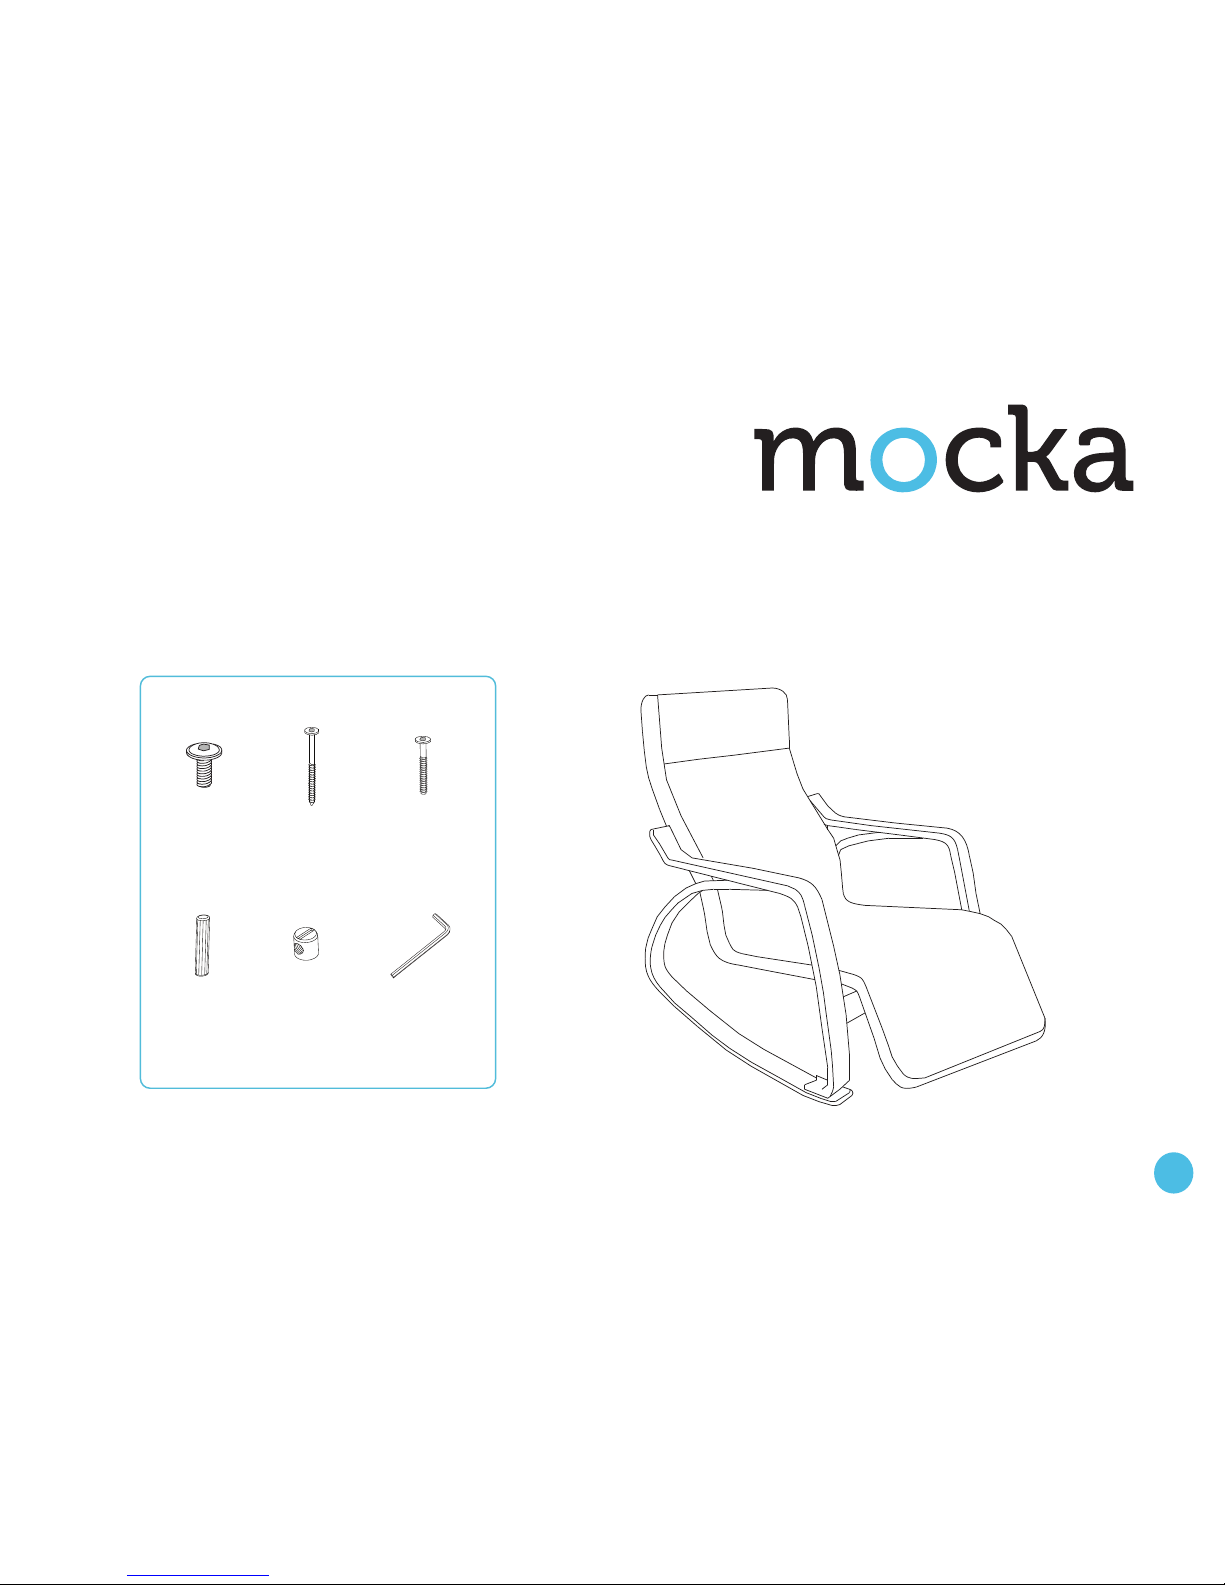
Hardware Supplied
nut
x2
x2
long screw
x1
allen key
bolt
x2
screw
x6
dowel
x4
Asta Recline
1
mocka.co.nz | mocka.com.au
Assembly Instructions
Thank you for your purchase.
Please follow the instructions below for correct assembly.
1
2
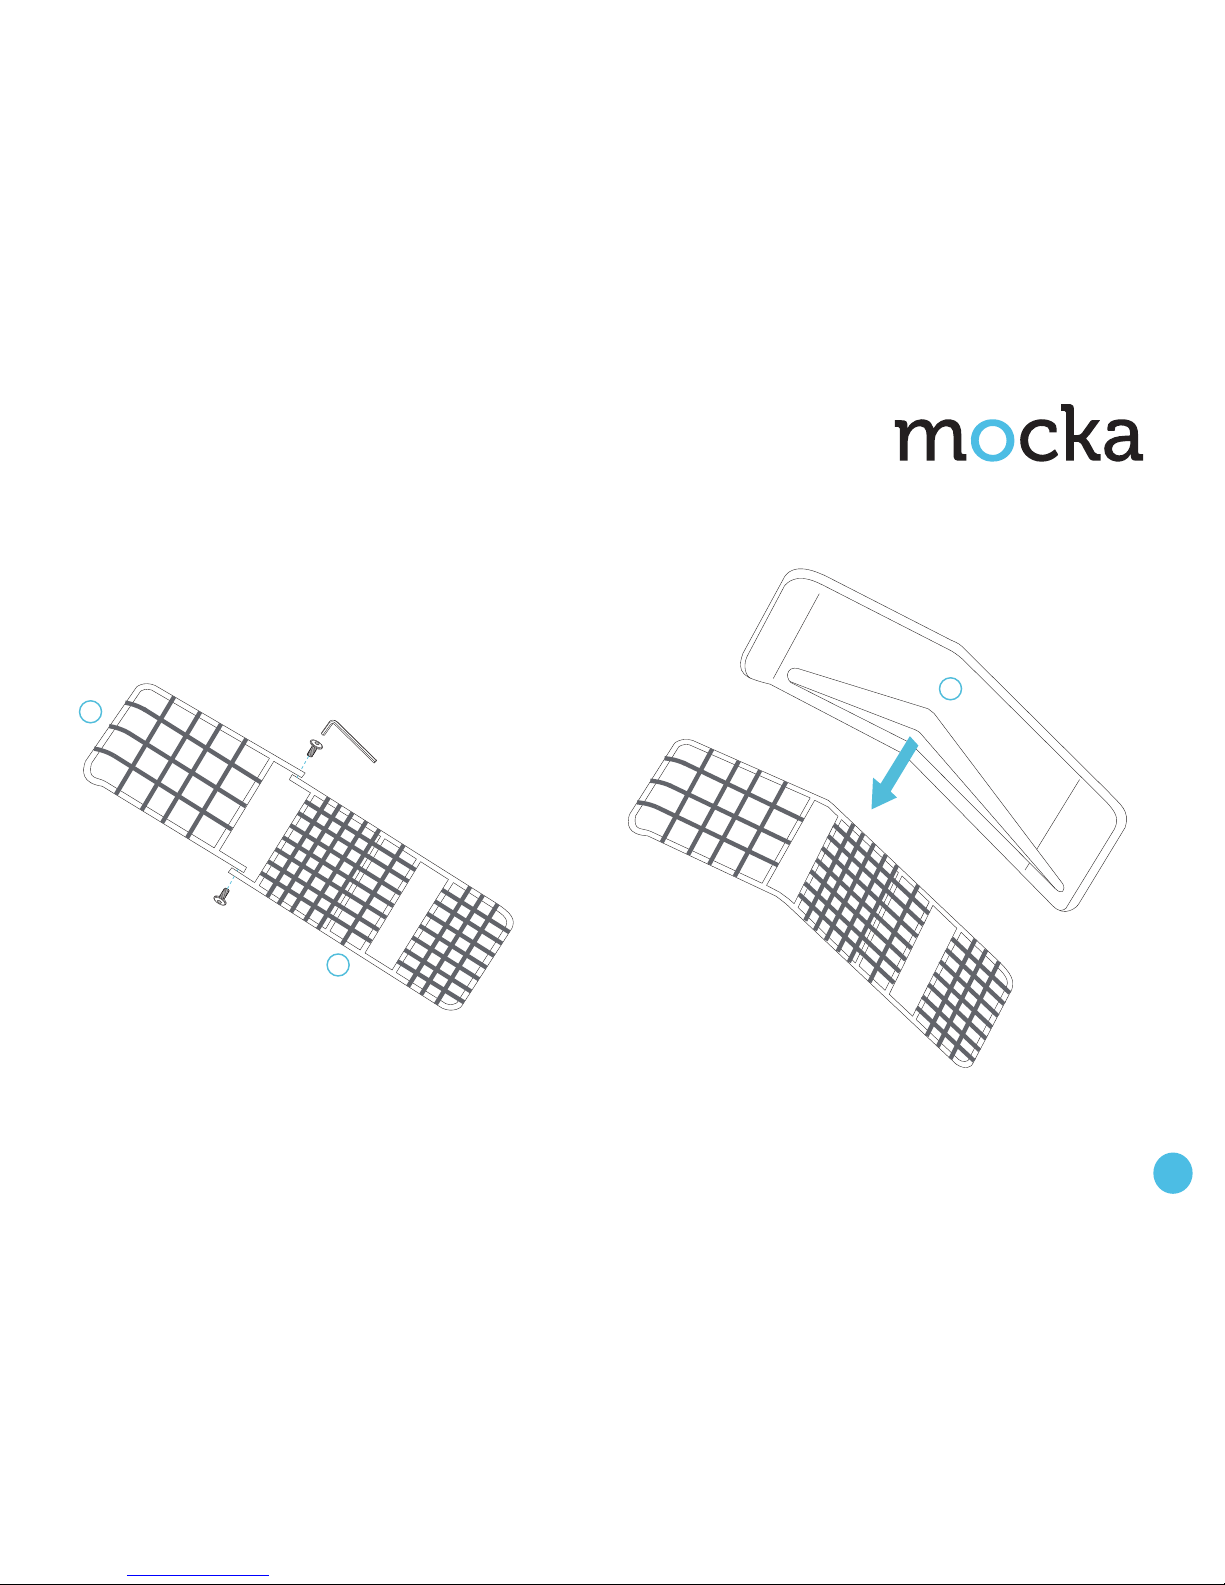
On parts [4] and [5], the arrows on the frames point in the direction it
should be facing (upwards). Attach part [4] to [5] using 2x bolts (A).
Tighten with the allen key (F).
Place the assembled frame inside the cover [3], ensuring the arrows in
the frame point away from the zip i.e. into the inside of the cover.
Note: the cover zips up from the back.
5
4
3
A
A
F
Asta Recline
2
mocka.co.nz | mocka.com.au
Assembly Instructions

3
4
Insert 4x dowels (D) into panel [2] as shown.
2
1
D D
D
D
Attach panel [2] to the chair legs [1] using 2x long screws (B) and secure
with 2x nuts (E).
F
B
B
E
E
E
B
2
1
Asta Recline
3
mocka.co.nz | mocka.com.au
Assembly Instructions

5
6
3
1
C
C
C
C
C
C
C
x6
Position the chair body [3] between the chair legs [1]. Attach the chair body [3] to the chair legs [1] as shown, using 6x screws
(C). Ensure the holes in the metal frame match up with the eyelets on the
cover. Tighten with the allen key (F).
3
1
1
Asta Recline
Assembly Instructions
4
mocka.co.nz | mocka.com.au

Jolt Wardrobe
ASSEMBLY INSTRUCTIONS
5
mocka.co.nz | mocka.com.au
7
8
Once assembled lift the footrest and click into the desired position. To
lower the footrest, pull upwards and push down.
You’re done, enjoy!
Asta Recline
Assembly Instructions
5
mocka.co.nz | mocka.com.au
 Loading...