

Mobotix MX-HALO-EXT-CM, MX-HALO-EXT-CO, MX-HALO-EXT-PW, MX-HALO-EXT-NG, MX-HALO-EXT-SW Quick Install Manual
Page 1
EN
www.mobotix.com
MX-HALO-EXT-CM/CO/NG/PW/SW
Quick Install HaloMount
Security-Vision-Systems
Installation Mount For
Optical Sensor Modules
• Suitable for all optical sensor modules
• Inner ring can be tilted 20°
• High-quality metal design
• Design variety with five colors
31.764 _EN_V3_12/2014
The MOBOTIX accessory HaloMount oers the possibility to integrate the sensor modules of a FlexMount
Dual camera in an installation mount that can also be used for lighting equipment
(QR-CBC/MR16 LED Sharp Array 4/6 W). Since the sensor module can be tilted up to
20°, you can point the image center precisely on the area that is to be monitored.
Note: The HaloMount is not suited for unprotected outdoor usage.
Material: steel; inner ring: brass; surface: powder-coated orgalvanized; colors: (matt
chrome/chrome/brushed nickel/white/black); installation diameter: 68mm.
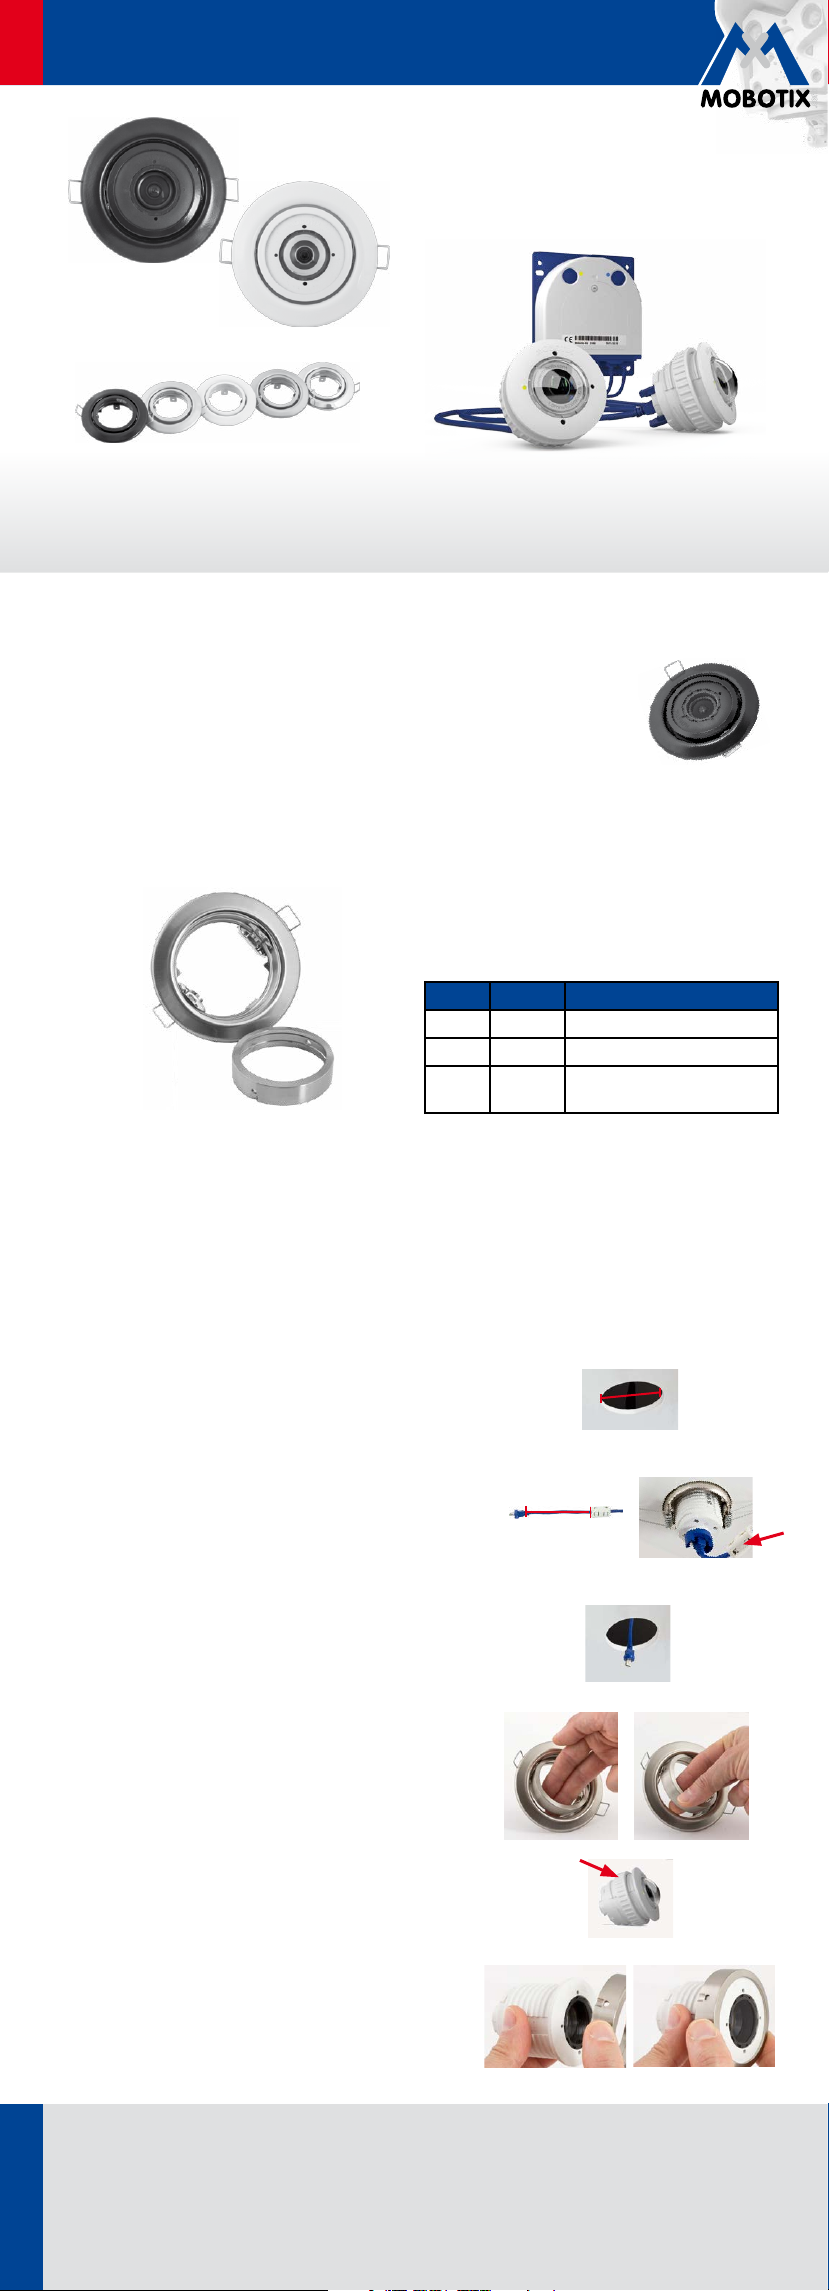
Delivered Parts
1.1
Item Number Part Name
1.1 1 Outer ring with spring clip
1.2
1.2 1 Inner ring
w/o
image
1 Light connection cable (not
needed for sensor module)
Installation
Before installing the sensor modules, make sure that the sensor cables will reach the intended mounting
position without placing a strain on the cables. Disconnect the sensor modules from the sensor cables
before installing the modules. Cables with straight or with angled plugs can be used to connect the sensor
modules (on the camera: straight plugs only). Further information on the connectors and the installation
can be found in the S14/S15 manual.
1. Prepare opening
Prepare a circular opening with a diameter of
68mm with a holesaw.
2. Attach hinged ferrite
Attach a hinged ferrite to the sensor cable (maximum
distance to the connector 10cm).
3. Lead sensor cable through the opening
Lead the sensor cable through the opening in the
ceiling and allow it to protrude through (the longer
it extends, the easier the installation).
4. Loosen inner ring of the mount
Loosen the inner ring (fixed using a spring
mechanism) by gripping it from the inside and
moving it beyond the maximum tilt angle (moderate
pressure is sucient).
5. Remove lock nut
If a lock nut is attached to the sensor module,
remove it. The lock nut is not needed for the
installation of the HaloMount.
68mm
Max. 10cm!
6. Insert sensor module into inner ring
Insert the sensor module into the dismantled inner
ring of the HaloMount from behind.
Innovations– Made in Germany
The German company MOBOTIX AG is known as the leading pioneer in network camera technology and its decentra-
lized concept has made high-resolution video systems cost ecient.
MOBOTIX AG • D-67722 Langmeil • Phone: +49 6302 9816-103 • Fax: +49 6302 9816-190 • sales@mobotix.com
Page 2
EN
www.mobotix.com
Quick Install HaloMount
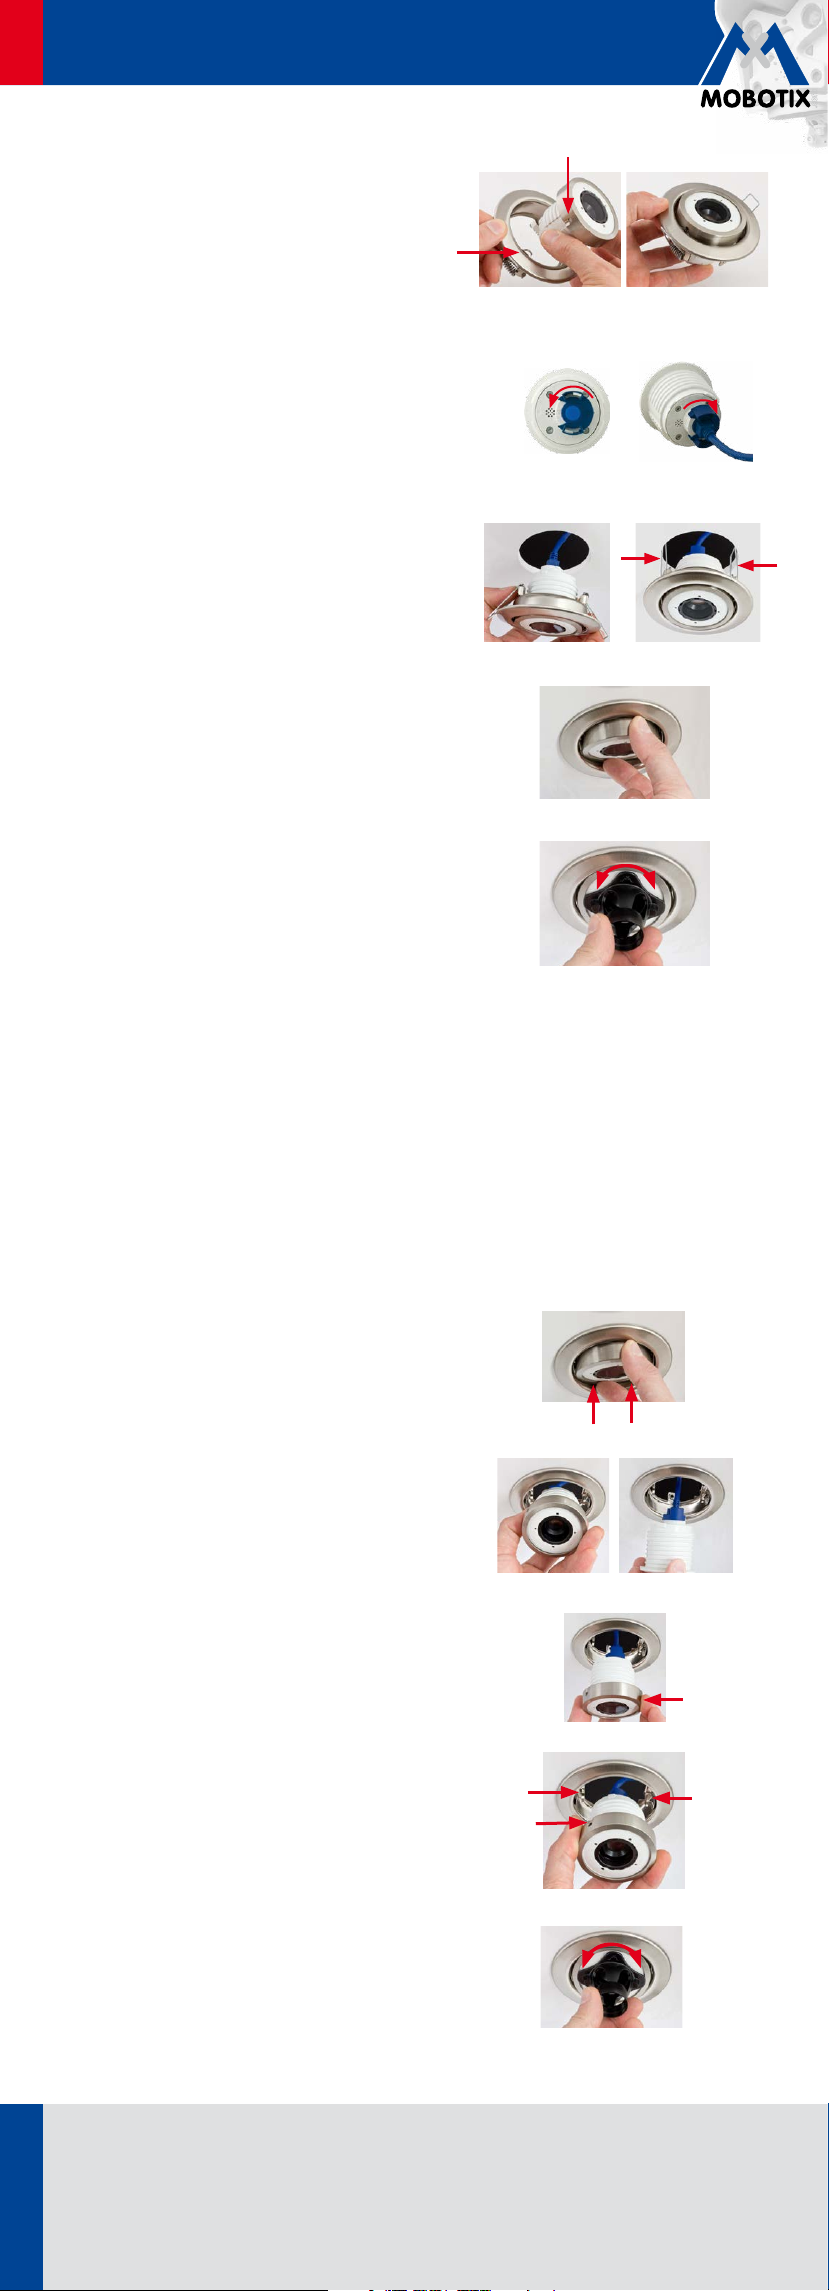
7. Insert sensor module into outer ring
Insert the inner ring with the sensor module into
the outer ring from below. Turn the inner ring in
such a way that the two notches are positioned
above the two retaining collars in the outer ring.
Engage the inner ring holding the sensor module
into the outer ring by applying slight pressure.
8. Connect sensor module
Connect the sensor cable to the sensor module:
Turn the blue bayonet catch to the left and remove
it. Remove the plug,then insert the sensor cable,
attach the bayonet catch and turn it to the right.
9. Insert HaloMount into opening
Push the two spring clamps of the outer ring
upwards and insert the HaloMount into the
opening. Note that the position of the two spring
clamps determines the position of the inner ring‘s
swivel axis and, therefore, the final position of
the sensor module.
Security-Vision-Systems
10. Adjust sensor module
The inner ring can be tilted up to 20° (without
the use of tools), thus, you can focus the sensor
module optimally on the area to be monitored.
11. Adjust camera image
For proper adjustment of the camera image use the
black module wrench (provided with the camera).
Use the wrench to turn the sensor module in either
direction until the desired position is shown on
the computer monitor.
Replacing a Sensor Module
All optical MOBOTIX sensor modules can be mounted in the HaloMount housing.
1. Loosen sensor module
Tilt the inner ring up to the stop and press hard
on one side of the ring‘s edge to loosen the inner
ring of the HaloMount.
2. Replace sensor module
Remove the sensor module of the inner ring and
disconnect it from the sensor cable (turn bayonet
catch to the left and remove it, then remove the
sensor cable). Connect the new sensor module
to the sensor cable (insert sensor cable, attach
bayonet catch and turn it to the right).
3. Insert sensor module into inner ring
Insert the new sensor module into the inner ring.
4. Insert inner ring into HaloMount
Turn the inner ring in such a way that the two
notches are positioned above the two retaining
collars in the outer ring. Engage the inner ring
holding the sensor module into the HaloMount
by applying slight pressure.
5. Adjust sensor module and camera image
Adjust the sensor module and the camera image
as described in steps 10. and 11. in „Installation“.
Innovations– Made in Germany
The German company MOBOTIX AG is known as the leading pioneer in network camera technology and its decentra-
lized concept has made high-resolution video systems cost ecient.
MOBOTIX AG • D-67722 Langmeil • Phone: +49 6302 9816-103 • Fax: +49 6302 9816-190 • sales@mobotix.com
Copyright © MOBOTIX AG 2014 • Made in Germany • Technical information subject to change without notice.
 Loading...