

MOBOT
® Mars & Venus
Electric Bicycle
USER MANUAL
PLEASE CAREFULLY READ THE USER MANUAL AND
WARRANTY BOOK BEFORE USING
MOBOT® Mars & Venus, edited on 7/12/2015

WARNING
Whenever you ride the MOBOT® Mars & Venus electric bicycle
you might risk having serio us injury from collisions, falls or loss
of control. To ride safely, YOU MUST READ AND FOLLOW ALL
INSTRUCTIONS AND WARNINGS STATED IN THIS MANUAL.
This manual includes basic operational instructions for the
MOBOT
® Freedom electric scooter. It does not cover any
situations where injury or death may occur.
OPERATORS MUST USE GOOD JUDGMENT AND COMMON
SENSE TO DETECT AND AVOID HAZARDS AND DANGERS that
they may encounter when riding the MOBOT
® Mars & Venus
electric bicycle. By using the MOBOT® Mars & Venus electric
bicycle, it deems tha t you accept the inherent risks of operating
this product.
2

Table of Contents
APPEARANCE 4
MAIN PART 5
SAFETY 6
RIDING TECHNOLOGY 7
INSTRUCTION OF TRANSMISSION SYSTEM 8
ATTENTION TO DETAIL DURING RIDING & 9
ADJUSTMENT OF MAIN PARTS 9
BATTERY AND CHARGER 13
MAINTENANCE 14
GENERAL TROUBLESHOOTING 14
PRODUCT SPECIFICATION SHEET 15
PRODUCT WARRANTY 16
3
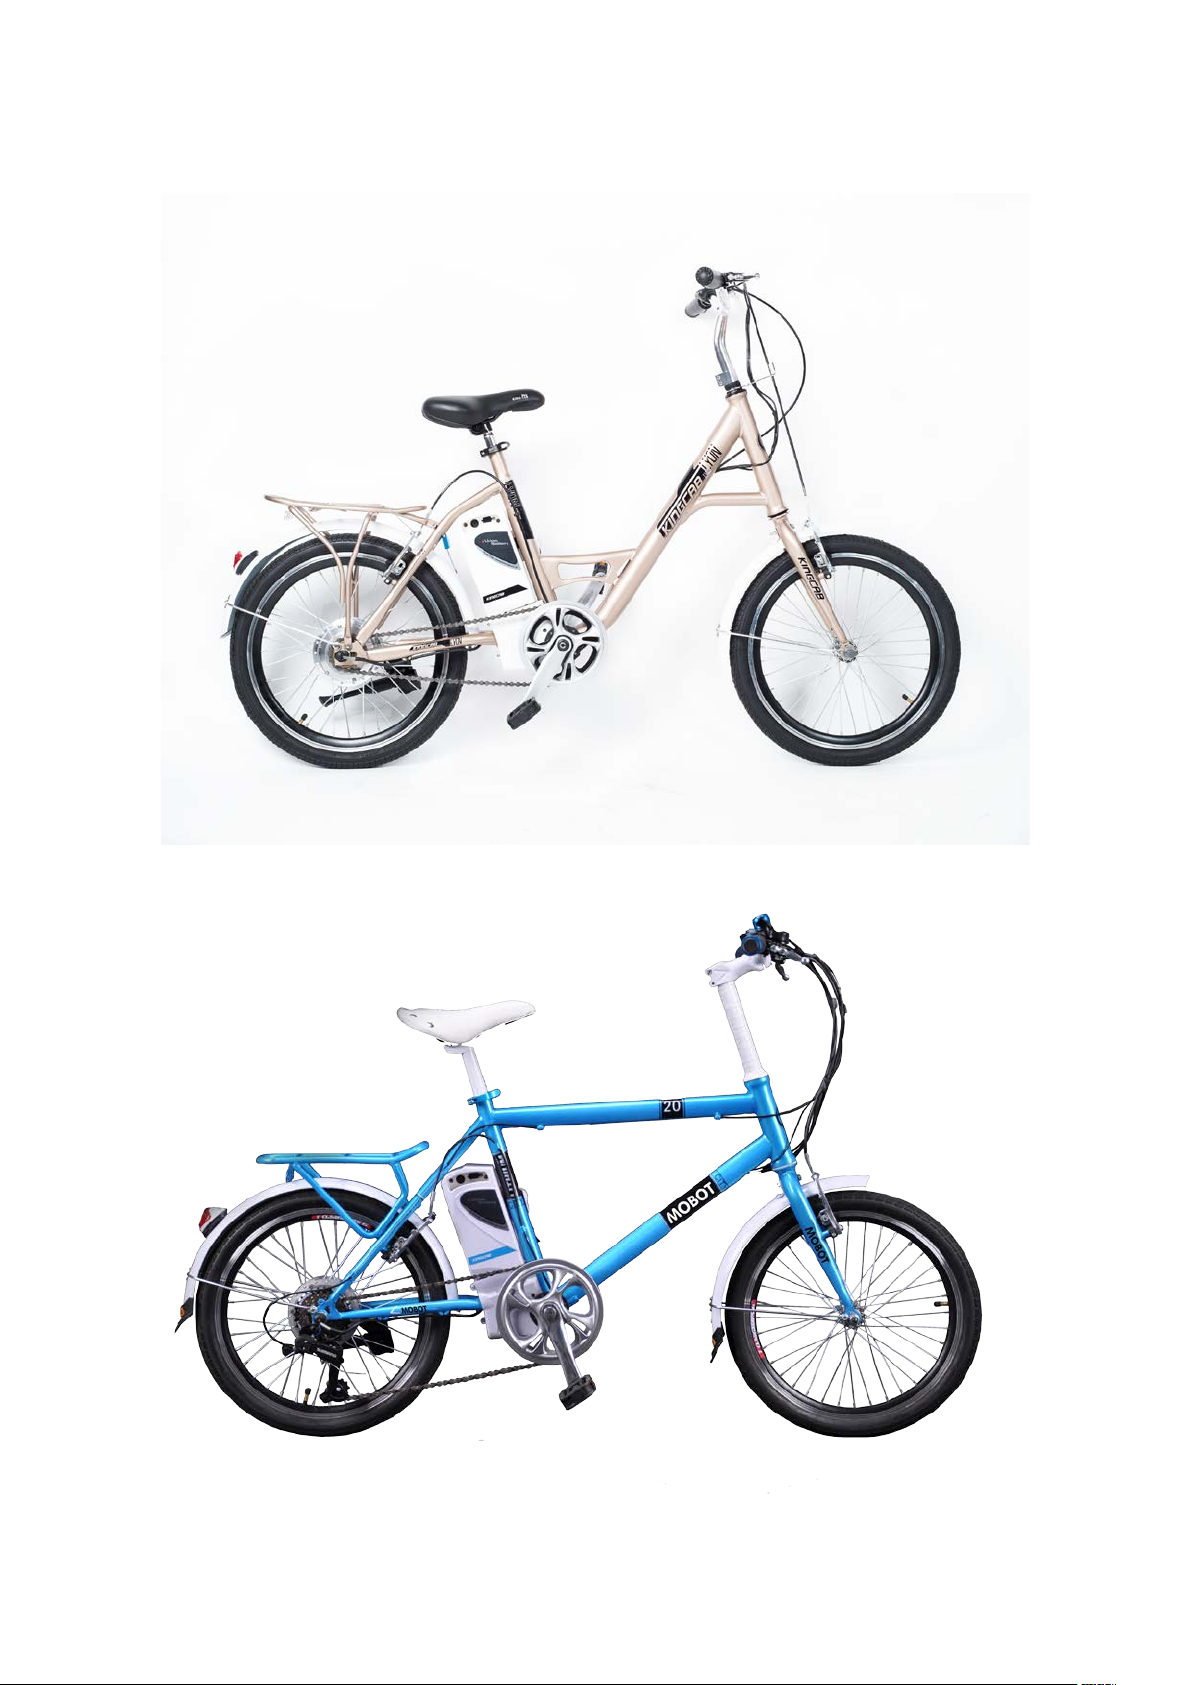
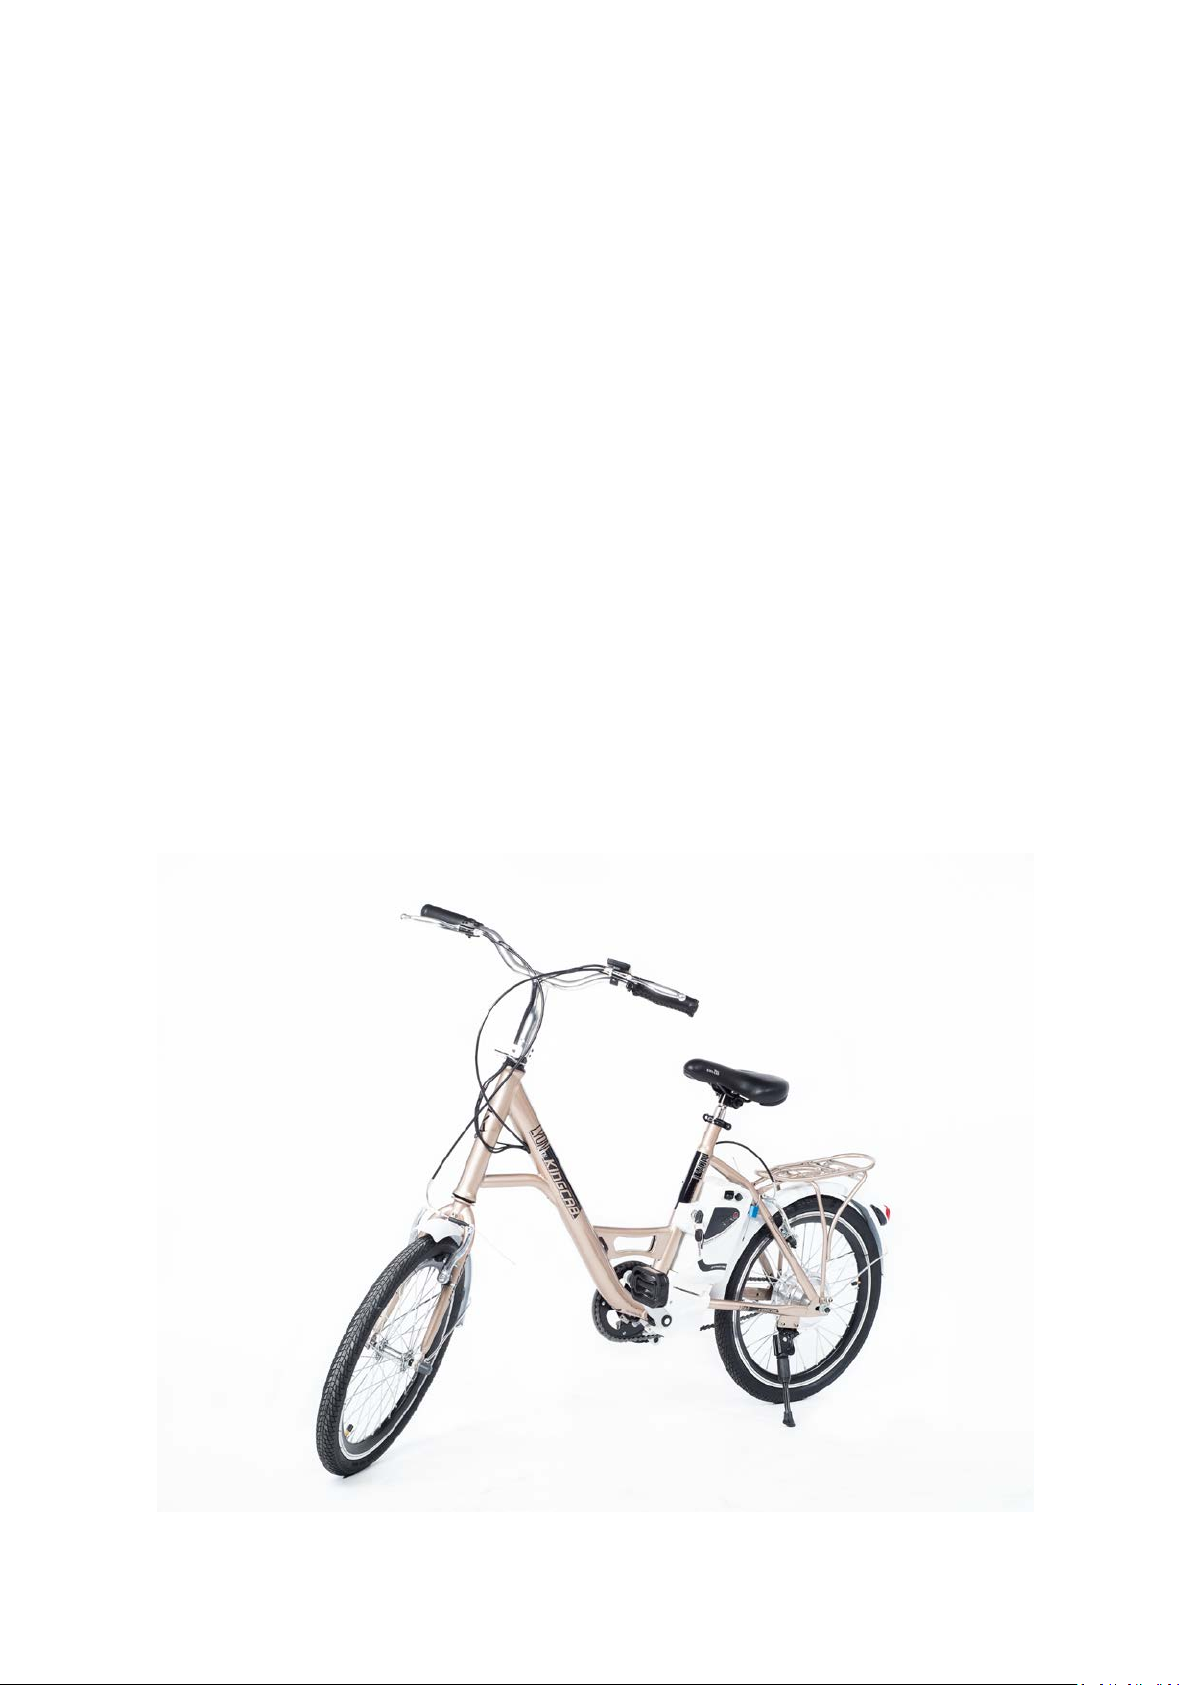
APPEARANCE
4
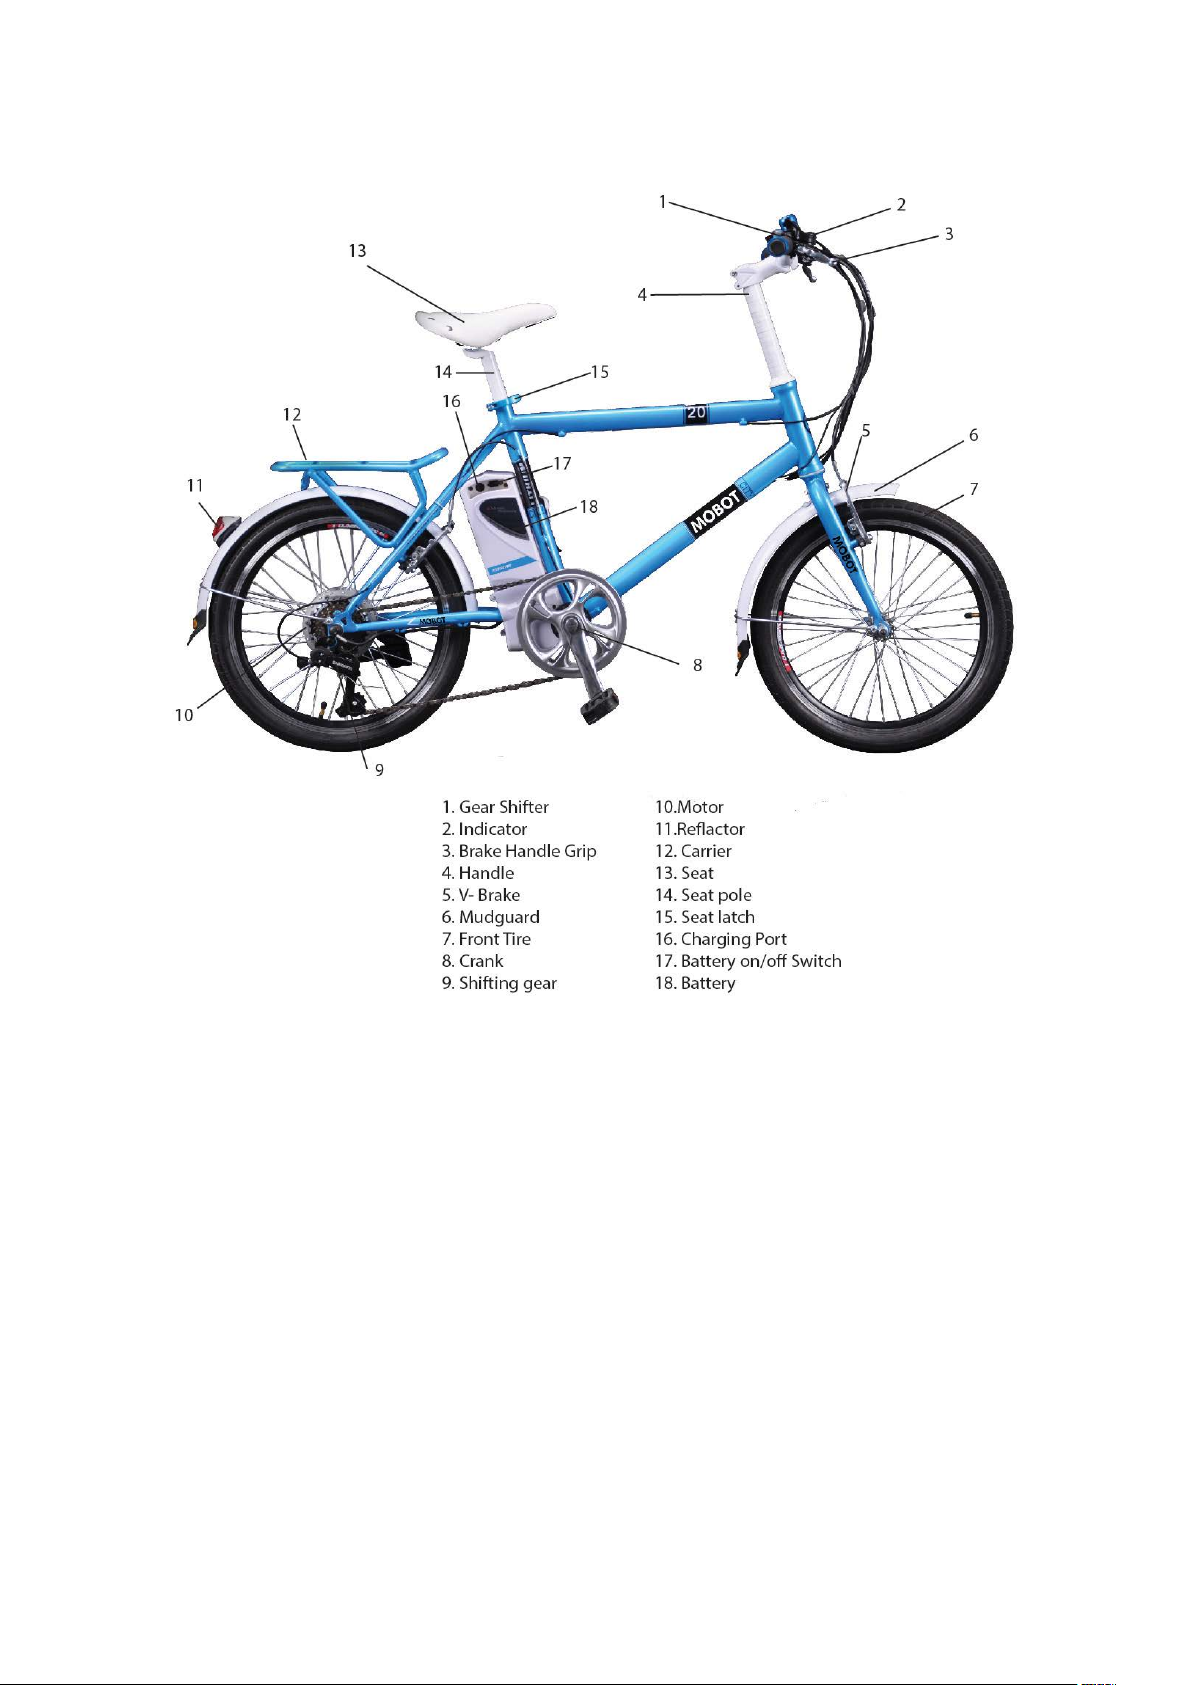
MAIN PART
5

SAFETY
1. The product is recommended for adults (18 years old and above) and is not
suitable for minors age (below 12 years old). Please do not load two
passengers at the same time.
2. Please wear your safety helmet and other protective equipment when
riding.
3. Do ride traffic lane and not pavement as it is breaking the local traffic rules
and regulations.
4. Please exercise in wide areas, and ride after skilled manipulation.
5. Do not attempt any dangerous actions like riding single-handedly.
6. Do not attempt to ride the bicycle on stairs that are above 10 cm. It may
result in vehicle overturn, causing injuries and/or damages to the rider
and/or bicycle.
7. The maximum speed limit for MOBOT ®
your safety, please maintain the riding speed at 20 Km/h.
8. When travelling at night, please limit the speed within 15 Km/h or less and
turn on the headlights.
9. For safety reasons, do not ride the bicycle in bad weather conditions such
as heavy downpours and high winds.
10. Do not use the bicycle when outdoor temperature is lower than 0ºC.
11. Please slow down or avoid using the bicycle when riding in poor road
conditions such as oily or slippery road surfaces.
12. Please adjust the handlebar according to your height to ensure a safe and
Mars & Venus is 25 Km/h. Fo r
comfortable riding.
13. To avoid damages to the el ectrical parts of the vehicle, do not immerse t he
bicycle in water with depth of more than 10 cm. Do not wash it with
pressurized water.
6

:
:
RIDING TECHNOLOGY
1 The correct riding posture:
Body: Back and arms slightly bent, the waist keeps straight;
Hands: The hand with the shoulder width and can not see from behind;
Saddle Height: Sitting on the saddle, Legs straight, heels is stepped on the pedal;
Legs: Keep straight and parallel, not inward or outward;
Feet: Pedaling with front feet.
2 Should pay attention to when riding
a Different speed shall cooperate with the different gear, same as the car, starting should use chain wheel.
b Emergency brake:The principle of the emergency brake is brake the front one after the rear one. But in an
emergency, shall work together. If the braking distance appropriately, it is safety to break. If the speed is too
fast, people often will be thrown forward. To avoid this risk, the best method is intermittent brake, while the
hips move back. Particularly, much more is on the rainy day or small stone road.
c Control Speed: In the downhill, especially to turn on the occasion, to prevent career off the road or fall, you
must control the brake.
d Climbing technique: When sloping, besides electric power, pedal assistant is also need. When feel hard, the
solution is:
(1) Switching the speed, you could make the flywheel toward the larger one when you feel comfortable.
(2) Using the upper body strength: waist slightly back, hold the handle to the chest and pedal, so you can
naturally applied to the upper body muscles, reducing the hardship. Do not let the waist leave the saddle, if so,
it is easy to fatigue. At the same time on the slope, it is best to use the two suction breathing methods to
increase oxygen intake.
3 Safety using instructions
a. When riding, please obey the traffic rules, to avoid danger.
b When on high speed or downhill, do not use the front brake, in order to prevent the center of gravity
forward.
c The bike for single riding, to prevent the center deviation, please avoid carrying people or carrying more
than 25 kg of goods.
d Please keep the proper air pressure on tire, so as to avoid increase resistance, easy wear of tire and out of
shape when riding.
7

:
INSTRUCTION OF TRANSMISSION SYSTEM
1 The usage of transmission system.:
This bicycle only provide rear transmission system, the control part is shifting system on the right of handle.
a When switching to increase the flywheel tooth, please shifting gradually.
B When switching to decrease the flywheel tooth, please press the back button gradually.
2 The instruction of transmission system.
a Internal transmission, should choose the sliding speed; the outer transmission should be changed the
speed when pedaling, otherwise the transmission damage easily. Do not astern pedaling, to prevent the chain
drop down.
b Don't change the gear wheel sharply, you should adapt to the changes of terrain, in order to avoid foot
and leg fatigue.
c Uphill before about 60 meters, depending on size the slope, you should switch the transmission. People
often switch the transmission when they can't get up the uphill, not only affect the speed, sometimes improper
operation will also lead to fall, and wearing the machine parts.
d When resting for a long time, please switch the chain to the minimum freewheel tooth, to prevent the
fatigue of machine parts.
e Please do not switch any device of the transmission system when not using.
f Chain, gear, flywheel, transmission, should always clean, wipe the oil with the principle of less oil and
more times. Please use the special oil.
8

ATTENTION TO DETAIL DURING RIDING &
ADJUSTMENT OF MAIN PARTS
During the pedal assist riding, there is no need to turn off the power switch, you may keep the
switch on. This will feel just like riding a normal bicycle.
1): Before riding, you can loosen the quick release ② , adjust the saddle height up or down for your
required fit, and then lock the quick release fastener ② .
2): Handlebar Adjustment
See in reference illustration A:
Insertion depth of the stem cannot be less than the minimum depth, to make sure that the safety line
on the stem is adjusted to be hidden.
Attention: During the adjustment of the handlebar stem up or down, please do not disconnect any plug
or electrical parts.
3): The throttle adjustment (for outside Europe Market)
The throttle is installed on the right handlebar; there is an on/off switch to turn power on & off.
9

After turning on the power button, you can use the throttle to accelerate or decelerate by rotating it or
release it to the top.
During you release the throttle, it will return back to its starting position, and accordingly you can turn
off the power button.
4): Fro nt brake Adjustment
See in reference illustration B:
●Gap adjustment: let the single side touch, loosen the terminal screw a little, there are three holes on
the board, when moving up the spring, the elasticity will be raised to make the gap between brake and
rim become bigger and vice versa.
●The best gap between the brake shoes and the rim is 1.5mm.
●The best position of brake wire stand is that it not to touch the front mudguard.
5): Rear brake adjustment
See in reference illustration C and D,adjust for rear brake:
●Loose nut and pull-rod nut of the adjusting screw, unscrew the adjusting screw, while meantime,
hold the brake to make sure its position is on the1/3—1/2 of total distance in order the rear brake
shoe cling to the centre of the brake to reach ideal braking effect, and then screw down nut and the
pull-rod nut.
10

6): Wheel hub tightening Adjustment
When you tighten the wheel hub, the fasten torque should be as below:
●For front wheel hub, the fasten torque can not be less than 40-45 N.M
●For rear wheel hub, the fasten torque can not be less than 18-20 N.M
★Attention: Front wheel hub axle collets nut can not be over-tightened, otherwise it can cause warping
at the front wheel (not be smooth & round)
7): Adjustment of Chain(See picture E)
The chain may become loose after long-time riding, when you find this problem, you can unscrew the
nut of rear hub axle; tighten the chain adjustor for tightening the chain. Pull the chain down 10-15mm
to its best tension. Hold the pedal and rotate on anti-clockwise, the chain should be in normal state:
(rotate well, without abnormality, without noise). Tighten the screw of the rear hub axle again.
8): Assembly of the Pedal
The screw thread direction of the Right Pedal is right-hand thread; its lock direction is shown as (F).
The screw thread direction of the left Ped al is lef t-hand thread; its lock direction is shown as (G).
11

▲ Please carefully read the manual before riding your E-bike; avoid lending it to others who do
not know / unclear of the details.
1): Your Ebike has been equipped with brake switch-off device, left and right brake levers are installed
with brake power switch. No matter which brake you use on either left or right during riding, t he power
will be cut off automatically for safety purposes.
2): When the battery output voltage has reached the bottom index, the electronic control system will
cut off the power automatically to protect the battery cycle lifetime. When the battery reaches its
bottom voltage, you can just ride your bike by the pedal. And the battery should be recharged full for
the next cycling time.
3): Please switch off the battery power (and the throttle if it’s installed) when ebike is not in use.
4): Please ensure your ebike is stable while parking and the kickstand is locked as well.
5): Please do not rotate the throttle grip to full throttle when the ebike start, it will cause a large start ecurrent that may damage your battery and shorten the battery cycle lifetimes.
6): After fully charged, the riding range is subjected to the following facts like: road condition, loading
weight or wind direction etc. We suggest that riders should try to pedal more when travelling up the
slope or against wind direction to maintain a longer lifespan of the battery & motor.
7): Always try pedaling during riding on muddy or rough road to gain a better control of the bike.
8): For cleaning process, wipe the body frame of the ebike with wet cloth, never use water hose or
squirt gun for the cleaning work.
9): Prohibit putting oil on the front brake shoes.
10): The big seat post ③ and the seat post ② should be cleaned, apply a few drops of machine oil
for lubrication if necessary.
12

BATTERY AND CHARGER
Each MOBOT® 1 sec eBike electric bicycle is equipped with a special lithium polymer battery and
special smart charger. These accessories that come with each scooter have a dedicated number, do
not use the chargers from other brands. Damages caused by using inappropriate battery chargers is
not under usual product warranty.
Battery
1) When charging the battery, the LED turns red which means that charging is in progress. When
it is in “green” it means battery is fully charged.
2) If the red light does not turn green after continuous charging, please visit our service center.
3) For the first 5 uses, please charge the battery for at least 10 hours before use.
4) Please do not charge the battery for more than 12 hours.
5) Charge the battery in area temperature of (0~45)°C, the ideal temperature for charging will be
25°C.
6) Please charge the battery once every month, if not in use for a long period of time.
7) Do not operate motor while charging.
(Important!)
8) Avoid direct contact of the battery from flames and direct sun exposure.
9) Avoid water or other liquid to be in contact with the battery.
10) We recommend you to go for maintenance once every 3 months to check on the body and
parts of the scooter.
Charging Description
1) Open the charging hole under the rubber protective cover and plug in the charger connector.
2) Connect the charger plug into the power socket.
3) The charger light turns red when charging is in progress. Charger light turns green when
battery is fully charged.
4) Please close the main power of the scooter, and charge the scooter around 48V.
5) Please always check whether there is still remaining power left in the battery the next trip.
6) The company provides dedicated charger which has a charging protection function, when the
battery is 100% charged, the charger will automatically stop charging. Charging time is n o
more than 3 hours.
7) Water immersion, collisions, and other abnormal factors will lead to charger damage, which is
not covered under warranty.
13

MAINTENANCE
Due to the likelihood of breakdown of the electric scooter usually within 1 year, in order to allow
convenience and ease of maintenance. The company has implement 1 year of free warranty plan.
Proper use and maintenance of the scooter will prolong the lifespan of the scooter. We recommend
you to send the scooter for maintenance once every 3 months to check on the brakes and the battery
functionality.
1): Check the tires/tubes regularly to ensure that they are inflated to the correct air pressure.
Tyre pressure: 40 - 65 psi or 280 – 460 kps
2): Make sure all quick release fasteners, nuts and bolts have been tightened securely.
3): After a period of riding, check whether the spokes’ tension is normal. Make adjustments if
necessary.
4): The frame and other components are made of aluminum alloy. Avoid any friction or collision and
clean them regularly.
5): Maintenance of the motor, battery, controller, etc. Please do not disassemble by yourself, but take
the e-bike to the service centre for repair if necessary.
6): Never wash the e-bike with high-pressured water.
7): Apply lubrication periodically (once per three months) in the following sections: chain, freewheel,
rear wheel, head parts, kickstand etc, if necessary.
8): The product is equipped with lithium battery can repeat charging at least 2 year , 800 times. When
each time with electric range is too short, lithium batteries need to be replaced.
GENERAL TROUBLESHOOTING
Checking List
1) Please check the following actions do or not if the bicycle cannot work
2) Power switch is turned on
3) Display shows remaining power stand more the limited
4) Brake lever is not stand at the working position
5) All sockets and connectors are clean and well connected.
14

The Main Parameter of Vehicles
Outer Size:L*W*H(mm)
1820*700*1180
Center distance of front and rear
1107.7
The Weight of Vehicles(KG)
40
Max. Load(KG)
75
Max. Speed(Km/h)
20
Pedaling capacity
7Km/30min
Full charge endurance(Km)
40
The Main Parameter of Battery
Battery Type:
Li battery
Capacity(Ah)
10
Nominal Voltage (V)
36
The Main Parameter of mid-motor
Mid-motor Type:
Permanent magnet DC, without brush and Holzer
Rated continuous output power(W)
240
Rated speed r/min
72
Rated Voltage(V)
36
Rated output torque(N.m)
32
power consumption per hundred
1.2
The Main Parameter of controller and
V)
31.5V±1V
A)
12A±1A
Parameters
Project
PRODUCT SPECIFICATION SHEET
wheel(mm)
≤
≥
≥
km(KW.h)
Charger
Under voltage protection value(
Over current protection value(
≤
15

Warranty
Under normal circumstances the motor cannot be
Free
Free
Under normal circumstances cannot be charged
Free
Failures under normal use, such as deformations
Free
Free
UBHI
PRODUCT WARRANTY
In normal use, if a part or parts of the electric bicycle have any problems listed in the following form
during the warranty period, please contact your local vendor or authorised reseller, we will provide a
complete service as specified in the warranty book.
Item Quality problems
Motor
Controller Failures under normal use One year
Lithium Battery
Body structure
Charger Failures under normal use Six month
(uniblock human
interface-display)
used
and discharged
and fractures
Cannot be used under natural conditions
(Excluding the impact forces and external
damages)
period
One year
One year
One year
Six month
Service item
maintenance
maintenance
maintenance
maintenance
maintenance
Free
maintenance
Note: Please follow the correct way to use this product, the company will not be responsible for parts
damaged and other damages caused by misusing.
PRODUCT WARRANTY
In warranty period, if the malfunction and damage caused by the following reasons, it will not be within
the scope of product warranty:
1. Inappr opriate maintenance and repair that are not in accordance with the instruction manual.
2. Use of the electric bicycle f or other purposes such as performing dangerous acts which result
in damages or functional failures.
3. Using any of the external factory components.
4. Disassembling the bicycle without contacting the local reseller.
5. Wrongly usage causing traffic accidents or accidental collision damage to the product body and
the parts.
6. Product wear and tear.
MOBOT PTE LTD
62 Ubi Road 1, #03-19 Oxley Bizhub 2, Singapore 408734
Tel: 65382816 | Fax: 65382817 www.MOBOT.sg
16
 Loading...