

Page 1
R
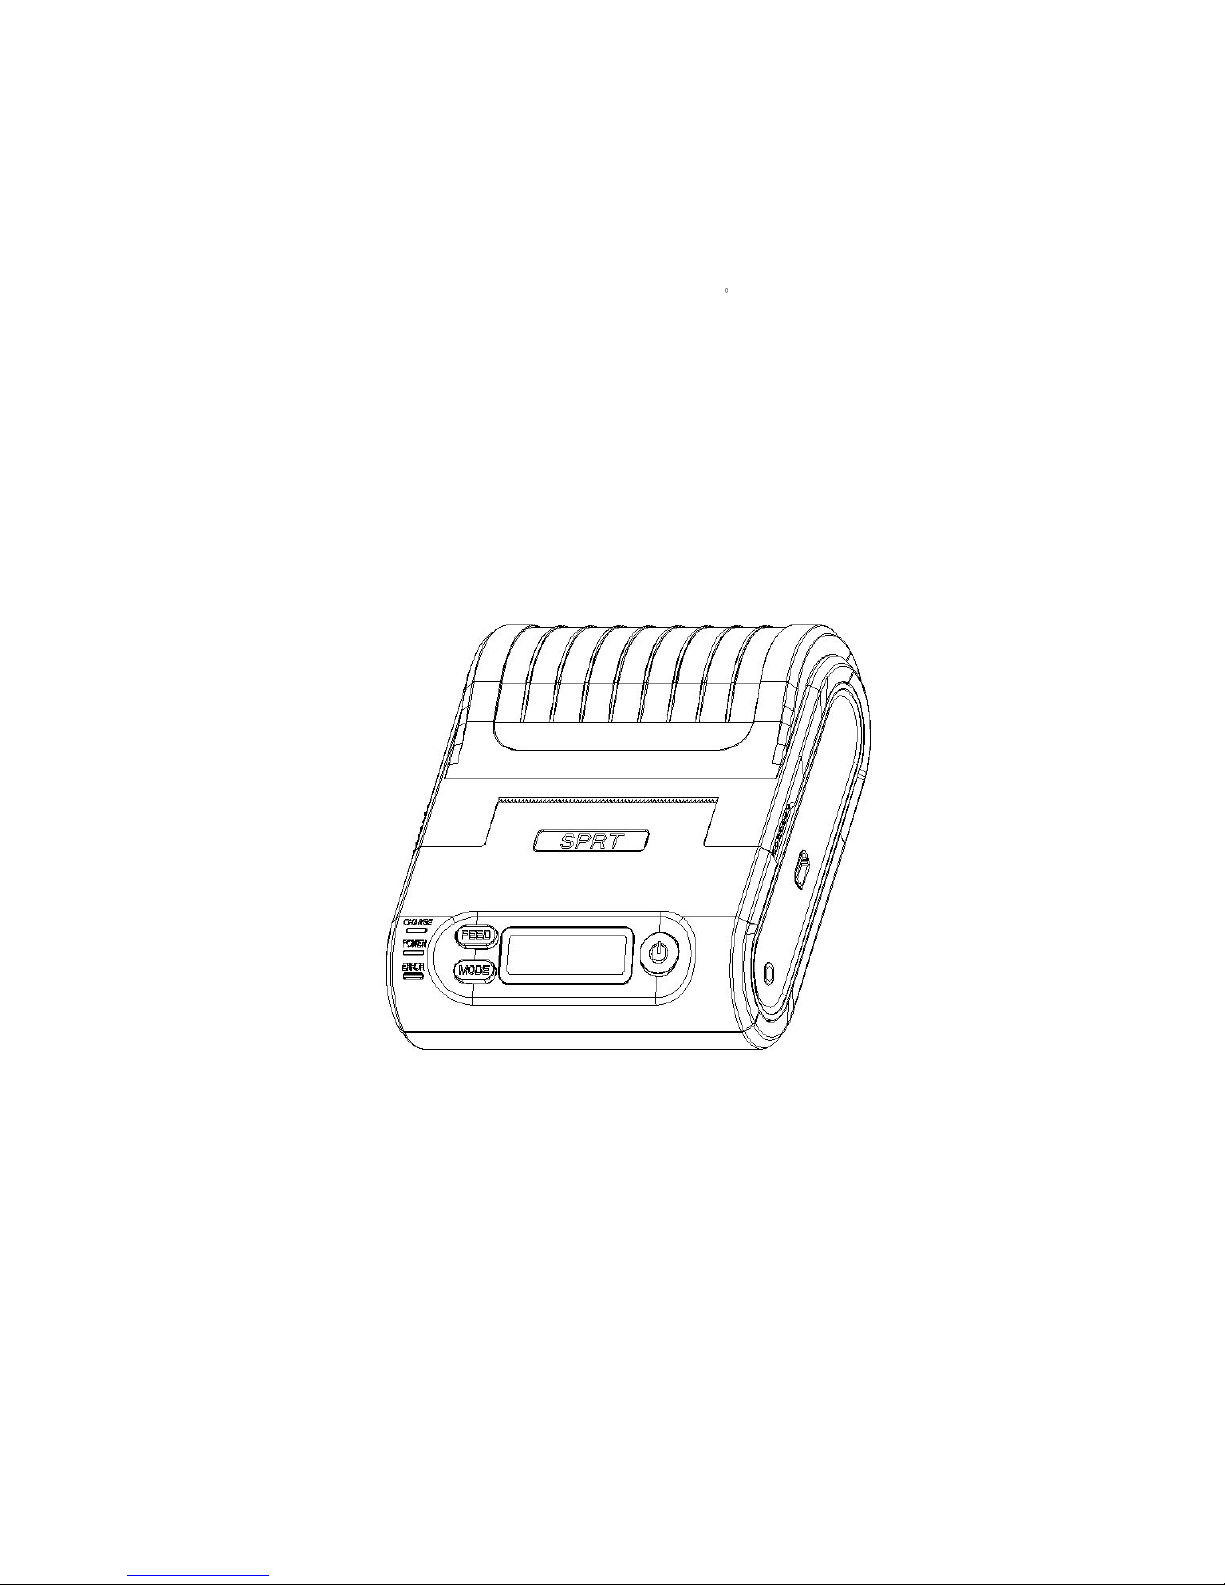
MobiPrint MPT7BT
Portable Dot Matrix Printer
User’s Manual
(VER1.2)
Page 2

Content
NOTICE................................................................................................................................................... 5
Notice of Safety.......................................................................................................................................... 5
Notice of Using...........................................................................................................................................5
Notice of Storing.........................................................................................................................................5
Chapter 1 Appearance and Model No............................................................................................................ 6
1.1 Outer Appearance............................................................................................................................. 6
1.2 Model No....................................................................................................................................... 7
Chapter 2 Characteristic Specification........................................................................................................... 7
2.1 Printing Specification.........................................................................................................................7
2.2 Other Specification............................................................................................................................8
Chapter 3 Operation Method......................................................................................................................9
3.1 Using Preparation........................................................................................................................9
3.1.1 Battery Installation.............................................................................................................. 9
3.1.2 Paper Roll Installation..............................................................................................................10
3.2Basic function usage.........................................................................................................................11
3.2.1 Switch On............................................................................................................................ 11
3.2.2 Switch Off............................................................................................................................11
3.2.3 Paper Feeding (Manual Feeding).................................................................................................11
3.2.4 Self-Test.............................................................................................................................. 12
3.2.5 Hexadecimal Printing.............................................................................................................. 12
3.2.6 Printer Parameters Setting.........................................................................................................13
3.2.7 Battery Charging....................................................................................................................13
3.3 Printer Parameters Setting................................................................................................................. 14
3.4 Printer Interface Connection and Printing...............................................................................................14
3.4.1 USB Connection.................................................................................................................... 14
3.4.2 Bluetooth Connection.............................................................................................................. 14
3.4.3 Function of Bluetooth Address Binding.........................................................................................15
3.4.4 Radio Frequency Connection..................................................................................................... 16
3.5 Indicator and Buzzer........................................................................................................................16
3.6 LCD Indicator................................................................................................................................18
4.1 Command Programming Manual......................................................................................................... 21
4.2 Description of Black Mark Pre-print..................................................................................................... 21
APPENDIX.............................................................................................................................................22
Page 3

NOTICE
Please read this manual carefully before using the printer!
Notice of Safety
Be sure to use the specified battery and power supply provided by our company. Otherwise it
may cause fire, explosion or damage printer, meanwhile, the battery also may be damaged.
Don’t put battery into the fire, don’t disassemble or heat the battery, don’t be short circuit, it
may cause fire, explosion or damage printer, meanwhile, the battery also may be damaged.
If the printer would not be used for a long time, be sure to take off the battery, otherwise the
battery may leak liquid which is corrosive liquid, if improper operation causes battery leak
liquid, and it paste in the skin or clothes, please rinse it by clean water, if paste in the eyes,
please rinse them thoroughly by clean water and see a doctor. Please do not open the paper
case cover when it is printing or just when printing is finished, do not touch the printer head
with hand or body, overheat may cause scald.
Notice of Using
Water or other liquid should not be spilled into the printer, also the printer should not be
appeared in the rain, or else may cause printer damage. Please do not open the paper case
cover when it is printing, otherwise the printer may work improperly. If printer is using USB
connection to work, should not unplug the USB cable, or else some printing data may be lost.
When printer is using USB connection to work, the distance of communication should be
within 10 meters, otherwise the printer doesn’t print or prints rubbish codes. Too high
(45℃)or too low(5℃) environment temperature and too high (85%) or too low (20%)
environment humidity both effect the printing quality. The printer paper roll with poor
quality or stored for too long time also may reduce the printing quality even damage the
printer. Under the black mark detecting mode, the printer requires that the pre-printed black
mark is accordant with the printing rule of black mark (please refer to details in Chapter 4.2),
otherwise the black mark can not be detected correctly. Be sure to use up the power of the
battery before charge up it,as it can ensure the using life of the battery.
Notice of Storing
The printer should be placed in such an environment that the temperature is between-20℃
and 70℃, and the relative humidity is between 10% and 95%. If the printer will be stored for
a long time, please be sure to take out the battery, otherwise may damage the battery and
printer.
Page 4
Chapter 1 Appearance and Model No.
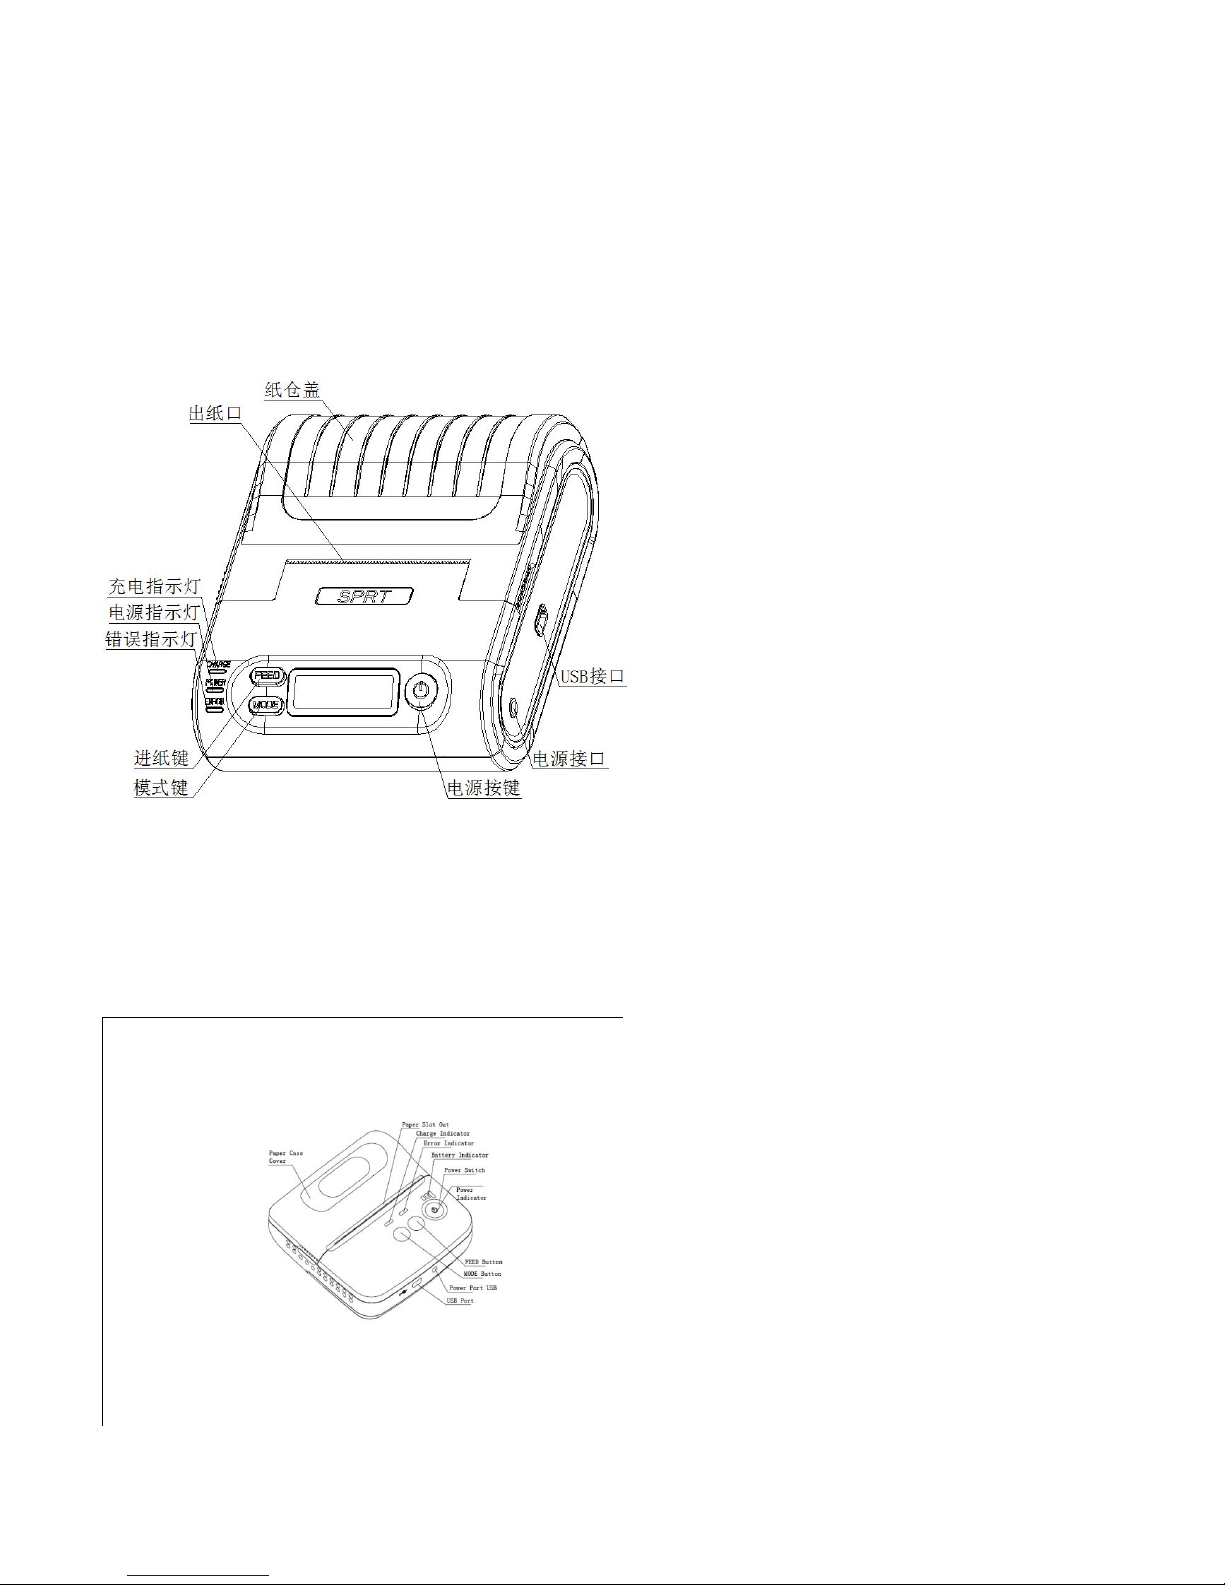
1.1 Outer Appearance
[CHARGE]: Battery Charging Indicator [ERROR]: Error Indicator
[FEED]: Feed Button [MODE]: Mode Button
Page 5

1.2 Model No.
SP-T7 Support USB Interface
SP-T7BT Support USB and Bluetooth Interface
SP-T7RF Support USB and RF Interface
Chapter 2 Characteristic Specification
2.1 Printing Specification
Print
Printing Method Dot matrix
Printing Speed 80mm/s
Resolution
5 点/mm(127dpi)
Effective Printing Width
48mm;
Character
Character Set
GB18030and BIG5(16*16和12*12)(chinese),ASCII
(8*16and6*12);
ASCII、Codepage and International character sets
(7*9)(English
Printing Font ANK: 12 x 24Chinese: 24 x 24
Character per Line
240 点
Paper Spec
Paper Type Thermal paper
Paper Width
57.5±0.5mm
;
Paper Roll Diameter Max: 40.0mm
Roll Core Inner Diameter 13mm(min.)
Paper Thickness 0.06 to 0.085mm
Paper Supply Method Drop-in easy loading
Reliability
MCBF 15 million lines
TPH 100km
Page 6

Barcodes
EAN-13,EAN-8,UPC-A,UPC-E,CODE39,CODE93,CODE128
CODABAR,INTERLEAVED25
Emulation ESC/POS
Driver Windows 98 / 2000 / NT / XP / VISTA/Win7/windows Mobile /windows CE
Sensor Paper End Sensor
Interface SP-T7-BT:USB,Bluetooth;SP-T7U:USB
Power Adaptor 9V DC/2A
Battery Power 7.4V DC, 1.5A rechargeable Li-ion battery
Battery duration 120m continuous printing
Physical Weight 260g(excluding roll paper)
Dimension(W×L×H) 103×99×46mm
Color Beige/Black
Environment Operating Temp 0℃~50℃
Storage Temp
-40℃~70℃
Operating Humidity 10%~80%
Storage Humidity 10%~95%
2.2 Other Specification
● Paper Loading Method: drop-in easy loading ( please refer to details in 3.1.2 Paper Roll
Installation).
● Black Mark Location: available(details please see 4.2
Page 7

pre-printing black mark manual).
● Paper End Detection: when paper is out, the ERROR
Indicator will constant on lighting, The buzzer rings when it is printing, and
it will stop printing.
● Printing Control Command: ESC/POS compatible command set
(refer to<T7 Printer Developer Manual >).
● Power Supply: 7.4VDC/1500mAh rechargeable polymer lithium battery.
● Power Alarm: when the battery is low, the battery indicator blinks
● Battery Charging: quick charging ,it will be charged full about 3 hours;
● Battery Duration: under25% printing density ,at least 120 meters, the standby time is
over 100 hours.
These parameters are just for reference, long term usage will cause the capacity decline, and
can not ensure the time of printing.
Chapter 3 Operation Method
3.1 Using Preparation
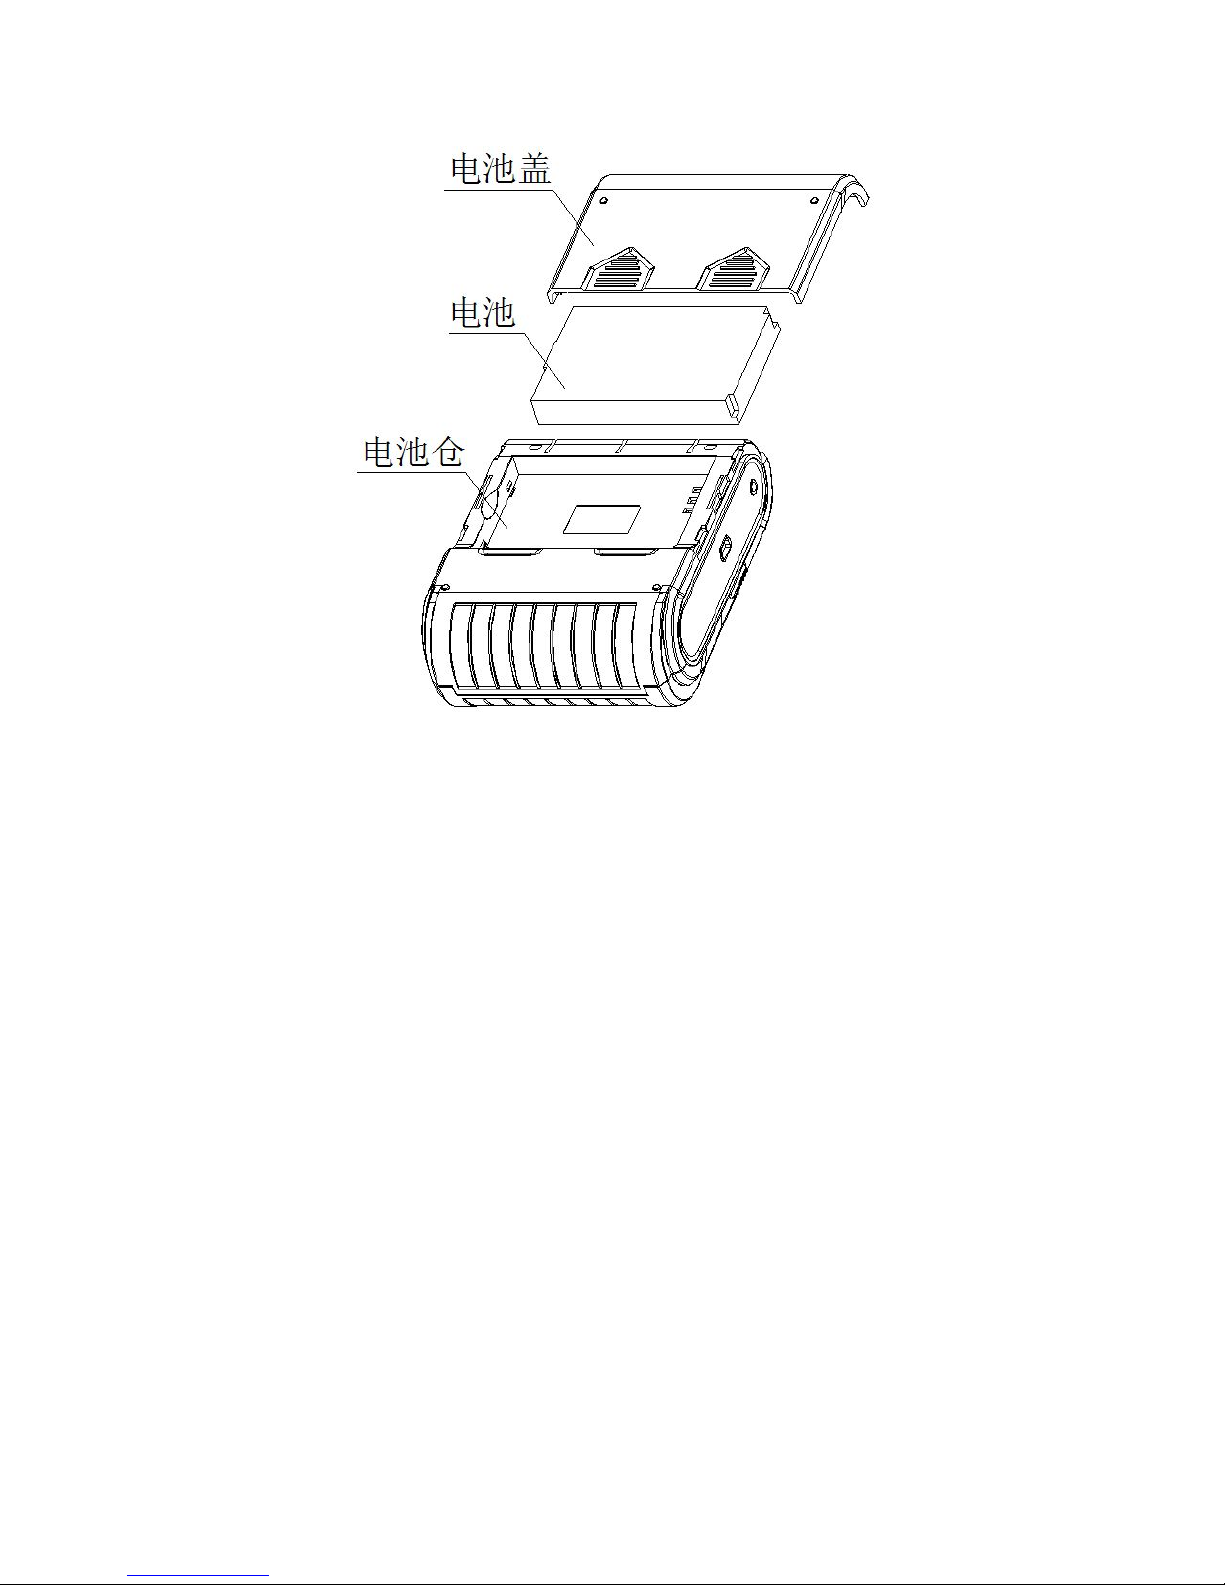
3.1.1 Battery Installation
1. Put the battery into the battery slot.
2. Install the battery cover.
Page 8
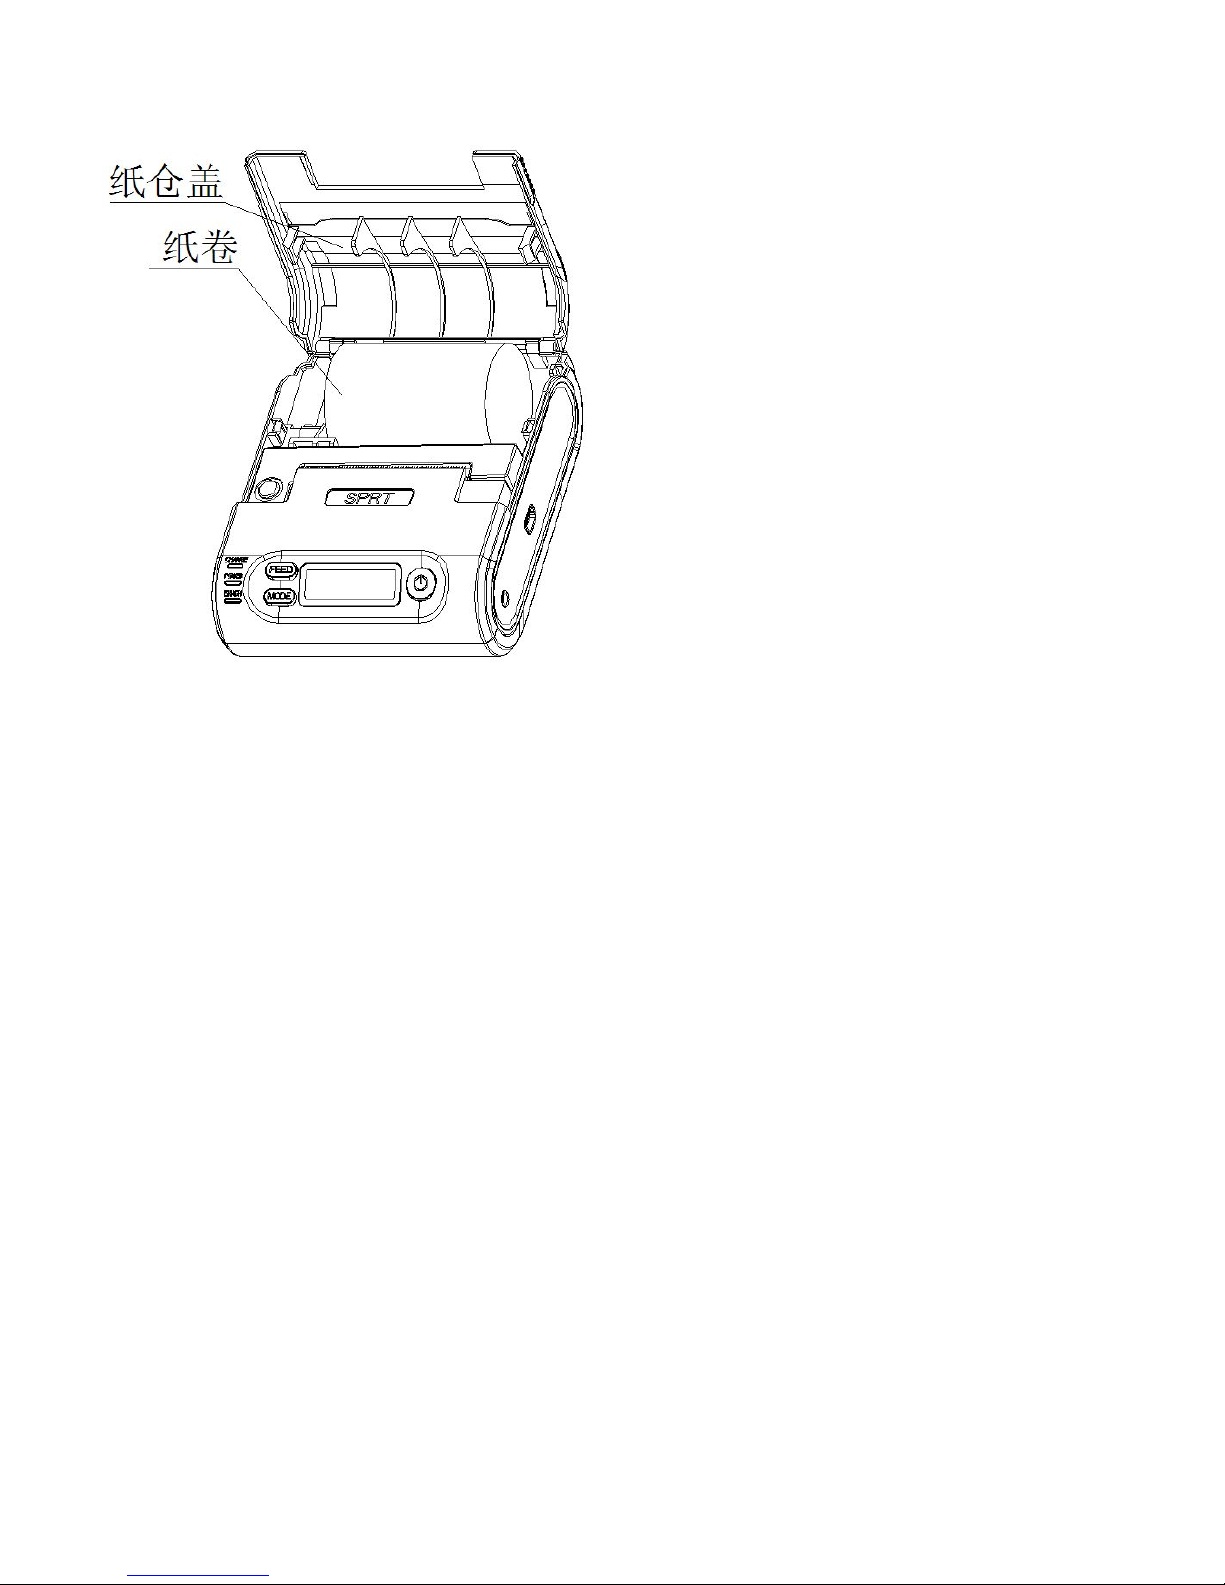
3.1.2 Paper Roll Installation
1. Hold both sides of the paper case cover, and open it.
2. Pay attention to use paper that effective printing side is outside in the printing paper face
when you enchase the new paper roll.
3. Pull out a part of paper and put them in the middle of the paper out orifice.
4. Shut down paper case cover and cut off the redundant paper
Page 9
3.2Basic function usage
3.2.1 Switch On
Press【POWER】button, the power indicator is on, about 1 second later you will hear ‘one low
one high ’prompt tone. The printer will turn into work mode when loosen the【POWER】button.
The LCD screen show operating parameters of printer
3.2.2 Switch Off
Under status of switch on ,the printer will send out the prompt tone of ‘one low one high ’
after pressed the【POWER】button for 1 second, the power indicator go out, then loosen the
【POWER】button, the printer is off.
3.2.3 Paper Feeding (Manual Feeding)
Page 10

Under the normal work status, press 【FEED】 button, the paper feeding begins, and stop
when loosen 【FEED】 button. When the printer works in black mark mode, press【FEED】
button, the printer begins to feed paper and stops over the position of black mark. If the paper
is not the black mark paper, the printer stops automatically after feeds paper for 30cm.Being
out of paper,insert paper into paper port ,the printer stops automatically after feeds paper
for 10 cm
3.2.4 Self-Test
After receiving the printer, user can check its current setting and status at anytime. Self-test
way is as below: Power off, then hold down the 【FEED】 button and press the power button
at the same time. Then loosen the【FEED】button when you hear ‘one low one high ’prompt
tone, the current setting and status will be printed out.
3.2.5 Hexadecimal Printing
The function of hexadecimal printing is to print the information received from host machine
by hexadecimal numbers and corresponding characters. It will be convenient to debug
application.
Into hexadecimal printing: Power off, hold down the【MODE】button and press the power
button at the same time. Then loosen the power button and press the【FEED】button when you
hear ‘one low one high’ prompt tone of power on. After that you may loosen the 【MODE】
button and 【FEED】 button. The printer turns into the hexadecimal printing mode and print
the presentation.
Page 11

Quit hexadecimal printing :The way to quit hexadecimal printing mode is switch off the printer
or press the 【FEED】 button for three times. The printer will also print the presentation which
shows that the printer have quitted hexadecimal printing mode.
3.2.6 Printer Parameters Setting
This function may set some simple printing parameters.
Entering parameter setting: Switch off, then hold down the 【FEED】 button and press the
【POWER】button at the same time. Then loosen the 【POWER】button and【MODE】button
when you hear ‘one low one high ’prompt tone. The printer turns into the parameters setting
mode.
Print out the first item which can be set parameters and the current numerical value. Please
see details in the appendix as below.
Quitting parameter setting: Hold down【MODE】and【FEED】buttons, then loosen 【MODE】
button and【FEED】button. Saving the set parameter and exiting the parameter setting mode.
The setting parameters won’t be saved if you directly press the 【POWER】 button to turn off
the printer.
3.2.7 Battery Charging
The battery will run out after a period of usage. When it nearly runs out, printer will give a
alarm through the battery indicator flashing, at this time, user needs to charge up the battery
The charging method is as following: connecting the adapter to the power socket with 220V,
Page 12

50HZ, then plug the power charging plug to the power socket of the printer, so the power
charging begins. During the course of power charging, the charging indicator 【CHARGE】 goes
red, and【CHARGE】turns to blue when the charging is full. It takes about 4 hours to charge up
the battery. Using the printer during the course of charging power will make the charging time
go longer. It shows the failure if the charging indicator【CHARGE】goes blue and red during the
course of charging. Such as faulty installation of battery, faulty contact of battery or internal
temperature of battery is too high or too low.
3.3 Printer Parameters Setting
Users can set more parameters by using the specified 〈T7 Setting Tools 〉 software through
computer. The setting includes: language、font、printing density、default code page、bluetooth
device name and password (only T7-BT) etc. The setting method please refer to the <T7
Setting Tools Software Help>, offered with the software together.
3.4 Printer Interface Connection and Printing
3.4.1 USB Connection
The T7 printer of standard accessories includes Mini USB cable which connects printer. The
USB type belongs to the slave device type.
3.4.2 Bluetooth Connection
Handheld device, laptop and other information terminal devices with Bluetooth can drive T7
to print by the Bluetooth interface. T7 portable printer is compatible with Bluetooth2.0
Page 13

standard. Power class is CLASS 2, effective communication distance is 10meters. The Bluetooth
of the printer belongs to the slave device. The initial name of the printer is T7 Printer, the
initial password is ‘1234’; users can change the printer name and password by using<T7
Setting Tools> software. Please see the details in help file of <T7 Setting Tools>.
Before working, T7 Portable Thermal Printer need to be pairing with primary device,matching
begins with the host device. Usual matching course is as below:
1. Switch on printer;
2. Host device searches for the outer Bluetooth device;
3. If there are other Bluetooth devices, please select T7 BT Printer;
4. Enter the password ‘1234’;
5. Pairing finished.
Please see details in primary device Bluetooth function instruction for reference.
Notice:
1, When pairing, please make T7 BT switch on.
2. Once T7 has paired with the host successful, it can’t be paired with other Bluetooth device
until it unconnected with the host.
3, The power indicator flashing after paired successful.
3.4.3 Function of Bluetooth Address Binding
Bluetooth Binding: once the printer remembers the device’s address, it only can connect with
Page 14

the first device and can’t connect with others. So in this case, if the printer needs to connect
with other devices, user can delete the remembered address or set the mode is not binding.
No binding: in this case, the printer can be searched or paired by other devices. So when the
printer needs to connect with a fixed device, it would be better to bind address. Please see the
details in help file of<T7 Setting Tools>
3.4.4 Radio Frequency Connection
Information terminal devices with RF can drive T7 to print by RF .It adopt 2.4 Ghz global open
ISM band which is license-exempt. With maximum operating speed of 2Mbps, efficient GFSK
modulation and strong anti-jamming ability it is particularly suitable for industrial control .It
can also satisfy multi-point communications and frequency hopping communication with 126
channels.
3.5 Indicator and Buzzer
There are four indicators, they are red and blue【CHARGE】light, red【ERROR】light, blue
【BATTERY】indicator and blue【POWER】indicator. The meanings of each indicator are as
below:
【POWER】indicator
Light constant on: printer is on, Bluetooth is with disconnect status
Page 15
Light flashing: printer is on, Bluetooth is with connection status
【CHARGE】indicator
Blue light constant on: charging is completed;
Red light constant on: in charging;
Blue and red lights on: there are some mistakes, please check whether the battery should be
good contact or not, and the temperature is normal or not.
【ERROR】indicator
Constant on lighting: printer out of paper
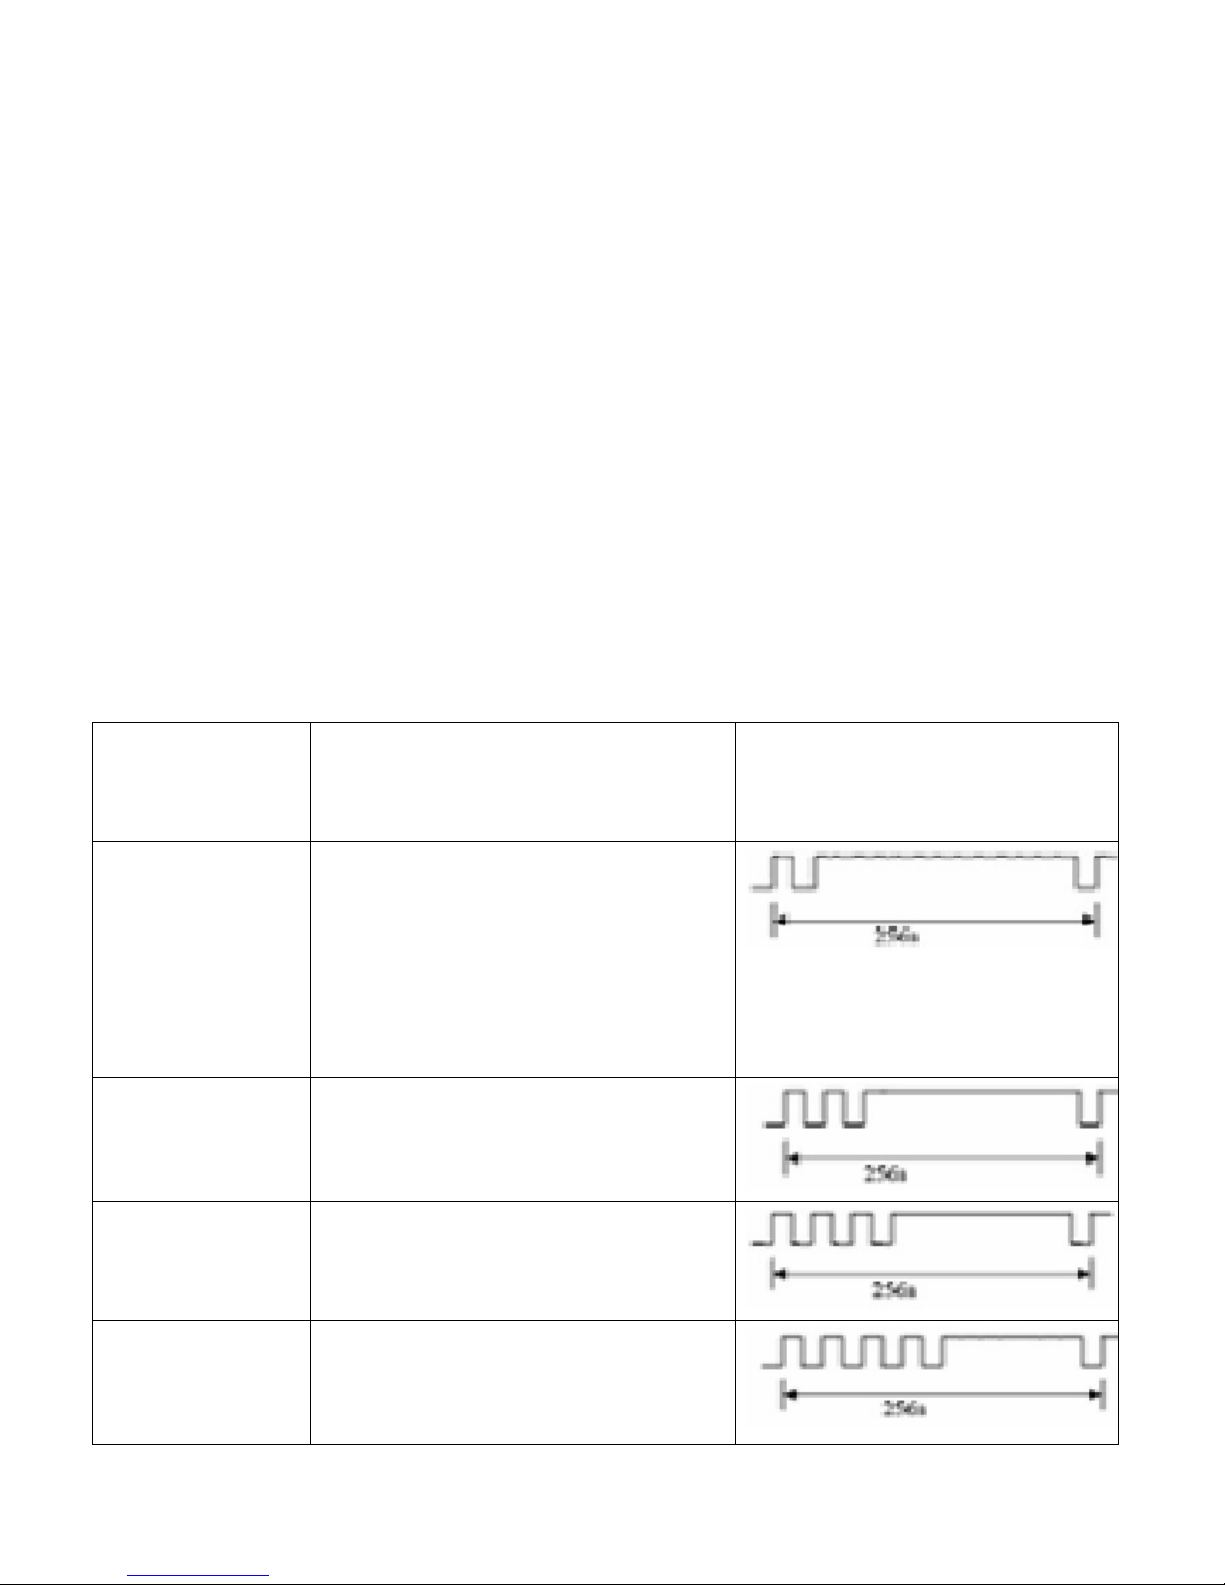
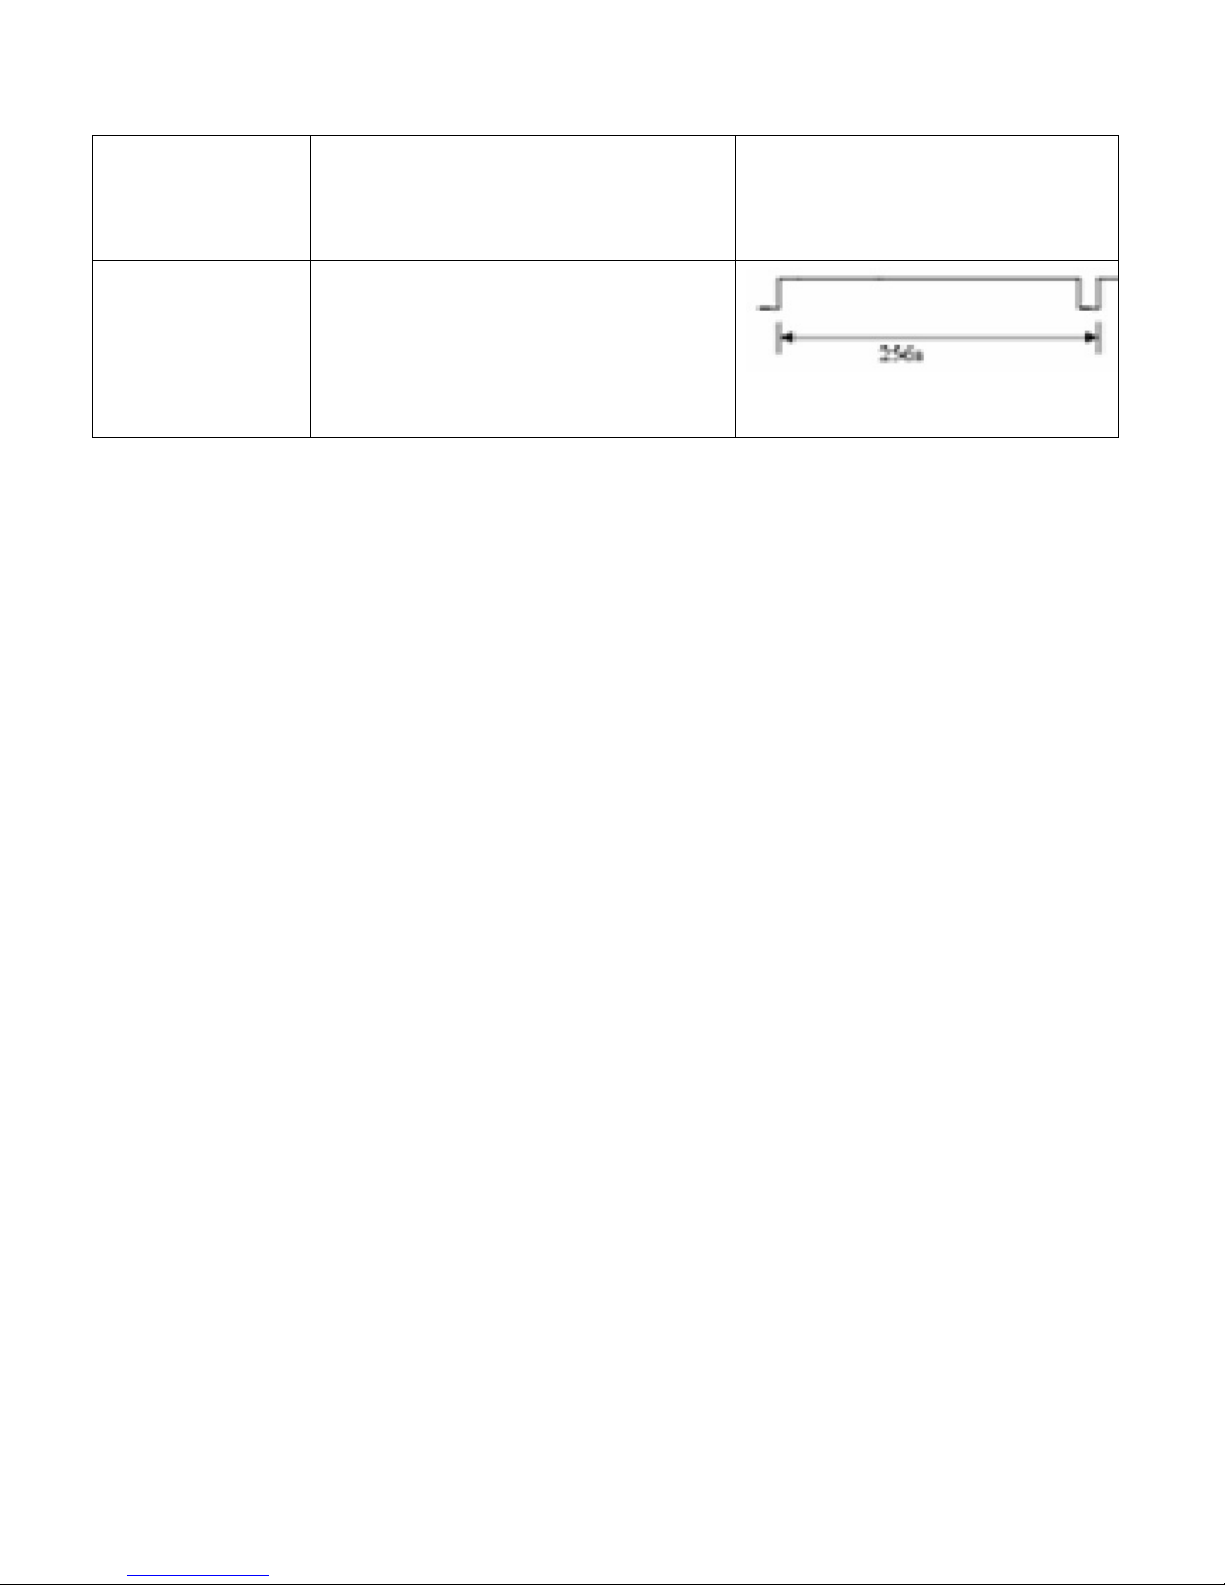
Light flashing: printer has mistakes. Different types of mistake, different ways of flashing
Error Description The flashing way of [ERROR]
ERROR
Memory The printer can’t work normally after
the memory need to be read-write
calibration
Over voltage The voltage of power is too high
Owe voltage The voltage of power is too low
The CPU
execution
The CPU execution to the wrong
address
Page 16
Temperature
detection circuit
Connection of temperature detection
circuit connection error
There is also a buzzer to indicate various status of the printer. The meanings are as below:
One low one high: power on;
One high one low: power off;
Circulation continuous two lows: printer at mistakes status
3.6 LCD Indicator
Turn on the printer,it will show ” Loading ……”. After initialization,LCD Screen in printer will
show some information .If there is no data sent to printer or no interfaces connected to the
printer ,the screen will close automatically. There is data sent to printer or no interfaces are
connected to printer.The screen will show as following:
Page 17
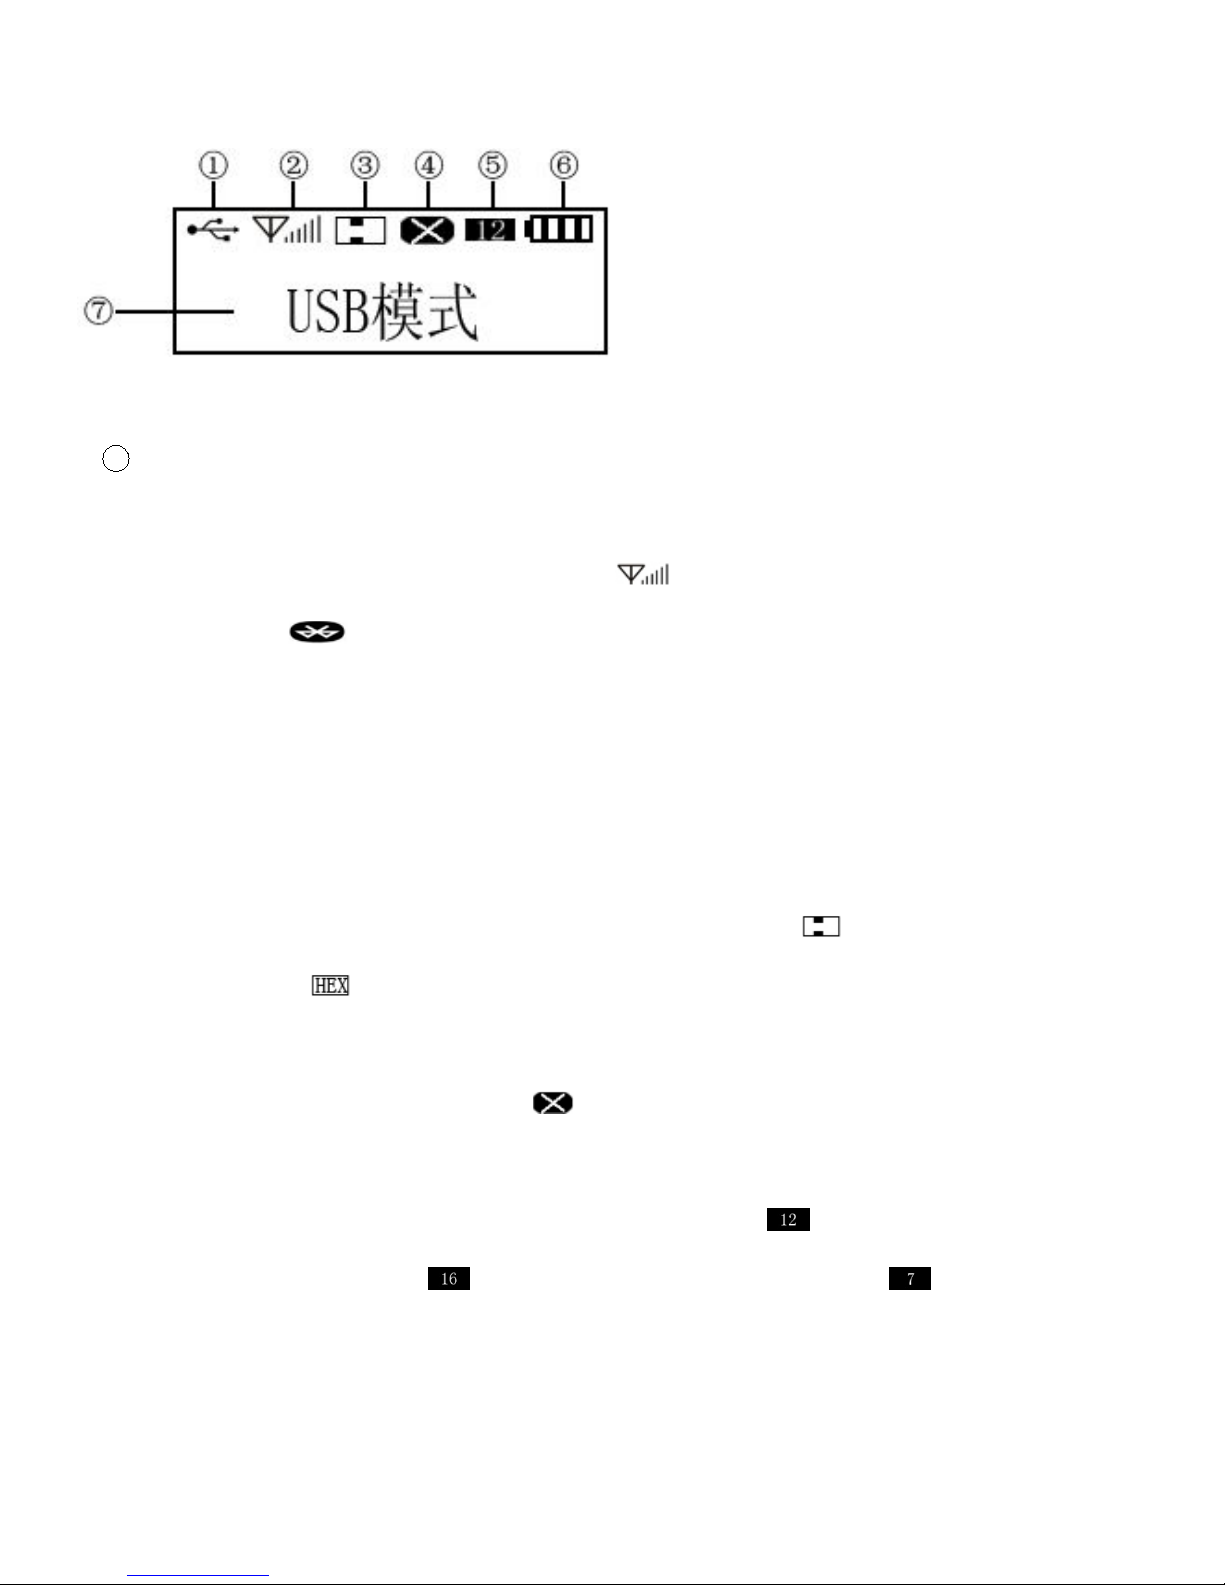
1
icon for usb interface and it means USB interface is usable .
②icon for wireless interface,when it shows “ ”,it means RF is usable.
,when it shows ,it means blueteeth works.If it show nothing ,it means wireless interface
is useless.。
Notice :blueteeth and RF interface can not be used together .
③icon for hexadecimal and Black Mark mode ,when it shows ,it means Black Mark
mode ;if it shows ,it means hexadecimal and Black Mark mode
④icon for wrong mode ,when it shows ,it means the wrong mode and the icon flicker.
⑤the icon for default printing character font,when it shows ,it means the character font
is 6*12/12*12;when it shows ,it means 8*16/16*16.when it shows ,it means :7*9.
Notice :if you change the language of printing ,icons wont change.
Page 18
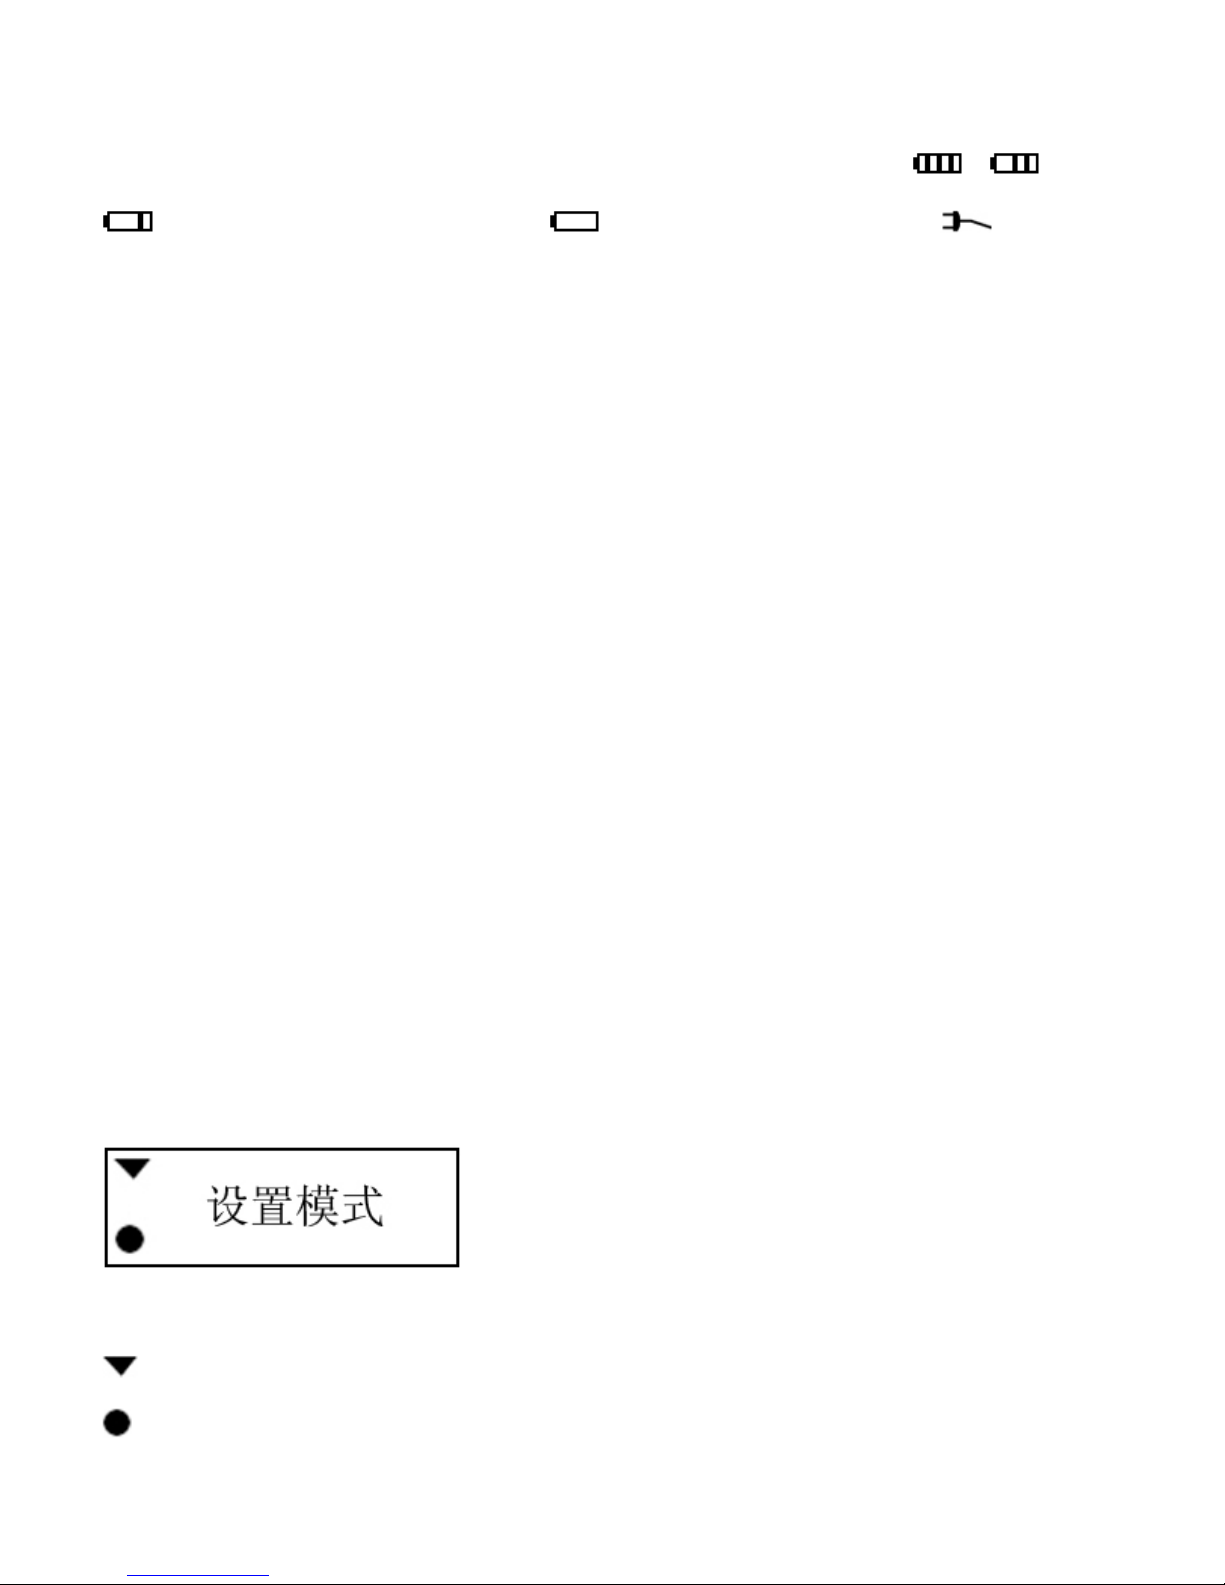
⑥icons for battery .icons as following show the battery at different stage . , ,
.when the power is low ,it will show .In each situation ,it will shows when it
connected to power.
⑦it shows the printer situation through character.
When printer is not connected to anything ,it show the USB mode.
When connected to USB ,it shows usb has been connected .
When data are sent to printer through USB ,it will show the USB interface is on .
When printer connected through bluetooth and the corresponding port is open ,it will show
bluetooth is on . When printer connected through both usb and Bluetooth interface ,it will
show usb and blue tooth are connected .
When data is sent to printer through bluetooth ,it will show:Bluetooth are connected.
When data is sent to printer through RF interface ,it will show the RF interface are connected.
When printer goes wrong,it may show being out of paper ,printer head is wrong ,pressure
is more or less.
When it is in the mode of settings,it will show :
is corresponding with button,they are used to chose the setting parameters .
is corresponding with button 【FEED】. they are used to chose the setting parameters .
Page 19

After settings ,press both button【FEED】and button 【MODE】.
Save the settings and enter the normal situation,or it cannot be saved .
For more detailed setting methods ,you can find in the appendix.
Chapter 4 Other Information
4.1 Command Programming Manual
<T7Technical Manual> is a technical manual for engineer to develop printer utility, and users
can claim our company for it. This manual including the technical description of hardware
interface ( Bluetooth, USB interface ), technical documentation of printing control command
set, and others such as how to print black mark and locate by it.
4.2 Description of Black Mark Pre-print
If user use pre-print black mark to locate the receipt, please be sure to abide by the following
black mark pre-print regulation when print the black mark paper, if not ,it will cause that the
printer can not identify the black mark.
The black mark pre-print regulations are as below:
Page 20
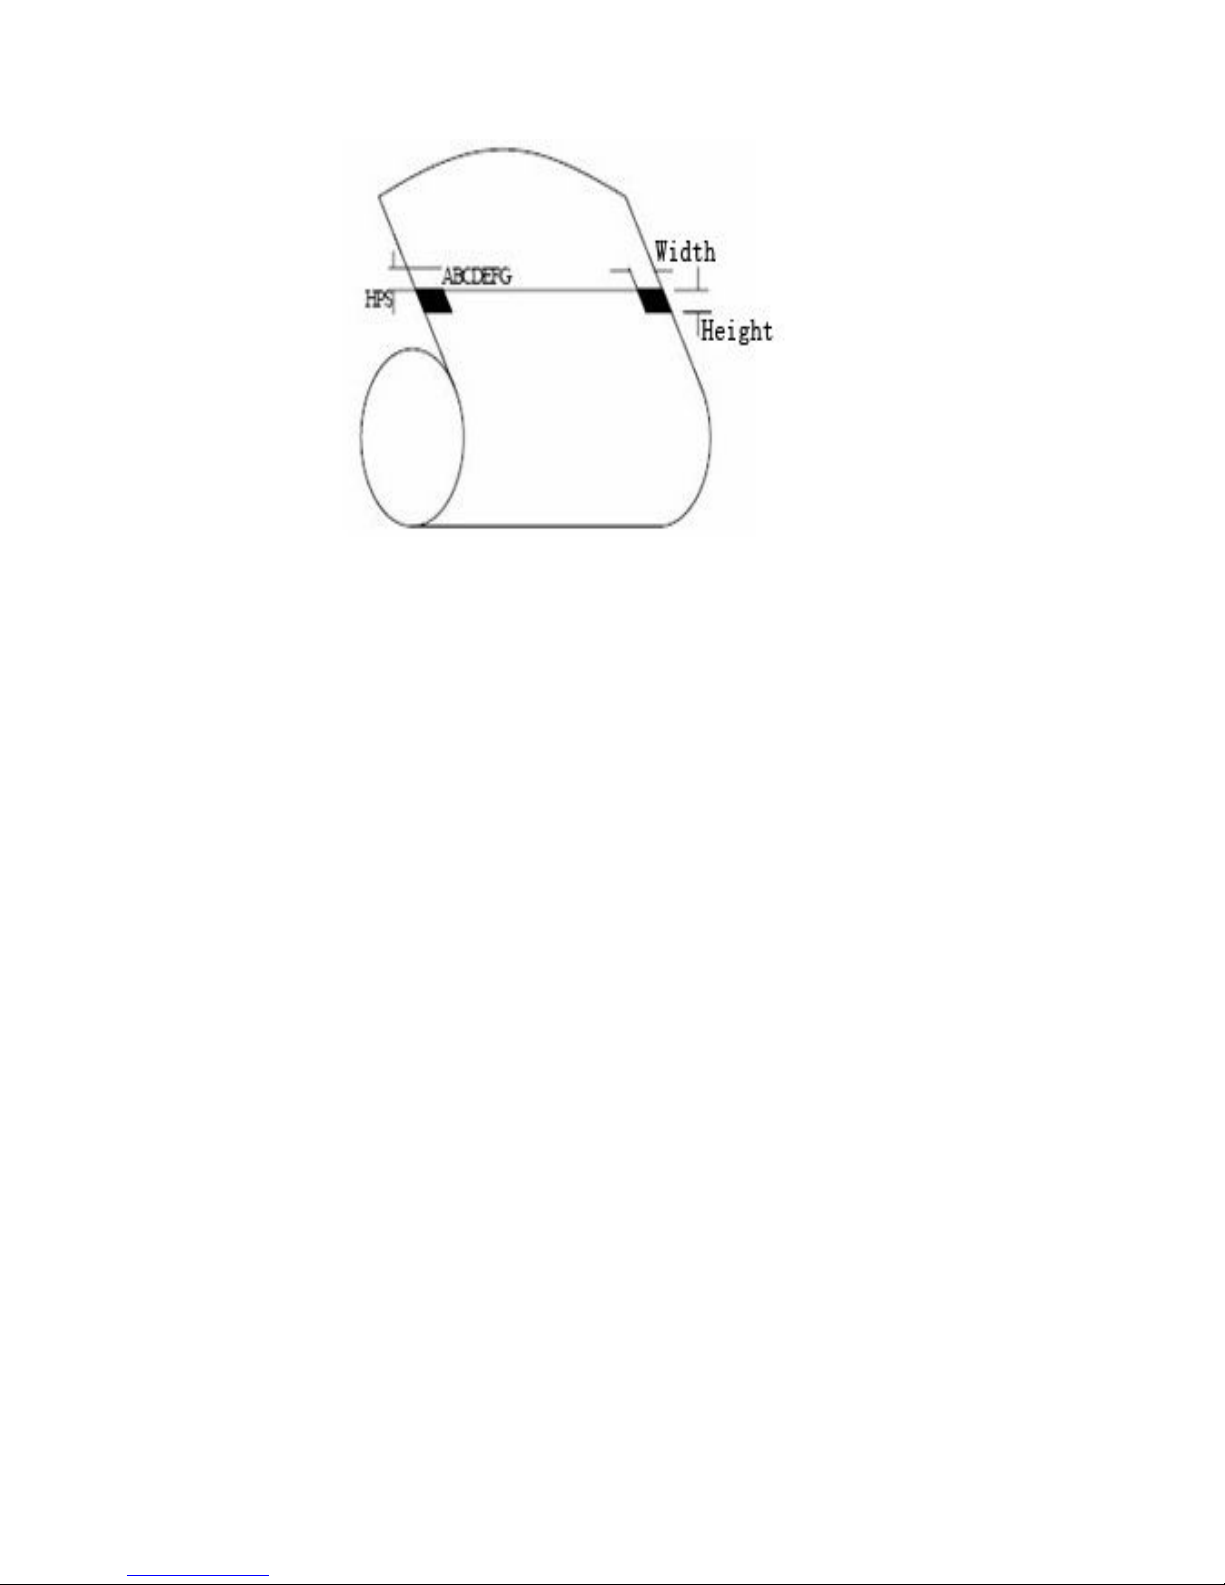
Printing Position: As the picture above, the black mark should be printed on the right or left
edge of the side of words.
Width range: width≥7mm
Height range: 4mm≤height≤6mm
Reflectivity of infrared ray : <10% (infrared ray reflectivity of other parts of the black mark
paper is>65%)
HPS: it is the distance between edges of black mark and loading position.
4.5mm≤Hps≤6.5mm
Page 21
APPENDIX
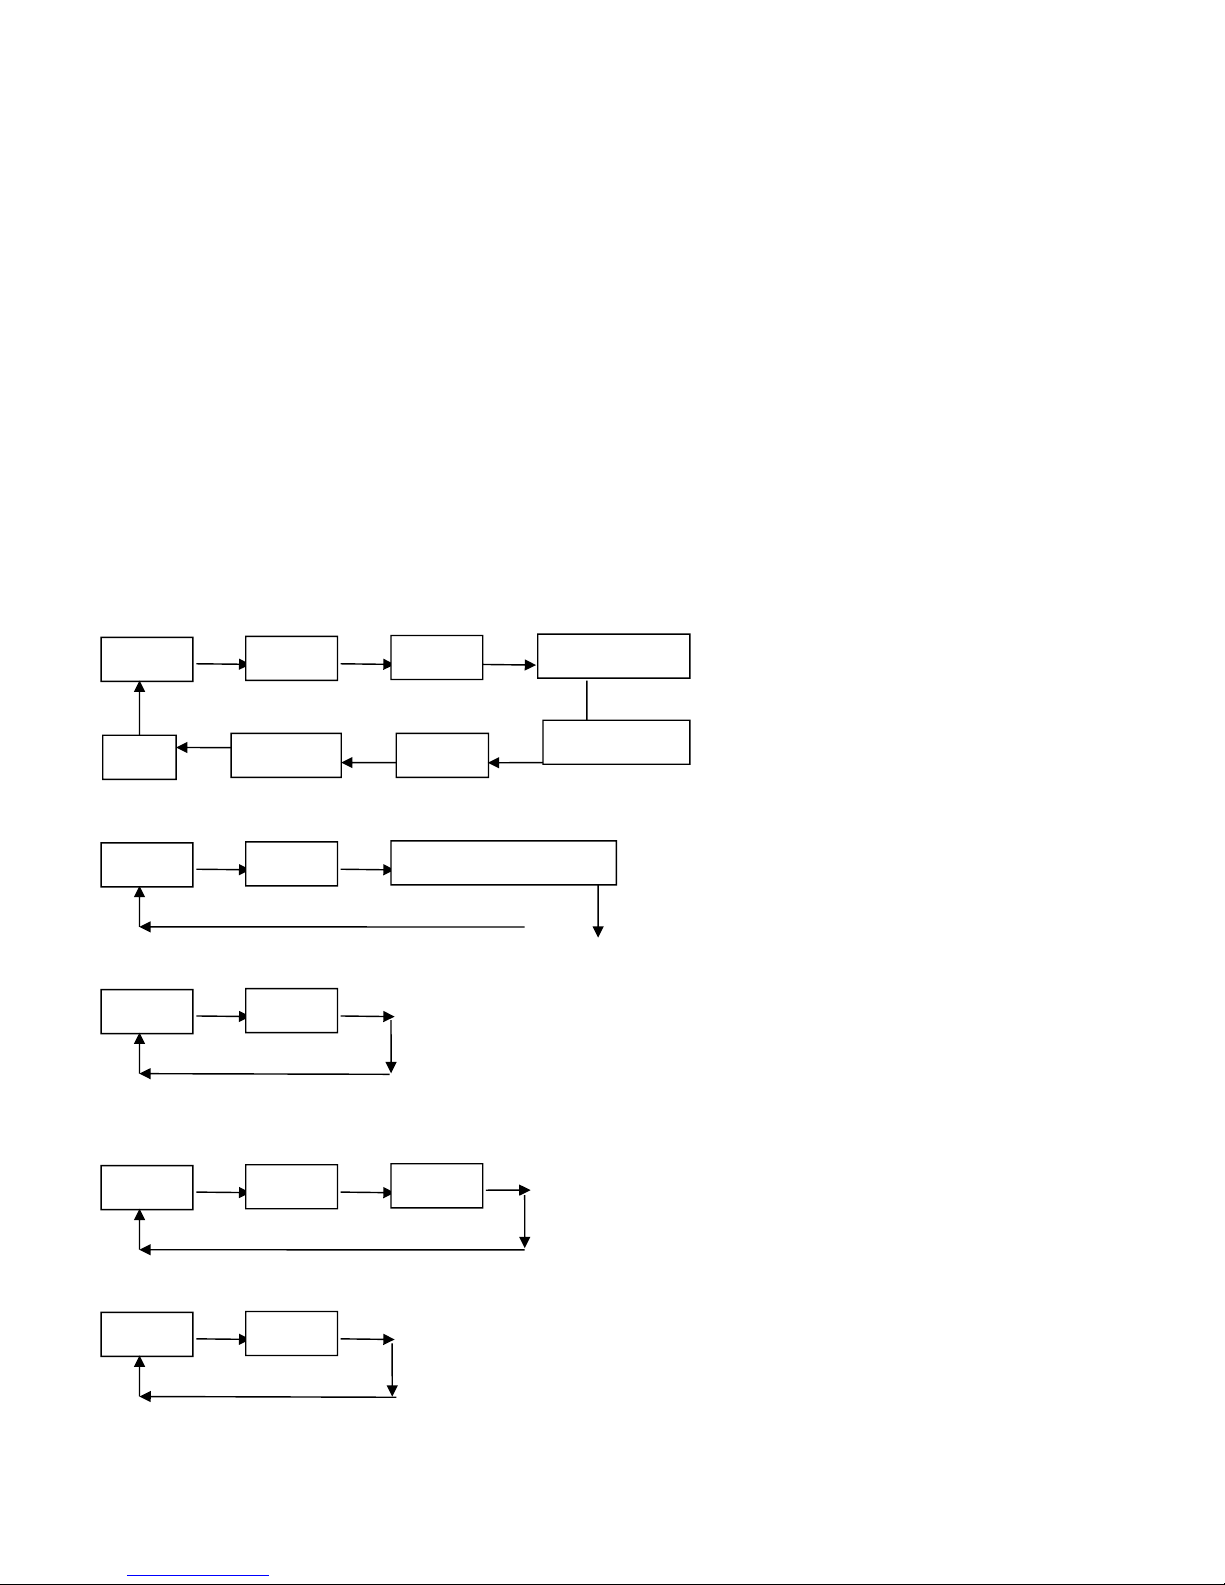
Appendix is the usage of setting printer parameter: this method is shown by picture. FEED]
means to hold down [FEED] button,[MODE] means to hold down [MODE] button;after
settings,press both [MODE] and [FEED] button,you can save the settings.
Set introduction:
MODE MODE MODE
MODE MODE
MODE MODE MODE
Language :
FEED FEED
FEED
Character :
FEED
FEED
Sensitivity of senor:
FEED FEED
FEED
Black mode
FEED
FEED
language
Power off
direction
RF
Back light
Characte
Sensor
Black mark mode
12×12
16×16
wester
chinese
Traditional Chinese
low
middle
high
On
Off
Page 22
Off
FEED FEED FEED
FEED
Direction :
FEED
FEED
Back light set :
FEED
FEED
RF Ad:
FEED FEED FEED
FEED FEED
FEED FEED FEED
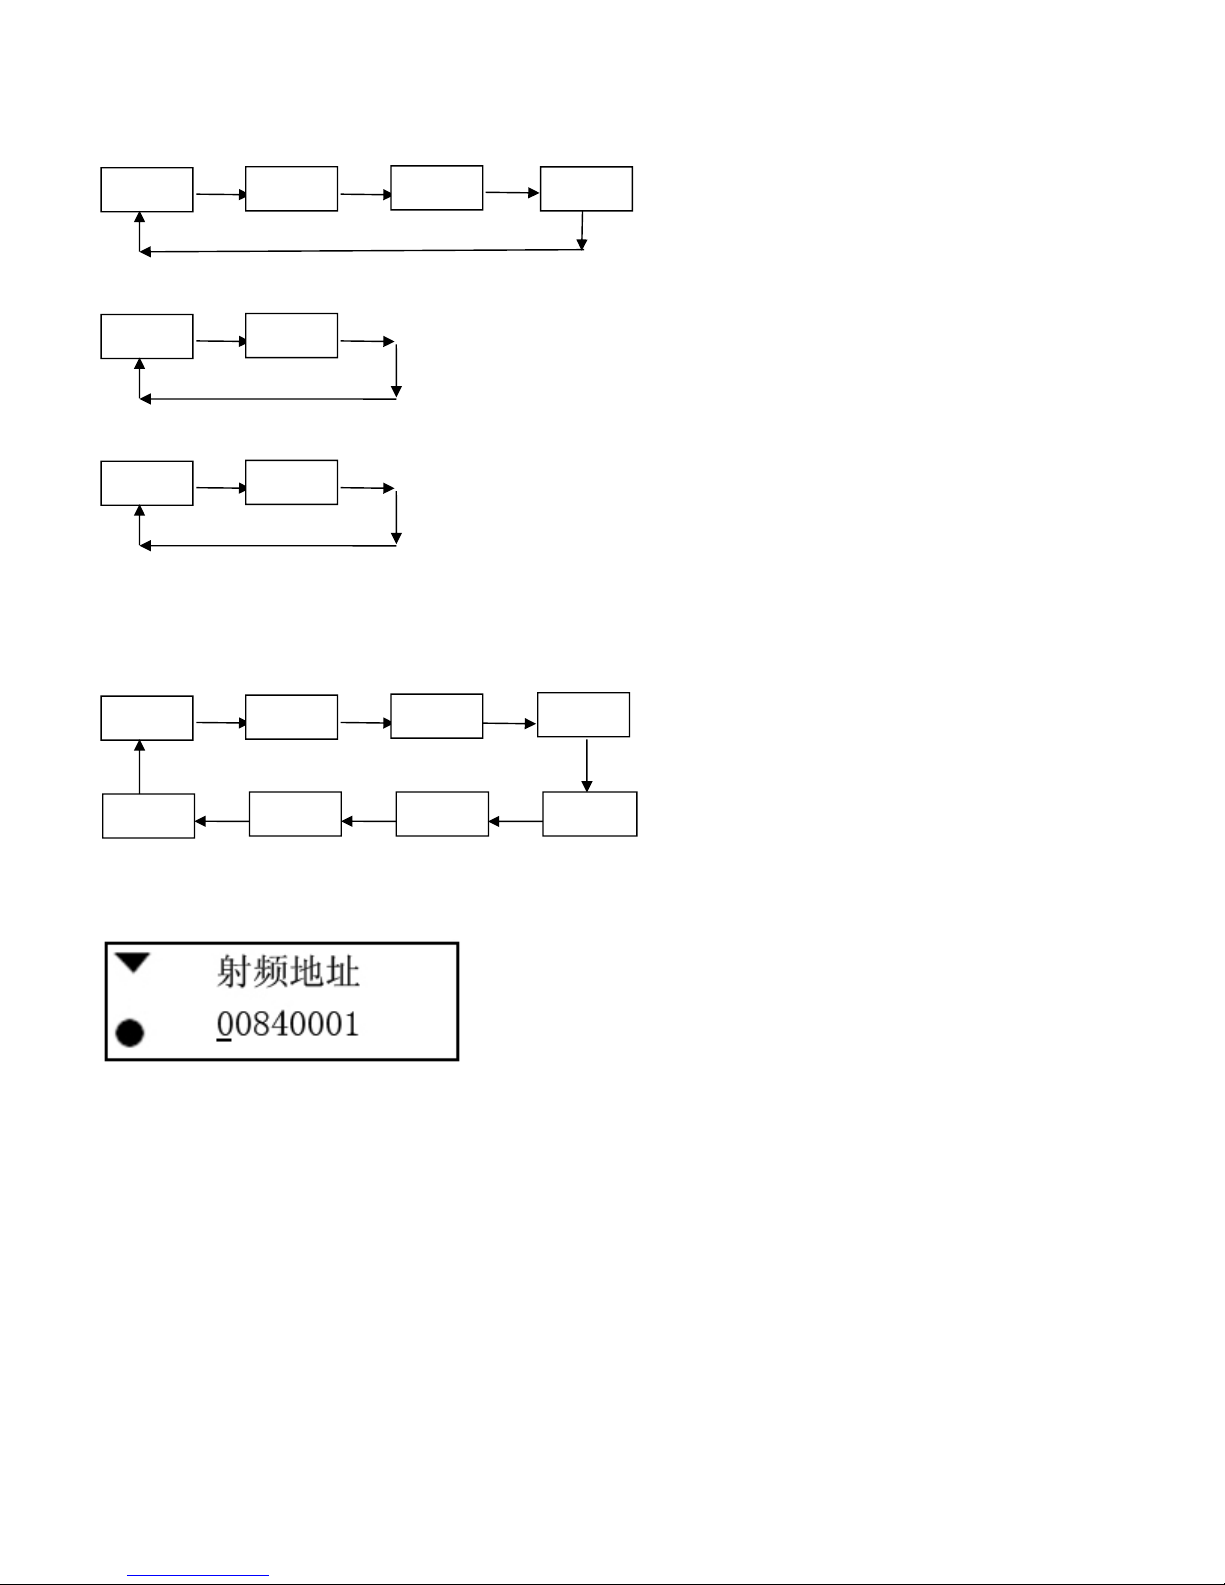
Note :RF AD SET
The setting is as following:
The number underlined is needed to be changed ,pressing 【FEED】button means to be plus
one ,pressing 【MODE】button means underline moves once on the right;when moving to the
last number ,the underline disappeared .press 【MODE】button again means entering the next
setting .
Never
5mins
20mins
Normal
Opposite
30mins
On
Off
First
Fifth
Sixth
Eight
Seventh
Second
Third
Forth
Page 23

Manufacture has right to amend the content of the instruction without prior announcement!
Page 24
 Loading...