

Page 1
Quick Start (en)
Date: 12/2019
Revision: v.2.0
Page 2
Table of contents
1. Version history 4
2. Safety 5
2.1 Safety message types 5
2.2 General safety precautions 6
2.3 Intended use 9
2.4 Users 10
2.5 Foreseeable misuse 12
2.6 Residual risks 12
2.7 Warning label 13
3. Light indicators and speakers 14
3.1 Status lights 14
3.2 Signal lights 16
3.3 Speakers 16
4. Control panel 18
4.1 The control panel buttons 18
4.2 The Operating mode key 19
5. Accessing the internal parts 20
5.1 Front compartment 20
5.2 Rear compartment 22
5.3 Side compartments 22
5.4 Top compartments 23
6. IT security 24
6.1 Managing users and passwords 24
MiR1000Quick Start (en) 12/2019 - v.2.0 ©Copyright 2019-2020: MobileIndu strial Robots A/S. 2
Page 3
6.2 Software security patches 24
7. Getting started 26
7.1 In the box 26
7.2 Unpacking MiR1000 27
7.3 Connecting the battery 31
7.4 Connecting to the robot interface 32
7.5 Driving the robot in Manual mode 34
7.6 Checking the hardware status 36
7.7 Mounting the nameplate 37
7.8 Shutting down the robot 39
7.9 Charging the robot 39
MiR1000Quick Start (en) 12/2019 - v.2.0 ©Copyright 2019-2020: MobileIndu strial Robots A/S. 3
Page 4
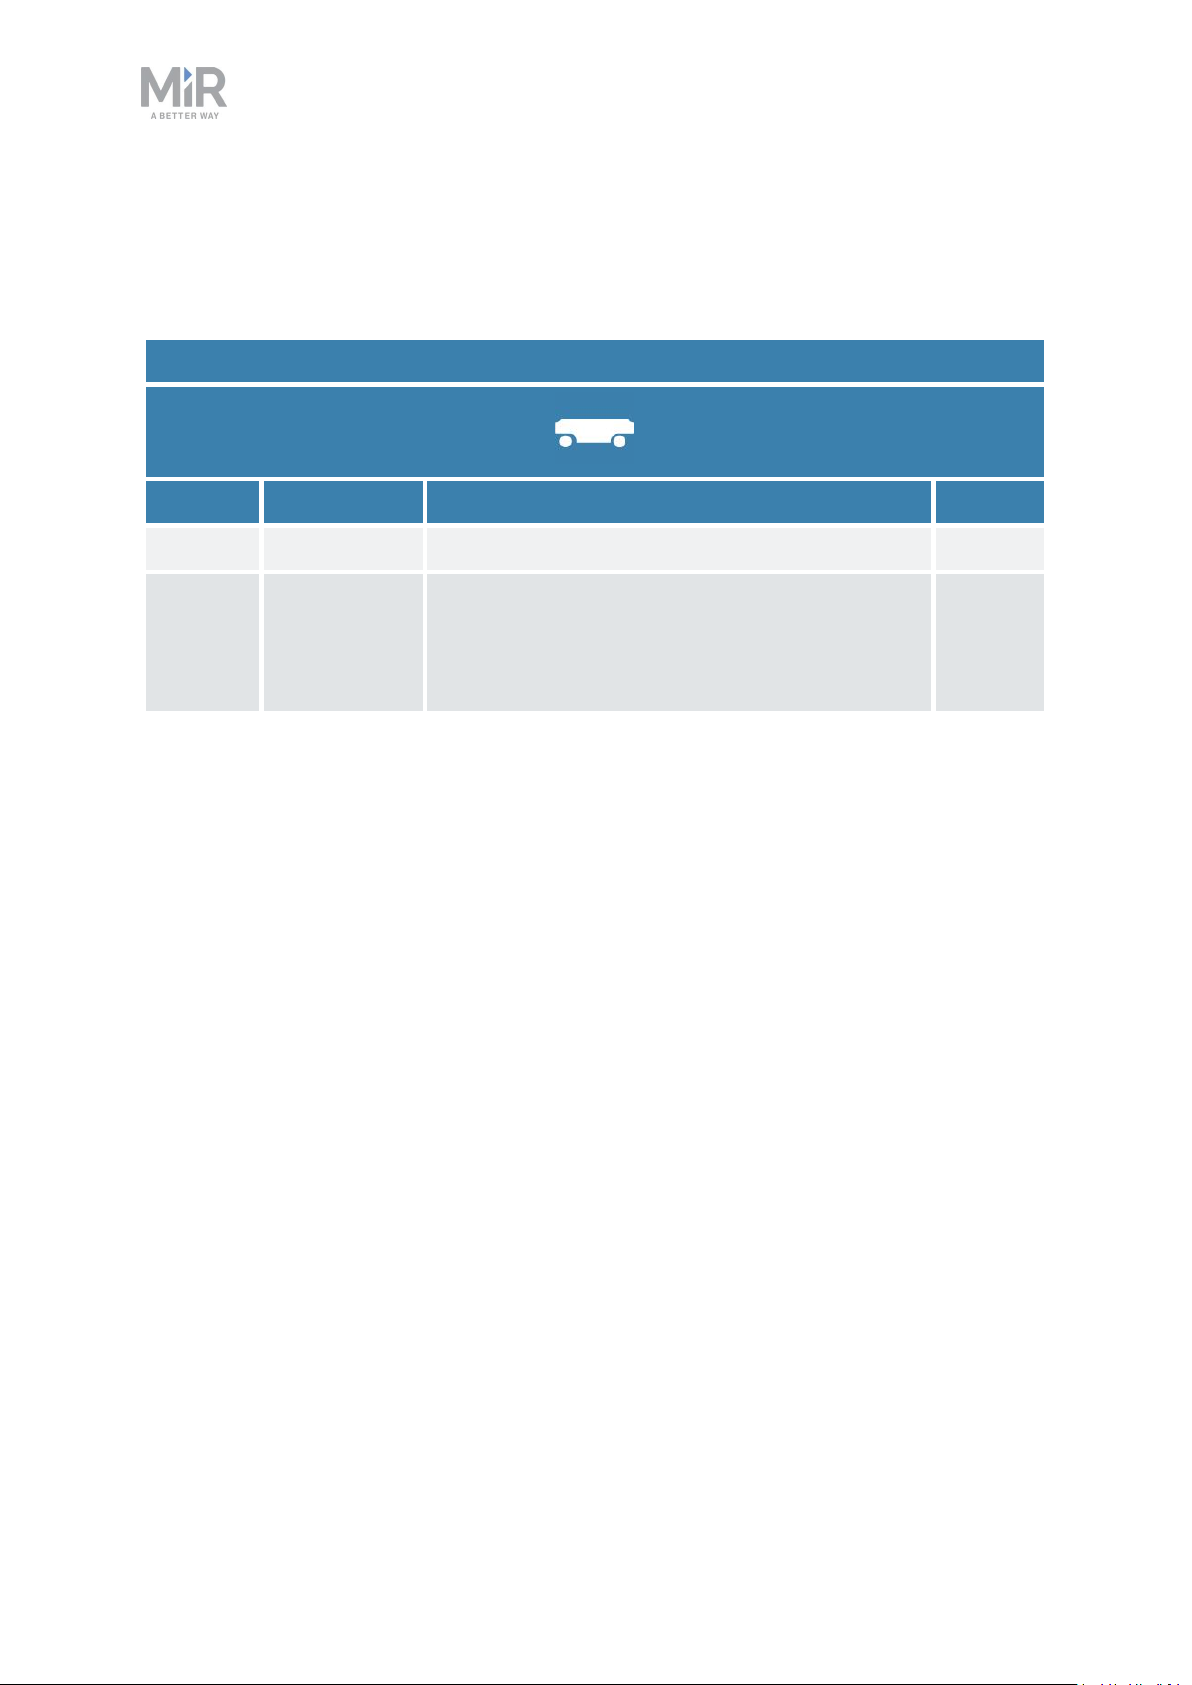
1. Version history
1. Version history
This table shows current and previous versions of this document.
MiR1000
Revision Release date Description HW
1.0-1.2 2020-06-18 First editions. 1.0
2.0 2020-12-01 Major update and new structure with new
sections: Version history, Warning label, IT
security, Mounting the nameplate, and Charging
the robot.
1.0
MiR1000Quick Start (en) 12/2019 - v.2.0 ©Copyright 2019-2020: MobileIndu strial Robots A/S. 4
Page 5
2. Safety
Read the information in this section before powering up and operating MiR1000.
Pay particular attention to the safety instructions and warnings.
NOTICE
Mobile Industrial Robots disclaims any and all liability if MiR1000 or its
accessories are damaged, changed, or modified in any way. Mobile Industrial
Robots cannot be held responsible for any damages caused to MiR1000,
accessories, or any other equipment due to programming errors or
malfunctioning of MiR1000.
2. Safety
2.1 Safety message types
This document uses the following safety message types.
WARNING
Indicates a potentially hazardous situation that could result in death or serious
injury. Carefully read the message that follows to prevent death or serious
injury.
CAUTION
Indicates a potentially hazardous situation that could result in minor or
moderate injury. Alerts against unsafe practices. Carefully read the message
that follows to prevent minor or moderate injury.
NOTICE
Indicates important information, including situations that can result in damage
to equipment or property.
MiR1000Quick Start (en) 12/2019 - v.2.0 ©Copyright 2019-2020: MobileIndu strial Robots A/S. 5
Page 6
2.2 General safety precautions
This section contains general safety precautions.
WARNING
If the robot is not running the correct software and is therefore not functioning
properly, the robot may collide with personnel or equipment causing injury or
damage.
• Ensure that the robot is always running the correct software.
WARNING
2. Safety
When the robot is in an operating hazard zone, there is a risk of injury to any
personnel within the zone.
• Ensure that all personnel are instructed to stay clear of operating hazard
zones when the robot is in or approaching the zone.
WARNING
The robot may drive over the feet of personnel, causing injury.
• All personnel must be informed of the side Protective fields of the robot and
be instructed to wear safety shoes near an operating robot.
WARNING
The robot may drive into a ladder, scaffold, or similar equipment that has a
person standing on it. Personnel risk fall injuries and equipment may be
damaged.
• Don't place ladders, scaffolds, or similar equipment in the robot's work
environment.
MiR1000Quick Start (en) 12/2019 - v.2.0 ©Copyright 2019-2020: MobileIndu strial Robots A/S. 6
Page 7
WARNING
The robot may drive down staircases or holes in the floor and cause serious
injury to personnel and damage to the robot and to equipment.
• Mark descending staircases and holes as Forbidden zones on maps.
• Keep the maps up to date.
• Inform personnel that the robot cannot detect descending staircases and
holes in the floor in time to stop.
WARNING
Contact with live electrical parts can cause electric shock.
2. Safety
• Do not touch any internal components of the robot while it is powered.
WARNING
Using a charging device different from the one supplied by the manufacturer
can cause a fire and thereby burn injuries to nearby personnel and damage to
the robot and equipment.
• Only use an original MiR charger.
WARNING
Attempting to charge batteries outside the robot can lead to electrical shock
or burns.
• Never charge the batteries outside the robot.
MiR1000Quick Start (en) 12/2019 - v.2.0 ©Copyright 2019-2020: MobileIndu strial Robots A/S. 7
Page 8
2. Safety
WARNING
Lithium battery packs may get hot, explode, or ignite and cause serious injury
if they are misused electrically or mechanically.
Observe the following precautions when handling and using lithium-ion
batteries:
• Do not short-circuit, recharge, or connect with false polarity.
• Do not expose to temperatures beyond the specified temperature range or
incinerate the battery.
• Do not crush, puncture, or disassemble the battery. The battery contains
safety and protection devices, which, if damaged, may cause the battery to
generate heat, explode, or ignite.
• Do not allow the battery to get wet.
• In the event the battery leaks and the fluid gets into one’s eye, do not rub
the eye. Rinse well with water, and immediately seek medical care. If left
untreated, the battery fluid could cause damage to the eye.
• Use only an original MiR charger (cable charger or charging station) and
always follow the instructions from the battery manufacturer.
• Do not touch damaged batteries with bare hands. Only personnel using
suitable Personal Protection Equipment (PPE) and tools should handle
damaged batteries.
• Isolate the battery and keep clear if the following conditions are observed:
• The battery exhibits abnormally high temperatures.
• The battery emits abnormal odors.
• The battery changes colors.
• The battery case is deformed or otherwise differs from the normal
electrical or mechanical condition.
• Modifications or manipulations of the battery may lead to considerable
safety risks and are therefore prohibited.
• Do not use the battery for anything other than MiR1000.
MiR1000Quick Start (en) 12/2019 - v.2.0 ©Copyright 2019-2020: MobileIndu strial Robots A/S. 8
Page 9

2. Safety
WARNING
Load falling or robot overturning if the load on the robot is not positioned or
fastened correctly can cause fall injuries to nearby personnel or damage to
equipment.
• Ensure that the load is positioned according to the specifications and is
fastened correctly—see the user guide of your robot for safe payload
distribution.
CAUTION
Robot malfunctions can cause an electrical fire, causing damage and injury to
equipment and personnel.
• Personnel operating near the robot must be informed on how to use an ABC
fire extinguisher to put out an electrical fire should the robot malfunction
and catch on fire.
CAUTION
Risk of trapping or injury to personnel if robots malfunction or if personnel
enter operating hazard zones.
• Personnel operating near the robot must be informed on how to engage the
robot's Emergency stop function in emergency situations.
2.3 Intended use
MiR1000 is intended to be commissioned and used in indoor industrial environments where
access for the public is restricted.
MiR1000 is intended to be commissioned according to the guidelines in your robot's user
guide. This is a prerequisite for safe usage of MiR1000.
MiR1000 is equipped with safety-related features that are purposely designed for
collaborative operation where the robot operates without a safety enclosure or together
with people.
MiR1000Quick Start (en) 12/2019 - v.2.0 ©Copyright 2019-2020: MobileIndu strial Robots A/S. 9
Page 10
2. Safety
MiR1000 is intended to be used with top modules supported by Mobile Industrial Robots or
custom modules that:
• Do not have any moving parts.
• Do not extend the footprint of the robot.
• Operate within the environmental conditions required for MiR1000.
If used with custom modules, all obligations of a manufacturer apply to the individual who
performs the modifications in accordance with the machinery directive.
MiR1000 is designed for and all risks are considered when used with one of the following
types of top modules:
• MiR Pallet Lift 1000 used with MiR Lift Pallet Rack.
• MiR EU Pallet Lift 1000 used with MiR EU Pallet Rack.
• MiR Shelf Lift to transport MiR supported shelves.
MiR1000 can be used as a partly complete machine as defined in the EU machinery
directive, with top modules that do not meet the above limitations. Those who design,
manufacture, or commission a system that does not meet the limitations of use of MiR1000
carry the obligations of a manufacturer and shall ensure a safe design according to EN ISO
12100. Guidelines outlined in this manual are not sufficient.
The following list gives examples of modules that are foreseeable misuse of MiR1000:
• Top modules (including total payload) that increase the footprint of MiR1000
• Conveyers (powered and non-powered)
• Industrial robot arms
• Devices that tow carts
• Customized load transfer stations
NOTICE
A safe machine does not guarantee a safe system. Follow the commissioning
guidelines in your robot's user guide to ensure a safe system.
2.4 Users
MiR1000 is only intended to be used by personnel that have received training in their
required tasks.
MiR1000Quick Start (en) 12/2019 - v.2.0 ©Copyright 2019-2020: MobileIndu strial Robots A/S. 10
Page 11

2. Safety
There are three types of intended users for MiR1000: commissioners, operators, and direct
users.
Commissioners
Commissioners have thorough knowledge of all aspects of commissioning, safety, use, and
maintenance of MiR1000 and have the following main tasks:
• Commissioning of the product. This includes creating maps and restricting the user
interface for other users and making brake tests with a full payload.
• Conducting the risk assessment.
• Determining the payload limit, weight distribution, safe fastening methods, safe loading
and unloading of loads on MiR1000, and ergonomic loading and unloading methods if
relevant.
• Ensuring the safety of nearby personnel when the robot is accelerating, braking, and
maneuvering.
• Marking operating hazard zones.
Operators
Operators have thorough knowledge of MiR1000 and of the safety precautions presented in
this user guide. Operators have the following main tasks:
• Servicing and maintaining MiR1000.
• Creating and changing missions and map features in the robot interface.
Direct users
Direct users are familiar with the safety precautions in this quick start and have the
following main tasks:
• Assigning missions to MiR1000.
• Fastening loads to MiR1000 securely.
• Loading and unloading from a paused robot.
All other persons in the vicinity of MiR1000 are considered indirect users and must know
how to act when they are close to the robot. For example, they must be aware that visibly
marked operating hazard zones must be respected.
MiR1000Quick Start (en) 12/2019 - v.2.0 ©Copyright 2019-2020: MobileIndu strial Robots A/S. 11
Page 12

2. Safety
2.5 Foreseeable misuse
Any use of MiR1000 deviating from the intended use is deemed as misuse. This includes, but
is not limited to:
• Using the robot to transport people
• Using the robot on steep surface grades, such as ramps
• Making changes to the SICK configuration
• Driving the robot on cross slopes
• Exceeding the total payload
• Positioning or fastening loads incorrectly according to the specifications
• Using Emergency stop buttons for anything other than emergency stops
• Using the robot in medical and life critical applications
• Operating the robot outside the permissible operating parameters and environmental
specifications
• Using the robot in potentially explosive environments
• Using the robot outdoors
• Using the robot in hygiene zones
2.6 Residual risks
Mobile Industrial Robots has identified the following potential hazards that commissioners
must inform personnel about and take all precautions to avoid when working with MiR1000:
• You risk being run over, drawn in, trapped, or struck if you stand in the path of the robot
or walk towards the robot or its intended path while it is in motion.
• You risk being run over, drawn in, trapped, or struck if you stand in the path of the robot
or walk towards it while it is driving in reverse. The robot only drives in reverse when
undocking from a marker, such as a charging station or load transfer station.
• You risk being crushed or trapped if you touch the robot while it is in motion.
• You risk being crushed or trapped if the robot places a load outside a designated drop-off
area due to faulty localization.
• You risk losing control of the robot if it is accessed by unauthorized users. Consider
increasing the IT security of your product—see IT security on page 24.
MiR1000Quick Start (en) 12/2019 - v.2.0 ©Copyright 2019-2020: MobileIndu strial Robots A/S. 12
Page 13
2. Safety
NOTICE
Other significant hazards may be present in a specific robot installation and
must be identified during commissioning.
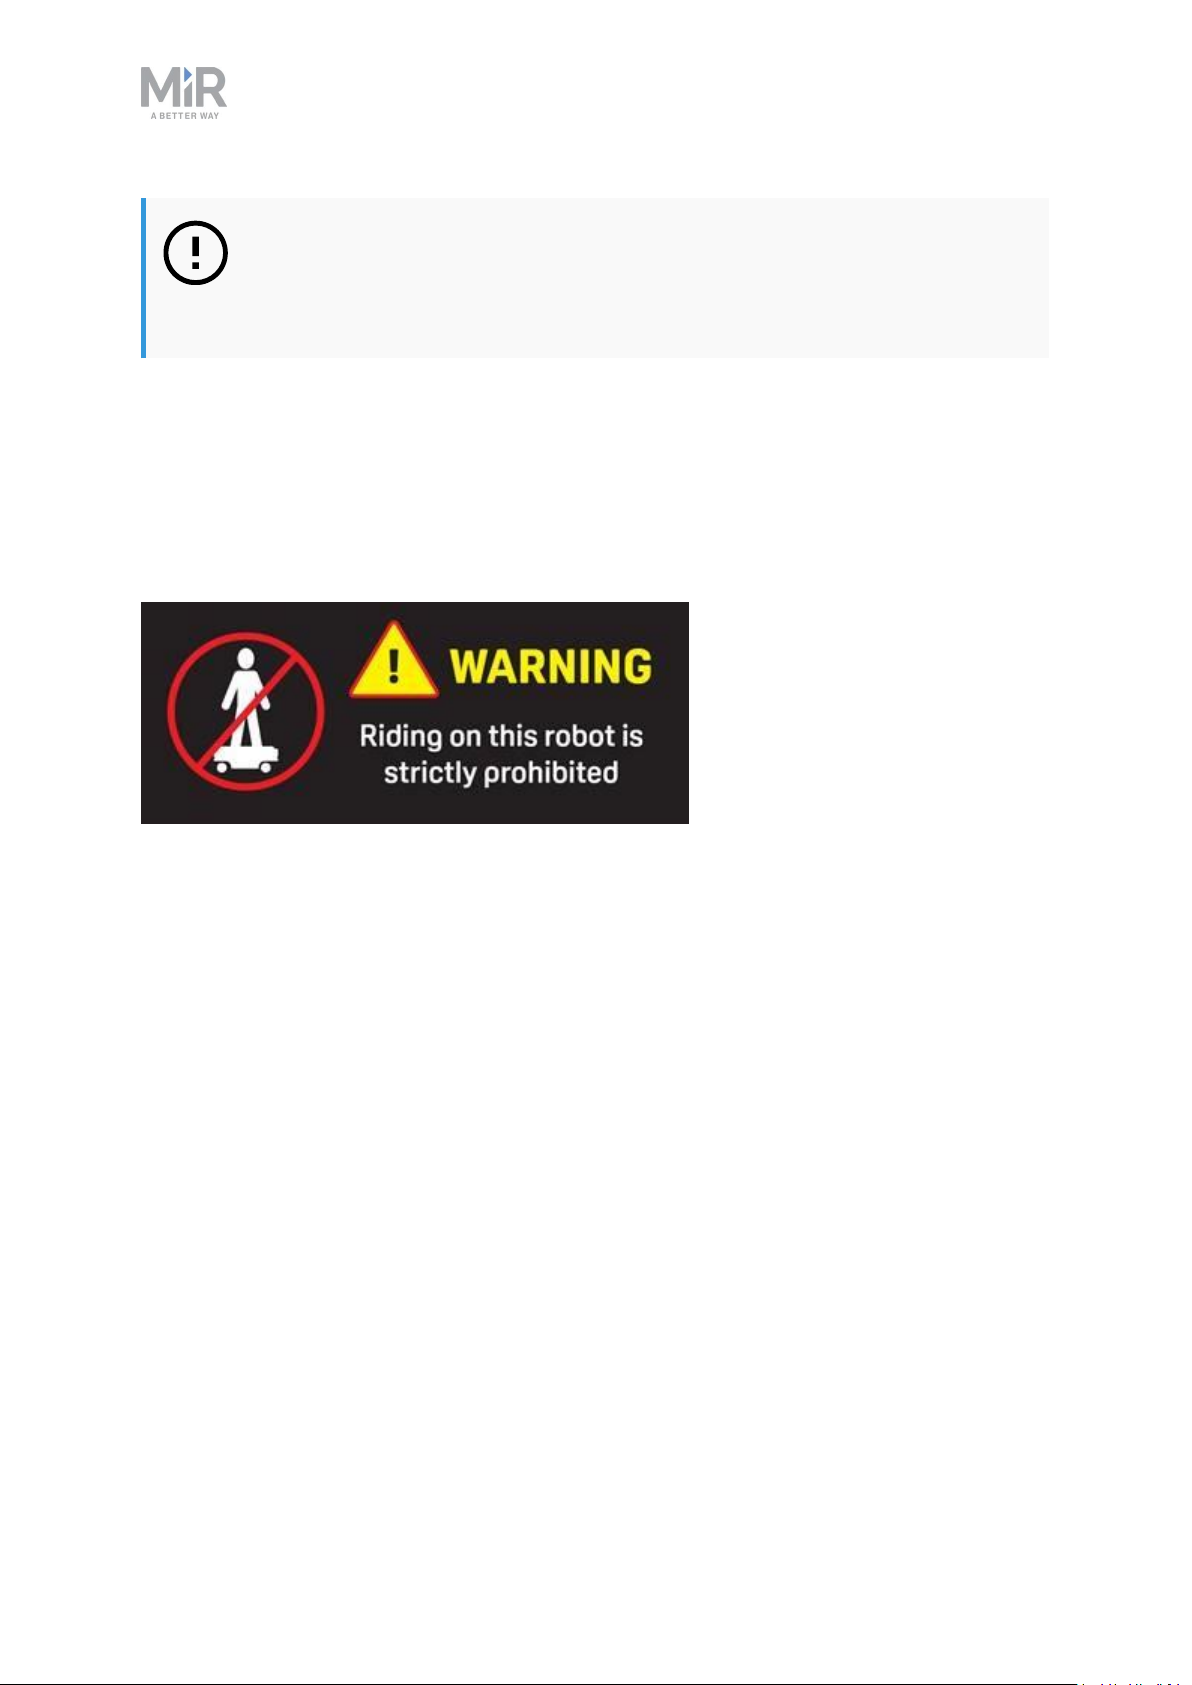
2.7 Warning label
MiR1000 is supplied with a warning label that specifies that it is strictly prohibited to ride on
the robot.
The label must be placed on the robot or top module so that it is clearly visible.
Figure 2.1. The warning label must be placed on the robot or top module.
MiR1000Quick Start (en) 12/2019 - v.2.0 ©Copyright 2019-2020: MobileIndu strial Robots A/S. 13
Page 14
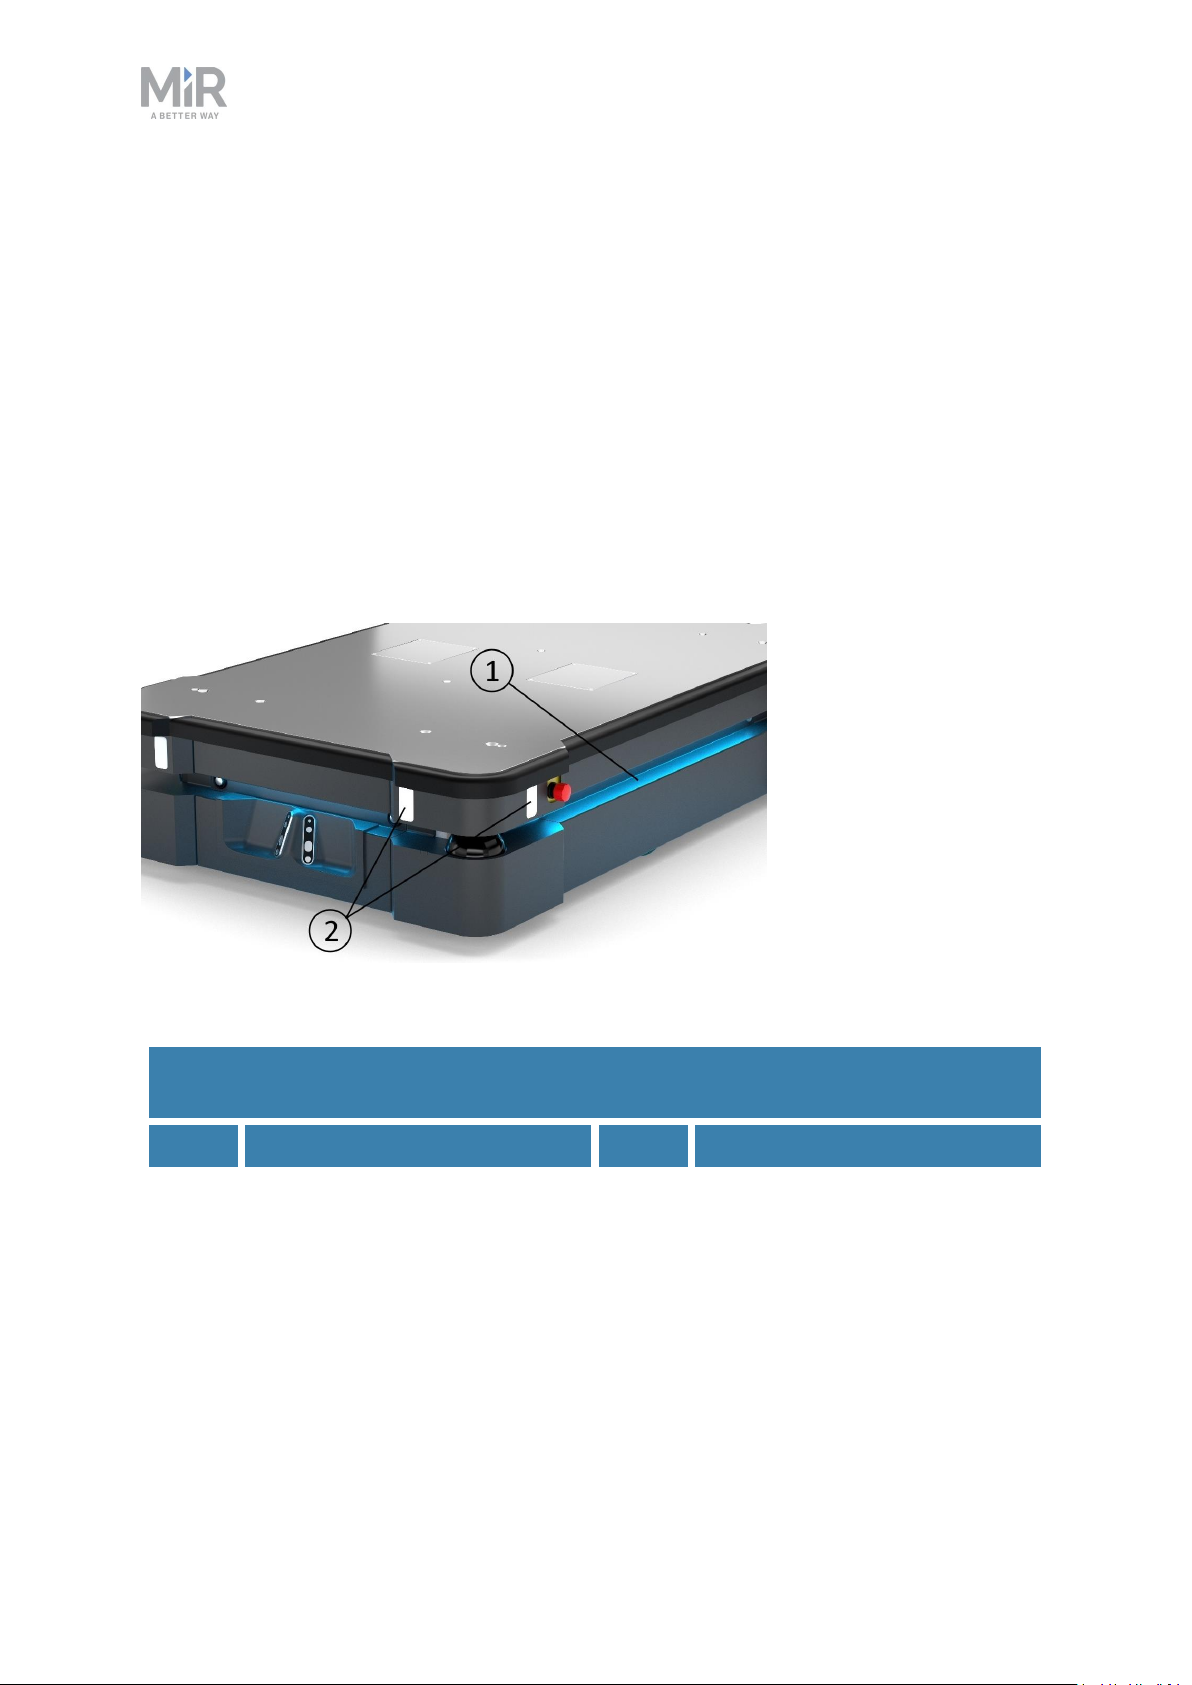
3. Light indicators and speakers
3. Light indicators and speakers
The robot uses two types of light indicators to let people in the environment know what the
robot is currently doing or planning to do.
• Status lights
LED light bands on all four sides of the robot uses colors and light motion patterns to
signal the current status of the robot.
• Signal lights
The signal lights at the front and back of the robot show if the robot is about to turn a
corner or go backward. Front lights are white and rear lights are red. Right and left turns
are indicated by blinking.
Figure 3.1. Indicator lights on MiR1000.
Table 3.1.
Identification of indicator lights in Figure 3.1
Pos. Description Pos. Description
1 Status lights 2 Signal lights
3.1 Status lights
The LED light bands running all the way around the robot indicate the robot’s current
operational state. Colors may also be used as part of missions, but as standard, status lights
indicate the statuses described in Table 3.2.
MiR1000Quick Start (en) 12/2019 - v.2.0 ©Copyright 2019-2020: MobileIndu strial Robots A/S. 14
Page 15

Table 3.2.
Status light colors
Red Emergency stop
Green Ready for job
Cyan Drives to destination
Purple Goal/Path blocked
White Planning/Calculating
Yellow Mission paused
Yellow wavering Startup signal before PCis active
3. Light indicators and speakers
Yellow fade Shutting down robot
Yellow blinking Relative move, ignoring obstacles
Purple - yellow General error, for example hardware, localization
Blue Manual drive
Blue wavering Mapping
Contracting white Chargingat charging station
White wavering Prompt user / Waiting for user's response
Cyan wavering (robots
connected to MiR Fleet
Waiting for MiR Fleet resource
only)
When the robot's battery reaches a critically low level of power (0-1%), the
ends of the status lights flash red.
MiR1000Quick Start (en) 12/2019 - v.2.0 ©Copyright 2019-2020: MobileIndu strial Robots A/S. 15
Page 16

3. Light indicators and speakers
When the robot is charging in a charging station, the status lights on the side
of the robot indicate the robot's battery percentage.
3.2 Signal lights
Signal lights are used to indicate the robot’s immediate motion plans by signaling forwardsbackwards-braking and left-right turns.
The signal lights work similarly to lights used on cars; white at the front, red at the back, and
indicating a left or right turn by blinking.
When the robot drives with muted Protective fields, for example, when docking to a marker,
all signal lights blink yellow.
3.3 Speakers
In Setup > Sounds, you can upload new sounds to the robot or edit the volume and length of
the default sounds.
Sounds are used in missions and can be used as alerts: “Please step aside” or to attract
peoples attention, for example, when the robot has arrived at a position.
When the robot drives with muted Protective fields it emits a warning sound. In System >
Settings > Safety system, you can choose which sound the robot makes and the volume of
the sound.
CAUTION
Changing the safety system can cause the robot to not comply with safety
standards.
• Do not disable the sound in the safety system.
MiR1000Quick Start (en) 12/2019 - v.2.0 ©Copyright 2019-2020: MobileIndu strial Robots A/S. 16
Page 17

3. Light indicators and speakers
Figure 3.2. In the Safety system settings, you can modify the sounds the robot plays when the robot mutes its
Protective fields.
CAUTION
It is the responsibility of the commissioner to ensure that the warning sounds
are audible in the robot's work environment.
MiR1000Quick Start (en) 12/2019 - v.2.0 ©Copyright 2019-2020: MobileIndu strial Robots A/S. 17
Page 18

4. Control panel
MiR1000 has a control panel in the rear-left corner of the robot.
4.1 The control panel buttons
4. Control panel
Figure 4.1. The MiR1000 control panel.
Table 4.1.
Identification of items on the control panel in Figure 4.1
Pos. Description Pos. Description
1 Manual stop button 2 Resume button
3 Power button 4 Operating mode key
Manual stop
Pressing this button stops the robot. After pressing this button, you must press the Resume
button to let the robot continue operating.
Color indication:
• Red: It is possible to engage the Manual stop.
MiR1000Quick Start (en) 12/2019 - v.2.0 ©Copyright 2019-2020: MobileIndu strial Robots A/S. 18
Page 19

4. Control panel
Resume
Pressing this button:
• Clears the Emergency stop state.
• Lets the robot continue operating after the Manual stop button was pressed or after the
operating mode changes.
• Lets the robot start operating after powering up.
Color indication:
• Blinking blue: The robot is waiting for a user action (clear the Emergency stop state,
acknowledge the change of operating mode).
Power
Pressing this button for three seconds turns the robot on or shuts it off.
Color indication:
• Blue: The robot is off.
• Blinking green: The robot is starting up.
• Green: Normal operation.
• Blinking red: The battery level is too low to start without additional charging, or the robot
is shutting down.
4.2 The Operating mode key
The Operating mode key lets you switch between operating modes.
• Left position: Autonomous mode
Puts the robot in Autonomous mode.
• Middle position: Locked
Locks the robot. The robot blocks the wheels; you cannot start a mission or drive the robot
manually.
• Right position: Manual mode
Puts the robot in Manual mode.
MiR1000Quick Start (en) 12/2019 - v.2.0 ©Copyright 2019-2020: MobileIndu strial Robots A/S. 19
Page 20

5. Accessing the internal parts
5. Accessing the internal parts
Most internal parts of MiR1000 are accessed through maintenance hatches that open to
different compartments:
• Front compartment
• Rear compartment
• Side compartments
• Top compartments
5.1 Front compartment
To open the front compartment, follow these steps:
1. Push the two white buttons and pull the hatch.
MiR1000Quick Start (en) 12/2019 - v.2.0 ©Copyright 2019-2020: MobileIndu strial Robots A/S. 20
Page 21

2. Turn the two levers 180°.
5. Accessing the internal parts
3. Pull out the compartment drawer while holding underneath it and lifting slightly.
MiR1000Quick Start (en) 12/2019 - v.2.0 ©Copyright 2019-2020: MobileIndu strial Robots A/S. 21
Page 22

5. Accessing the internal parts
5.2 Rear compartment
To open the rear compartment, push the two white buttons at the same time and pull the
hatch.
5.3 Side compartments
To open a side hatch, turn the two screws 90° with a flat-head screwdriver, and pull open the
hatch.
MiR1000Quick Start (en) 12/2019 - v.2.0 ©Copyright 2019-2020: MobileIndu strial Robots A/S. 22
Page 23

5. Accessing the internal parts
5.4 Top compartments
To open a top compartment, remove the four screws and lift off the top cover.
MiR1000Quick Start (en) 12/2019 - v.2.0 ©Copyright 2019-2020: MobileIndu strial Robots A/S. 23
Page 24

6. IT security
6. IT security
ITsecurity is a set of precautions you can take to prevent unauthorized personnel from
accessing MiR1000. This section describes the main IT-security related risks and how to
minimize them when commissioning MiR1000.
MiR1000 communicates all data over the network that it is connected to. It is the
responsibility of the commissioner to ensure that it is connected to a secure network. MiR
recommends conducting an IT-security risk assessment before commissioning the robot.
Contact your distributor for a list of FAQs about IT security.
6.1 Managing users and passwords
Managing your users and passwords is the main way you can control access to MiR1000.
There are three default users with predefined passwords for you to start using. These are
described in the MiR Robot Reference Guide along with instructions to create new users,
user groups, and passwords. MiR advises you to:
• Change the default password for all predefined users if you choose to continue to use
them. Make sure to choose a strong password since MiR1000 does not enforce any
password rules nor expire the password.
• Create new user groups if more levels of access are necessary.
• Create dedicated user accounts under the relevant user group for each person accessing
MiR1000, and ensure that the users change the password on their first sign-in. It is not
recommended to have several users share the same account.
• Only enable users with a minimum level of access to use a pin code to sign in. Users with
a higher level of access are recommended to use a strong password to sign in instead.
6.2 Software security patches
To improve the security of MiR1000, MiR supplies security patches to the operating system
in new MiR software update files. When you install a security patch, it takes approximately
10-15 minutes longer to update a MiR product.
MiR1000Quick Start (en) 12/2019 - v.2.0 ©Copyright 2019-2020: MobileIndu strial Robots A/S. 24
Page 25

6. IT security
Security patches are included from software version 2.8.3 and higher.
Understanding MiR software versions
MiR uses the Major.Minor.Patch.Hot fix format to version software. For example, 2.8.1.1
means that the software is based on the second major release, the eighth minor release of
the major version, the first patch release of the minor version, and, in this example, a single
hot fix is included too.
• Major releases include the most significant changes that affect the entire robot software.
• Minor releases often include new features and smaller changes that only affect parts of
the software.
• Patch releases focus on fixing small issues in the software and introducing quality
improvements.
• Hot fix releases are only created when a patch release has introduced a critical issue that
needs to be fixed immediately.
Security patch policy
MiR applies the following policy when supplying security patches:
• New security patches are distributed per every minor release.
• All patch releases under a minor release include the previous security patches also. In
other words, if you chose not to install the first software version in a minor release, such
as version 2.9.0, the security patches will still be installed when you update to 2.9.1 or
higher.
MiR1000Quick Start (en) 12/2019 - v.2.0 ©Copyright 2019-2020: MobileIndu strial Robots A/S. 25
Page 26

7. Getting started
This section describes how to get started with MiR1000.
NOTICE
Read Safety on page 5 before powering up MiR1000.
In some images in this section, the robot is shown with a MiR EU Pallet Lift
1000 top module.
7.1 In the box
7. Getting started
This section describes the contents of the MiR1000 box.
Figure 7.1. The box containing the robot and accessories.
MiR1000Quick Start (en) 12/2019 - v.2.0 ©Copyright 2019-2020: MobileIndu strial Robots A/S. 26
Page 27

7. Getting started
The box contains:
• The MiR1000 robot
• A MiR1000 document folder containing a USB flash drive and the following printed
documents:
• MiR1000 Quick Start
• High visibility stickers
• The CE Declaration of Conformity for your robot
• Getting the robot online
• Passwords
• The unique nameplate for your robot
• The USB flash drive in the document folder has the following content:
• MiR1000 User Guide
• MiR1000 Quick Start
• MiR Network and WiFi Guide
• MiR Robot Reference Guide
• MiR Robot REST API Reference
• Getting the robot online
• CE Declaration of Conformity
7.2 Unpacking MiR1000
This section describes how to unpack the robot.
Keep the original packaging for future transportation of MiR1000.
To unpack the robot, follow these steps:
1. Place the box with the robot so that there is at least three meters of free space at the
front or the back of the box. This is necessary as the robot drives out of the box on a
ramp.
MiR1000Quick Start (en) 12/2019 - v.2.0 ©Copyright 2019-2020: MobileIndu strial Robots A/S. 27
Page 28

7. Getting started
2. Remove the screws that attach the walls of the box to the box lid and the base of the box.
3. Remove the lid from the box.
4. Take the folder with the printed documents and the USB flash drive out of the box.
MiR1000Quick Start (en) 12/2019 - v.2.0 ©Copyright 2019-2020: MobileIndu strial Robots A/S. 28
Page 29

5. Remove the walls of the box and the protective foam blocks.
7. Getting started
MiR1000Quick Start (en) 12/2019 - v.2.0 ©Copyright 2019-2020: MobileIndu strial Robots A/S. 29
Page 30

6. Cut the protective straps.
7. Getting started
For increased visibility, you can add the supplied high visibility stickers to
the four corners of the robot.
MiR1000Quick Start (en) 12/2019 - v.2.0 ©Copyright 2019-2020: MobileIndu strial Robots A/S. 30
Page 31

7. Getting started
7. Place the lid of the box so that you can use it as a ramp. Align the lid so that it is flush
with the base of the box.
8. Remove the wheel stop board from the pallet to let the robot drive on the ramp.
7.3 Connecting the battery
To connect the battery to the robot, you need to open the rear compartment—see Accessing
the internal parts on page 20.
MiR1000Quick Start (en) 12/2019 - v.2.0 ©Copyright 2019-2020: MobileIndu strial Robots A/S. 31
Page 32

7. Getting started
Once you have accessed the rear compartment, turn the Battery disconnect switch to the On
position.
The battery is now connected, and you can close the rear maintenance hatch.
7.4 Connecting to the robot interface
When the robot is turned on, it enables the connection to its WiFi access point. The name of
the access point appears in the list of available connections on your PC, tablet, or phone.
NOTICE
The original username and password for the robot’s web interface are in the
document Getting the robot online.
The unique password for the WiFi access point is in the Passwords document.
Both documents are in the box with the product.
MiR1000Quick Start (en) 12/2019 - v.2.0 ©Copyright 2019-2020: MobileIndu strial Robots A/S. 32
Page 33

7. Getting started
To connect to the robot interface, follow these steps:
1. Using your PC, tablet, or phone, connect to the WiFi access point of the robot using the
unique password for the WiFi access point. The access point name has the following
format: MiR_20XXXXXXX.
The access point name is derived from the robot application's model serial
number.
2. In a browser, go to the address mir.com and sign in.
3. Switch to Manual mode, and drive the robot down the ramp—see Driving the robot in
Manual mode on the next page.
MiR1000Quick Start (en) 12/2019 - v.2.0 ©Copyright 2019-2020: MobileIndu strial Robots A/S. 33
Page 34

7.5 Driving the robot in Manual mode
CAUTION
When driving the robot in Manual mode, it is possible to mute the Protective
fields and drive the robot into Forbidden zones and Unpreferred zones on the
map. This means that the robot will only stop when it is very close to an
obstacle and will not respond to zones on the map. This can result in injury to
personnel or damage to equipment if the robot is not driven carefully.
• Drive carefully to avoid collisions with any personnel or objects when
driving the robot in Manual mode.
• Avoid driving the robot manually without a clear visual of the robot.
7. Getting started
To drive the robot in Manual mode, follow these steps:
1. On the robot, turn the Operating mode key to Manual mode (turn it to the right).
2. In the robot interface, select Manual control. The Resume button on the robot starts
blinking.
3. On the robot, press the Resume button. The status lights turn blue, indicating that the
robot is in Manual mode.
The robot is shown with an EU pallet lift.
MiR1000Quick Start (en) 12/2019 - v.2.0 ©Copyright 2019-2020: MobileIndu strial Robots A/S. 34
Page 35

4. In the robot interface, select the joystick icon. The joystick control appears.
7. Getting started
5. Drive the robot off the ramp using the joystick.
Place your foot in front of the ramp while the robot drives on it to keep the
ramp from slipping.
MiR1000Quick Start (en) 12/2019 - v.2.0 ©Copyright 2019-2020: MobileIndu strial Robots A/S. 35
Page 36

7. Getting started
7.6 Checking the hardware status
To check that all hardware components work as intended, follow these steps:
1. Sign in to the robot interface—see Connecting to the robot interface on page 32.
2. Go to Monitoring > Hardware health.
MiR1000Quick Start (en) 12/2019 - v.2.0 ©Copyright 2019-2020: MobileIndu strial Robots A/S. 36
Page 37

7. Getting started
3. Check that all elements on the page have the OK status and that they have green dots on
the left.
For more information, see Hardware health in MiR Robot Reference Guide on the MiR
website.
7.7 Mounting the nameplate
Before using MiR1000, you must mount its unique nameplate to it. The nameplate contains
information specific to your MiR application.
NOTICE
The nameplate must be mounted as described in the following steps. If
mounted incorrectly, the CEmark is invalid.
MiR1000Quick Start (en) 12/2019 - v.2.0 ©Copyright 2019-2020: MobileIndu strial Robots A/S. 37
Page 38

To mount the nameplate correctly, follow these steps:
1. Locate the right side hatch.
2. Clean the area marked in the image below with a degreasing agent.
7. Getting started
3. Mount the nameplate on the cleaned area.
MiR1000Quick Start (en) 12/2019 - v.2.0 ©Copyright 2019-2020: MobileIndu strial Robots A/S. 38
Page 39

7.8 Shutting down the robot
To shut down MiR1000, follow these steps:
1. Ensure that the robot is not moving or executing an action.
2. Press the Power button for three seconds.
7. Getting started
3. The robot starts the shutdown process. The status lights waver yellow, and the Power
button blinks red.
4. When the robot finishes the shutdown process, the status and the signal lights go off, and
the Power button turns blue.
When you shut down the robot for transportation, service, or repair, the battery must be
disconnected—see your robot's user guide.
7.9 Charging the robot
This section describes how to charge MiR1000 using a MiR cable charger.
A MiR cable charger is not part of the MiR1000 standard delivery. Contact
your distributor for more information.
The robot is delivered 40-60% charged.
MiR1000Quick Start (en) 12/2019 - v.2.0 ©Copyright 2019-2020: MobileIndu strial Robots A/S. 39
Page 40

7. Getting started
The rear compartment holds the robot’s battery. To access the rear compartment, see
Accessing the internal parts on page 20.
To charge MiR1000 using the cable charger, connect the cable charger to the charging
interface on the robot in the bottom-left corner.
Use only an original MiR cable charger.
For information about the charging time, see specifications on the MiR website.
MiR1000Quick Start (en) 12/2019 - v.2.0 ©Copyright 2019-2020: MobileIndu strial Robots A/S. 40
Page 41

7. Getting started
MiR1000Quick Start (en) 12/2019 - v.2.0 ©Copyright 2019-2020: MobileIndu strial Robots A/S. 41
Page 42

7. Getting started
MiR1000Quick Start (en) 12/2019 - v.2.0 ©Copyright 2019-2020: MobileIndu strial Robots A/S. 42
Page 43

7. Getting started
MiR1000Quick Start (en) 12/2019 - v.2.0 ©Copyright 2019-2020: MobileIndu strial Robots A/S. 43
Page 44

7. Getting started
Copyright and disclaimer
All rights reserved. No parts of this document may be reproduced in any form without the
express written permission of Mobile Industrial Robots A/S (MiR). MiR makes no warranties,
expressed or implied, in respect of this document or its contents. In addition, the contents of
the document are subject to change without prior notice. Every precaution has been taken in
the preparation of this document. Nevertheless, MiR assumes no responsibility for errors or
omissions or any damages resulting from the use of the information contained.
Copyright © 2019-2020 by Mobile Industrial Robots A/S.
Contact the manufacturer:
Mobile Industrial Robots A/S
Emil Neckelmanns Vej 15F
DK-5220 Odense SØ
www.mobile-industrial-robots.com
Phone: +45 20 377 577
Email: support@mir-robots.com
CVR: 35251235
MiR1000Quick Start (en) 12/2019 - v.2.0 ©Copyright 2019-2020: MobileIndu strial Robots A/S. 44
 Loading...