

Mobal BLU ADVANCE 4.0 L2 Quick Start Manual
BLU ADVANCE 4.0 L2 - Quick Start Guide
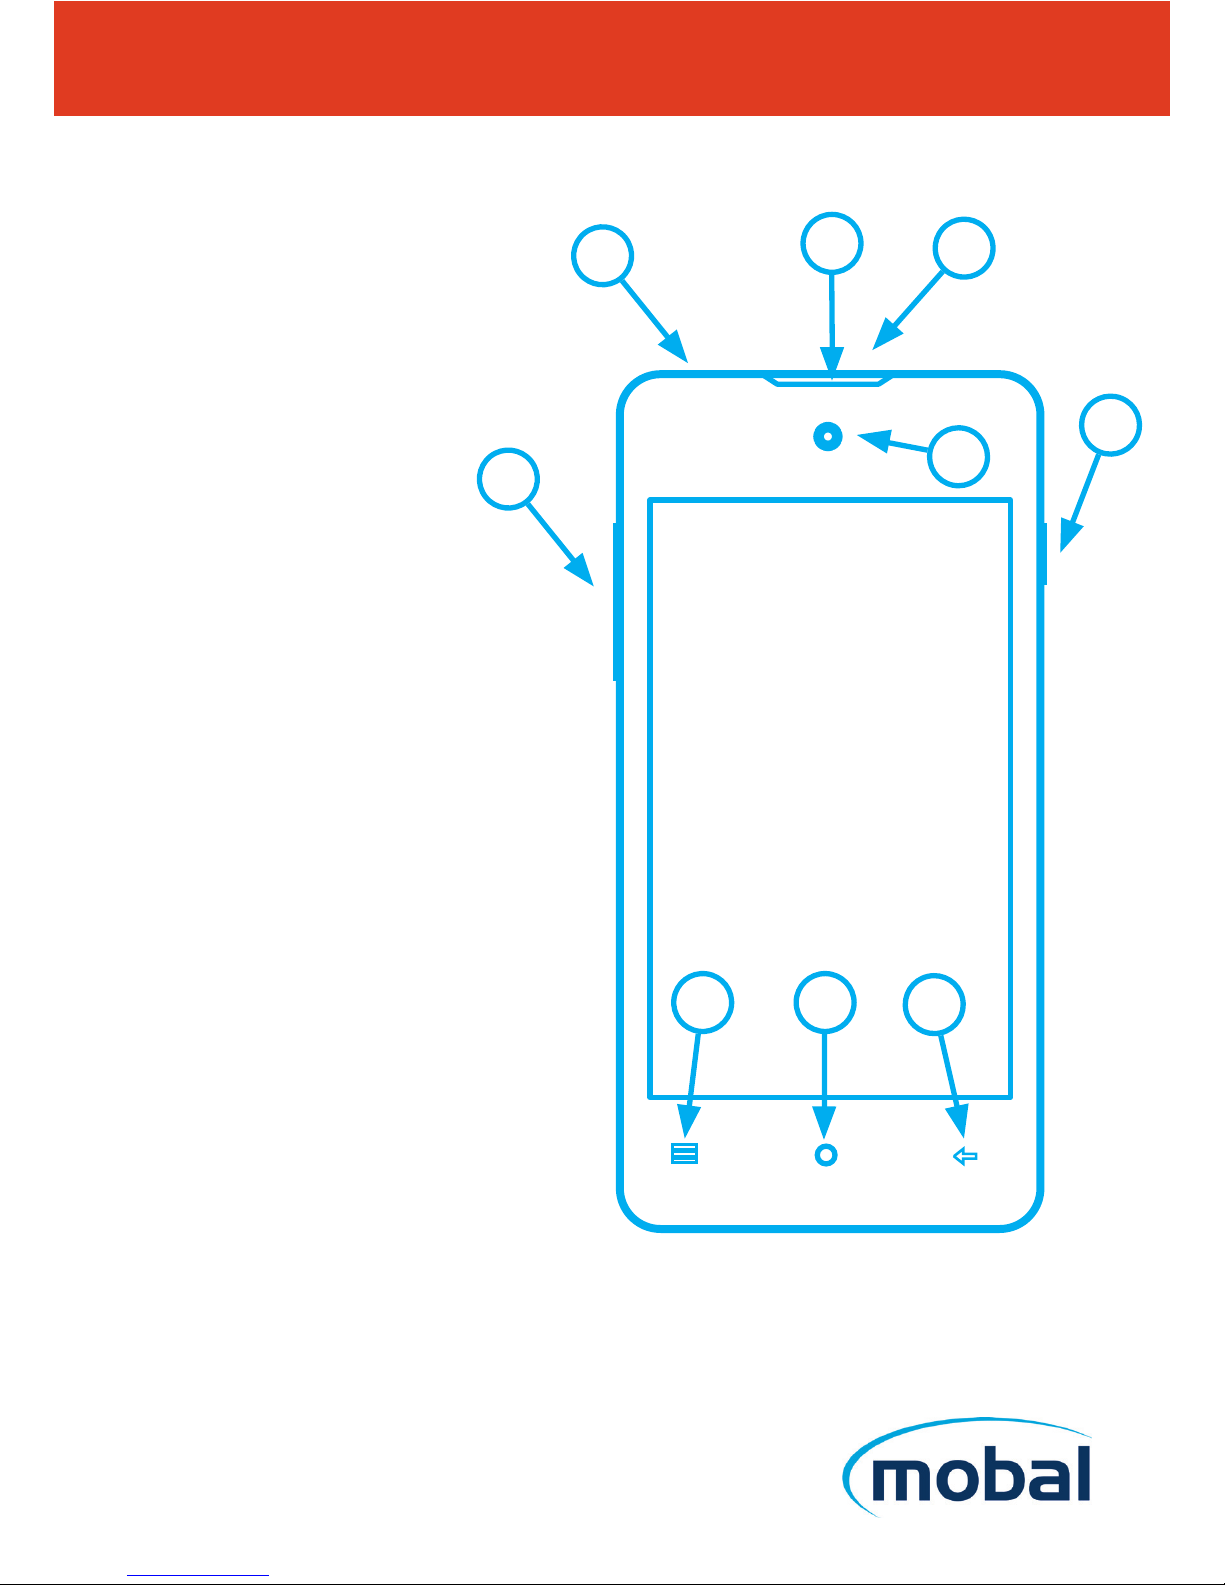
Operating Your Device
QS59Ver29SEP16
1) Speaker
2) Mini USB charging port
3) Front camera
4) Power button
5) Back button
6) Home button
7) Menu button
8) Volume buttons
Customer Service +1 212 785 5800
Support@mobal.com
www.mobal.com/support
1
2
3
4
5
6
7
8
9
BLU ADVANCE 4.0 L2 - Quick Start Guide
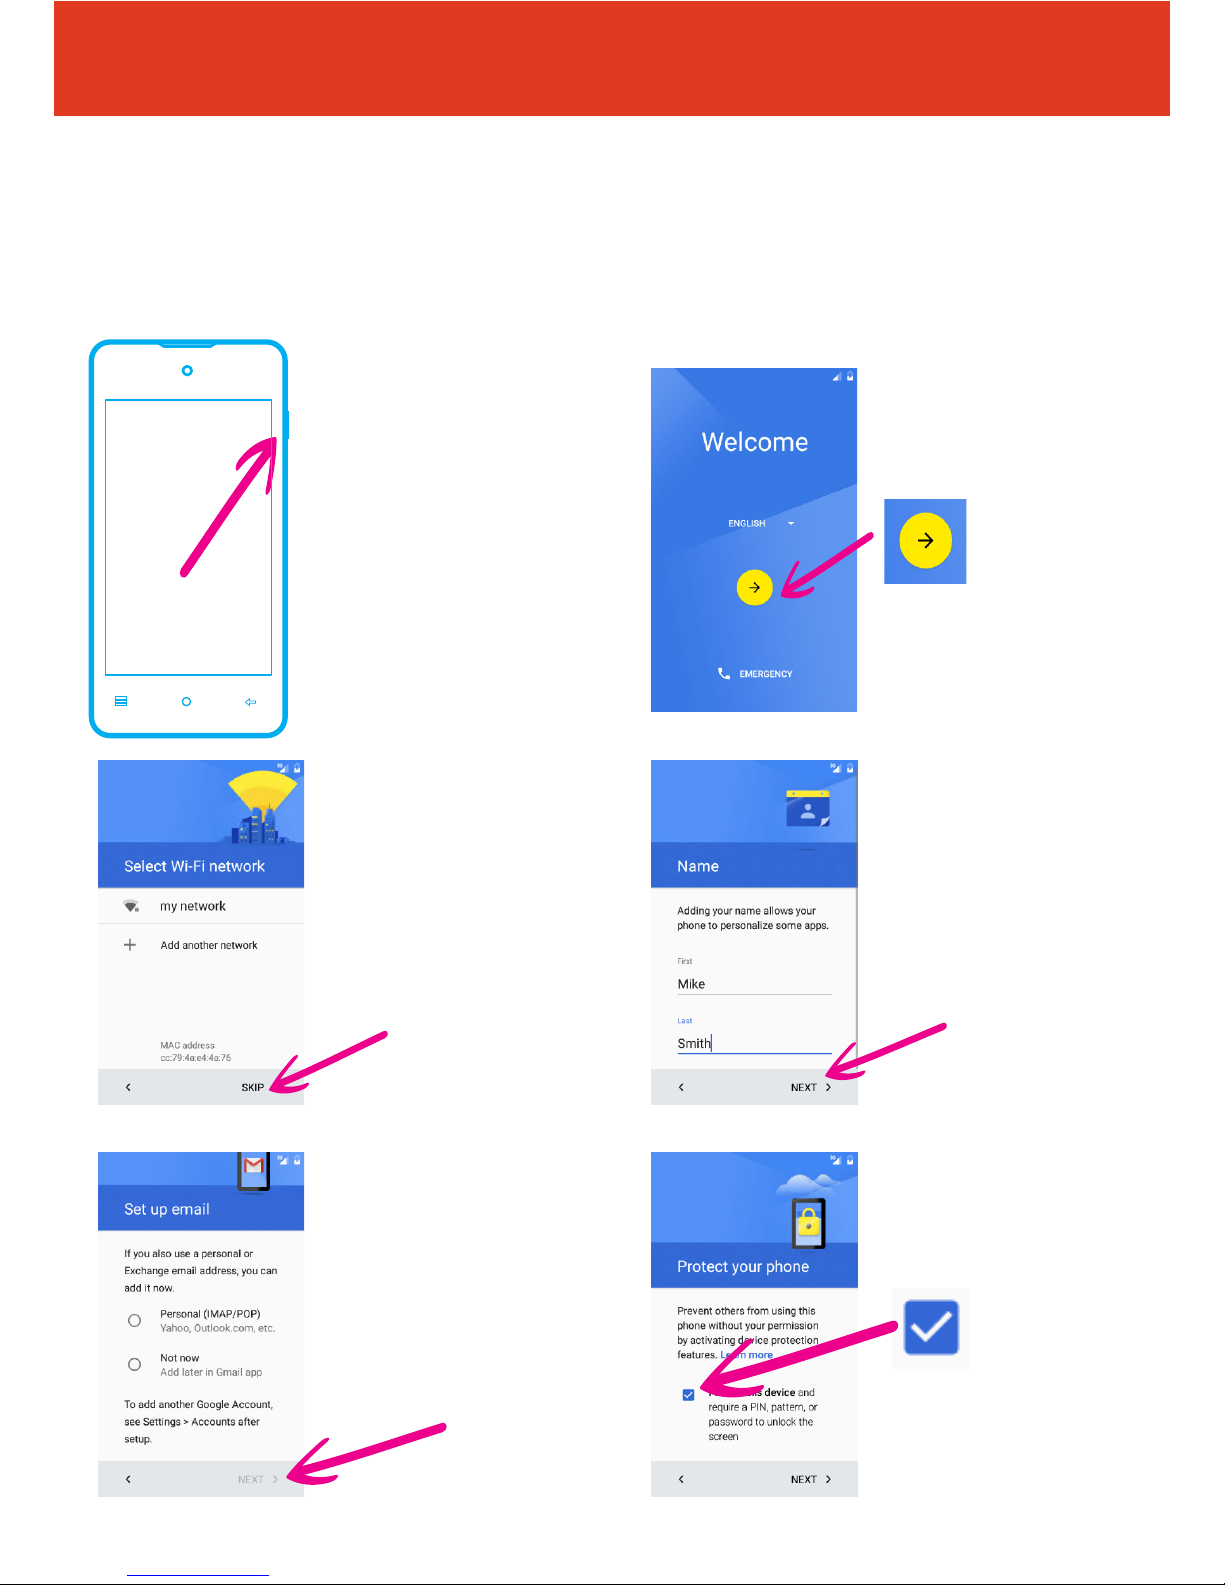
Setting Up Your New Smartphone (Page 1 of 2)
To get started with your smartphone, follow these steps:
2 First, select your
language from the
dropdown box, then tap
the arrow icon
4 Now ll in who the
phone belongs to and
then tap “NEXT”.
6 Now you can set up a
PIN for your phone, to do
this tap the box until a tick
appears, then tap “NEXT”.
3 Set up a wi
connection
(or skip this step and
set up later if wi isn’t
available)
5 Set up your email
accounts.
(or skip this step and set
up later in the gmail app if
you don’t know your email
settings). Tap “NEXT” when
nished.
QS59Ver29SEP16
1 To turn the phone on
press and hold the power
button on the right hand
side of the phone
BLU ADVANCE 4.0 L2 - Quick Start Guide
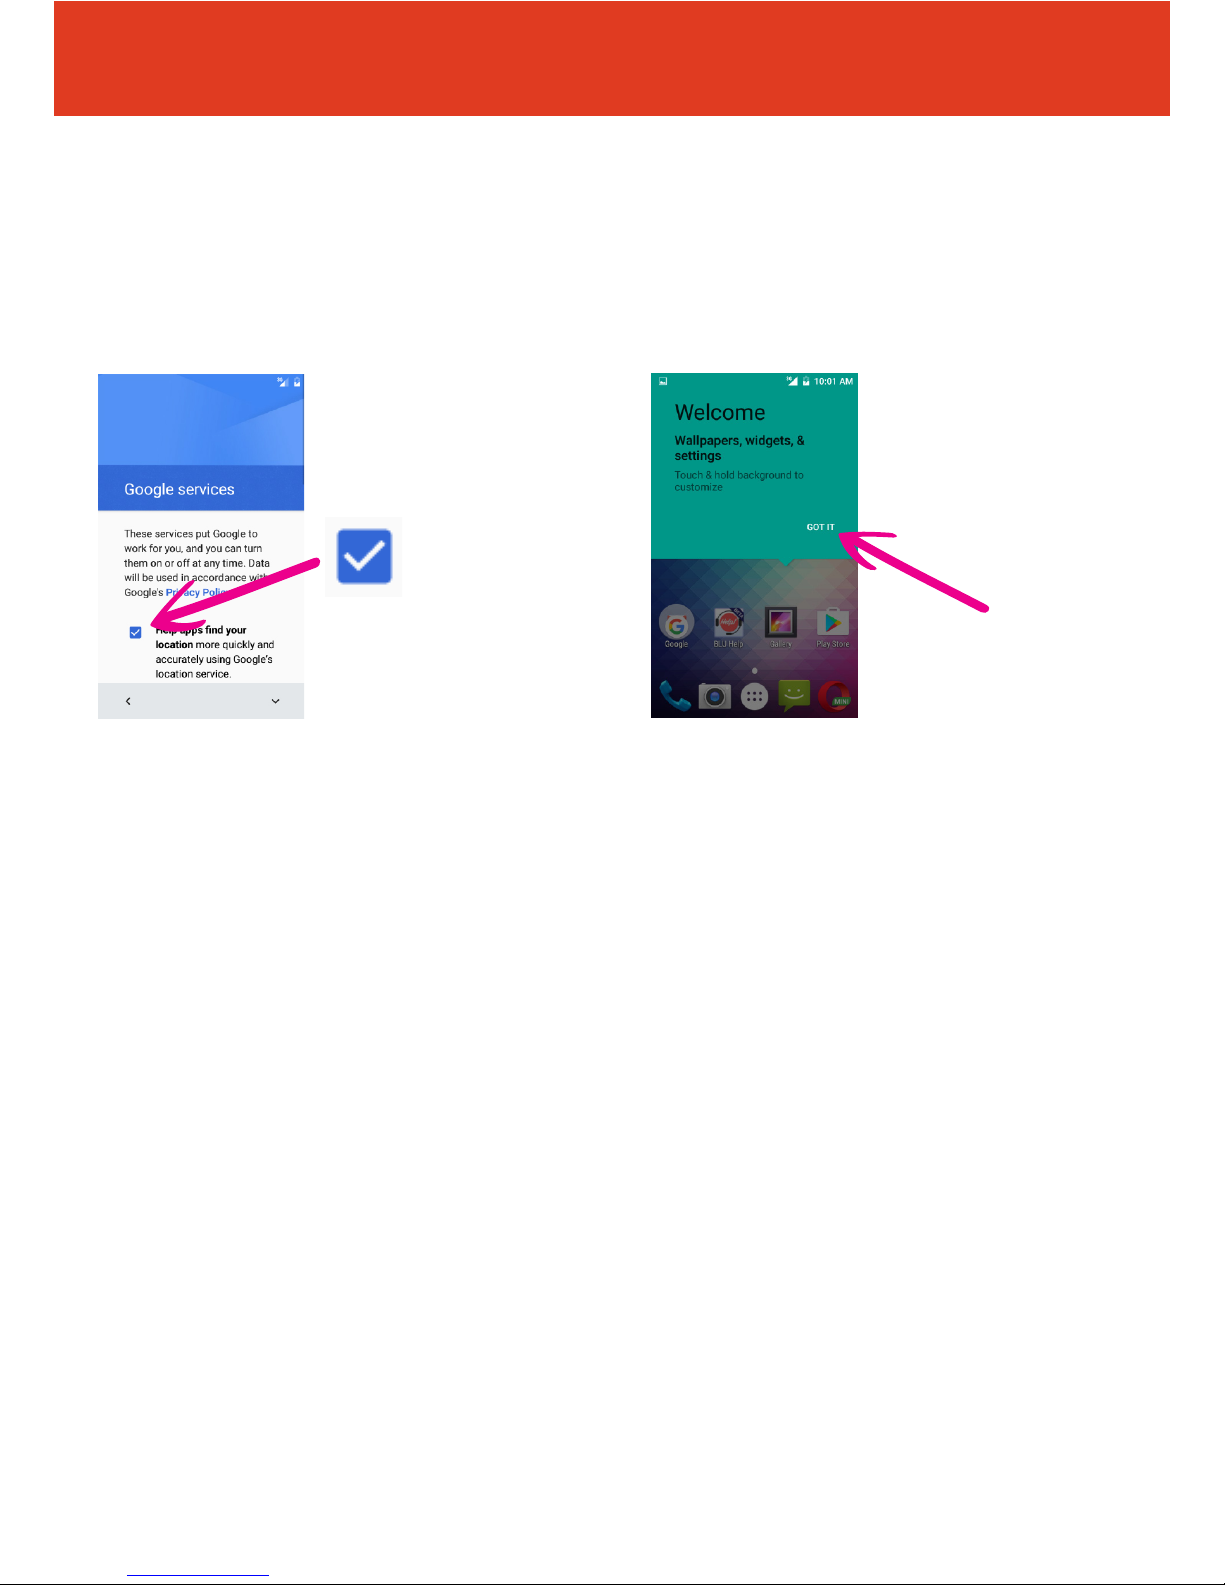
Setting Up Your New Smartphone (Page 2 of 2)
To get started with your smartphone, continue with these steps:
8 Your phone is now set
up and ready to use. Tap
“GOT IT” to start using
your phone.
QS59Ver29SEP16
7 Now choose whether
you want to turn on
location services by
tapping the tick boxes
When complete tap
“NEXT”.
 Loading...