

MNC OVERDRIVE User Manual

Használati utasítás
HU
User ManUal
BedienUngsanleitUng
Használati Utasítás
Uživateľská prírUčka
Overdrive
witH sd / UsB reader
Product code / Produktcode / Termékkód / Cod produs /Kód produkta:
39738 (black) - 39739 (gray)
EN
User Manual User Manual
EN
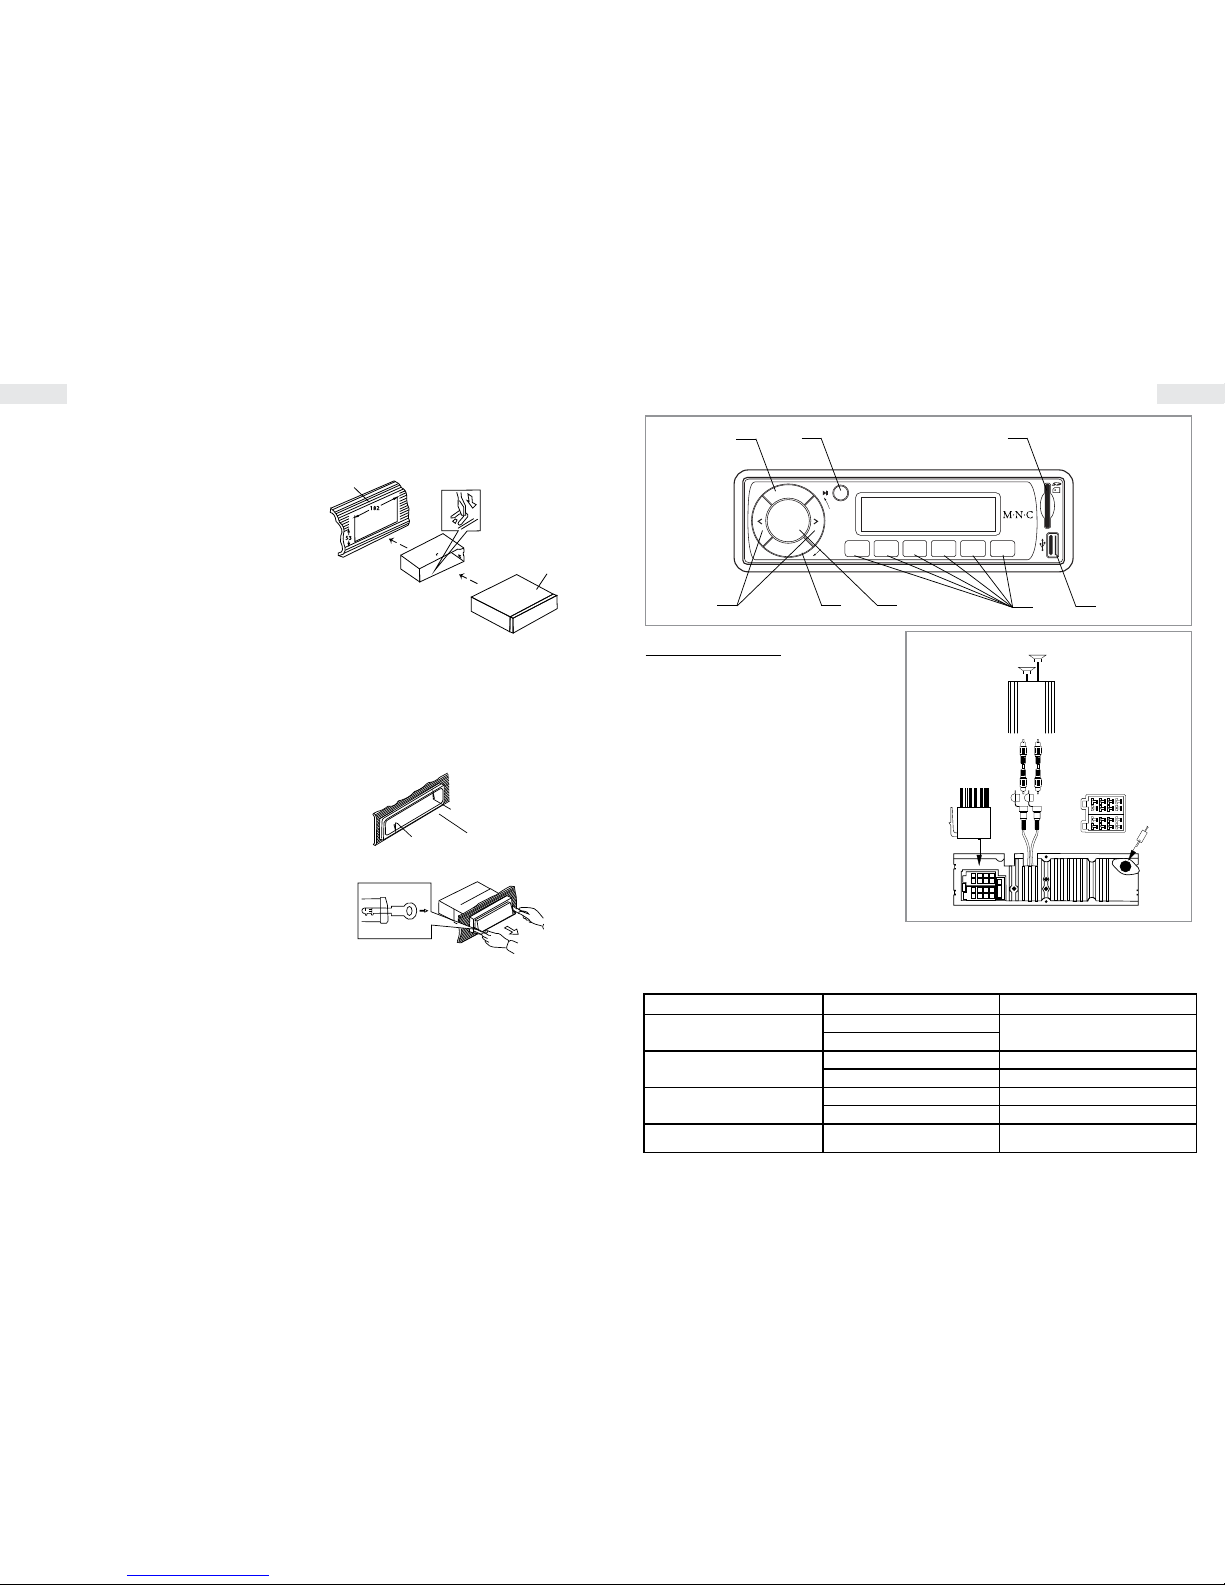
interface
1. Play / Pause / Mute
2. Band selection / Next track (in MP3 mode)
3. Clock / Clock setting
4. Band / Automatic station search and store
5. Volume level / Mode selection / OFF
6. Station select (from 1 to 6)
7. USB socket
8. SD card reader socket
Use
The unit can be turn on by any button.
1. In radio mode turns the mute ON or OFF. In MP3
mode starts or stops the play.
2. In radio mode you can search a radio station in
manually. In MP3 mode press short and it will step
the next/previous track, press long for step 10
tracks forward or back.
3. CLK/MOD: In radio and MP3 mode if press the time
will be displayed.
Clock setting: In radio mode press long and hold
the button until the display is blink. Set the time
with the volume level knob.
4. BND/AS: Press biey in radio mode and select from
3 FM channels. Press and hold and the automatic
station search and store function will start.
5. Press briey and you can select between the radio,
SD and USB modes, turn: volume level, press and
hold for turn o the unit.
6. In radio mode press briey for select the previously
stored radio stations. Hold it for store the frequency.
7. USB data storage reader and mobile phone charge
function (only for phones with USB-charge
function).
installing
• Before the nal installing, set the wiring in
temporary and check all functions works properly
on the device.
• If your car needs special modication for
mounting let the car service to do it.
• When installing keep on mind the proper xing
of the unit.
• Do not install the unit in a location where direct
solar radiation, sunlight, dust or other dirt may be
exposed.
The device can be mount only common DIN front
mounting methode with the attached xing
accessories.
DIN front mount
182
53
9
10
11
Mounting the device:
9. Dashboard
10. Install the mounting frame into the dashboard,
then select the proper metal clips and bend for
xing.
11. Push the device into the mounting frame to the
nal position.
UnMOUnting
12
13
Unmounting of the device:
12. Plastic frame
13. Take o the plastic frame from the device, and
place the two „keys” (as seen ont he picture) into
the two holes until you hear a click sound, then
pull the whole device - while holding the „keys” –
from the dashboard.
taBle Of MalfUnctiOns
Before start the debuggig, check the wiring and all of connections are immaculate condition. If the following
tables fails to help you to solve the disfunctions, take the device back to the service or retail shop.
Malfunction Possible cause Solution
The device isn’t turning ON
The ignition is turned OFF.
If the power cable wiring is OK, then turn the
ignition to the ACC position.
The fuse has blown
No sound
The volume level on minimum level. Set the volume to the desired level.
The device wiring is wrong. Check the wiring.
The radio receiver doesn’t work
The automatic search isn’t work
The antenna cable isn’t connected Check the antenna cable’s connection!
Receiving signal is weak Use manual channel search!
The display shows “READ” text for more than
a minute.
The le on the data storage is not supported
or no music le on it.
Replace the data storage or copy music to it.
specificatiOn
USB/card reader
Supported memory card type: SD
Supported le format: MP3
Maximum data storage capacity handle: 8GB
Warning: The device maybe cannot support the
fast write-/read data storages!
Tuner
Frequency range: FM 87.5-108 MHz
General
Input voltage: DC 11-14.4V
Output power: 2x40W
Audio output: 2 RCA
Time display: 24h
MUT
BND/AS
CLK/MOD
1 2 3 4 5 6
V
O
L
/
P
W
R
/
O
F
F
/
M
O
D
E
OverDrive
Amplier
Connector „B”
Connector „A”
Aerial
connector
RCA
ISO
Connector
Red
White
1
2
3
4
5
6
7
8
 Loading...