

MMSOFT Design Pulseway User Manual

ver. 4.4 – © 2014 MMSOFT Design Ltd.
www.pulseway.com
Pulseway
User Manual

Pulseway User Manual
Page 2 of 85
Table of Contents
1. Description ............................................................................................................................................... 5
2. Installation ............................................................................................................................................... 6
2.1. Installing Pre-requirements ............................................................................................................................................. 6
2.2. Installing on Microsoft© Windows© OS's ..................................................................................................................... 6
2.3. Installing on Apple© Mac OS's........................................................................................................................................ 7
2.4. Installing on Red Hat Enterprise Linux based OS's ......................................................................................................... 7
2.5. Installing on Debian Linux based OS's ............................................................................................................................ 8
2.6. Installing on RaspberryPi (Raspbian) .............................................................................................................................. 8
2.7. Installing on Apple© Mobile Devices ............................................................................................................................. 8
2.8. Installing on Google© Android© based Mobile Devices .............................................................................................. 9
2.9. Installing on Microsoft© Windows Phone© based Mobile Devices ............................................................................ 9
2.10. Installing on Microsoft© Windows © 8 ......................................................................................................................... 9
3. Account Configuration ............................................................................................................................11
3.1. Account Details ..............................................................................................................................................................11
3.1.1. Creating a new account ..................................................................................................................................11
3.1.2. Validating Account ..........................................................................................................................................11
3.1.3. Recovering Account’s Username ................................................................................................................12
3.1.4. Recovering Account’s Password .................................................................................................................12
3.1.5. Changing Account’s Password ....................................................................................................................13
3.2. Account Management ...................................................................................................................................................14
3.2.1. Account Details ...............................................................................................................................................14
3.2.2. Subscription Details ........................................................................................................................................18
3.2.3. Managing Registered Computers ..................................................................................................................18
3.2.4. Managing Registered Devices ........................................................................................................................21
3.3. Computer Information ..................................................................................................................................................22
3.4. Dedicated Server ...........................................................................................................................................................22
4. System Configuration ..............................................................................................................................24
4.1. General Settings .............................................................................................................................................................24
4.1.1. Allowed System Commands ...........................................................................................................................25
4.1.2. System Command Force Attribute .................................................................................................................25
4.1.3. Process Browsing ............................................................................................................................................26
4.1.4. Event Log Browsing .........................................................................................................................................26
4.1.5. Hardware Sensor Settings ..............................................................................................................................27
4.1.6. Wake on WAN .................................................................................................................................................27
4.1.7. Screen View .....................................................................................................................................................28
4.1.8. Webcam View .................................................................................................................................................29
4.1.9. User Chat .........................................................................................................................................................29
4.1.10. User Support Request .......................................................................................................................................30
4.2. Service Monitoring ........................................................................................................................................................30
4.3. Network Monitoring ......................................................................................................................................................31
4.3.1. Network Interface Monitoring .......................................................................................................................31
4.3.2. Port Monitoring ..............................................................................................................................................32

Pulseway User Manual
Page 3 of 85
4.3.3. Performance Monitoring ................................................................................................................................34
4.4. Scheduled Task Monitoring ...........................................................................................................................................35
4.5. Performance Counter Monitoring ................................................................................................................................36
4.6. Web Configuration ........................................................................................................................................................37
4.6.1. SSL Certificate Monitoring ..............................................................................................................................37
4.6.2. Web Sites Monitoring .....................................................................................................................................37
4.7. File Browser Configuration ............................................................................................................................................38
4.7.1. Email Configuration ........................................................................................................................................39
4.8. Maintenance Schedule ..................................................................................................................................................39
5. Server Modules .......................................................................................................................................41
5.1. Active Directory (AD) .....................................................................................................................................................41
5.2. Microsoft© Exchange© Server ....................................................................................................................................42
5.3. Microsoft© Hyper-V© Server .......................................................................................................................................43
5.4. Internet Information Server© (IIS) ...............................................................................................................................44
5.5. System Center Operations Manager ............................................................................................................................45
5.6. Microsoft© SQL Server© ..............................................................................................................................................46
5.7. Windows Server Backup ................................................................................................................................................47
5.8. VMware© vSphere© Server .........................................................................................................................................48
5.9. Citrix© XenServer© .......................................................................................................................................................49
5.10. Amazon Web Services ...................................................................................................................................................50
5.11. Windows Azure ..............................................................................................................................................................51
5.12. Simple Network Management Protocol (SNMP) .........................................................................................................53
6. Notification Settings ................................................................................................................................56
6.1. Status Notifications ........................................................................................................................................................56
6.2. Performance Notifications ............................................................................................................................................57
6.3. Service Notifications ......................................................................................................................................................57
6.4. Process Notifications .....................................................................................................................................................58
6.5. Ping Notifications ...........................................................................................................................................................58
6.6. Storage Notifications .....................................................................................................................................................58
6.6.1. Low Disk Space Notifications ..........................................................................................................................59
6.6.2. File Change Notifications ................................................................................................................................59
6.7. Event Log Notifications ..................................................................................................................................................60
6.7.1. Exporting Event Log Notification’s Configuration ......................................................................................60
6.7.2. Importing Event Log’s Notification’s Configuration ................................................................................60
6.8. Hardware Sensor Notifications .....................................................................................................................................61
6.9. Performance Counter Notifications ..............................................................................................................................61
6.9.1. Exporting Performance Counter Notification’s Settings............................................................................62
6.9.2. Importing Performance Counter Notification’s Settings ...........................................................................62
6.10. Web Notifications ..........................................................................................................................................................62
6.11. Server Module Notifications .........................................................................................................................................63
6.11.1. Active Directory...............................................................................................................................................63
6.11.2. Microsoft Exchange Server .............................................................................................................................63
6.11.3. IIS .....................................................................................................................................................................64
6.11.4. SCOM ...............................................................................................................................................................64
6.11.5. Windows Backup .............................................................................................................................................64
6.11.6. VMware ...........................................................................................................................................................64
6.11.7. Amazon ............................................................................................................................................................65
6.11.8. SNMP ...............................................................................................................................................................65
7. Rule Configuration ..................................................................................................................................67

Pulseway User Manual
Page 4 of 85
7.1. Adding Rules ..................................................................................................................................................................67
7.2. Exporting Rules ..............................................................................................................................................................67
7.3. Importing Rules ..............................................................................................................................................................68
8. Plugin Configuration ................................................................................................................................69
8.1. Installing Plugins ............................................................................................................................................................69
8.2. Configuring Plugins ........................................................................................................................................................70
8.3. Creating Plugins .............................................................................................................................................................71
9. Display Settings .......................................................................................................................................72
10. Device Settings ........................................................................................................................................73
11. Settings ...................................................................................................................................................74
11.1. Proxy Configuration .......................................................................................................................................................74
11.2. Runtime Configuration ..................................................................................................................................................74
11.3. Diagnostic Collection .....................................................................................................................................................75
11.4. Syslog Forwarding ..........................................................................................................................................................76
11.5. PagerDuty Forwarding ...................................................................................................................................................77
11.6. ZenDesk Forwarding ......................................................................................................................................................78
12. Manager Security Lock ............................................................................................................................80
13. Exporting Configuration ..........................................................................................................................81
14. Importing Configuration ..........................................................................................................................82
15. Maintenance Mode .................................................................................................................................83
16. Unattended Installation...........................................................................................................................84
17. Support ...................................................................................................................................................85
Description
Pulseway User Manual
Page 5 of 85
1. Description
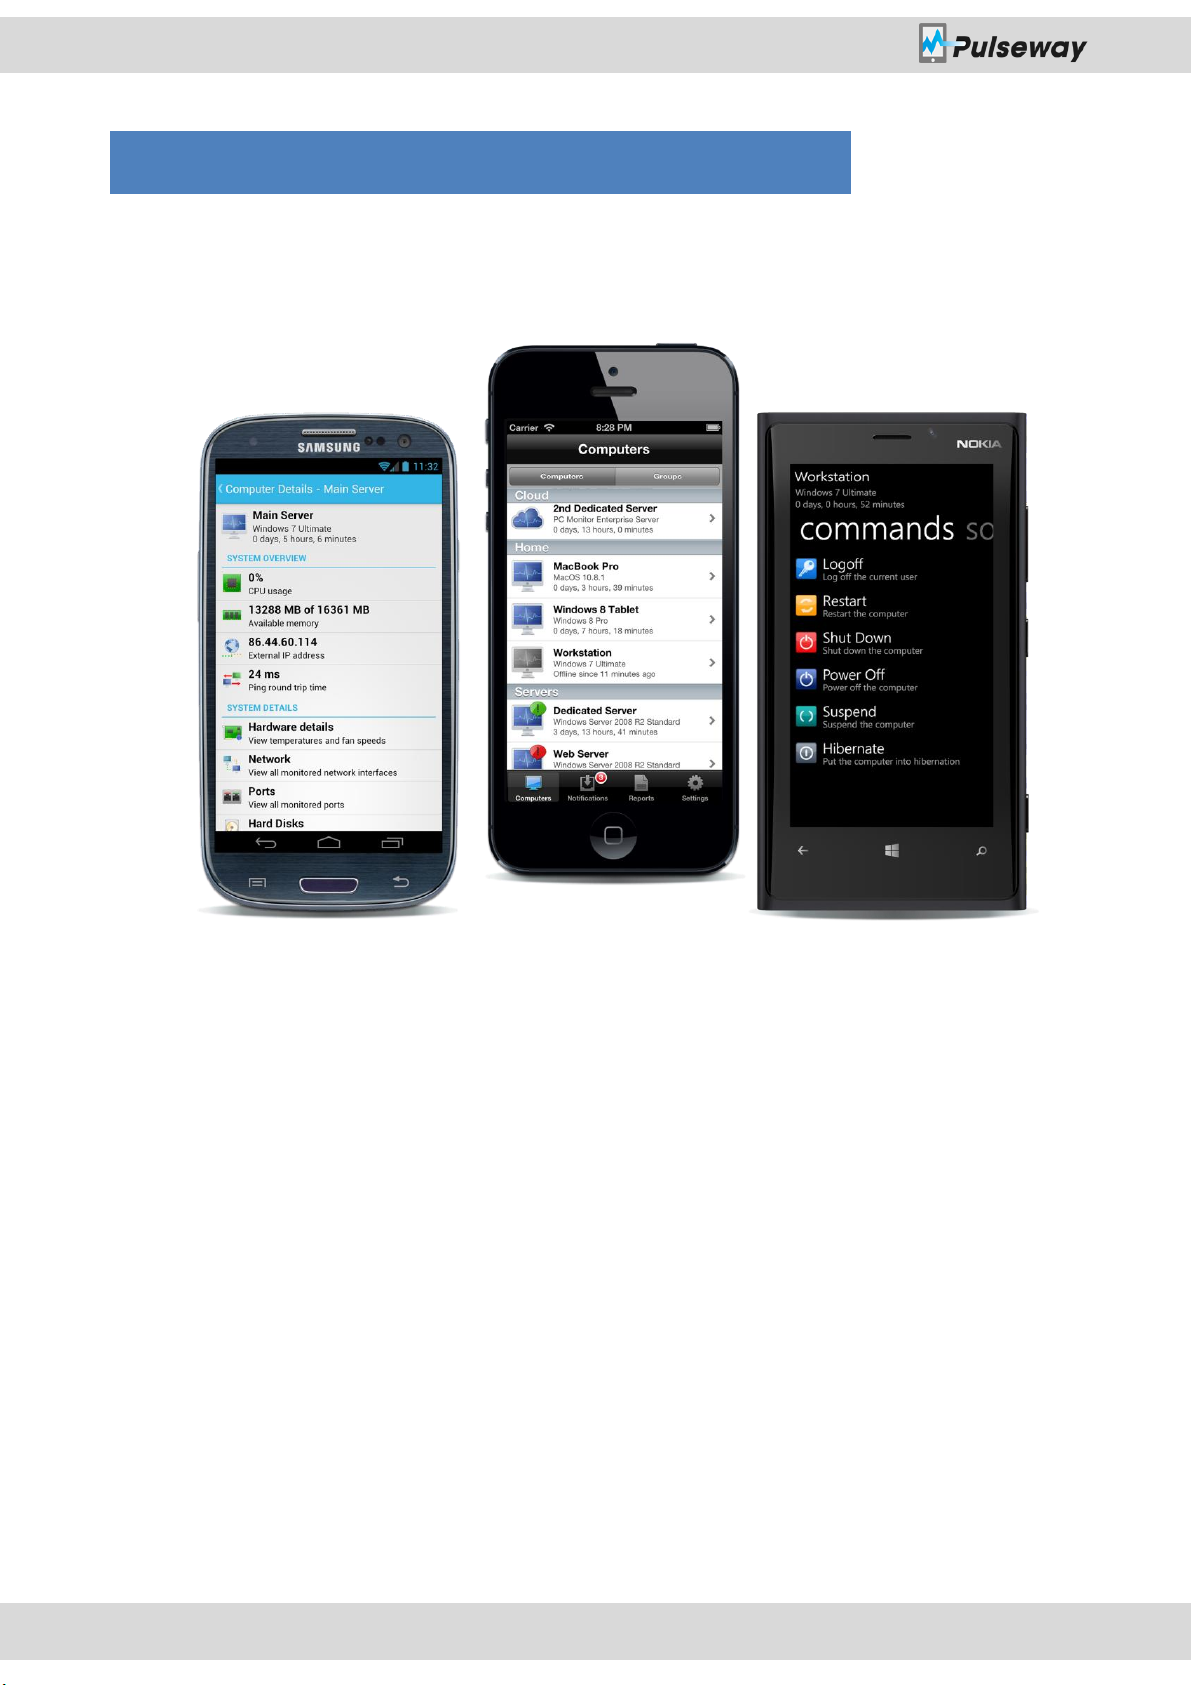
Pulseway provides an innovative solution for monitoring and managing your computers
using a securely encrypted mobile app that gives you total control of your systems from
anywhere, anytime.
This manual is made to guide the reader through the installation, configuration and use
process without the need for any background experience in the domain.
Installation
Pulseway User Manual
Page 6 of 85
2. Installation
Pulseway requires an agent to be installed on each monitored PC and will communicate
using a secured connection with a remote server from where the information will be passed
on to the mobile client.
Pulseway Agent supports the following operating systems:
Microsoft© Windows© XP or newer.
Apple© Mac OS X Snow Leopard or newer.
Almost all Linux distributions.
Supported Mobile Devices:
Apple© iOS based Mobile Devices
Google© Android based Mobile Devices
Microsoft© Windows Phone© based Mobile Devices
Blackberry© based Mobile Devices
Windows 8 Devices
2.1. Installing Pre-requirements
Microsoft© Windows© Operating Systems Pre-requirements:
Microsoft .NET Framework 4.0:
http://www.microsoft.com/en-us/download/details.aspx?id=17718
2.2. Installing on Microsoft© Windows© OS's
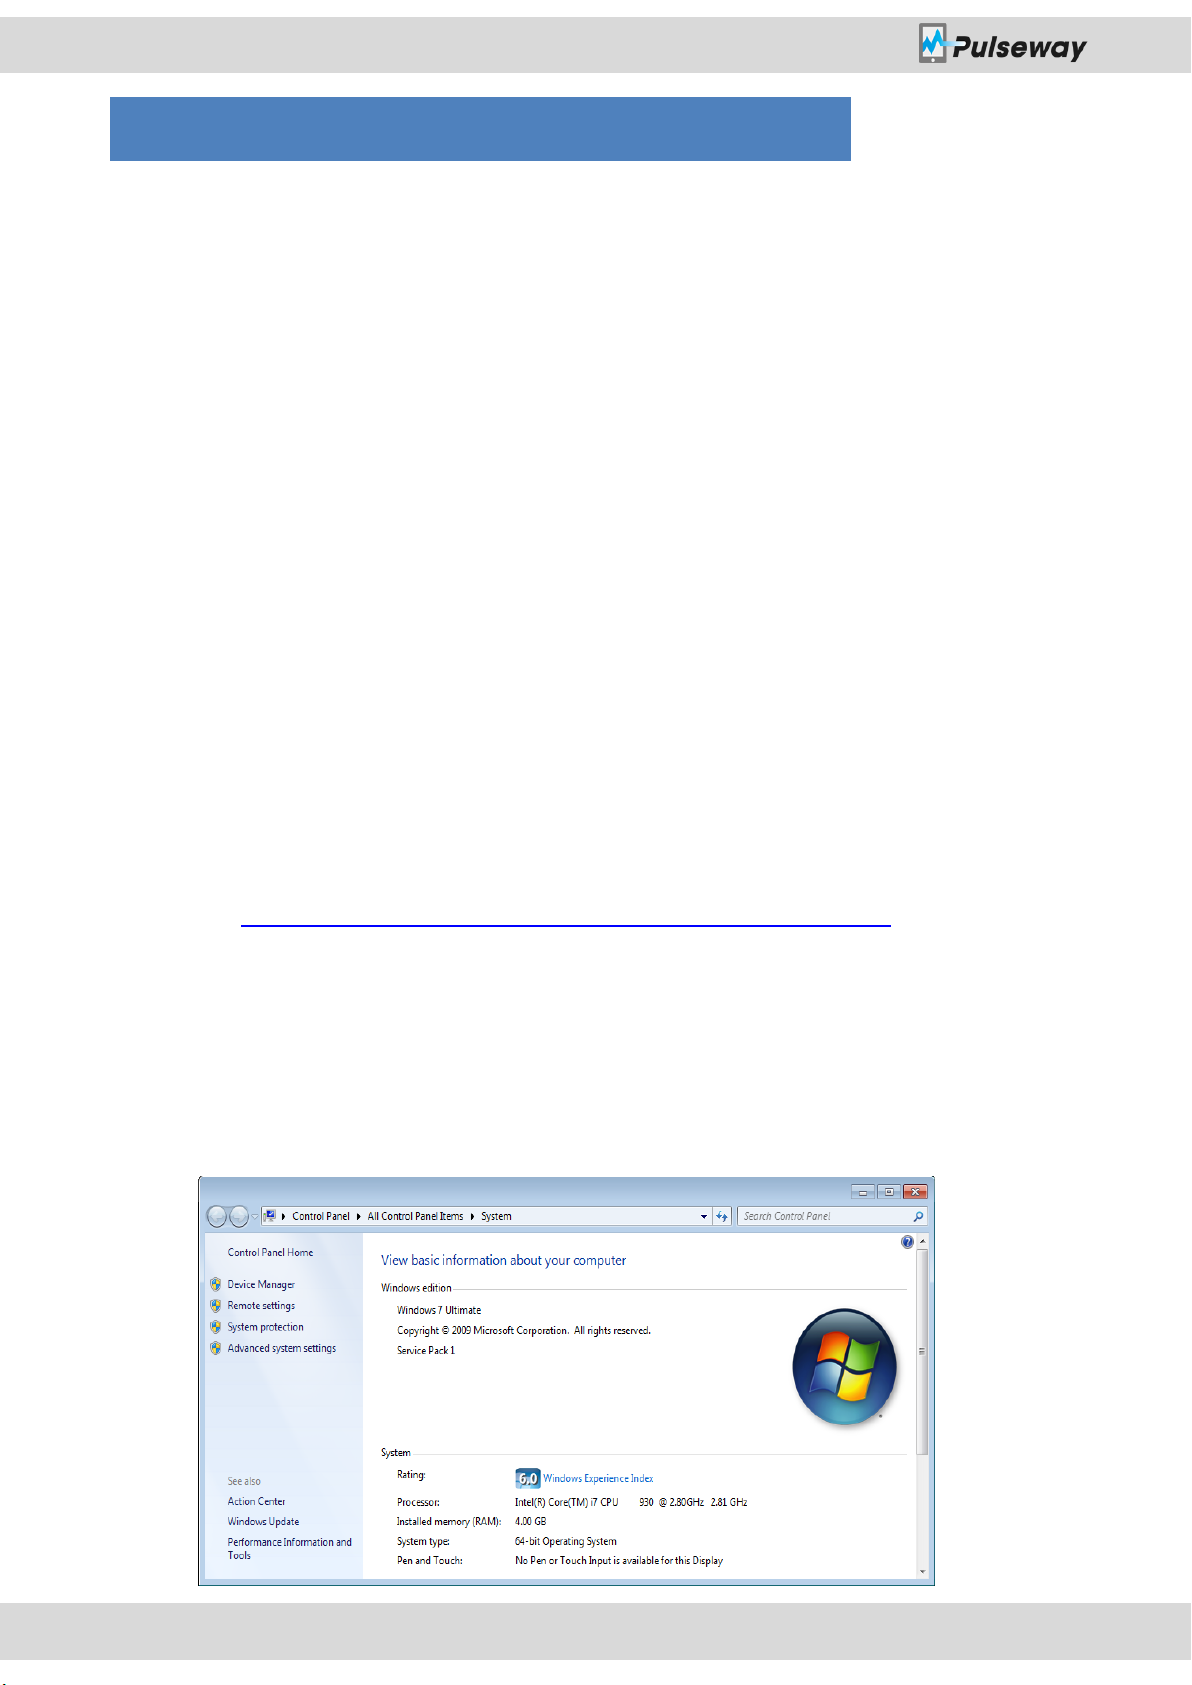
Before you start downloading Pulseway you need to know what your windows architecture
is.
To find out whether you’re running a 64bit or a 32bit operating system you need to go to
Control Panel and go to System. There you will need to look for your System Type as shown
in the picture bellow.
Installation
Pulseway User Manual
Page 7 of 85
After you find your system architecture go to http://www.pulseway.com/downloads and
Note: You will be prompted to insert your password to authorize the installation.
rpm -Ivh http://www.pulseway.com/download/pulseway_x64.rpm
download the appropriate version for your system: Pulseway for Windows x64 (64 bit) or
the x86 (32 bit).
After you downloaded the installer follow the instructions in the setup screen and a
Pulseway icon will be automatically created on your Desktop.
2.3. Installing on Apple© Mac OS's
To install Pulseway on a Mac operating system all you need is to download the appropriate
version http://www.pulseway.com/downloads, Pulseway for Mac.
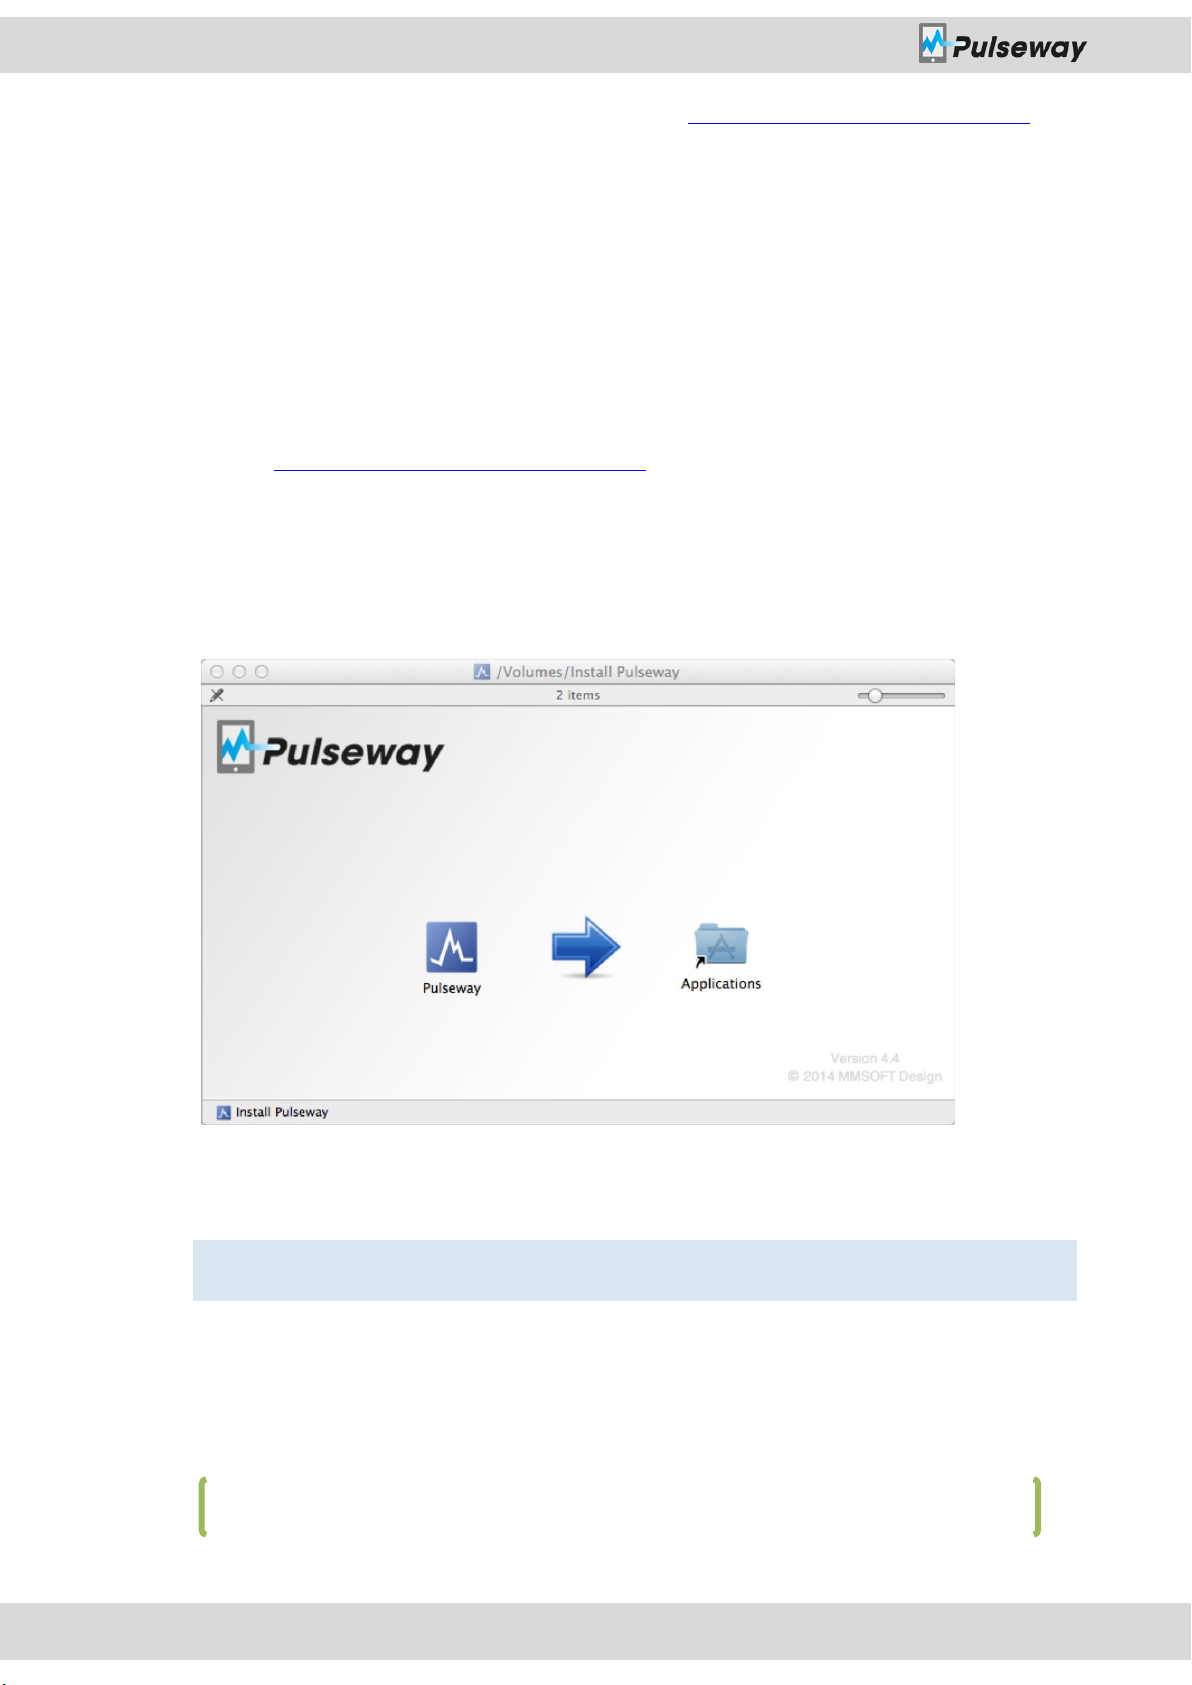
After you have the *.dmg file in your computer double click on it and a license agreement
will show up.
After you have read the license agreement and if you agree with it click on the Agree button
and a window like this will show up.
Now you need to select the Pulseway icon from the left and drag it into the Applications
folder (the icon on the right).
2.4. Installing on Red Hat Enterprise Linux based OS's
Open up your terminal (a ssh connection will work too) and run the linux installer.

Installation
Pulseway User Manual
Page 8 of 85
Or if your operating system is working on 32 bit architecture:
rpm -Ivh http://www.pulseway.com/download/pulseway_x86.rpm
wget http://www.pulseway.com/download/pulseway_x64.deb
wget http://www.pulseway.com/download/pulseway_x86.deb
dpkg -i pulseway_x64.deb
or
dpkg -i pulseway_x86.deb
wget http://www.pulseway.com/download/pulseway_armhf.deb
dpkg -i pulseway_armhf.deb
Follow the instruction process (where you don’t know what to type just leave the default
value).
2.5. Installing on Debian Linux based OS's
Open up your terminal (a ssh connection will work too) and run the linux installer.
Or if your operating system is working on 32 bit architecture:
Then start the installation process:
Follow the instruction process (where you don’t know what to type just leave the default
value).
2.6. Installing on RaspberryPi (Raspbian)
Open up your terminal (a ssh connection will work too) and run the linux installer.
Then start the installation process:
Follow the instruction process (where you don’t know what to type just leave the default
value).
2.7. Installing on Apple© Mobile Devices
Installation
Pulseway User Manual
Page 9 of 85
In order to install Pulseway on Apple© based mobile devices you will need an apple account.
To create an Apple Account you need to download and install iTunes from: here.
After you have an Apple account just open App Store from your mobile device:
Then go the Search tab and search for Pulseway. Then you will need to tab on the Free icon
to reveal the install button, tab the install button and you will be prompted for your Apple
password then the application will install.
2.8. Installing on Google© Android© based Mobile Devices
To install Pulseway on your Android device open up the Market application and search for
Pulseway. The application is free of charge so you will be able to download it without having
to pay for anything at all. After the application description page opens tap to install it.
After a few seconds, depending on your connection speed you will find Pulseway in your
application list.
2.9. Installing on Microsoft© Windows Phone© based
Mobile Devices
On your Windows Phone© device open up marketplace application and search for Pulseway.
Pulseway app should be among the first applications in the search results.
Tap on install and after a few seconds you will find Pulseway in your application list.
2.10. Installing on Microsoft© Windows © 8

Installation
Pulseway User Manual
Page 10 of 85
Bring up the start menu (with the Metro UI) and click on the “Microsoft Store” icon then
search for Pulseway.
Pulseway app should be among the first applications in the search results.
Once it’s installed you will find Pulseway in your applications list.
Account Configuration
Pulseway User Manual
Page 11 of 85
The first part of the configuration (and the most important one) represents your account
3. Account Configuration
information.
Without correct configuration your computer will not show up on mobile devices and will
not be monitored.
Account configuration is split into four categories:
1. Account Details
2. Account Management
3. Computer Information
4. Dedicated Server
3.1. Account Details
In order to configure your Account you need to have one created. If you already have an
account you may skip to 3.1.2. Validating Account.
Pulseway Manager will not allow you to configure or start the service until you provide a
valid account.
3.1.1. Creating a new account
In order to create a new account Pulseway requires you to input some personal information
such as Name, Company, Country, Email Address and Username. This information is only
used to identify you as the owner of your account and for billing purposes. Read our Privacy
Policy to learn more about your privacy.
Once the code has been inserted and it was confirmed your account is activated and ready
to use.
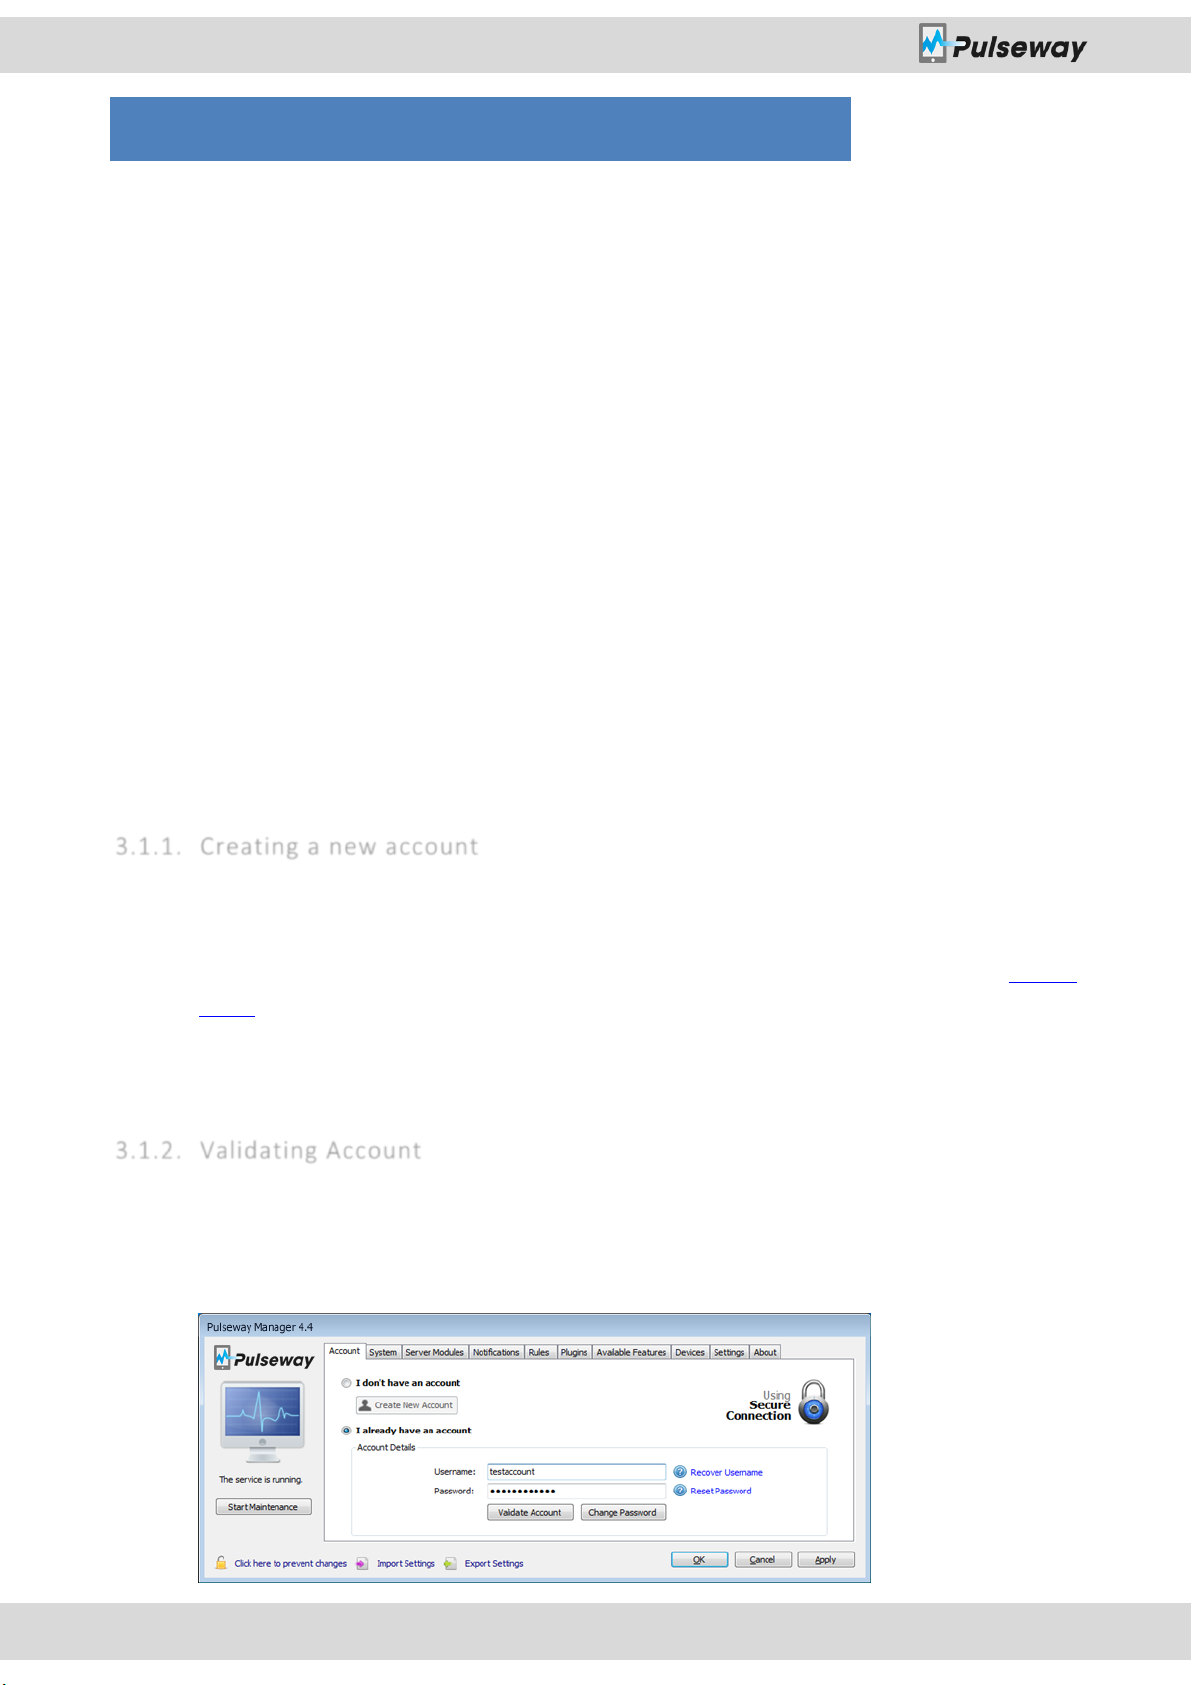
3.1.2. Validating Account
Validating your account is important because it will help you understand why your computer
is not showing up on the mobile devices. If you click it you will know if your account is valid
and no problems were detected.

Account Configuration
Pulseway User Manual
Page 12 of 85
If any error is printed out when you click Validate Account please post the error in our forums
in order to investigate the problem.
3.1.3. Recovering Account’s Username
If by any chance you forgot your username click the Recover Username link on the right of
the username field and you will be prompted for your email address that is associated with
your account.
Your email address is requested to confirm account ownership.
After 5 minutes (usually instantly) you will receive an email containing your username.
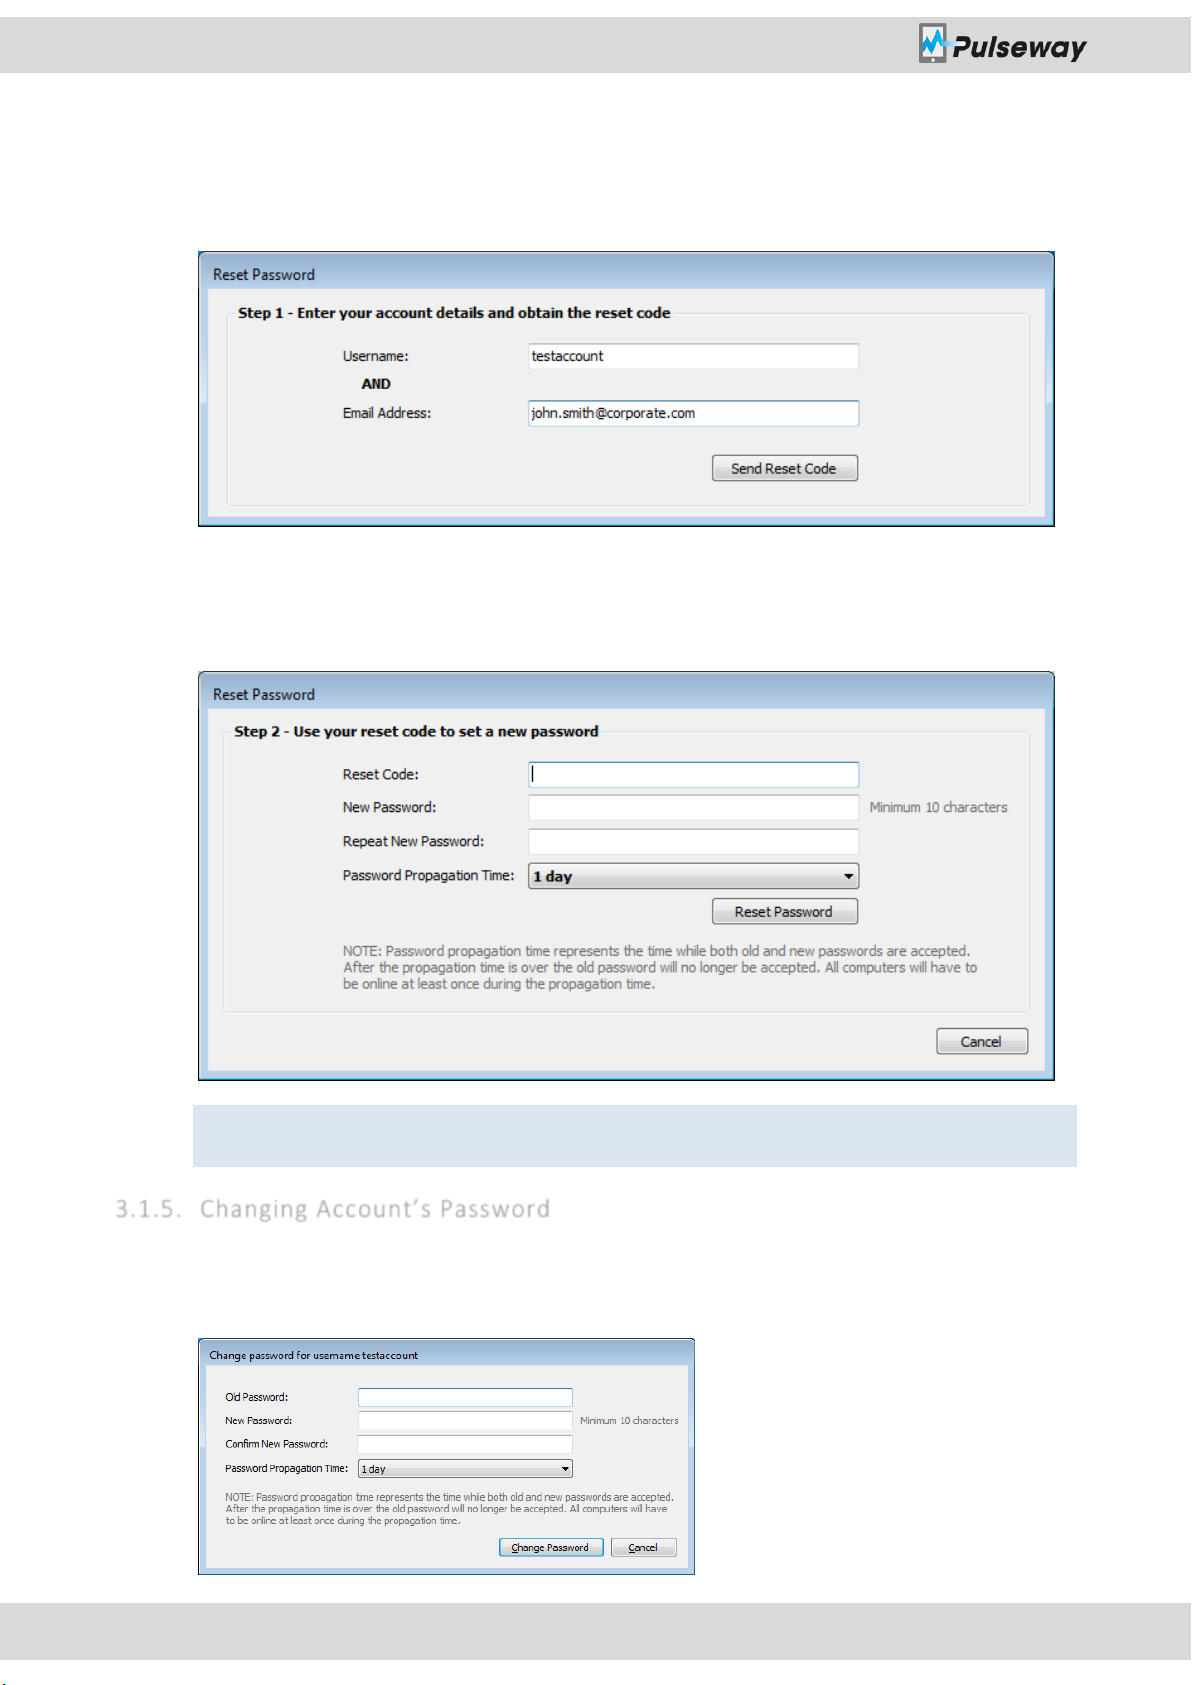
3.1.4. Recovering Account’s Password
If by any chance you forgot your password click the Reset Password link on the right of the
password field and you will be prompted for your username and email address that is
associated with your account.
Account Configuration
Pulseway User Manual
Page 13 of 85
Enter the reset code you from your mailbox then input a new password and confirm it to
Note: Password propagation system is using secure socket layer (SSL) connection.
complete the process. Optionally you can choose a custom password propagation time that
will permit computers that are configured with the old password to automatically update it
to the new one.
After 5 minutes (usually instantly) you will receive an email containing your new password
reset code that will be used to change your password and propagate the changes to your
computers.
3.1.5. Changing Account’s Password
If you would like to change your password click the Change Password button under the
password field and the following window will show up.
Account Configuration
Pulseway User Manual
Page 14 of 85
The Password Propagation Time represents the time while both old and new passwords are
Note: The computers have to be online at least once during the password propagation
period in order to automatically change the password.
accepted, also during this time all computers that have the old password will automatically
switch to the new password without any user action at all.
3.2. Account Management
Account Management panel holds your account control panel. From here you can change
your account details, activate security features, manage your subscription, manage your
registered computers and control registered devices and their policies.
All Account Management functions are protected with your account’s password to prevent
unauthorized changes.
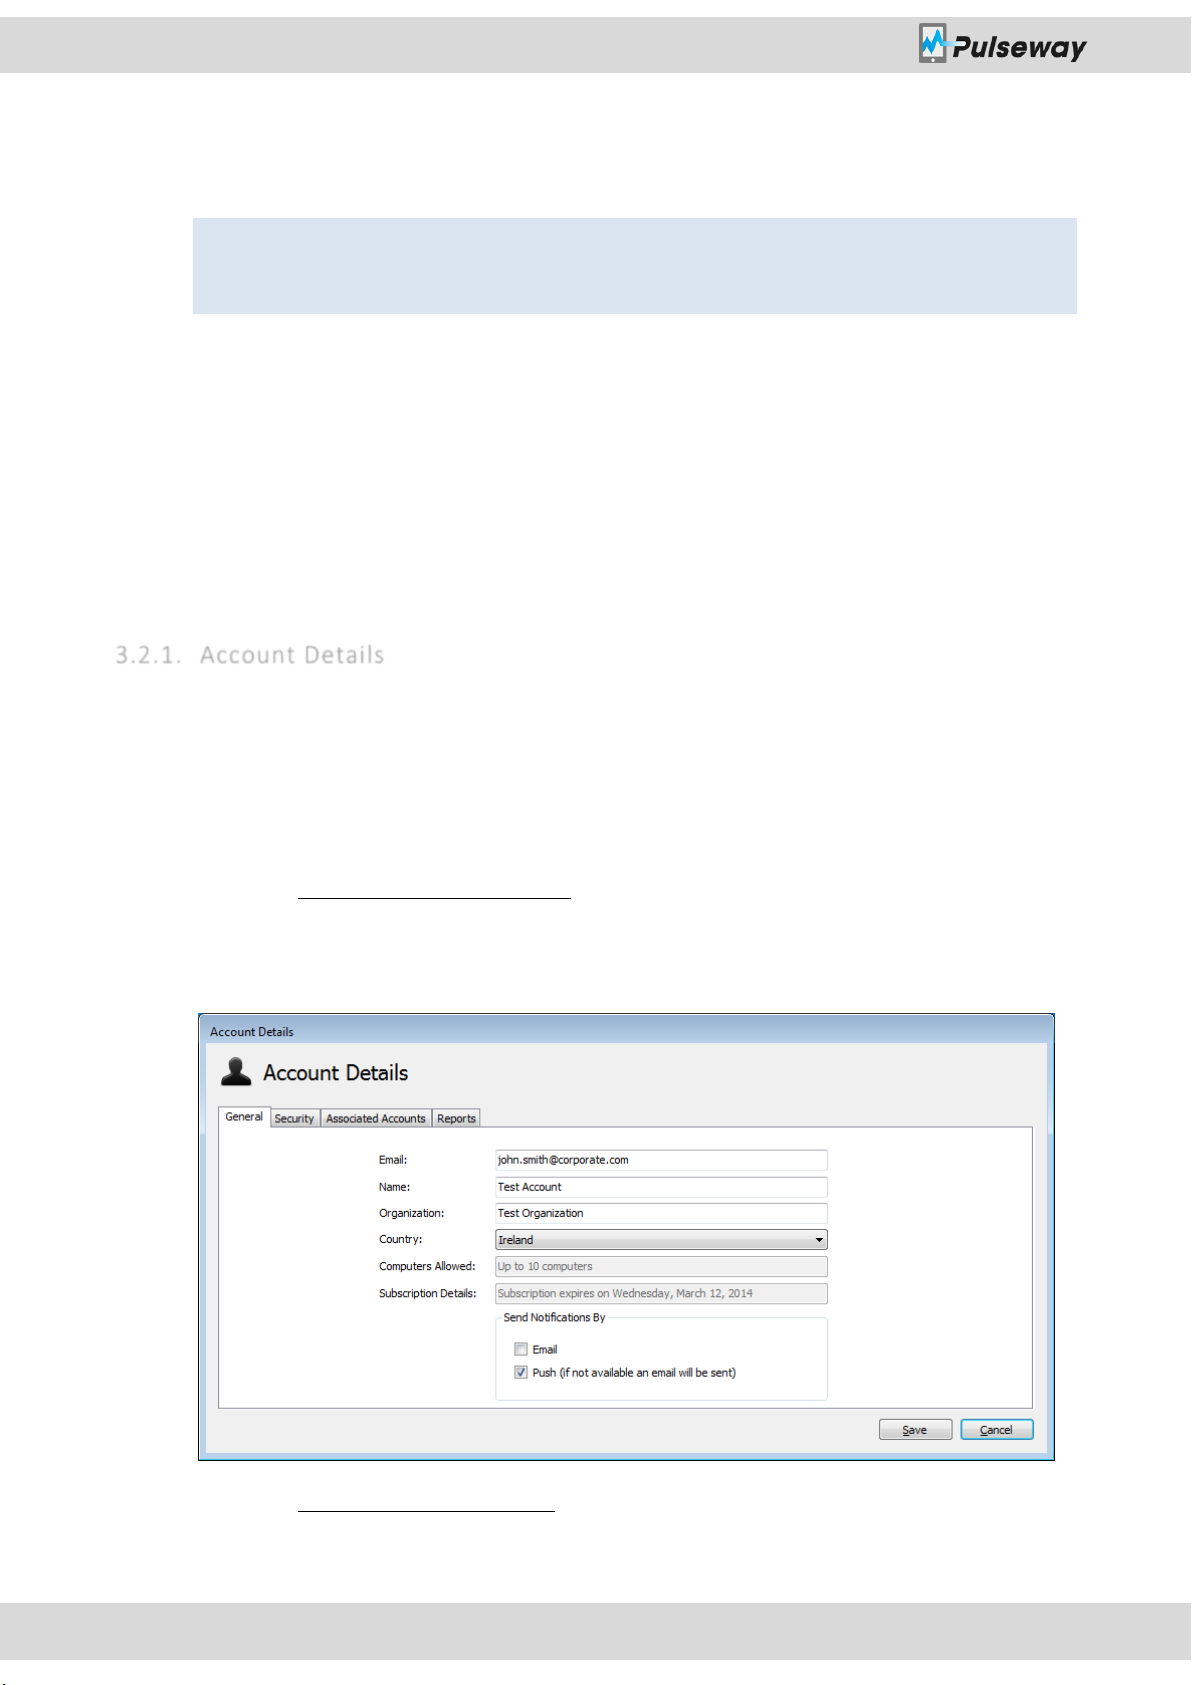
3.2.1. Account Details
From Account Details Management you can change your account information you inserted
when you created your account and changing your notification settings.
Please note that the notification settings are global. This means that if you disable push
notifications all mobile devices will stop receiving push notifications.
3.2.1.1. Modifying Account Details
If you would like to change your account details just modify the field you would like to
change and press the Save button.
3.2.1.2. Two Step Authentication
Two-Step Authentication adds another layer of security to your account that will prevent
unauthorized changes to your account.

Account Configuration
Pulseway User Manual
Page 15 of 85
If enabled the following actions will require a confirmation code that will be sent to the email
registered on your account:
Password change from Pulseway Manager
Access the registered computers from Pulseway Manager
Access the registered devices from Pulseway Manager
Access the Web Application
3.2.1.3. IP Restrictions
IP Restrictions prevent unauthorized access to the Dashboard application and Web
Application by adding authorized IP addresses to your account. You can mix accesses to web
application and dashboard using single IP addresses or even IP ranges.
3.2.1.4. Associated Accounts
Associating accounts gives the possibility of sharing computers among two or more
accounts.
Account Configuration
Pulseway User Manual
Page 16 of 85
An associated account will gain access to the computer you choose to share in read-only
Note: You can only use Associated Account if you have a Pulseway Enterprise Server.
mode or full control and if allowed, receive notifications from selected computers. To add
an Associated Account you need to know the other person’s usernames and link them to
your account from Pulseway Manager application in Account Details screen at Associated
Accounts tab.
Common Scenarios for associating accounts:
Monitor and control a machine and give your client access to see the status of their
machine.
Share access to servers with all your technicians so that when a problem arises they
will know.
Share a computer with a support technician in read only mode to look at the logs
without actually having access to the computer itself.
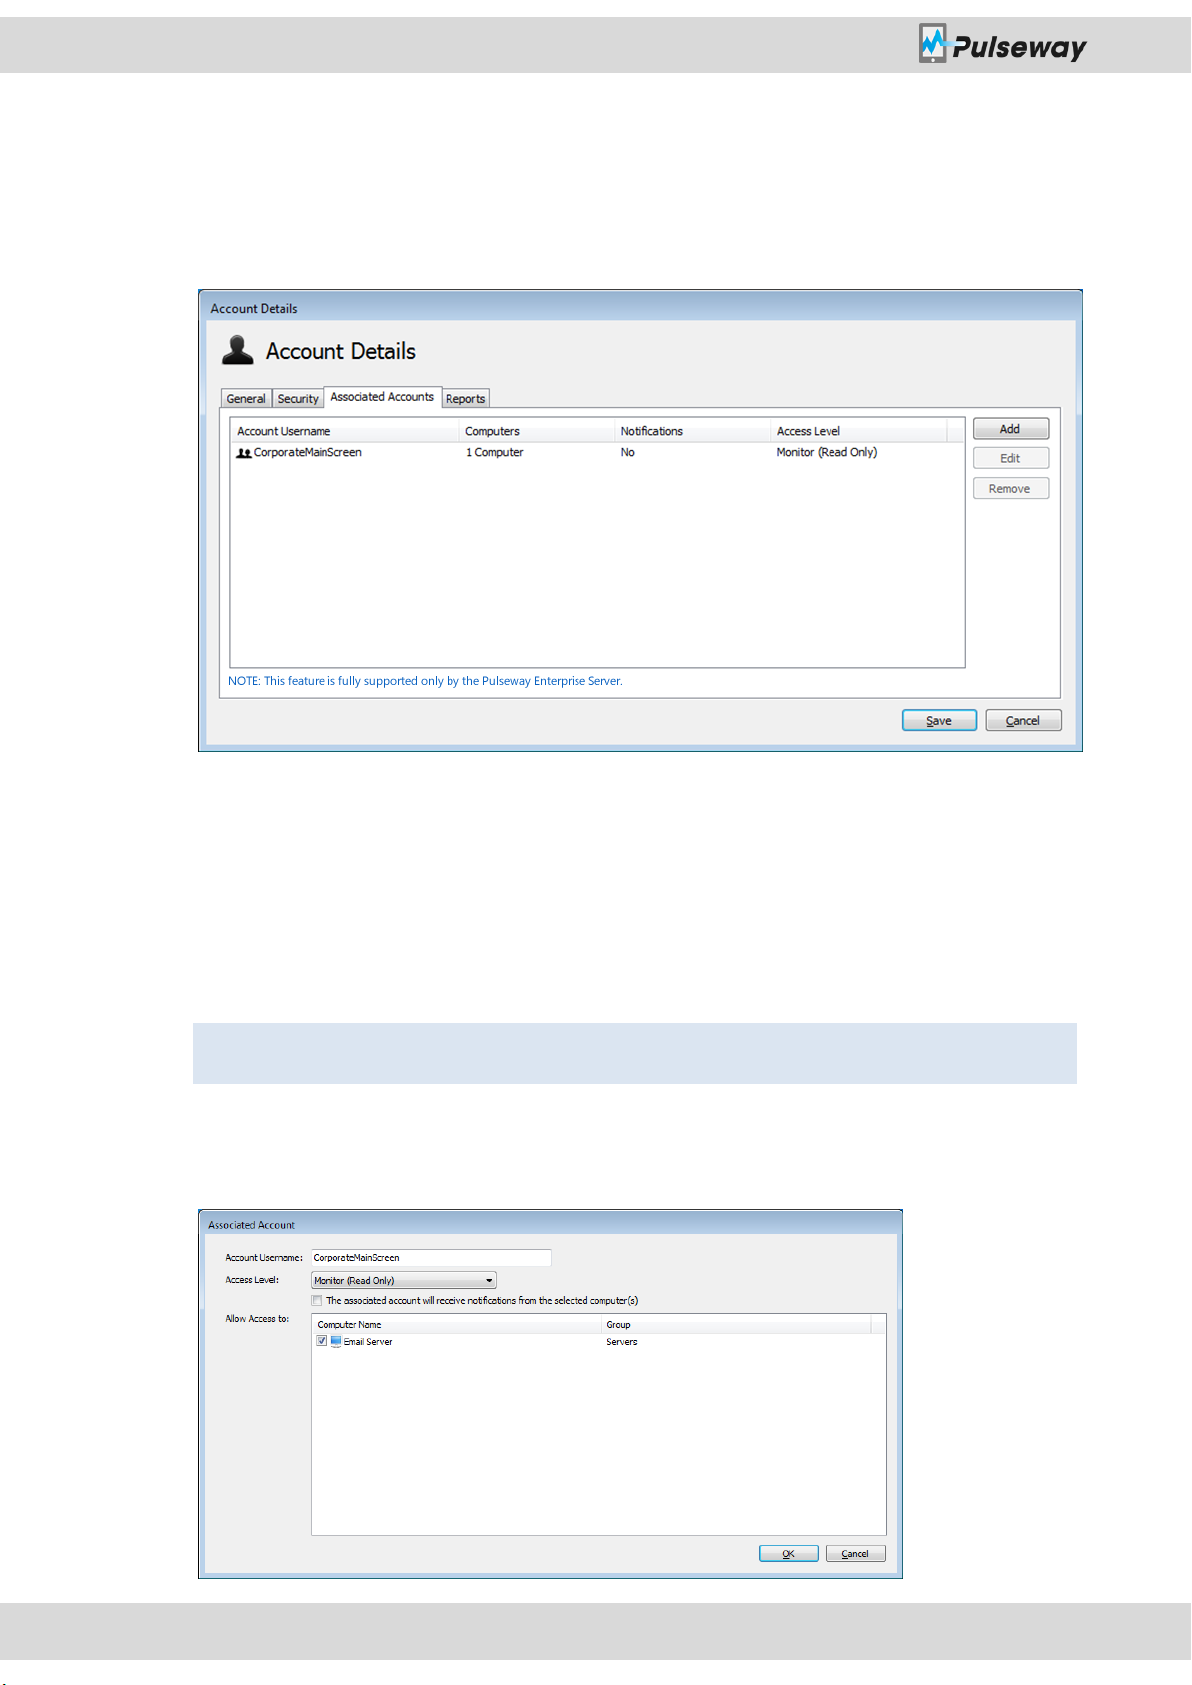
To add an associated account just click on Add, enter the person’s username at Account
Username, set the access level, choose if you would like the associated account to receive
notifications and allow access to the selected computers.
Account Configuration
Pulseway User Manual
Page 17 of 85
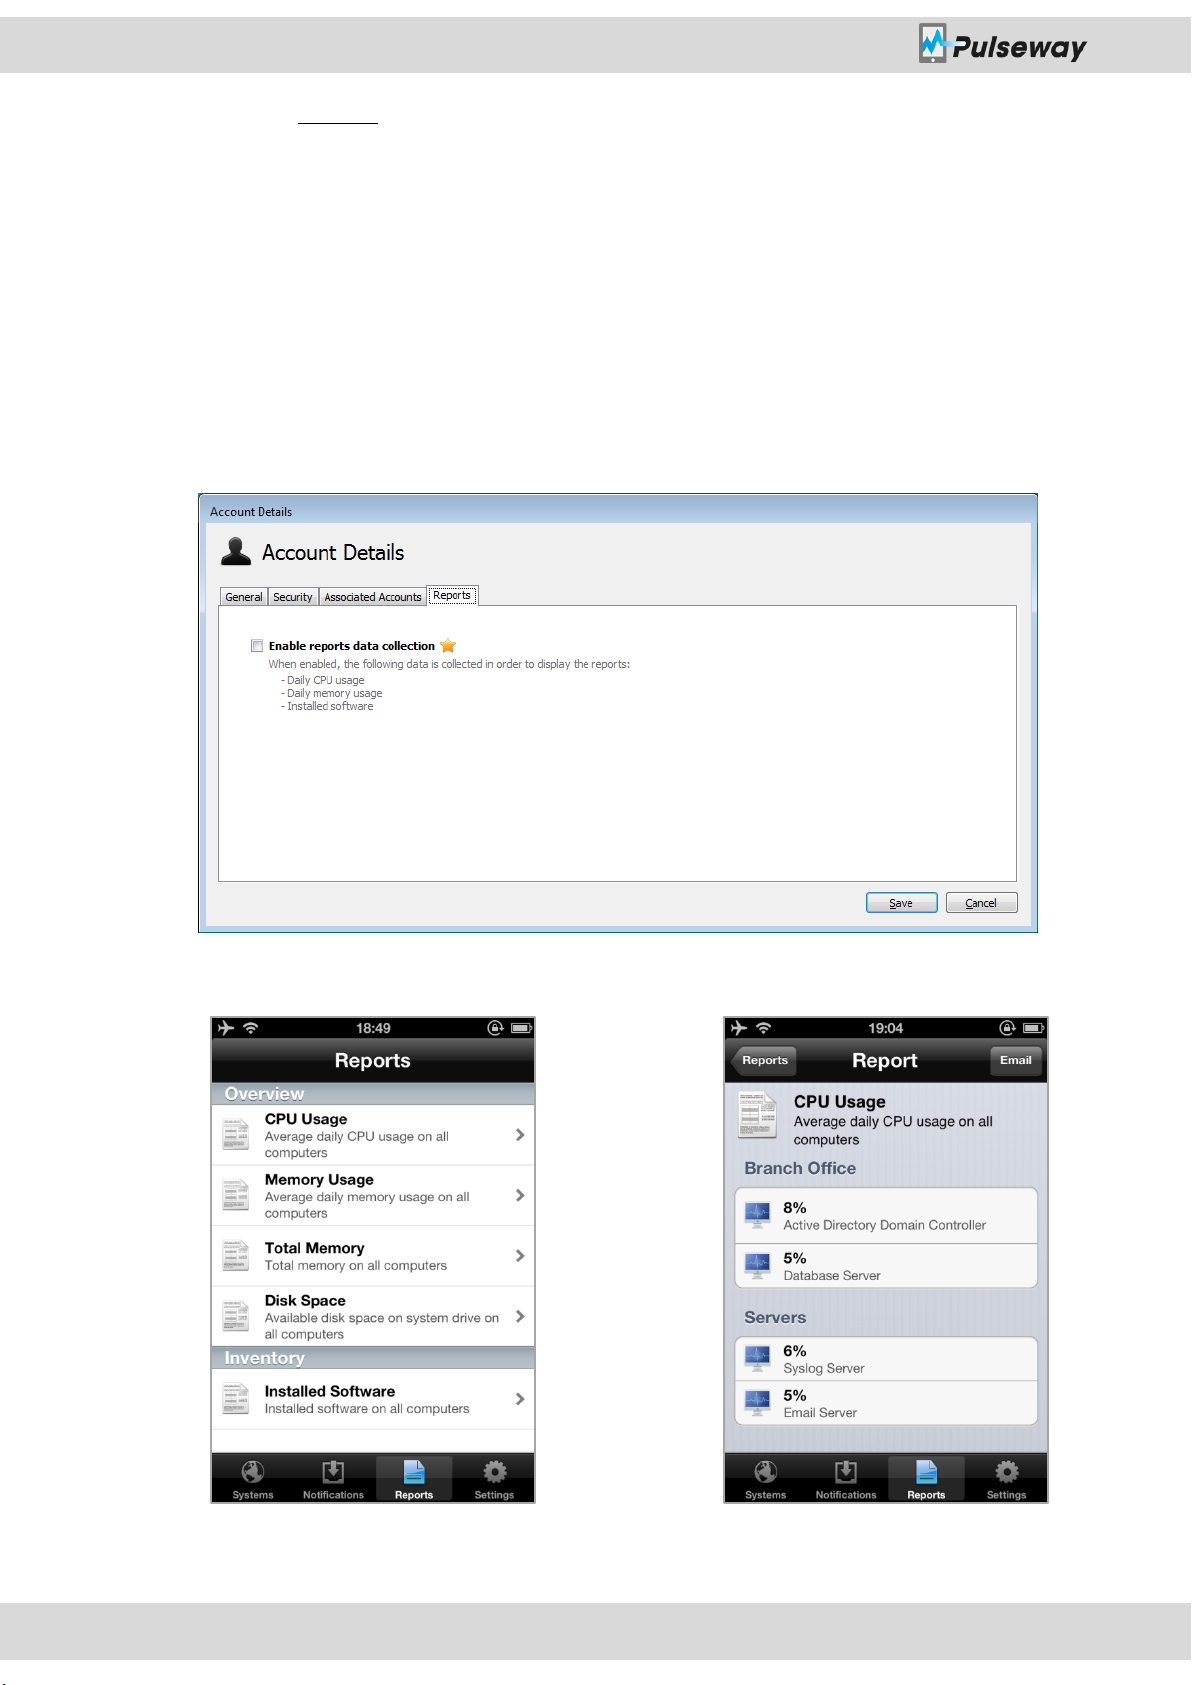
3.2.1.5. Reports
Reports give you a quick overall insight on your monitored computers. A report contains
values that are critical on understanding an ongoing situation or detecting new problems
before they occur. In order for Pulseway to start gathering report data you must agree with
Report Privacy Policy and activate it from Account Details.
Current report types are:
Average CPU Usage
Average Memory Usage
Installed Software
Account Configuration
Pulseway User Manual
Page 18 of 85
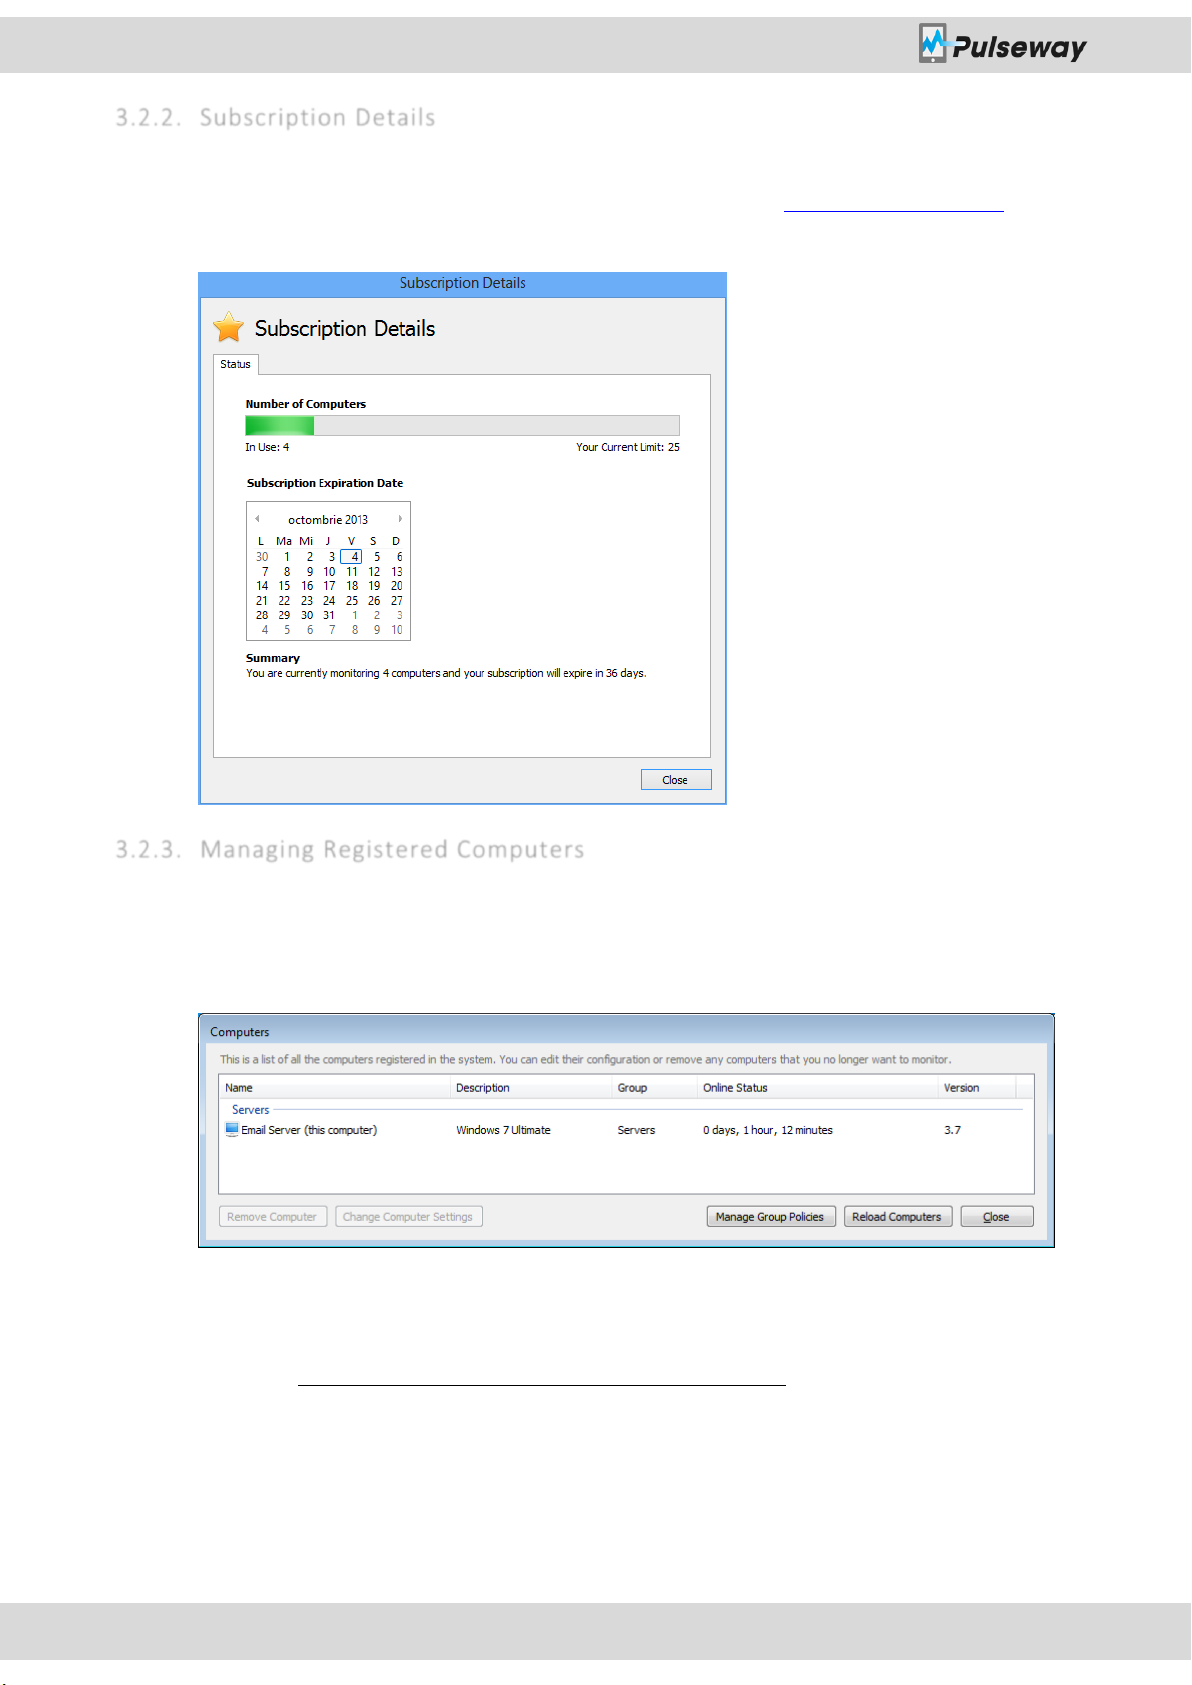
3.2.2. Subscription Details
Subscription details give you an overview of your current subscriptions expiration date and
computer limit. You can purchase a subscription from the Account Control Panel on the
website.
3.2.3. Managing Registered Computers
Clicking the Registered Computers button will take you to a list of all computers that are
assigned to your account. The list contains its display name, the group, OS version, online
status and the version of the Pulseway Agent.
Clicking on Remove Computer will remove the selected computer from your account and if
the target is online the Pulseway agent will be instructed to remove the configuration.
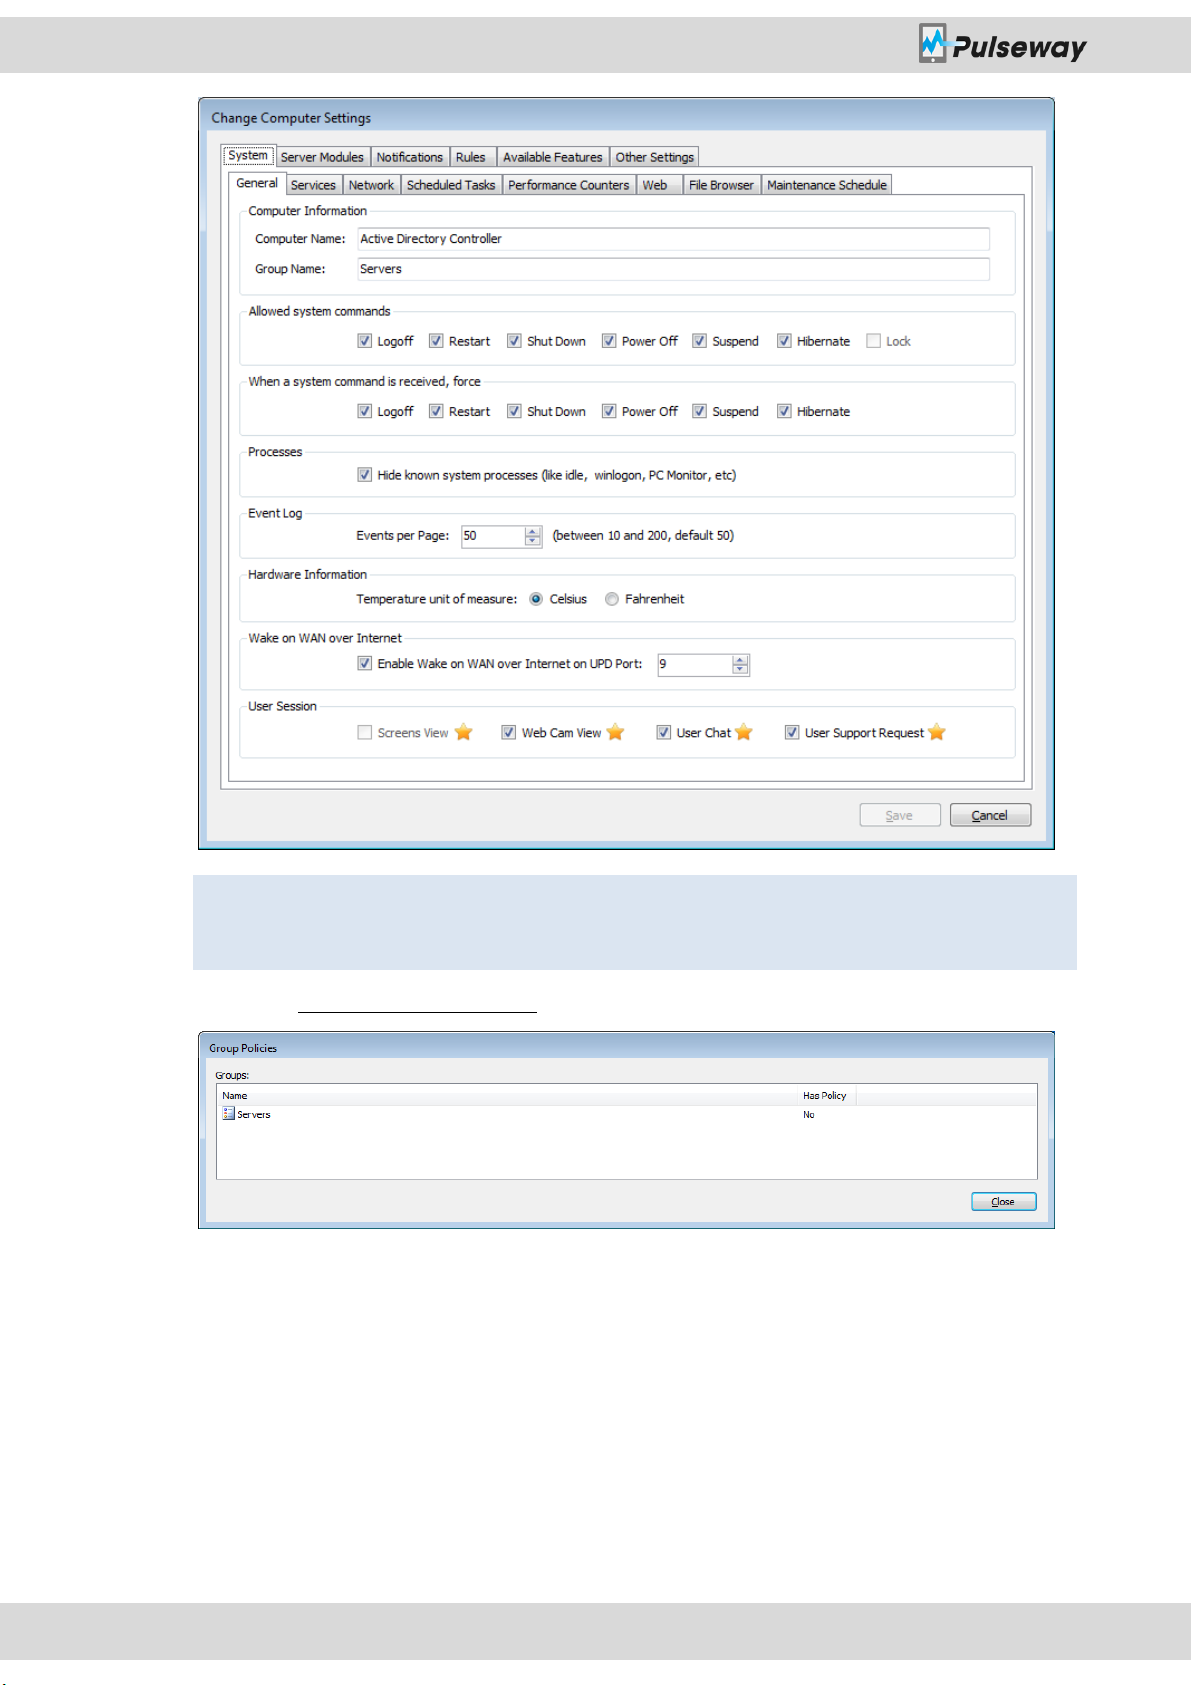
3.2.3.1. Changing Registered Computer’s Configuration
Changing a computer’s configuration can be very useful if you don’t have access to that
specific computer or if you prefer doing it remotely. Just select the online computer, click
Change Computer Settings and you will be able to perform the changes you need just like
you would do from Pulseway Manager at the local PC.
Account Configuration
Pulseway User Manual
Page 19 of 85
Note: Both agents must have the same version in order to perform remote configuration
changes.
3.2.3.2. Manage Group Policies
Group Policies provides the centralized management and configuration of Pulseway
configuration. Group Policies work on computer groups and they overwrite the
configuration of all computers in the group.
Group Policies is commonly used in enterprise environments to quickly configure new
computers and to ease the configuration update process. Once a Group Policy has been
created all computers will automatically update their configuration based on the policy.
Also computers that are added in a group that has a policy will change its configuration
according to the policy.
Account Configuration
Pulseway User Manual
Page 20 of 85
There are two types of group policies:
Note: Group policy changes are not reflected in the Pulseway Manager. The Manager only
allows you to edit the local configuration; at runtime, in the Pulseway service, group
policy settings will take priority over local configuration.
Default policies will affect all monitored computers, changing all settings that are
configured in the policy that don’t conflict with other policy.
Explicit policies only affects computers that are part of the group. Explicit policies
have priority over the default so that if an explicit policy has a setting configured the
default policy will not be checked for that setting.
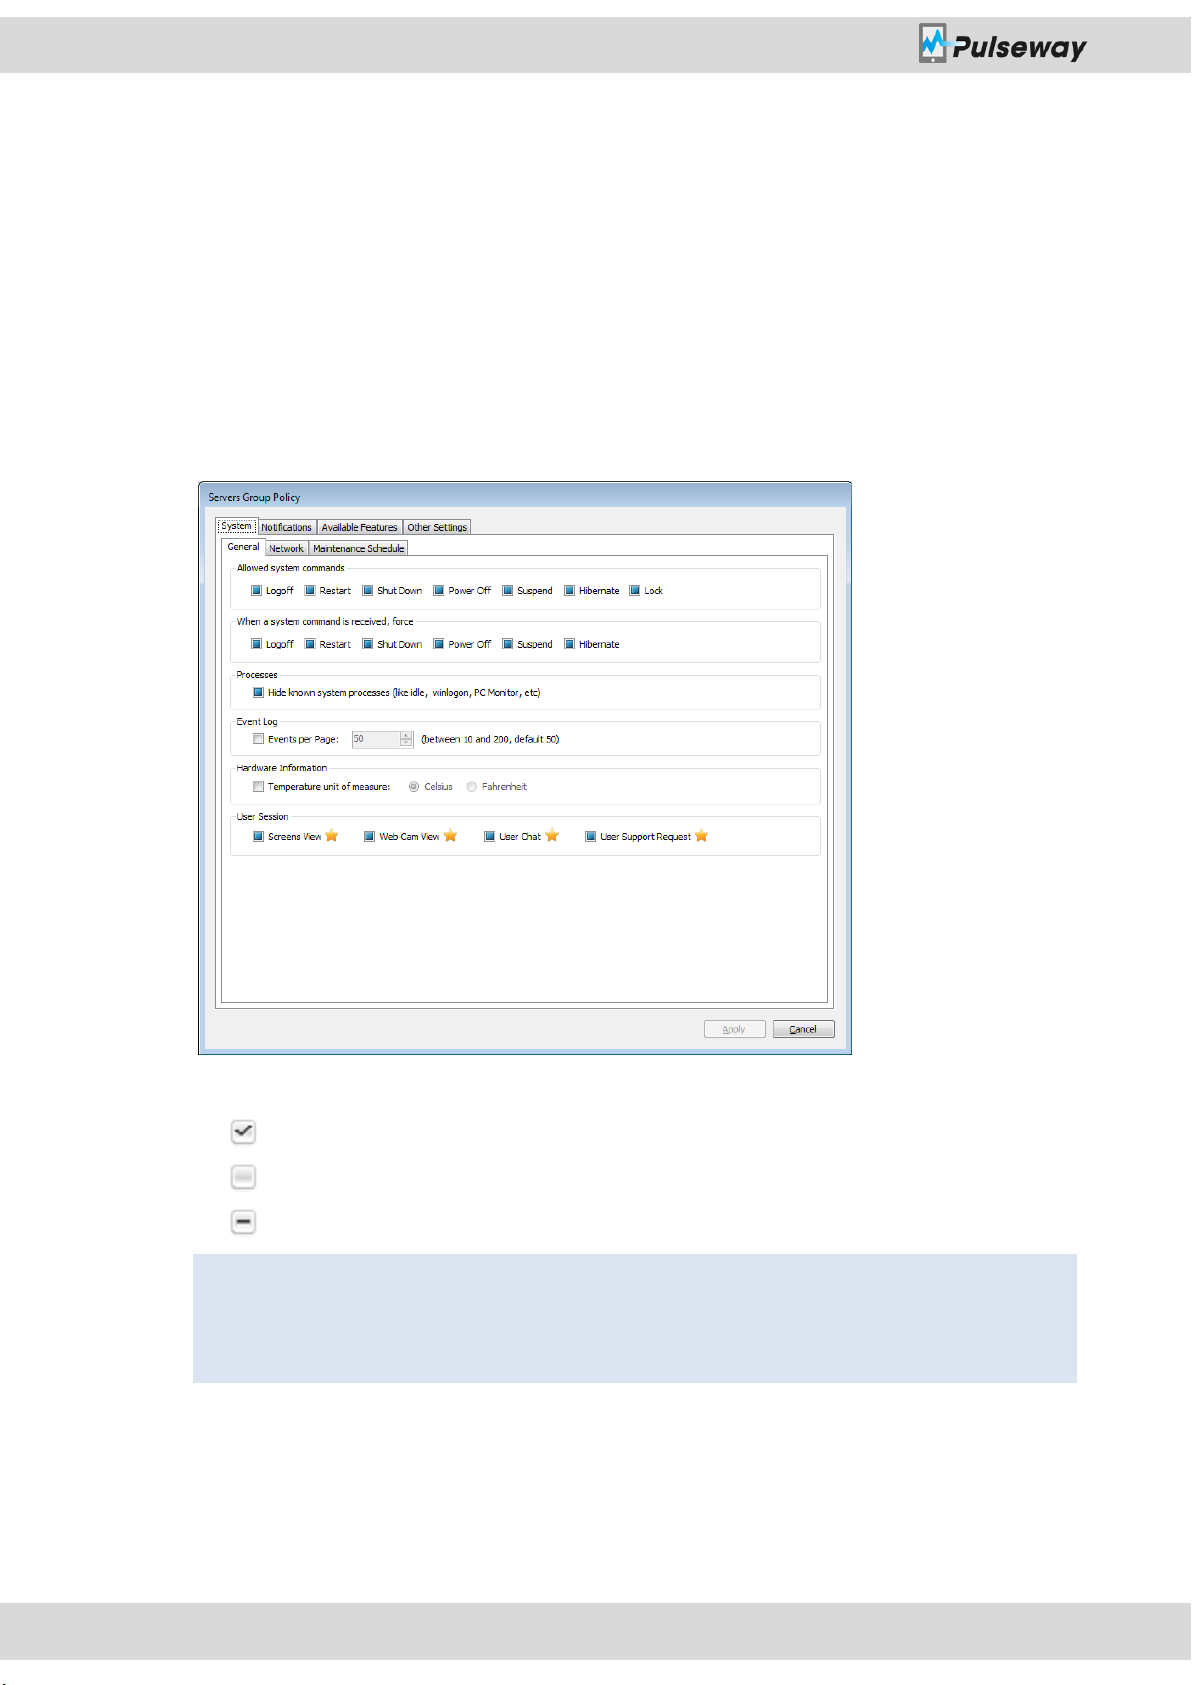
Adding a Group Policy
In order to add a Group Policy you must decide if you would like to affect all computers or
only a specific group. After you select the group from the Manage Group Policies window
you can choose to create a policy or to update if it already exists.
A policy setting has three states:
Checked
Unchecked
Undecided
If a setting is Checked or Unchecked will be propagated to computers thus overwriting its
value.
Leaving a setting as Undecided will not propagate any changes to the computer and the
existing value on computers will remain untouched.
Account Configuration
Pulseway User Manual
Page 21 of 85
Removing a Group Policy
Note: Removing a Group Policy is permanent and cannot be undone. If you would like to
preserve your configured policy you can export it into a file.
Note: If you import a Group Policy over an existing one the policy will be overwritten.
If you would like to remove a Group Policy select it from Manage Group Policies window and
then click on Remove Policy.
Removing a Group Policy will stop propagating configuration changes to monitored and new
computers.
Exporting a Group Policy
After you have configured your policy you can export it into a file for backup purposes. You
can do so by selecting the policy from Manage Group Policies window and then clicking on
the Export Policy button. This will open a save dialog asking you where to save the file on
your computer.
An exported Group Policy can be used to import it on other accounts, to copy a policy to a
different group and to restore a backup copy of a policy.
Importing a Group Policy
If you would like to import an exported Group Policy you need to have the exported *.pcmgp
file on your local computer or in a network path. You can start the import process from
Manage Group Policies window by clicking the Import Policy button after you have selected
an existing group. An open dialog will show asking you to where is the exported file located.
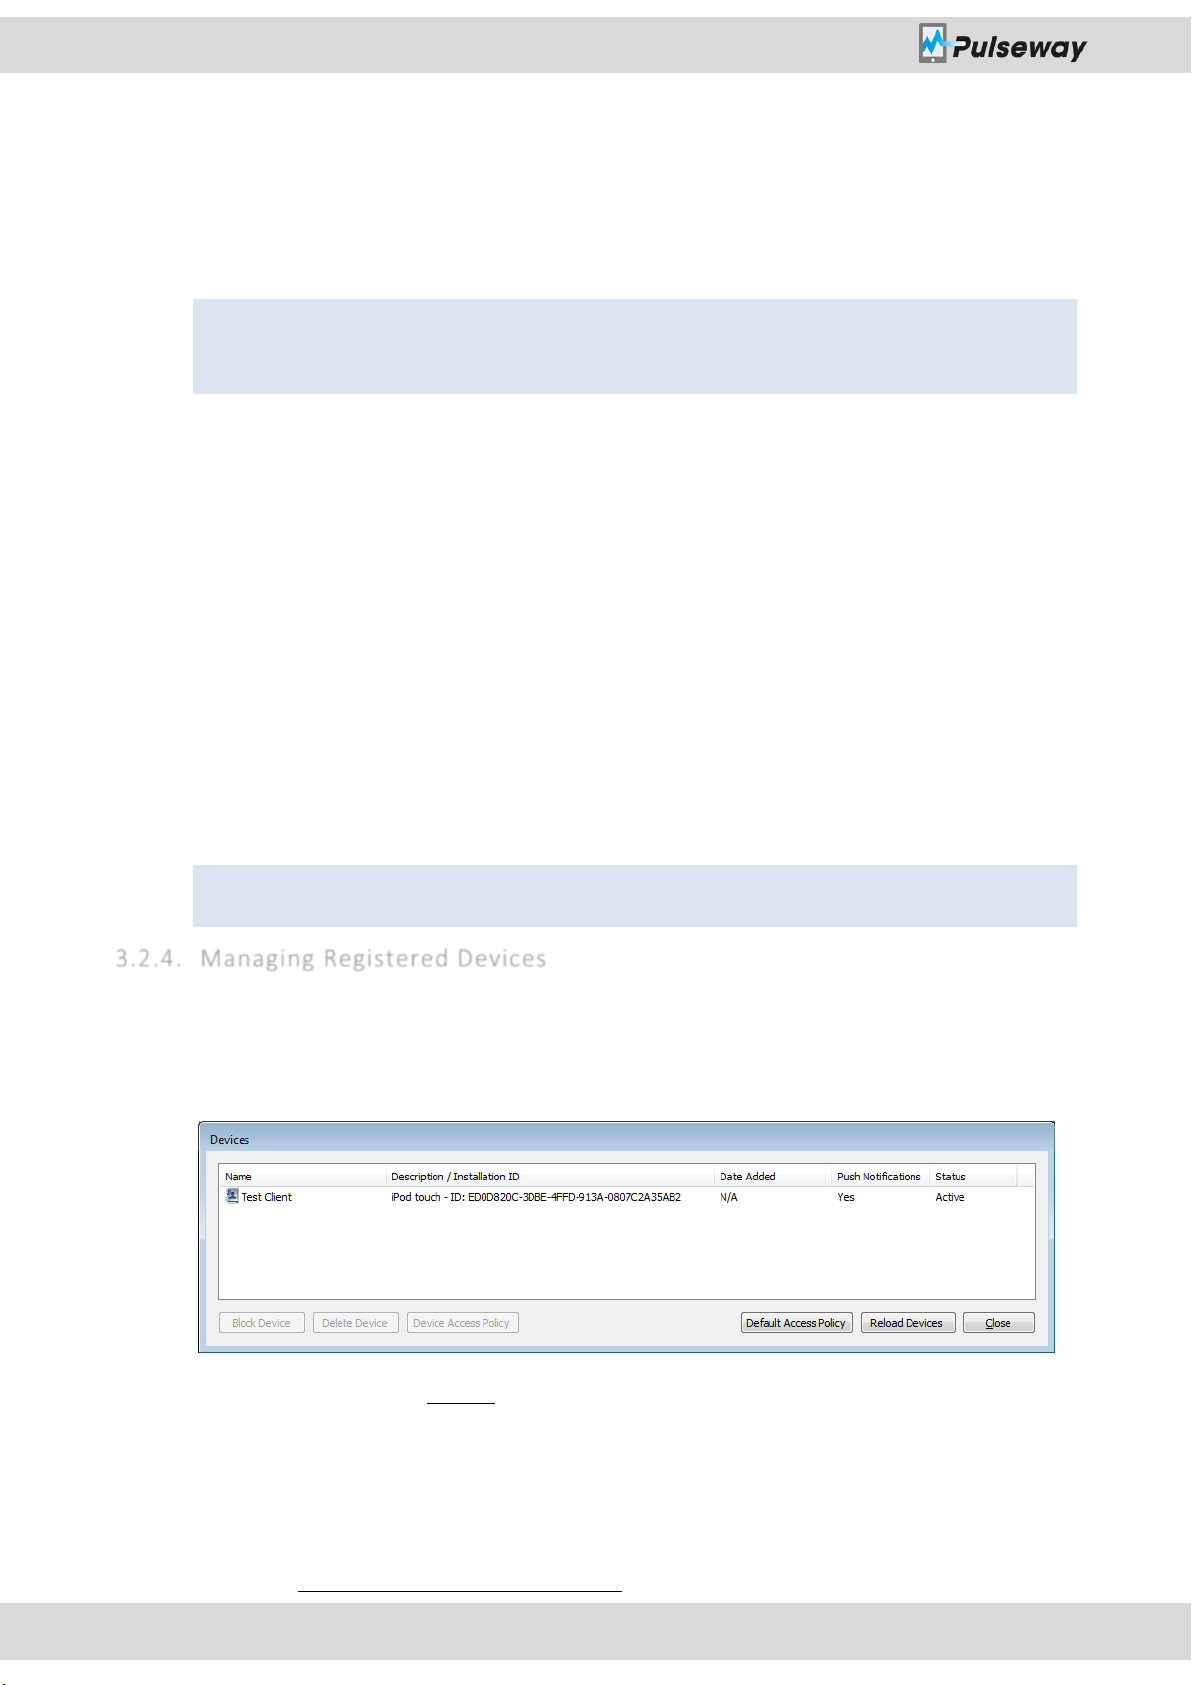
3.2.4. Managing Registered Devices
The Registered Devices form lets you control the mobile devices that use your account. You
will get a list with all the devices that are registered on your account, their installation ID’s,
PUSH notification status and the overall status (Active or Blocked).
Blocking a device will disable the application’s functionality on your account until you
unblock it. Deleting a device will remove it from the list, however if the device will use your
Pulseway under your account it will show up again. This is useful when you would like to
remove a device from receiving PUSH notifications without actually performing any changes
on the mobile device itself.
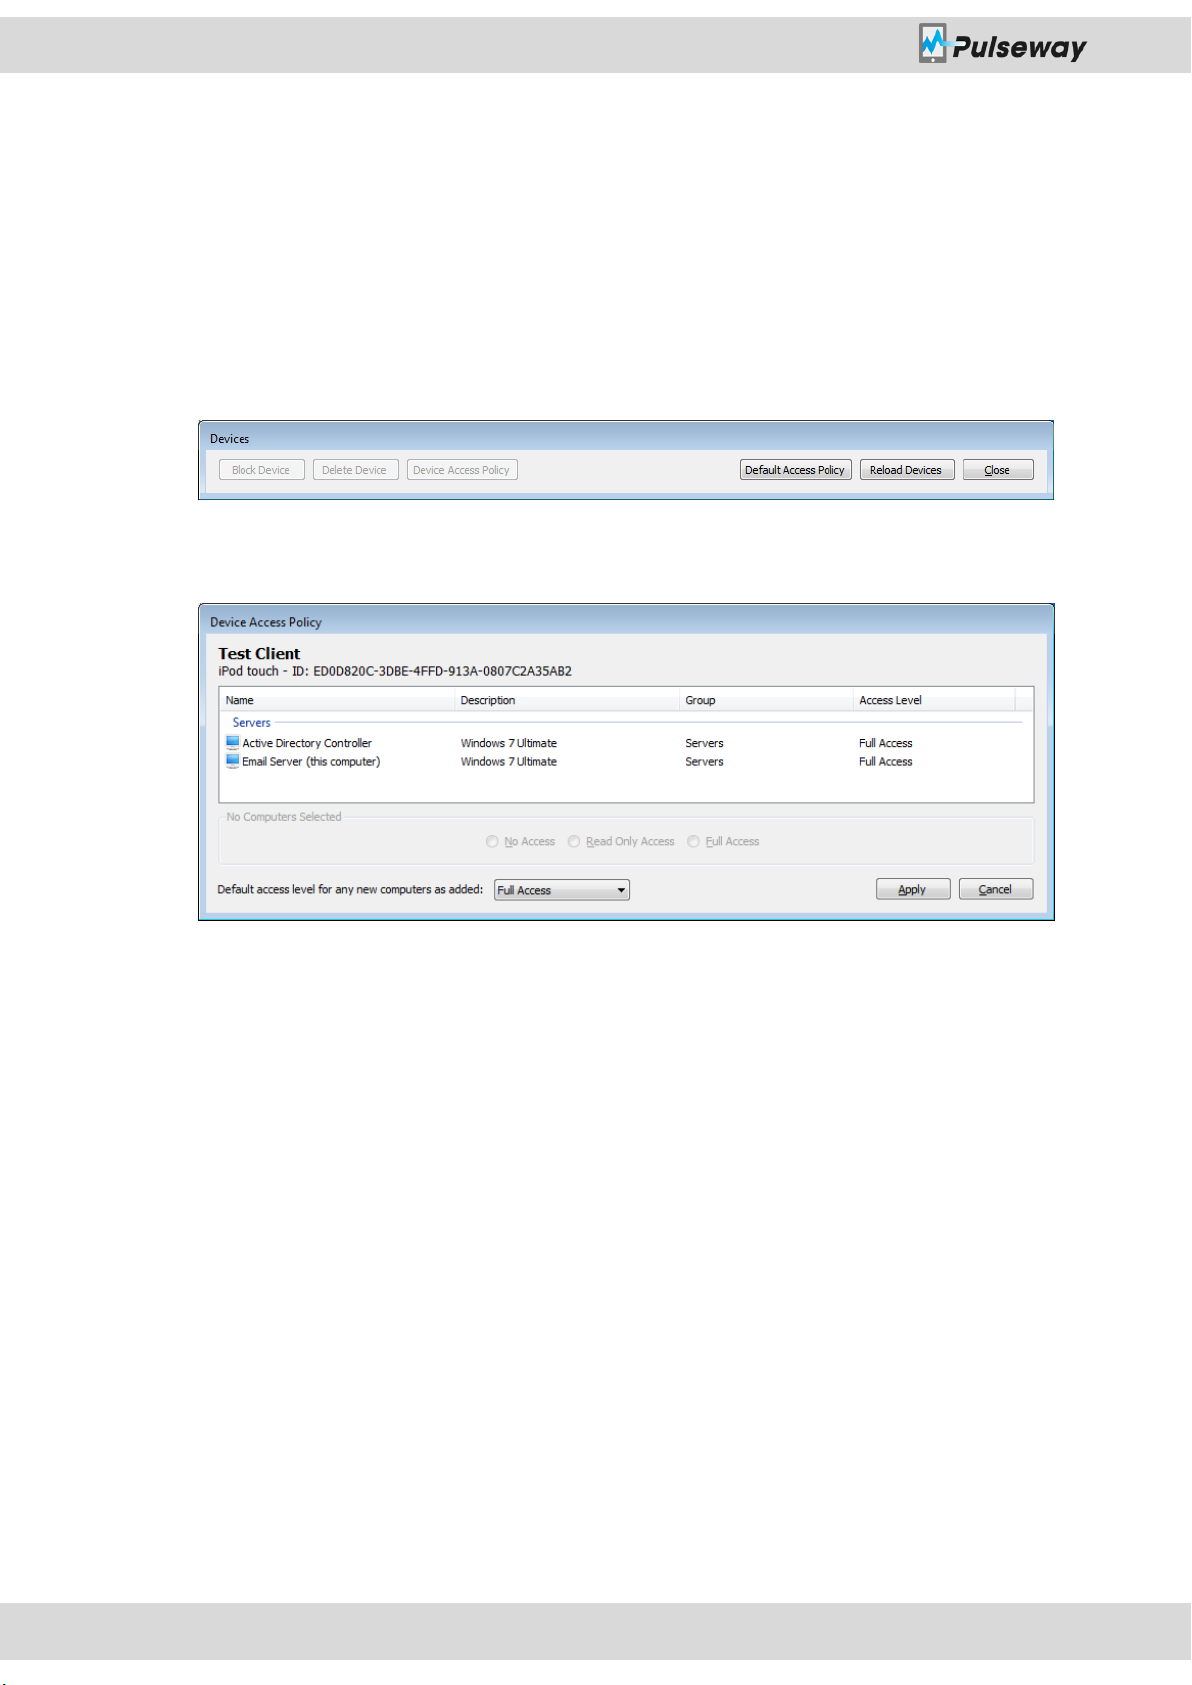
3.2.4.1. Creating Device Access Policies
Account Configuration
Pulseway User Manual
Page 22 of 85
Creating Device Access Policies help you control the computers that a specific device has
access to.
There are two types of Device Access Policies:
Explicit Policy (for a specific device)
Default Policy (for all devices that don’t have an explicit policy)
To create an explicit policy you need to click a device from the Registered Devices form and
click the Device Access Policy button, or if you would like to change the default policy you
need to click the Default Access Policy button.
On the form that opens you will see a list of all the computers that are registered on your
account.
From here you can set the Access for each computer and default access for new computers.
3.3. Computer Information
Computer Information keeps the identification settings for the specific computer.
Computer Name
Group Name
These settings will not affect your existing computer name and workgroup and will only be
used to keep an order in your computer list.
You can use Group Name field for the Branch Office Location, Datacenter Rack Coordinates
or whatever fits best for your case. Computer Name can be its user’s First Name, Asset
number or anything you want.
3.4. Dedicated Server
The dedicated server setting is reserved for the customers that own a Pulseway Enterprise
Server.

Account Configuration
Pulseway User Manual
Page 23 of 85
This field will represent the hostname of your server; however, incorrectly changing this
setting will result in loss of communication with the cloud servers and loss of the ability to
view the device on mobile clients.
System Configuration
Pulseway User Manual
Page 24 of 85
4. System Configuration
System Configuration settings represent configuration of Pulseway features that are used
for the local machine.
The supported system features are:
System Commands
Process Commands
Event Log Browsing
Hardware Sensors
Wake on WAN Commands
Screen View
Webcam View
Service Commands
Network Monitoring
Scheduled Task Commands
Performance Counter Browsing
File Browser
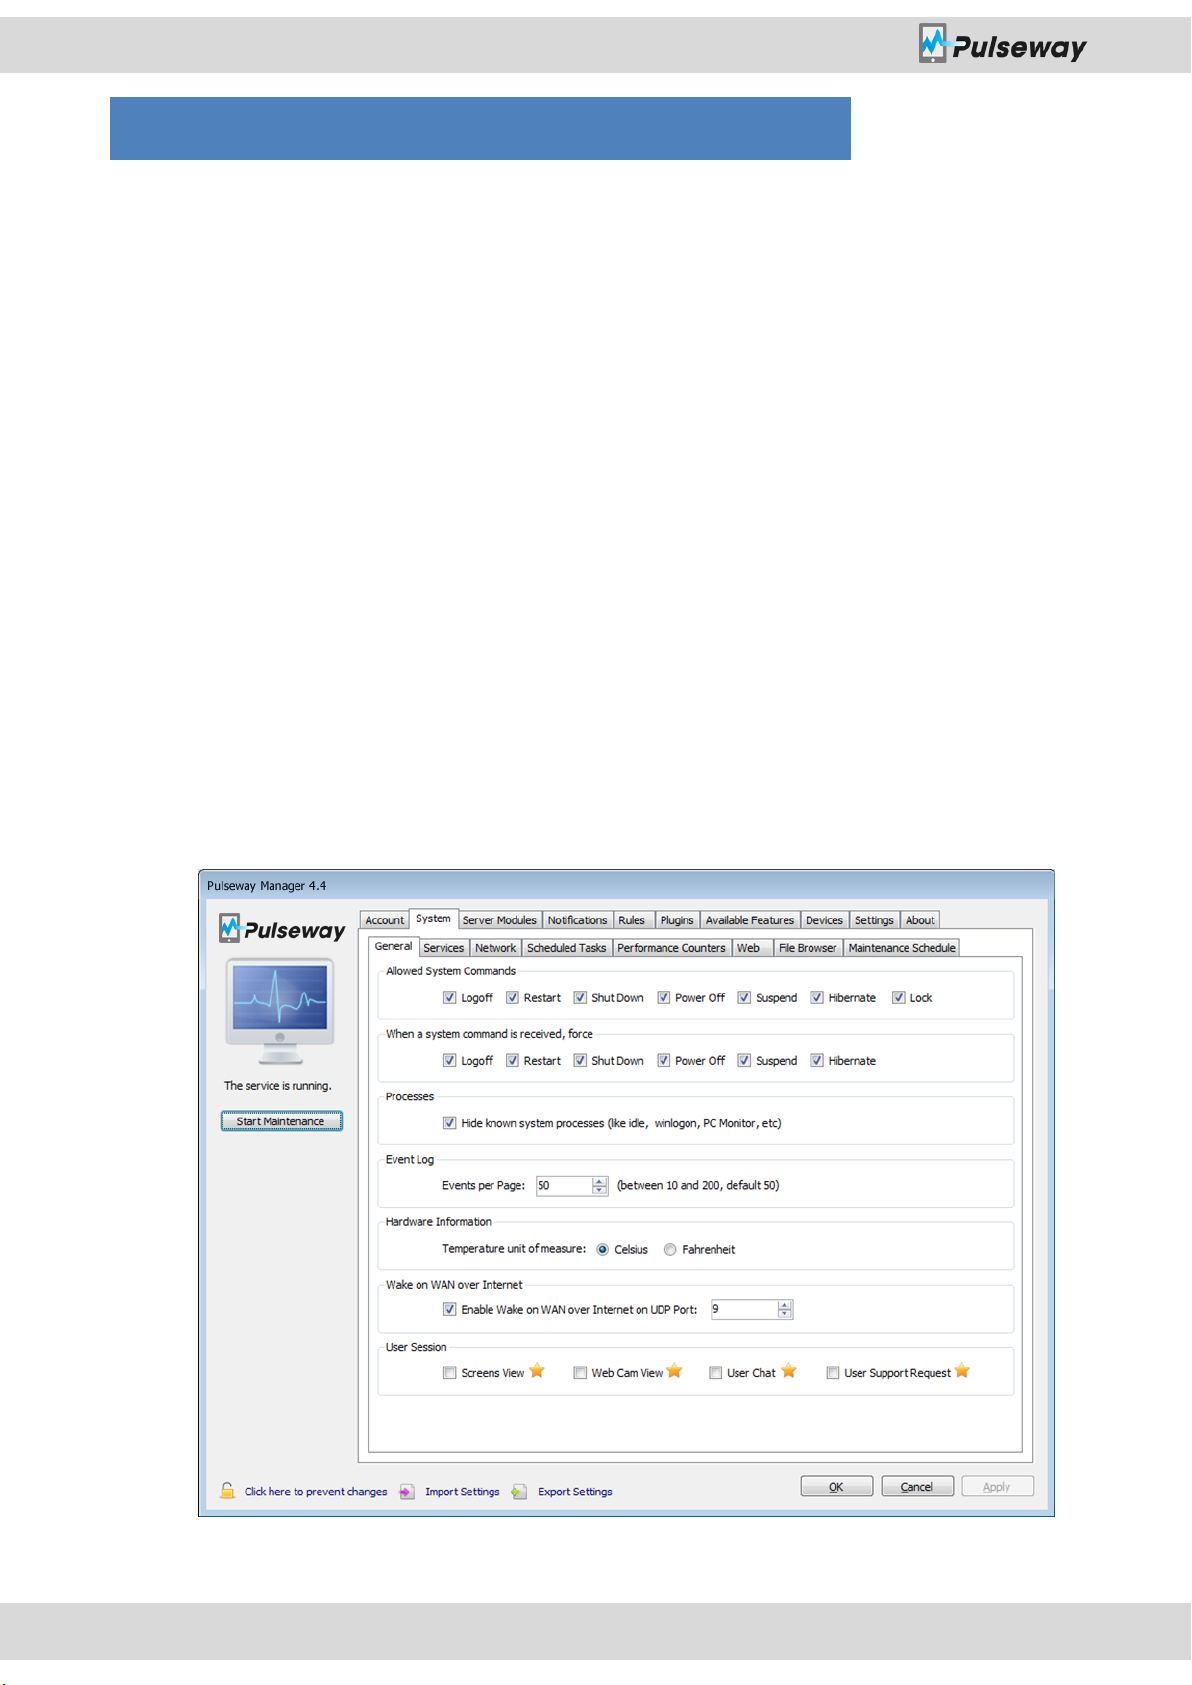
4.1. General Settings
General System Settings controls which features will be available to the mobile device and
their configuration.

System Configuration
Pulseway User Manual
Page 25 of 85
4.1.1. Allowed System Commands
Some system administrators would like to prevent hardware damage to the computers the
operator share access to and disable the Power Off command which is a hard shutdown that
can cause data loss.
By default all System Commands are enabled, however, you get the option to customize
their availability.
For example if you would like to allow only restart commands to be sent, just uncheck all
boxes except restart.
4.1.2. System Command Force Attribute
The force attribute forces the application to close so that you will know for sure that the
system will execute your command. This can cause loss of data if any opened application
contains unsaved data.

System Configuration
Pulseway User Manual
Page 26 of 85
4.1.3. Process Browsing
Process Browsing has only one setting which is used to hide know processes like (system,
idle, pulseway).
4.1.4. Event Log Browsing
Browsing through the event logs of an operating system is crucial to understand the current
status of the hardware and software components. Pulseway offers the ability to limits the
amount of log entries per page in order to increase browsing speed and reduce bandwidth
usage.
 Loading...