

Page 1
MMF POS
Version
1
E
E
E
N
N
N
G
G
G
L
L
L
I
I
I
S
S
S
H
H
H
VAL-u LinePLUS™
Instruction Manual
/User Guide
Page 2
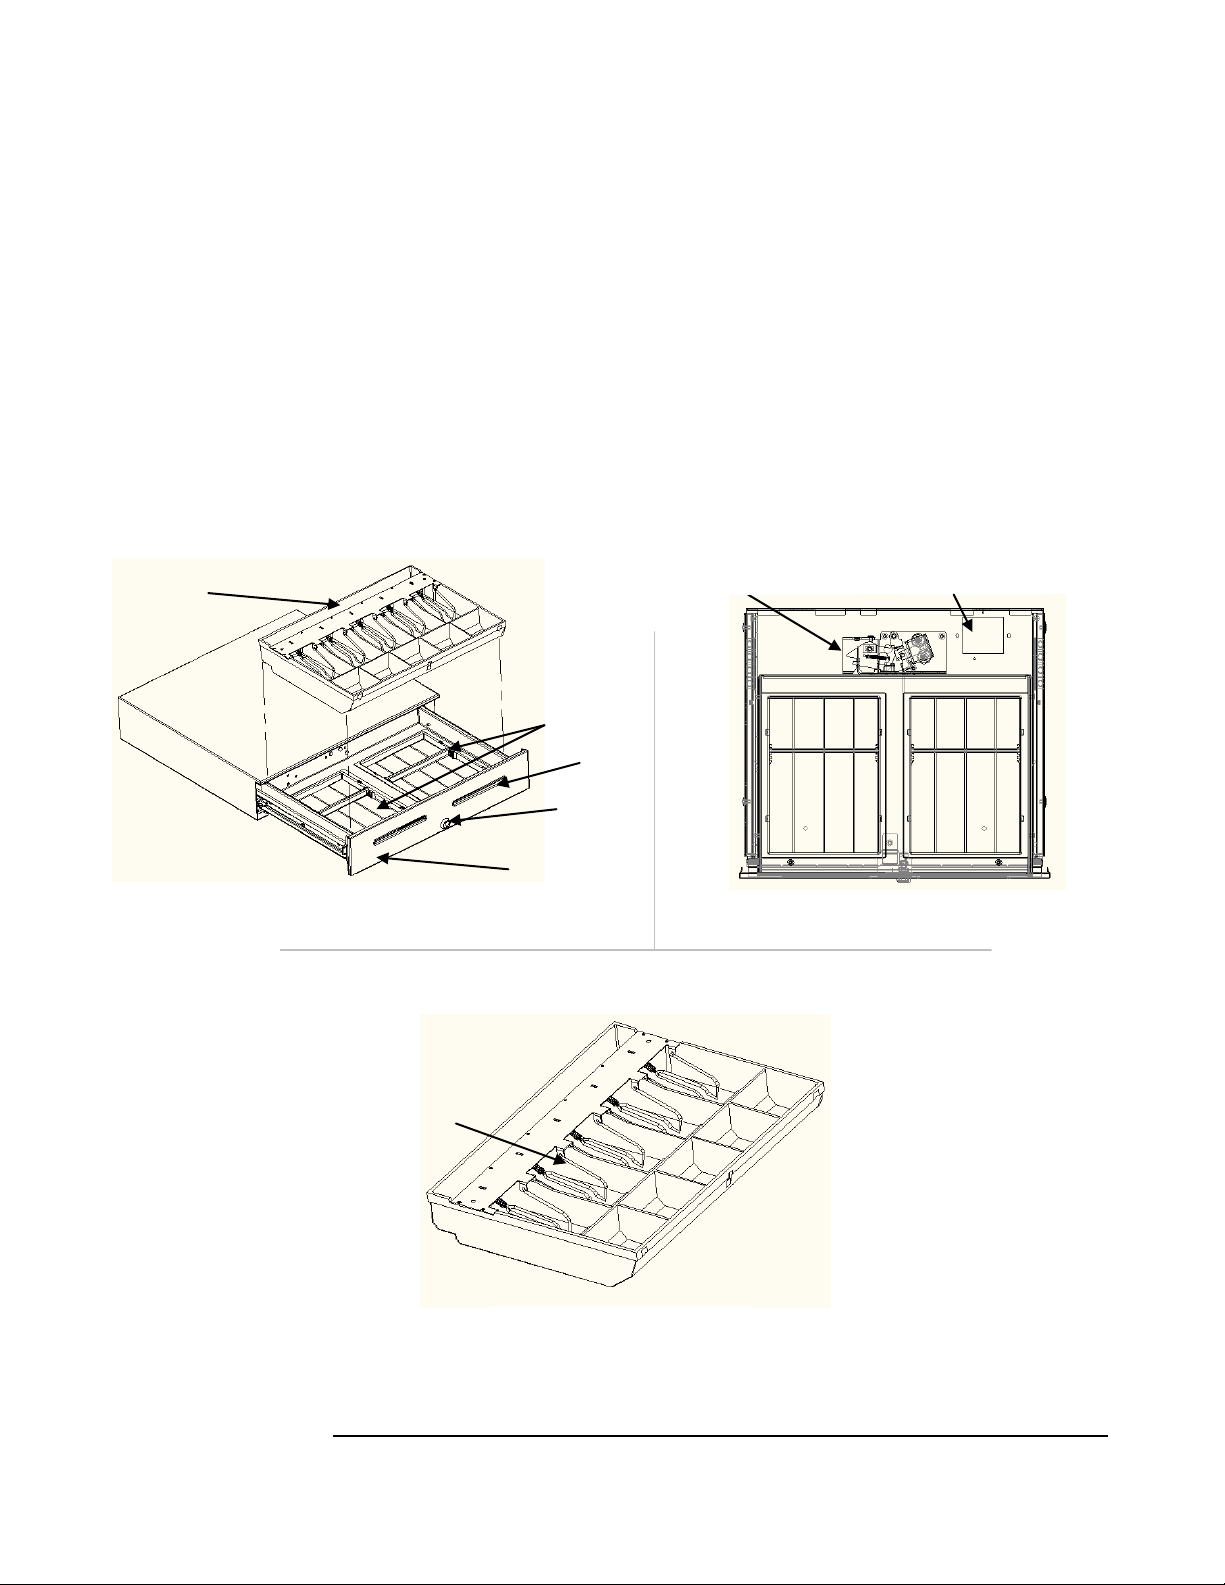
1
Media
Slots
Lock
Media
Storage
Trays
Currency
Tray
Inner Drawer
Coin Roll
Storage
Inner Drawer
Latch Mechanism
Receipt-Printer
Connection
(under-unit)
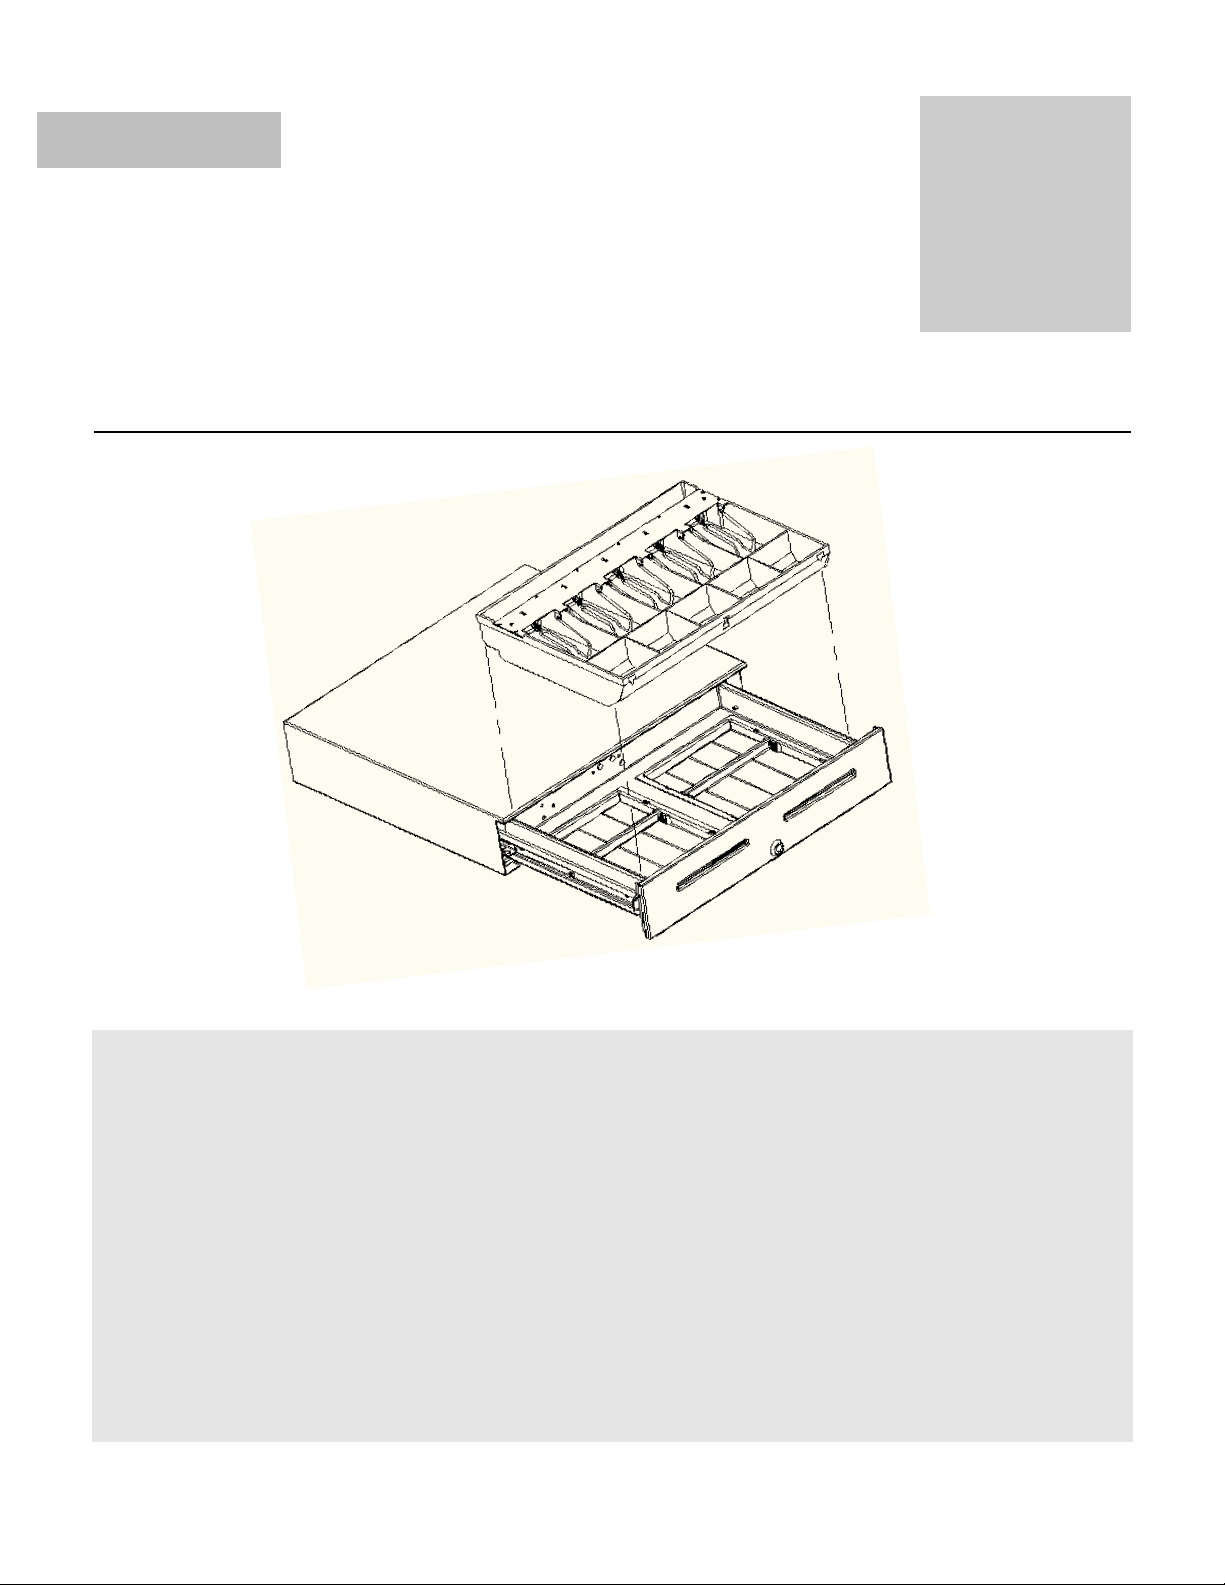
VAL-u LinePLUS™ Cash Drawer
Currency Till
Bill Weights
VAL-u LinePLUS™
P/N: 225-1418141-04
The VAL-u LinePLUS™ solution has been engineered to offer a full-size product with more robust
capabilities than the standard VAL-u Line. The benefits and usefulness of this full size cash drawer are
many, with a media & coin storage compartments giving you much more capability of space and
organization. An easy to use printer-driven connection offers the flexibility to be used with most POS
printers.
VAL-u LinePLUS User Manual
Last Revision 7/6/2010
Page 3
2
Getting Started
Prepare a location for the cash drawer by selecting a secured, leveled surface that is no
smaller than the cash drawer.
Operating temperature should be controlled at 20° F to 100°F (-7° C to 37°C).
Position the cash drawer and remove any packing tape or guards from the tray.
If mounting under a counter, please use the VAL-
Mounting Bracket (P/N: 225-1430-04). Follow instructions detailed in this manual under
Optional Accessories on Page 4.
Lock Type / Functions
The VAL-u LinePLUS cash drawer is designed with standard 4-position locks. Each cash
drawer is equipped with one (1) set of 2 keys. The lock provides the following functions:
12 o’clock position – Electronically ON
3 o’clock position – Locked Open
9 o’clock position- Locked Closed
To manually open the cash drawer turn the key 45 degrees to the right. To avoid the possibility
of losing, damaging, or breaking the key from the lock during transactions, please place lock in
the 12 o’clock position and remove key.
Media Storage
u
LinePLUS Under-Counter
There are two (2) tray compartments located under the cash tray that serve as media
storage. The compartments are equipped with swapping dividers for any desired
configuration.
.
Printer-Driven Interface Connection (Separate purchase necessary)
The printer-driven Interface has been designed to use the VAL-u LinePLUS with a
variety of POS printers by connecting printer specific cables.
Connect one side of the corresponding printer-specific MMF RJ-12 Cable to the
interface connection located under the cash drawer. The end of the cable that has
a label with the MMF cable part number will plug into the Cash Drawer and the
end that has a label that reads: “Connect to Printer” would plug into the receipt printer.
Follow the set-up instructions from the printer manufacturer to properly connect the cash
drawer to the receipt printer.
VAL-u LinePLUS User Manual
Last Revision 7/6/2010
Page 4

3
Optional Accessories
The following VAL-u LinePLUS cash drawer accessories are sold separately:
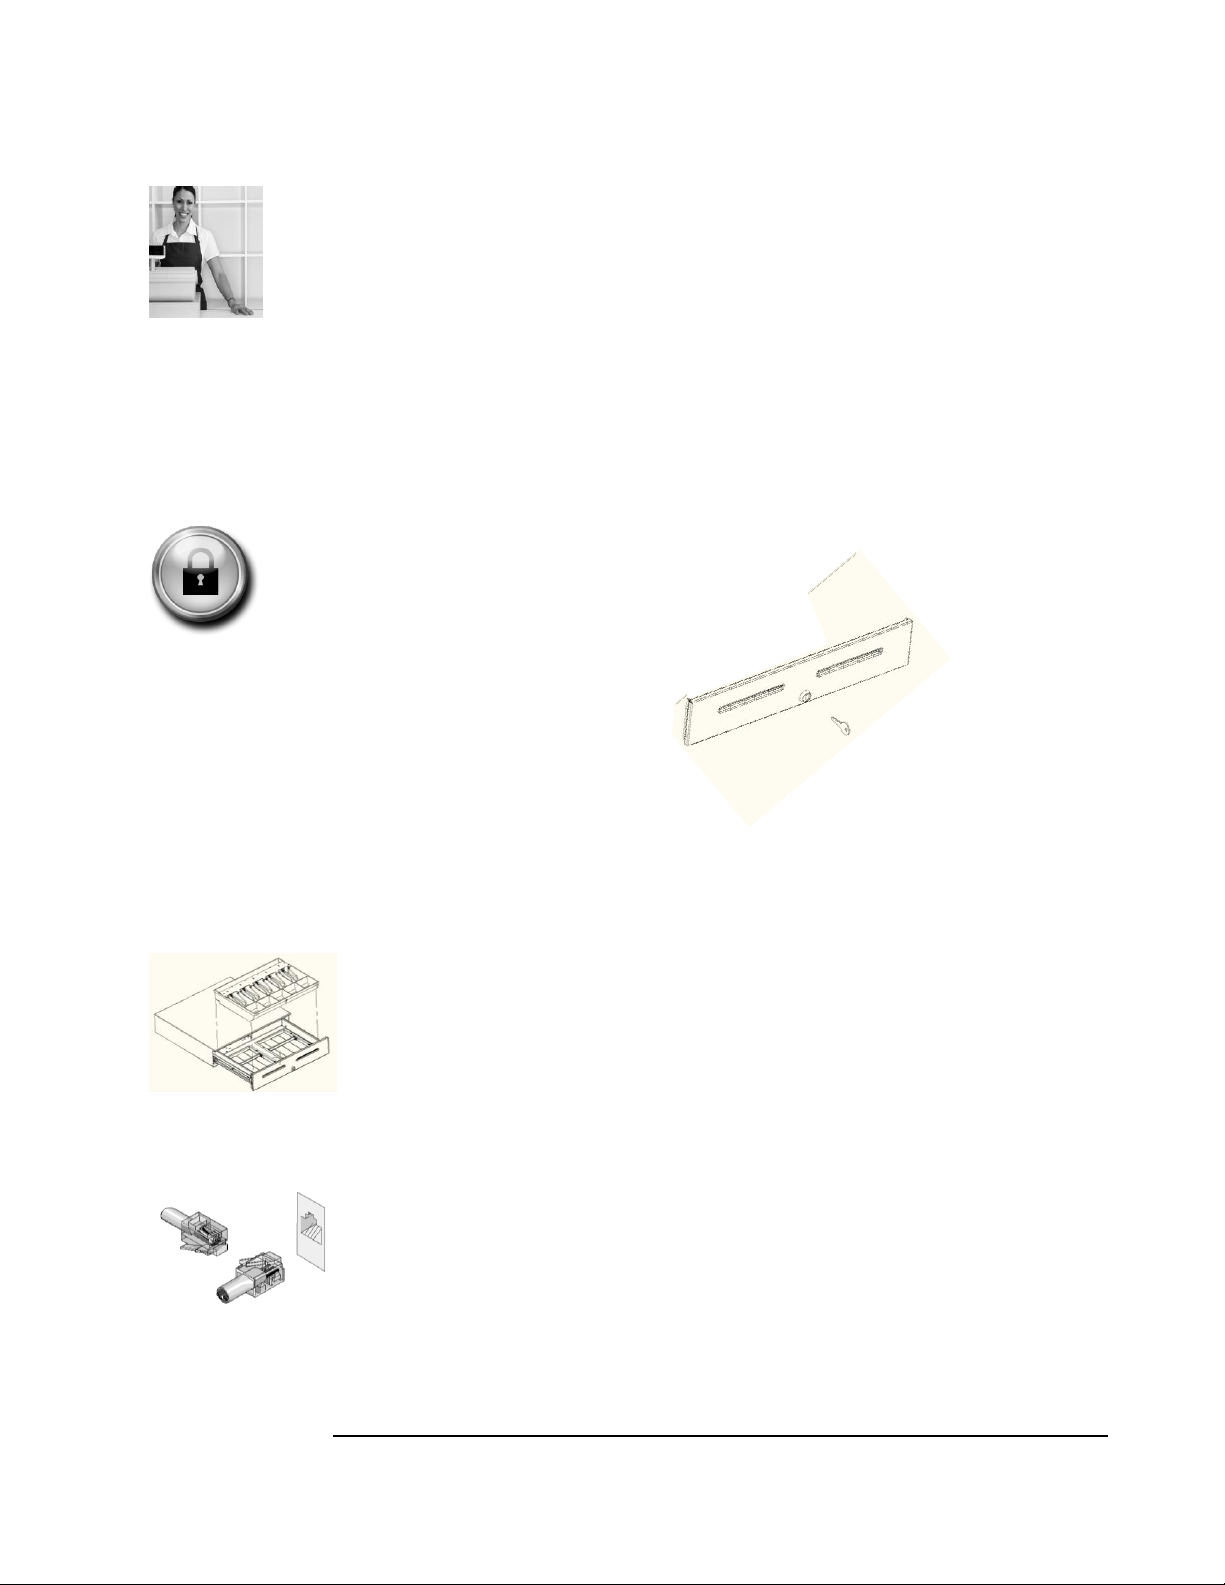
Till Cover (P/N: 225-1400-04)
Placed on top of till and locked with a separate set of keys, the till cover protects the content inside the till
when till is away from the cash drawer.
Position till cover in a 45° Angle and align with the back opening of the till.
Bring cover down and rotate key to the left to lock the cover in place.
Under-Counter Mounting Bracket
(P/N: 225-1430-04)
The Under-Counter Mounting Brackets secure the cash drawer in place when installed underneath counter
top displays.
Mount the two (2) brackets provided under the counter where you wish to place the cash
drawer leaving enough room for the 18” wide cash drawer (Approximately 18 ¼” of space).
Remove feet from under the cash drawer unit
Glide cash drawer in between the brackets and secure in place by using the set of screws
provided
Other Parts/Accessories:
Replacement Till - P/N: 225-1435-04
Media Storage Trays - P/N: 225-1431-04
Media Storage Tray Dividers - P/N: 225-1432-04
Bill Weight w/Spring - P/N: 225-1433-04
Rubber Feet - P/N: 225-1434-04
Replacement Lock with two (2) keys (random) - P/N: 635-2530-00
VAL-u LinePLUS User Manual
Last Revision 7/6/2010
Page 5

4
For replacement parts and/or
accessories, contact your supplier
or visit our website at
http://www.mmfpos.com
If you experience resistance on the
slide bearings as you close the drawer
make sure the slides are fully engaged
and properly lubricated.
Lock Cam
Lock Rod
Replacement / Removal of components
Inner Drawer Removal
Open the cash drawer and remove the currency tray.
Place both hands on the front sides of the inner
drawer and lift the cash drawer up (Approximately 1/4"). Pull
the inner drawer all the way out of the cabinet.
Inner Drawer Replacement
Pull the inner drawer’s ball bearing slides back as far as
possible; unite and align the side rails mounted to the inner
drawer with the side rails mounted on the cash drawer
housing walls.
Push the inner drawer to the closed position.
When the inner drawer is fully in the closed position, open it and close it a few times to
Lock Removal
Lift the drawer up (Approximately 1/4") just before it touches the top, and then
drive the drawer into the cash drawer housing until its in place.
verify proper functionality. Then, re-insert currency tray inside cash drawer.
Remove the inner drawer as directed above. Flip Inner drawer over.
Rotate lock cam until screw on top is showing. Unscrew it to disengage
from lock rod. Pull lock cam and remove lock assembly.
Lock Replacement
Connect new lock cam to lock rod by orienting the lock rod to the side
opening of the lock as illustrated.
Place the new lock cam in place behind the inner drawer’s front panel.
Place the new lock assembly through the lock opening in the front panel
of the inner drawer and attach to lock rod by pressing the lock cam into
the lock assembly.
VAL-u LinePLUS User Manual
Last Revision 7/6/2010
Page 6

5
Cash Drawer Maintenance
Troubleshooting:
Cash Drawer does not open electronically
The VAL-
requires the POS application to send the proper opening codes to the printer,
which will then send the signal to open the Cash Drawer. Consult the
documentation or manuals for your particular printer for the proper open codes.
Verify the correct end of the RJ-12 printer cable is connected to the cash drawer as
well as the printer.
Verify correct position of the lock. To open electronically the lock would need to
be in the 12 o’clock position.
Cash Drawer does not open manually or electronically
Make sure all packing tapes were removed from the cash tray and that no foreign
objects are obstructing the cash tray from opening.
Preventive Maintenance:
Remove any debris from slides, if present
The cash drawer should be inspected, cleaned and lubricated more frequently during
heavy use.
u
LinePLUS connects directly to a receipt printer. This connection
Lubricate the slides and latch mechanism periodically. Inspection and lubrication will
vary based on operating conditions. A thin film of lithium-based grease or a few drops
of general purpose oil should be maintained on the ball bearing tracks of the slides.
Warnings/Safety Instructions:
Avoid breaking coin rolls on the drawer front or the currency tray.
Do not clean roller bearings or slides with any water or substance cleaners; use a lint-
free fabric to wipe old grease and/or debris.
Support:
Please visit www.mmfpos.com for FREE Technical Support or call 1-800-769-1954.
VAL-u LinePLUS User Manual
Last Revision 7/6/2010
Page 7

6
Warranty - Detailed Terms and Conditions
MMF POS company warrants that its VAL-u LinePLUS cash drawers will be free
of defects in material or workmanship for 2 years from the date of manufacture
under normal use and service. From the date of manufacture through the applicable
warranty period, MMF POS Company will repair or replace, at its option, any cash
drawer or cash drawer component found defective during the warranty period,
subject to the conditions and exclusions specified herein.
CONDITIONS TO WARRANTY SERVICE
For warranty service, the following requirements must be met:
Call MMF POS Company (1-800-769-1954) for instructions prior to returning equipment.
A Serial Number, Part Number, and description of the equipment defect(s) or operational
problem(s) is required by MMF POS Company for issuance of a returned goods
authorization (RGA) number to expedite handling and repair.
All warranty inspections and repairs shall be performed by MMF POS Company.
EXCLUSIONS FROM THE WARRANTY
This warranty does not cover the specific items and/or conditions described below:
Equipment which has been abused or damaged due to:
Accident, misuse, abuse, fire, flood, or other contingencies beyond the control of MMF
POS Company.
Use of incorrect line or input control voltages.
Failure to follow MMF POS Company operating instructions.
Improper or unauthorized repairs.
Equipment which has been subject to repairs not made by MMF POS Company.
Any unit which has had its serial number altered, defaced or removed.
Modification of unit electronically or manually will invalidate warranty.
There are no warranties, expressed or implied, except the warranty that is expressly set forth on the face hereof. The
obligation of MMF POS Company shall be limited to replacement or repairs as set forth above. MMF POS Company
shall not be liable for incidental or consequential loss or damage arising out of or in connection with use or
performance of the equipment.
VAL-u LinePLUS User Manual
Last Revision 7/6/2010
 Loading...