

SHB2505


blue
blue
Please note that the right earpiece
is the “Master device” and the left
Earpiece is the “Slave” device.
Before the rst time use, put them
into charging case to fully charge
for 3 hours.
Take both earpieces from the
charging case, the earpiece will
power on automatically. There
will be a voice “Power on” and a
3
voice “Pairing”. Then, there will
be a voice“ R channel” on right
earpiece and “L Channel” on left
earpiece after paring each other.
There will be a voice “Connected”
from Right Channel. Then, the
master devices ( the right earpieces )
The LED on Right earpiece ashes
in white and blue for 3 mins.
The LED on Right earpiece ashes
in white and blue for 3 mins.
There will be a voice “Connected”
from both earpieces. You can use
your device to play music or make
a call.
Single earbud pairing
( Mono mode)
Take the right earpiece ("Master
device" ) from the charging case, the
earpiece will power on automatically.
There will be a voice ”Power on” and
a voice “ Pairing". Then, there will be
a voice” R channel” on right earpiece.
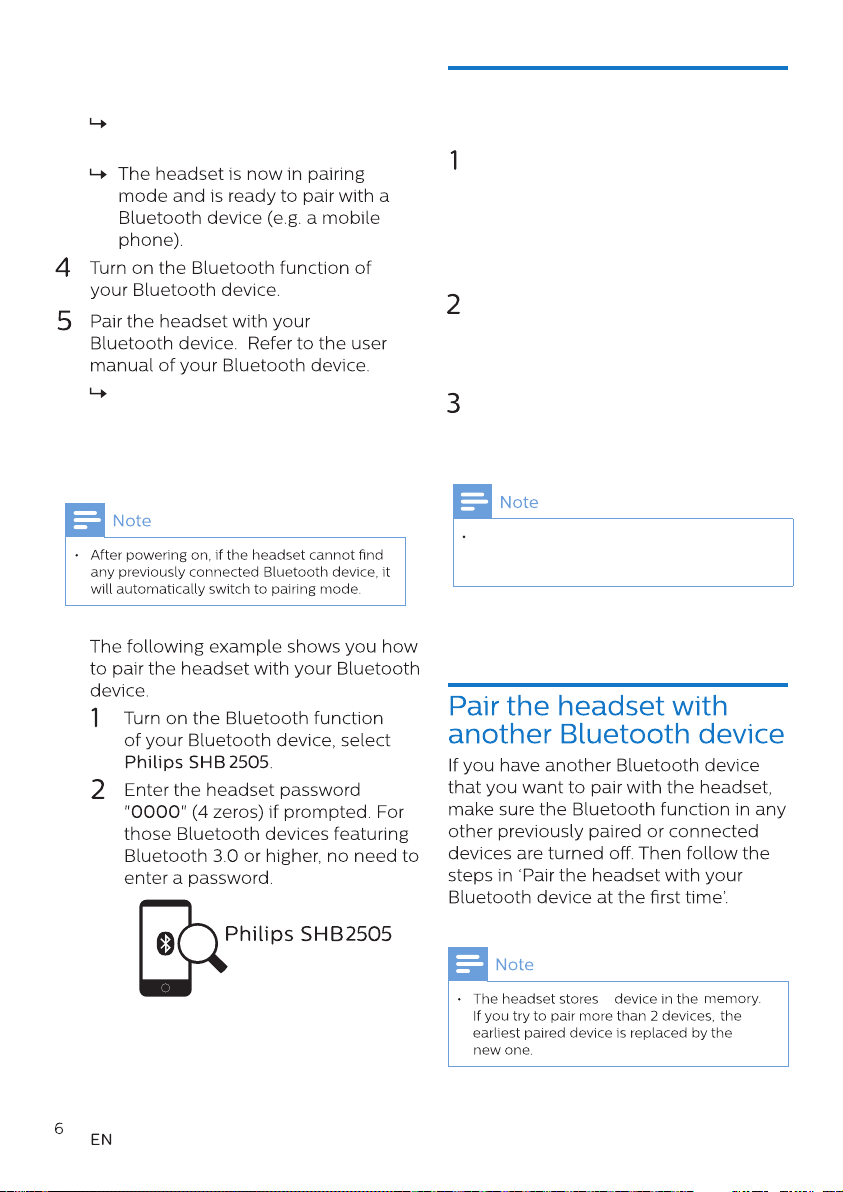
Turn on the Bluetooth function on
your device, search for" Philips
SHB2505” tap to connect. ( Please
refer to P.6 )
Once the pairing succeed, you will
hear a voice" connected" And the
indicator light will be o.
Only Turn the “Left earpiece channel power on,
it cannot connect to Bluetooth device, need to
turn on “R Channel” to pair each other.
1

Take both earpieces from the charging
case, the earpiece will power on and
reconnect automatically.
If no device is connected, the
earpieces will automatically turn o
after 3 mins
Take both
earpieces
from the
charging
case, the
earpiece
will power
on and
reconnect
automatically
5
3 times.
/Left
3
and
hold 2
seconds
Left
and
hold 2
seconds

/Left
/Left
white
will ashe 2 times
per 3 mins
2
/Left
/Left
white
2
once.
and white
Battery LED indicator on
headset status
It will show a battery indicator on
Bluetooth device after connected to
headset.
Battery LED indicator on
Charging case
While charging earbud, Blue LED will
light on
One LED will light on for 0-25% power
Two LED will light on for 25-50% power
Three LED will light on for 50-75% power
Four LED will light on for 75-100% power
will
and white
3
Battery LED indicator
on Charging case with
USB cable
While charging earbud, Blue LED
will light on
One LED will ash per second for
0-25% power
Two LED will ash per second for
25-50% power
Three LED will ash per second for
50-75% power
Four LED will ash per second for
75-100% power
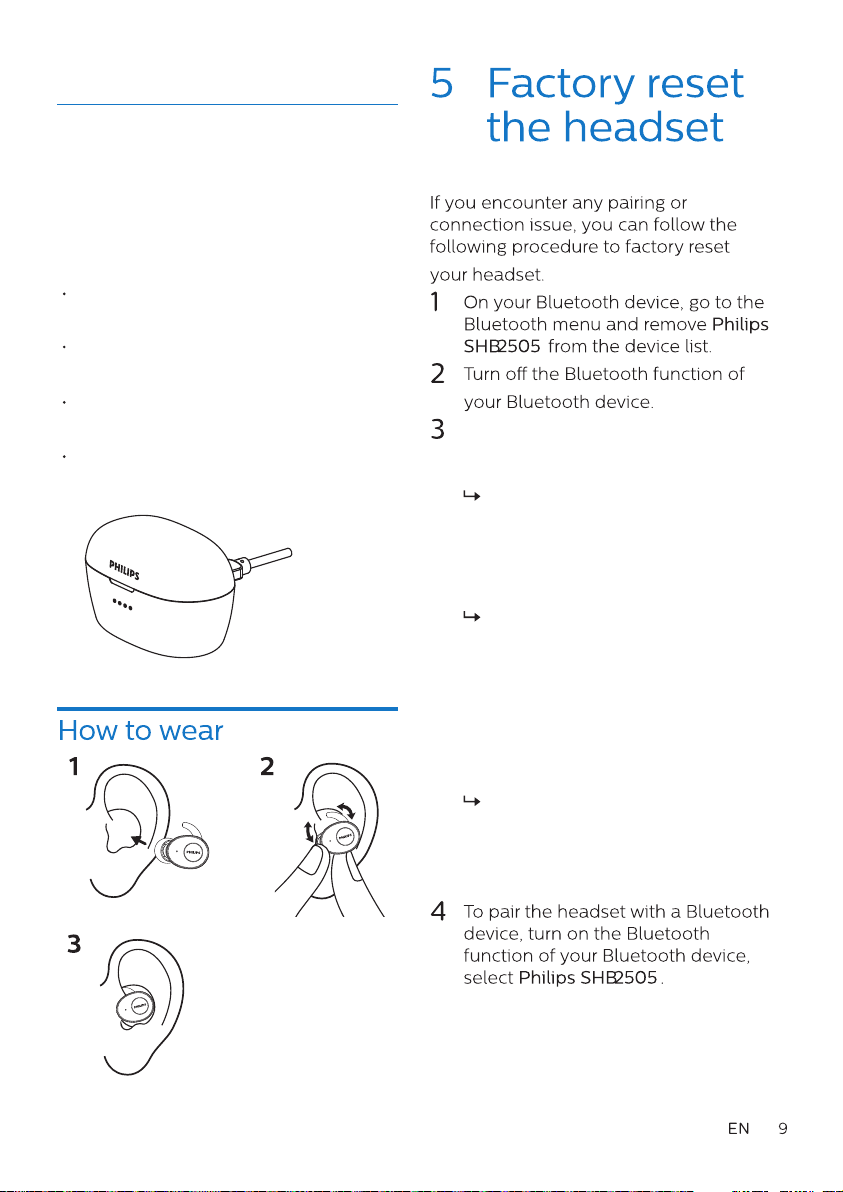
Put both earpieces back to charging
case. Hold and press left & right
earpieces function button for 5 seconds.
Take both earpieces from the
charging case, the earpiece will
power on automatically.
There will be a voice “Power on”
and a voice “ Pairing”.
Then, there will be a voice“ R
channel” on right earpiece and
“L Channel” on left earpiece
after paring each other. The LED
on Right earpiece ashes in
white and blue for 3 mins.
There will be a voice “Connected”
from Right Channel.
Then, the master devices ( the right
earpieces ) The LED on Right
earpiece ashes in white and
blue for 3 mins.

3
3
60
5.0
, AAC


and Left
put both earpieces
back to charging case for 5
seconds and thak them out.
put both earpieces back to
charging case for 5 seconds and
thak them out.

NOTE: This equipment has been tested and found to comply with the limits for a
Class B digital device, pursuant to part 15 of the FCC Rules. These limits are
designed to provide reasonable protection against harmful interference in a
residential installation. This equipment generates uses and can radiate radio
frequency energy and, if not installed and used in accordance with the instructions,
may cause harmful interference to radio communications. However, there is no
guarantee that interference will not occur in a particular installation. If this
equipment does cause harmful interference to radio or television reception, which
can be determined by turning the equipment off and on, the user is encouraged to
try to correct the interference by one or more of the following measures:
- Reorient or relocate the receiving antenna.
- Increase the separation between the equipment and receiver.
-Connect the equipment into an outlet on a circuit different from that to which the
receiver is connected.
-Consult the dealer or an experienced radio/TV technician for help
Changes or modifications not expressly approved by the party responsible for compliance
could void the user's authority to operate the equipment.
This device complies with Part
15 of the FCC Rules. Operation is subject to the following two conditions:
(1) this device may not cause harmful interference, and
(2) this device must accept any interference received, including interference that may
cause undesired operation.

 Loading...