

MKN HLEFRIL2-HU, OPEFRIL2-HU, HLEFRIPS-HU, OPEFRIPS-HU, O7EFRIPS-HU Operating Instructions Manual
...Page 1
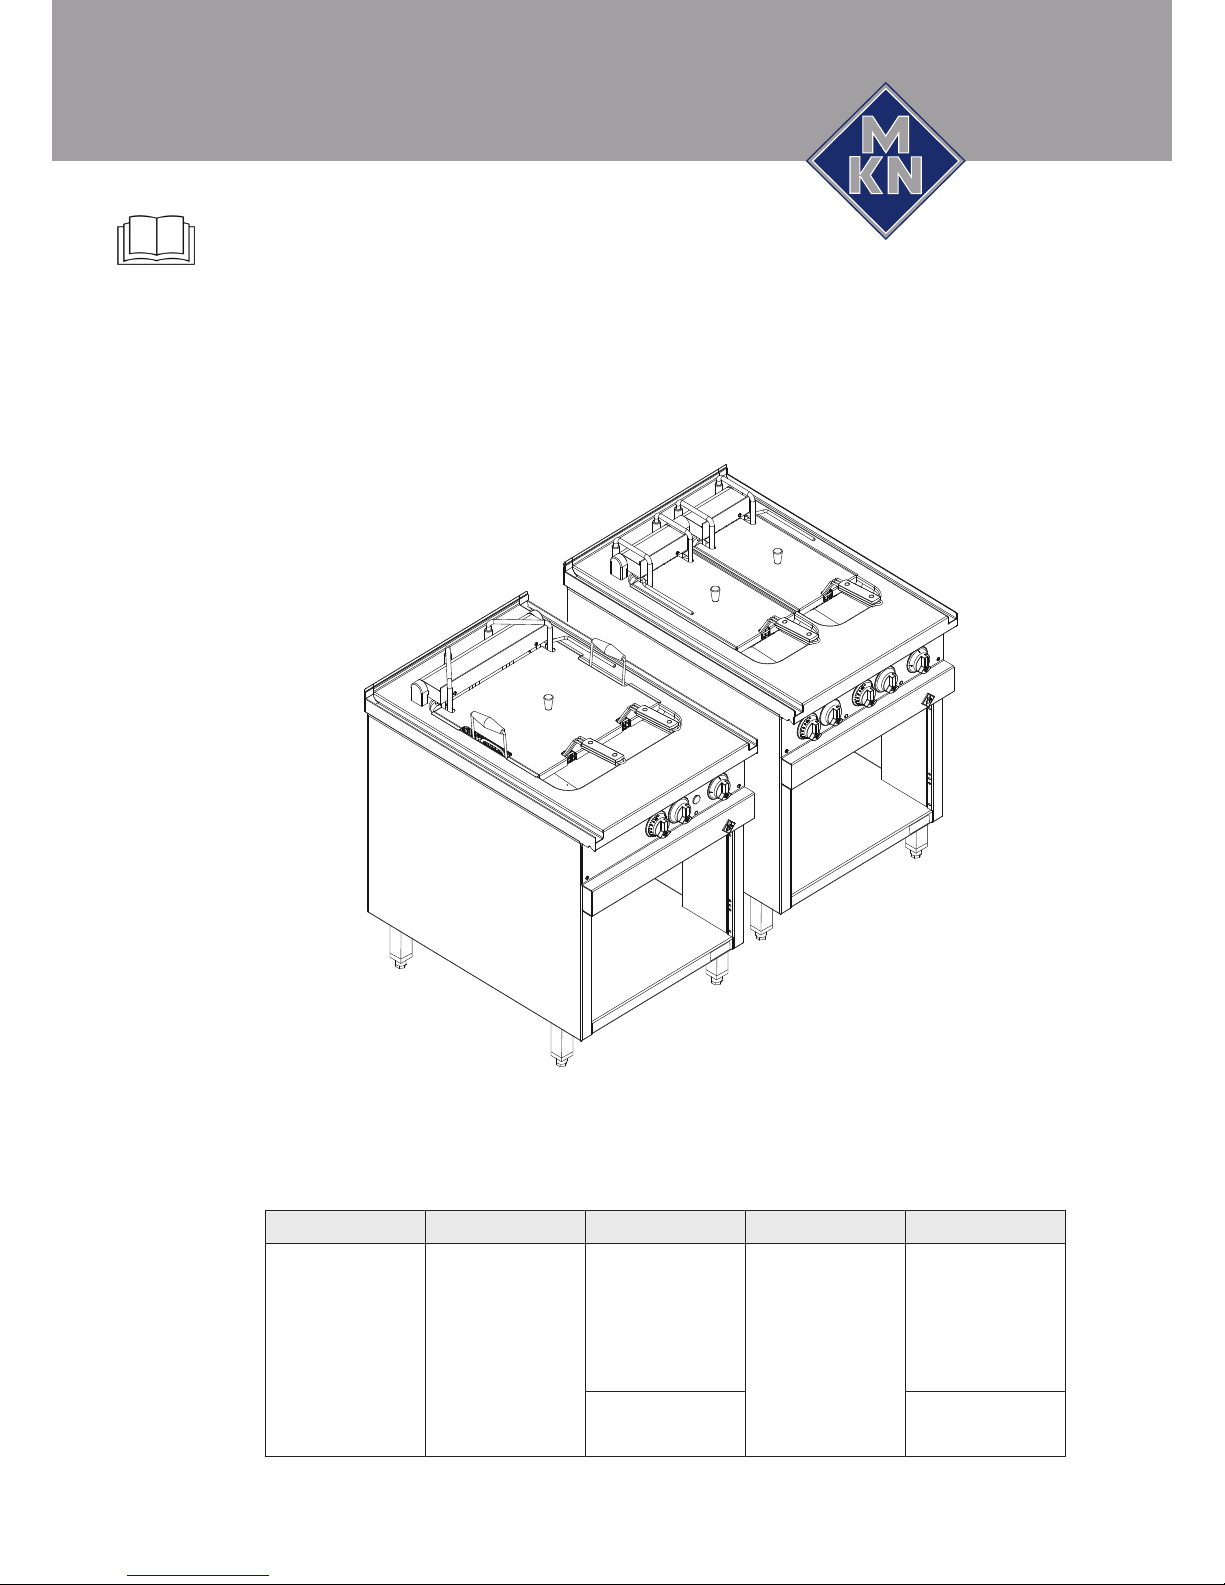
Operating instructions
Deep-fat fryer
Unit Type of energy Unit type Version Model
London 2
Paris
Electric Floor-standing
unit
Lift mechanism OPEFRIL2-HU
O7EFRIL2-HU
HLEFRIL2-HU
OPEFRIPS-HU
O7EFRIPS-HU
HLEFRIPS-HU
Countertop unit SLEFRIL2-HU
SLEFRIPS-HU
Translation from the original document • 2020325A21ABDE-A • 27/03/2017
2020325A21ABBE-A en-GB
Read the operating instructions prior to
commissioning
Page 2

Operating and display elements
n
i
m
2
1
5
3
1
4
4
1
3
5
1
2
6
1
1
7
1
0
8
9
abcd
Image: Operating and display elements for Paris lifting deep-fat fryer
a
On/Off
control knob c
Temperature
control knob
b
Heating
indicator light d
Time
control knob
n
i
m
2
1
5
3
1
4
4
1
3
5
1
2
6
1
1
7
1
0
8
9
abcd
n
i
m
2
1
5
3
1
4
4
1
3
5
1
2
6
1
1
7
1
0
8
9
b
c
d
Image: Operating and display elements for London 2 lifting deep-fat fryer
a
On/Off
control knob c
Temperature
control knob
b
Heating
indicator light d
Time
control knob
2020325A21ABBE-A
2 Operating instructions
Page 3

Manufacturer
MKN Maschinenfabrik Kurt Neubauer GmbH & Co. KG
Halberstädter Strasse 2a
38300 Wolfenbüttel
Germany
Phone +49 5331 89-0
Fax +49 5331 89-280
Internet www.mkn.eu
Copyright
All rights to text, graphics and pictures in this documentation are held by MKN Maschinenfabrik Kurt
Neubauer GmbH & Co. KG. Distribution or duplication is only permitted with the prior written consent
of MKN.
Copyright by MKN Maschinenfabrik Kurt Neubauer GmbH & Co. KG.
3Operating instructions
Page 4

Directory of contents
4 Operating instructions
1Introduction......................................................................... 7
1.1About this manual ............................................................................ 7
1.1.1Explanation of signs .................................................................................. 8
1.2Intended use ..................................................................................... 9
1.3Guarantee, warranty and liability.................................................... 9
2Safety information............................................................ 10
3Description of the unit ..................................................... 13
3.1Overview of the unit ....................................................................... 13
3.2Function of the operating and display elements......................... 14
3.3Application...................................................................................... 15
3.3.1Fill quantity .............................................................................................. 15
3.3.2Operating temperature ............................................................................ 15
4Operating the unit............................................................. 16
4.1Tips for use ..................................................................................... 16
4.2Switching the unit on and off ........................................................ 16
4.2.1Switching on ............................................................................................ 16
4.2.2Switching off ............................................................................................ 16
4.3Removing the lifting arm and putting it on .................................. 16
4.3.1Removing the lifting arm.......................................................................... 17
4.3.2Putting on the lifting arm.......................................................................... 17
4.4Swinging the heating element in and out..................................... 17
4.4.1Swinging the heating element out ........................................................... 18
4.4.2Swinging the heating element in ............................................................. 18
4.5Basic functions............................................................................... 18
4.5.1Setting the cooking temperature ............................................................. 18
4.5.2Setting the cooking time .......................................................................... 18
4.5.3Starting the deep-frying cooking mode.................................................... 19
4.5.4Ending the deep-frying cooking mode..................................................... 19
4.6Pausing and end of use ................................................................. 20
4.6.1Short pause ............................................................................................. 20
4.6.2Longer pauses and end of use................................................................ 20
4.7Handling deep-frying oil ................................................................ 20
4.7.1Ensuring that the oil is fit for human consumption................................... 22
4.8Filling the unit with deep-frying oil............................................... 23
4.8.1Gently heating up deep-frying oil............................................................. 23
4.9Deep-frying ..................................................................................... 24
4.10Emptying out the deep-frying oil ................................................ 25
5Cleaning and caring for the unit ..................................... 26
5.1Preventing corrosion ..................................................................... 26
5.2Removing rust spots...................................................................... 26
5.3Cleaning the housing..................................................................... 26
2020325A21ABBE-A
Page 5

Directory of contents
5Operating instructions
5.4Cleaning the heating element ....................................................... 27
5.5Cleaning the deep-frying tank....................................................... 27
5.6Cleaning the drain .......................................................................... 28
6Troubleshooting ............................................................... 29
6.1Cause of failure and the remedy................................................... 29
6.2Nameplate ....................................................................................... 30
7Carrying out maintenance ............................................... 31
8Dispose of unit in an environmentally responsible
manner ................................................................................. 32
9Manufacturer's declaration.............................................. 33
2020325A21ABBE-A
Page 6

Directory of contents
6 Operating instructions
2020325A21ABBE-A
Page 7

Introduction
7Operating instructions
1 Introduction
1.1 About this manual
The operating instructions are part of the unit and contain information:
• On safe operation,
• On cleaning and care,
• On remedies in case of faults.
Be aware of the following notes and adhere to them:
• Read the operating instructions completely before operating the
unit for the first time.
• Make the operating instructions available to the operator at all
times at the operating site of the unit.
• Insert any supplements from the manufacturer.
• Keep the operating instructions throughout the service life of the
unit.
• Pass on the operating instructions to any subsequent operator of
the unit.
Target group The target group of the instruction manual is the operator, who is
entrusted with the operation, cleaning and care of the unit.
Figures All figures in this manual are intended as examples. Discrepancies
between these and the actual unit can arise.
2020325A21ABBE-A
Page 8
Introduction
8 Operating instructions
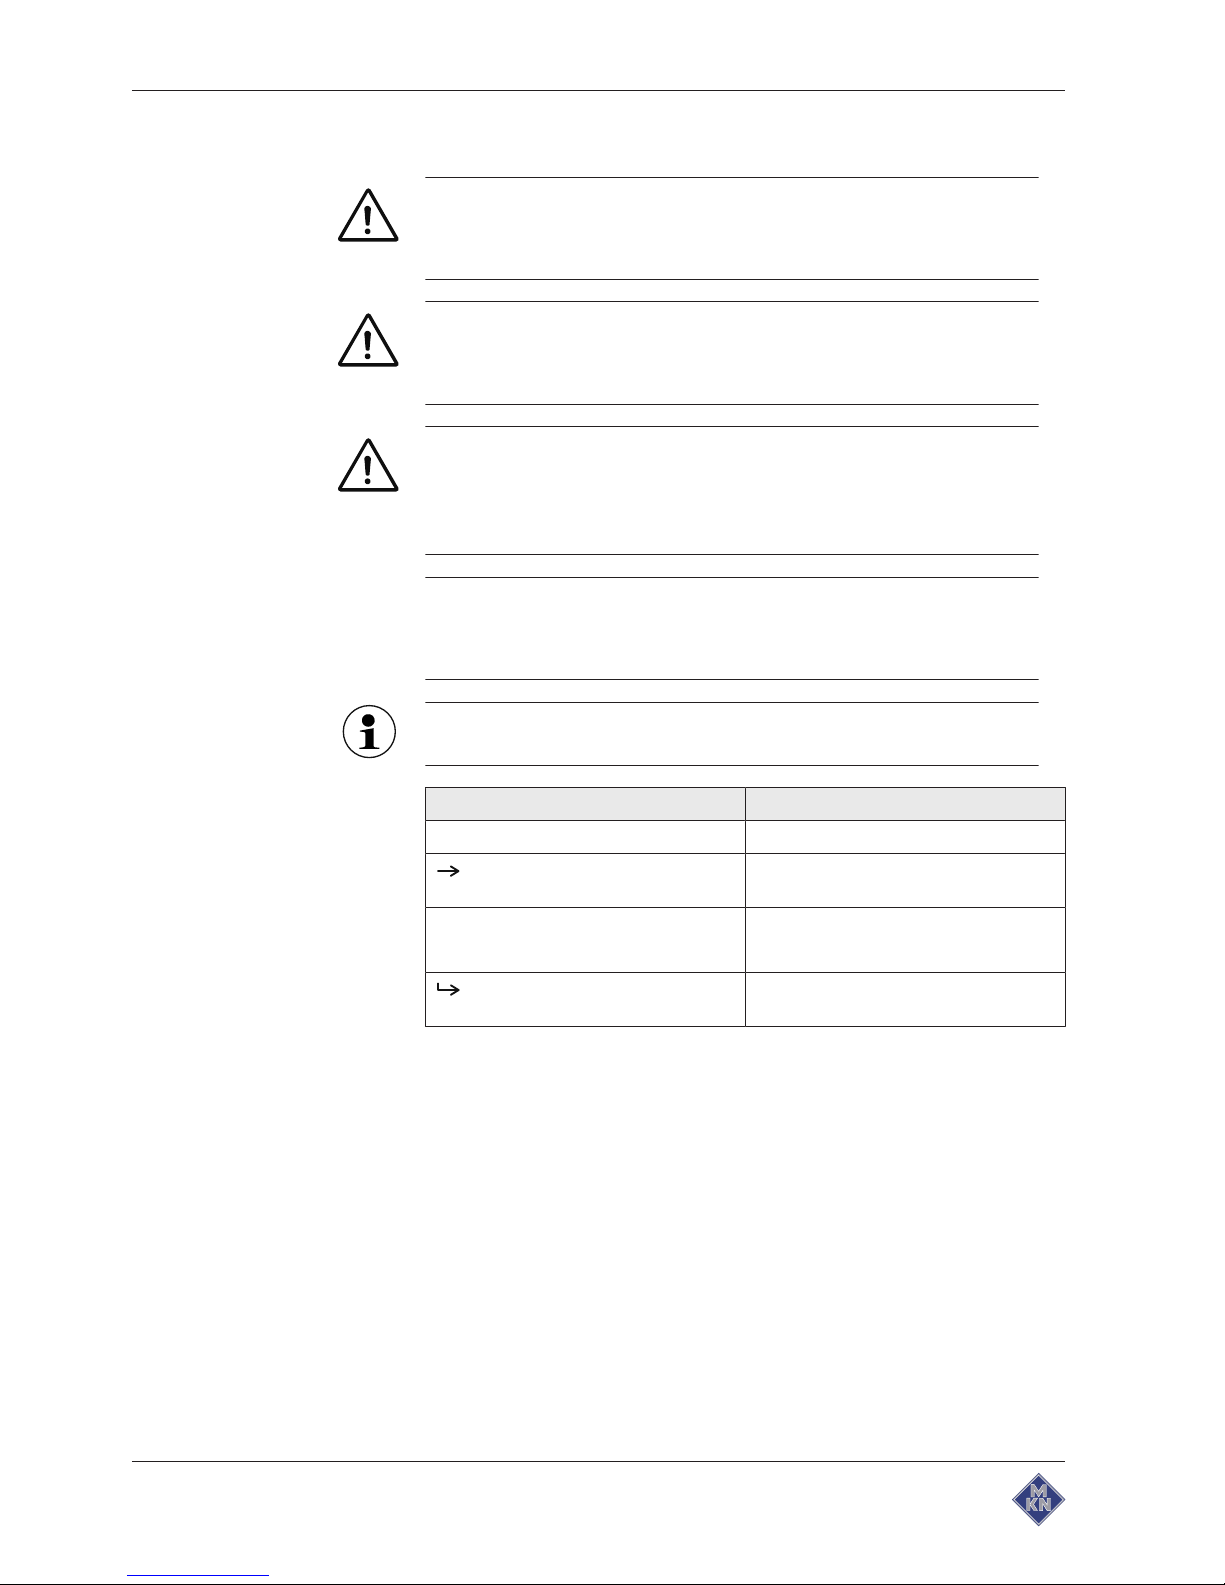
1.1.1 Explanation of signs
DANGER
Imminent threat of danger
Failure to comply will lead to death or very severe injuries.
WARNING
Possible threat of danger
Failure to comply can lead to death or very severe injuries.
CAUTION
Dangerous situation
Failure to comply can lead to slight or moderately severe
injuries.
ATTENTION
Physical damage
Failure to comply can cause physical damage.
Notes for better understanding and operation of the unit.
Symbol / sign Meaning
• Listing of information.
Action steps, which can be performed
in any sequence.
1.
2.
Action steps, which must be performed
in the specified sequence.
Result of an action performed or
additional information about it.
2020325A21ABBE-A
Page 9

Introduction
9Operating instructions
1.2 Intended use
This unit is intended to be used solely for commercial purposes,
particularly in commercial kitchens.
This unit may only be used with suitable accessories and for the
cooking of food.
It is forbidden to use the unit for purposes, which include the
following:
• Drying cloths, paper or dishes
• Heating rooms
• Heating acids, alkaline solutions or other chemicals
• Heating flammable liquids
• Heating of closed containers (for example preserves)
The use of the unit is prohibited in the following countries:
• USA
• Canada
1.3 Guarantee, warranty and liability
The warranty is void and safety is no longer assured in the event of:
• Improper conversion or technical modifications of the unit,
• Improper use,
• Incorrect startup, operation or maintenance of the unit,
• Problems resulting from failure to observe these instructions.
2020325A21ABBE-A
Page 10

Safety information
10 Operating instructions
2 Safety information
The unit complies with applicable safety standards. Residual risks
associated with operation or risks resulting from incorrect operation
cannot be ruled out and are mentioned specifically in the safety
instructions and warnings.
The operator must be familiar with regional regulations and observe
them.
Operation Individual below 16 years of age are not allowed to operate the unit.
During operation, the following group of individuals must be
supervised by an individual who is responsible for safety:
• Individuals with physical, sensory, or mental handicaps, or who
lack the knowledge and experience to operate the unit properly.
The supervising individual must be familiar with the unit and the risks
associated with it.
Hot surfaces Risk of burns from hot surfaces
• Protect arms and hands by wearing suitable protective gloves.
• Do not touch heating elements, hot surfaces or accessories
immediately after use.
• Allow surfaces to cool prior to cleaning.
Hot liquids Risk of burns from hot liquids
• Protect arms and hands by wearing suitable protective gloves.
• Remove, transport and empty baskets carefully.
• Observe the maximum filling quantity.
• Open the drain carefully and empty the unit.
Risk of scalding from hot oil
• Protect arms and hands by wearing suitable protective gloves.
• Prior to deep frying, remove excess ice from frozen foods to be
cooked.
• Prior to deep frying, dry wet foods to be cooked.
Risk of chemical burns from evaporating cleaners
• Follow the instructions of the cleaning agent manufacturer.
Risk of burns from steam
• Protect arms and hands by wearing protective gloves.
• Open the drain carefully and empty the unit.
• Dry unit completely after cleaning it.
2020325A21ABBE-A
Page 11

Safety information
11Operating instructions
Defective unit Risk of injury from a defective unit
• Disconnect a defective unit from the electric mains.
• Do not operate a defective unit.
• Allow only an authorized technician to repair the unit.
Fire prevention Risk of fire from dirt and grease deposits
• Clean the unit when finished using it.
• When the oil starts to become rancid, replace the deep-frying oil
completely; do not add oil.
Risk of fire from overheating
• Observe the unit during operation.
• Observe the maximum filling quantity.
• Observe the minimum filling quantity.
Firefighting
• In the event of a fire, disconnect the unit from the electric mains.
• Use a Fire Class F fire extinguisher, never water, to extinguish
grease fires. Other fires, for instance, can be extinguished with fire
extinguishers suitable for Fire Classes A, B, C, CO2 fire
extinguishers or extinguishing media suitable for the fire class
confronted.
Unit on casters Risk of injury from a unit on casters
• Attach units with a wall side narrower than 600mm to the wall at
the installation site.
• Move the unit only for cleaning or maintenance.
• Lock casters during operation.
• Only move an empty unit.
Risk of a line breaking if subjected to high tensile load
• Secure the unit with a chain as a strain relief for the power
connection at the installation site so that no tensile load is applied
to the power connection if the unit is moved.
Improper cleaning Risk of chemical burns from cleaning agent
• Follow the instructions of the cleaning agent manufacturer.
• Take appropriate protective measures when handling aggressive
cleaning agents.
Risk of falling on smooth floors
• Keep the floor in front of the unit clean and dry.
2020325A21ABBE-A
Page 12

Safety information
12 Operating instructions
Risk of physical damage from improper cleaning
• Clean the unit after using it.
• Do not clean the unit with a high-pressure cleaner.
• Do not clean the housing with highly abrasive or chemically
aggressive cleaning agents.
• Do not clean the housing with highly abrasive sponges.
• Follow the instructions of the cleaning agent manufacturer.
• Do not cool shock the unit by cooling it abruptly.
• Do not immerse the housing in water.
Hygiene Hygiene risk from rancid oil
• When the oil starts to become rancid, replace the deep-frying oil
completely; do not add oil.
Health risk from insufficient hygiene
• Observe applicable regional hygiene regulations.
• Follow the cleaning instructions.
Improper use Risk of physical damage from improper use
• Do not operate the unit outdoors.
• Use only original accessories.
• Train operators regularly.
• Do not heat food warmer plates or tins of preserved food.
• Observe the unit during operation.
• Do not melt solid deep-frying oil in the deep-frying pan.
• Use only commercially available deep-frying oils when operating
the unit.
2020325A21ABBE-A
Page 13

Description of the unit
13Operating instructions
3 Description of the unit
The unit is intended for universal use in commercial kitchens for
cooking food. The unit may only be used for deep-frying starch- and
protein-containing food with suitable deep-frying oils.
3.1 Overview of the unit
d
c
b
a
e
f
g
h
i
Image: Paris floor-standing deep-fat fryer with lift mechanism
a Lifting arm f London 1 deep-frying basket
b Swivel mechanism housing g Control panel
c Paris deep-frying basket h Drain
d Equipment leg i Nameplate
e Swivel mechanism control lever
2020325A21ABBE-A
Page 14

Description of the unit
14 Operating instructions
d
c
b
a
e
f
g
h
i
Image: London 2 floor-standing deep-fat fryer with lift mechanism
a Lifting arm f London 1 deep-frying basket
b Swivel mechanism housing g Control panel
c Swivel mechanism control lever h Drain
d Equipment leg i Nameplate
e Lid
3.2 Function of the operating and display elements
Operating/display element Symbol Designation Function
On/Off
control knob 0 Off Switching off the unit
1 On Switching on the unit
Temperature
control knob Off Heating element off
100 – 185°C Temperature Setting the heating element; adjustable
temperature
Time
control knob Off Timer off
2 — 15min Time Adjustable time
Heating
indicator light Illuminates, if the heating element is active
2020325A21ABBE-A
Page 15

Description of the unit
15Operating instructions
3.3 Application
3.3.1 Fill quantity
Unit Fill quantity of food to
be cooked (kg)
Fill quantity of oil (l)
Maximum Minimum / Maximum
Paris 1 x 2.5 1 x 15 / 1 x 30
London 2 2 x 1.2 2 x 6.5 / 2 x 12.5
3.3.2 Operating temperature
Quantity Temperature
Small to medium quantity 150°C
Large quantity 160 – 180°C
Recommended cooking temperature and cooking time
Food to be cooked Cooking temperature
(°C)
Cooking time (minutes)
Doughnuts 170 3 — 4
Cauliflower 170 2 — 3
Fish fillet 170 2 — 6
Trout 160 2 — 4
Chicken, portioned 170 3 — 8
Quick-frying food 170 2 — 4
Chips, pre-blanched and
deep-frozen
180 3 — 5
Chips, pre-blanched and
defrosted
180 2 — 3
Fried pastries 180 2 — 3
Onion rings 170 1 — 3
2020325A21ABBE-A
Page 16

Operating the unit
16 Operating instructions
4 Operating the unit
4.1 Tips for use
In order to use the unit to its optimum and avoid heat loss:
• Reduce the temperature during brief pauses.
• Put the lid on during brief pauses.
• Unit with several deep-frying tanks: Switch off heat zones that are
not required.
4.2 Switching the unit on and off
4.2.1 Switching on
Turn the
On Off
control knob to "1".
The unit is now on.
4.2.2 Switching off
ATTENTION
Risk of physical damage from switching off improperly
If there is a power failure or the unit is switched off by a main
switch, it does not switch off automatically. When the power
supply is switched on again, the unit is still on.
• Make sure that the unit is switched off, when the power
supply is switched on again.
Turn the
On Off
control knob to "0".
The unit is now off.
4.3 Removing the lifting arm and putting it on
a
b
Image: Lifting arm
a Lifting arm
b Lifting cylinder
2020325A21ABBE-A
Page 17

Operating the unit
17Operating instructions
4.3.1 Removing the lifting arm
Requirements Unit switched off
Deep-frying tank emptied
Heating element swung into the deep-frying tank
Deep-frying basket unhooked and removed from the deep-frying tank
Remove the lifting arm from the lifting cylinder.
4.3.2 Putting on the lifting arm
Requirements Unit switched off
Deep-frying tank emptied
Heating element swung into the deep-frying tank
Put the lifting arm onto the lifting cylinder.
4.4 Swinging the heating element in and out
CAUTION
Risk of burns from hot surfaces
• Protect arms and hands by wearing suitable protective
gloves.
A B
a
b
c
d
Image: Heating element, A) Slightly swung, B) Swung out and secured
a Swivel mechanism control lever c Heating element holder
b Heating element d Catch for the heating element
holder
2020325A21ABBE-A
Page 18

Operating the unit
18 Operating instructions
4.4.1 Swinging the heating element out
Requirements Unit has cooled down
Deep-frying tank emptied
1. Press the
Swivel mechanism
control lever upwards.
The heating element holder is supported on the edge of the
deep-frying tank.
The heating element holder engages behind the catch.
Heating element swung out and secured.
4.4.2 Swinging the heating element in
Requirements Unit has cooled down
Deep-frying tank emptied
1. Press the
Swivel mechanism
control lever slightly upwards.
The load on the heating element holder is relieved.
2. Guide the heating element holder carefully over the catch.
The heating element holder is in contact with the rear of the
deep-frying tank.
3. Using the
Swivel mechanism
control lever, swing the heating
element into the deep-frying tank.
4.5 Basic functions
4.5.1 Setting the cooking temperature
Set the
temperature
control knob to the desired temperature.
The
heating
indicator light illuminates.
The
heating
indicator light goes out when the set temperature is
reached.
4.5.2 Setting the cooking time
Requirement The unit is on
Cooking temperature set
Set the
Time
control knob to the desired cooking time.
The cooking time is set.
2020325A21ABBE-A
Page 19

Operating the unit
19Operating instructions
4.5.3 Starting the deep-frying cooking mode
CAUTION
Risk of injury from deep-frying oil foaming over
• Protect arms and hands by wearing suitable protective
gloves.
• Briefly defrost and dry any frozen food to be cooked.
• Dry wet food to be cooked.
• Do not exceed the maximum fill quantity for the food being
cooked.
Requirements Drain closed
Filled with deep-frying oil
The unit is on
1. Put the lifting arm onto the lifting cylinder.
2. Hook the deep-frying basket onto the lifting arm.
3. Load the food to be cooked into the deep-frying basket.
Do not exceed the maximum fill quantity for the deep-frying
baskets.
4. Set the cooking temperature.
The Heating indicator light goes out, after the cooking
temperature has been reached.
5. Set the cooking time.
6. Press the Time control knob and start the the deep-frying cooking
mode.
The deep-frying basket is lowered into the deep-frying tank.
An audible signal sounds, after the cooking time has expired.
The deep-frying basket is lifted out.
Tip
Observe the recommended cooking temperature and cooking
time when deep-frying.
4.5.4 Ending the deep-frying cooking mode
Requirement The unit is on
Cooking process started
Cooking time has not expired
Press the
Time
control knob.
A signal sounds.
The deep-frying basket is lifted out.
The deep-frying cooking mode is ended
2020325A21ABBE-A
Page 20

Operating the unit
20 Operating instructions
4.6 Pausing and end of use
4.6.1 Short pause
Requirement The unit is on
Lift mechanism moved out
The food being cooked has been removed
Turn the
Temperature
control knob to 120°.
The
Heating
indicator light illuminates continuously.
4.6.2 Longer pauses and end of use
Requirement The unit is on
Lift mechanism moved out
The food being cooked has been removed
1. Turn the
Temperature
control knob to
Off
.
The
Heating
indicator light goes out.
2. Turn the
On/Off
control knob to "0".
The unit is off.
4.7 Handling deep-frying oil
DANGER
Risk of explosion from hot oil or fat
Risk of a fat explosion when extinguishing burning fat or oil with
water or an extinguishing agent that contains water.
• Always use a Fire Class F fire extinguisher to extinguish fat
fires.
• Smother the flame with a flame-retardant fire blanket.
• Never extinguish burning fat with water!
CAUTION
Risk of burns from hot oil or fat that is foaming over
The use of old fat or fat with a high proportion of frying or
coating residue increases the risk, that hot fat will foam over.
• Clean or replace fat in accordance with the manufacturer's
instructions.
2020325A21ABBE-A
Page 21

Operating the unit
21Operating instructions
CAUTION
Risk of burns from emptying hot oil or fat
• Before emptying fat, allow it to cool to a temperature of <100
°C.
ð Fill hot fat or oil into heat-resistant containers.
ð Only decant oil or fat into plastic containers after it has
cooled down, so that the containers are not damaged.
CAUTION
Hygiene risk from fat residue
Fat residue is a hygiene risk.
• Avoid fat residue underneath the heating element.
• When replacing the fat, warm it to a temperature of
maximum 100 °C.
ð Stir the fat with a suitable implement until it has reached
temperature, so that the fat underneath the heating
element is completely liquefied.
CAUTION
Hygiene risk from rancid oil
• When the oil starts to become rancid, replace the deep-frying
oil completely; do not add oil.
• Observe the manufacturer's information regarding the
duration of use of the deep-frying oil.
ATTENTION
Risk of fire from hot oil or fat
Spontaneous combustion of hot fat or oil can occur above
approximately 350 °C.
The greater the proportion of frying or coating residue, the
higher the risk of fire.
• Do not leave the unit unattended.
• Do not overheat the fat.
• "Smoking" fat means an increased risk of fire.
• Clean or replace fat in accordance with the manufacturer's
instructions.
2020325A21ABBE-A
Page 22

Operating the unit
22 Operating instructions
ATTENTION
Risk of fire from hot oil or fat
Old oil or fat has a lower ignition point.
The use of old fat or oil increases the risk of fire.
• Do not overheat the fat.
• "Smoking" fat means an increased risk of fire.
• Clean or replace fat in accordance with the manufacturer's
instructions.
4.7.1 Ensuring that the oil is fit for human consumption
Deep-frying oil counts as food. It must be fit for human consumption.
The suitability of the deep-frying oil for human consumption can be
checked with quick-tests from specialist shops (e.g. 3M oil test strip).
The suitability of the deep-frying oil for human consumption can be
extended by the following measures:
• Shake loose breadcrumbs from breaded food, before the food is
fried.
• Do not overheat deep-frying oil (160 – 180°C is sufficient).
• Cover the unit with the lid during pauses.
• Do not reduce the temperature of the deep-frying oil below 120°C
during longer interruptions in operation.
• Deep-frying oil that has been consumed during operation should
be supplemented by the amount consumed.
• Replace the deep-frying oil before it becomes rancid.
• Filter the deep-frying oil.
• Clean the unit carefully.
• Empty, clean and cover the unit when unused.
• If the deep-frying oil is not being used, store it hermetically sealed
and cool away from light.
Collect rancid deep-frying oil in suitable containers and dispose of it
properly in accordance with the regulations.
2020325A21ABBE-A
Page 23

Operating the unit
23Operating instructions
4.8 Filling the unit with deep-frying oil
WARNING
Risk of burns from the oil
The deep-frying oil can ignite, if the minimum fill quantity is not
met.
• Observe the fill level mark.
a
b
a Maximum fill level mark
b Minimum fill level mark
Requirements Unit switched off and cooled down
Drain closed
1. Remove the lid.
2. Warm solidified deep-frying fat in a saucepan before pouring in.
3. Fill the deep-frying oil in the quantity required for the food to be
cooked.
4.8.1 Gently heating up deep-frying oil
In order to extend the suitability of the deep-frying oil for human
consumption, the highest temperature setting should not be used
when first heating up the oil at the start of operation. The deep-frying
oil should be heated up slowly at the lowest temperature setting.
2020325A21ABBE-A
Page 24

Operating the unit
24 Operating instructions
4.9 Deep-frying
CAUTION
Risk of injury from deep-frying oil foaming over
• Protect arms and hands by wearing suitable protective
gloves.
• Briefly defrost and dry any frozen food to be cooked.
• Dry wet food to be cooked.
• Do not exceed the maximum fill quantity for the food being
cooked.
Image: Suspending the deep-frying basket on the swivel mechanism housing
Requirements Drain closed
Filled with deep-frying oil
The unit is on
1. Suspend the deep-frying basket on the swivel mechanism
housing.
2. Load the food to be cooked into the deep-frying basket.
Do not exceed the maximum fill quantity of the deep-frying
baskets.
3. Set the cooking temperature.
The Heating indicator light goes out, after the cooking
temperature has been reached.
Observe the recommended cooking temperatures and cooking
times when deep-frying.
4. Insert the deep-frying basket into the deep-frying basin.
The deep-frying starts.
Tip
Observe the recommended cooking temperature and cooking
time when deep-frying.
2020325A21ABBE-A
Page 25

Operating the unit
25Operating instructions
4.10 Emptying out the deep-frying oil
CAUTION
Risk of burns from emptying hot oil or fat
• Before emptying fat, allow it to cool to a temperature of <100
°C.
ð Fill hot fat or oil into heat-resistant containers.
ð Only decant oil or fat into plastic containers after it has
cooled down, so that the containers are not damaged.
CAUTION
Risk of scalding from hot oil
• Protect arms and hands by wearing suitable protective
gloves.
• Use heat-resistant containers with handles and lockable lids
for transportation.
• Observe the maximum fill quantity for the unit.
CAUTION
Risk of burns from hot surfaces
• Protect arms and hands by wearing suitable protective
gloves.
Requirements Deep-frying fat is liquid
Unit switched off
Deep-frying basket removed
Lifting arm removed from the lifting cylinder
Heating element swung out and engaged
1. Place a suitable collection container underneath.
2. Open the drain slowly.
3. Empty the deep-frying oil.
4. Close the drain.
5. Close the lid on the collection container when transporting.
6. Collect rancid deep-frying oil in a suitable container and dispose of
it properly in accordance with the regulations.
2020325A21ABBE-A
Page 26

Cleaning and caring for the unit
26 Operating instructions
5 Cleaning and caring for the unit
WARNING
Risk of scalding from hot steam
Hot deep-frying oil causes residual water to vaporise
explosively.
• Dry deep-fat fryers completely after cleaning.
CAUTION
Risk of burns from hot surfaces
• Allow surfaces to cool prior to cleaning.
ATTENTION
Risk of physical damage from improper cleaning
• Do not clean the unit with a high-pressure cleaner or water
jet.
5.1 Preventing corrosion
• Keep the surfaces of the unit clean and with access to air.
• Remove lime, grease, starch and protein deposits.
• Only expose parts made from non-rusting steel to brief contact
with highly acidic foods, spices, salts or the like.
• Avoid damaging the stainless steel surface with other metal items,
for example steel spatulas or steel wire brushes.
• Prevent contact with iron and steel, for example steel wool and
steel spatulas.
• Do not use bleaching or chlorine-containing cleaning agents.
• Clean contact surfaces with water.
5.2 Removing rust spots
• Remove fresh rust spots with a mild abrasive or fine sandpaper.
• Always remove rust spots completely.
• Expose treated areas to fresh air for at least 24 hours. During this
time, do not allow any contact with greases, oils or foods so that a
new protective layer can form.
5.3 Cleaning the housing
Requirement Unit switched off and cooled down
Clean the housing with warm water and commercially available
washing-up liquid.
2020325A21ABBE-A
Page 27

Cleaning and caring for the unit
27Operating instructions
5.4 Cleaning the heating element
Requirements Deep-frying oil emptied
Unit switched off and cooled down
Deep-frying basket removed
Lifting arm removed from the lifting cylinder
1. Close the drain.
2. Place a suitable collection container underneath.
3. Load in the water up to the
Maximum fill level
mark.
4. Switch on the unit and heat the water to 90°C.
5. Switch off the unit.
6. Allow incrustation to soak for approx.30minutes.
Add several drops of commercially available cleaning agent.
7. Open the drain slowly and let the water run into the collection
container.
8. Close the drain.
9. Swing the heating element out with the swivel mechanism control
lever
The swivel mechanism locking lever engages.
The heating element cools down.
10.Clean the heating element with a soft brush, warm water and a
commercially available cleaning agent.
11.Rinse with clear water and then dry thoroughly.
12.Open the drain slowly and let the water run into the collection
container.
13.Clean the deep-frying tank (see "Cleaning the deep-frying tank").
14.Lift the heating element slightly with the swivel mechanism control
lever.
15.Fold in the swivel mechanism locking lever.
16.Swing the heating element back into the deep-frying basin with the
swivel mechanism control lever.
5.5 Cleaning the deep-frying tank
Requirements Deep-frying oil emptied
Unit switched off and cooled down
1. Close the drain.
2. Place a suitable collection container underneath.
3. Remove the deep-frying basket.
4. Remove the lifting arm from the lifting cylinder.
5. Swing the heating element out with the swivel mechanism control
lever and let it engage.
6. Lift the oil clarifying tray carefully out of the deep-frying tank and
empty it.
7. Thoroughly clean the deep-frying tank, deep-frying basket and oil
clarifying tray with warm water and a mild cleaning agent.
2020325A21ABBE-A
Page 28

Cleaning and caring for the unit
28 Operating instructions
8. Let the cleaning water drain away.
9. Rinse with clear water and then dry.
10.Clean and dry the drain and drain pipe thoroughly with a bottle
brush.
11.Empty the collection container.
12.Hook in the oil clarifying tray.
13.Lift the heating element slightly with the swivel mechanism control
lever and then fold in the swivel mechanism locking lever.
14.Swing the heating element back into the deep-frying basin with the
swivel mechanism control lever.
15.Put the lifting arm on the lifting cylinder.
16.Insert the deep-frying basket.
17.Put the lid on.
5.6 Cleaning the drain
Requirements Deep-frying oil emptied
Unit switched off and cooled down
Deep-frying basket removed
Lifting arm removed from the lifting cylinder
Heating element swung out and engaged
Oil clarifying tray removed
Suitable collection container placed underneath
1. Open the drain completely.
2. Clean the drain thoroughly with a bottle brush.
3. Clean the drain with clear water.
Use a mild cleaning agent if required.
Rinse thoroughly with clear water.
4. Close the drain completely.
2020325A21ABBE-A
Page 29

Troubleshooting
29Operating instructions
6 Troubleshooting
6.1 Cause of failure and the remedy
Failure Possible causes Remedy
The unit does not react Operating element defective • Disconnect the unit from the electric
mains.
• Contact Customer service.
Fuse defective • Disconnect the unit from the electric
mains.
• Contact Customer service.
Ambient temperature is below 0°C,
the safety temperature limiter has
tripped
• Disconnect the unit from the electric
mains.
• Contact Customer service.
The unit does not heat up Unit defective • Disconnect the unit from the electric
mains.
• Contact Customer service.
Power supply interrupted • Contact the authorized technical person-
nel.
Temperature control knob or
heating element is defective
• Disconnect the unit from the electric
mains.
• Notify Customer service.
The unit is switched off • Switch on the unit.
Temperature control knob in the
" " position
• Set the temperature.
Insufficient heat output Heating element defective • Disconnect the unit from the electric
mains.
• Contact Customer service.
Mains phase missing • Contact the authorized technical person-
nel.
Unit switches off No mains voltage • Contact the authorized technical person-
nel.
The
Heating
indicator light does not
illuminate
Unit or
Heating
indicator light is
defective
• Disconnect the unit from the electric
mains.
• Contact Customer service.
Audible signal; continuous sound The safety temperature limiter has
tripped
• Disconnect the unit from the electric
mains.
• Contact Customer service.
Audible signal, intermittent sound Operating temperature exceeded,
oil level too low
• Acknowledge the fault
• Check the oil level.
2020325A21ABBE-A
Page 30

Troubleshooting
30 Operating instructions
6.2 Nameplate
When contacting Customer service, please always provide the
following data from the nameplate:
Serial number
(SN)
Type number
(TYP)
2020325A21ABBE-A
Page 31

Carrying out maintenance
31Operating instructions
7 Carrying out maintenance
The unit is maintenance-free, there are no maintenance
requirements.
2020325A21ABBE-A
Page 32

Dispose of unit in an environmentally responsible manner
32 Operating instructions
8 Dispose of unit in an environmentally responsible
manner
Do not dispose of unit or the unit's components together with nonrecyclable waste. If the unit is disposed of together with nonrecyclable waste or treated improperly, toxic substances contained in
the unit can damage health and pollute the environment.
Dispose of the unit in accordance with local regulations for used
appliances. Clarify any open questions with the responsible agencies
(for instance, solid waste management).
Oil and fat Residue that contains oil and fat must be collected in suitable
containers and disposed of in accordance with the local disposal
regulations.
Cleaning agents Dispose of leftover cleaning agents and cleaning agent containers in
accordance with the information provided by the cleaning agent's
manufacturer. Observe applicable regional regulations.
Unit In addition to valuable materials, used electrical and electronic
equipment also contains harmful substances that were needed for
their operation and safety.
2020325A21ABBE-A
Page 33

Manufacturer's declaration
33Operating instructions
9 Manufacturer's declaration
EC Declaration of Conformity
1 / 1
2020325A-0KOBE-B en-GB
Manufacturer
MKN Maschinenfabrik Kurt Neubauer GmbH & Co. KG • Halberstädter Straße 2a • 38300 Wolfenbüttel,
Germany
We hereby declare, that the following product:
Description of the unit
Unit for cooking food in commercial applications
Unit type
Electric deep-fat fryer with lifting mechanism
Unit number
1320325A 1320325C 1320330A 1320330C 1420325A 1420325C 1420330A 1420330C
2020325A 2020325C 2020330A 2020330C 2120325A 2120325C 2120330A 2120330C
complies with the relevant provisions of the following directives, but does not contain any assurance of
properties:
• Directive 2006/42/EC dated 17 May 2006 on machinery
• Directive 2011/65/EU (RoHS) dated 01 July 2011
• Directive 2014/30/EU dated 26 February 2014 on electromagnetic compatibility
• REGULATION (EC) No. 1935/2004 dated 27 October 2004 on materials and objects, which are intended to
come into contact with food
Adduced basis for verification
EN ISO 12100:2010
DIN EN 55014-1:2012-05
EN 60335-1:2012/A11:2014
EN55014-2:2015
EN 60335-2-37:2002/AC:2007
The manufacturer bears the sole responsibility for issuing this Declaration of Conformity. This Declaration of
Conformity becomes invalid, if changes are made which are not agreed with us.
Wolfenbüttel, 12/05/2016
Person authorised to compile the technical documents: ppa. Peter Helm,Chief Technical Officer (address as
manufacturer)
Translation from the original document • 2020325A-0KODE-B
2020325A21ABBE-A
Page 34

Manufacturer's declaration
34 Operating instructions
2020325A21ABBE-A
Page 35

Page 36

www.mkn.eu
 Loading...