

MixRC T38 Instruction Manual

Ages 8+
INSTRUCTION
MANUAL
Introduction
Safety Guidelines
Thank you for purchasing this product, please read this maunal carfully before use and
retain it for future reference.
1. Coaxical-rotor design, built-in gyro insure more stable performance and make the
operation more easier. It is the best choice for beginner.
2. By using of latest infrared auto connection techonology, up to two helicopters can
be operated simultaneously with high stability.
3. Double protection( overcurrent and low-voltage) features ensure the security
of flying and longer product life.
1. Please read this instruction manual carefully before playing and operate the product
according to the manual.
2. Keep the small accessories away from the kids to avoid accident.
3. Keep batteries away from fire or high temperature environment.
4. When flying the helicopter, keep it 1 ~ 2 meters away from user or others to avoid
injury due to collision.
5. Not to decompose or modify the product which may cause malfunction or accident.
6. Fly the helicopter within your eye vision for easy and safety control.
7. Need adult supervision when this helicopter is being played by children.
8. Only batteries of the same or equivalent type as recommended are to be used.
9. Insert batteries with correct polarity.
10. Non rechargeable batteries are not to be charged.
11. Do not mix old and new batteries.
12. Do not mix alkaline batteries, standard (Carbon-Zinc) or rechargeable (Nickel Cadmium) batteries.
13. Remove exhausted batteries from the battery compartment for the transmitter.
14. The power supply terminal are not to be short circuited.
15. Please retain this information for future reference.
16. Rechargeable batteries are to be removed from the toy before being charged(only for
AA type).
17. Rechargeable batteries are only to be charged under adult supervision.
Model No.: T38
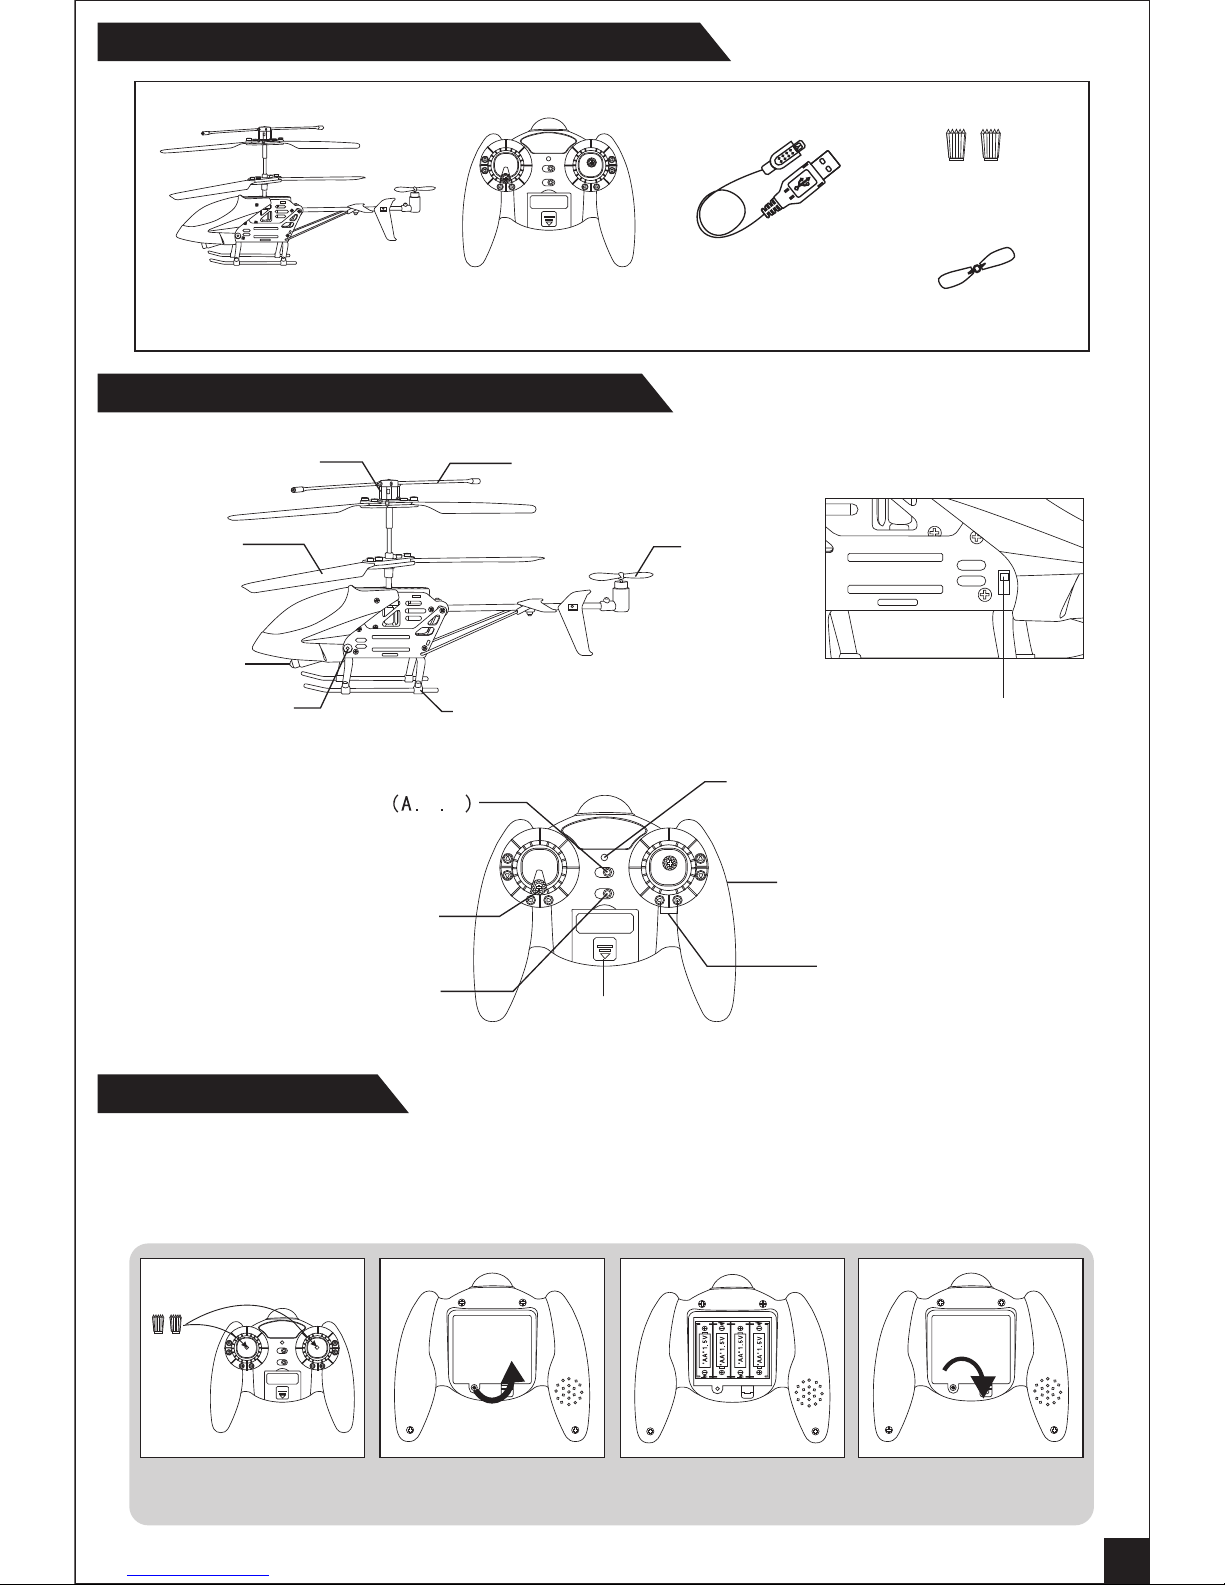
Product / Spare Parts Included in This Packaging
Sketch - major Parts and Function Switches
Battery Installation
Helicopter Remote Control
Control Sticks
USB Charger
Extra Tail Rotor
1. Install the control sticks.(Pic.1)
2. Unscrew counter clockwise to open the battery compartment cover.( Pic. 2 )
3. Install 4 X AA batteries into the battery compartment according to the given polarity. ( Pic. 3 )
4. Screw clockwise to close the battery compartment. (Pic. 4 )
Pic. 1 Pic. 2 Pic. 3 Pic. 4
1
A12
Power
ON OFF
OPEN
Connector
Main Rotor
Tail Rotor
Landing gear
Stabilizer bar
ON
OFF
Charging
socket
Searchlight
Power switch
A12
Power
ON OFF
OPEN
1
2
Light indicator
Channel selector
Throttle control stick
Power switch
Charging
compartment
Forward/backward/
left/right control stick
Gyro trim
How to remove and insert batteries.
A12
Power
ON OFF
OPEN
 Loading...